


FortiSwitch 124D-POE
QuickStart Guide

June 11, 2015
11-520-258883-20150611
Copyright© 2015 Fortinet, Inc. All rights reserved. Fortinet®, FortiGate®, FortiCare® and FortiGuard®, and certain other marks are registered trademarks of Fortinet, Inc., in the U.S. and other jurisdictions, and other Fortinet names herein may also be registered and/or common
law trademarks of Fortinet. All other product or company names may be trademarks of their respective owners. Performance and other metrics contained herein were attained in internal lab tests under ideal conditions, and actual performance and other results may vary. Network
variables, different network environments and other conditions may affect performance results. Nothing herein represents any binding commitment by Fortinet, and Fortinet disclaims all warranties, whether express or implied, except to the extent Fortinet enters a binding written contract, signed by Fortinet’s General Counsel, with a purchaser that expressly warrants that the identified product will perform according to certain expressly-identified performance metrics and, in such event, only the specific performance metrics expressly identified in such binding written contract shall be binding on Fortinet. For absolute clarity, any such warranty will be limited to performance in the same ideal conditions as in Fortinet’s internal lab tests. In no event does Fortinet make any commitment related to future deliverables, features or development, and circumstances may change such that any forward-looking statements herein are not accurate. Fortinet disclaims in full any covenants, representations, and guarantees pursuant hereto, whether express or implied. Fortinet reserves the right to change, modify, transfer, or otherwise revise this publication without notice, and the most current version of the publication shall be applicable.

Register for Support
Register your Fortinet product to receive:
•Technical Support
•New product features
•Protection from new threats
Vous devez enregistrer le produit pour recevoir:
•Support technique
•Nouvelles fonctionnalitées du produit
•Protection contre de nouvelles menaces
La reistrazione ti permette di usufruire di:
•Supporto Tecnico
•Nuove funzionalita
•Proteezione dalle ultime minaccce
Debe registrar el producto para recibir:
•Apoyo técnico
•Nuevas funcionalidades del producto
•Protección contra ataques
テクニカルサポート• •
https://support.fortinet.com Toll free: 1 866 648 4638 Phone: 1 408 486 7899 Fax: 1 408 235 7737 Email: register@fortinet.com
QuickStart Guide
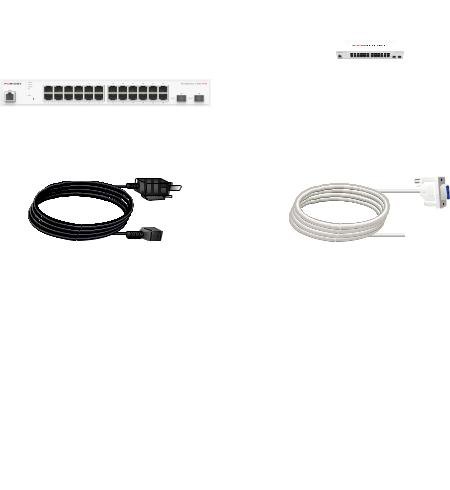
Box Includes
|
|
|
|
|
|
|
|
|
|
|
|
FortiSwitch 124D-POE |
|
|
|
|
QuickStart Guide |
|
|
|
|
|
|
|
FortiSwitch 124D-POE |
QuickStart Guide |
|||
Power Cable |
Console Cable |
8 Bracket Screws
2 Rack-Mount Brackets
4 Rubber Feet
4
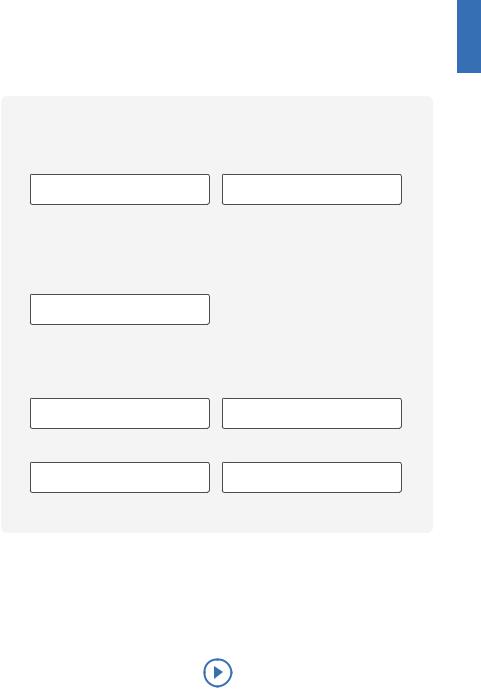
Before You Begin
Write down details that you may need from your network administrator or ISP.
DSL PPPoE
Username |
Password |
Cable Modem DHCP
It is normal to not require a hostname, but your ISP may require it. Hostname
Static IP address
IP Address |
Subnet Mask |
Default Gateway |
Primary/Secondary DNS |
QuickStart Guide Video http://video.fortinet.com/video/38/fortigate-and-fortiwifi-quick-start-guide-5-0
5
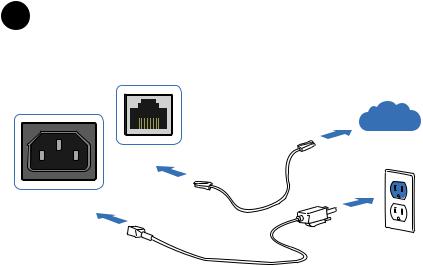
1 Basic Connections
Internet
Ethernet Port
Power Connection
Connect your device to a power outlet and an Internet connection. This is usually a modem, but could also be another device on your network.
6

2 Setup Options
A Web Browser |
B Terminal Emulation |
Setup Wizard (p.7) |
With console cable (p.8) |
A Web Browser with Ethernet cable
https://
MGMT Port
To Connect to the GUI
1.Connect an Ethernet cable.
2.Configure the management computer to be on the same subnet as the internal interface as the FortiSwitch unit:
IP address: 192.168.1.XXX
Netmask: 255.255.255.0
3.Visit https://192.168.1.99 in your web browser.
4.Login using username “admin” and no password.
5.Configure your device and save your settings.
6.Register your device from the dashboard page.
7
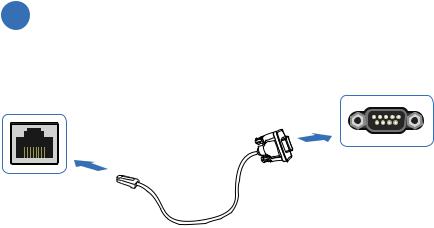
BTerminal Emulation with Console Cable
Serial Port
Console Port
To Connect to the CLI
1.Connect the device’s console port to the management computer using the provided console cable.
2.Start a terminal emulation program on the management computer, select the COM port, and use the following settings:
Baud Rate: 115200
Data bits: 8
Parity: None
Stop bits: 1
Flow Control: None
3.Press Enter on your keyboard to connect to the CLI.
4.Login using username “admin” and no password. You can now proceed with configuring your device.
Get started by typing “?” for a list of available commands.
Begin typing a command then type “?” for a list of available ways to complete. For example “config ?” will show the lowest level of configuration options.
8
 Loading...