


TM
A D V A N C E D C O O K I N G S Y S T E M
OS302, OS302M, OD302, OD302M
Multifunction oven
User guide US CA
Contents
Introduction |
3 |
Safety & warnings |
4 |
Location of features |
6 |
Setting the clock |
7 |
Oven displays |
8 |
Oven modes |
9 |
Shelf positions |
12 |
Accessories |
13 |
Using the oven controls |
14 |
Oven operation |
17 |
User select options |
22 |
Cooking mode options |
26 |
Cooking charts |
27 |
Cleaning |
34 |
Self Clean mode |
36 |
Trouble shooting |
39 |
Maintenance |
41 |
Limited warranty |
42 |
1
Introduction
This User Guide explains how to operate and maintain your new appliance properly and safely. Please read the whole guide carefully before starting to use your oven.
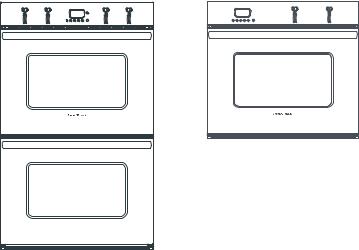
Fisher & Paykel AeroTech™ oven Double model OD302, OD302M and Single model OS302, OS302M
Important!
It is important that the User Guide should be retained with the appliance for future reference. Should the appliance be sold or transferred to another owner, always ensure that the User Guide is left with the appliance.
3
Safety and warnings
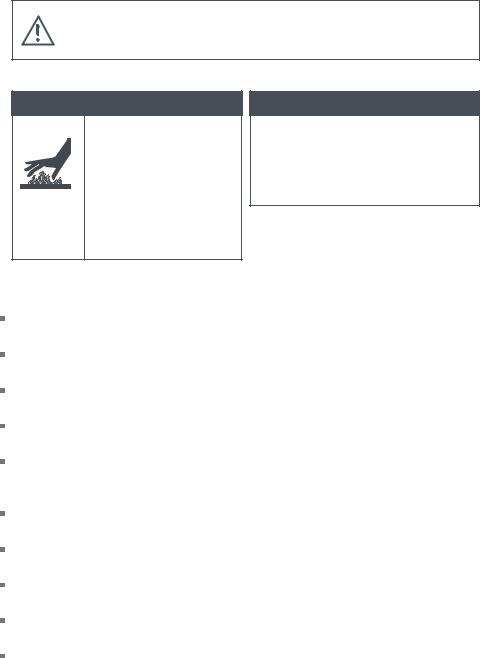
This symbol alerts you to hazards such as fire, electrical shock, or other potential injuries. It also warns you of things that may cause damage to your oven.
 WARNING!
Hot Surface Hazard
Accessible parts will become hot when in use.
Children should be kept away and care should be taken.
Failure to do so could result in burns and scalds.
 WARNING!
To reduce the risk of fire, electrical shock, injury to persons, or damage when using the oven, follow the‘General safety precautions’listed below:
General safety precautions
Read all the instructions before using the oven. Use the oven only for its intended purpose as described in these instructions.
Install your oven in accordance with the provided installation instructions. Be sure your appliance is properly installed and grounded by a qualified technician.
Do not use your oven for warming or heating the room. Persons could be burned or injured or a fire could start.
Children should not be left alone or unattended in the area where the oven is in use. They should never be allowed to sit or stand on any part of the appliance.
Use only dry oven mitts or potholders. Moist or damp potholders on hot surfaces could result in burns from steam. Do not let potholders touch hot or heating elements. Do not use a towel or a bulky cloth for a potholder. It could catch fire.
Do not store flammable materials on or near the oven. They could create an explosion and/ or fire hazard.
Do not use water on grease fires. Smother the fire/flames or use a multipurpose dry chemical or foam-type extinguisher.
Do not repair or replace any part of the oven unless specifically recommended in this manual. All other servicing should be referred to a qualified technician.
Do not store things children might want above the oven. Children could be burned or injured while climbing on it.
Do not operate the oven if it is damaged or not working properly.
4

Do not install or use a damaged appliance. If you receive a damaged product, contact your dealer or installer immediately.
Children or persons with a disability that may limit their ability to use the appliance should have a competent person instruct them in its use. This person should be satisfied that they can then use the appliance without danger to themselves or their surroundings.
When using the oven
Do not touch heating elements or interior surfaces of the oven. Heating elements may be hot even though they are dark in color.
Always position oven shelves in the desired location while oven is cool. If a shelf must be removed while the oven is hot do not let the oven gloves contact hot heating elements in the oven or the base of the oven.
Wear Proper Apparel. Do not wear loose fitting or hanging garments when using the oven. They could ignite or melt if they touch an element or hot surface or you could be burned.
Do not heat unopened food containers. They can build up pressure that may cause the container to burst and result in injury.
Always keep oven vent ducts unobstructed.
Use care when opening the oven door. Let hot air or steam escape before removing or replacing food.
Do not clean the door or cavity seals (gaskets) or use any oven cleaning products on the seals. They are essential for a good seal and efficient operation of the oven.
5
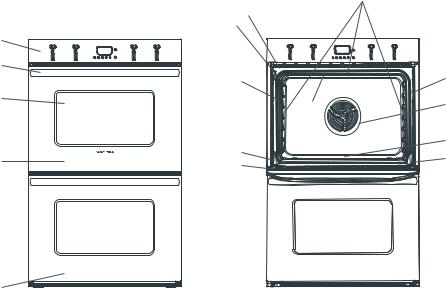
Location of features
The diagram below shows you what features your oven has and where they are located (Double oven model shown).
|
|
|
11 |
|
7 |
6 |
|
|
|
|
|
1 |
|
|
|
2 |
|
|
|
|
12 |
|
9 |
3 |
|
10 |
13 |
|
|
||
|
|
|
|
|
|
|
14 |
4 |
15 |
|
15 |
8 |
|
||
|
|
||
|
|
|
5
1 |
Control Panel |
10 |
Broil Element |
2 |
Door Handle |
11 |
Oven Lights |
3 |
Oven Window |
12 |
Cooking Probe Socket |
4 |
Upper Oven |
13 |
Aero™ Fan & Concealed Element |
5 |
Lower Oven (double models only) |
14 |
Lower Concealed Element |
6 |
Model & Serial Number |
15 |
Door Hinge |
7Self Clean Latch
8Door Seal
9Cavity Seal
6
Setting the clock
As your oven is connected to a power supply for the first time, a tone will sound and the clock display will light up. The clock display will show ‘0:00’ and the colon ( : ) will flash. Next, set the clock.
Clock must be set before oven can be operated
To set the clock
The oven clock has a default 24 hour display. ‘0:00’ will be shown when the oven has been turned on at the wall and the colon will flash.
1 While the colon is flashing, rotate the setting selector until the correct time of day is showing.
2Press the 

 button to adopt the time you have set or wait eight seconds and the setting will be automatically adopted.
Refer to the User Select Options for instructions on how to change the clock to display 12 hour time.
|
a |
Clock Display |
a |
b Clock button |
|
|
|
- Allows you to set the clock. |
|
c |
Setting selector/Push to Clear |
|
|
- Turn this knob to set the: clock/ timer/ |
|
|
probe temperature/ cook time/ stop time. |
|
|
Press this knob to clear the display. |
bc
7
Oven displays
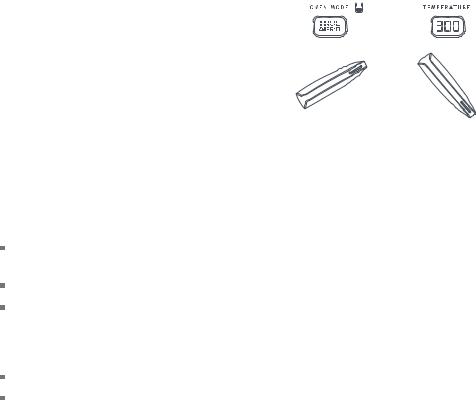
Oven mode dial & display
Turn clockwise to select your desired oven mode. When the mode is set, the lights and cooling fan will come on.
Temperature dial & display
Turn clockwise to select the oven temperature you want to cook at. The default setting for the temperature display is degrees Fahreheit. Refer to the User Select Options for instructions on how to change the temperature display settings.
Note: For double oven models, controls on the left are for the upper cavity and controls on the right are for the lower cavity.
Preheating your oven
Preheat your oven when using the following modes: TrueAero, AeroBake, Bake, AeroPastry and Pastry Bake.
Position shelves in the oven before preheating.
When your oven is preheating, your selected cooking temperature is displayed alternately with the actual oven temperature. When the oven has reached the selected temperature an audible beep will sound and the temperature display will change from orange to green (Brushed stainless steel models) or red to blue (Iridium stainless steel models).
Preheating your oven is not required when using Roast and AeroBroil.
The AeroTech™ oven is equipped with a fast preheat function. In TrueAero, AeroBake, Bake, AeroPastry and Pastry Bake modes it will heat to 345ºF (175ºC) from cold in under 10 minutes and to 425ºF (220ºC )in under 15 minutes.
To reactivate the fast preheat function
Turn the oven mode and temperature dials to ‘OFF’ then wait for the temperature and mode lights to turn off before selecting your new oven mode and temperature settings.
8
Oven modes
Your Fisher & Paykel AeroTech™ oven has nine cooking modes plus Warm and Self Clean. These modes use different combinations of elements and the convection fan to give you maximum flexibility when cooking.
TrueAero: convection fan plus fan element
TrueAero is a very flexible method of cooking. A concealed heating element surrounding the fan in the rear of the oven heats air, which is then blown into the cavity. The consistent temperature creates an ideal oven environment giving baking which is well risen and evenly coloured. Cookies are crisp on the outside and chewy in the middle, meat and poultry is delicously browned and sizzling while remaining juicy and tender. Casseroles are cooked to perfection and reheating is quick and efficient. TrueAero is the mode to choose for multishelf cooking and complete oven meals.
AeroBake: convection fan plus upper and lower elements
The oven fan circulates hot air from the top outer and lower concealed elements and distributes it around the oven cavity. Food cooked using the AeroBake mode tends to brown more quickly than foods cooked on
conventional modes like Bake. AeroBake is great for crisping pastry in lemon meringue pie and vegetable phyllo parcels. AeroBake at a low temperature - 125°F (50°C) - is ideal for drying fruit, vegetables and herbs.
Bake: upper and lower elements
Heat comes from the top outer and lower concealed elements. Bake is the conventional cooking mode, suitable for single shelf cooking. It is ideal for foods that require long cooking periods or cooking at low temperatures, like meringues and rich fruitcakes.
AeroPastry: convection fan plus lower element
Heat from the lower concealed element is circulated throughout the oven cavity by the oven fan. Excellent for sweet and savory pastry foods, for moist breads and brownies and cookies that you want extra chewy.
Pastry Bake: lower element
Uses the heat from the lower element only, this is a traditional cooking mode which is suitable for recipes that were developed in older ovens. For best results, cook on only one shelf at a time. Perfect for foods that require delicate cooking and have a pastry base, like custard tarts, quiches and cheesecake or anything that does not require direct heat and browning on the top surface.
9

Warm
Warm is a constant low heat of 165°F (75°C). It is excellent for keeping cooked food hot and warming plates and serving dishes. To reheat food from cold; use TrueAero and change to Warm when the food is hot, as this mode will not bring cold food up to a temperature high enough to kill any harmful bacteria.
Roast
Roast is a two step program that has been developed to help you cook delicious roasts effortlessly. Place the meat in the cold oven and the first stage will sear the meat at a high temperature for 20 minutes to crisp and brown the exterior. The oven then automatically drops to a lower, selected temperature for the remainder of the cooking time, giving you a moist and juicy roast. Roast
can be used with or without the cooking probe and is also great for cooking vegetables.
Broil: upper inner element
Broil delivers intense heat from the inner region of the top element. Great when you need to quickly Broil smaller dishes, for example Crème Brulee, or one to two portions of your usual favorites, like crispy chicken breasts or a steak. Broil takes a minute or so to warm up and is carried out with the door closed. Power levels are expressed as a percentage from LO (50% power) to HI (100% power).
Maxi Broil: upper inner and outer elements
Maxi Broil delivers intense heat from the entire top element. It is the most suitable mode for ‘finishing off’ many meals, for example browning the top of potato gratin and frittata as well as cooking smaller cuts of meat. Use Maxi Broil to toast bread or as well as Broiling your favorite chicken, fish and steak. Maxi Broil takes a minute or so to warm up and is carried out with the door closed. Power levels are expressed as a percentage from LO (50% power) to HI (100% power).
AeroBroil: fan plus upper inner and outer elements
AeroBroil produces food with a finish that is similar to a rotisserie. Meat, poultry and vegetables cook beautifully; food is crisp and brown on the outside while the inside remains moist and tender. Try using this mode with foods you might usually fry, like meatballs. Great for chops, cutlets and beef burgers as well as vegetables.
10

Self Clean
This oven features a pyrolytic self-cleaning cycle that takes care of the mess and grime that is traditionally associated with oven cleaning. During self clean cycles the oven reaches higher temperatures than it does for cooking and this burns off and breaks down soil and grease deposits. A smoke eliminator and active venting system eradicates odor. The ash residue that remains can simply be removed from the cool oven with a damp cloth or sponge.
All about the cooling fan
A cooling fan will come on automatically when most oven modes are used and blow air out below the oven door. The cooling fan may continue to run after the oven is switched off to keep the door and control panel cool.
11

Shelf positions
Optilevel™
The Optilevel™ shelving system allows you to choose the optimum cooking level within the oven. Placing the shelves on or between the shelf support runners provides 13 cooking positions to choose from.
Organize the shelves prior to heating the oven. Generally the shelf positions located in the top of the oven are suitable for Broiling. Shelves in the middle and lower region of the oven are suitable for baking, roasting and casseroles. For more specific information on which shelf position to use, refer to the Cooking Charts.
Your oven shelves come with built in stop locks for your safety, this means when inserted properly they will not tilt when pulled towards you.
To insert shelves
Position the shelves so that the
single^in the center is facing |
1 |
|
2 |
||
towards you, as shown, and slide the |
||
shelf right to the back of the oven. |
3 |
Shelves will feel very stable when |
4 |
|
5 |
||
inserted correctly. |
||
6 |
||
|
||
|
7 |
|
|
8 |
|
|
9 |
|
|
10 |
|
|
11 |
|
|
12 |
|
|
13 |
shelf positions with shelves at positions 5 and 10
rack detail showing the single^facing toward you
12

Accessories
Broiling system
The Broiling system is designed to prevent hot fat and juices in the broil pan splattering throughout the oven. It is intended to be used as one complete unit, however pieces can be interchanged.
Glass tray (OS302M, OD302M Iridium models only)
This is made of extremely tough glass and is perfect oven to tableware.
The glass tray is great for all broiling and baking modes.
Wash in hot soapy water or the dishwasher. Soaking with a little dishwasher detergent will help to remove stubborn stains.
Cookie sheets
The cookie sheets have a non-stick finish and need only a light coating of cooking spray or greasing before use.
Their dark color absorbs heat and you may find that your favorite recipes cook more quickly than on old shiny trays. Alternatively you can reduce the oven temperature by approximately 60-70°F (15-20°C).
Allow your baking to cool for a few minutes after it comes out of the oven before removing it from the tray using a wooden or teflon spatula.
Always remove food before it is completely cold. In most cases wiping with a paper towel is all that is needed to clean the trays.
Pizza stone and paddle (OS302M, OD302M Iridium models only)
Your pizza stone will allow you to cook a pizza like one cooked in an authentic pizza oven.
Using the pizza stone is a great way to cook bought, ready made pizzas as well as home made ones.
If cooking frozen pizza, allow to defrost completely before placing on the hot pizza stone.
13
 Loading...