

Fire Sense 61280, 61294, 61302, 61303, 61305 Owner's Manual
...
Contents
General Safety Information.................... ........ ...........
Assembly Instructions………………………………..
Components & Hardware.............. .................... ......
Additional Requirements........................................
Installation Process…………………………………...
Step1 - Attach Wheel Assembly to Base..................
Step 2 – Attach
Step 3 –Attach L-Sh a p e d B r a c k e t s t o Base..............
Step 4 – Attach Post to Cylinder Housing Top and
Attach Cylinder Ho using to Base….......................
Step 5 – Table
Step 6 – Attach Reflector Studs to Head Assembly
Step 7 – Attach Head Assembly to Post..................
Step 8 – Install Reflector.........................................
Step 9 – Attach Reflector Assembly to Studs..........
Step 10 – Connect Ho se & Re gul ato r t o Cy lind er...
Leak Check.............................................................
Operation................................................................
Operation Checklist................................................
Troubleshooting......................................................
Maintenance...........................................................
Storage...................................................................
Service....................................................................
Warranty ................................................................
Sand Box to Base...........................
Installation............…………….
........
1-3
3
3-4
4
4
4
4-5
5
5
5
5
6
6
7
7
8
8-10
10
11
11-12
12
12
13
DANGER
DANGER indicates an imminently hazardous situatio n
which, if not avoided, will result in death or serious injury.
WARNING
WARNING indicates an imminently hazardous situation
which, if not avoided, could result in deat h or serious i njury.
CAUTION
CAUTION indicates an imminently hazardous situation
which, if not avoided, may result in minor or moderat
personal injury , or property damage.
FOR YOUR SAFETY
Do not store or use gasoline or other
flammable vapo
this or any other appliance.
WARNING: For Outdoor Use Only
r and liquids in the vicinity of
e
General Safety Info
rmation
This manual contains important information about the
assembly, operation and maintenance of this patio heater.
General safety information is presented in these first fe
pages and is also locate d th roug hout th e manual.
Keep this manual for future reference and to educat
new users of this product. This manual should be read in
conjunction with the labeling on the product.
Safety precautions are essential when any mechanical
or propane fueled equipment is involved. Thes
precautions are necessary when using, storing, and
servicing.
The following symbols shown below are used extensively
throughout this manual.
Always heed these precautions as they are essential
when using any mechnical or fueled equipment.
a
f
WARNING
Improper installation, adjustment, alteration,
w
e
e
service or maintenance can cause injury or
rty damage. Read the instructions
prope
roughly before installing or servicing this
tho
equipment.
DANGER
Failure to com ply with the precautions and instructions
provided with this heater can result in death, serious bodily
injury and property loss or damage from hazards of fire,
explosion, burn, asphyxiation, and/or carbon monoxid
poisoning.
Only persons who can understand and follow the
instructions sho uld use or service this heater.
e
1
2
DANGER
• EXPLOSION - FIRE HAZARD
• Keep solid combustibles, such as building materials,
paper or cardboard, a safe distance away from the heater
as recommended by the instructions.
• Provide adequate clearances around air openings into
the combustion chamber.
• Never use the heater in spaces which do or may contain
volatile or airborne combustibles, or products such as
gasoline, solvents, paint thinner, dust particles or unknown
chemicals.
• During operation, this product can be a source of
ignition. Keep heater area clear and free from combustible
materials, gasoline, paint thinner, cleaning solvents and
other flammable vapors and liquids. Do not use heater in
areas with high dust content. Minimum heater clearances
from combustible materials: three (3) feet from the sides &
two (2) feet from the top.
FOR YOUR SAFETY
If you smell gas:
1. Shut off gas to the
appliance.
2. Extinguish
all open flames.
3. If odor continues, immediately call your gas
supplier.
WARNING
We cannot foresee every use which may be made of our
heaters.
Check with your local fire safety authority if you have
questions about heater use.
Other standards govern the use of fuel gases and heat
producing products for specific uses. Your local authorities
can advise you about these.
If no local codes exist, follow National Fuel Gas Code,
ANSI Z223.1. In Canada, installation must conform to local
codes. If no local codes exist, follow the current National
standards of CANADA CAN/CGA-B 149.2.
DANGER
• CARBON MONOXIDE HAZARD
• This heater is a combustion appliance. All combustion
appliances produce carbon monoxide (CO) during the
combustion process. This product is designed to produce
extremely minute, non-hazardous amounts of CO if used
and maintained in accordance with all warnings and
instructions. Do not block air flow into or out of the heater.
• Carbon Monoxide (CO) poisoning produces flu-like
symptoms, watery eyes, headaches, dizziness, fatigue and
possibly death. You can't see it and you can't smell it. It's
an invisible killer. If these symptoms are present during
operation of this product get fresh air immediately!
• For outdoor use only .
• Never use inside a house or any other unventilated or
enclosed areas.
• This heater consumes air (oxygen). Do not use in
unventilated or enclosed areas to avoid endangering
your life.
CAUTION
• SERVICE SAFETY
• Keep all connections and fittings clean. Make sure
propane cylinder valve outlet is clean.
• Inspect hose before use. Replace if there is evidence of
abrasion or wear.
• During set up, check all connections and fittings for leaks
using soapy water. Never use a flame.
• Use as a heating appliance only. Never alter in any way or
use with any other device.
• Check entire hose at least annually.
WARNING
• BURN HAZARD
• Never leave heater unattended when hot or in use.
• Keep out of reach of children.

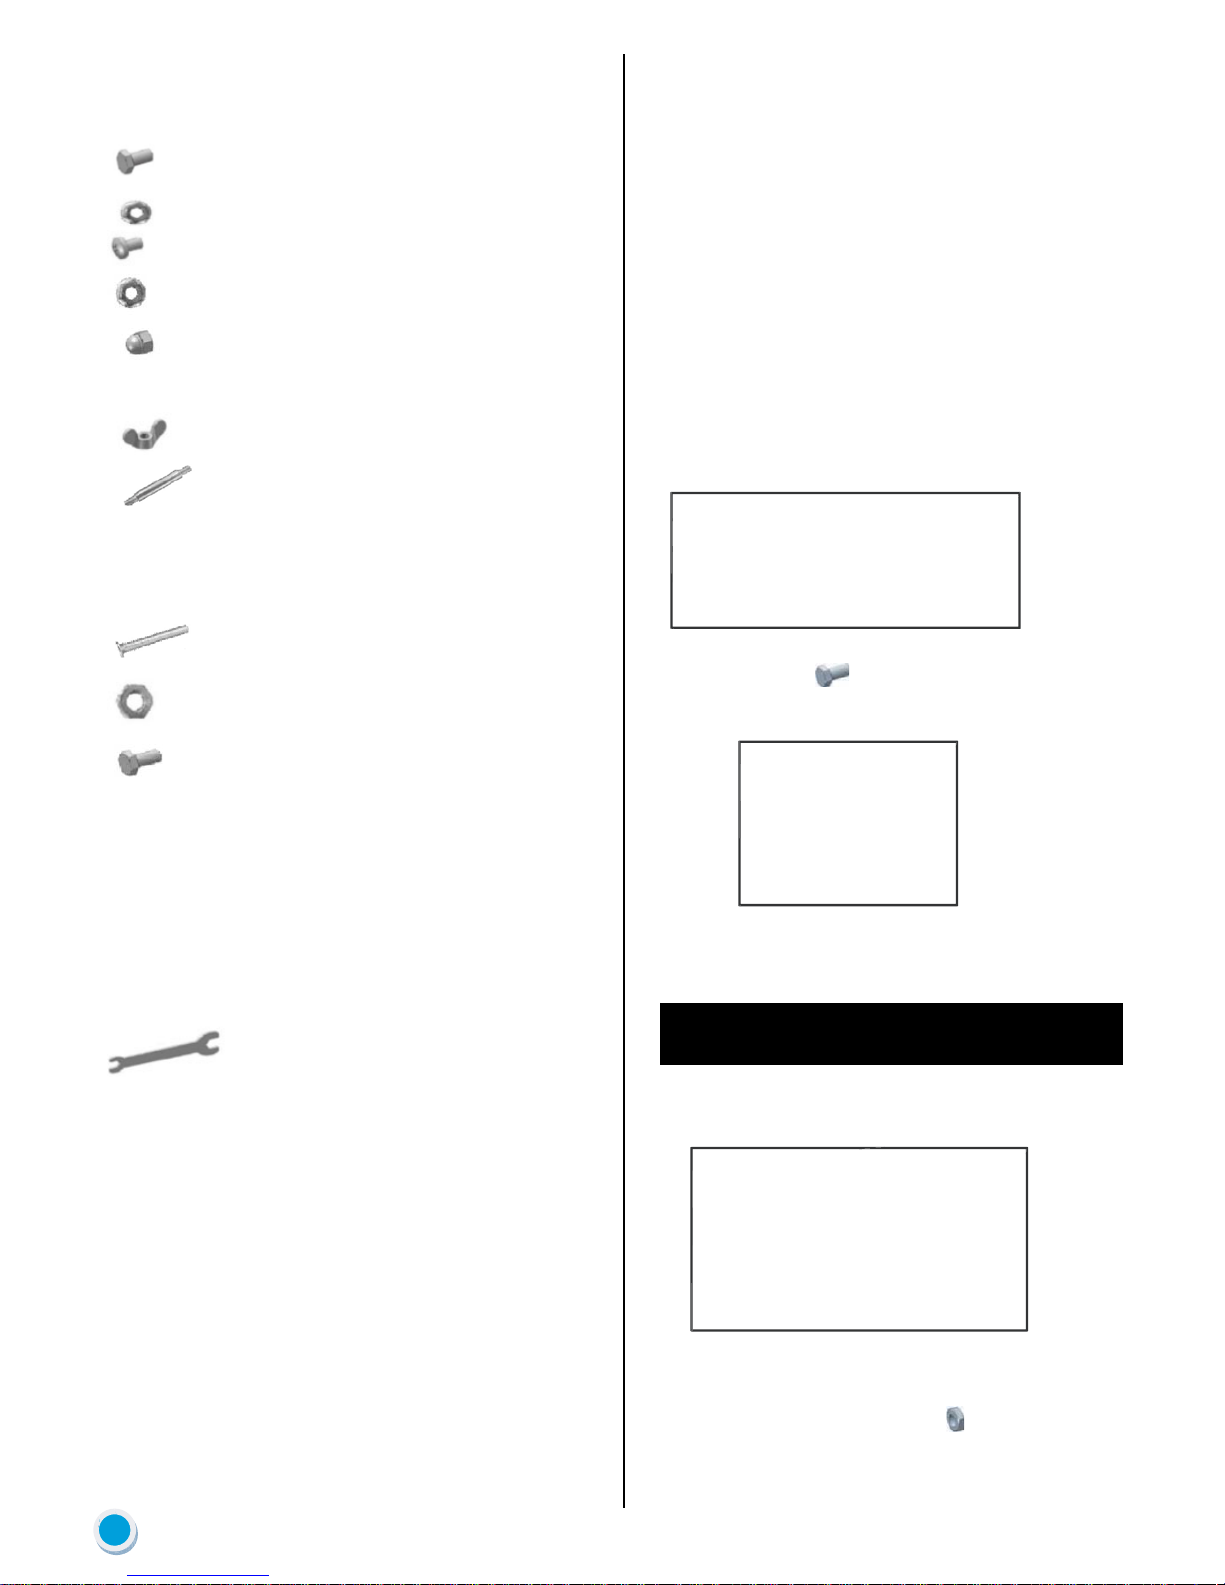
Hardware
Picture Qty Description Used in
4 M6x12 Hex Bolt 4
4 M6 Flange Nut 4
8 M6x10 Round Head Screw 4
8 M5 Flange Nut 4
9 M6 Cap Nut 8
9 M6x10 Flat Head Screw 8
3 Wing Nut 9
3 Reflector Stud 6
4 Small Bolt
*Pre-inserted in Head A ssem bly
4 Lock Washer
*Pre-inserted in Head A ssem bly
4 M8 Flat Head Screw
*Pre-assembled to base with
sand box
6 M8 nut
*4 pcs. pre-assembled to base
with sand box
6 M8x12 Hex Bolt 1/3
13 M8 Flat Washer 3/6/9
Step(s)
7
7
2
1/2
Installation process Assembly time: 4 0 minutes
tep 1 – Attach Wheel Assembly to Base
S
Line up holes in Wheel Bracket with corresponding
.
holes in Base and insert 2 - M 8 x 1 2 B o l t s through holes.
Finger tighten the bolts.
Be sure that the Wheel Assembly is parallel to the
.
base, and fully tighten bolt s
Wheel Assembly
2 M8x12 Hex Bolts
.
Additional Requiremen ts
The following items are not included, but are necessary for
the proper assembly of your heater. Do NOT attempt to
assemble without proper tools.
.
Philips screwdriver w/ medium blade.
.
Adjustable opening wrench.
Leak Detection Solution (Instructions on how to make
.
solution are included o n p a g e 8 )
4 L-Shaped Bracket 3
1 Plastic Ring 4
1 Plastic Fastener (optional) 5
1 Wrench As
needed
For best stability, fill the sand box with sand.
For models with sand box pre-assembled to
the base, skip to Step 3.
Step 2 – Attach San dBox to Base
.Slip 4 M8 Flat Head Screws through holes of Base.
Note: You must follow all steps to properly assemble
heater.
4
4 M8 Flat Head Screws
4 M8 Nuts
 Loading...