


The car is equipped with a CONNECT Nav+ system designed according to the specific features of the passenger compartment with a customised design which matches the style of the dashboard.
The system is installed in an ergonomically convenient position for the driver and the passenger; the graphic on the front panel helps to quickly identify the controls and makes them easier to use.
In order to deter thefts, the device is provided with a special protection system and may only be used on the car where it was originally fitted.
The interface language of the system is that in use in the country where the car is registered. Contact a Fiat Dealership to change the language or the voice (male/female) at a later time.
Read the following instructions carefully and keep the instructions at hand at all times (e.g. in the oddment compartment).
Enjoy.
IMPORTANT For the CONNECT Nav+ navigator function, use the original CD supplied with your car
or other CDs of the same make.

CONNECT Nav+
TIPS, CONTROLS |
|
AND GENERAL |
|
INFORMATION........................... |
4 |
TIPS........................................................ |
4 |
CONTROLS........................................ |
8 |
GENERAL INFORMATION ........... |
13 |
Important instructions |
|
and road safety ................................... |
13 |
Switching the system |
|
on and off.............................................. |
14 |
Antitheft protection .......................... |
14 |
Configuration....................................... |
14 |
AUDIO............................................... |
15 |
Volume adjustments........................... |
15 |
Audio adjustments ............................ |
15 |
Radio mode ......................................... |
16 |
CD mode ............................................ |
19 |
CD changer mode.............................. |
21 |
CD charger .......................................... |
22 |
MP3 mode ........................................... |
23 |
AUDIO FUNCTIONS ................ |
24 |
MOBILE TELEPHONE............. |
26 |
Introduction......................................... |
26 |
Alphanumeric codes ......................... |
28 |
How to insert the SIM card ............. |
29 |
How to enter the PIN code............. |
29 |
How to make a call ........................... |
30 |
How to call a service number.......... |
30 |
How to answer a call ........................ |
31 |
How to reject a call .......................... |
31 |
Directory ............................................. |
31 |
Text messages (SMS) ......................... |
33 |
bCONNECT SERVICES .......... |
35 |
“SOS” function.................................... |
35 |
“Emergency” function........................ |
35 |
“Breakdown” function ...................... |
36 |
– Emergency and breakdown |
|
calls..................................................... |
36 |
Infomobility services .......................... |
37 |
– “Connect” function ....................... |
37 |
– “Breakdown” function ................... |
38 |
– “Operator services” function....... |
38 |
– “Messages received” function ..... |
38 |
– Traffic information ......................... |
38 |
– Information on centres of |
|
interest .............................................. |
39 |
– Generic information ...................... |
39 |
VOICE CONTROLS .................. |
40 |
NAVIGATOR................................. |
43 |
CD-ROM drive ................................... |
44 |
Main menu............................................ |
44 |
Select destination .............................. |
45 |
Guidance options................................ |
46 |
TMC traffic info................................... |
47 |
Map ....................................................... |
49 |
VIDEO FUNCTION..................... |
51 |
3

TIPS, CONTROLS AND GENERAL INFORMATION
TIPS
ROAD SAFETY
We recommend that you learn to use the various car radio and navigator functions (for example, storing stations) before starting to drive.
WARNING
Excessively high volume while you are driving may endanger your life and that of others. Always adjust the volume so you are able to hear the surrounding noises (for example, horns,
ambulances, police cars, etc.).
RECEPTION CONDITIONS
Reception conditions change constantly while driving. Reception may be disturbed near mountains, buildings or bridges especially when you are far away from the broadcaster’s transmitter.
IMPORTANT When receiving traffic information, there may be an increase in volume with respect to normal.
MAINTENANCE AND CARE
The constructive structure of the radio and navigation system guarantees a long life without any need for particular maintenance. In the case of damage, contact a Fiat Dealership.
The following precautions will ensure fully efficient operation of the radio and navigation system:
–the monitor may be scratched and damaged by liquid detergents and UV radiation;
–the device could be damaged beyond repair if fluids penetrate inside.
Use a clean, dry, antistatic, soft cloth to clean the front panel and the display only. Cleaning and polishing products could damage the surface.
4
Be careful not to scratch  the display with sharp or rigid objects. Avoid touching it with your fingers. Do not press on
the display when cleaning it.
NOTES
–Contact a Fiat Dealership only for repairs to the radio and navigation system, if required.
–The display may take some time to reach optimal brightness in the event of particularly low temperatures.
–The overheat protection device of the system may trip if the car is parked for a long time and the outside temperature is high. The system will start working again when the temperature in the passenger compartment returns to acceptable levels.
CD
When using the audio CD player, remember that dirt or scratches on a CD may make it skip and cause poor playback quality. The same things may happen if the CDs are bent.
IMPORTANT Do not use 8-cm audio CDs or MP3 CDs even with a specific adapter. This type of disk may damage the system.
To achieve optimal playing conditions, we recommend the following:
– Only use audio CDs with the following trademark:
–Do not use chemical cleaning products (e.g. antistatic products, sprays, or thinners) to prevent damage to the CD surface.
–After playing a CD, put it back it case to prevent marks and scratches which could make it skip during playback.
–Keep CDs away from direct sunlight, high temperatures and prolonged humidity to prevent bending them.
–Do not stick labels or write on the recorded side of a CD.
To extract a CD from its case, press onto the middle of the case and lift the CD holding it from its edges.
Removing the disc
– Carefully clean each CD with soft cloth. Remove fingerprints and dust. Hold the CD from the edges and clean it from the middle to the edges.
Proper way to hold the compact disc
5
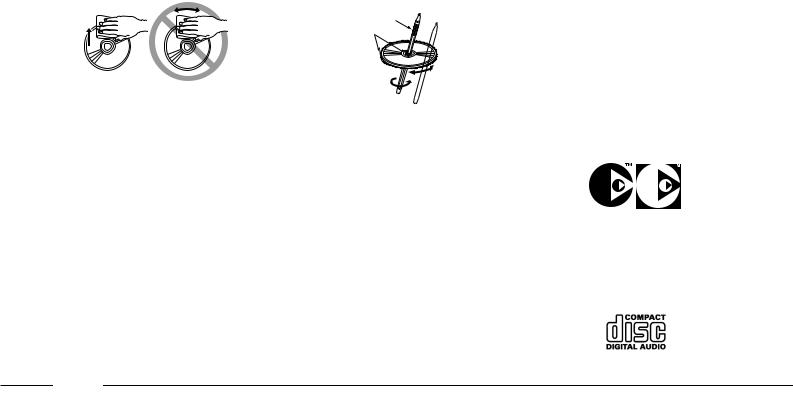
Always only hold a CD from its edges. Never touch the surface.
Use a soft cloth and sweep the CD from the middle towards the edge to remove fingerprints and dust.
No
New CDs may be rough along the edges. The device may not work properly and playback may skip in this case. Rub the edge with a ballpoint pen or the like to make the edges of the CD smooth.
Ball-point pen
Roughness
IMPORTANT Do not use commercially available protective sheets for CDs or disks with stabilisers as these could get stuck in the internal mechanism and damage the disk.
IMPORTANT If a copy protected CD is used, it may take a few seconds before the system will start to play it. In addition, due to the proliferation of new and different protective methods, it cannot always be guaranteed that the CD player will play every protected disk. The presence of a copy protection system is often written in very small, difficultly legible print on the cover of the CD itself. Possible wording includes “COPY CONTROL”, “COPY PROTECTED”, “THIS CD CANNOT BE PLAYED ON A PC/MAC”. Symbols such as the following may be used:
The symbol used to identify audio CDs is often missing from the disk and the cover of a copy protected CD:
6
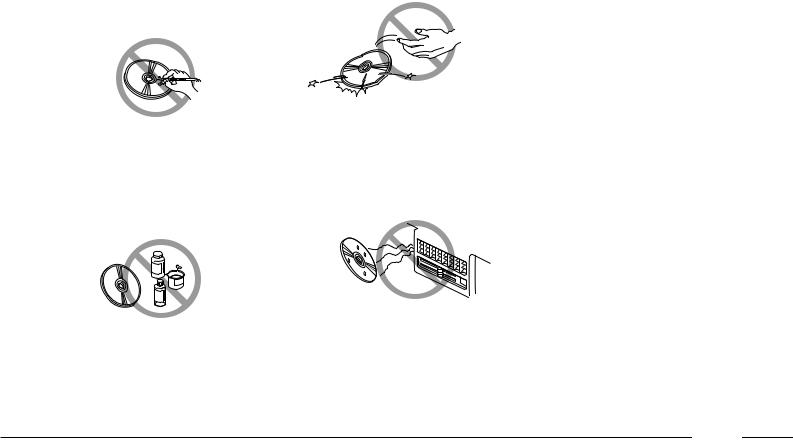
Notes on CDs
Do not stick labels onto the surface of a CD. Do not write on the surface of a CD with pencils or pens.
No
Do not use stain removers, antistatic sprays or thinners to clean a CD.
No
Do not use very damaged, cracked or deformed CDs.
No
Use of such CD may damage the player. Keep CDs away from direct sunlight and all sources of heat.
Errato
INTRODUCTION
The CONNECT Nav+ system essentially consists of:
–a keypad on the front panel and two knobs (encoders);
–controls on the central unit and remote controls on the steering wheel;
–electronic control unit inside the dashboard.
The system interface is the multifunctional display used by all integrated components.
Unavailable functions will appear shaded on the display and cannot be operated.
7

CONTROLS
F0P0284m |
F0P0280m |
fig. 1
8

Some controls have multiple functions which depend on the active system mode. The activated function in some cases depends on how long the button is pressed as shown in the following table:
|
Key |
|
Short press (less than 1 second) |
|
Long press (over 1 second) |
|
1 |
|
SOS |
|
Display emergency call menu |
|
– |
|
|
(medical emergency, breakdown, etc.). |
|
|||
|
|
|
|
|
|
|
2 |
|
˚ |
|
Eject audio CD audio or navigation CD-ROM. |
|
– |
3 |
|
SOURCE |
|
Select mode: radio, CD, CD changer. |
|
– |
4 |
|
|
|
System on/off. |
|
– |
|
|
|
Turn: adjust volume and audio settings |
|
||
|
|
|
|
(treble, bass, balance, fader, loudness). |
|
|
|
|
|
|
Telephone mode. |
|
|
5 |
|
£ |
|
Dial set number. |
|
– |
|
|
|
|
Answer incoming call. |
|
|
6 |
|
|
|
CONNECT Nav+ comprised system |
|
– |
|
|
|
multifunctional display |
|
||
|
|
|
|
|
|
|
7 |
|
• |
|
bCONNECT mode. |
|
– |
8 |
|
|
|
CD compartment/housing. |
|
– |
9 |
|
ESC |
|
Quit selection menu or go from a submenu to a |
|
– |
|
|
higher level menu. |
|
|||
|
|
|
|
|
|
|
|
|
|
|
Radio mode: tune radio in 50 kHz (in FM) or 1 kHz (in |
|
Show active mode general information. |
10 |
|
N |
|
AM) steps to the next radio station from the |
|
|
|
|
currently tuned station. |
|
|
||
|
|
|
|
CD changer mode: select next CD. |
|
|
11 |
|
|
|
Sound settings. |
|
– |
|
|
|
|
|
|
|
9
Key |
|
|
Short press (less than 1 second) |
|
Long press (over 1 second) |
|
12 |
|
|
|
IR port. |
|
– |
13 |
|
|
|
SIM card housing adapter. |
|
– |
|
|
|
|
Radio mode: tune radio to the next station; |
|
|
14 |
|
˜ |
|
press twice: switch from LO mode to DX mode. |
|
CD mode: fast forward by one track. |
|
|
CD mode: go to next track. |
|
|||
|
|
|
|
|
|
|
|
|
|
|
CD changer mode: go to next track. |
|
|
|
|
|
|
Radio mode: show receivable radio stations in |
|
|
15 |
|
LIST |
|
alphabetical order. |
|
– |
|
|
CD mode: show track list contained on CD. |
|
|||
|
|
|
|
MP3 mode: show folder list contained on CD. |
|
|
16 |
|
|
|
Turn: select function. |
|
– |
|
|
|
Press: confirm selected functions. |
|
||
|
|
|
|
|
||
|
|
|
|
|
|
|
|
|
|
|
Radio mode: tune radio in 50 kHz (in FM) or 1 kHz (in |
|
|
17 |
|
O |
|
AM) steps to the previous radio station from the current- |
|
– |
|
|
ly tuned station. |
|
|||
|
|
|
|
|
||
|
|
|
|
CD changer mode: select previous CD. |
|
|
18 |
|
MENU |
|
Access to function menus. |
|
Show help menu. |
|
|
|
|
Radio mode: tune radio to the previous station; |
|
|
19 |
|
÷ |
|
press twice: switch from LO mode to DX mode. |
|
CD mode: fast backward by one track. |
|
|
CD mode: go to previous track. |
|
|||
|
|
|
|
|
|
|
|
|
|
|
CD changer mode: go to previous track. |
|
|
|
|
|
|
Radio mode: recall preset station (1 – 6) |
|
Store current station (1 – 6). |
20 |
|
|
|
Telephone mode: dial telephone number (1 – 12). |
|
|
|
|
|
CD changer mode: select CD (1 – 6). |
|
|
|
|
|
|
|
|
|
|
21 |
|
Ô |
|
Reject incoming call. |
|
– |
|
|
Hang up current call. |
|
|||
|
|
|
|
|
|
|
|
|
|
|
|
|
|
10

|
Key |
|
Short press (less than 1 second) |
|
Long press (over 1 second) |
|
22 |
|
BND AST |
|
Select frequency band FM1 – FM2 – FMAST |
|
Automatic station store (in FMAST band). |
|
|
(autostore) – AM. |
|
|
||
|
|
|
|
|
|
|
23 |
|
TA/PTY |
|
TA (Traffic Announcements): automatic |
|
PTY (Type Program): activate search filter |
|
|
reception of traffic announcements. |
|
according to broadcasting station category. |
||
|
|
|
|
|
||
|
|
|
|
Press once: partial dimming of display. |
|
|
24 |
|
DARK |
|
Press twice: dimming of display. |
|
– |
|
|
|
|
Press three times: normal display brightness. |
|
|
25 |
|
MODE |
|
Change current display. |
|
– |
26 |
|
|
|
Voice controls |
|
Navigation mode: repeat last voice message |
|
|
|
|
(supplied by system). |
||
|
|
|
|
|
||
|
|
|
|
|
|
|
|
|
|
|
Anticlockwise: |
|
|
27 |
|
MEMO |
|
Radio mode: previous preset station. |
|
– |
|
|
|
|
CD changer mode: select previous CD. |
|
|
28 |
|
˜ |
|
Radio mode: manual tuning next station. |
|
– |
|
|
CD mode: select next track |
|
|||
|
|
|
|
|
|
|
29 |
|
|
|
Audio section: volume up. |
|
– |
|
|
|
Pressed with button 31: mute function |
|
|
|
|
|
|
|
|
|
|
30 |
|
SRC |
|
Select mode: radio, CD, CD changer. |
|
– |
31 |
|
|
|
Audio section: volume down. |
|
– |
|
|
|
Pressed with button 29: mute function |
|
||
|
|
|
|
|
|
|
32 |
|
÷ |
|
Radio mode: manual tuning previous station. |
|
– |
|
|
CD mode: select previous track |
|
|||
|
|
|
|
|
|
|
|
|
|
|
Clockwise. |
|
|
33 |
|
MEMO |
|
Radio mode: next preset station. |
|
– |
|
|
|
|
CD changer mode: select next CD |
|
|
|
|
|
|
|
|
|
11

|
Key |
|
Short press (less than 1 second) |
|
Long press (over 1 second) |
|
34 |
|
MUSIC |
|
Audio settings: treble, bass, balance, fader, loudness auto- |
|
|
|
|
matic volume adjustment |
|
– |
||
|
|
|
|
according to speed. |
|
|
|
|
|
|
|
|
|
35 |
|
MODE |
|
Change current display. |
|
– |
36 |
|
ESC |
|
Quit selection menu or go from a submenu to a higher |
|
– |
|
|
level menu. |
|
|||
|
|
|
|
|
|
|
37 |
|
TEL |
|
Telephone mode. |
|
– |
38 |
|
NAV |
|
Navigation mode. |
|
– |
39 |
|
MAIN |
|
Go to main menu. |
|
– |
40 |
|
|
|
Turn: select function. |
|
– |
|
|
|
Press: confirm selected function. |
|
||
|
|
|
|
|
|
|
41 |
|
MENU |
|
Access function menus. |
|
Show help menu. |
|
|
|
|
|
|
|
12

GENERAL INFORMATION
IMPORTANT INSTRUCTIONS FOR USE AND ROAD SAFETY
The Connect Nav+ system allows to easily control the main car functions.
Read the following instructions to avoid endangering yourself and other system users:
–maintain full control of the car while using the Connect Nav+ system. If in doubt when selecting a function, stop the car before proceeding.
–do not use the mobile telephone in the proximity of explosive substances.
The navigation system allows to reach your destination indicating changes of route employing the data stored on the navigation CD-ROM.
The system calculates the route taking all stored road data into account and recommends the best route. Traffic conditions, unexpected detours and other problems cannot be taken into consideration.
Respect the highway code regardless of the navigation system instructions. The navigation system will calculate a new route if you decide not to follow the recommended route instructions.
IIMPORTANT Do not use 8-cm audio CDs or MP3 CDs even with a specific adapter. This type of disk may damage the system.
WARNING
The navigation system is designed to assist the driver and to suggest the best route to
reach the programmed destination using voice and graphic messages. The suggestions supplied by the navigation system do not exonerate the driver from driving the car responsibly and respecting the highway code as well as other road traffic dispositions. The driver is always and only responsible for road safety.
13
SWITCHING THE SYSTEM ON/OFF
The system will be switched on when the key is switched to the M position.
The system will be switched off when the key is turned to the S position.
With the key at S, press knob (4) to operate the system for 20 minutes only to protect the battery charge.
ANTITHEFT PROTECTION
The CONNECT Nav+ system is provided with an automatic antitheft system which does not need to be operated by the user.
F0P1005g |
fig. 2
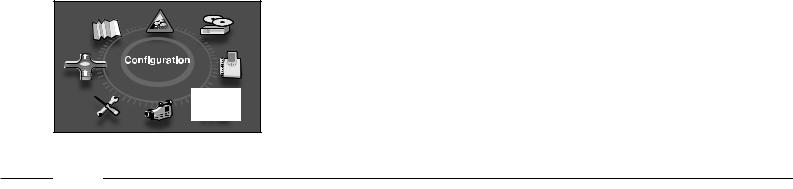
CONFIGURATION
Press MENU (18); turn and press the knob (16 – 40) to select the CONFIGURATION function - fig. 2. The following settings may be accessed:
–“Display configuration”: turn and press the knob (16 – 40) to select and confirm. This function is used to change the display colour, adjust brightness, set the date and time and set the unit of measure.
–“Sound”: turn and press the knob (16 – 40) to select and confirm. This function is used to adjust the voice control volume, set the voice synthesis parameters and switch the auxiliary input (RCA socket) located in the oddment compartment on and off.
–“Select language”: turn and press the knob (16 – 40) to select and confirm. This function is used to select the required language.
–“Define vehicle parameters”: turn and press the knob (16 – 40) to select and confirm. This function may be used switch some vehicle parameters on and off. The parameters change according to the version (e.g. parking sensors, etc.).
14

With the key at M, the audio section may be switched on and off by pressing the knob (4).
VOLUME ADJUSTMENT
Turn the knob (4) clockwise to turn the radio volume up and anticlockwise to turn it down.
AUDIO SETTINGS
Sound settings (BASS/ TREBLE), balance (BAL), fader (FAD), loudness (LOUD), automatic volume and type of sound (musical ambiance) may be adjusted. The balance and fader functions emphasise the sound from the left/right and the front/rear speakers. The loudness function is used to emphasise the bass and treble tone when the volume is low. To access the audio settings function, repeatedly press (11) to adjust bass (BASS), treble (TREB), loudness (LOUD), fader (FAD), balance (BAL), automatic volume and sound type (musical ambience).
AUDIO
The system will deactivate the audio adjustment system after a few seconds if no action is performed or if the ESC (9 - 36) is pressed after making the setting.
IMPORTANTThe bass and treble settings are source specific. They may be adjusted separately in RADIO, CD or CD changer mode.
Bass settings (BASS)
When the message “BASS” appears on the display, turn the knob (4) to adjust the setting as follows:
–“BASS -9” for setting bass to minimum level;
–“BASS 0” for setting bass to medium level;
–“BASS +9” for setting bass to maximum level.
Treble setting (TREB)
When the message “TREB” appears on the display, turn the knob (4) to adjust the setting as follows:
–“TREB -9” for setting treble to minimum level;
–“TREB 0” for setting treble to medium level;
–“TREB +9” for setting treble to maximum level.
Loudness function (LOUD)
This function allows to automatically emphasise bass and treble settings when the volume is low. Simply turn the knob (4) to switch the function on and off.
15

Front/rear balance (Fader)
When the message “FAD” appears on the display:
–turn the knob (4) clockwise to enhance the sound from the front speakers;
–turn the knob (4) anticlockwise to enhance the sound from the rear speakers.
Right/left balance (Balance)
When the message “BAL” appears on the display:
–turn the knob (4) clockwise to enhance the sound from the right speakers;
–turn the knob (4) anticlockwise to enhance the sound from the left speakers.
Automatic volume correction
This function is used to automatically adjust the volume according to the vehicle speed. Simply turn the knob (4)) to switch the function on and off.
Musical ambiance
This function is used to set the required ambiance (classical/jazz/rock/ pop/techno/vocal/none).
Select the required sound using the knob (16 - 40) and press the knob to confirm.
After making the required settings, turn and press the knob (16 - 40) to select and confirm the setting and go back to the previous menu.
RADIO MODE
Listening to the radio
Select radio mode and repeatedly press SOURCE (3) or SRC (30) to display “Radio”.
Frequency band selection
Press BAND/AST (22) to select the frequency bands: FM1, FM2, FMAST or AM.
16

Automatic station search
Briefly press ÷ (19) or ˜ (14) to select either the previous or the next station.
Hold the button corresponding the chosen direction pressed to change frequency continuously.
Tuning will stop at the first receiveable station when the button is released.
Only the stations transmitting traffic information will be selected if the TA function is on.
Station search is firstly run with “LO” sensitivity (most powerful stations) and then with “DX” sensitivity (weaker stations).
To perform a search with “DX” sensitivity directly, press ÷ (19) or ˜ (14) twice.
Manual station search
Briefly press ▲ (10) or ▼ (17). Hold the button corresponding the chosen direction pressed to change frequency continuously. Tuning will end as soon as the button is released.
Manual stations store
Proceed as follows to manually store stations:
–tune to the required station;
–press one of the buttons from 1 to 6 (20) and hold the button pressed until you hear the acoustic tone.
Automatic FM station store (Autostore)
Hold BAND/AST (22) pressed to activate the “Autostore” function. When this function is on, the radio will automatically store the six FM band stations with the strongest signal.
The message “FMAST” will appear on the display during automatic tuning. The stations will be automatically saved under buttons from 1 to 6 of keypad (20). After saving, the radio will be automatically tuned to the first station in the FMAST band, corresponding to the frequency stored under selection button 1 of keypad (20).
Each station is stored only one. Regional programmes may be stored twice.
The system will work as follows when the Autostore function is on:
–all other functions are off when Autostore starts;
–Autostore is stopped when the source is changed (radio, CD, CD changer) during the function;
–volume adjustments will not appear on the display.
17
 Loading...