Ferris Industries IS3000z, 1000z User Manual

FERRIS
OPERATOR’S MANUAL
with Blower Setup Instructions
Double & Triple Bag Grass Collection Systems
Double Bag Collection System for: |
Triple Bag Collection System for: |
Ferris 1000Z Series - 48” & 52” Mowers |
Ferris IS3000Z Series - 61” Mower |
Derby Colt ZT2148 & ZT2352 - 48” & 52” Mowers |
Derby Stallion ZT2561 - 61” Mower |
Ferris Industries |
22860 |
5375 North Main Street |
|
Munnsville, NY 13409 |
Rev. 9/2001 |
800-933-6175 |
TP 100-7040-01-AT-FD |

FERRIS LIMITED WARRANTY
IMPORTANT
This warranty shall apply ONLY if the warranty registration form has been completed and returned to Ferris Industries, Inc. within 20 days from the date of delivery.
Ferris Industries, Inc. (Ferris) warrants, in accordance with the provisions below, to the original purchaser for the period of twenty-four (24) months from the date of delivery of a
Ferris mower that the mower is free from defects in material or workmanship. Ferris’ obligation under this warranty is to repair or replace, at Ferris’ election, without charge and at the place of business of a dealer authorized to handle Ferris mowers, any part or parts of the machine which, in the judgment of Ferris, prove to be defective.
THIS WARRANTY AND FERRIS’ OBLIGATION HEREUNDER IS IN LIEU OF ALL
OTHER WARRANTIES, EXPRESSED OR IMPLIED, INCLUDING, WITHOUT LIMITA-
TION, THE IMPLIED WARRANTY OF MERCHANTABILITY OR IMPLIED WARRANTY OF FITNESS FOR PARTICULAR PURPOSE, and all other obligations or liabilities of Ferris for incidental and consequential damages resulting from the design, manufacture, sale or use of the machine. No person is authorized to make any warranty or assume for Ferris any liability not strictly in accordance with this warranty.
This warranty shall not apply to any mower part which, in the judgment of Ferris, has been altered or tampered with in any way or has been subjected to misuse, neglect or accident, or has had the serial numbers altered, effaced or removed. This warranty does not apply to component parts not manufactured by Ferris (motors, batteries, tires, belts) except to the extent of their individual manufacturer’s guarantees.
Ferris Industries, Inc. is continually striving to improve its products, and therefore reserves the right to make improvements or change when it becomes practical and possible to do so, without incurring any obligation to make changes or additions to the equipment sold previously.
FERRIS Ferris Industries
5375 North Main Street
Munnsville, NY 13409 800-933-6175
www.ferrisindustries.com
© Copyright 2001 Ferris Industries
All Rights Reserved. Printed in USA.

Table of Contents
SAFETY RULES & INFORMATION |
|
General Warnings .............................................. |
2 |
Safety Decals..................................................... |
2 |
GENERAL OPERATING INSTRUCTIONS |
|
Mowing with the Double / Triple Catcher ........... |
3 |
After Operation .................................................. |
3 |
Storing the Grass Catcher ................................. |
3 |
Mowing Without the Blower ............................... |
3 |
INITIAL INSTALLATION & ASSEMBLY |
|
48” & 52” DOUBLE BAG COLLECTION SYSTEM |
|
BLOWER MOUNT & DRIVE GROUP |
|
Remove Discharge Chute.................................. |
4 |
Release Mower Drive Belt Tension.................... |
4 |
Remove Guard & Spindle Pulley ....................... |
4 |
Install Spindle Pulley.......................................... |
5 |
Install Guard ...................................................... |
5 |
Mower Deck Preparation ................................... |
5 |
Blower Preparation ............................................ |
7 |
Install Blower & Belt Guard................................ |
9 |
INITIAL INSTALLATION & ASSEMBLY |
|
61” TRIPLE BAG COLLECTION SYSTEM |
|
BLOWER MOUNT & DRIVE GROUP |
|
Remove Discharge Chute................................ |
10 |
Release Mower Drive Belt Tension.................. |
10 |
Remove Guard & Spindle Pulley ..................... |
10 |
Install Spindle Pulley........................................ |
11 |
Install Guard & Blower Mount.......................... |
11 |
Blower Preparation .......................................... |
12 |
Install Blower & Belt Guard.............................. |
15 |
OPERATING WITHOUT BLOWER |
|
Reattaching Discharge Chute.......................... |
16 |
REFERENCE INFORMATION: |
|
Torque Specification Chart .....Inside Back Cover |
|
NOTE: In these instructions, “left” and “right” are referred to as seen from the operating position.
PRODUCT |
REFERENCE DATA |
|
|
|
|
Model Description Name |
|
|
|
|
|
Unit MODEL Number |
|
Unit SERIAL Number |
|
|
|
Dealer Name |
|
Date Purchased |
|
|
|
© Copyright 2001 Ferris Industries, Inc.
All Rights Reserved. Printed in USA.
TP 100-7040-01-AT-FD
1

Safety Rules
& Information
Read these safety rules and follow them closely. Failure to obey these rules could result in loss of control of unit, severe personal injury or death to you, or bystanders, or damage to property or equipment. The triangle  in text signifies important cautions or warnings which must be followed.

 GENERAL WARNINGS
•Know the mower controls, safety rules and how to stop quickly. READ AND UNDERSTAND THE MOWER OPERATOR’S MANUAL.
•READ AND OBEY ALL SAFETY DECALS.
•Wear appropriate ear, eye and breathing protection.
•Only allow responsible adults, who are familiar with the instructions, to operate the unit.
•Disengage the electric clutch (PTO). Shut off the engine and wait for all moving parts to stop before attaching, adjusting, or disconnecting any part of the collection system.
•When blower assembly is removed from the mower deck, the deflector must be properly installed.
•If the mower stalls or the turbo blower chute plugs:
1.Disengage the electric clutch (PTO);
2.Stop the engine and remove the key;
3.Set the parking brake, and wait for all moving parts to stop.
4.Remove the foreign object or clear the chute with a piece of wood before restarting the engine.
NEVER PLACE HANDS INTO BLOWER HOUSING TO CLEAR JAMMED OBJECT. BLOWER MAY ROTATE WHEN OBJECT IS REMOVED.
•Check the collection system to make sure it is bolted tightly to the rider.
•DO NOT operate the mower without either the entire grass catcher or the deflector in place.
•Turn off the PTO switch to disengage the blades when not mowing.
•DO NOT mow in reverse. Always look down and behind before and while travelling in reverse.
•DO NOT turn sharply when travelling alongside a building or any object. Slow down before turning.
•DO NOT carry passengers on the rider.
•For added rider stability and to prevent tipping or loss of control:
a.Use reduced speed on uneven ground and when turning corners.
b.Reduce loads on hillsides. It is recommended that the collection system be kept only half full when negotiating any slopes. Start mowing on slopes when the collection system is empty.
c.Mow up and down the face of slopes; never across the face of any slope.
•When operating on slopes, use front counterweights.
Never operate on slopes greater than 17.6% (10°).
SAFETY DECALS
This unit has been designed and manufactured to provide you with the safety and reliability you would expect from an industry leader in outdoor power equipment manufacturing.
Although reading this manual and the safety instructions it contains will provide you with the necessary basic knowledge to operate this equipment safely and effectively, we have placed several safety labels on the unit to remind you of this important information while you are operating your unit.
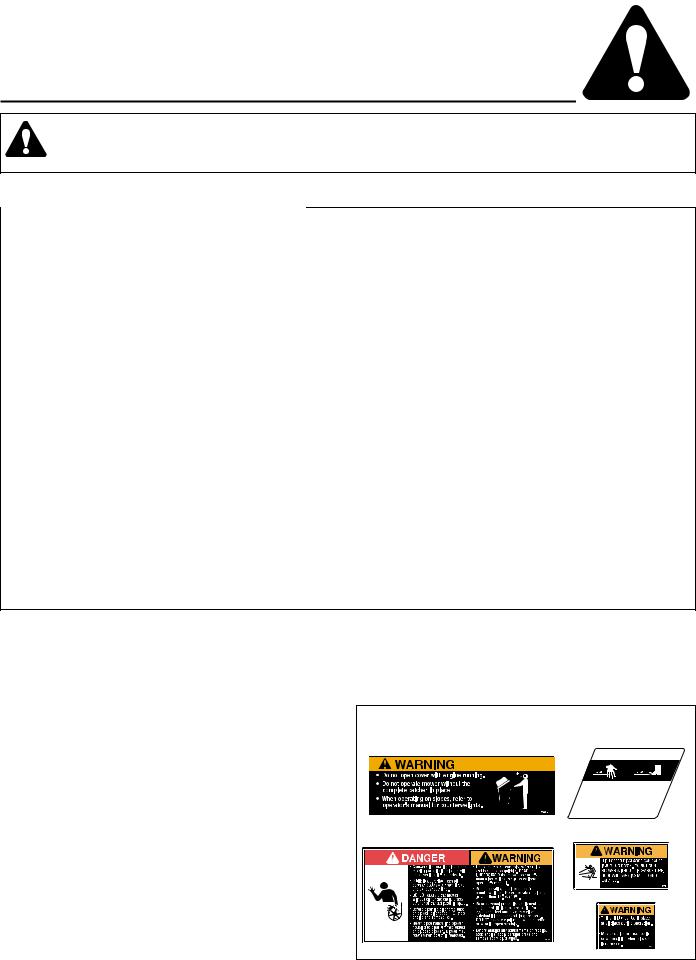
All DANGER, WARNING, CAUTION and instructional messages on your rider and mower should be carefully read and obeyed. Personal bodily injury can result when these instructions are not followed. The information is for your safety and it is important! The safety decals below are on your rider and mower.
If any of these decals are lost or damaged, replace them at once. See your local dealer for replacements.
These labels are easily applied and will act as a constant visual reminder to you, and others who may use the equipment, to follow the safety instructions necessary for safe, effective operation.
Read and obey all operation and warning decals.
 DANGER
ROTATING CUTTING BLADE
Do not operate mower without deflector or entire
grass catcher in place.
1704277
2

General
Operating Instructions
BEFORE OPERATION
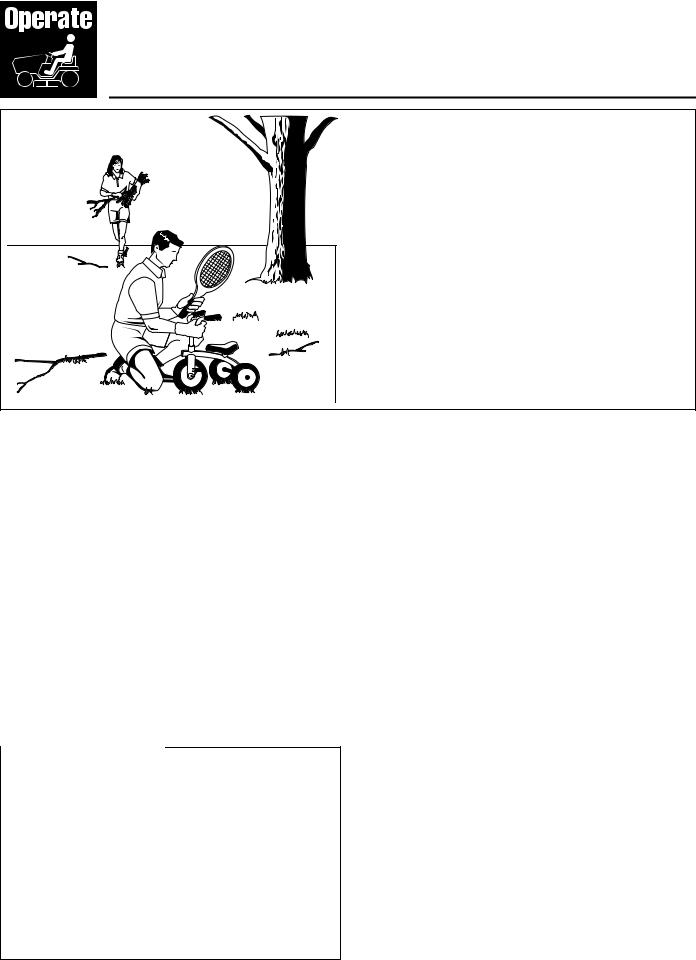
Clear the lawn of all sticks, stones, wire and other debris which may be caught or thrown by the mower blades.
Check grass condition. If wet, wait until later in the day. If grass is wet, the grass catcher is likely to become plugged.
For efficient bagging, air circulation under the mower deck, through the chute and into the bag is very important.
For this reason, BEFORE YOU BEGIN MOWING you should make certain the underside of the mower and the underside of the catcher lid are free from grass and debris.
Make sure that there is a snug fit between mower deck, blower housing, tubes, and grass catcher cover.
MOWING WITH THE DOUBLE / TRIPLE CATCHER
Always operate with throttle at full speed when mowing.
Grass should be cut often, and not too short. If grass is too long or lush it may be necessary to keep ground speed to a minimum or to cut only half the width of the mower to prevent clogging. If grass is long, operate with mower in high cutting position for first pass, cutting again in a lower position on a second pass.
Do not open the cover with mower engaged.
If a large amount of cut grass is spilling out from under deck, the tube may be plugged or the bags may be full— discontinue mowing, stop the rider, disengage the PTO and then empty the catcher or clear the tube.

 WARNING
ALWAYS shut off the tractor. disengage the PTO, and allow all moving parts to stop BEFORE disconnecting or clearing tube, or emptying catcher.
Before leaving the operator’s position for any reason, engage the parking brake, disengage the PTO, stop the engine and remove the key.
To reduce fire hazard, keep the engine, rider and mower free of grass, leaves and excess grease. Do not stop or park rider over dry leaves, grass or combustible materials.
AFTER OPERATION
Remove any debris from the the screen on the underside of the lid. Note: The lid screen can be partially removed for easier cleaning and should be cleaned regularly.
The blower housing and tube should be removed for cleaning.
Inspect the grass bags for wear or damage. Make sure that there is a snug fit between mower deck, blower housing, tubes, and grass catcher cover.
STORING THE GRASS CATCHER
Clean the grass catcher thoroughly using a mild detergent (other products may damage the tube). Remove any debris from the the screen on the underside of the lid. The screen can be partially removed for easier cleaning.
If paint has been scratched on metal parts, touch up with paint, or apply a thin film of oil to prevent corrosion.
Store in a dry area. Hang the catcher and catcher bags to dry thoroughly before storing for a long period of time.
Always store away from moisture.
MOWING WITHOUT THE BLOWER
For operation without the blower, the deflector must be properly installed in the down position and retained by the spring latch (Derby models only).
To remove the blower, reverse the installation steps.
3

Initial
Installation & Assembly
48” & 52” DOUBLE-BAG COLLECTION SYSTEM BLOWER MOUNT & DRIVE GROUP
Remove Discharge Chute
1.Park machine on a flat, level surface and apply the parking brake.
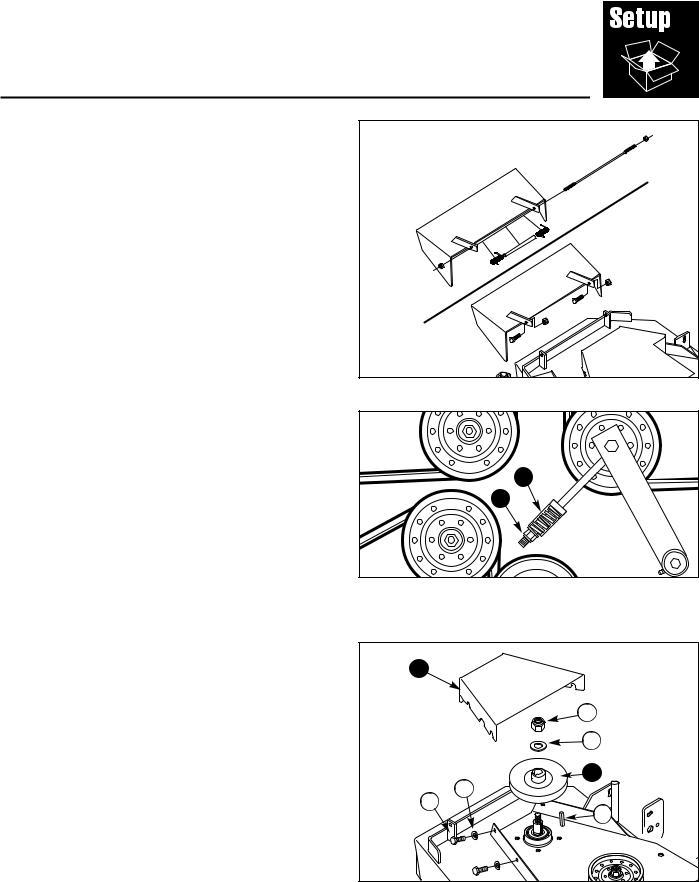
2.Remove the discharge chute and save. Save springs and spacer (Derby Colt only).
Release Mower Drive Belt Tension
1.Raise the floor pan and loosen the spring compression nut (A, Figure 2) to release the belt tension.
Figure 1. Chute Removal
|
B |
|
A |
Figure |
Mower Drive Belt |
A.Spring Compression
B.Idler
Remove Guard & Spindle Pulley
1.Remove the right-hand belt guard (A, Figure 3) and save.
2.Remove the mower deck drive belt from the righthand spindle pulley.
3.Remove the right-hand spindle pulley (D), 5/8” nylon lock nut (B), 5/8” washer (C) and 1/4” key (E). Use a block of wood to keep the blade from spinning while removing the 5/8” nut.
A
F
G
B
C
D
Figure 3. Belt Guard & Pulley Removal
A. |
Guard |
E. |
Key |
B. |
5/8” Nylon Lock Nut |
F. |
5/16” Washer (3) |
C. |
5/8” Washer |
G. |
5/16” x 3/4” Bolt (3) |
D.Spindle Pulley
4
 Loading...