


CG204
User's Guide
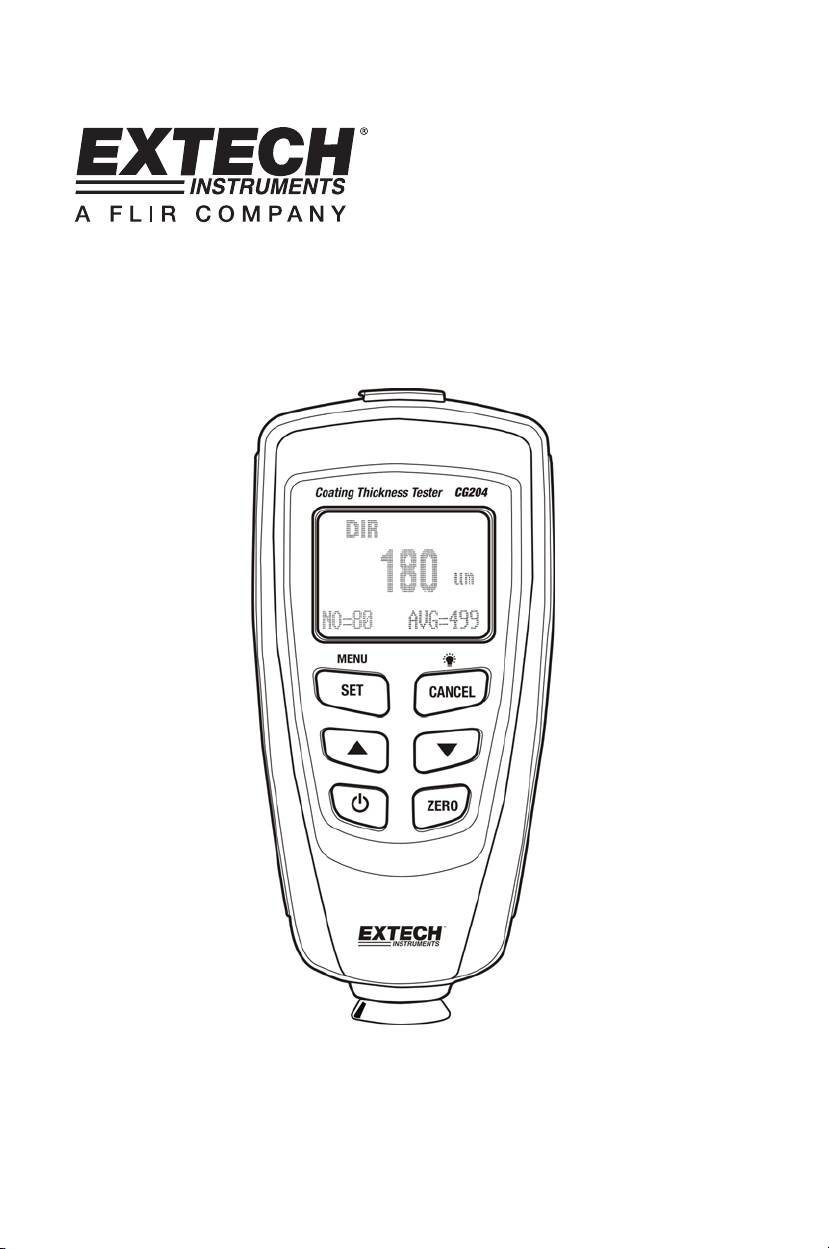
Extech CG204
Coating Thickness Tester
CG204-EU-EN V2.0 2/11
2
Introduction
Congratulations on your purchase of the Extech CG204 Coating Thickness Tester. The
CG204 is a portable meter designed for non-invasive coating thickness measurements.
The meter uses two measurement methods: magnetic induction (for ferrous metal
substrates) and eddy current (for non-ferrous metal substrates).
The meter is easily configured using the intuitive push-button programming menu. Five (5)
film reference samples and two (2) metal substrates are provided. The meter is also
equipped with a USB PC interface port and PC software.
Proper use and care of this meter will provide many years of reliable service.
Description
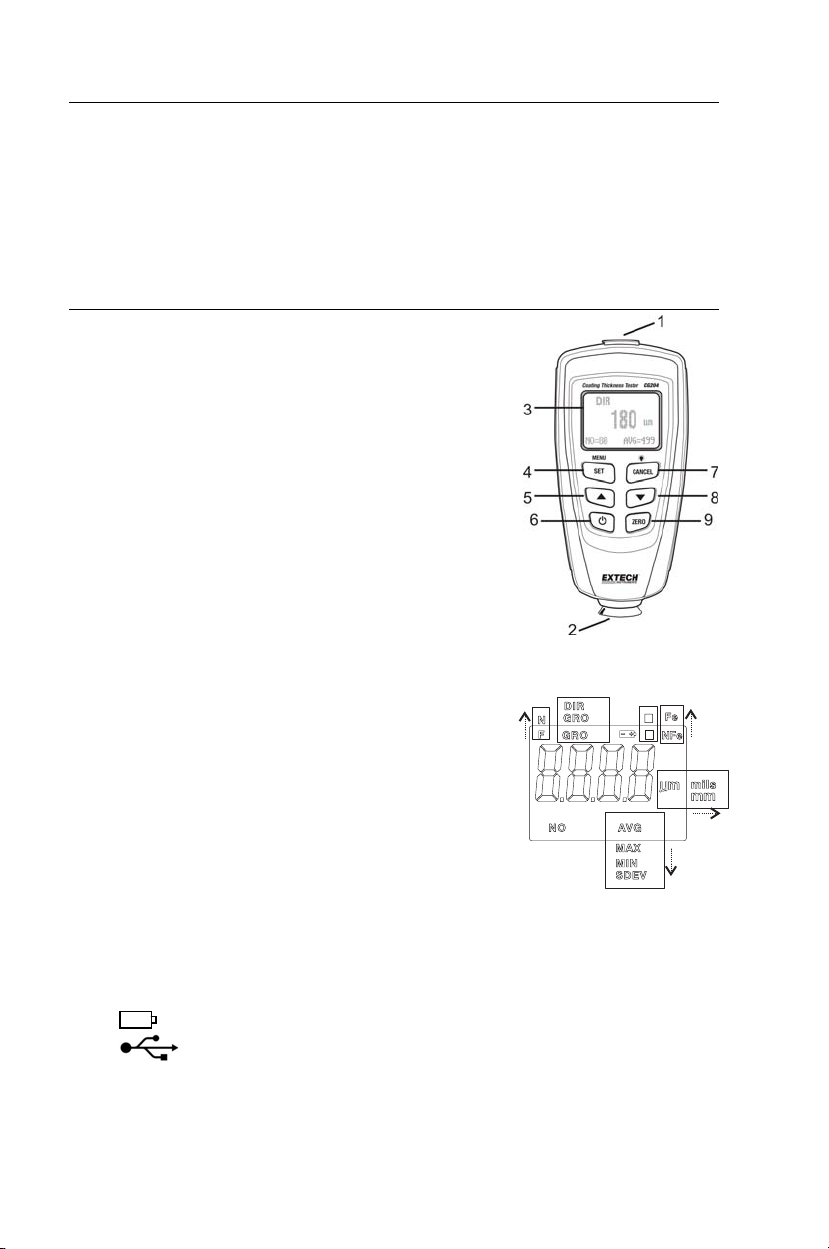
Meter Description
1. USB jack for PC interface
2. Measurement probe
3. Backlit LCD display
4. SET /OK /YES /MENU /SELECT button
5. UP /LEFT ARROW button
6. Power ON/OFF button
7. CANCEL /ESC /NO /BACK button (menu mode)
and Backlight ON/OFF (normal mode)
8. DOWN ARROW /RIGHT button
9. ZERO calibration button
Note: Battery compartment on rear of meter
Display Icon Description
NFe Non-ferrous metals
Fe Ferrous metals
AUTO Automatic substrate recognition
F or N Calibration icons
DIR DIRECT mode
GRO1…4 GROUP Mode
μm Micrometers unit of measure
mils mils = millimeters * 2.54/100
mm Millimeters unit of measure
AVG Average reading
MIN Minimum reading
MAX Maximum reading
SDEV Standard Deviation reading
NO Number of data points
Low battery
USB Connection
Note: The unit of measure icon flashes when in the CONTINUOUS mode of operation.
The unit of measure icon is stable when in the SINGLE mode of operation.
L
H
1
=
=
[AUT
O]
[NOALRRM]
cal n o(1 or 2)
zero n o(yes)
CG204-EU-EN V2.0 2/11
3
Quick Start Instructions
Meter Power
Press the power button to switch the meter ON. The display will switch ON. If the
display does not switch ON, replace the batteries.
Measurements
Use the supplied film references and zero reference metal substrates to learn how the
meter operates before moving to a professional application. The round metal substrate is
the ferrous (magnetic) substrate and the rectangular shaped metal substrate is the non-
ferrous (non-magnetic) substrate. The meter automatically senses ferrous or non-ferrous
substrates.
1. Place a reference film (250μm, for example) on the round, ferrous substrate.
2. Place the spring-loaded meter sensor against the reference film.
3. In the single mode the meter will emit an audible tone indicating that the
measurement has been taken.
4. In the continuous mode the display will continually measure and update the display
5. The LCD will show the reading (250μm) at the center of the display area.
6. A typical display will also show the following:
• NO = 1 (reading number one) on the lower left of
the LCD
• AVG = 250μm (running average) on the lower right
• DIR = DIR mode of operation on the upper left
• Fe = Ferrous substrate on the upper right of the
LCD
Experiment with the remaining reference films and the substrate before using the meter
professionally.
Automatic Power OFF
In order to conserve battery life, the meter will automatically turn off after approximately 3
minutes. To defeat this feature use the programming menu detailed in the next section
(menu parameter AUTO POWER OFF under OPTIONS).
LCD Backlight Button
The LCD is equipped with backlighting for easier viewing, especially in dimly lit areas.
Press the backlight button to turn the backlight on. Press again to turn the backlight off. To
enable/disable the LCD backlighting, use the BACKLIGHT parameter under OPTIONS in
the programming menu.
Factory Default Reset
To restore the meter to its original factory default settings:
1. Turn the meter OFF.
2. Press and hold the ZERO button while switching the meter ON.
3. When the meter powers up, the display will prompt for a YES or NO.
4. Press the SET button for YES or the CANCEL button for NO.
5. Note that all data in all memory locations will be erased, in addition to statistics,
calibration values, and alarm limits.
DIR
um
AVG=250
NO=1
250
Fe

CG204-EU-EN V2.0 2/11
4
Programming Menu
The meter can be configured and calibrated through simple button presses in the
programming menu. Press the MENU button to access the menu and refer to the menu
‘tree’ below. The menu uses UP/DOWN, SELECT, BACK, & ESC presses for navigation
and selection. In the table below the factory default settings are in bold with an asterisk.
Each parameter is explained in detail in the subsequent sections.
Top level Sub level 1 Sub level 2 Notes
AVG* Average of a series of readings
MIN Lowest of a series of readings
MAX Highest of a series of readings
NO Number of sampled readings
STATISTICAL VIEW
SDEV Standard deviation of a series
Single* One reading at a time
Measure mode
Continuous Continuous measurements
Direct* Readings are not stored in groups
Working mode
Group 1…4 Store readings in groups
Auto* Meter automatically selects mode
Fe Ferrous measurement mode
Probe used
No Fe Non-ferrous measurement mode
μm*
Micrometers
mils Mils = mm * 2.54 / 100
Unit settings
mm Millimeters
ON* Enables backlight operation
Backlight
OFF Disables backlight operation
AVG* Average of a series of readings
MAX Lowest of a series of readings
MIN Highest of a series of readings
LCD Statistics
SDEV Standard deviation of a series
Enable* Allows auto power off to operate
OPTIONS
Auto Power OFF
Disable Defeats the auto power off feature
High Limit High Alarm alerts user when reached
Limit settings
Low Limit Low Alarm alerts user when reached
LIMIT
Delete Limits Clear the alarm limit values
Current Data Delete current data
All Data Delete all stored data
DELETE
Group Data
Delete data stored data plus alarm
and calibration data
MEASUREMENT
VIEW
View stored data in all groups
Enable Allow calibration access
Disable Lock out the calibration mode
Delete Zero N Clear the zero cal. data (non-ferrous)
CALIBRATION
Delete Zero F Clear the zero cal. data (ferrous)
NOTE: Disable the Auto Power OFF feature before lengthy programming to avoid
inconvenient automatic power down while programming.

CG204-EU-EN V2.0 2/11
5
STATISTICAL VIEWS Menu
1. Press the MENU button to access the programming menu
2. Press SELECT to choose STATISTCAL VIEW
3. Use the UP and DOWN buttons to scroll through the AVERAGE, MINIMUM,
MAXIMUM, NUMBER OF DATA, and SDEV (Standard Deviation) values for the stored
readings.
4. ‘NO DATA’ will display if no readings are available for the meter to analyze. Stored
readings will clear when the meter powers down unless the GROUP feature is used
(refer to GROUP function explanation later in this section).
5. Press the BACK and then the ESC soft-keys to return to the normal operating mode.
OPTIONS Menu
1. Press the MENU button to access the programming menu
2. Use the DOWN ARROW button to scroll down to OPTIONS
3. Press SELECT to choose OPTIONS
4. Use the UP and DOWN buttons to scroll to the MEASURE MODE, WORKING MODE,
PROBE USED, UNIT SETTINGS, BACKLIGHT, LCD STATISTICS, AND AUTO
POWER OFF parameters. Use the SELECT soft-key to select the desired parameter.
Each parameter is detailed below:
a. Measure Modes
Select CONTINUOUS or SINGLE under MEASURE MODES in the OPTIONS Menu
using the arrow buttons and the SELECT soft-key.
In the CONTINUOUS measurement mode the meter displays a running average of
readings as they are taken. Note that the audible measurement ‘beep’ is not active in
this mode.
In the SINGLE measurement mode measurements are taken one at a time. Single
mode measurement readings are accompanied by an audible tone.
b. Working Modes
Select DIRECT or GROUP 1, 2, 3, or 4 under WORKING MODES in the OPTIONS
Menu using the arrow buttons and the SELECT soft-key.
In DIRECT mode, individual readings are logged to memory. When power is switched
off or if the meter is switched to GROUP mode, all DIRECT readings will be cleared.
However, the statistical analysis data will remain. The statistical analysis utility can
evaluate up to 80 readings. When the memory is filled, new readings will replace old
readings. Lastly, this mode has its own calibration and alarm limit values.
In GROUP mode each group memory can store a maximum of 80 readings and 5
statistical values. Calibration and alarm limit values can be individually set and stored
for each group. When the memory is filled, measurements will continue to be taken but
readings will no longer log (previously logged readings are not affected); in addition,
statistical data will no longer update. If desired, the group data, statistical values,
calibration data, and alarm limit values can be deleted using the programming menu.
 Loading...