


Performance Series
Embedded DVR
HRG4
HRG8
HRG16
User Guide
Document 800-12005V1 – Rev A – 08/2012
User Guide

Revisions
Issue |
Date |
Revisions |
|
|
|
A |
08/2012 |
New document 800-12005V1 to replace 800-12005. Replaced various screen shots |
|
|
throughout to improve quality and legibility. Edited the system diagram. Replaced the |
|
|
front-panel photograph for the HRG8/HRG16 model, and rear-panel photographs of |
|
|
the HRG8 and HRG16 models. |
|
|
Added the Cautions and Warnings, Regulatory Statements, Safety Instructions, and |
|
|
Warranty and Service sections and the Specifications appendix. |
|
|
Added the About This Document chapter. |
|
|
Corrected the Operating Temperature range in the Specifications chapter. |
|
|
|
|
|
|
|
|
|
|
|
|
|
|
|
|
|
|
Cautions and Warnings
|
|
|
|
|
|
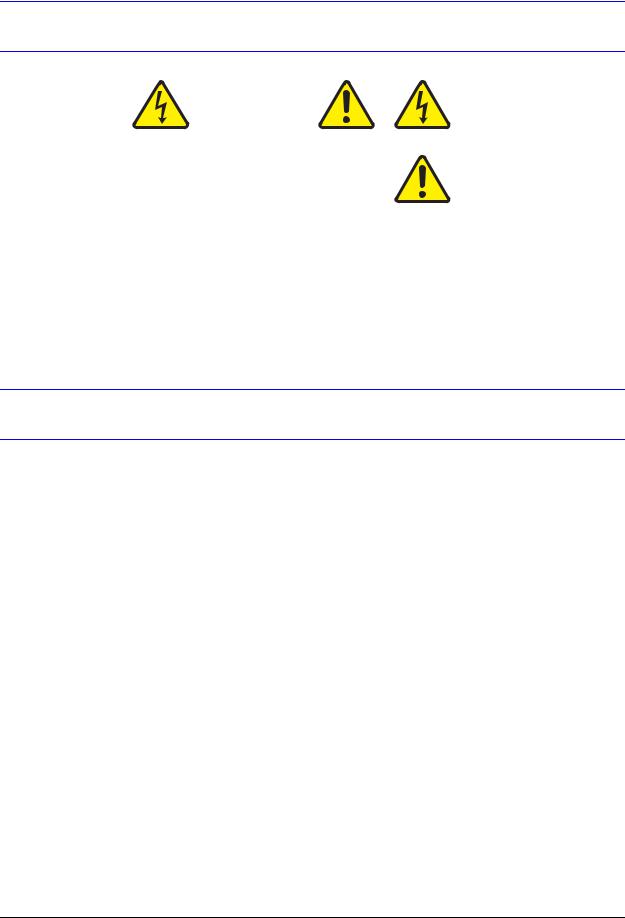
CAUTION |
|
THIS SYMBOL INDICATES THAT |
|
|
|
DANGEROUS VOLTAGE |
||
|
RISK OF ELECTRIC |
|
CONSTITUTING A RISK OF |
|
|
SHOCK |
|
ELECTRIC SHOCK IS PRESENT |
|
|
DO NOT OPEN |
|
WITHIN THE UNIT. |
|
|
|
|
|
|
CAUTION: TO REDUCE THE RISK OF ELECTRIC |
THIS SYMBOL INDICATES THAT |
|||
SHOCK, DO NOT REMOVE THE COVER. |
||||
IMPORTANT OPERATING AND• |
||||
NO USER-SERVICEABLE PARTS INSIDE. |
||||
MAINTENANCE INSTRUCTIONS |
||||
REFER SERVICING TO QUALIFIED SERVICE |
||||
ACCOMPANY THIS UNIT. |
||||
|
PERSONNEL. |
|||
|
|
|||
|
|
|
|
|
Installation and servicing should be performed only by qualified and experienced technicians to conform to all local codes and to maintain your warranty.
CAUTION 12 VDC models require the use of CSA Certified/UL Listed Class 2 power adapters to ensure compliance with electrical safety standards.
Regulatory Statements
Information to the User: This equipment has been tested and found to comply with the limits for a Class A digital device. Pursuant to part 15 of the FCC Rules, these limits are designed to provide reasonable protection against harmful interference in a commercial environment. This equipment generates, uses, and can radiate radio frequency energy and, if not installed and used in accordance with the instruction manual, may cause harmful interference to radio communications. Operation of this equipment in a residential area is likely to cause harmful interference, in which case the user will be required to correct the interference at his own expense.
CAUTION Changes or modifications not expressly approved by the party responsible for compliance could void the user’s authority to operate the equipment.
Canadian Compliance Statement
This Class A digital apparatus complies with Canadian ICES-003.
Cet appareil numérique de la Classe A est conforme à la norme NMB-003 du Canada.
North America
The equipment supplied with this guide conforms to UL 60950-1 and CSA C22.2 No. 60950-1.
800-12005V1 - A - 08/2012
6 | Performance Series DVR User Guide
Europe
The manufacturer declares that the equipment supplied is compliant with the essential requirements of the EMC directive 2004/108/EC, conforming to the requirements of standards EN 55022 for emissions, EN 50130-4 for immunity, and EN 60950 for Electrical Equipment safety.
Waste Electrical and Electronic Equipment (WEEE)
Correct Disposal of this Product (applicable in the European Union and other European countries with separate collection systems).
This product should be disposed of, at the end of its useful life, as per applicable local laws, regulations, and procedures.
Safety Instructions
BEFORE OPERATING OR INSTALLING THE UNIT, READ AND FOLLOW ALL INSTRUCTIONS.
AFTER INSTALLATION, retain the safety and operating instructions for future reference
1.HEED WARNINGS - Adhere to all warnings on the unit and in the operating instructions.
2.INSTALLATION
•Install in accordance with the manufacturer’s instructions.
•Installation and servicing should be performed only by qualified and experienced technicians to conform to all local codes and to maintain your warranty.
•Do not install the unit in an extremely hot or humid location, or in a place subject to dust or mechanical vibration. The unit is not designed to be waterproof. Exposure to rain or water may damage the unit.
•Any wall or ceiling mounting of the product should follow the manufacturer’s instructions and use a mounting kit approved or recommended by the manufacturer.
3.POWER SOURCES - This product should be operated only from the type of power source indicated on the marking label. If you are not sure of the type of power supplied to your facility, consult your product dealer or local power company.
4.HEAT - Situate away from items that produce heat or are heat sources such as radiators, heat registers, stoves, or other products (including amplifiers).
5.WATER AND MOISTURE - Do not use this unit near water or in an unprotected outdoor installation, or any area classified as a wet location.
6.MOUNTING SYSTEM - Use only with a mounting system recommended by the manufacturer, or sold with the product.
7.ATTACHMENTS - Do not use attachments not recommended by the product manufacturer as they may result in the risk of fire, electric shock, or injury to persons.
8.ACCESSORIES - Only use accessories specified by the manufacturer.
9.CLEANING - Do not use liquid cleaners or aerosol cleaners. Use a damp cloth for cleaning.
www.honeywellvideo.com

| 7
10.SERVICING - Do not attempt to service this unit yourself as opening or removing covers may expose you to dangerous voltage or other hazards. Refer all servicing to qualified service personnel.
11.REPLACEMENT PARTS - When replacement parts are required, be sure the service technician has used replacement parts specified by the manufacturer or have the same characteristics as the original part. Unauthorized substitutions may result in fire, electric shock or other hazards.
Warranty and Service
Subject to the terms and conditions listed on the Product warranty, during the warranty period Honeywell will repair or replace, at its sole option, free of charge, any defective products returned prepaid.
In the event you have a problem with any Honeywell product, please call Customer Service at 1.800.796.CCTV for assistance or to request a Return Merchandise Authorization (RMA) number.
Be sure to have the model number, serial number, and the nature of the problem available for the technical service representative.
Prior authorization must be obtained for all returns, exchanges, or credits. Items shipped to
Honeywell without a clearly identified Return Merchandise Authorization (RMA) number may be refused.
800-12005V1 - A - 08/2012

8 | Performance Series DVR User Guide
www.honeywellvideo.com

Contents | 9
Contents
Figures. . . . . . . . . . . . . . . . . . . . . . . . . . . . . . . . . . . . . . . . |
. . . . . . . . . . . . . |
13 |
|
Tables . . . . . . . . . . . . . . . . . . . . . . . . . . . . . . . . . . . . . . . . |
. . . . . . . . . . . . . |
17 |
|
About This Document . . . . . . . . . . . . . . . . . . . . . . . . . . . . . . . . |
. . . . . . . . . . . . . |
19 |
|
|
Overview of Contents. . . . . . . . . . . . . . . . . . . . . . . . . . . . . . . |
. . . . . . . . . . . . . . |
19 |
|
Related Documents . . . . . . . . . . . . . . . . . . . . . . . . . . . . . . . |
. . . . . . . . . . . . . . |
20 |
|
Typographical Conventions . . . . . . . . . . . . . . . . . . . . . . . . . . . |
. . . . . . . . . . . . . . |
20 |
1 |
Introduction . . . . . . . . . . . . . . . . . . . . . . . . . . . . . . . . . . |
. . . . . . . . . . . . . |
23 |
|
Overview . . . . . . . . . . . . . . . . . . . . . . . . . . . . . . . . . . . . . |
. . . . . . . . . . . . . . |
23 |
|
Product Features . . . . . . . . . . . . . . . . . . . . . . . . . . . . . . . |
. . . . . . . . . . . . . |
23 |
|
System Diagram . . . . . . . . . . . . . . . . . . . . . . . . . . . . . . . . |
. . . . . . . . . . . . . |
25 |
|
Operating the HRG DVR . . . . . . . . . . . . . . . . . . . . . . . . . . . . . . |
. . . . . . . . . . . . . |
26 |
|
Front Panel. . . . . . . . . . . . . . . . . . . . . . . . . . . . . . . . . . . |
. . . . . . . . . . . . . |
26 |
|
Using the IR Remote Control . . . . . . . . . . . . . . . . . . . . . . . . . |
. . . . . . . . . . . . . |
29 |
|
Using a USB Mouse . . . . . . . . . . . . . . . . . . . . . . . . . . . . . . |
. . . . . . . . . . . . . |
30 |
|
Using the Virtual Keyboard . . . . . . . . . . . . . . . . . . . . . . . . . . |
. . . . . . . . . . . . . |
31 |
|
Rear Panel . . . . . . . . . . . . . . . . . . . . . . . . . . . . . . . . . . . |
. . . . . . . . . . . . . |
31 |
2 |
Getting Started . . . . . . . . . . . . . . . . . . . . . . . . . . . . . . . . |
. . . . . . . . . . . . . |
35 |
|
Starting and Shutting Down the HRG DVR. . . . . . . . . . . . . . . . . . . . . |
. . . . . . . . . . . . . |
35 |
|
Starting the HRG DVR . . . . . . . . . . . . . . . . . . . . . . . . . . . . . |
. . . . . . . . . . . . . |
35 |
|
Shutting Down the HRG DVR . . . . . . . . . . . . . . . . . . . . . . . . . |
. . . . . . . . . . . . . |
35 |
|
Rebooting and Locking the HRG DVR . . . . . . . . . . . . . . . . . . . . . . . |
. . . . . . . . . . . . . |
36 |
|
Using the Setup Wizard . . . . . . . . . . . . . . . . . . . . . . . . . . . . . . |
. . . . . . . . . . . . . |
36 |
|
Setting the Date and Time . . . . . . . . . . . . . . . . . . . . . . . . . . . . . |
. . . . . . . . . . . . . |
42 |
3 |
Live View . . . . . . . . . . . . . . . . . . . . . . . . . . . . . . . . . . . |
. . . . . . . . . . . . . |
43 |
|
On-screen Display in Live View . . . . . . . . . . . . . . . . . . . . . . . . . . |
. . . . . . . . . . . . . |
43 |
|
Live View Icons . . . . . . . . . . . . . . . . . . . . . . . . . . . . . . . . |
. . . . . . . . . . . . . |
43 |
|
Operating Live View . . . . . . . . . . . . . . . . . . . . . . . . . . . . . . . . |
. . . . . . . . . . . . . |
44 |
|
Using the Mouse in Live View . . . . . . . . . . . . . . . . . . . . . . . . . |
. . . . . . . . . . . . . |
44 |
|
Using the Digital Zoom . . . . . . . . . . . . . . . . . . . . . . . . . . . . |
. . . . . . . . . . . . . |
45 |
|
Configuring the Live View Display . . . . . . . . . . . . . . . . . . . . . . . . . |
. . . . . . . . . . . . . |
46 |
|
Setting the Camera Order . . . . . . . . . . . . . . . . . . . . . . . . . . . |
. . . . . . . . . . . . . |
47 |
4 |
Recording Settings . . . . . . . . . . . . . . . . . . . . . . . . . . . . . . |
. . . . . . . . . . . . . |
49 |
|
Configuring Recording Settings . . . . . . . . . . . . . . . . . . . . . . . . . . |
. . . . . . . . . . . . . |
49 |
|
Initializing Recording Settings . . . . . . . . . . . . . . . . . . . . . . . . . |
. . . . . . . . . . . . . |
49 |
|
Scheduling Recording . . . . . . . . . . . . . . . . . . . . . . . . . . . . . |
. . . . . . . . . . . . . |
51 |
|
Starting a Manual Recording . . . . . . . . . . . . . . . . . . . . . . . . . |
. . . . . . . . . . . . . |
52 |
|
Protecting Recorded Files . . . . . . . . . . . . . . . . . . . . . . . . . . . . . |
. . . . . . . . . . . . . |
53 |
|
Locking and Unlocking Recorded Files . . . . . . . . . . . . . . . . . . . . |
. . . . . . . . . . . . . |
53 |
|
Setting the Hard Drive to Read-Only . . . . . . . . . . . . . . . . . . . . . |
. . . . . . . . . . . . . |
54 |
5 |
Playback . . . . . . . . . . . . . . . . . . . . . . . . . . . . . . . . . . . . |
. . . . . . . . . . . . . |
57 |
|
Video Playback . . . . . . . . . . . . . . . . . . . . . . . . . . . . . . . . . . . |
. . . . . . . . . . . . . |
57 |
|
Playback Interface . . . . . . . . . . . . . . . . . . . . . . . . . . . . . . . |
. . . . . . . . . . . . . |
57 |
|
Playback by Search . . . . . . . . . . . . . . . . . . . . . . . . . . . . . . |
. . . . . . . . . . . . . |
58 |
|
Playback in Live View Mode . . . . . . . . . . . . . . . . . . . . . . . . . . |
. . . . . . . . . . . . . |
59 |
|
Playback by System Log . . . . . . . . . . . . . . . . . . . . . . . . . . . |
. . . . . . . . . . . . . |
60 |
|
Playback Frame-by-Frame . . . . . . . . . . . . . . . . . . . . . . . . . . |
. . . . . . . . . . . . . |
61 |
800-12005V1 - A - 08/2012

10 | Performance Series DVR User Guide
|
Digital Zoom . . . . . . . . . . . . . . . . . . . . . . . . . . . . . . . . . . . . . . |
. . . . . . . . . |
61 |
6 |
Backup. . . . . . . . . . . . . . . . . . . . . . . . . . . . . . . . . . . . . . . . . . |
. . . . . . . . |
63 |
|
Backing Up Recorded Files . . . . . . . . . . . . . . . . . . . . . . . . . . . . . . . . |
. . . . . . . . . |
63 |
|
Exporting Files . . . . . . . . . . . . . . . . . . . . . . . . . . . . . . . . . . . . . . |
. . . . . . . . |
63 |
|
Exporting Video Clips . . . . . . . . . . . . . . . . . . . . . . . . . . . . . . . . . . |
. . . . . . . . |
65 |
|
Managing Backup Devices . . . . . . . . . . . . . . . . . . . . . . . . . . . . . . . |
. . . . . . . . |
66 |
7 |
Alarm Settings. . . . . . . . . . . . . . . . . . . . . . . . . . . . . . . . . . . . . . |
. . . . . . . . |
69 |
|
Configuring Alarms . . . . . . . . . . . . . . . . . . . . . . . . . . . . . . . . . . . . . . |
. . . . . . . . |
69 |
|
Motion Detection Alarm . . . . . . . . . . . . . . . . . . . . . . . . . . . . . . . . . |
. . . . . . . . |
69 |
|
Sensor Alarm Settings . . . . . . . . . . . . . . . . . . . . . . . . . . . . . . . . . . |
. . . . . . . . |
72 |
|
Manual Alarm Triggering . . . . . . . . . . . . . . . . . . . . . . . . . . . . . . . . |
. . . . . . . . |
75 |
|
Video Loss Detection . . . . . . . . . . . . . . . . . . . . . . . . . . . . . . . . . . |
. . . . . . . . |
76 |
|
Video Tampering Detection . . . . . . . . . . . . . . . . . . . . . . . . . . . . . . . |
. . . . . . . . |
78 |
|
Exception Settings . . . . . . . . . . . . . . . . . . . . . . . . . . . . . . . . . . . . . . |
. . . . . . . . |
80 |
|
Understanding Exception Trigger Options . . . . . . . . . . . . . . . . . . . . . . . |
. . . . . . . . |
81 |
8 |
Network Settings . . . . . . . . . . . . . . . . . . . . . . . . . . . . . . . . . . . . |
. . . . . . . . |
83 |
|
Configuring Network Settings . . . . . . . . . . . . . . . . . . . . . . . . . . . . . . . . |
. . . . . . . . |
83 |
|
Configuring General System Settings. . . . . . . . . . . . . . . . . . . . . . . . . . |
. . . . . . . . |
83 |
|
Configuring PPPoE Settings. . . . . . . . . . . . . . . . . . . . . . . . . . . . . . . |
. . . . . . . . |
84 |
|
Configuring DDNS . . . . . . . . . . . . . . . . . . . . . . . . . . . . . . . . . . . . |
. . . . . . . . |
86 |
|
Configuring NTP Server Settings . . . . . . . . . . . . . . . . . . . . . . . . . . . . |
. . . . . . . . |
86 |
|
Configuring Remote Alarm Host Settings . . . . . . . . . . . . . . . . . . . . . . . . |
. . . . . . . . |
87 |
|
Configuring Multicast . . . . . . . . . . . . . . . . . . . . . . . . . . . . . . . . . . |
. . . . . . . . |
88 |
|
Configuring Server and HTTP Ports. . . . . . . . . . . . . . . . . . . . . . . . . . . |
. . . . . . . . |
89 |
|
Configuring Email . . . . . . . . . . . . . . . . . . . . . . . . . . . . . . . . . . . . |
. . . . . . . . |
89 |
9 |
PTZ Control . . . . . . . . . . . . . . . . . . . . . . . . . . . . . . . . . . . . . . . |
. . . . . . . . |
91 |
|
Navigating the PTZ Menu . . . . . . . . . . . . . . . . . . . . . . . . . . . . . . . . . . |
. . . . . . . . |
91 |
|
Configuring PTZ Settings. . . . . . . . . . . . . . . . . . . . . . . . . . . . . . . . . . . |
. . . . . . . . |
92 |
|
Setting PTZ Presets, Patrols and Patterns . . . . . . . . . . . . . . . . . . . . . . . . . . |
. . . . . . . . |
93 |
|
Understanding PTZ Controls . . . . . . . . . . . . . . . . . . . . . . . . . . . . . . |
. . . . . . . . |
93 |
|
Customizing Presets. . . . . . . . . . . . . . . . . . . . . . . . . . . . . . . . . . . |
. . . . . . . . |
93 |
|
Customizing Patrols . . . . . . . . . . . . . . . . . . . . . . . . . . . . . . . . . . . |
. . . . . . . . |
94 |
|
Customizing Patterns . . . . . . . . . . . . . . . . . . . . . . . . . . . . . . . . . . |
. . . . . . . . |
96 |
10 Camera Management . . . . . . . . . . . . . . . . . . . . . . . . . . . . . . . . . . |
. . . . . . . . |
97 |
|
|
OSD Settings . . . . . . . . . . . . . . . . . . . . . . . . . . . . . . . . . . . . . . . . . |
. . . . . . . . |
97 |
|
Image Settings . . . . . . . . . . . . . . . . . . . . . . . . . . . . . . . . . . . . . . . . |
. . . . . . . . |
98 |
|
Privacy Mask Settings . . . . . . . . . . . . . . . . . . . . . . . . . . . . . . . . . . . . |
. . . . . . . . |
99 |
11 |
Hard Drive Management . . . . . . . . . . . . . . . . . . . . . . . . . . . . . . . . |
. . . . . . . . |
101 |
|
Managing Hard Drives . . . . . . . . . . . . . . . . . . . . . . . . . . . . . . . . . . . . |
. . . . . . . . |
101 |
|
Initializing Hard Drives . . . . . . . . . . . . . . . . . . . . . . . . . . . . . . . . . . |
. . . . . . . . |
101 |
|
Setting HDD Groups. . . . . . . . . . . . . . . . . . . . . . . . . . . . . . . . . . . |
. . . . . . . . |
102 |
|
Setting HDD Status . . . . . . . . . . . . . . . . . . . . . . . . . . . . . . . . . . . |
. . . . . . . . |
102 |
|
Checking HDD Status . . . . . . . . . . . . . . . . . . . . . . . . . . . . . . . . . . |
. . . . . . . . |
103 |
|
Configuring HDD Alarms . . . . . . . . . . . . . . . . . . . . . . . . . . . . . . . . |
. . . . . . . . |
105 |
12 HRG DVR Management . . . . . . . . . . . . . . . . . . . . . . . . . . . . . . . . . |
. . . . . . . . |
107 |
|
|
Configuring System Settings . . . . . . . . . . . . . . . . . . . . . . . . . . . . . . . . . |
. . . . . . . . |
107 |
|
Configuring General Settings . . . . . . . . . . . . . . . . . . . . . . . . . . . . . . |
. . . . . . . . |
107 |
|
Configuring Advanced Settings . . . . . . . . . . . . . . . . . . . . . . . . . . . . . |
. . . . . . . . |
108 |
|
Setting the RS-232 Port . . . . . . . . . . . . . . . . . . . . . . . . . . . . . . . . . . . |
. . . . . . . . |
109 |
|
Managing User Accounts . . . . . . . . . . . . . . . . . . . . . . . . . . . . . . . . . . |
. . . . . . . . |
110 |
|
Adding a New User . . . . . . . . . . . . . . . . . . . . . . . . . . . . . . . . . . . |
. . . . . . . . |
110 |
|
Deleting a User . . . . . . . . . . . . . . . . . . . . . . . . . . . . . . . . . . . . . |
. . . . . . . . |
113 |
|
Modifying a User. . . . . . . . . . . . . . . . . . . . . . . . . . . . . . . . . . . . . |
. . . . . . . . |
114 |
|
Managing the System . . . . . . . . . . . . . . . . . . . . . . . . . . . . . . . . . . . . |
. . . . . . . . |
114 |
|
Importing and Exporting the Configuration File. . . . . . . . . . . . . . . . . . . . . |
. . . . . . . . |
114 |
|
Updating the System Firmware . . . . . . . . . . . . . . . . . . . . . . . . . . . . . . . |
. . . . . . . . |
115 |
|
Restoring the Default Settings . . . . . . . . . . . . . . . . . . . . . . . . . . . . . . . . |
. . . . . . . . |
117 |
|
Viewing the System Information . . . . . . . . . . . . . . . . . . . . . . . . . . . . . . . |
. . . . . . . . |
118 |
|
Viewing the System Log . . . . . . . . . . . . . . . . . . . . . . . . . . . . . . . . . . . |
. . . . . . . . |
118 |
www.honeywellvideo.com
Contents | 11
Appendix A |
Glossary . . . . . . . . . . . . . . . . . . . . . . . . . . . . . . . . . . . . . . . . . . . . |
121 |
Appendix B |
Solutions . . . . . . . . . . . . . . . . . . . . . . . . . . . . . . . . . . . . . . . . . . . . |
123 |
Troubleshooting the HRG DVR. . . . . . . . . . . . . . . . . . . . . . . . . . . . . . . . . . . . . . . . |
123 |
|
Troubleshooting the IR Remote Control . . . . . . . . . . . . . . . . . . . . . . . . . . . . . . . . . . . |
125 |
|
Appendix C Specifications . . . . . . . . . . . . . . . . . . . . . . . . . . . . . . . . . . . . . . . . . |
127 |
|
Dimensions . . . . . . . . . . . . . . . . . . . . . . . . . . . . . . . . . . . . . . . . . . . . . . . 129
Index . . . . . . . . . . . . . . . . . . . . . . . . . . . . . . . . . . . . . . . . . . . . . . . . . . . . . . 131
800-12005V1 - A - 08/2012

12 | Performance Series DVR User Guide
www.honeywellvideo.com

| 13
Figures |
|
|
Figure 1-1 |
System Diagram (HRG4 DVR shown) . . . . . . . . . . . . . . . . . . . . . . . . . . . . . . . |
26 |
Figure 1-2 |
HRG4 Front Panel . . . . . . . . . . . . . . . . . . . . . . . . . . . . . . . . . . . . . . . . . |
27 |
Figure 1-3 |
HRG8 and HRG16 Front Panel . . . . . . . . . . . . . . . . . . . . . . . . . . . . . . . . . . |
28 |
Figure 1-4 |
IR Remote Control . . . . . . . . . . . . . . . . . . . . . . . . . . . . . . . . . . . . . . . . . |
29 |
Figure 1-5 |
Virtual Keyboard . . . . . . . . . . . . . . . . . . . . . . . . . . . . . . . . . . . . . . . . . . |
31 |
Figure 1-6 |
HRG4 Rear Panel Connections and Switches . . . . . . . . . . . . . . . . . . . . . . . . . . |
31 |
Figure 2-1 |
Shutdown Menu . . . . . . . . . . . . . . . . . . . . . . . . . . . . . . . . . . . . . . . . . . |
36 |
Figure 2-2 |
Setup Wizard. . . . . . . . . . . . . . . . . . . . . . . . . . . . . . . . . . . . . . . . . . . . |
37 |
Figure 2-3 |
User Permission Window . . . . . . . . . . . . . . . . . . . . . . . . . . . . . . . . . . . . . |
37 |
Figure 2-4 |
Entering the HDD Management Window . . . . . . . . . . . . . . . . . . . . . . . . . . . . . |
38 |
Figure 2-5 |
HDD Management Window . . . . . . . . . . . . . . . . . . . . . . . . . . . . . . . . . . . . |
38 |
Figure 2-6 |
Entering the Record Settings Window. . . . . . . . . . . . . . . . . . . . . . . . . . . . . . . |
39 |
Figure 2-7 |
Schedule Tab . . . . . . . . . . . . . . . . . . . . . . . . . . . . . . . . . . . . . . . . . . . |
39 |
Figure 2-8 |
Entering a New Recording Schedule . . . . . . . . . . . . . . . . . . . . . . . . . . . . . . . |
40 |
Figure 2-9 |
Copying a Schedule . . . . . . . . . . . . . . . . . . . . . . . . . . . . . . . . . . . . . . . . |
40 |
Figure 2-10 |
Entering the Network Settings Window . . . . . . . . . . . . . . . . . . . . . . . . . . . . . . |
41 |
Figure 2-11 |
Network Settings Window . . . . . . . . . . . . . . . . . . . . . . . . . . . . . . . . . . . . . |
41 |
Figure 2-12 |
Setting the Date and Time . . . . . . . . . . . . . . . . . . . . . . . . . . . . . . . . . . . . . |
42 |
Figure 3-1 |
Live View Shortcut Menu . . . . . . . . . . . . . . . . . . . . . . . . . . . . . . . . . . . . . |
44 |
Figure 3-2 |
Digital Zoom . . . . . . . . . . . . . . . . . . . . . . . . . . . . . . . . . . . . . . . . . . . . |
45 |
Figure 3-3 |
Display Settings Menu . . . . . . . . . . . . . . . . . . . . . . . . . . . . . . . . . . . . . . . |
46 |
Figure 3-4 |
Camera Order Settings . . . . . . . . . . . . . . . . . . . . . . . . . . . . . . . . . . . . . . |
47 |
Figure 4-1 |
General Record Settings Menu . . . . . . . . . . . . . . . . . . . . . . . . . . . . . . . . . . |
49 |
Figure 4-2 |
More Record Settings . . . . . . . . . . . . . . . . . . . . . . . . . . . . . . . . . . . . . . . |
50 |
Figure 4-3 |
Advanced Record Settings . . . . . . . . . . . . . . . . . . . . . . . . . . . . . . . . . . . . |
51 |
Figure 4-4 |
Schedule Record Settings Menu . . . . . . . . . . . . . . . . . . . . . . . . . . . . . . . . . |
51 |
Figure 4-5 |
Manual Record Menu . . . . . . . . . . . . . . . . . . . . . . . . . . . . . . . . . . . . . . . |
52 |
Figure 4-6 |
Video Search Menu . . . . . . . . . . . . . . . . . . . . . . . . . . . . . . . . . . . . . . . . |
53 |
Figure 4-7 |
Video Search Result List . . . . . . . . . . . . . . . . . . . . . . . . . . . . . . . . . . . . . . |
54 |
Figure 4-8 |
HDD Management Menu . . . . . . . . . . . . . . . . . . . . . . . . . . . . . . . . . . . . . |
54 |
Figure 4-9 |
HDD Property Settings Menu . . . . . . . . . . . . . . . . . . . . . . . . . . . . . . . . . . . |
55 |
Figure 5-1 |
Playback Interface . . . . . . . . . . . . . . . . . . . . . . . . . . . . . . . . . . . . . . . . . |
57 |
Figure 5-2 |
Playback Control Panel . . . . . . . . . . . . . . . . . . . . . . . . . . . . . . . . . . . . . . |
58 |
Figure 5-3 |
Video Search Menu . . . . . . . . . . . . . . . . . . . . . . . . . . . . . . . . . . . . . . . . |
58 |
Figure 5-4 |
Playback Interface . . . . . . . . . . . . . . . . . . . . . . . . . . . . . . . . . . . . . . . . . |
59 |
Figure 5-5 |
Playback Interface . . . . . . . . . . . . . . . . . . . . . . . . . . . . . . . . . . . . . . . . . |
59 |
Figure 5-6 |
Log Search Menu . . . . . . . . . . . . . . . . . . . . . . . . . . . . . . . . . . . . . . . . . |
60 |
Figure 5-7 |
Digital Zoom in Playback Mode . . . . . . . . . . . . . . . . . . . . . . . . . . . . . . . . . . |
61 |
800-12005V1 - A - 08/2012

14 | Performance Series DVR User Guide
Figure 6-1 |
Record Backup Menu . . . . . . . . . . . . . . . . . . . . . . . . . . . . . . . . . . . . . . . |
63 |
Figure 6-2 |
Video Search Results . . . . . . . . . . . . . . . . . . . . . . . . . . . . . . . . . . . . . . . |
64 |
Figure 6-3 |
Export Menu . . . . . . . . . . . . . . . . . . . . . . . . . . . . . . . . . . . . . . . . . . . . |
64 |
Figure 6-4 |
Backup Progress Screen . . . . . . . . . . . . . . . . . . . . . . . . . . . . . . . . . . . . . |
65 |
Figure 6-5 |
Export Successful Screen . . . . . . . . . . . . . . . . . . . . . . . . . . . . . . . . . . . . . |
65 |
Figure 6-6 |
Save Video Clips Prompt . . . . . . . . . . . . . . . . . . . . . . . . . . . . . . . . . . . . . |
66 |
Figure 6-7 |
Export Menu . . . . . . . . . . . . . . . . . . . . . . . . . . . . . . . . . . . . . . . . . . . . |
66 |
Figure 7-1 |
Camera Settings Menu . . . . . . . . . . . . . . . . . . . . . . . . . . . . . . . . . . . . . . |
69 |
Figure 7-2 |
Advanced Camera Settings - Motion Detection . . . . . . . . . . . . . . . . . . . . . . . . . . |
70 |
Figure 7-3 |
Motion Detection Area Settings Interface . . . . . . . . . . . . . . . . . . . . . . . . . . . . . |
70 |
Figure 7-4 |
Motion Detection Sensitivity Settings . . . . . . . . . . . . . . . . . . . . . . . . . . . . . . . |
71 |
Figure 7-5 |
Exception Handle Menu . . . . . . . . . . . . . . . . . . . . . . . . . . . . . . . . . . . . . . |
71 |
Figure 7-6 |
Schedule Settings . . . . . . . . . . . . . . . . . . . . . . . . . . . . . . . . . . . . . . . . . |
72 |
Figure 7-7 |
Handle Settings . . . . . . . . . . . . . . . . . . . . . . . . . . . . . . . . . . . . . . . . . . |
72 |
Figure 7-8 |
Alarm Settings Menu. . . . . . . . . . . . . . . . . . . . . . . . . . . . . . . . . . . . . . . . |
73 |
Figure 7-9 |
Alarm Input Settings Menu . . . . . . . . . . . . . . . . . . . . . . . . . . . . . . . . . . . . |
73 |
Figure 7-10 |
Alarm Input Handle Menu . . . . . . . . . . . . . . . . . . . . . . . . . . . . . . . . . . . . . |
74 |
Figure 7-11 |
Alarm Output Interface. . . . . . . . . . . . . . . . . . . . . . . . . . . . . . . . . . . . . . . |
74 |
Figure 7-12 |
Alarm Output Settings . . . . . . . . . . . . . . . . . . . . . . . . . . . . . . . . . . . . . . . |
75 |
Figure 7-13 |
Manual Alarm Menu . . . . . . . . . . . . . . . . . . . . . . . . . . . . . . . . . . . . . . . . |
75 |
Figure 7-14 |
Camera Settings Menu . . . . . . . . . . . . . . . . . . . . . . . . . . . . . . . . . . . . . . |
76 |
Figure 7-15 |
Advanced Camera Settings - Video Loss Detection . . . . . . . . . . . . . . . . . . . . . . . |
77 |
Figure 7-16 |
Schedule Settings . . . . . . . . . . . . . . . . . . . . . . . . . . . . . . . . . . . . . . . . . |
77 |
Figure 7-17 |
Handle Settings . . . . . . . . . . . . . . . . . . . . . . . . . . . . . . . . . . . . . . . . . . |
78 |
Figure 7-18 |
Camera Settings Menu . . . . . . . . . . . . . . . . . . . . . . . . . . . . . . . . . . . . . . |
78 |
Figure 7-19 |
Advanced Camera Settings - Tamper Detection . . . . . . . . . . . . . . . . . . . . . . . . . |
79 |
Figure 7-20 |
Schedule Settings . . . . . . . . . . . . . . . . . . . . . . . . . . . . . . . . . . . . . . . . . |
79 |
Figure 7-21 |
Handle Settings . . . . . . . . . . . . . . . . . . . . . . . . . . . . . . . . . . . . . . . . . . |
80 |
Figure 7-22 |
Exception Menu . . . . . . . . . . . . . . . . . . . . . . . . . . . . . . . . . . . . . . . . . . |
81 |
Figure 8-1 |
Network Settings Menu . . . . . . . . . . . . . . . . . . . . . . . . . . . . . . . . . . . . . . |
83 |
Figure 8-2 |
Network Status. . . . . . . . . . . . . . . . . . . . . . . . . . . . . . . . . . . . . . . . . . . |
84 |
Figure 8-3 |
Advanced Network Settings Menu . . . . . . . . . . . . . . . . . . . . . . . . . . . . . . . . |
85 |
Figure 8-4 |
PPPoE Settings . . . . . . . . . . . . . . . . . . . . . . . . . . . . . . . . . . . . . . . . . . |
85 |
Figure 8-5 |
DDNS Settings Menu . . . . . . . . . . . . . . . . . . . . . . . . . . . . . . . . . . . . . . . |
86 |
Figure 8-6 |
NTP Settings Menu . . . . . . . . . . . . . . . . . . . . . . . . . . . . . . . . . . . . . . . . |
87 |
Figure 8-7 |
Host/Others Menu . . . . . . . . . . . . . . . . . . . . . . . . . . . . . . . . . . . . . . . . . |
88 |
Figure 8-8 |
Host/Others Menu . . . . . . . . . . . . . . . . . . . . . . . . . . . . . . . . . . . . . . . . . |
88 |
Figure 8-9 |
Host/Others Menu . . . . . . . . . . . . . . . . . . . . . . . . . . . . . . . . . . . . . . . . . |
89 |
Figure 8-10 |
Email Settings Menu . . . . . . . . . . . . . . . . . . . . . . . . . . . . . . . . . . . . . . . . |
90 |
Figure 9-1 |
PTZ Menu . . . . . . . . . . . . . . . . . . . . . . . . . . . . . . . . . . . . . . . . . . . . . |
91 |
Figure 9-2 |
PTZ Settings Menu. . . . . . . . . . . . . . . . . . . . . . . . . . . . . . . . . . . . . . . . . |
92 |
Figure 9-3 |
PTZ Control Panel . . . . . . . . . . . . . . . . . . . . . . . . . . . . . . . . . . . . . . . . . |
93 |
Figure 9-4 |
Preset Management Menu. . . . . . . . . . . . . . . . . . . . . . . . . . . . . . . . . . . . . |
94 |
Figure 9-5 |
Patrol Management Menu . . . . . . . . . . . . . . . . . . . . . . . . . . . . . . . . . . . . . |
94 |
Figure 9-6 |
Patrol Configuration Menu. . . . . . . . . . . . . . . . . . . . . . . . . . . . . . . . . . . . . |
95 |
Figure 9-7 |
Patrol Management Menu . . . . . . . . . . . . . . . . . . . . . . . . . . . . . . . . . . . . . |
96 |
Figure 9-8 |
Pattern Management Menu . . . . . . . . . . . . . . . . . . . . . . . . . . . . . . . . . . . . |
96 |
Figure 10-1 |
Camera Settings Menu . . . . . . . . . . . . . . . . . . . . . . . . . . . . . . . . . . . . . . |
97 |
Figure 10-2 |
Advanced Camera Settings Menu. . . . . . . . . . . . . . . . . . . . . . . . . . . . . . . . . |
98 |
www.honeywellvideo.com

| 15
Figure 10-3 |
Image Settings . . . . . . . . . . . . . . . . . . . . . . . . . . . . . . . . . . . . . . . . . . . |
98 |
Figure 10-4 |
Advanced Camera Settings Menu. . . . . . . . . . . . . . . . . . . . . . . . . . . . . . . . . |
99 |
Figure 10-5 |
Setting Mask Area . . . . . . . . . . . . . . . . . . . . . . . . . . . . . . . . . . . . . . . . . |
99 |
Figure 11-1 |
HDD Management Menu . . . . . . . . . . . . . . . . . . . . . . . . . . . . . . . . . . . . . |
101 |
Figure 11-2 |
HDD Group Settings Menu . . . . . . . . . . . . . . . . . . . . . . . . . . . . . . . . . . . . |
102 |
Figure 11-3 |
HDD Property Settings Menu . . . . . . . . . . . . . . . . . . . . . . . . . . . . . . . . . . . |
103 |
Figure 11-4 |
Log Search Menu . . . . . . . . . . . . . . . . . . . . . . . . . . . . . . . . . . . . . . . . . |
104 |
Figure 11-5 |
Log Search Results . . . . . . . . . . . . . . . . . . . . . . . . . . . . . . . . . . . . . . . . |
104 |
Figure 11-6 |
HDD SMART Information . . . . . . . . . . . . . . . . . . . . . . . . . . . . . . . . . . . . . |
105 |
Figure 11-7 |
HDD SMART Menu . . . . . . . . . . . . . . . . . . . . . . . . . . . . . . . . . . . . . . . . |
105 |
Figure 11-8 |
Exception Menu, HDD Error . . . . . . . . . . . . . . . . . . . . . . . . . . . . . . . . . . . . |
106 |
Figure 12-1 |
General Settings Menu . . . . . . . . . . . . . . . . . . . . . . . . . . . . . . . . . . . . . . |
107 |
Figure 12-2 |
More Settings Menu . . . . . . . . . . . . . . . . . . . . . . . . . . . . . . . . . . . . . . . . |
108 |
Figure 12-3 |
RS-232 Settings Menu . . . . . . . . . . . . . . . . . . . . . . . . . . . . . . . . . . . . . . . |
109 |
Figure 12-4 |
User Settings Menu . . . . . . . . . . . . . . . . . . . . . . . . . . . . . . . . . . . . . . . . |
110 |
Figure 12-5 |
Add User Menu . . . . . . . . . . . . . . . . . . . . . . . . . . . . . . . . . . . . . . . . . . |
111 |
Figure 12-6 |
Permission Settings Menu . . . . . . . . . . . . . . . . . . . . . . . . . . . . . . . . . . . . . |
111 |
Figure 12-7 |
Network Permission Settings Menu . . . . . . . . . . . . . . . . . . . . . . . . . . . . . . . . |
112 |
Figure 12-8 |
Camera Permission Settings Menu . . . . . . . . . . . . . . . . . . . . . . . . . . . . . . . . |
113 |
Figure 12-9 |
Modify User Menu . . . . . . . . . . . . . . . . . . . . . . . . . . . . . . . . . . . . . . . . . |
114 |
Figure 12-10 |
Import/Export Configuration Menu . . . . . . . . . . . . . . . . . . . . . . . . . . . . . . . . |
115 |
Figure 12-11 |
Firmware Update Menu . . . . . . . . . . . . . . . . . . . . . . . . . . . . . . . . . . . . . . |
116 |
Figure 12-12 |
FTP Firmware Update . . . . . . . . . . . . . . . . . . . . . . . . . . . . . . . . . . . . . . . |
116 |
Figure 12-13 |
Default Settings Menu . . . . . . . . . . . . . . . . . . . . . . . . . . . . . . . . . . . . . . . |
117 |
Figure 12-14 |
System Information . . . . . . . . . . . . . . . . . . . . . . . . . . . . . . . . . . . . . . . . |
118 |
Figure 12-15 |
Log Search Menu . . . . . . . . . . . . . . . . . . . . . . . . . . . . . . . . . . . . . . . . . |
119 |
Figure 12-16 |
Log Search Results . . . . . . . . . . . . . . . . . . . . . . . . . . . . . . . . . . . . . . . . |
119 |
Figure 12-17 |
Log Search Export Menu . . . . . . . . . . . . . . . . . . . . . . . . . . . . . . . . . . . . . |
120 |
800-12005V1 - A - 08/2012

16 | Performance Series DVR User Guide
www.honeywellvideo.com

| 17
Tables |
|
|
Table 1-1 |
HRG4 Front Panel Controls and Indicators . . . . . . . . . . . . . . . . . . . . . . . . . . . . |
27 |
Table 1-2 |
IR Remote Control . . . . . . . . . . . . . . . . . . . . . . . . . . . . . . . . . . . . . . . . . |
29 |
Table 1-3 |
Mouse Controls . . . . . . . . . . . . . . . . . . . . . . . . . . . . . . . . . . . . . . . . . . . |
30 |
Table 1-4 |
Virtual Keyboard Controls . . . . . . . . . . . . . . . . . . . . . . . . . . . . . . . . . . . . . |
31 |
Table 1-5 |
HRG4 Rear Panel Connections and Switches . . . . . . . . . . . . . . . . . . . . . . . . . . . |
32 |
Table 1-6 |
HRG8 and HRG16 Rear Panel Connections and Switches . . . . . . . . . . . . . . . . . . . . |
33 |
800-12005V1 - A - 08/2012

18 | Performance Series DVR User Guide
www.honeywellvideo.com

About This Document
This document introduces the HRG Performance Series DVRs. It covers how to install and operate the HRG Performance Series DVRs.
This document is intended for system integrators, installers, and end-user operators.
Overview of Contents
This document contains the following chapters and appendixes:
•Chapter 1, Introduction, introduces the HRG Performance Series DVRs, the main features; the typical setup; the front panel, IR remote control, mouse, and virtual keyboard controls; and the back panel connections.
•Chapter 2, Getting Started, explains how to start up and shut down the DVR, how to reboot and lock the DVR, how to use the Setup Wizard for initial setup, and how to set the date and time.
•Chapter 3, Live View, describes the Live View on-screen display, how to use the mouse to control Live View, how to zoom in Live View, and how to configure the Live View display.
•Chapter 4, Recording Settings, explains how to configure recording settings and how to protect recorded files.
•Chapter 5, Playback, describes the playback interface, explains how to search recordings and the system log, and how to play back recorded video.
•Chapter 6, Backup, explains how to export files and video clips, and how to manage backup devices.
•Chapter 7, Alarm Settings, explains how to configure alarms, including motion detection, sensors, video loss and video tampering detection, and how to managed exception settings.
•Chapter 8, Network Settings, explains how to configure network settings, including email notification.
•Chapter 9, PTZ Control, explains PTZ configuration, including PTZ presets, patrols, and patterns.
•Chapter 10, Camera Management, explains OSD settings, image settings, and privacy mask settings.
•Chapter 11, Hard Drive Management, explains how to configure and manage hard drives.
800-12005V1 - A - 08/2012

20| Performance Series DVR User Guide
•Chapter 12, HRG DVR Management, explains how to configure system settings such as language, time zone, date and time, mouse speed, and password; how to configure the RS-232 port, how to manage user accounts and system configuration; how to update the firmware; how to restore default settings; how to view system information and system logs.
•Appendix A, Glossary, explains commonly used terms in this guide.
•Appendix B, Solutions, provides possible solutions for resolving system malfunctions that may occur from time to time.
•The Index provides a searchable list for easy access to the document.
Related Documents
This document is a necessary prerequisite for understanding the [Product Name]. For more information, please refer to the following documents:
Document title |
Part number |
Description |
|
|
|
Multi-Site 4200 Remote Viewing |
800-12064 |
Describes how to use the remote viewing software for |
Software User Guide |
|
the HRG Performance Series DVRs. |
|
|
|
HRG App for Apple iOS Devices User |
800-12168 |
Describes how to remotely access the HRG |
Guide |
|
Performance Series DVRs via a wireless network |
|
|
connection. |
|
|
|
HRG App for Android Devices User |
800-12218 |
Describes how to remotely access the HRG |
Guide |
|
Performance Series DVRs via a wireless network |
|
|
connection. |
|
|
|
Typographical Conventions
This document uses the following typographical conventions:
Font |
What it represents |
Example |
|
|
|
Helvetica |
Keys on the keyboard |
Press Ctrl+C |
|
|
|
Lucida |
Values of editable fields that are mentioned in the |
The Time from field can be set to |
|
body text of the document for reference purposes, |
Hours:Minute:Seconds. |
|
but do not need to be entered as part of a procedure |
|
|
|
|
|
Text strings displayed on the screen |
The message Unauthorized |
|
Syntax |
displays. |
|
|
|
|
|
(object) entered |
|
|
|
www.honeywellvideo.com
| 21
Font |
What it represents |
Example |
|
|
|
Swiss721 BT Bold Words or characters that you must type. The word |
Enter the password. |
|
|
“enter” is used if you must type text and then press |
|
|
the Enter or Return key. |
|
|
|
|
|
Menu titles and other items you select |
Double-click Open from the File menu. |
|
|
|
|
Buttons you click to perform actions |
Click Exit to close the program. |
|
|
|
Italic |
Placeholders: words that vary depending on the |
Enter your user name. |
|
situation |
|
|
|
|
|
Cross-reference to external source |
Refer to the System Administrator Guide. |
|
|
|
|
Cross-reference within document |
See Chapter 2, Installation. |
|
|
|
800-12005V1 - A - 08/2012

22 | Performance Series DVR User Guide
www.honeywellvideo.com

1
Introduction
This chapter introduces the Honeywell HRG 4-Channel, 8-Channel, and 16-Channel Performance Series DVRs and provides an overview of how to operate the HRG DVR using various methods.
Overview
Developed using the latest technology, the Honeywell HRG Performance Series DVRs (HRG DVRs) combine the latest in advanced H.264 video encoding and decoding technologies to deliver high performance, rock-solid reliability, and longer recording times.
The Honeywell HRG DVRs can be used either as standalone video surveillance products or used to build a powerful surveillance network. This flexibility makes them perfect for small business applications.
Product Features
Feature Overview
•4, 8, or 16 video inputs (model dependent).
•H.264 video compression with excellent reliability and superior definition.
•4 audio inputs, 1 audio output.
•IR remote controller and mouse included
•Independent video encoding parameters, including frame rate, resolution, bit rate, and video quality.
•Remote access from iPhone and Android devices.
•Multi-site software.
•Recording rates up to 120 (4-channel), 240 (8-channel) and 480 (16-channel) ips @ 4CIF resolution.
•PTZ dome control.
800-12005V1 - A - 08/2012

24 | Performance Series DVR User Guide
Local Monitoring Features
•Up to 1280 × 1024 resolution for VGA output display.
•Simultaneous VGA and CVBS output.
•Multi-camera video live view, with an adjustable camera order.
•Group switch, manual switch, and automatic cycles modes that are selectable for video live view, with a configurable auto-cycle period.
•Digital zoom in live mode.
•Shield of assigned channels for live view.
•Privacy masking support.
•Multiple PTZ protocols support, including the setting and call up of presets, patrols, and patterns.
•Video image zoom-in by clicking the mouse and tracing by dragging the mouse in PTZ control mode.
Hard Disk Drive Management Features
•S.M.A.R.T. technology.
•HDD standby function.
Recording Features
•Cycle and non-cycle recording mode.
•Normal and event video encoding parameters.
•Multiple recording types, including manual, normal, alarm, motion, motion/alarm, and motion + alarm recording.
•Eight recording time periods, with separate recording types.
•Pre-record and post-record time intervals for alarm and motion detection, and pre-record time intervals for scheduled and manual recording.
•Lock and unlock video files.
•HDD can be set to read-only.
•Video data search and playback by channel number, recording type, and time.
•Digital zoom function in playback mode.
•Pause, fast forward play, slow play, skip forward, and skip backward available during playback.
•Up to 4/8/16-channel synchronous playback.
Backup Features
•Back up recorded files to a USB or SATA device.
•Bunch backup by file or by time.
•Recorded files edited for backup in playback.
•Management and maintenance for backup devices.
www.honeywellvideo.com

Introduction | 25
Alarm and Exception Features
•Configurable arming time for alarm in/out.
•Support of various exception alarm types, including: alarms for video loss, motion detection, video tampering, unmatched video in/out format, illegal access, network disconnection, IP conflict, hard disk error, and hard disk full.
•Support of various exception alarm handling methods, including: pop-up alarm image on the monitor, audible warnings, surveillance center notifications, alarm output triggers, and send emails.
•Auto recovery from exceptions.
Other Features
•Use a mouse or the IR remote control to control the HRG DVR.
•Three-level user management. Each user has individual operating permission for the HRG DVR and cameras.
•Powerful recording and searching of operation, alarm, and exception logs.
•Import/export of device configuration files.
Network Features
•10M/100M adaptive network interface.
•TCP/IP protocol suites, PPPoE, DHCP, DNS, DDNS, NTP, SADP protocols.
•Unicast and multicast supported; TCP and UDP protocols applicable in unicast transmission.
•Remote search, playback and download, lock/unlock of video files.
•Breakpoint resume support.
•Remote access and configuration of parameters; remote import/export of device configuration parameters.
•Remote access of device running status, system log, and alarm status.
•Remote formatting of hard disk, upgrade, reboot/shutdown, and other system maintenance operations.
•Event alarm and exceptions upload to a remote management host.
•Remote video image capture in JPEG format.
•Remote PTZ control.
•Voice talk and broadcast.
•Built-in WEB Server.
System Diagram
Connect your HRG DVR as shown in Figure 1-1.
800-12005V1 - A - 08/2012

26 | Performance Series DVR User Guide
Figure 1-1 System Diagram (HRG4 DVR shown)
Operating the HRG DVR
You can use the following tools to navigate and operate your HRG DVR.
•the front panel controls (see Front Panel on page 26)
•the IR (Infrared) remote (see Using the IR Remote Control on page 29)
•a mouse (see Using a USB Mouse on page 30)
•the virtual keyboard (see Using the Virtual Keyboard on page 31)
Front Panel
Familiarize yourself with the front panel controls for your HRG DVR.
www.honeywellvideo.com

Introduction | 27
HRG4 Front Panel
Figure 1-2 HRG4 Front Panel
1 2 3 4 5 6
|
Table 1-1 |
HRG4 Front Panel Controls and Indicators |
|
|
|
Position |
Control/Indicator |
Function |
|
|
|
1 |
Status Indicators |
|
|
|
|
|
POWER |
Turns green when the HRG DVR is on. |
|
|
|
|
STATUS |
Illuminates when the compound key switches to numeric/letter input mode. |
|
|
|
|
Tx/Rx |
Flickers green when the network connection is functioning normally. |
|
|
|
2 |
IR Receiver |
Sensor for IR Remote Controller. |
|
|
|
3 |
Compound Buttons |
|
|
|
|
|
1/MENU |
Enter number “1”; Access the main menu. |
|
|
|
|
2/ABC/F1 |
Enter number “2” or letters “A”, “B”, “C”; The F1 button when used in a list field will |
|
|
select all items on the list. In PTZ Control mode, it will turn on/off PTZ light. |
|
|
|
|
3/DEF/F2 |
Enter number “3” or letters “D”, “E”, “F”; The F2 button is used to cycle through tab |
|
|
pages. It will also bring up the Channel and OSD Position settings. |
|
|
|
|
4/GHI/ESC |
Enter number “4” or letters “G”, “H”, “I”; Exit and back to the previous menu. |
|
|
|
|
5/JKL/EDIT |
Enter number “5” or letters “J”, “K”, “L”; Delete characters before cursor; Select the |
|
|
check box and ON/OFF switch; Start/stop record clipping in playback. |
|
|
|
|
6/MNO/PLAY |
Enter number “6” or letters “M”, “N”, “O”; Playback, for direct access to playback |
|
|
interface. |
|
|
|
|
7/PQRS/REC |
Enter number “7” or letters “P”, “Q”, “R”, “S”; Manual record, for direct access to |
|
|
manual record interface; manually enable/disable record. |
|
|
|
|
8/TUV/PTZ |
Enter number “8” or letters “T”, “U”, “V”; Access to PTZ control interface. |
|
|
|
|
9/WXYZ/PREV |
Enter number “9” or letters “W”, “X”, “Y”, “Z”; Multi-camera display in live view. |
|
|
|
|
0/A |
Enter number “0”; Switch between input methods (upper and lowercase alphabet, |
|
|
symbols and numeric input). |
|
|
|
4 |
SHIFT |
Switches the compound keys functions from inputting the numeric/letter values to |
|
|
the functional controls. |
|
|
|
5 |
Control Buttons |
Directional buttons: In menu mode, the direction buttons are used to navigate |
|
|
between different fields and items and select setting parameters. In playback mode, |
|
|
the Up and Down buttons are used to speed up and slow down record play, and the |
|
|
Left and Right buttons are used to select the recording 30s forwards or backwards. |
|
|
In Live View mode, these buttons can be used to cycle through channels. |
|
|
Enter: The Enter button is used to confirm selection in the Menu mode; or used to |
|
|
select check box fields and ON/OFF switch. In playback mode, it can be used to |
|
|
play or pause the video. In single-frame play mode, pressing the Enter button |
|
|
advances the video by a single frame. And in auto sequence live view mode, the |
|
|
buttons can be used to pause / resume auto sequence. |
|
|
|
6 |
USB Port |
Connection for a USB mouse or USB flash memory device. |
|
|
|
800-12005V1 - A - 08/2012

28 | Performance Series DVR User Guide
HRG8 and HRG16 Front Panel
Figure 1-3 HRG8 and HRG16 Front Panel
Position |
Button/Indicator |
Function |
|
|
|
1 |
USB Port |
Connection for a USB mouse or USB flash memory device. |
|
|
|
2 |
Status Indicators |
|
|
|
|
|
POWER |
Turns green when the HRG DVR is on. |
|
|
|
|
READY |
Turns green when the device is running normally. |
|
|
|
|
STATUS |
Illuminates when the compound key switches to numeric/letter input mode. |
|
|
|
|
ALARM |
Turns red when there is a sensor alarm occurring. |
|
|
|
|
HDD |
Flickers red when the HDD is reading or writing. |
|
|
|
|
Tx/Rx |
Flickers green when the network connection is functioning normally. |
|
|
|
3 |
IR Receiver |
Sensor for IR Remote Controller. |
|
|
|
4 |
Compound Buttons |
|
|
|
|
|
1/MENU |
Enter number “1”; Access the main menu. |
|
|
|
|
2/ABC/F1 |
Enter number “2” or letters “A”, “B”, “C”; The F1 button when used in a list field will |
|
|
select all items on the list. In PTZ Control mode, it will turn on/off PTZ light. |
|
|
|
|
3/DEF/F2/SPOT |
Enter number “3” or letters “D”, “E”, “F”; The F2 button is used to cycle through tab |
|
|
pages. It will also bring up the Channel & OSD Position settings. SPOT - reserved at |
|
|
this time. |
|
|
|
|
4/GHI/ESC |
Enter number “4” or letters “G”, “H”, “I”; Exit and back to the previous menu. |
|
|
|
|
5/JKL/EDIT |
Enter number “5” or letters “J”, “K”, “L”; Delete characters before cursor; Select the |
|
|
check box and ON/OFF switch; Start/stop record clipping in playback. |
|
|
|
|
6/MNO/PLAY |
Enter number “6” or letters “M”, “N”, “O”; Playback, for direct access to playback |
|
|
interface. |
|
|
|
|
7/PQRS/REC |
Enter number “7” or letters “P”, “Q”, “R”, “S”; Manual record, for direct access to |
|
|
manual record interface; manually enable/disable record. |
|
|
|
|
8/TUV/PTZ |
Enter number “8” or letters “T”, “U”, “V”; Access to PTZ control interface. |
|
|
|
|
9/WXYZ/PREV |
Enter number “9” or letters “W”, “X”, “Y”, “Z”; Multi-camera display in live view. |
|
|
|
www.honeywellvideo.com
Introduction | 29
Position |
Button/Indicator |
Function |
|
|
|
|
0/A |
Enter number “0”; Switch between input methods (upper and lowercase alphabet, |
|
|
symbols and numeric input). |
|
|
|
5 |
SHIFT |
Switches the compound keys functions from inputting the numeric/letter values to |
|
|
the functional controls. |
|
|
|
6 |
Control Buttons |
Directional buttons: In menu mode, the direction buttons are used to navigate |
|
|
between different fields and items and select setting parameters. In playback mode, |
|
|
the Up and Down buttons are used to speed up and slow down record play, and the |
|
|
Left and Right buttons are used to select the recording 30s forwards or backwards. |
|
|
In Live View mode, these buttons can be used to cycle through channels. |
|
|
Enter: The Enter button is used to confirm a selection in the Menu mode; or used |
|
|
to select check box fields and the ON/OFF switch. In playback mode, it can be used |
|
|
to play or pause the video. In single-frame play mode, pressing the Enter button |
|
|
advances the video by a single frame. And in auto sequence live view mode, the |
|
|
buttons can be used to pause / resume auto sequence. |
|
|
|
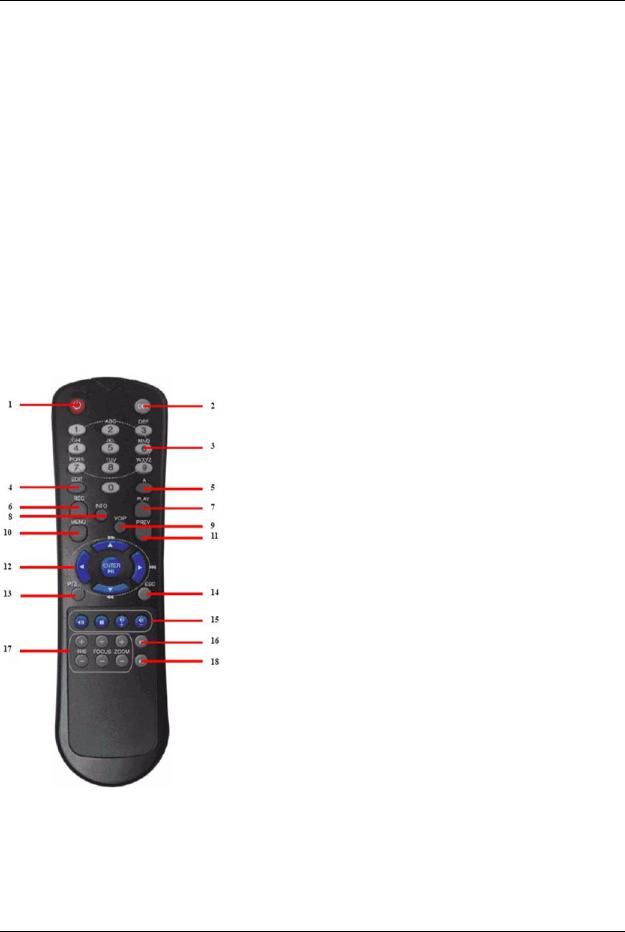
Using the IR Remote Control
Your HRG DVR may also be controlled with the IR remote control. Batteries (2 x AAA) must be installed before operation.
Figure 1-4 IR Remote Control |
|
|
||
|
|
Table 1-2 |
IR Remote Control |
|
|
|
|
|
|
|
# |
Button |
|
Function |
|
|
|
|
|
1 |
POWER |
|
Turn On/Off the HRG DVR. |
|
|
|
|
|
|
2 |
DEV |
|
Enable/Disable Remote Control |
|
|
|
|
|
|
3 |
Alphanumerics |
Same as front panel |
||
|
|
|
|
|
4 |
EDIT |
|
Same as JKL/EDIT on front panel. |
|
|
|
|
|
|
5 |
A |
|
Same as 0/A on front panel. |
|
|
|
|
|
|
6 |
REC |
|
Same as 7/PQRS/REC on front panel. |
|
|
|
|
|
|
7 |
PLAY |
|
Same as 6/MNO/PLAY on front panel. |
|
|
|
|
|
|
8 |
INFO |
|
Reserved. |
|
|
|
|
|
|
9 |
VOIP |
|
Same as 2/ABC/F1 on front panel. |
|
|
|
|
|
|
10 |
MENU |
|
Same as 1/MENU on front panel. |
|
|
|
|
|
|
11 |
PREV |
|
Same as 9/WXYZ/PREV on front panel. |
|
|
|
|
|
|
12 |
DIRECTION/ENTER |
Same as on front panel. |
||
|
|
|
|
|
13 |
PTZ |
|
Same as 8/TUV/PTZ on front panel. |
|
|
|
|
|
|
14 |
ESC |
|
Same as ESC on front panel. |
|
|
|
|
|
|
15 |
RESERVED |
|
Reserved. |
|
|
|
|
|
|
16 |
F1 |
|
Same as 2/ABC on front panel. |
|
|
|
|
|
|
17 |
PTZ CONTROL Buttons |
Use to adjust the iris, focus, and zoom. |
||
|
|
|
|
|
18 |
F2 |
|
The F2 button is used to cycle through tab |
|
|
|
|
|
pages. It can also be used to enter the |
|
|
|
|
Channel and OSD Position settings. |
|
|
|
|
|
See HRG4 Front Panel on page 27 and HRG8 and HRG16 Front Panel on page 28 for more about front panel controls.
800-12005V1 - A - 08/2012

30 | Performance Series DVR User Guide
Configuring the IR Remote Control
Aim the remote control at the IR receiver located at the front of the unit to test operation. If there is no response, try the following steps:
1.Use the front control panel or the mouse to navigate to Menu Settings General More Settings.
2.Check and remember the HRG DVR ID number. The default ID number is 255. This ID number is valid for all IR remote controls.
3.Press DEV on the remote.
4.Enter the DVR ID number from step 2.
5.Press ENTER on the IR remote control.
The Status indicator on the front panel should turn green to indicate that the remote control is operating properly.
Using a USB Mouse
A regular 3-button (Left/Right/Scroll-wheel) USB mouse can also be used with this HRG DVR.
Connecting a USB Mouse
•Plug the USB mouse into one of the USB ports on the front panel of the HRG DVR.
The mouse should automatically be detected. If, in a rare case, that the mouse is not detected, pleased refer to the recommended device list from your provider.
USB Mouse Controls
Table 1-3 |
Mouse Controls |
|
|
|
|
|
|
Control |
|
Action |
Result |
|
|
|
|
|
|
Single click |
Select a menu component, such as a button or an |
|
|
|
input field. This is similar to pressing the ENTER |
|
|
|
button on the remote/front panel controls. |
|
|
|
|
|
|
Double click |
Switch between single screen and multi-screen |
|
|
|
mode in Live View/ Playback mode. |
Left button |
|
|
|
|
Click and drag |
Click and drag the Left mouse button to control the |
|
|
|
||
|
|
|
pan/tilt of a PTZ camera as well as to vary the |
|
|
|
position of the digital zoom area and the camera |
|
|
|
OSD. It can also be used to setup the alarm areas. |
|
|
|
|
Right button |
|
Single click |
Shows pop-up menu. |
|
|
|
|
|
|
Scroll up |
In Live View mode, scrolling up will switch to the |
|
|
|
previous screen. In Menu mode, it will move the |
Scroll wheel |
|
|
selection to the previous item. |
|
|
|
|
|
Scroll down |
In Live View mode, scrolling down will switch to the |
|
|
|
||
|
|
|
next screen. In Menu mode, it will move the |
|
|
|
selection to the next item. |
|
|
|
|
www.honeywellvideo.com
 Loading...