


P7000
Table of contents
 Loading...
Epson® SureColor® P-Series
P6000/P7000/P8000/P9000
Setup

Contents | 1
Contents
Unpacking and assembling the printer ..............................................................................................2
Assembling the stand .................................................................................................................. 5
Mounting the printer on the stand .............................................................................................7
Attaching the paper basket (SC-P6000/SC-P7000) .................................................................... 9
Attaching the paper basket (SC-P8000/SC-P9000) .................................................................. 16
Installing the optional internal print server ............................................................................... 24
Completing setup and connecting the power cord .......................................................................... 26
Installing ink ................................................................................................................................... 29
Loading roll paper ........................................................................................................................... 33
Placing roll paper in the printer ................................................................................................ 33
Loading roll paper for printing ................................................................................................. 39
Aligning the print head ............................................................................................................ 40
Connecting to your system .............................................................................................................41
Installing the software ..................................................................................................................... 42
Updating your printer firmware ...................................................................................................... 42
Checking the current firmware version .....................................................................................42
Updating the firmware ............................................................................................................. 42
Configuring the printer for your network .................................................................................43
2 | Unpacking and assembling the printer
12 in. (305 mm)
12 in. (305 mm)
12 in. (305 mm)
12 in. (305 mm)
Unpacking and assembling the printer
Note: Unless otherwise indicated, the illustrations in this guide show the SureColor® P8000/P9000, but the
instructions apply to all models.
Follow these steps to assemble your printer and its stand.
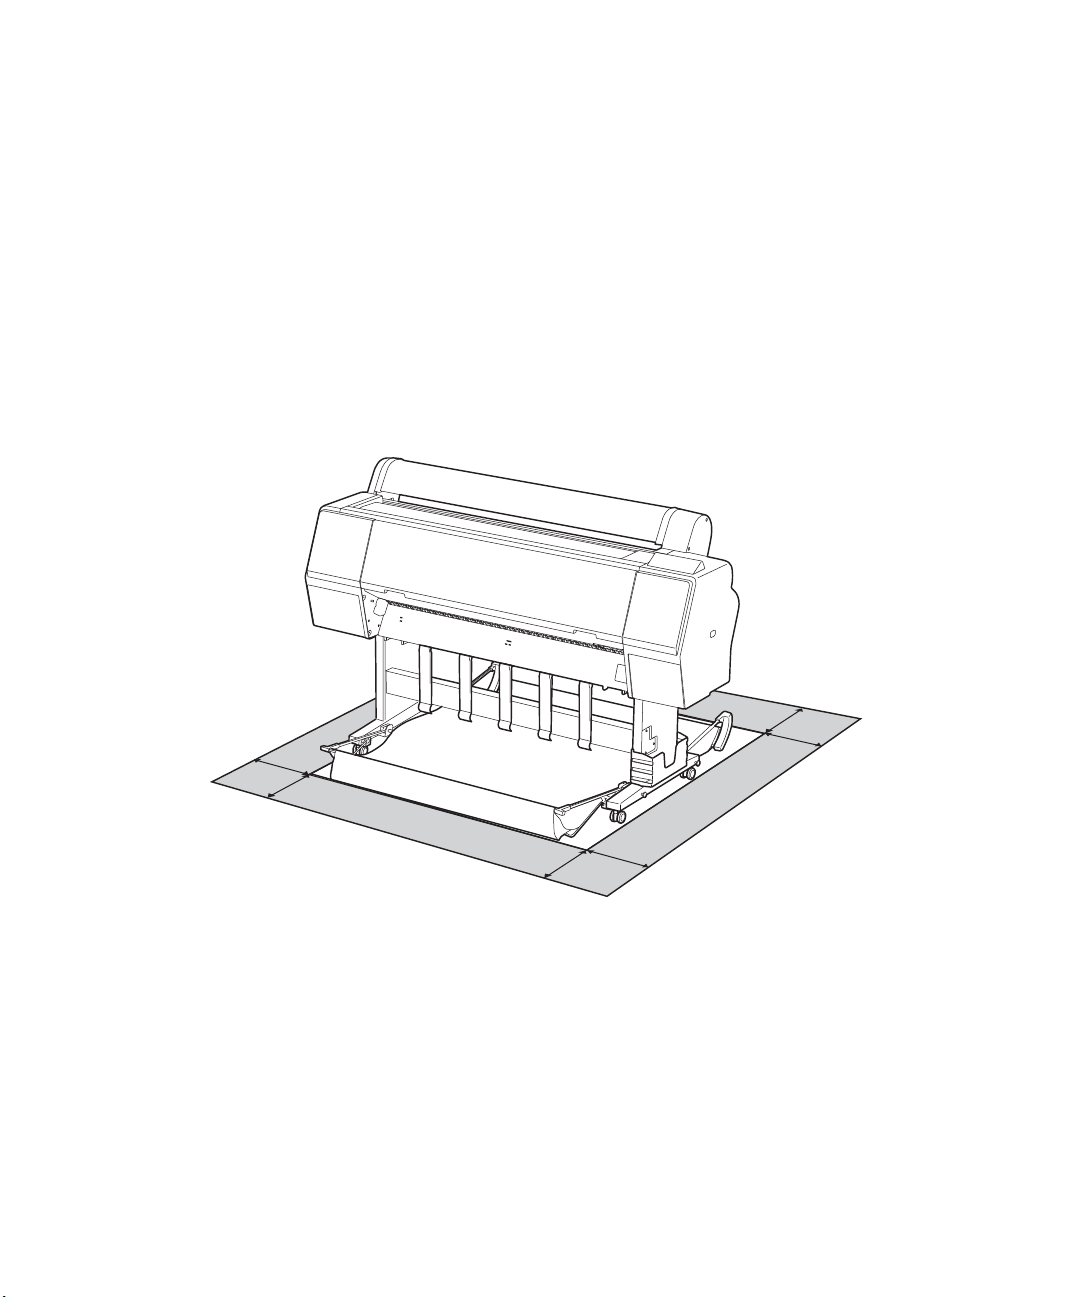
Before you begin, make sure you have enough space to set up and use the printer—at least
12 inches (305 mm) on all sides in addition to the dimensions of the printer and stand:
• 53.4 × 35.6 inches (1356 × 903 mm) for the SC-P6000/SC-P7000
• 73.4 × 52 inches (1864 × 1318 mm) for the SC-P8000/SC-P9000
When choosing a place for the printer, choose a flat, stable location with adequate room for easy access and
ventilation. Avoid locations subject to direct sunlight, excessive heat, moisture, or dust. Also avoid
locations near potential sources of electromagnetic interference, such as loudspeakers, cordless phones,
TVs, or air conditioners.
WARNING: Four people are required to unpack and install the printer.
Unpacking and assembling the printer | 3
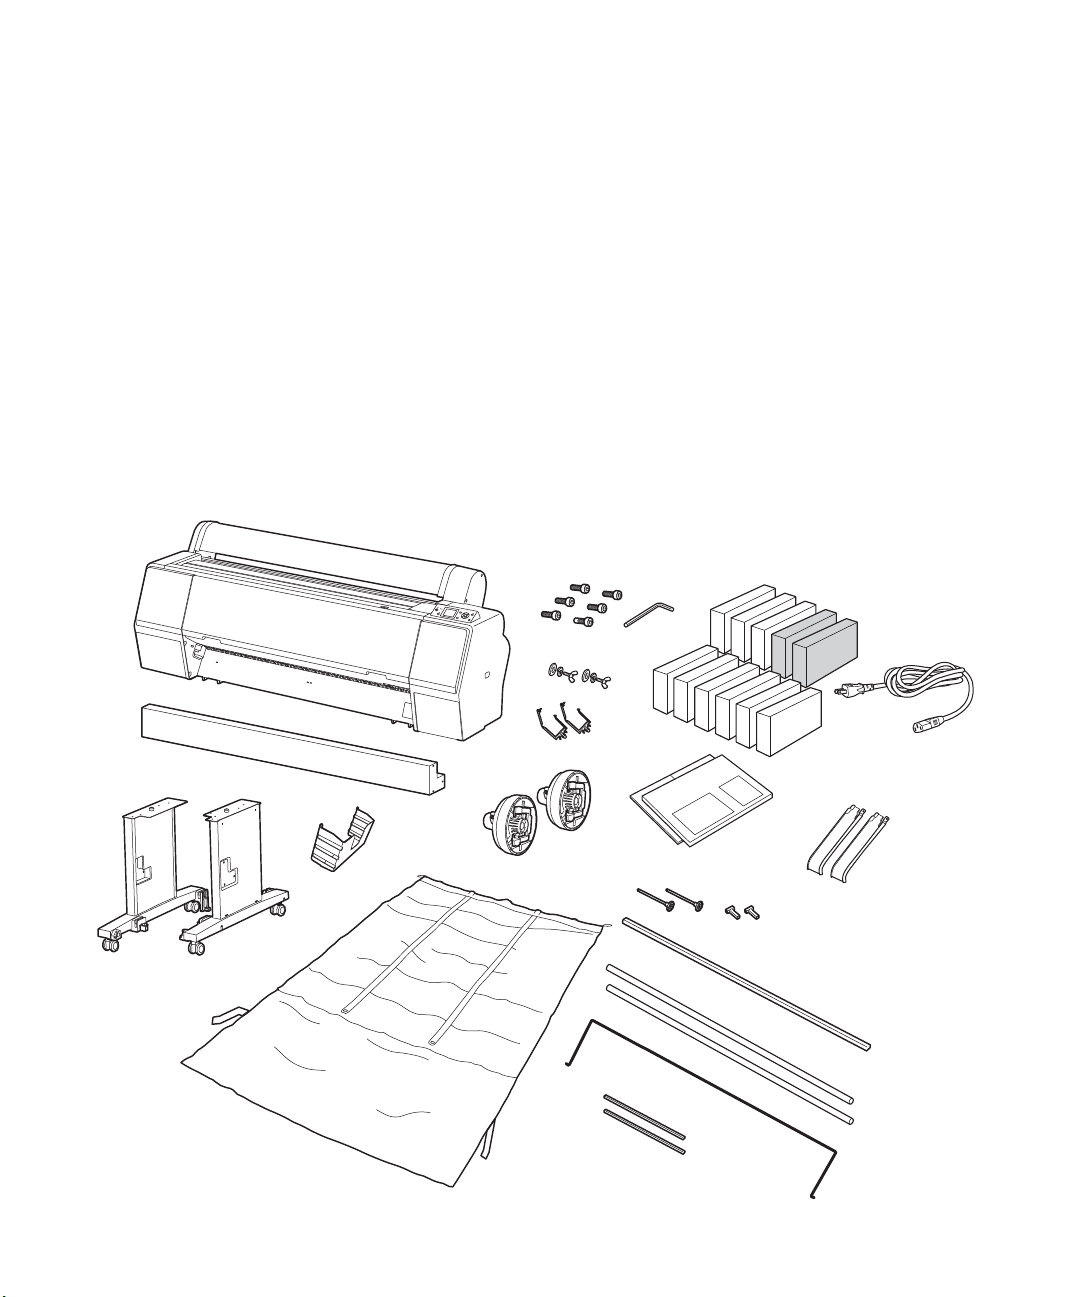
9 ink cartidges (SC-P6000)
11 ink cartridges (SC-P7000)
You need additional floor space to assemble the printer and stand, so be sure to prepare a large, empty area
before unpacking them. For assembly, you need floor space of approximately:
• 8 × 8 feet (2.4 × 2.4 m) for the SC-P6000/SC-P7000 and stand
• 13 × 13 feet (4 × 4 m) for the SC-P8000/SC-P9000 and stand
Note: Make sure you save the box and packaging in case you need to ship the printer.
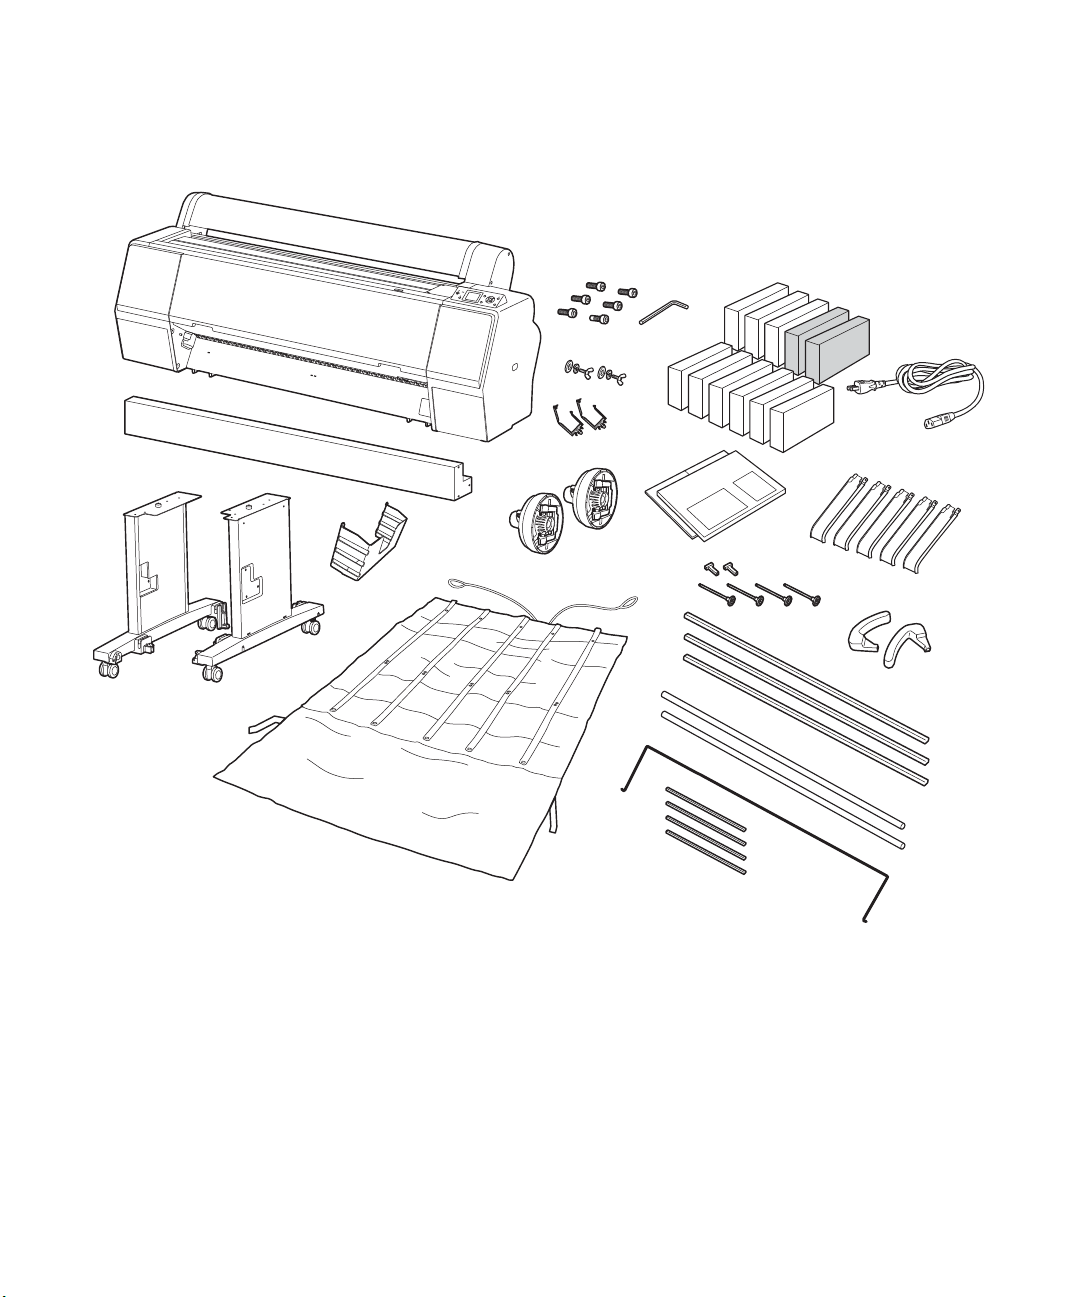
For the SC-P7000/SC-P9000, the ink cartridges included in the box depend on which version of the printer you
purchased. The Standard edition includes the Light Light Black (LLK) cartridge, while the Commercial edition
includes the Violet (V) cartridge.
The following items are included with your printer:
SC-P6000/SC-P7000
4 | Unpacking and assembling the printer
9 ink cartidges (SC-P8000)
11 ink cartridges (SC-P9000)
SC-P8000/SC-P9000
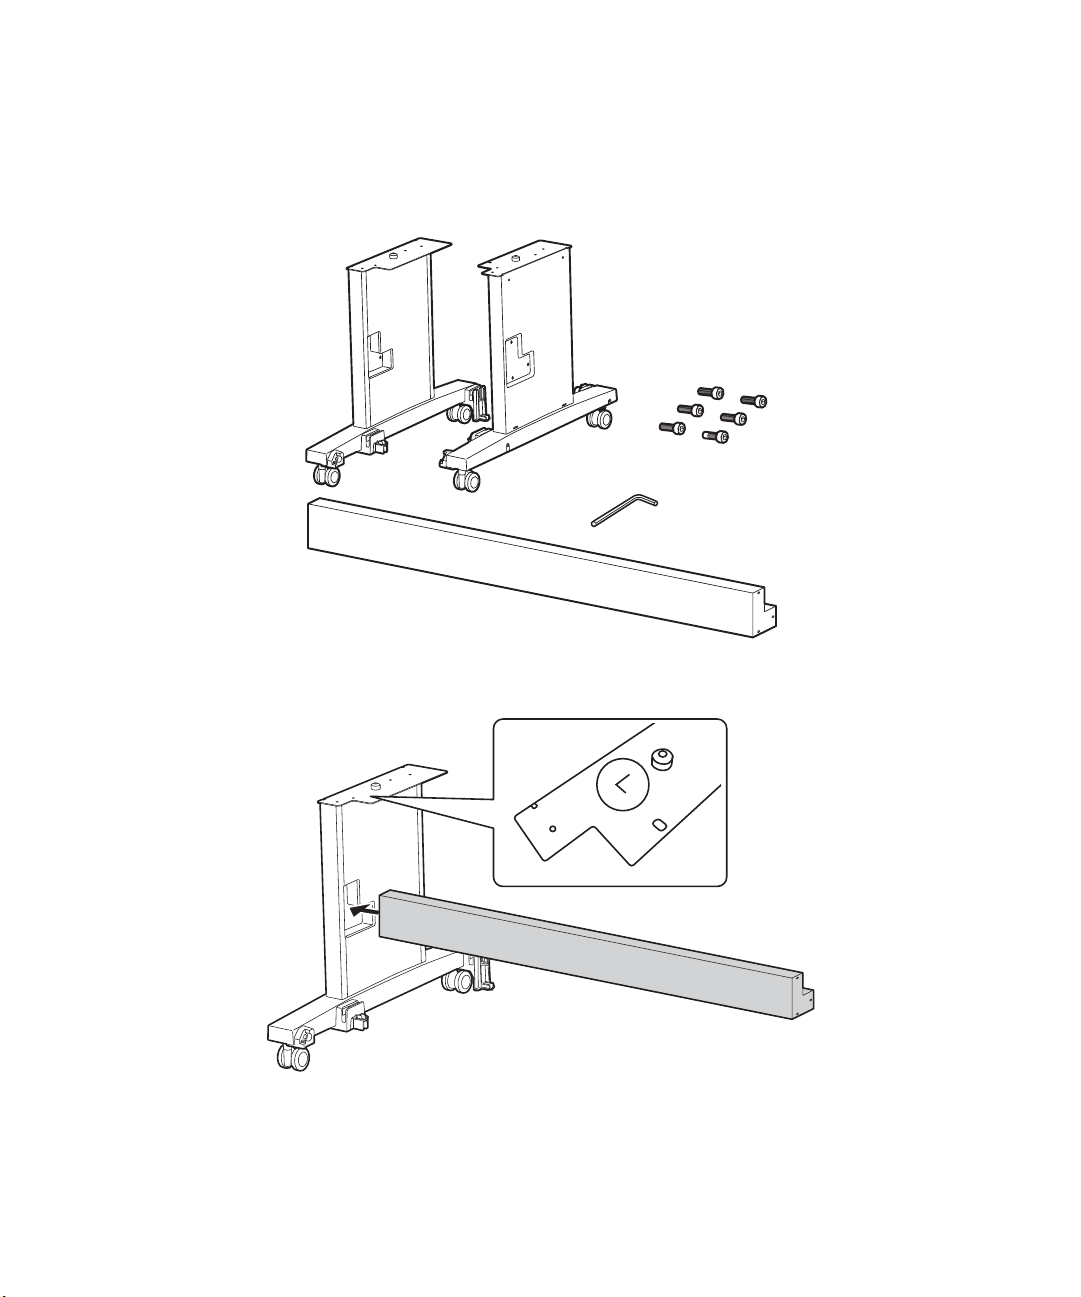
Assembling the stand
2 sides
Horizontal strut
Hex wrench
6 bolts
1. Make sure you have all of these items:
Assembling the stand | 5
2. Insert the strut into the left side of the stand. (The sides of the stand are labeled L and R.)

6 | Assembling the stand
3. Fasten the strut with 3 bolts. Use the hex wrench to tighten the bolts.
4. Insert the strut into the right side and fasten it with 3 bolts.
Note: Make sure you tighten all bolts before moving to the next step.
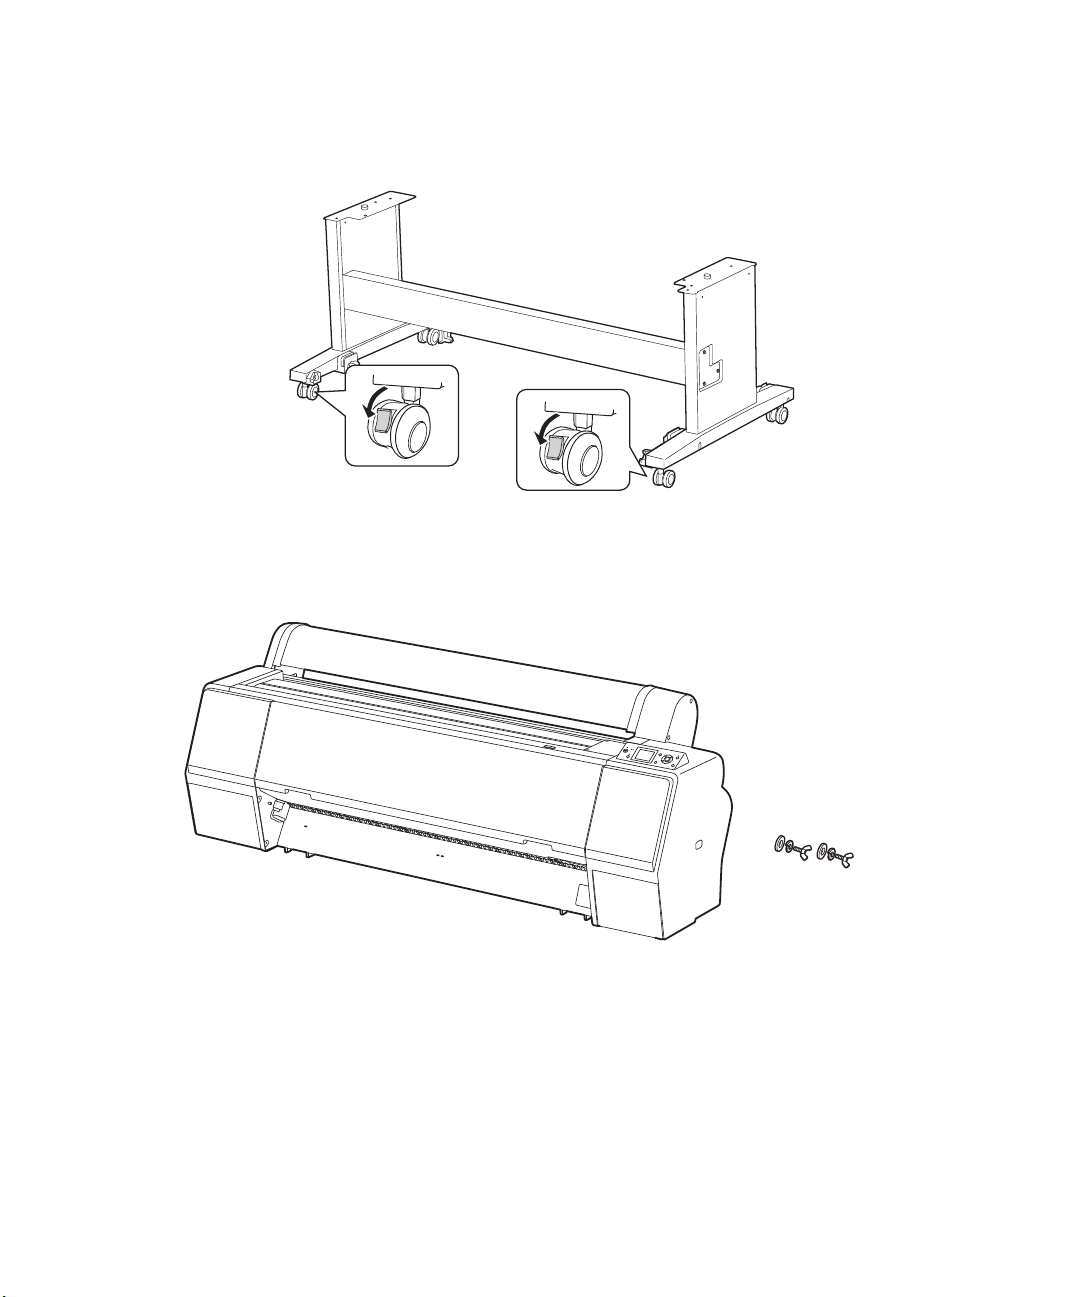
Lock the casters.
Printer
2 wing screws with
lock washers
5.
Mounting the printer on the stand
1. Make sure you have these items:
Mounting the printer on the stand | 7
2. Remove the cardboard panels and other printer packing materials.
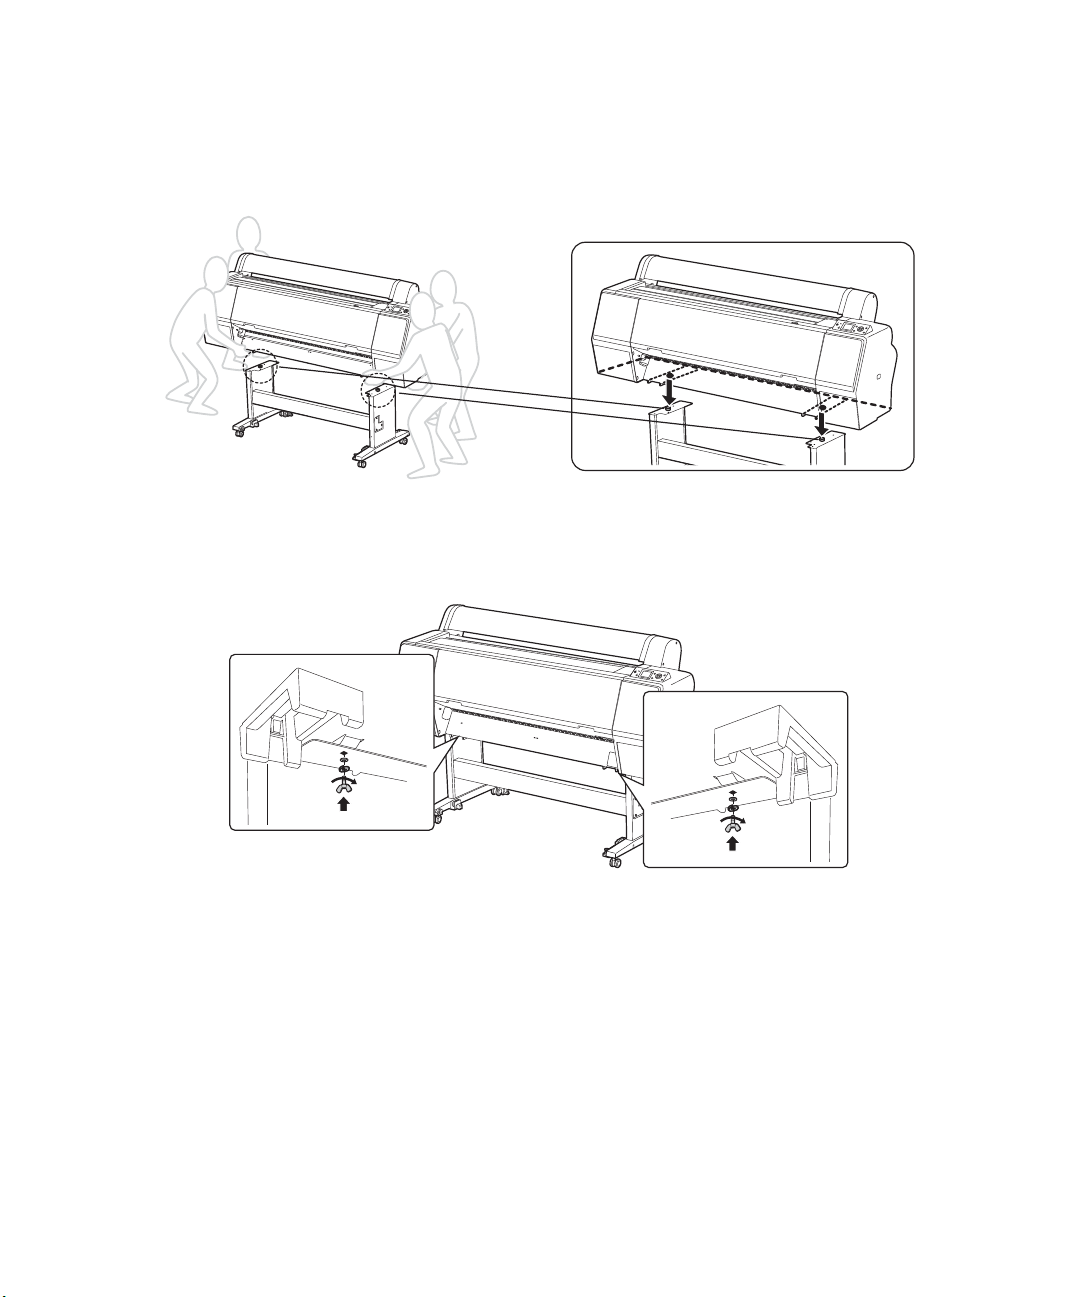
8 | Mounting the printer on the stand
3. Lift the printer and mount it on the stand, aligning the pegs with the holes on the bottom of the
printer.
WARNING: Four or more people are required to lift the printer.
4.
Insert the printer to the stand with the wing screws and washers.
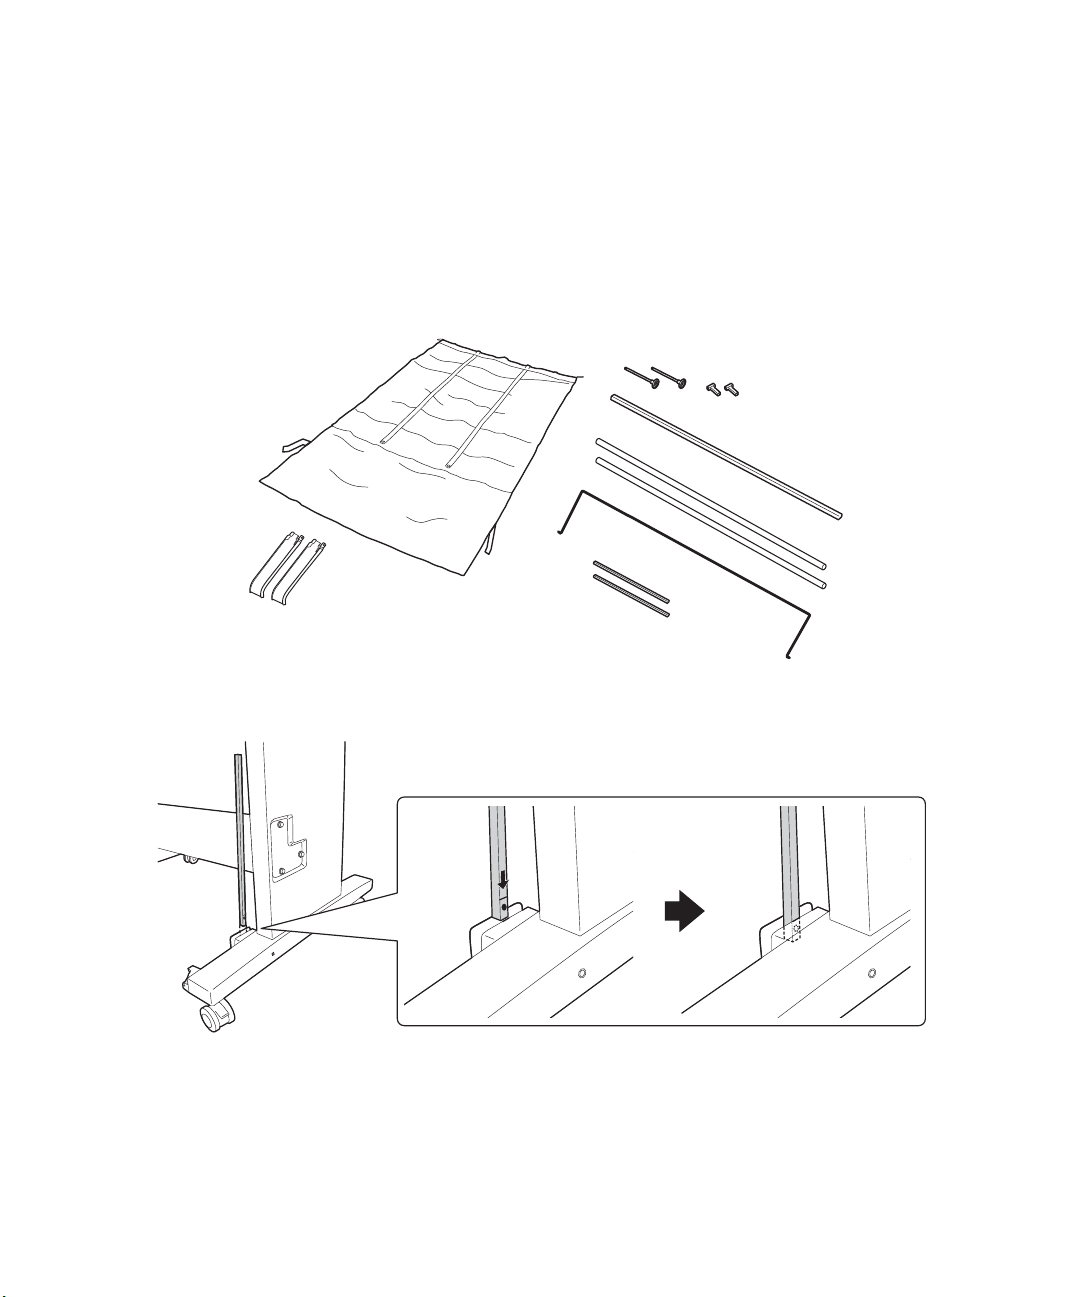
Attaching the paper basket (SC-P6000/SC-P7000) | 9
2 paper guides
1 square
pole and 2
round poles
2 pins
Cloth basket
2 posts
2 black plastic
connectors
Rod
Attaching the paper basket (SC-P6000/SC-P7000)
The paper basket is a cloth sheet that attaches to the printer stand and catches your prints without
damaging them. If you have the SC-P8000/SC-P9000, see page 16 for instructions on attaching the paper
basket.
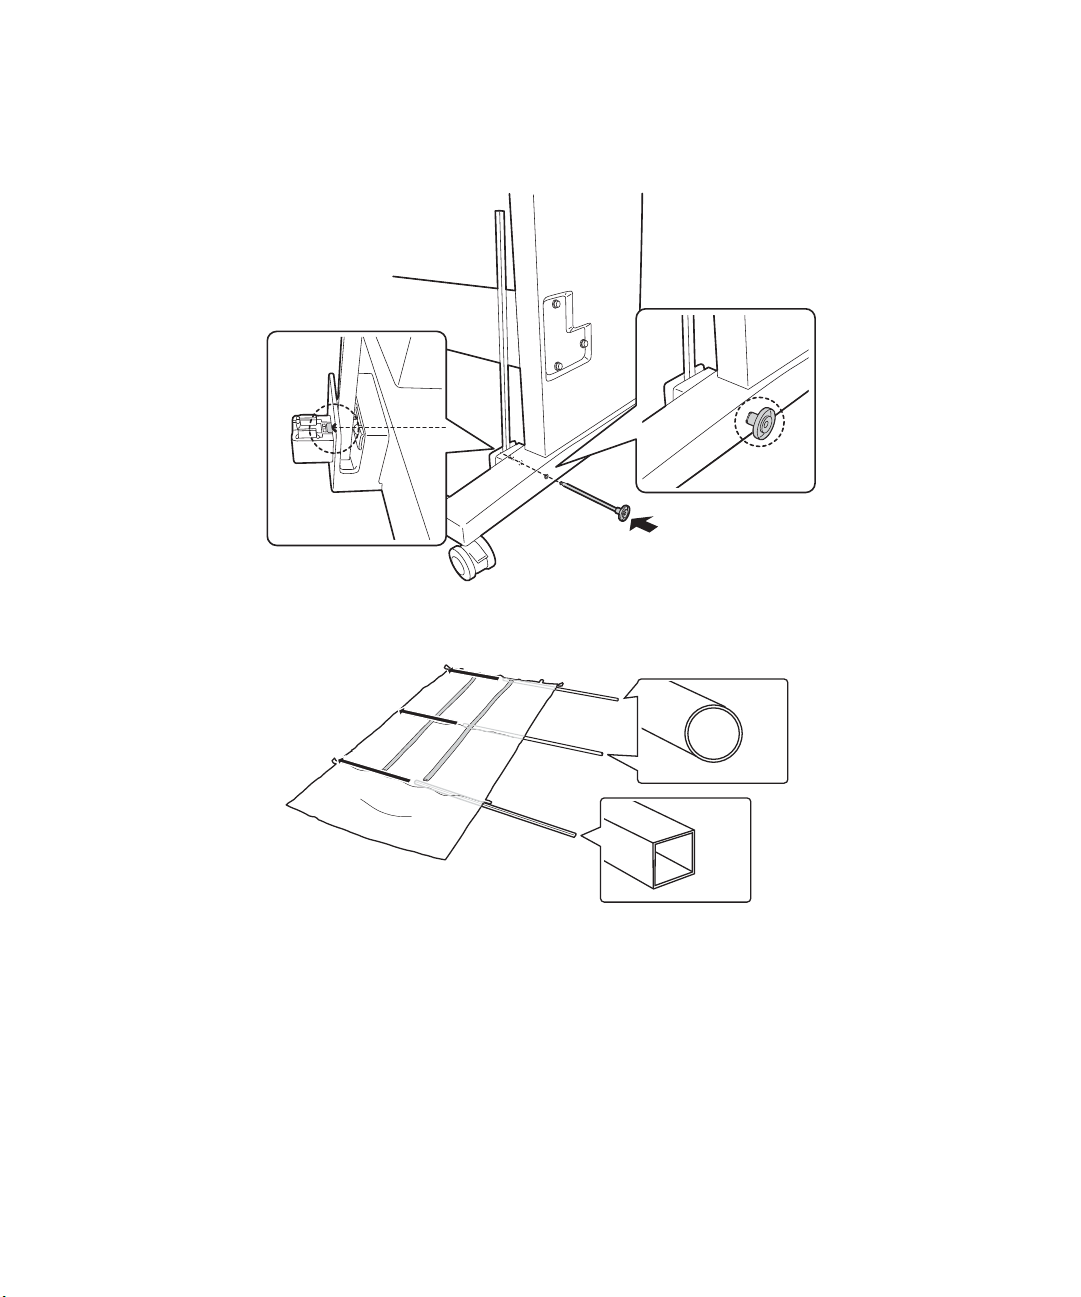
1. Make sure you have all the included paper basket parts.
2. Insert the two short posts, one on each side of the stand.
10 | Attaching the paper basket (SC-P6000/SC-P7000)
3. Use the pins to fasten the posts in place.
4. Insert the round and square poles into the basket cloth.
Attaching the paper basket (SC-P6000/SC-P7000) | 11
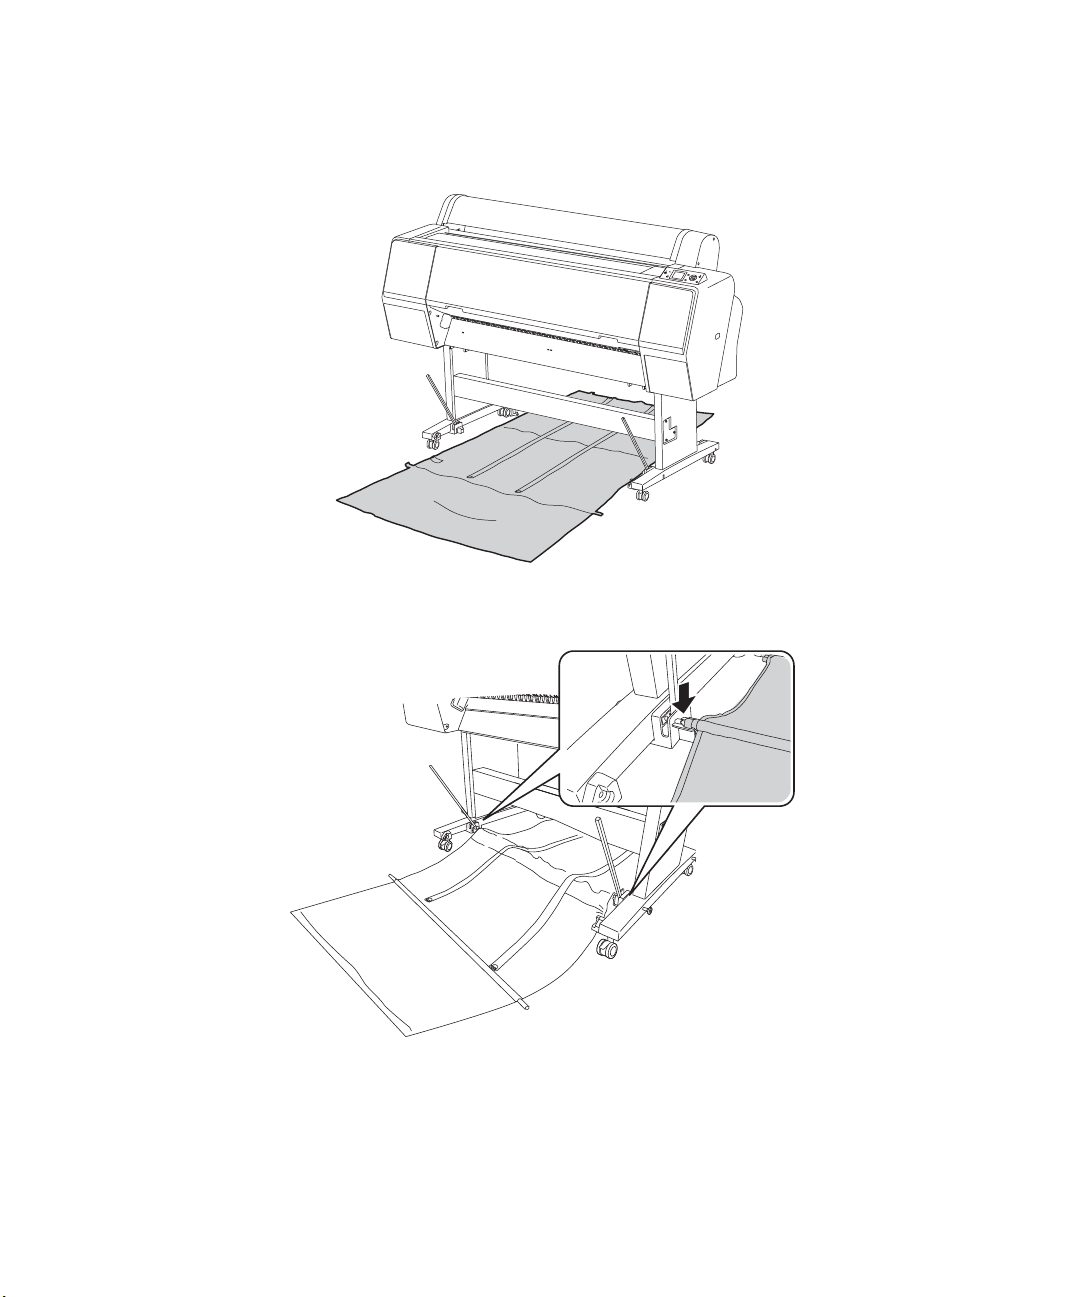
Place the basket under the printer.
5.
6. Snap the center pole into the holders on each side of the stand.
12 | Attaching the paper basket (SC-P6000/SC-P7000)
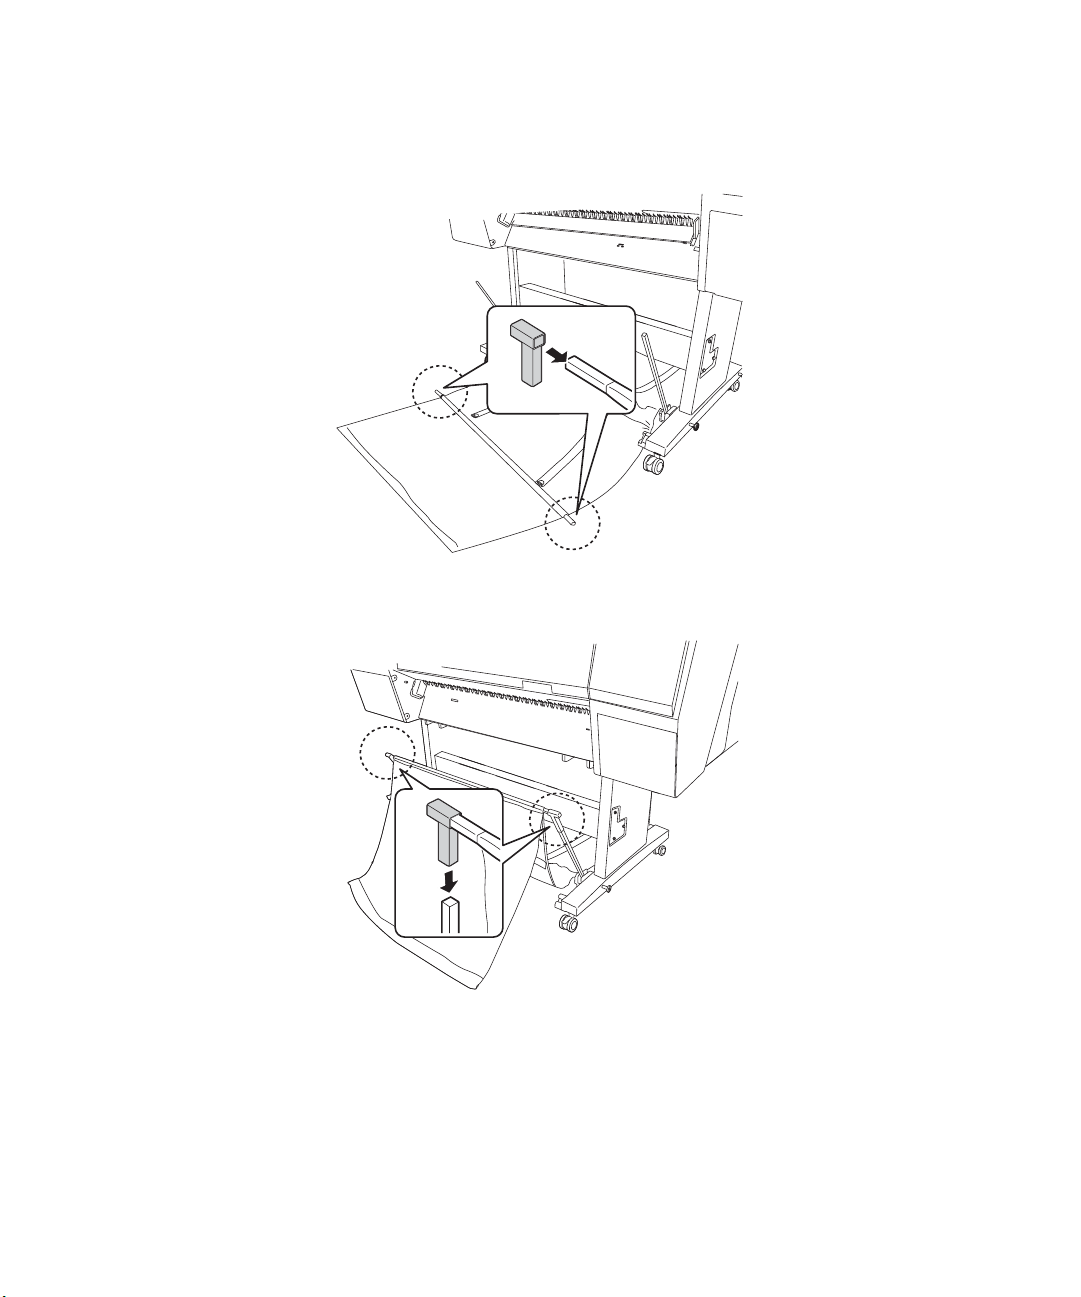
7. Insert the black plastic connectors into both ends of the square pole.
8. Fasten the black plastic connectors onto the posts on each side of the stand.
Attaching the paper basket (SC-P6000/SC-P7000) | 13
Snap the back pole into the holders.
9.
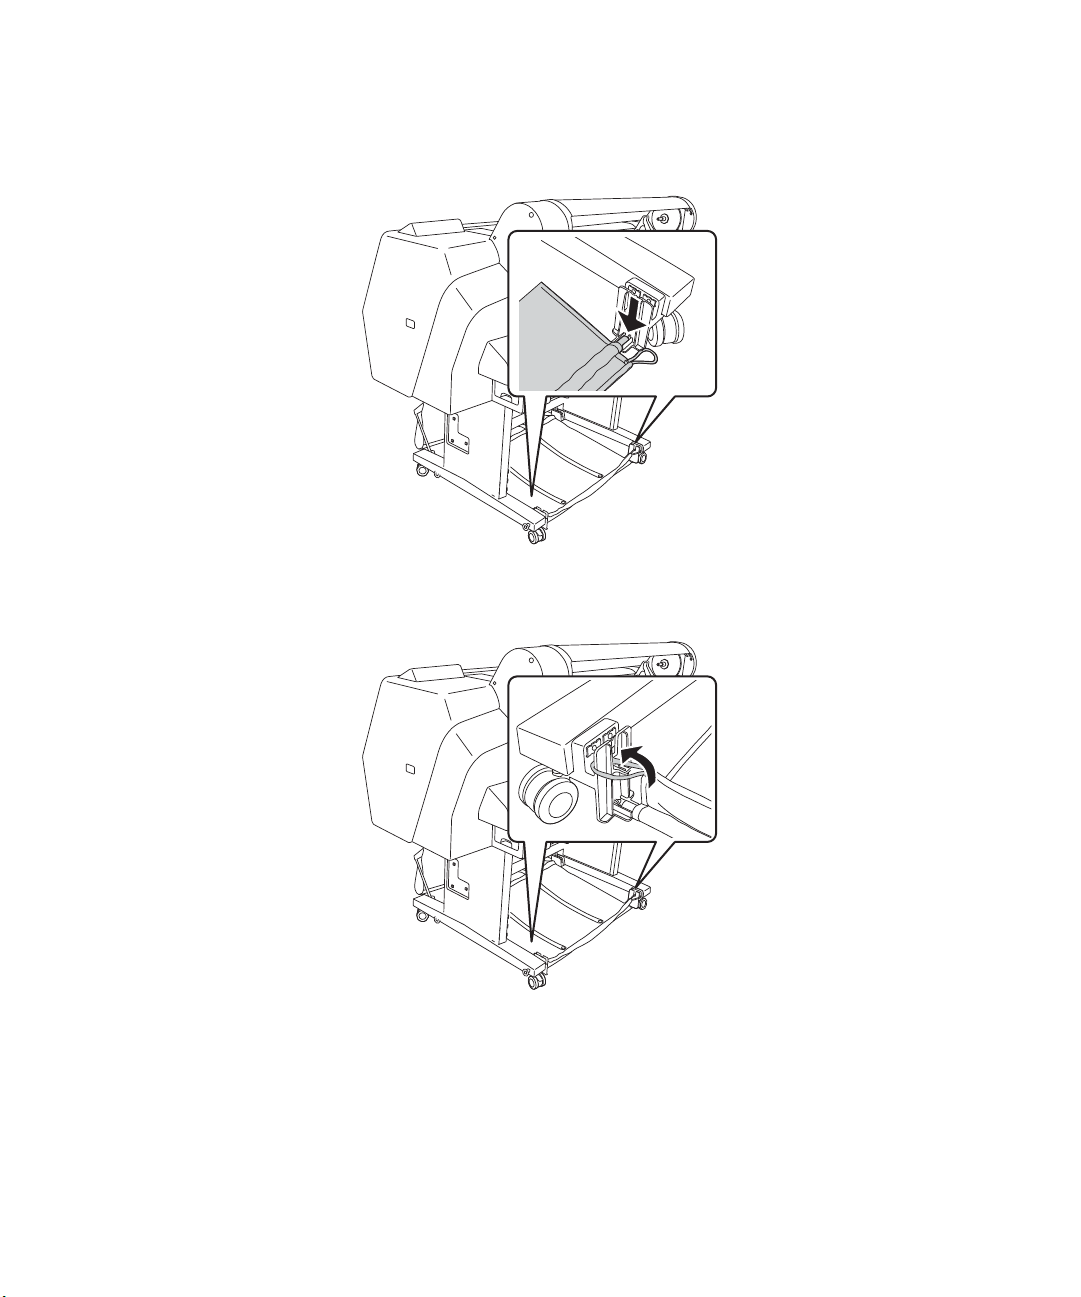
10. Hook the loops around the pins on the back of the stand legs.
Loading...