


IQ R800
SubliJet
IQ
™
Getting Started Guide
For EPSON Stylus
Photo R1800
& EPSON Stylus
®
Photo R800
Revision 3.1

SubliJet IQ
Getting Started Guide
for the
EPSON Stylus
Photo R800 & R1800
© Copyright 2008, Sawgrass Technologies, Inc., Revision 3.1 February 2008. All
rights reserved. Printed in the United States of America.
SubliJet
®
is a registered trademark of Sawgrass Technologies, Inc. SubliJet IQ
is a registered trademark of Sawgrass Technologies, Inc. PowerDriver Pro is a
registered trademark of Sawgrass Technologies Inc. Epson
®
and Stylus
®
are
registered trademarks of Seiko Epson Corporation.
Other trademarks and registered trademarks are the property of their respective
owners.
No part of this manual may be reproduced or transmitted in any form by any
means without the prior written consent of Sawgrass Technologies, Inc.
Information in this manual is subject to change without notice and does not
represent a commitment on the part of Sawgrass Technologies, Inc.

IMPORTANT – READ CAREFULLY:
This Process License Agreement (“PLA”) is a legal agreement between you and Sawgrass Technologies,
Inc. (“Sawgrass”). By installing the SubliJet IQ
ink in your printer, or otherwise using the Sawgrass
SubliJet IQ
ink, you agree to be bound by the terms of this PLA. If you do not agree to the terms of this
PLA, Sawgrass is unwilling to license the process of using the SubliJet IQ
ink to you. In such event, you
may not use the SubliJet IQ
ink, and you should promptly contact your supplier for instructions on return
of the unopened package.
The process of using the SubliJet IQ
ink is protected by U.S. and foreign patents. Sawgrass will provide a
complete list of the relevant patents upon request. The use of the SubliJet IQ
ink to practice the patented
process is permitted by this license.
GRANT OF LICENSE
This PLA grants you the following rights: You may install and use the SubliJet IQ
ink
packaged herewith in your EPSON printer to practice the printing process described in U.S. Patent No. 5,488,907.
The use of any ink, dye, or pigment to practice the Sawgrass Process, other than a SubliJet IQ
ink purchased
from Sawgrass or its authorized distributor accompanied by a PLA, is not a licensed use of the Sawgrass
Process. No rights to use the Sawgrass Process, except those specified herein, are granted, and no rights to use
any other process, product, software, or hardware developed or sold by Sawgrass are granted or implied hereby.
LIMITATIONS ON REVERSE ENGINEERING
You agree that you will not attempt to reverse engineer, reproduce,
or deformulate the SubliJet IQ
ink.
PATENTS AND COPYRIGHTS
Sawgrass owns multiple U.S. and foreign patents which apply to the Sawgrass
Process and/or the SubliJet IQ
ink or its use. All patents in and to the SubliJet
ink and the method of using the
SubliJet IQ
ink are owned by Sawgrass Technologies, Inc. You may not copy the printed materials
accompanying the SubliJet IQ
ink. All rights not specifically granted under this PLA are reserved by Sawgrass
Technologies, Inc.
Made In U.S.A.
CAUTION:
For best printing results, use the ink within six months of purchase. Please refer to the individual ink
bag/cartridge for the specific ink expiration date.
Keep out of reach of children.
Do not expose ink to temperatures above 100
º
F or below 40
º
F.
Keep ink out of direct sunshine.
Sawgrass Technologies, Inc. agrees to replace any defective ink within a reasonable time, which shall be
Sawgrass’ sole responsibility for errors or defects in these goods.
THERE ARE NO OTHER WARRANTIES, EXPRESSED OR IMPLIED, INCLUDING, BUT NOT LIMITED TO,
ANY IMPLIED WARRANTY OF MERCHANTABILITY OR ANY IMPLIED WARRANTY OF FITNESS FOR A
PARTICULAR PURPOSE. SAWGRASS SHALL NOT BE LIABLE FOR LOSS OF PROFIT OR OTHER
ECONOMIC LOSS, OR FOR INDIRECT, SPECIAL, CONSEQUENTIAL OR OTHER SIMILAR DAMAGES.
SubliJet IQ
®
,
PowerDriver IQ
®
, PowerDriver XG
®
, PowerDriverSupra 1800 XG8
®
and
PowerDriver
Supra
XG
8
,
are registered trademarks of Sawgrass Technologies, Inc. ColorSure™ is a
trademark of Sawgrass Technologies, Inc.
General Notice: Other product names used herein are for identification purposes only and may be
trademarks of their respective owners. Sawgrass Technologies, Inc. disclaims any and all rights in
those marks.

END-USER LICENSE AGREEMENT FOR SAWGRASS SOFTWARE-
PowerDriver IQ
®
, PowerDriver XG
®
, PowerDriver Lite
®
, PowerDriverSupra
1800 XG8
®
and PowerDriver
Supra
XG
8
IMPORTANT-READ CAREFULLY: This Sawgrass Technologies Inc. End-User License Agreement ("EULA") is a legal agreement
between you (either an individual or a single entity) and Sawgrass Technologies, Inc for the Sawgrass software product identified
above, which includes computer software and may include associated media, printed materials, and "online" or electronic
documentation ("SOFTWARE PRODUCT"). By installing, copying, or otherwise using the SOFTWARE PRODUCT, you agre e to
be bound by the terms of this EULA. If you do not agree to the ter ms of this EULA, do not install or use the SOFTWARE
PRODUCT.
Software PRODUCT LICENSE
Copyright laws and international copyright treaties, a s well as other intellectual property laws and treatie s protect the SOFTWARE
PRODUCT. The SOFTWARE PRODUCT is licensed, not sold. The title to, and ownership of, this SOFTWARE PRODUCT
remains with Sawgrass Technologies, Inc. (Sawgrass).
GRANT OF LICENSE. This EULA grants you the following rights:
This license is provided to you for your use according to the terms hereof. You may install and use the SOFTWARE
PRODUCT packaged herewith to practice the printing process described in U.S. Patent No. 5,488,907 (the "Sawgrass
Process"). The use of any ink, dye or pigment to practice the Sawgrass Process, other than a SubliJet ink which is purchased
from Sawgrass or its authorized distributor, is not a licensed use of the SOFTWARE PRODUCT. You agree not to use the
SOFTWARE PRODUCT for any other purpose or in any process except as expressly permi tted he reby.
Not for Resale. You may not sell, or otherwise transfer for value, the SOFTWARE PRODUCT.
No Reverse Engineering, Decompilation, C opying or Disassembly. You may not reverse en gineer, decompile, copy or
disassemble the SOFTWARE PRODUCT.
No Rental. You may not rent, lease, or lend the SOFTWARE PRODUCT.
Support Services. Sawgrass Technologies, Inc. may provide you with support services related to the SOFTWARE
PRODUCT ("Support Services"). Use of Support Services is governed by the Sawgrass policies and programs described
in the user manual, in "online" documentation, and/or in other Sawgrass-provided materials. Any sup plemental software
code provided to you as part of the Support Services shall be considered part of the SOFTWARE PRODUCT and subject
to the terms and conditions of this EULA. With respect to technical information y ou provide to Sawgrass as part of the
Support Services, Sawgrass may use such informati on for its business purposes, including for product support and
development. Sawgrass will not utilize such technical i nfor mation in a form that personally identifies you.
No Assignment or Sublicense. You may not assign or s ub license the rights granted hereby.
Termination. Without prejudice to any other rights, Saw gra ss may terminate this EULA if you fail to comply with th e terms
and conditions of this EULA. In the event of termination, yo u must destroy all copies of the SOFTWARE PRODUCT and
all of its component parts.
COPYRIGHT. All title and copyrights in and to the SOFTWARE PRODUCT (including but not limited to any images, photographs,
animations, video, audio, music, text, and "applets" incorporated into the SOFTWARE PRODUCT), the accompanying printed
materials, and any copies of the SOFTWARE PRODUCT are owned by Sawgrass Technologies Inc. or its suppliers. Copyright
laws and international treaty provisions protect the SOFTWARE PRODUCT. Therefore, you must treat the SOFTWARE
PRODUCT like any other copyrighted material, except that you may inst all the SOFTWARE PRODUCT on a computer for the uses
permitted hereby. You may not copy the printed materials accompanying the SOFTWARE PRODUCT. You may not loan, rent,
lease, or otherwise transfer the other medium to another user, except as part of the permanent transfer (as provided above) of the
SOFTWARE PRODUCT.

U.S. GOVERNMENT RESTRICTED RIGHTS. The SOFTWARE PRODUCT and documentation are provid ed with RES TRICTED
RIGHTS. Use, duplication, or disclosure by the Government is subject to restrictions as set forth in subparagraph (c)(1)(ii) of the
Rights in Technical Data and Computer Software clause at DFARS 252.227-7013 or subparagraphs (c)( 1) and (2) of the
Commercial Computer Software-Restricted Rights at 48 CFR 52.227-19, as applicable.
MISCELLANEOUS
a. If you acquired this product in the United States, this EULA is governed by the laws of the State of South Carolina. In the ev ent
of any dispute arising under this license or from the use of the SOFTWARE PRODUCT, each party irrevocably a gre es to the
jurisdiction of the United States District Court for the District of South Carolina, Charleston Division.
b. If you acquired this product in Canada, this EULA is governed by the laws of the Province of Ontario, Canada. In the event of
any dispute arising under this licens e or from the use of the SOFTWARE PRODUCT, each party irrevocably agrees to the
jurisdiction of the courts of the Province of Ontario and fur t her a grees to commence any litigation which may arise hereunder in the
courts located in the Judicial District of York, Province of Ontario.
c. If this product was acquired outside the United States, then local law may apply.
LIMITED WARRANTY. Sawgrass warrants that (a) the SOFTWARE PRODUCT will perform substantially in accordance with the
accompanying written materials for a period of thirty (30) days from the date of receipt, and (b) any Support Services provided by
Sawgrass shall be substantially as described in applicable written materials provided to you by Sawgrass, and Sawgrass support
engineers will make commercially reasonable efforts to solve any problem issues. Some states and jurisdictions do not allow
limitations on duration of an implied warranty, so the above limitation may not apply to you. To the extent allowed by applicable
law, implied warranties on the SOFTWARE PRODUCT, if any, are limited to thirty (30) days.
CUSTOMER REMEDIES. Sawgrass' and its suppliers' entire liability and your exclusive remedy shall be, at Sawgrass' optio n,
either (a) return of the price paid, if any, or (b) repair or replacement of the SOFTWARE PRODUCT that does not meet Sawgrass'
Limited Warranty and which is returned to Sawgrass with a copy of your receipt. This Limited Warranty is void if failure of the
SOFTWARE PRODUCT has resulted from accident, abuse, or misapplication. Any replacement SOFTWARE PRODUCT will be
warranted for the remainder of the original warranty p eri od or thirty (30) days, whichever is longer. Outside the United States,
neither these remedies nor any product support services offered by Sawgrass are available without proof of purchase from an
authorized international source.
NO OTHER WARRANTIES. To the maximum extent permitted by applicable law, Sawgrass and its suppliers disclaim all other
warranties and conditions, either express or implied, including, but not limited to, implied warranties of merchantability, fitness for a
particular purpose, title, and non-infringement, with regard to the SOFTWARE PRODUCT, and the provision of or failure to provide
Support Services. This limited warranty gives you specific l eg al rights. You may have others, which vary from state/jurisdiction to
state/jurisdiction.
LIMITATION OF LIABILITY. To the maximum extent permitted by applicable law, in no event shall Sawgrass or its suppli ers be
liable for any special, incidental, indirect, or consequential damages whatsoever (including, without limitation, damages for loss of
business profits, business interruption, loss of business information, or any other pecuniary loss) arisi ng out of the use of or
inability to use the SOFTWARE PRODUCT or the provision of or failure to provide Support Services, even if Sawgrass has been
advised of the possibility of such damages. In any ca se, Sawgrass' entire liability under any provision of this E ULA shall be limited
to U.S. $5.00. Because some states and jurisdictions do not allow the exclusion or limitation of liability, the above limitation may
not apply to you.

Sawgrass Technologies, Inc. Limited Warranty
– QuickConnect II
TM
System
What Is Covered:
Defects in materials or workmanship.
Length of Warranty Coverage:
The warranty coverage for the QuickConnect is one year from date of purchase. Any
QuickConnect not purchased from Authorized Sawgrass Resellers is not covered.
How to get service:
Please contact Sawgrass Technologies Technical Support at 843-884-1575 or an Authorized
Sawgrass Reseller. A technical support representative will troubleshoot the issue and provide
instructions on how to get a replacement if necessary.
What we will do:
Provide you with a new, or at our option, a refurbished QuickConnect unit. Alternatively, at our
option, we may refund the purchase price. The exchange is under warranty for the remainder of
the original products’ warranty period or 90 days, whichever is longer. The replacement will be
shipped to you via Ground shipment. Any rush shipments will be freight prepaid.
What your warranty does not cover:
Damage from misuse or neglect.
Damage caused by use outside of Sawgrass Technologies recommendations.
Limitations of Warranty
THERE ARE NO OTHER WARRANTIES, EXPRESSED OR IMPLIED, INCLUDING, BUT NOT
LIMITED TO, ANY IMPLIED WARRANTY OF MERCHANTABILITY OR ANY IMPLIED
WARRANTY OF FITNESS FOR A PARTICULAR PURPOSE. SAWGRASS SHALL NOT BE
LIABLE FOR LOSS OF PROFIT OR OTHER ECONOMIC LOSS, OR FOR INDIRECT, SPECIAL,
CONSEQUENTIAL, OR OTHER SIMILAR DAMAGES.

Table of Contents
Introduction......................................................................................................................................................2
About this Document.......................................................................................................................................3
Quick Connect II™ Set-up for the R800 & R1800 ...........................................................................................4
Printer Set-up for the R1800............................................................................................................................5
Printer Set-up for the R800............................................................................................................................10
Tips for Using the QuickConnect II™ System ...............................................................................................13
Ink Cartridge Set-up for the R800 & R1800 ...................................................................................................14
Selecting Paper.............................................................................................................................................15
Heat Transfer Instructions.............................................................................................................................15
Introduction....................................................................................................................................................17
Using PowerDriver
Supra
XG
8
............................................................................................................................17
PowerDriver
Supra
XG
8
System Requirements..................................................................................................18
PowerDriver
Supra
XG
8 -
Setup Instructions and Step By Step Installation........................................................18
PowerDriver
Supra
XG
8
Properties Overview.....................................................................................................25
Appendices....................................................................................................................................................29
Appendix A: Network Printing in Windows 2000, XP .....................................................................................29
Appendix B: Over-riding Graphic Software Color Management ....................................................................30
Appendix C: Using ColorSure™ and Custom Palette in PowerDriver
Supra
XG
8
..............................................35
Appendix D: Custom Paper Sizes.................................................................................................................41
Tips for Successful Sublimation ....................................................................................................................49
Supplies & Equipment...................................................................................................................................51
Storage..........................................................................................................................................................51
Troubleshooting.............................................................................................................................................52
Technical Support..........................................................................................................................................54
Project Sublimation........................................................................................................................................54

Introduction
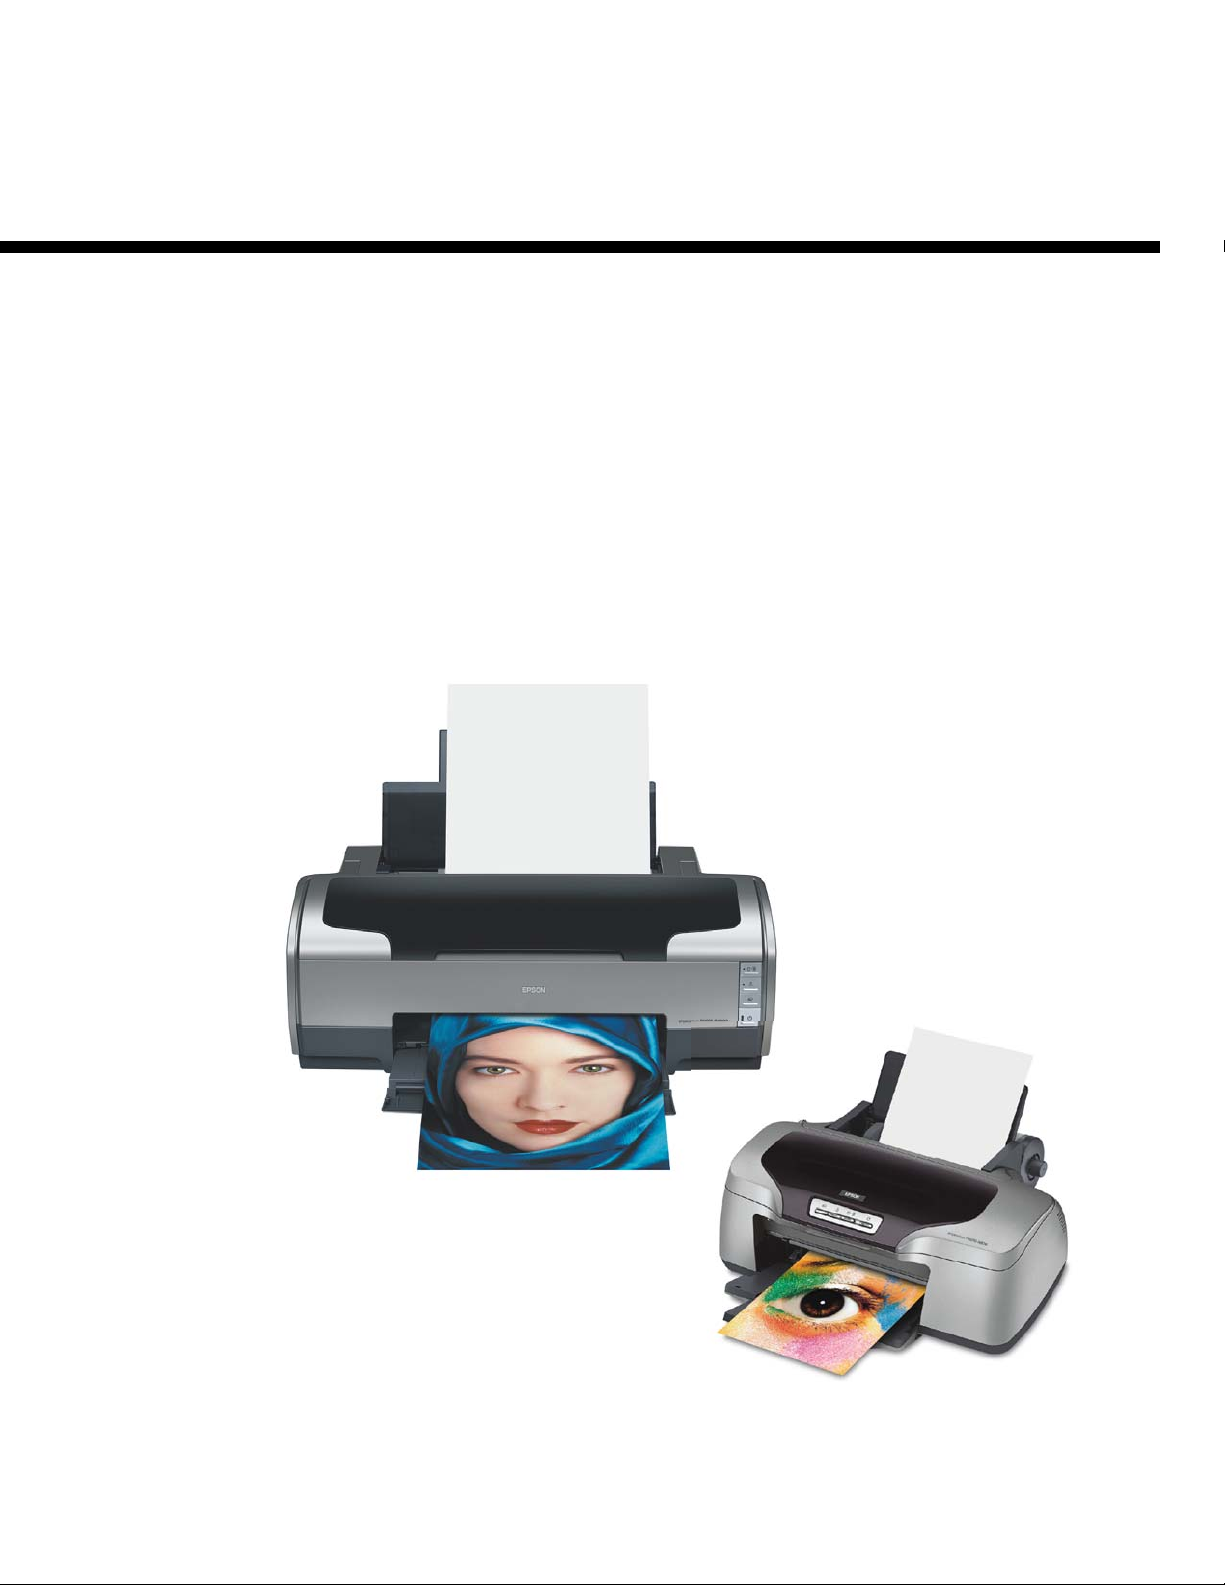
Congratulations on your purchase of the XG
8
System with SubliJet IQ™ digital transfer inks. This
system for the EPSON Stylus Photo R800 & R1800 is the latest advancement from Sawgrass
Technologies, Inc., a leader in the development of digitally driven color transfer technologies and
related products.
Your XG8 System includes: SubliJet IQ™ inks, the QuickConnect II ink delivery system, and
PowerDriver
Supra
XG
8
color matching software. This revolutionary, comprehensive system takes
sublimation to the professional level, allowing users to create perfect transfers with minimal effort.
With true eight-color printing, the XG8 System increases color gamut, creates noticeably smoother
gradient transitions, captures finer detail and adds color depth. The Red & Blue inks achieve true
blues and richer reds for better spot colors and the Light Cyan and Light Magenta create the
ultimate photo advantage with more realistic flesh tones and improved image quality.
With this system, your printed images can be transferred onto any product designed to accept
sublimation dyes including: ceramic, metal, tiles, mylar, polyester fabric, performance wear, TEC
Film
®
, TEC Tile
®
, UniSub
, and Hanes Soft L’Ink
®
T-shirts, resulting in an attractive, durable
product. Your imagination is the limit for producing brilliant, near photo-quality images on caps,
clipboards, clocks, mugs, mousepads, plaques, puzzles, synthetic T-shirts, and more. SubliJet
IQ™ is ideal for markets that personalize, customize or create short-run output.
This document contains information for using SubliJet IQ™ inks and helpful tips are also provided
for getting the best results from your transfers. The information provided pertains only to the use
of SubliJet IQ™ in your EPSON Stylus Photo R800 &/or R1800 printer. If you have questions
about the operation of your EPSON printer, refer to the EPSON Stylus Photo R800 &/or R1800
Printer User’s Guide.
Technical support is available from your Authorized SubliJet reseller or directly from Sawgrass
Technologies, Inc. See the section entitled Technical Support for additional information.
We at Sawgrass strive to provide you with the tools to make the sublimation process easy to learn
and simple to master. We hope you will find that the tools we have developed will make your
years in the sublimation business fun and profitable. Please feel free to contact us with your
feedback about our products. For additional information on our other products, visit our web site at
www.sublimation.com
.
Thank you and enjoy your XG
8
System.

About this Document
This document contains descriptions and procedures for using SubliJet IQ inks and the XG
8
System, along with additional information for getting the best results from your transfers.
The documentation provided pertains only to the use of SubliJet IQ™ inks in your EPSON Stylus
Photo R800 or R1800 ink jet printer. To assist you in the overall setup process, references are
made back to the EPSON Stylus Photo R800 &/or R1800 Printer Basics Guide for instructions.
To help point out important information, specific instructions, and helpful tips look for the
following symbols:
Indicates Must-Do items, including warnings
and important guidelines. These must be
followed to prevent damage to your printer.
Indicates useful tips for
printing and sublimation.
Before you Begin
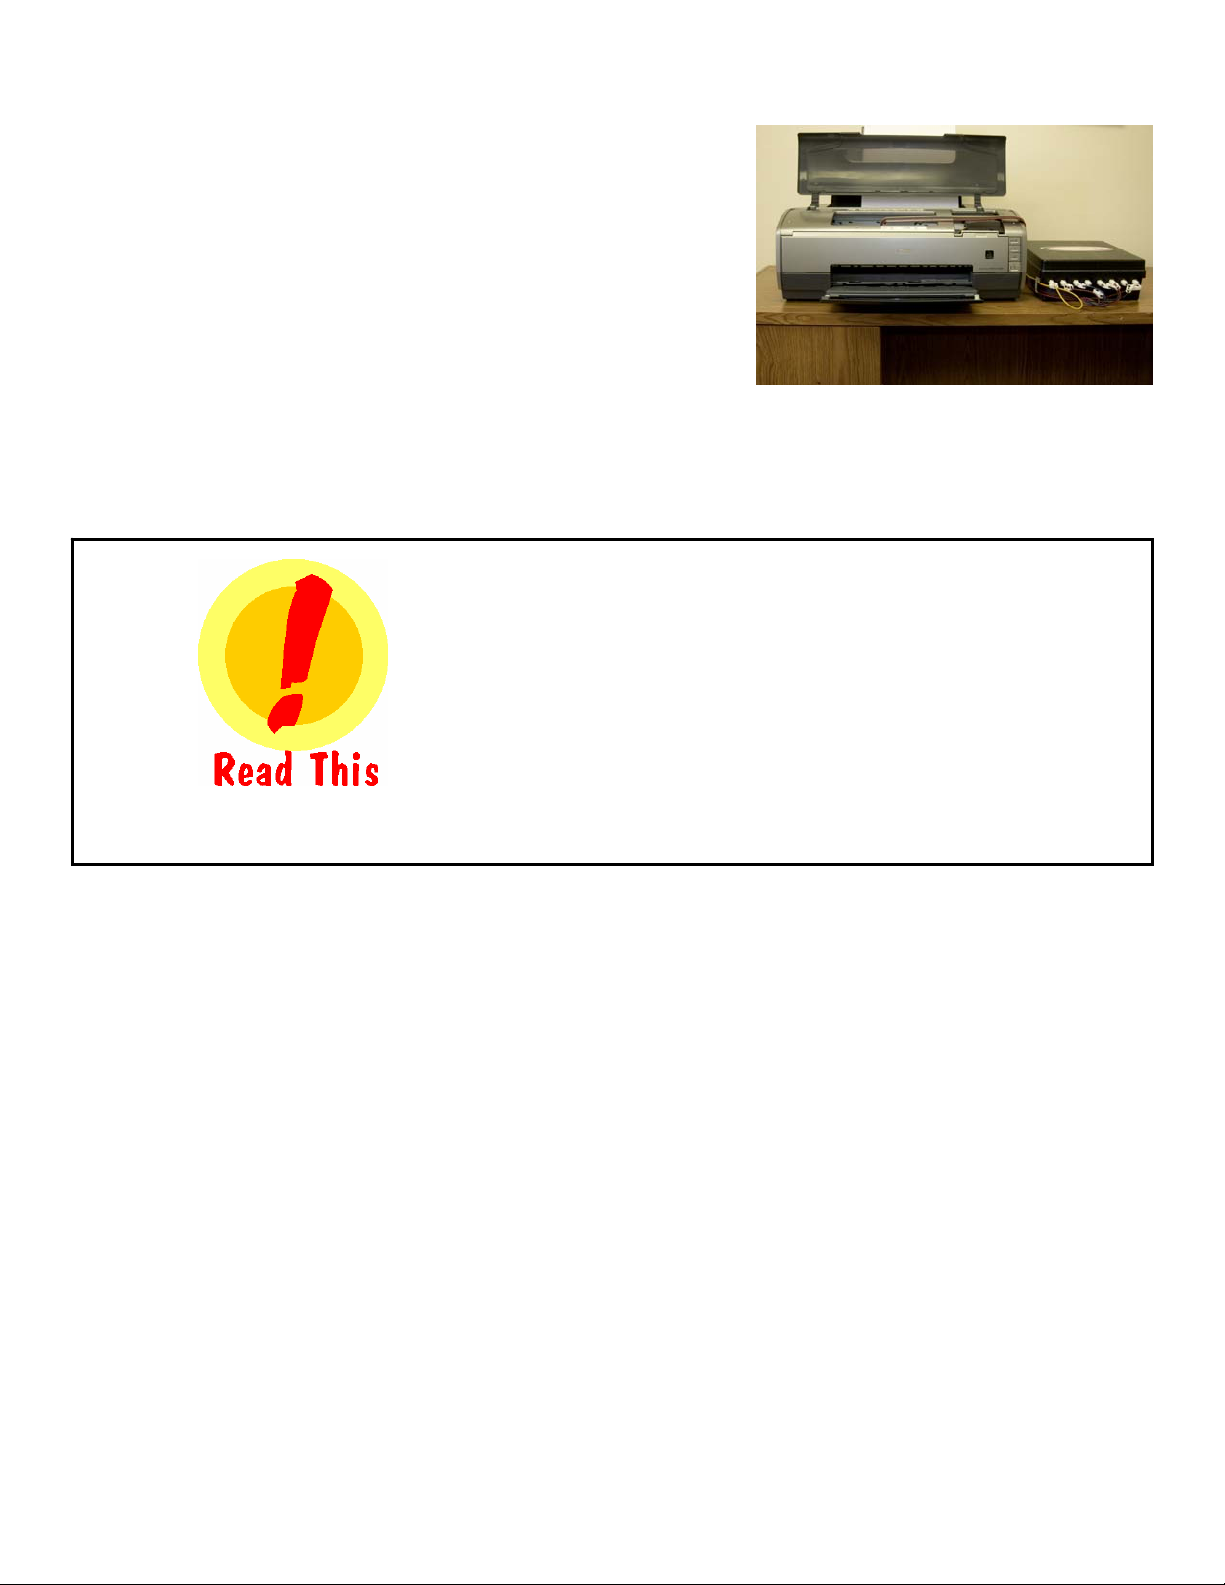
Quick Connect II™ Set-up for the R800 & R1800
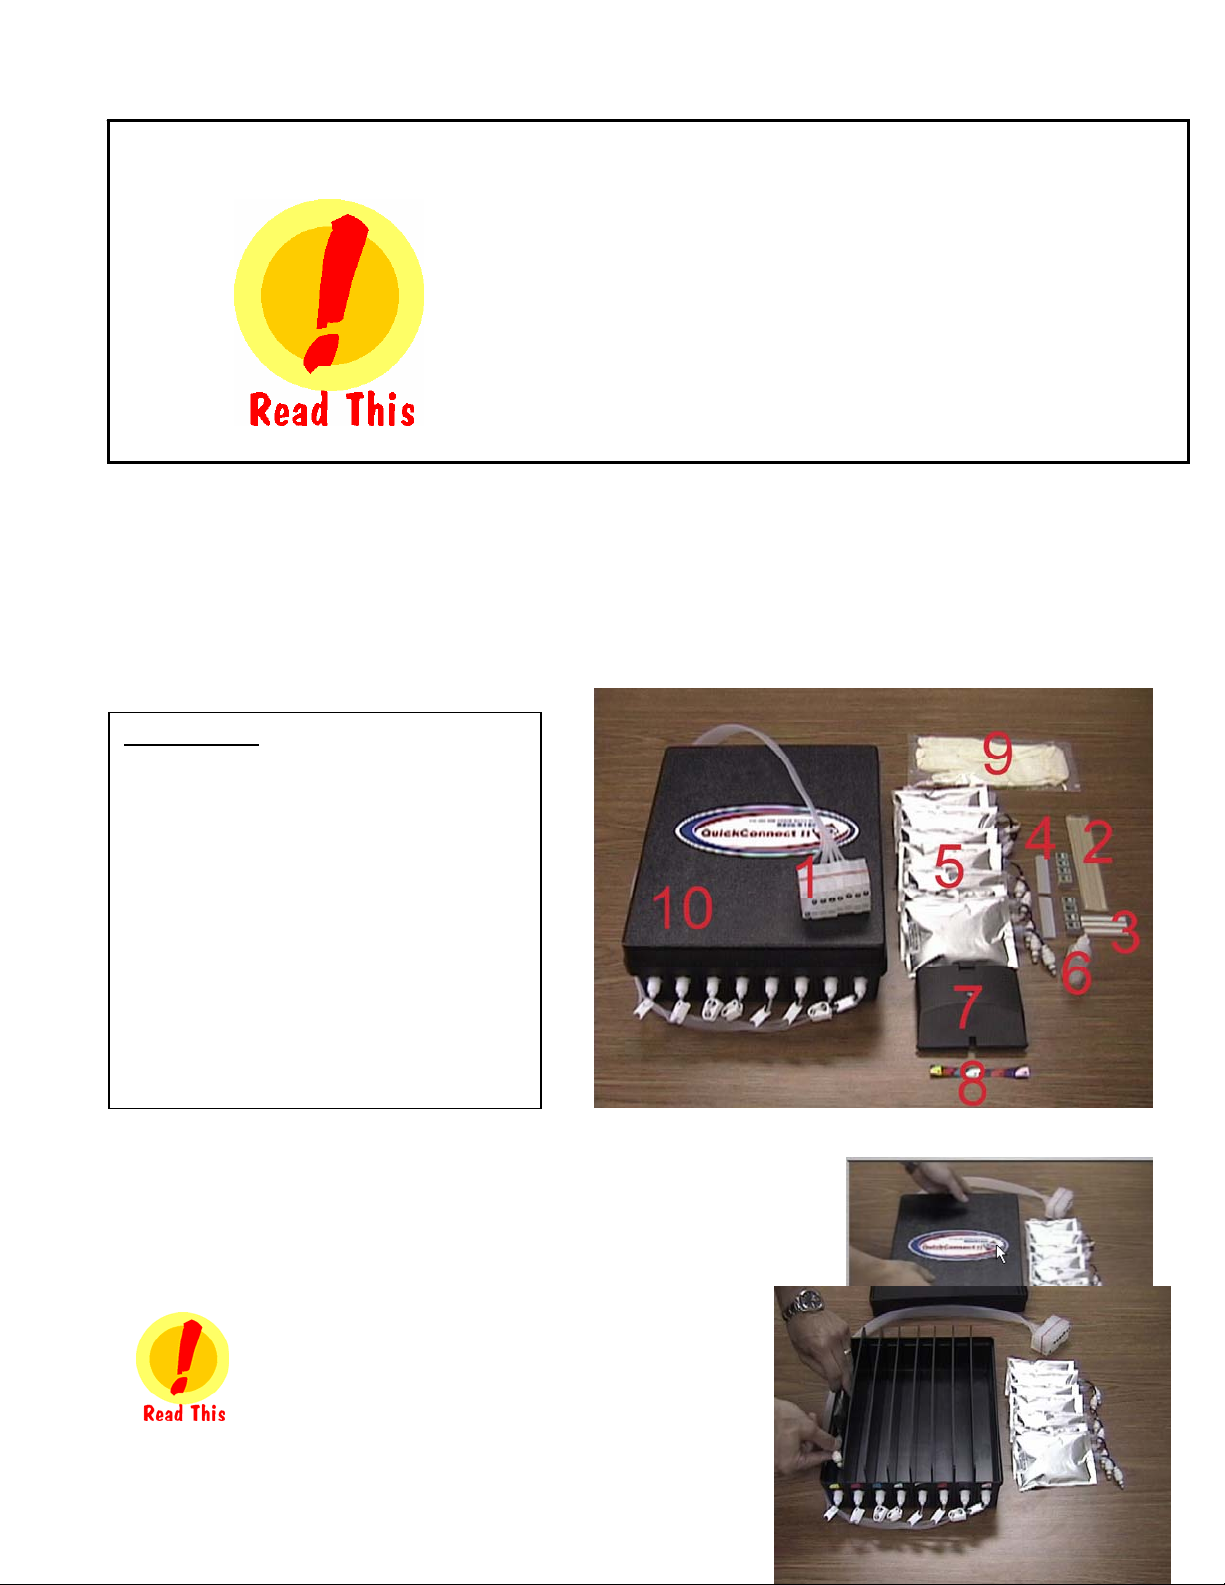
1. Check to ensure that you have all of the components necessary to setup your Quick Connect
II™ system.
2. Place the Quick Connect II box on a level surface next to where
your printer is going to be placed. For the R800 it should be on the
left hand side of the printer with the clamps facing towards the
back. For the R1800 it should be on the right hand side with the
clamps facing towards the front.
Your ink bags should never be elevated above
the print head. Keeping the bags beside the
printer at the same level assures the ink delivery
system will operate properly.
3. Remove the lid from the box and place it to the side.
Components
1. Ink Cartridge + tubes
2. 1 x Long Tube Grip
3. 1 x Short Tube Grip
4. Chips
5. 8x Ink Bags
6. Small primer bottle
7. Cartridge Cover (R1800 Only)
8. Cartridge placement sticker
9. Rubber Gloves
10. Ink Box
11. Foam Block for R800 only
(Not Shown)
12. Power Driver CD (Not Shown)
It is crucial that the OEM ink supplied with your
printer is installed before you attempt to install
your SubliJet IQ™ inks. This allows for two things:
First, it primes the ink delivery system, ensuring
that the SubliJet IQ™ ink will load more easily.
Second, it familiarizes you with the basic operation
of your printer. Please see the EPSON Stylus
Photo R800 or R1800 Printer User’s Guide for
instructions on installation.
For more detailed instructions
p
lease refer to the Video Installation Guide on
y
our PowerDriverSu
p
ra 1800
4. Insert the ink bags into the ink box by clipping them into the corresponding connectors attached
inside the box. Each section is marked with which color ink should be placed there.
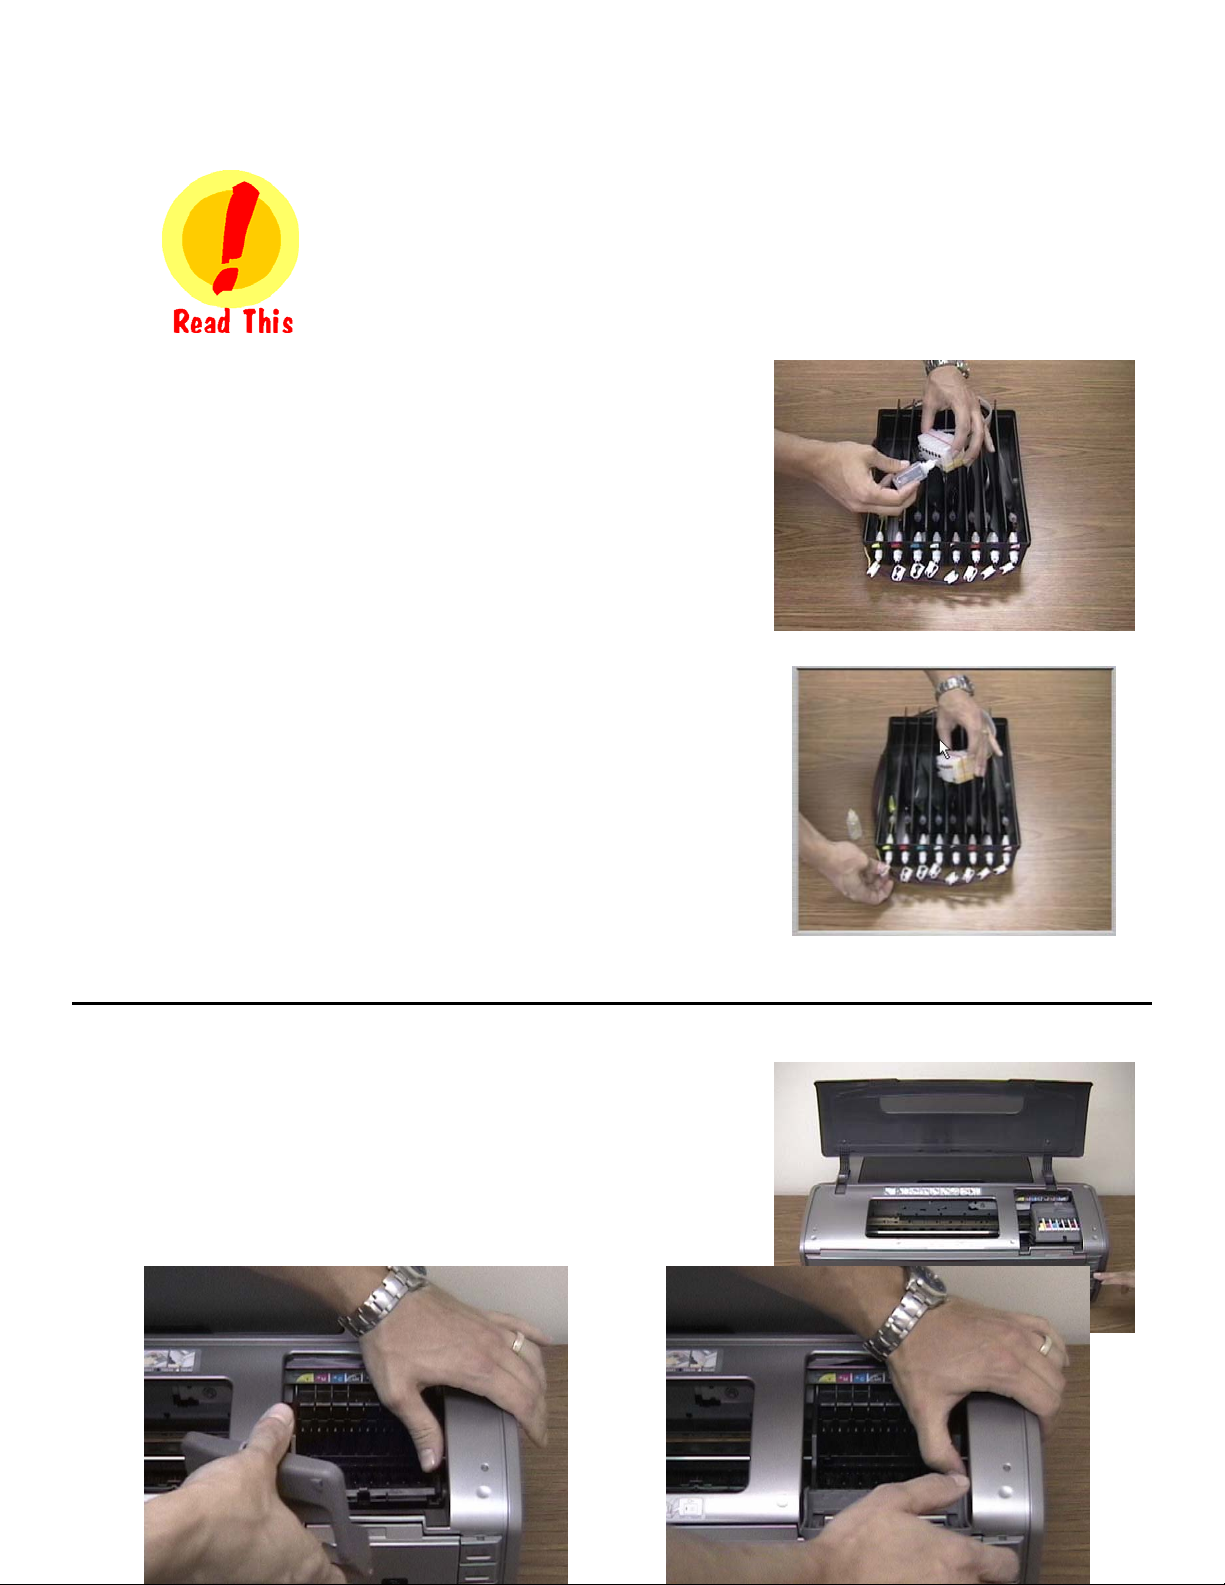
5. Once all ink bags are connected inside your Quick Connect
II™ ink box, you will need to obtain the small primer bottle to
prime each line.
6. Take the cartridge in one hand and the priming bottle in the
other as shown in the picture to the right. Squeeze the priming
bottle to release all of the air and insert it into the bottom of the
cartridge to pull ink through the line and just bring ink into the
reservoir.
7. Once ink is in the reservoir, pinch together the clamp that’s
connected to the tube on the outside of the box. This will ensure
that no more ink will pull into the reservoir until you are ready for
it.
8. Do this for each cartridge.
9. Place the lid back onto the Quick Connect II™ ink box and
gently place the cartridges on top of the box while you are
completing the printer setup.
Printer Set-up for the R1800
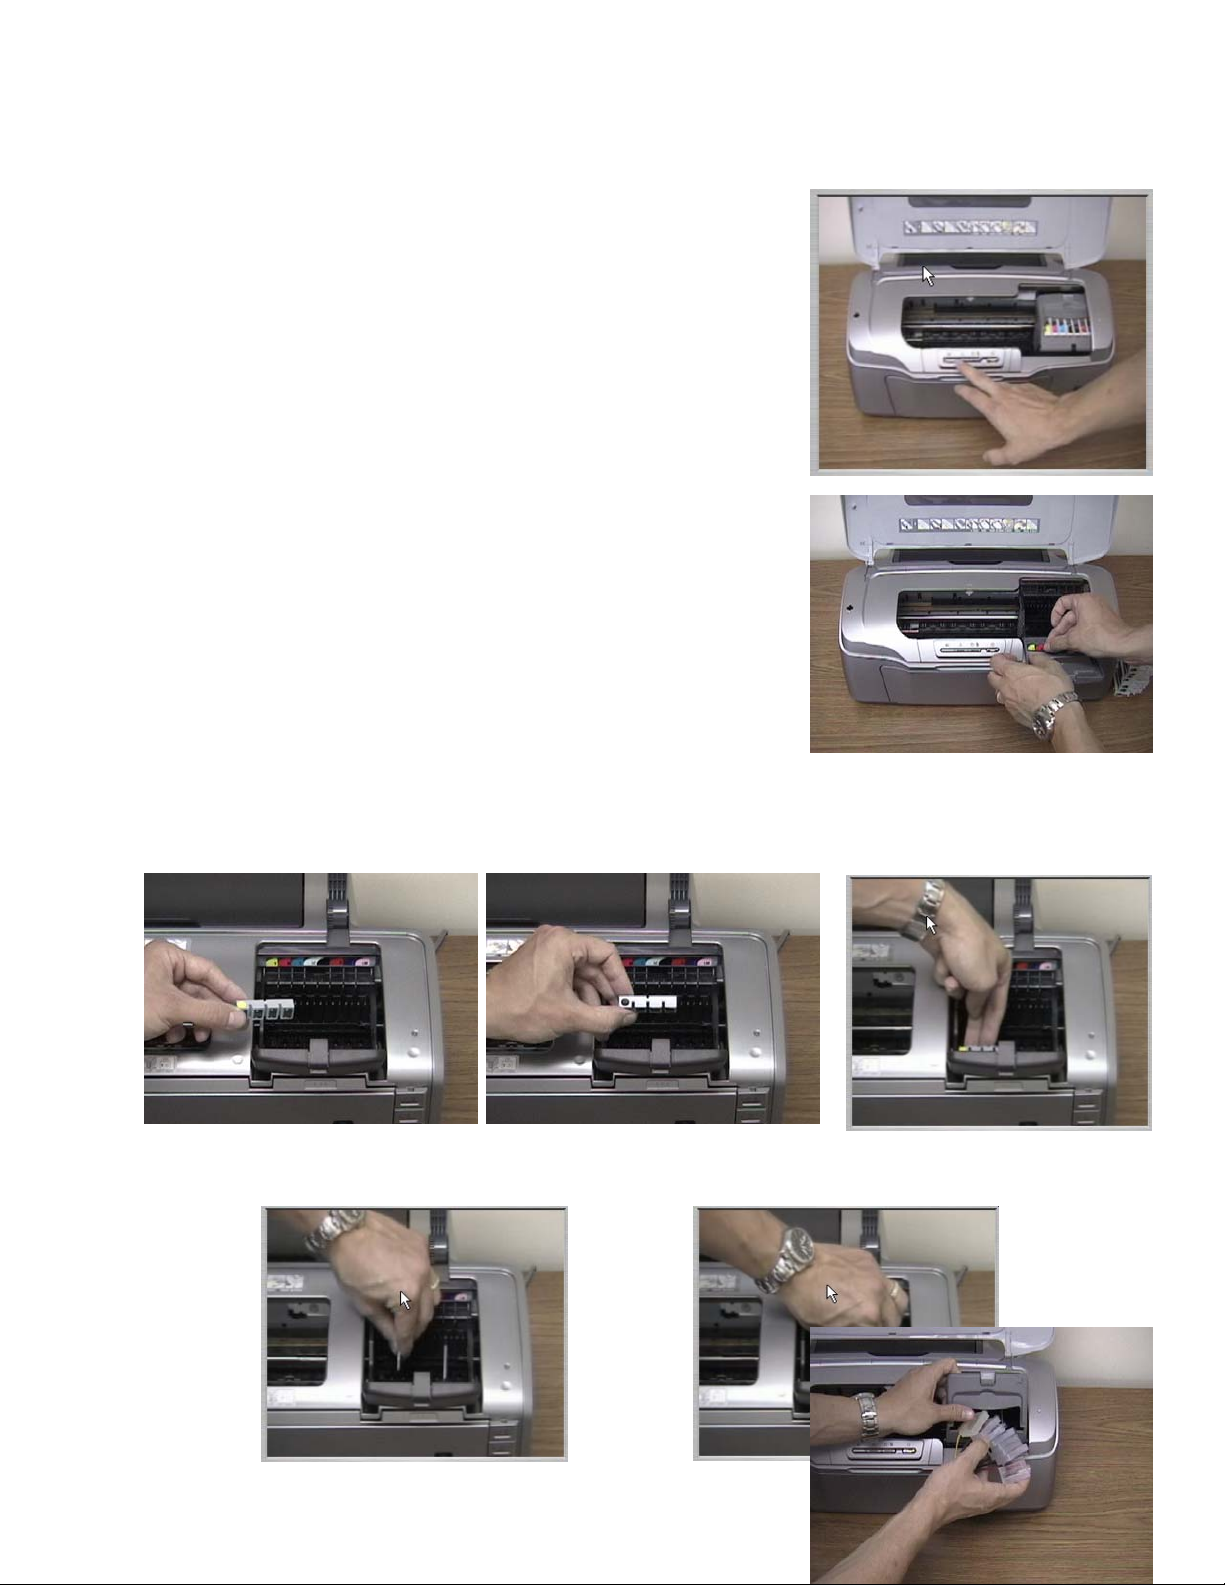
1. Turn the printer on, lift the lid, and press the cartridge
replacement button.
2. The cartridge bay will shift into the remove position. Lift the
bay lid and remove any installed cartridges.
3.
Remember to match the
right color ink to its
corresponding cartridge
chamber. Once the tube is
filled, there is no way to
undo it!
Remove the cartridge cover by gently pushing on the right side and twisting to the right as shown
below.
4. Take the cartridge placement sticker and place it over the
existing one on the cartridge bay.
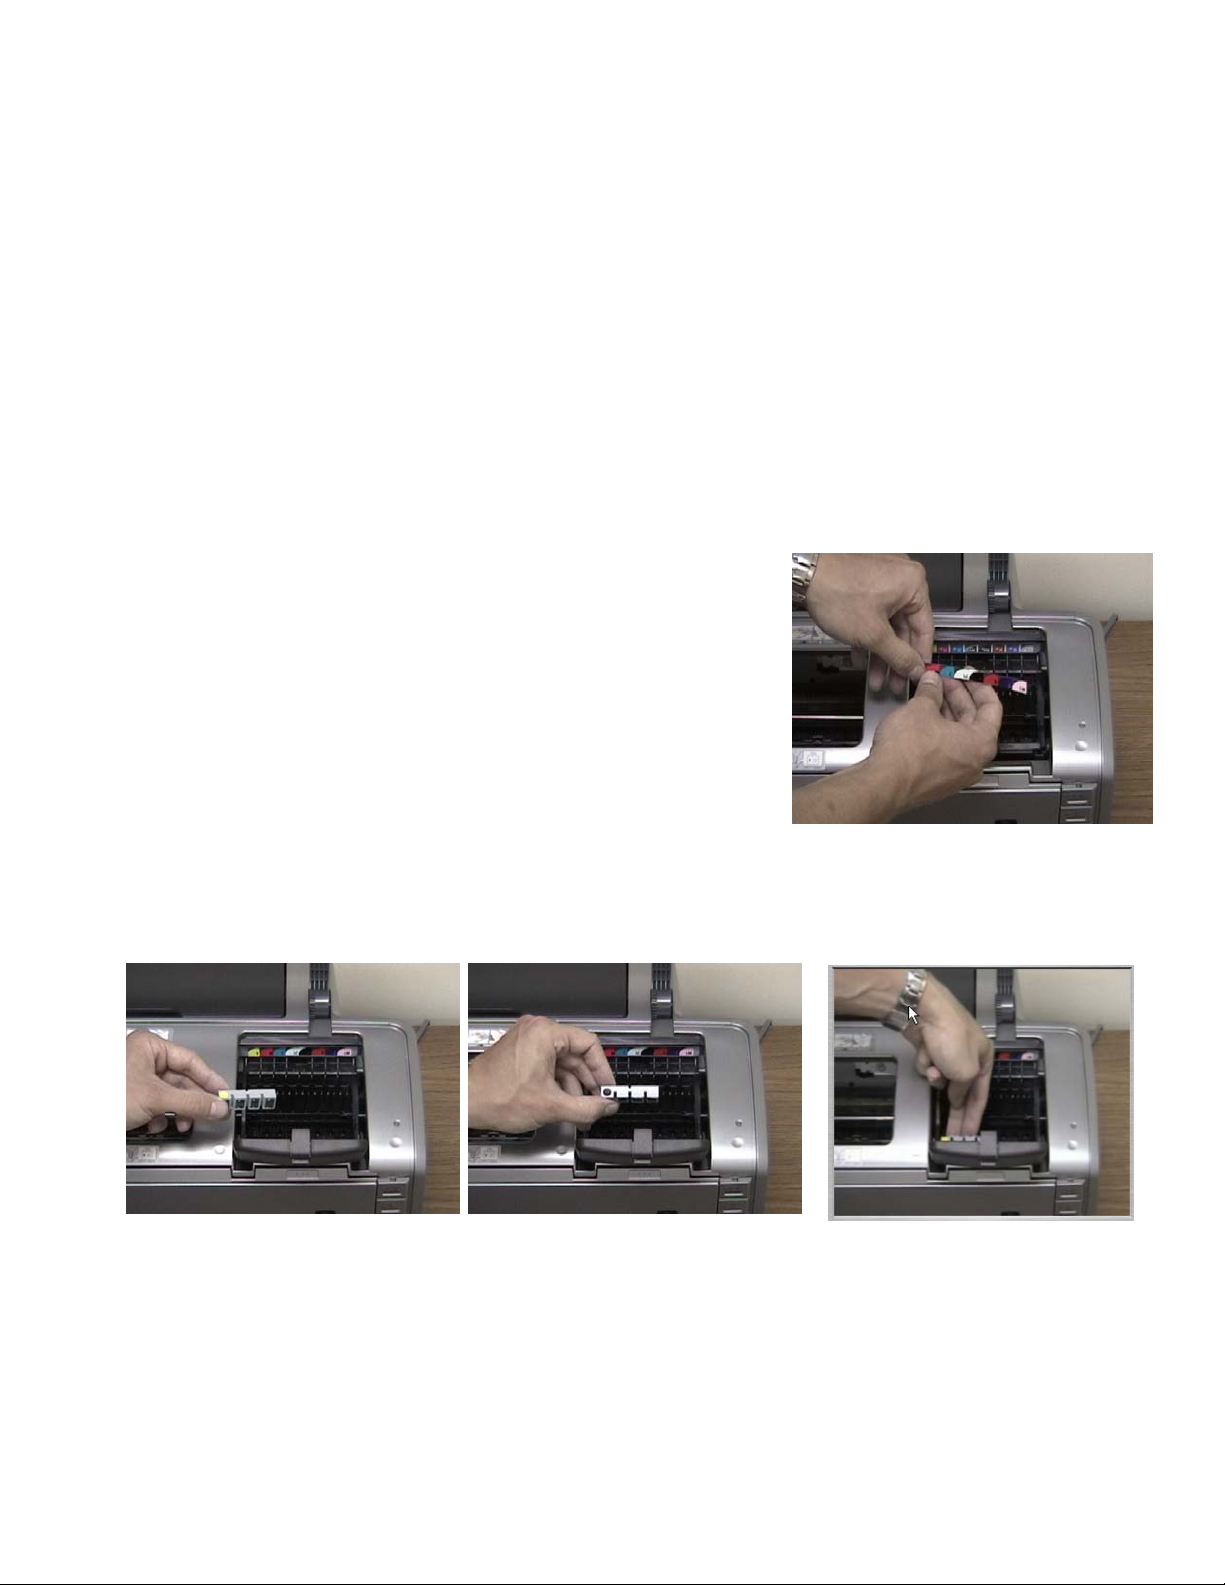
5. Install the cartridge chips as shown in the pictures below. Start by lining up the first chip with
the yellow dot with the yellow ink slot in the cartridge bay. Then line up the second chip with the
black dot with the black slot in the cartridge bay.
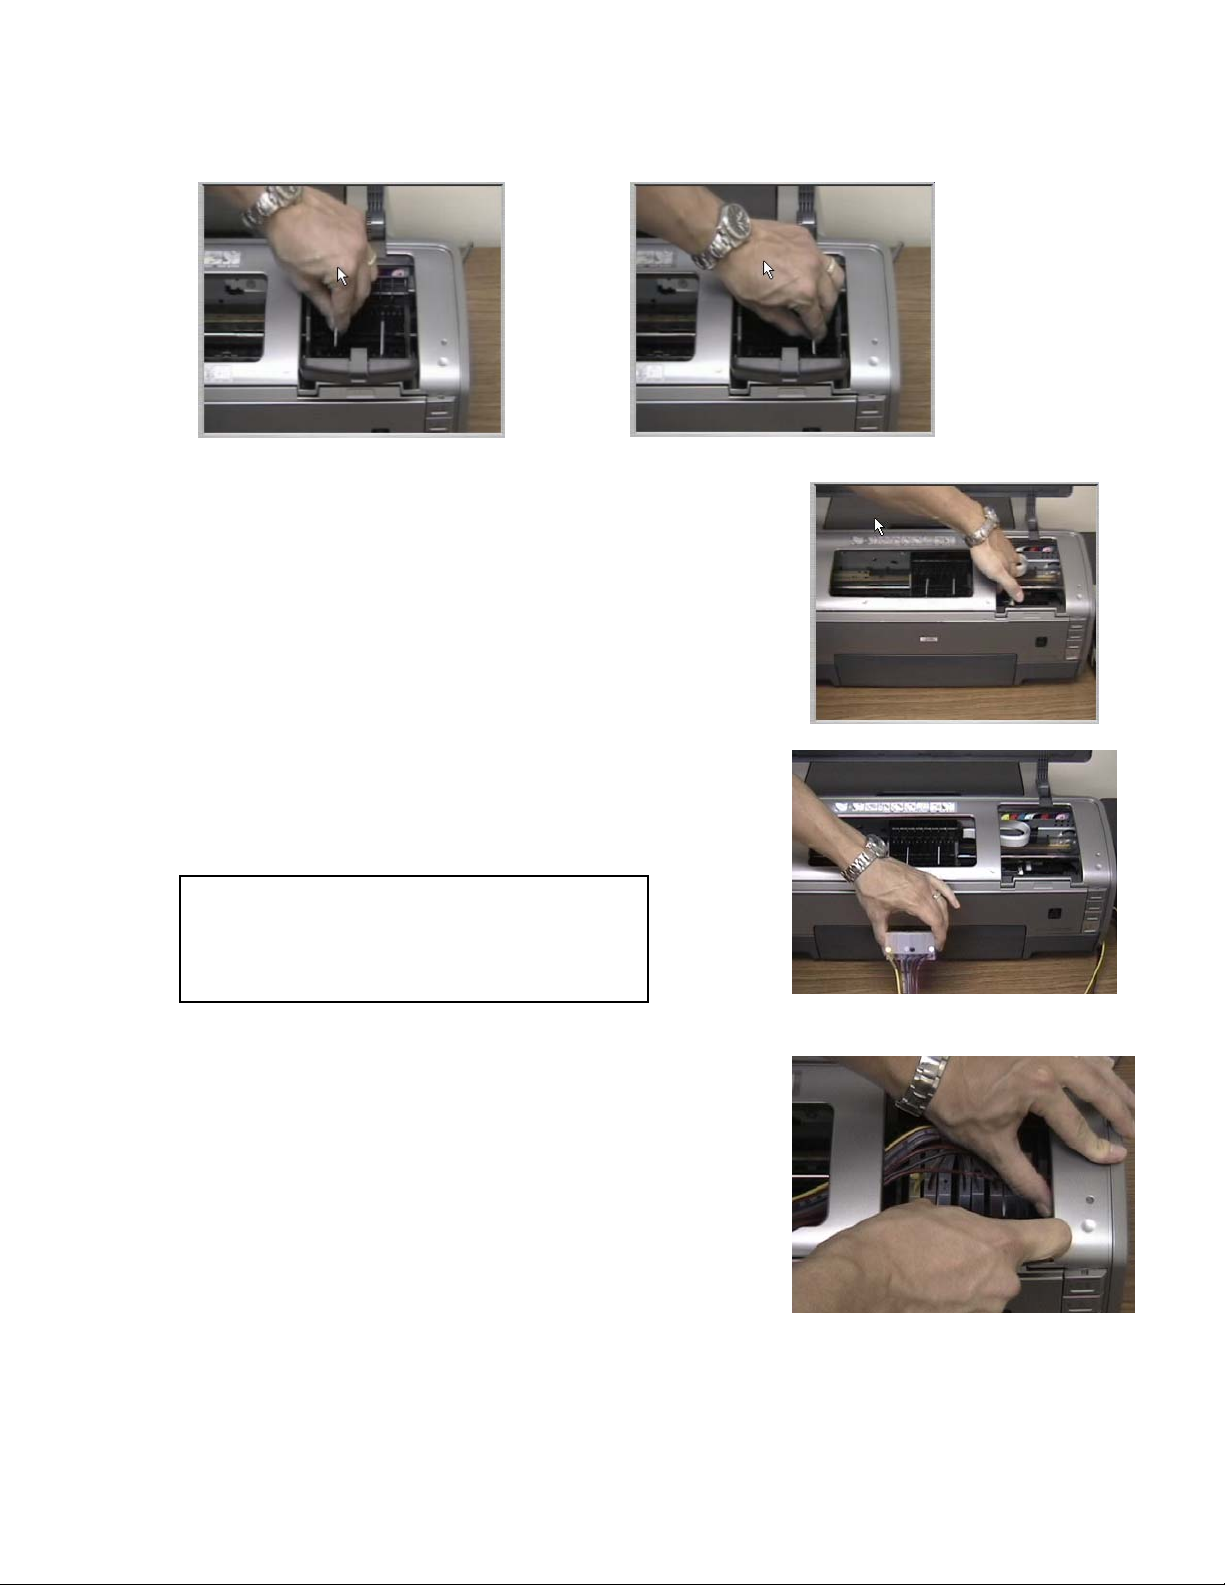
6. Insert the plastic cross bars into place by sliding the notched end into the back of the chip
holders.
7. Slide the cartridge bay to the center of the printer to install the
sublimation cartridges. It must be to the left of the gray bar before
any cartridges can be installed.
8. Gently place the cartridges into the cartridge bay. Start with the
yellow cartridge on the left and attach the cartridges in this order:
9. Once all cartridges are attached and in place, slide the cartridge
bay back to its original position. The Quick Connect II™ tubes
should be underneath the gray bar on the printer.
(from left to right)
Yellow, Magenta, Cyan, Light Cyan,
Black, Red, Blue, Light Magenta
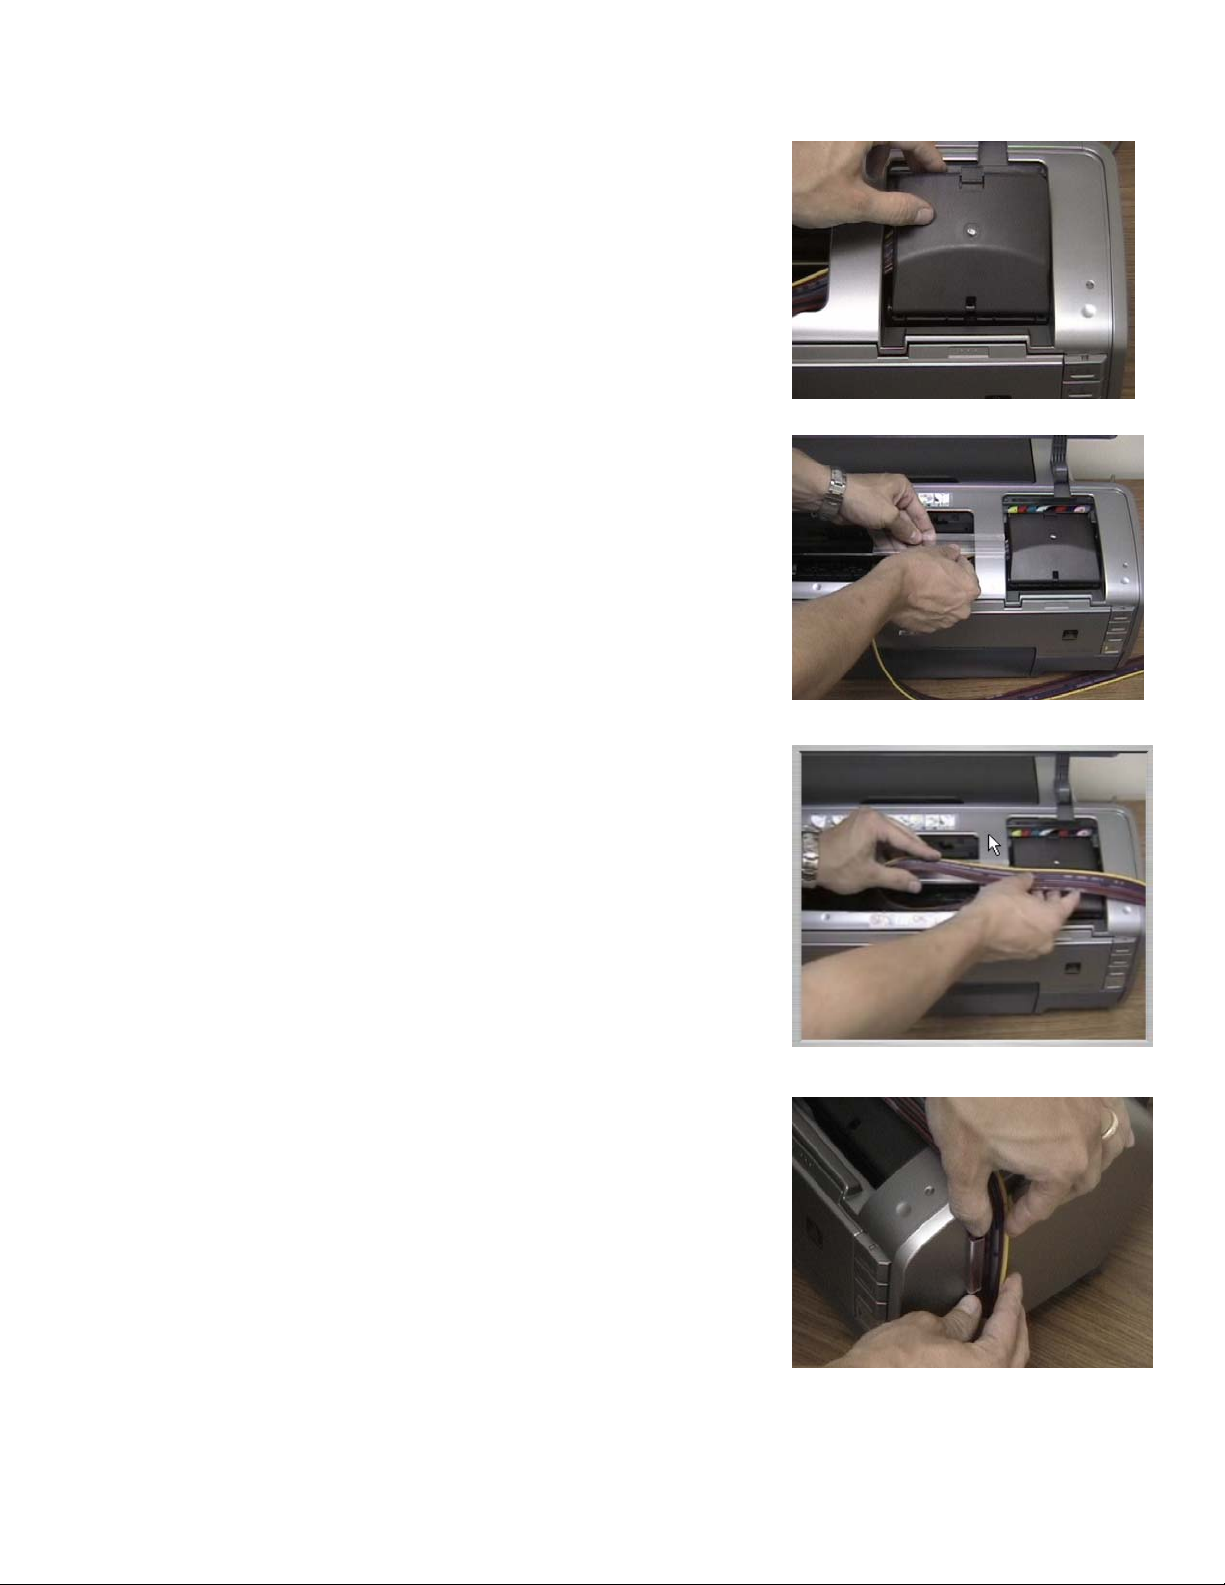
10. Attach the custom cover to the cartridge bay. Be careful
not to pinch the tubes when closing the cover.
11. Obtain the long tube holder and remove the tabs from the
back exposing the adhesive. Place the tube holder in the
middle of the gray bar and attach it to the printer.
12. Slide tubing into the holder for placement. Leave enough
slack so that the cartridge bay can easily slide from one side
of the printer to the other without creating tension on the
tubes.
13. Obtain the short tube holder and remove the tabs from the
back exposing the adhesive. Attach it to the right hand side of
the printer where the tubes hang down to meet the Quick
Connect II™ ink box. Slide tubes into the holder for placement.
14. Press the ink button to move the print head back to the ink
cartridge parked position.
Congratulations! You’ve successfully installed an R1800 Quick Connect II ink system and printer.
For instructions on how to install the R800 printer, please turn to the next page.
You may want to remove the printer lid or leave it
open at all times.
You may have a little air showing in your lines, but
this will clear after a few prints.
If you are going to leave your system without using
it for several days, you should clamp your lines with
the tube clamps.
Do not raise the ink box higher than the printer.
Printer Set-up for the R800
1. Turn the printer on, lift the lid, and press the cartridge
replacement button.
2. The cartridge bay will shift into the remove position. Lift the
bay lid and remove any installed cartridges.
3. Take the cartridge placement sticker and place it on the
cartridge cover.
4. Install the cartridge chips as shown in the pictures below. Start by lining up the first chip with
the yellow dot with the yellow ink slot in the cartridge bay. Then line up the second chip with the
black dot with the black slot in the cartridge bay.
5. Insert the plastic cross bars into place by sliding the notched end into the back of the chip
holders.
6. Gently
 Loading...