


¨
PORTABLE CD PLAYER WITH AM/FM DIGITAL TUNER AND CASSETTE RECORDER
OWNER’S MANUAL
PD6870RD - Red
PD6870CH - Champagne Gold
Visit our web site at www.emersonradio.com
WARNING
TO PREVENT FIRE OR SHOCK HAZARD, DO NOT USE THIS PLUG WITH AN EXTENSION CORD, RECEPTACLE OR OTHER OUTLET UNLESS THE BLADES CAN BE FULLY INSERTED TO PREVENT BLADE EXPOSURE. TO PREVENT FIRE OR SHOCK HAZARD, DO NOT EXPOSE THIS APPLIANCE TO RAIN OR MOISTURE.
CAUTION
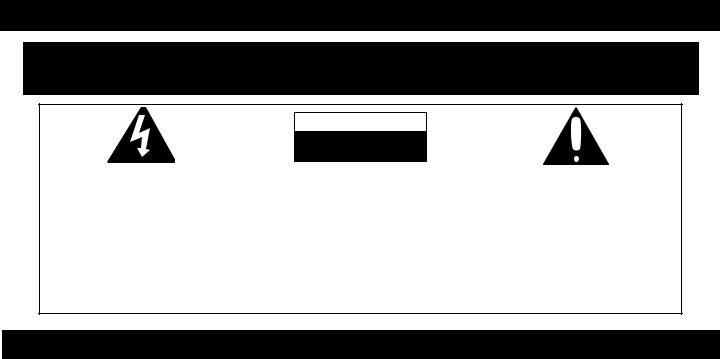
The lightning flash with arrowhead symbol, within an equilateral triangle is intended to alert the user to the presence of uninsulated ‘dangerous voltage’ within the product’s enclosure that may be of sufficient magnitude to constitute a risk of electric shock to persons.
RISK OF ELECTRIC SHOCK
DO NOT OPEN
CAUTION: TO REDUCE THE RISK OF ELECTRIC SHOCK DO NOT REMOVE COVER (OR BACK), NO USER SERVICEABLE PARTS INSIDE. REFER SERVICING TO QUALIFIED SERVICE PERSONNEL.
The exclamation point within an equilateral triangle is intended to alert the user to the presence of important operating and maintenance (servicing) instructions in the literature accompanying the appliance.
IMPORTANT SAFETY INSTRUCTIONS
1.Read these instructions.
2.Keep these instructions.
3.Heed all warnings.
4.Follow all instructions.
5.Do not use this apparatus near water.
6.Clean only with dry cloth.
7.Do not block any ventilation openings. Install in accordance with the manufacturer’s instructions.
8.Do not install near any heat sources such as radiators, heat registers, stoves, or other apparatus (including amplifiers) that produce heat.
9.Do not defeat the safety purpose of the polarized or grounding-type plug. A polarized plug has two blades with one wider than the other. A grounding type plug has two blades and a third grounding prong. The wide blade or the third prong are provided for your safety. If the provided plug does not fit into your outlet, consult an electrician for replacement of the obsolete outlet.
10.Protect the power cord from being walked on or pinched particularly at plugs, convenience receptacles, and the point where they exit from the apparatus.
11.Only use attachments / accessories specified by the manufacturer.
12.Unplug this apparatus during lightning storms or when unused for long periods of time.
13.Refer all servicing to qualified service personnel. Servicing is required when the apparatus has been damaged in any way, such as power-supply cord or plug is damaged, liquid has been spilled or objects have fallen into the apparatus, the apparatus has been exposed to rain or moisture, does not operate normally, has changed its performance, or has been dropped.
14.This appliance shall not be exposed to dripping or splashing water and that no object filled with liquids such as vases shall be placed on the apparatus.
15.Do not overload wall outlet. Use only power source as indicated.
16.Use replacement parts as specified by the manufacturer.
17.The product may be mounted to a wall only if recommended by the manufacturer.
18.Upon completion of any service or repairs to this product, ask the service technician to perform safety checks.
1

SAFETY INSTRUCTIONS
INFORMATION:
This equipment has been tested and found to comply with the limits for a Class B digital device, pursuant to Part 15 of the FCC Rules. These limits are designed to provide reasonable protection against harmful interference in a residential installation. This equipment generates, uses, and can radiate radio frequency energy and, if not installed and used in accordance with the instructions, may cause harmful interference to radio communications. However, there is no guarantee that interference will not occur in a particular installation. If this equipment does cause harmful interference to radio or television reception, which can be determined by turning the equipment off and on, the user is encouraged to try to correct the interference by one or more of the following measures:
•Reorient or relocate the receiving antenna.
•Increase the separation between the equipment and receiver.
•Connect the equipment into an outlet on a circuit different from that to which the receiver is connected.
•Consult the dealer or an experienced radio/TV technician for help.
LASER SAFETY: This unit employs a laser. Only qualified service personnel should attempt to service this device due to possible eye injury.
CAUTION: USE OF CONTROLS, ADJUSTMENTS OR PERFORMANCE OF PROCEDURES OTHER THAN THOSE SPECIFIED HEREIN MAY RESULT IN HAZARDOUS RADIATION EXPOSURE. WARNING: DO NOT EXPOSE THIS APPLIANCE TO RAIN OR MOISTURE.
DANGER:
Invisible and hazardous laser radiation when open and interlock failed or defeated. Avoid direct exposure to beam.
FCC WARNING:
This equipment may generate or use radio frequency energy. Changes or modifications to this equipment may cause harmful interference unless the modifications are expressly approved in the instruction manual. The user could lose the authority to operate this equipment if an unauthorized change or modification is made.
Thank you for purchasing this Emerson portable audio system. This uniquely designed product has a built-in CD player with programmable memory and repeat playback. It also features a digital tuning AM/FM stereo radio and a stereo cassette player/recorder that will allow you to make direct recordings from either the radio or the CD player.
We are sure that this unit will provide you with many years of exceptional performance with a minimum of care and maintenance. Please review the contents of this instruction manual completely and carefully before operating your unit, to make sure that you understand all functions and operations and get the maximum benefit out of all the great features included in this product. If you should encounter any problems with the set-up or operation of this product, please contact the Emerson Radio Corporation Customer Service hot-line, toll free, at 1-800-898-9020.
The serial number of your unit can be found on a label on the bottom of the cabinet. We suggest that you record the serial number in the space provided below in case this information is ever needed at a future date.
Model Number: PD6870RD/PD6870CH
Serial Number: _______________________________________
2
PREPARATION FOR USE
Unpacking and Setup
•Carefully remove the unit from the display carton and remove all packing material from the unit itself.
•Remove any descriptive labels that may be found on either the front or top cabinet of the unit. Do not remove any labels located on either the back or bottom cabinet of the unit.
•The detachable AC power cord is packed in the carton separately from the unit. Make sure that the AC power cord is not accidentally discarded with the carton or packing material.
•Press the CD Door OPEN/CLOSE area to open the CD compartment door. There is a white card in the CD compartment which is intended to prevent the CD pickup from moving during shipment of the product. Remove this card from the CD compartment before use.
Power Sources
This portable audio system is designed to operate on either 120V AC 60Hz house current or 12V DC, using eight (8) ‘C’ batteries, not included. Attempting to operate this unit from any other power source may cause damage to the unit, which is not covered by your warranty.
AC Operation
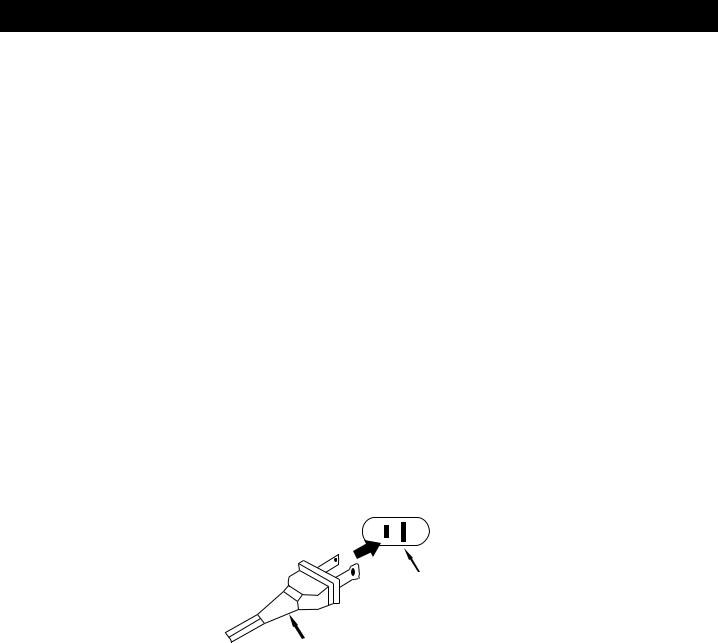
Unwind the AC power cord and extend it to its full length. Insert the small end of the AC power cord into the AC socket on the back cabinet of the unit. Insert the other end of the AC power cord into any convenient 120V 60Hz household outlet.
AC Outlet
AC Plug
Please note that this unit is equipped with a polarized AC plug which has one blade wider than the other. This is a safety feature to reduce the likelihood of electric shock. This polarized AC plug will only fit in a polarized AC outlet. If you find that you cannot insert this plug into your outlet, you may have an obsolete non-polarized outlet. Please do not try to defeat this safety feature by using a non-polarized adapter or by filing the wider blade to make it fit into your outlet. If this plug does not fit into your outlet, you should contact a qualified licensed electrician to replace your obsolete outlet.
3
PREPARATION FOR USE (CONTINUED)
Battery Operation
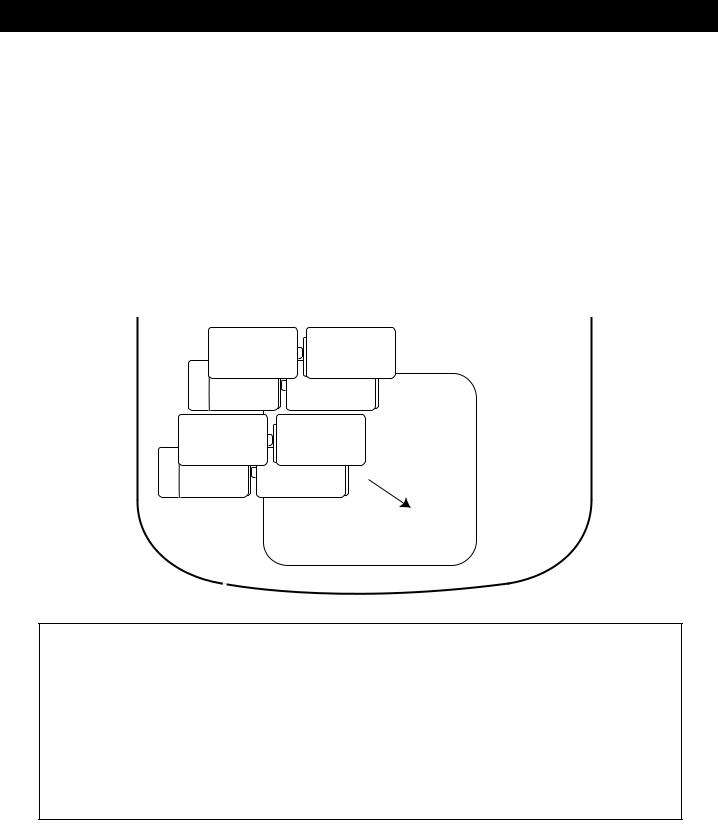
The battery compartment is located on the rear of the unit.
•Remove the battery compartment door by pressing down on the two arrow marks and sliding the door in the direction of the arrows.
•Insert eight (8) ‘C’ size batteries into the battery compartment as shown below. Be sure to observe the polarity markings which are engraved inside the battery compartment. If the batteries are inserted incorrectly, the unit will not operate.
•Replace the battery compartment door.
NOTE: The AC power cord must be disconnected from the AC socket on the back of the unit in order for the unit to operate on battery power.
-
 +
+
-
 +
+
|
+ |
- |
+ |
+ |
- |
- + |
|
-
 +
+
-
 +
+
-
BATTERY PRECAUTIONS
Follow these precautions when using batteries in this device:
1.Use only the size and type of batteries specified.
2.Be sure to follow the correct polarity when installing the batteries as indicated in the battery compartment. Reversed batteries may cause damage to the device.
3.Do not mix different types of batteries together (e.g. Alkaline and Carbon-zinc) or old batteries with fresh ones.
4.If the device is not to be used for a long period of time, remove the batteries to prevent damage or injury from possible battery leakage.
5.Do not try to recharge batteries not intended to be recharged; they can overheat and rupture. (Follow battery manufacturer’s directions.)
4

LOCATION OF CONTROLS AND INDICATORS
1 |
|
|
2 |
9 |
|
10 |
||
|
||
3 |
11 |
|
12 |
||
4 |
13 |
|
5 |
14 |
|
15 |
||
6 |
||
|
16 |
7
8 |
17 |
18
1. |
Carrying Handle |
|
PLAY (Ã) |
||||||||||||||||
2. |
Tuning CD Skip/Search |
|
(+)/ |
|
(–) |
|
RECORD ( ) |
||||||||||||
|
|
|
|||||||||||||||||
|
|
|
|||||||||||||||||
|
Buttons |
8. |
Display |
||||||||||||||||
3. |
CD STOP(■) Button |
9. |
Antenna |
||||||||||||||||
4. |
POWER Button |
10. |
VOLUME Control |
||||||||||||||||
5. |
PROGRAM/MEMORY/CLOCK SET |
11. |
CD Door OPEN/CLOSE Area |
||||||||||||||||
|
Button |
12. |
CD PLAY/PAUSE (¨ |
|
|
|
) Button |
||||||||||||
|
|
|
|||||||||||||||||
|
|
|
|||||||||||||||||
6. |
BASS BOOST Button |
13. |
BAND Button |
||||||||||||||||
7. |
Cassette Buttons: |
14. |
LIGHT Button |
||||||||||||||||
|
PAUSE ( |
|
|
|
) |
|
|
|
|
15. |
MODE/MEMORY UP Button |
||||||||
|
|
|
|||||||||||||||||
|
|
|
|||||||||||||||||
|
STOP/EJECT ( |
|
|
|
) |
|
|
|
|
16. |
FUNCTION Button |
||||||||
|
|
||||||||||||||||||
|
|
|
|||||||||||||||||
|
FAST FORWARD (ÃÃ) |
17. |
AC Jack (Rear of Unit) |
||||||||||||||||
|
REWIND (¨¨) |
18. |
Battery Compartment (Bottom of Unit) |
||||||||||||||||
5
 Loading...