


LM 350
Electronic
Labelmaker
User Guide
Etiqueteuse
Electronique
Guide D‘Utilisation
Elektronische
Labelmaker
Gebruikershandleiding
Elektronisches
Beschriftungsgerät
Bedienungsanleitung
www.dymo.com
D
Page 3
Page 15
Pagina 27
Seite 39
350
LM350 WEU.qxd 12-11-2003 09:02 Pagina 1
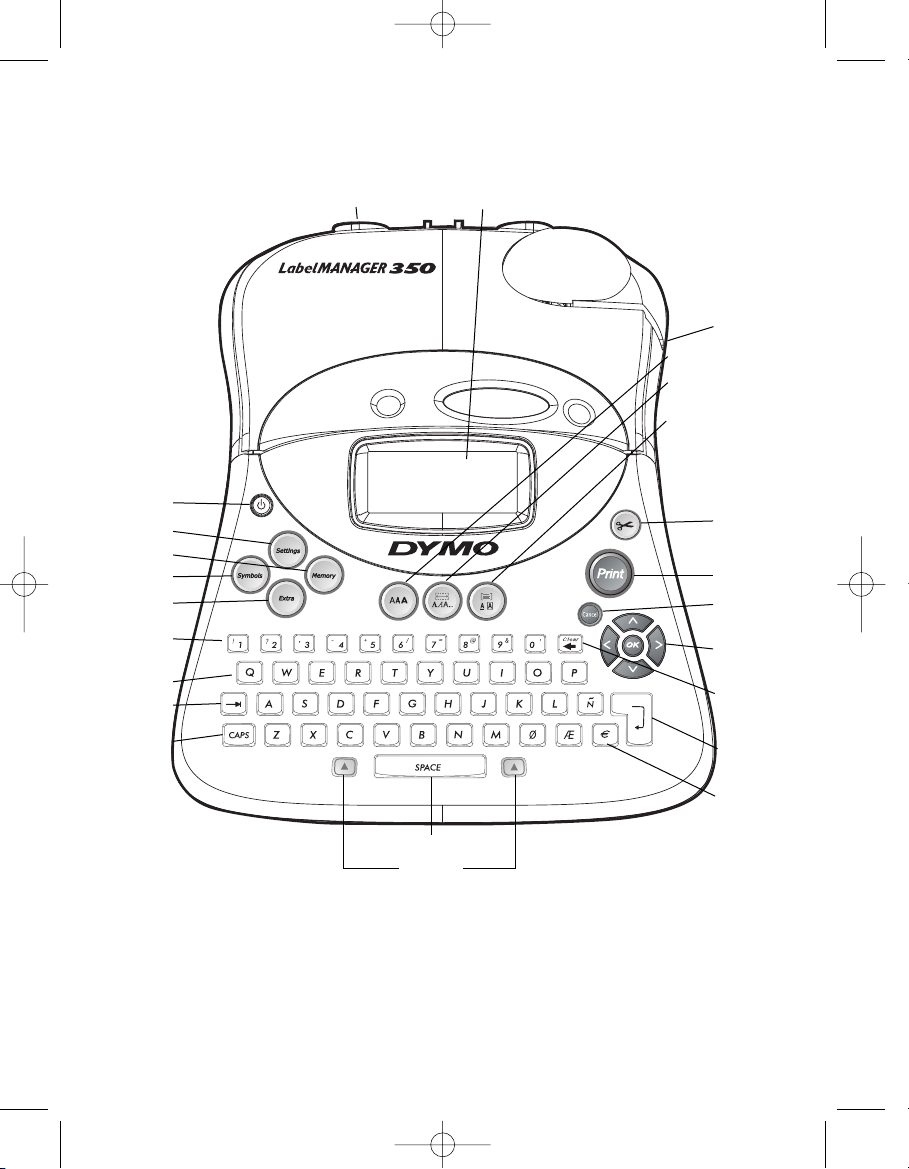
On/Off
Settings Key
Memory Key
Symbols Key
Extra Key
Numeric Keys
Alpha Keys
Tab Key
CAPS Key
Cutter Button
Print Key
Cancel Key
Arrow Keys
with OK Key
Backspace/
Clear Key
Return/
OK Key
Currency Key
Tape Exit
Font Key
Styles/
Fixed Length Key
Box-UL/Align Key
DC Power Connector LCD Display
Space Bar
Shift Keys
Figure 1 LabelMANAGER 350 Electronic Labelmaker
LM350 WEU.qxd 12-11-2003 09:02 Pagina 2
About Your LabelMANAGER 350
Electronic Labelmaker
The LabelMANAGER 350 electronic labelmaker
allows you to create a wide variety of high-
quality, self-adhesive labels. You can choose to
print your labels in many different sizes and
styles. The labelmaker uses D1 tape cassettes
in widths of 6 mm (1/4”), 9 mm (3/8”), 12 mm
(1/2”), or 19 mm (3/4”). These tape cassettes
are available in a wide range of colors. Visit
www.dymo.com for information on obtaining
tapes and accessories for your labelmaker.
Warranty Registration
Please complete the warranty registration card
and return it to the appropriate customer
service address within seven days. See the
Warranty booklet for details.
Getting Started
Follow the instructions in this section to get
started printing your first label.
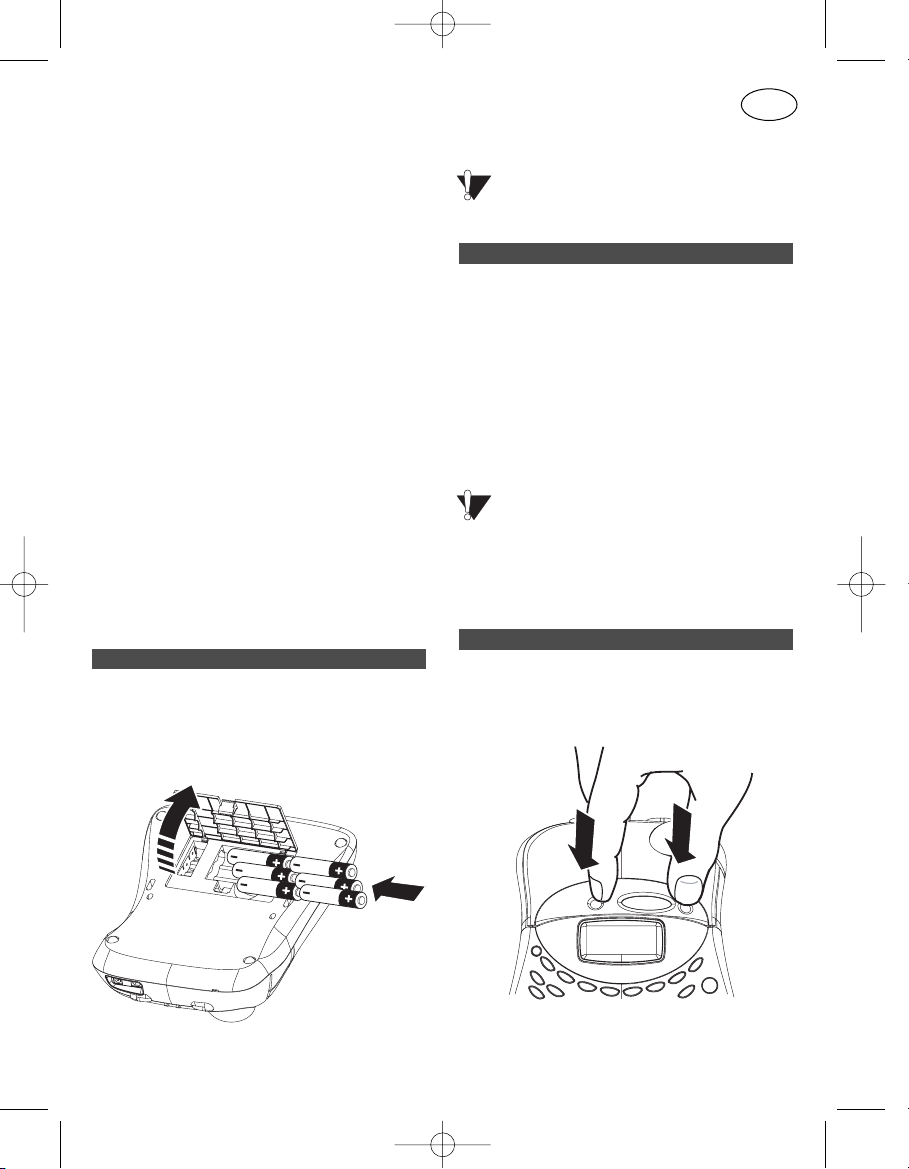
The labelmaker uses six AA batteries.
To insert the batteries
1. Remove the battery compartment cover.
See Figure 2.
Figure 2
2. Insert the batteries following
the polarity markings (+ and –).
3. Close the compartment door.
Remove the batteries if the labelmaker will
not be used for a long period of time.
Connecting the power adapter to the
labelmaker disconnects power from the
batteries.
To connect the power adapter
1. Plug the power adapter into the power
connector on the top, left side of the
labelmaker.
2. Plug the other end of the power adapter into
a power outlet.
Make sure you disconnect the labelmaker
from the power adapter before you unplug the
adapter from the main power source.
Otherwise, the most recent memory settings
will be lost.
To insert the tape cassette
1. Press and release the tape cassette cover to
open the tape compartment. See Figure 3
Figure 3
Inserting the Tape Cassette
Connecting the Power Adapter
Inserting the Batteries
3
GB
LM350 WEU.qxd 12-11-2003 09:02 Pagina 3
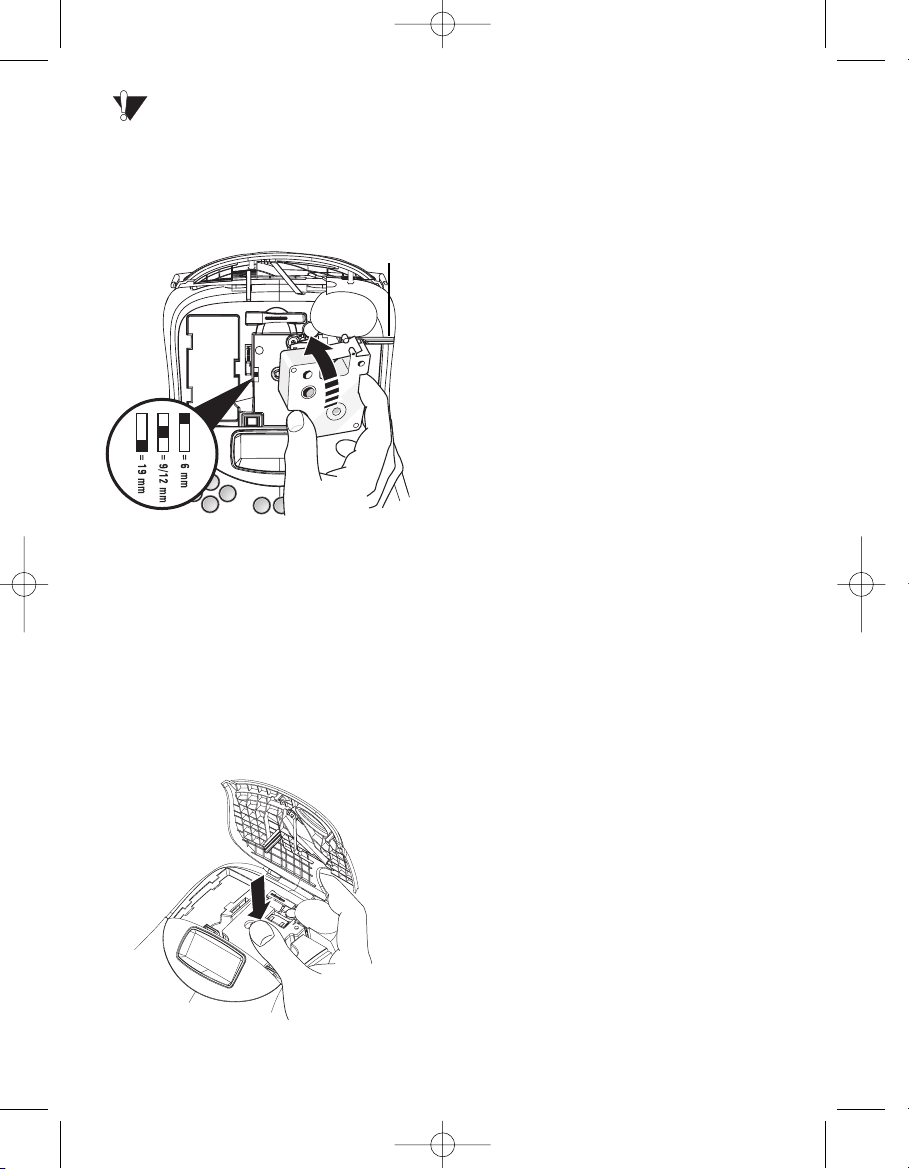
Remove the protective cardboard insert
from between the print head and roller. See
Figure 4.
2. Set the cassette switch for the size of the tape
cassette that you are inserting. See Figure 4.
Figure 4
A notch in the cassette will fit over the
switch when it is in the correct position.
3. Make sure the tape and ribbon are taut across
the mouth of the cassette and that the tape
passes between the guideposts. If necessary,
turn the spool clockwise to tighten the ribbon.
4. Insert the cassette with the tape and ribbon
positioned between the print head and pinch
roller. See Figure 4.
Figure 5
5. Press firmly until cassette clicks into place.
See Figure 5.
6. Close the tape cassette door.
Settings
Selecting the Language
You can select from a number of different
language options.
To select your language
1. Press the ON/OFF button.
2. Press Settings.
3. Use the arrow keys to select Set Language
and press OK.
4. Use the Up and Down arrow keys to scroll
to the language you want and press OK.
Selecting Units of Measure
You can choose to show measurements in
inches or millimeters.
To set the units of measure
1. Press Settings.
2. Use the Up and Down arrow keys to select
Set Units and press OK.
3. Use the Up and Down arrow keys to toggle
between inches and millimeters and press
OK.
You are now ready to print your first label !
Printing Your First Label
To print a label
1. Press the ON/OFF button.
2. Enter text to create a simple label.
3. Press the Print button to print the label.
Congratulations! You have printed your first
label. Continue reading to learn more about the
font, styles, and formatting options available.
CLICK !
4
Remove
Cardboard
Cassette
Switch
LM350 WEU.qxd 12-11-2003 09:02 Pagina 4
 Loading...