


MODELING GUITAR PROCESSOR
User’s Guide

|
DECLARATION OF CONFORMITY |
Manufacturer’s Name: |
DigiTech |
Manufacturer’s Address: |
8760 South Sandy Parkway |
|
Sandy, Utah 84070 USA |
declares that the product: |
|
Product name: |
RP80 |
Product option: |
all (requires Class II power adapter that conforms to the requirements of |
|
EN60065, EN60742, or equivalent.) |
conforms to the following Product Specifications: |
|
Safety: |
IEC 60065 (1998) |
EMC: |
EN 55013 (1990) |
|
EN 55020 (1991) |
Supplementary Information:
The product herewith complies with the requirements of the Low Voltage Directive 73/23/EEC and the EMC Directive 89/336/EEC as amended by Directive 93/68/EEC.
|
Vice-President of Engineering |
|
8760 S. Sandy Parkway |
|
Sandy, Utah 84070, USA |
|
Date: January 23, 2004 |
European Contact: |
Your local DigiTech Sales and Service Office or |
|
Harman Music Group |
|
8760 South Sandy Parkway |
|
Sandy, Utah 84070 USA |
|
Ph: (801) 566-8800 |
|
Fax: (801) 568-7583 |
Warranty
We at DigiTech are very proud of our products and back-up each one we sell with the following warranty:
1.The warranty registration card must be mailed within ten days after purchase date to validate this warranty.
2.Digitech warrants this product, when used solely within the U.S., to be free from defects in materials and workmanship under normal use and service.
3.Digitech liability under this warranty is limited to repairing or replacing defective materials that show evidence of defect, provided the product is returned to Digitech WITH RETURN AUTHORIZATION, where all parts and labor will be covered up to a period of one year. A Return Authorization number may be obtained from Digitech by telephone. The company shall not be liable for any consequential damage as a result of the product's use in any circuit or assembly.
4.Proof-of-purchase is considered to be the burden of the consumer.
5.Digitech reserves the right to make changes in design, or make additions to, or improvements upon this product without incurring any obligation to install the same on products previously manufactured.
6.The consumer forfeits the benefits of this warranty if the product's main assembly is opened and tampered with by anyone other than a certified Digitech technician or, if the product is used with AC voltages outside of the range suggested by the manufacturer.
7.The foregoing is in lieu of all other warranties, expressed or implied, and Digitech neither assumes nor authorizes any person to assume any obligation or liability in connection with the sale of this product. In no event shall Digitech or its dealers be liable for special or consequential damages or from any delay in the performance of this warranty due to causes beyond their control.
NOTE:The information contained in this manual is subject to change at any time without notification. Some information contained in this manual may also be inaccurate due to undocumented changes in the product or operating system since this version of the manual was completed.The information contained in this version of the owner's manual supersedes all previous versions.
Introduction
Getting Acquainted
Congratulations on your purchase of the RP80. You now have the flexibility and power to produce sonic creations never before thought possible. Although the RP80 is so user friendly you may not even need to read this manual, we recommend that you become better acquainted with us, and what we have to offer by going through this User’s Guide with your RP80 in front of you. It is your key to unlocking the potential within the RP80.
Included Items
Before you get started, please make sure that the following items have been included:
•RP80
•PS200R Power Supply
•This Owner’s Manual
•Warranty Card

The Front Panel
6
|
8 |
|
5 |
7 |
4 |
3 |
2 |
1
2
1. Footswitches - These 2 Footswitches are used to select presets, access the Tuner, or bypass the RP80. The Up Footswitch increments, and the Down Footswitch decrements through the presets. Pressing both Footswitches simultaneously bypasses the selected preset. Pressing and holding both Footswitches accesses the Tuner.
2.Value/Volume Buttons - The Value Buttons perform various value adjustment functions for the RP80. These buttons are used to control the RP80’s Master Level, adjust a selected effect, and also change the Pattern,Tempo, and Level of the Drum machine when it is turned on. When the Tuner is enabled, these buttons select the tuning reference.
3. Effect/Edit Buttons - Pressing either Edit buttons enters Edit mode and selects the individual effects to be edited. Press the left and right Edit buttons to move through the effects. Each effect LED will light to indicate which effect you are editing
4. Drums - The Drums button is used to turn on and off the RP80’s drum machine. When the Drums feature is active, the Drums LED lights and the selected drum pattern plays continuously.
5. Effect LEDs - The Effect LEDs provide information regarding the current preset. In Edit mode, the LEDs indicate the effect selected for editing. In Tuner mode, the LEDs indicate whether the note played is sharp, flat, or in tune.
3
6. Display - The Display provides information for different functions depending on the selected mode. In Play mode, the display shows the selected preset number. In Edit mode, the display shows the value of the parameter being adjusted. When the Tuner is enabled, the display shows the note played.
7.Store - The Store button saves your custom edits to the user presets.
8.Expression Pedal - The Expression Pedal adjusts RP80’s Volume or the assigned Effect
Parameter in real time. Almost every Parameter is available for Expression Pedal control.
4
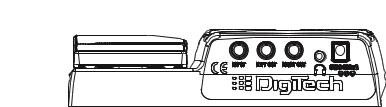
Rear Panel
1 |
2 |
3 |
4 |
|||
|
|
|
|
|
|
|
|
|
|
|
|
|
|
|
|
|
|
|
|
|
1.Input - Connect your instrument to this jack.
2.1/4” Outputs - Connect these outputs to your amplifier or direct to a mixing console that
accepts 1/4” unbalanced connections. Use the Left Output for all mono applications.
Note: When using the RP80 direct into a mixer or recording device, or when using it with headphones, you can enable the Global Cabinet Modeling feature to emulate speaker simulation on each of the RP80’s presets. (See Page 23 for more on Global Cabinet Modeling.)
3.Headphone Output - Connect a pair of stereo headphones to this 1/8” jack.
4.Power Input - Connect only the DigiTech PS200R power supply to this jack.
5
Making Connections
There are several different connection options available when using the RP80. The following diagrams show the connections for some of these options.
Before connecting the RP80, make sure that the power to your amplifier is turned off, and the power to the RP80 is disconnected.There is not a power switch on the RP80. To turn the RP80 off, disconnect your instrument from the Input Jack (for battery power) or disconnect the PS200R power supply from the Power Jack or from the AC outlet.
Mono Operation
Connect your guitar to the Input of the RP80. Connect a single mono instrument cable from the Left Output of the RP80 to the instrument input on your amplifier.
6
 Loading...