


 Loading...
CD/MP3 PLAYER
DN-C615
|
OPERATING INSTRUCTIONS |
|
|
|
|
INSTRUCCIONES DE OPERACION |
|||||||||||||||||||||||||||
|
BEDIENUNGSANLEITUNG |
|
|
|
|
GEBRUIKSAANWIJZING |
|||||||||||||||||||||||||||
|
MODE D’EMPLOI |
|
|
|
|
BRUKSANVISNING |
|||||||||||||||||||||||||||
|
ISTRUZIONI PER L’USO |
|
|
|
|
|
|
|
|
|
|
||||||||||||||||||||||
|
|
|
|
|
|
|
|
|
|
|
|
|
|
|
|
|
|
|
|
|
|
|
|
|
|
|
|
|
|
|
|
|
|
|
|
|
|
|
|
|
|
|
|
|
|
|
|
|
|
|
|
|
|
|
|
|
|
|
|
|
|
|
|
|
|
|
|
|
|
|
|
|
|
|
|
|
|
|
|
|
|
|
|
|
|
|
|
|
|
|
|
|
|
|
|
|
|
|
|
|
|
|
|
|
|
|
|
|
|
|
|
|
|
|
|
|
|
|
|
|
|
|
|
|
|
|
|
|
|
|
|
|
|
|
|
|
|
|
|
|
|
|
|
|
|
|
|
|
|
|
|
|
|
|
|
|
|
|
|
|
|
|
|
|
|
|
|
|
|
|
|
|
|
|
|
|
|
|
|
|
|
|
|
|
|
|
|
|
|
|
|
|
|
|
|
|
|
|
|
|
|
|
|
|
|
|
|
|
|
|
|
|
|
|
|
|
|
|
|
|
|
|
|
|
|
|
|
|
|
|
|
|
|
|
|
|
|
|
|
|
|
|
|
|
|
|
|
|
|
|
|
|
|
|
|
|
|
|
|
|
|
|
|
|
|
|
|
|
|
|
|
|
|
|
|
|
|
|
|
|
|
|
|
|
|
|
|
|
|
|
|
|
|
|
|
|
|
|
|
|
|
|
|
|
|
|
|
|
|
|
|
|
|
|
|
|
|
|
|
|
|
|
|
|
|
|
|
|
|
|
|
|
|
|
|
|
|
|
|
|
|
|
|
|
|
|
|
|
|
|
|
|
|
|
|
|
|
|
|
|
|
|
|
|
|
|
|
|
|
|
|
|
|
|
|
|
|
|
|
|
|
|
|
|
|
|
|
|
|
|
|
|
|
|
|
|
|
|
|
|
|
|
|
|
|
|
|
|
|
|
|
|
|
|
|
|
|
|
|
|
|
|
|
|
|
|
|
|
|
|
|
|
|
|
|
|
|
|
|
|
|
|
|
|
|
|
|
|
|
|
|
|
|
|
|
|
|
|
|
|
|
|
|
|
|
|
|
|
|
|
|
|
|
|
|
|
|
|
|
|
|
|
|
|
|
|
|
|
|
|
|
|
|
|
|
|
|
|
|
|
|
|
|
|
|
|
|
|
|
|
|
|
|
|
|
|
|
|
|
|
|
|
|
|
|
|
|
|
|
|
|
|
|
|
|
|
|
|
|
|
|
|
|
|
|
|
|
|
|
|
|
|
|
|
|
|
|
|
|
|
|
|
|
|
|
|
|
|
|
|
|
|
|
|
|
|
|
|
|
|
|
|
|
|
|
|
|
|
|
|
|
|
|
|
|
|
|
|
|
|
|
|
|
|
|
|
|
|
|
|
|
|
|
|
|
|
|
|
|
|
|
|
|
|
|
|
|
|
|
|
|
|
|
|
|
|
|
|
|
|
|
|
|
|
|
|
|
|
|
|
|
|
|
|
|
|
|
|
|
|
|
|
|
|
|
|
|
|
|
|
|
|
|
|
|
|
|
|
|
|
|
|
|
|
|
|
|
|
|
|
|
|
|
|
|
|
|
|
|
|
|
|
|
|
|
|
|
|
|
|
|
|
|
|
|
|
|
|
|
|
|
|
|
|
|
|
|
|
|
|
|
|
|
|
|
|
|
|
|
|
|
|
|
|
|
|
|
|
|
|
|
|
|
|
|
|
|
|
|
|
|
|
|
|
|
|
|
|
|
|
|
|
|
|
|
|
|
|
|
|
|
|
|
|
|
|
|
|
|
|
|
|
|
|
|
|
|
|
|
|
|
|
|
|
|
|
|
|
|
|
|
|
|
|
|
|
|
|
|
|
|
|
|
|
|
|
|
|
|
|
|
|
|
|
|
|
|
|
|
|
|
|
|
|
|
|
|
|
|
|
|
|
|
|
|
|
|
|
|
|
|
|
|
|
|
|
|
|
|
|
|
|
|
|
|
|
|
|
|
|
|
|
|
|
|
|
|
|
|
|
|
|
|
|
|
|
|
|
|
|
|
|
|
|
|
|
|
|
|
|
|
|
|
|
|
|
|
|
|
|
|
|
|
|
|
|
|
|
|
|
|
|
|
|
|
|
|
|
|
|
|
|
|
|
|
|
|
|
|
|
|
|
|
|
|
|
|
|
|
|
|
|
|
|
|
|
|
|
|
|
|
|
|
|
|
|
|
|
|
|
|
|
|
|
|
|
|
|
|
|
|
|
|
|
|
|
|
|
|
|
|
|
|
|
|
|
|
|
|
|
|
|
|
|
|
|
|
|
|
|
|
|
|
|
|
|
|
|
|
|
|
|
|
|
|
|
|
|
|
|
|
|
|
|
|
|
|
|
|
|
|
|
|
|
|
|
|
|
|
|
|
|
|
|
|
|
|
|
|
|
|
|
|
|
|
|
|
|
|
|
|
|
|
|
|
|
|
|
|
|
|
|
|
|
|
|
|
|
|
|
|
|
|
|
|
|
|
|
|
|
|
|
|
|
|
|
|
|
|
|
|
|
|
|
|
|
|
|
|
|
|
|
|
|
|
|
|
|
|
|
|
|
|
|
|
|
|
|
|
|
|
|
|
|
|
|
|
|
|
|
|
|
|
|
|
|
|
|
|
|
|
|
|
|
|
|
|
|
|
|
|
|
|
|
|
|
|
|
|
|
|
|
|
|
|
|
|
|
|
|
|
|
|
|
|
|
|
|
|
|
|
|
|
|
|
|
|
|
|
|
|
|
|
|
|
|
|
|
|
|
|
|
|
|
|
|
|
|
|
|
|
|
|
|
|
|
|
|
|
|
|
|
|
|
|
|
|
|
|
|
|
|
|
|
|
|
|
|
|
|
|
|
|
|
|
|
|
|
|
|
|
|
|
|
|
|
|
|
|
|
|
|
|
|
|
|
|
|
|
|
|
|
|
|
|
|
|
|
|
|
|
|
|
|
|
|
|
|
|
|
|
|
|
|
|
|
|
|
|
|
|
|
|
|
|
|
|
|
|
|
|
|
|
|
|
|
|
|
|
|
|
|
|
|
|
|
|
|
|
|
|
|
|
|
|
|
|
|
|
|
|
|
|
|
|
|
|
|
|
|
|
|
|
|
|
|
|
|
|
|
|
|
|
|
|
|
|
|
|
|
|
|
|
|
|
|
|
|
|
|
|
|
|
|
|
|
|
|
|
|
|
|
|
|
|
|
|
FOR ENGLISH READERS |
PAGE |
06 |
~ PAGE |
15 |
FÜR DEUTSCHE LESER |
SEITE |
16 |
~ SEITE |
25 |
POUR LES LECTEURS FRANCAIS |
PAGE |
26 |
~ PAGE |
35 |
PER IL LETTORE ITALIANO |
PAGINA 36 |
~ PAGINA 45 |
||
PARA LECTORES DE ESPAÑOL |
PAGINA 46 |
~ PAGINA 55 |
||
VOOR NEDERLANDSTALIGE LEZERS PAGINA 56 |
~ PAGINA 65 |
|||
FOR SVENSKA LÄSARE |
SIDA |
66 |
~ SIDA |
75 |
IMPORTANT TO SAFETY
WARNING:
TO PREVENT FIRE OR SHOCK HAZARD, DO NOT EXPOSE THIS APPLIANCE TO RAIN OR MOISTURE.
CAUTION
1.Handle the power supply cord carefully
Do not damage or deform the power supply cord. If it is damaged or deformed, it may cause electric shock or malfunction when used. When removing from wall outlet, be sure to remove by holding the plug attachment and not by pulling the cord.
2.Do not open the rear cover
In order to prevent electric shock, do not open the top cover.
If problems occur, contact your DENON DEALER.
3.Do not place anything inside
Do not place metal objects or spill liquid inside the system.
Electric shock or malfunction may result.
Please, record and retain the Model name and serial number of your set shown on the rating label.
Model No. DN-C615 Serial No.
CAUTION
RISK OF ELECTRIC SHOCK
DO NOT OPEN
CAUTION:
TO REDUCE THE RISK OF ELECTRIC SHOCK, DO NOT REMOVE COVER (OR BACK). NO USER-SERVICEABLE PARTS INSIDE. REFER SERVICING TO QUALIFIED SERVICE PERSONNEL.
The lightning flash with arrowhead symbol, within an equilateral triangle, is intended to alert the user to the presence of uninsulated “dangerous voltage” within the product’s enclosure that may be of sufficient magnitude to constitute a risk of electric shock to persons.
The exclamation point within an equilateral triangle is intended to alert the user to the presence of important operating and maintenance (servicing) instructions in the literature accompanying the appliance.
NOTE:
This CD/MP3 PLAYER uses the semiconductor laser. To allow you to enjoy music at a stable operation, it is recommended to use this in a room of 5°C (41°F) ~ 35°C (95°F).
LABELS (for U.S.A. model only)
CERTIFICATION
THIS PRODUCT COMPLIES WITH DHHS RULES 21 CFR SUBCHAPTER J APPLICABLE AT DATE OF MANUFACTURE.
CAUTION:
USE OF CONTROLS OR ADJUSTMENTS OR REFOR-MANCE OF PROCEDURES OTHER THAN THOSE SPECIFIED HEREIN MAY RESULT IN HAZARDOUS RADIATION EXPOSURE.
THE COMPACT DISC PLAYER SHOULD NOT BE ADJUSTED OR REPAIRED BY ANYONE EXCEPT PROPERLY QUALIFIED SERVICE PERSONNEL.
This device complies with Part 15 of the FCC Rules. Operation is subject to the following two conditions: (1) This device may not cause harmful interference, and (2) this device must accept any interference received, including interference that may cause undesired operation.
This Class B digital apparatus meets all requirements of the Canadian Interference-Causing Equipment Regulations.
Cet appareil numérique de la classe B respecte toutes les exigences du Règlement sur le matériel brouilleur du Canada.
• FOR CANADA MODEL ONLY
CAUTION
TO PREVENT ELECTRIC SHOCK, MATCH WIDE BLADE OF PLUG TO WIDE SLOT, FULLY INSERT.
•POUR LES MODELE CANADIENS UNIQUEMENT
ATTENTION
POUR ÉVITER LES CHOCS ÉLECTRIQUES, INTERODUIRE LA LAME LA PLUS LARGE DE LA FICHE DANS LA BORNE CORRESPONDANTE DE LA PRISE ET POUSSER JUSQU’ AU FOND.
SAFETY INSTRUCTIONS
1.Read Instructions – All the safety and operating instructions should be read before the product is operated.
2.Retain Instructions – The safety and operating instructions should be retained for future reference.
3.Heed Warnings – All warnings on the product and in the operating instructions should be adhered to.
4.Follow Instructions – All operating and use instructions should be followed.
5.Cleaning – Unplug this product from the wall outlet before cleaning. Do not use liquid cleaners or aerosol cleaners.
6.Attachments – Do not use attachments not recommended by the product manufacturer as they may cause hazards.
7.Water and Moisture – Do not use this product near water – for example, near a bath tub, wash bowl, kitchen sink, or laundry tub; in a wet basement; or near a swimming pool; and the like.
8.Accessories – Do not place this product on an unstable cart, stand, tripod, bracket, or table. The product may fall, causing serious injury to a child or adult, and serious damage to the product. Use only with a cart, stand, tripod, bracket, or table recommended by the manufacturer, or sold with the product. Any mounting of the product should follow the manufacturer’s instructions, and should use a mounting accessory
recommended by the manufacturer.
9. A product and cart combination should be moved with care. Quick stops, excessive force, and uneven surfaces may cause the product and cart combination to overturn.
10.Ventilation – Slots and openings in the cabinet are provided for ventilation and to ensure reliable operation of the product and to protect it from overheating, and these openings must not be blocked or covered. The openings should never be blocked by placing the product on a bed, sofa, rug, or other similar surface. This product should not be placed in a built-in installation such as a bookcase or rack unless proper ventilation is provided or the manufacturer’s instructions have been adhered to.
11.Power Sources – This product should be operated only from the type of power source indicated on the marking label. If you are not sure of the type of power supply to your home, consult your product dealer or local power company. For products intended to operate from battery power, or other sources, refer to the operating instructions.
12.Grounding or Polarization – This product may be equipped with a polarized alternating-current line plug (a plug having one blade wider than the other). This plug will fit into the power outlet only one way. This is a safety feature. If you are unable to insert the plug fully into the outlet, try reversing the plug. If the plug should still fail to fit, contact your electrician to replace your obsolete outlet. Do not defeat the safety purpose of the polarized plug.
FIGURE A
EXAMPLE OF ANTENNA GROUNDING
AS PER NATIONAL
ELECTRICAL CODE ANTENNA
LEAD IN
WIRE
GROUND
CLAMP
ANTENNA DISCHARGE UNIT
(NEC SECTION 810-20)
ELECTRIC
SERVICE
EQUIPMENT
GROUNDING CONDUCTORS (NEC SECTION 810-21)
GROUND CLAMPS
POWER SERVICE GROUNDING ELECTRODE SYSTEM
(NEC ART 250, PART H)
NEC - NATIONAL ELECTRICAL CODE
13.Power-Cord Protection – Power-supply cords should be routed so that they are not likely to be walked on or pinched by items placed upon or against them, paying particular attention to cords at plugs, convenience receptacles, and the point where they exit from the product.
15.Outdoor Antenna Grounding – If an outside antenna or cable system is connected to the product, be sure the antenna or cable system is grounded so as to provide some protection against voltage surges and built-up static charges. Article 810 of the National Electrical Code, ANSI/NFPA 70, provides information with regard to proper grounding of the mast and supporting structure, grounding of the lead-in wire to an antenna discharge unit, size of grounding conductors, location of antenna-discharge unit, connection to grounding electrodes, and requirements for the grounding electrode. See Figure A.
16.Lightning – For added protection for this product during a lightning storm, or when it is left unattended and unused for long periods of time, unplug it from the wall outlet and disconnect the antenna or cable system. This will prevent damage to the product due to lightning and power-line surges.
17.Power Lines – An outside antenna system should not be located in the vicinity of overhead power lines or other electric light or power circuits, or where it can fall into such power lines or circuits. When installing an outside antenna system, extreme care should be taken to keep from touching such power lines or circuits as contact with them might be fatal.
18.Overloading – Do not overload wall outlets, extension cords, or integral convenience receptacles as this can result in a risk of fire or electric shock.
19.Object and Liquid Entry – Never push objects of any kind into this product through openings as they may touch dangerous voltage points or short-out parts that could result in a fire or electric shock. Never spill liquid of any kind on the product.
20.Servicing – Do not attempt to service this product yourself as opening or removing covers may expose you to dangerous voltage or other hazards. Refer all servicing to qualified service personnel.
21.Damage Requiring Service – Unplug this product from the wall outlet and refer servicing to qualified service personnel under the following conditions:
a)When the power-supply cord or plug is damaged,
b)If liquid has been spilled, or objects have fallen into the product,
c)If the product has been exposed to rain or water,
d)If the product does not operate normally by following the operating instructions. Adjust only those controls that are covered by the operating instructions as an improper adjustment of other controls may result in damage and will often require extensive work by a qualified technician to restore the product to its normal operation,
e)If the product has been dropped or damaged in any way, and
f)When the product exhibits a distinct change in performance – this indicates a need for service.
22.Replacement Parts – When replacement parts are required, be sure the service technician has used replacement parts specified by the manufacturer or have the same characteristics as the original part. Unauthorized substitutions may result in fire, electric shock, or other hazards.
23.Safety Check – Upon completion of any service or repairs to this product, ask the service technician to perform safety checks to determine that the product is in proper operating condition.
24.Wall or Ceiling Mounting – The product should be mounted to a wall or ceiling only as recommended by the manufacturer.
25.Heat – The product should be situated away from heat sources such as radiators, heat registers, stoves, or other products (including amplifiers) that produce heat.
2

ENGLISH DEUTSCH |
FRANCAIS |
ITALIANO ESPAÑOL NEDERLANDS |
SVENSKA |
|
|
|||
|
|
|
|
|
|
482 |
|
|
FRONT PANEL |
|
|
|
|
|
465 |
|
|
FRONTPLATTE |
|
|
q |
w |
e r |
t |
!4 o y |
!0u i |
PANNEAU AVANT |
|
|
||||||
PANNELLO ANTERIORE |
|
|
|
|
|
|
|
|
PANEL FRONTAL |
|
|
|
|
|
|
|
|
VOORPANEEL |
|
|
|
|
|
|
|
|
FRONT PANELEN |
|
|
|
|
|
|
|
|
|
88 |
76.2 |
|
|
|
|
|
|
|
|
|
|
|
|
!3!7!8!9@0@1@2!1!2 !5@3 !6 |
||
REAR PANEL
RÜCKWAND PANNEAU ARRIERE
IL PANNELLO POSTERIORE PANEL TRASERO ACHTERPANEEL BAKSIDAN
DISPLAY
DISPLAY
AFFICHAGE
DISPLAY
VISUALIZADOR
DISPLAY
DISPLAYEN
q |
w e r t |
i |
u y |
w t |
o |
q |
w |
e |
r |
3
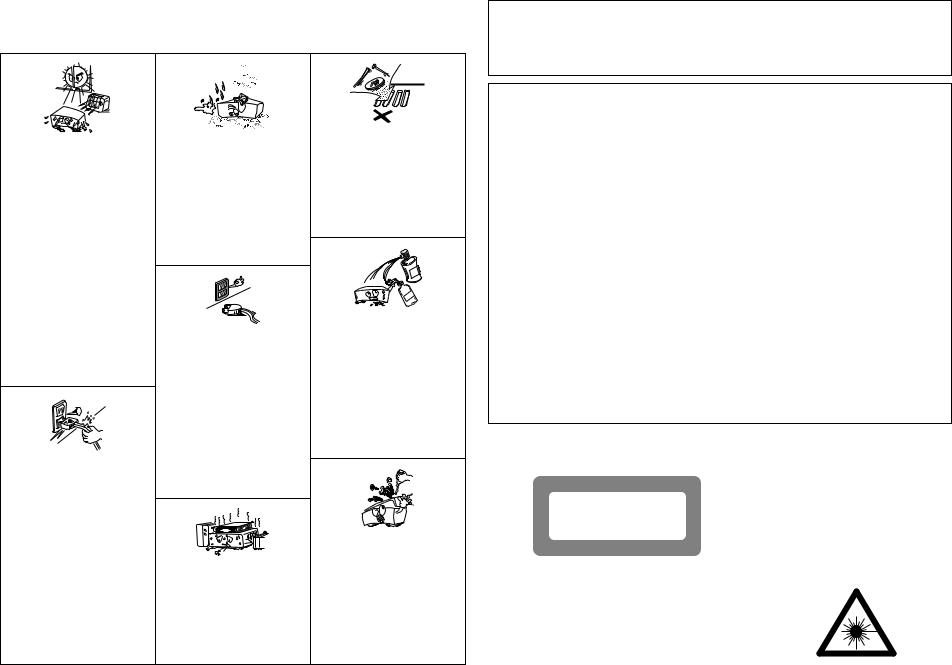
NOTE ON USE / HINWEISE ZUM GEBRAUCH /
OBSERVATIONS RELATIVES A L’UTILISATION / NOTE SULL’USO NOTAS SOBRE EL USO / ALVORENS TE GEBRUIKEN / OBSERVERA
•Avoid high temperatures.
Allow for sufficient heat dispersion when installed on a rack.
•Vermeiden Sie hohe Temperaturen. Beachten Sie, daß eine ausreichend Luftzirkulation gewährleistet wird, wenn das Gerät auf ein Regal gestellt wird.
•Eviter des températures élevées
Tenir compte d’une dispersion de chaleur suffisante lors de l’installation sur une étagère.
•Evitate di esporre l’unità a temperature alte. Assicuratevi che ci sia un’adeguata dispersione del calore quando installate l’unità in un mobile per componenti audio.
•Evite altas temperaturas
Permite la suficiente dispersión del calor cuando está instalado en la consola.
•Vermijd hoge temperaturen.
Zorg voor een degelijk hitteafvoer indien het apparaat op een rek wordt geplaatst.
•Undvik höga temperaturer.
Se till att det finns möjlighet till god värmeavledning vid montering i ett rack.
•Handle the power cord carefully.
Hold the plug when unplugging the cord.
•Gehen Sie vorsichtig mit dem Netzkabel um. Halten Sie das Kabel am Stecker, wenn Sie den Stecker herausziehen.
•Manipuler le cordon d’alimentation avec précaution.
Tenir la prise lors du débranchement du cordon.
•Manneggiate il filo di alimentazione con cura. Agite per la spina quando scollegate il cavo dalla presa.
•Maneje el cordón de energía con cuidado. Sostenga el enchufe cuando desconecte el cordón de energía.
•Hanteer het netsnoer voorzichtig.
Houd het snoer bij de stekker vast wanneer deze moet worden aanof losgekoppeld.
•Hantera nätkabeln varsamt.
Håll i kabeln när den kopplas från el-uttaget.
•Keep the set free from moisture, water, and dust.
•Halten Sie das Gerät von Feuchtigkeit, Wasser und Staub fern.
•Protéger l’appareil contre l’humidité, l’eau et lapoussière.
•Tenete l’unità lontana dall’umidità, dall’acqua e dalla polvere.
•Mantenga el equipo libre de humedad, agua y polvo.
•Laat geen vochtigheid, water of stof in het apparaat binnendringen.
•Utsätt inte apparaten för fukt, vatten och damm.
•Unplug the power cord when not using the set for long periods of time.
•Wenn das Gerät eine längere Zeit nicht verwendet werden soll, trennen Sie das Netzkabel vom Netzstecker.
•Débrancher le cordon d’alimentation lorsque l’appareil n’est pas utilisé pendant de longues périodes.
•Disinnestate il filo di alimentazione quando avete l’intenzione di non usare il filo di alimentazione per un lungo periodo di tempo.
•Desconecte el cordón de energía cuando no utilice el equipo por mucho tiempo.
•Neem altijd het netsnoer uit het stopkontakt wanneer het apparaat gedurende een lange periode niet wordt gebruikt.
•Koppla ur nätkabeln om apparaten inte kommer att användas i lång tid.
*(For sets with ventilation holes)
•Do not obstruct the ventilation holes.
•Die Belüftungsöffnungen dürfen nicht verdeckt werden.
•Ne pas obstruer les trous d’aération.
•Non coprite i fori di ventilazione.
•No obstruya los orificios de ventilación.
•De ventilatieopeningen mogen niet worden beblokkeerd.
•Täpp inte till ventilationsöppningarna.
•Do not let foreign objects in the set.
•Keine fremden Gegenstände in das Gerät kommen lassen.
•Ne pas laisser des objets étrangers dans l’appareil.
•E’ importante che nessun oggetto è inserito all’interno dell’unità.
•No deje objetos extraños dentro del equipo.
•Laat geen vreemde voorwerpen in dit apparaat vallen.
•Se till att främmande föremål inte tränger in i apparaten.
•Do not let insecticides, benzene, and thinner come in contact with the set.
•Lassen Sie das Gerät nicht mit Insektiziden, Benzin oder Verdünnungsmitteln in Berührung kommen.
•Ne pas mettre en contact des insecticides, du benzène et un diluant avec l’appareil.
•Assicuratevvi che l’unità non venga in contatto con insetticidi, benzolo o solventi.
•No permita el contacto de insecticidas, gasolina y diluyentes con el equipo.
•Laat geen insektenverdelgende middelen, benzine of verfverdunner met dit apparaat in kontakt komen.
•Se till att inte insektsmedel på spraybruk, bensen och thinner kommer i kontakt med apparatens hölje.
•Never disassemble or modify the set in any way.
•Versuchen Sie niemals das Gerät auseinander zu nehmen oder auf jegliche Art zu verändern.
•Ne jamais démonter ou modifier l’appareil d’une manière ou d’une autre.
•Non smontate mai, nè modificate l’unità in nessun modo.
•Nunca desarme o modifique el equipo de ninguna manera.
•Nooit dit apparaat demonteren of op andere wijze modifiëren.
•Ta inte isär apparaten och försök inte bygga om den.
CAUTION
•The ventilation should not be impeded by covering the ventilation openings with items, such as newspapers, table-cloths, curtains, etc.
•No naked flame sources, such as lighted candles, should be placed on the apparatus.
•Please be care the environmental aspects of battery disposal.
•The apparatus shall not be exposed to dripping or splashing for use.
•No objects filled with liquids, such as vases, shall be placed on the apparatus.
•DECLARATION OF CONFORMITY
We declare under our sole responsibility that this product, to which this declaration relates, is in conformity with the following standards:
EN60065, EN55013, EN55020, EN61000-3-2 and EN61000-3-3.
Following the provisions of 73/23/EEC, 89/336/EEC and 93/68/EEC Directive.
•ÜBEREINSTIMMUNGSERKLÄRUNG
Wir erklären unter unserer Verantwortung, daß dieses Produkt, auf das sich diese Erklärung bezieht, den folgenden Standards entspricht:
EN60065, EN55013, EN55020, EN61000-3-2 und EN61000-3-3.
Entspricht den Verordnungen der Direktive 73/23/EEC, 89/336/EEC und 93/68/EEC.
•DECLARATION DE CONFORMITE
Nous déclarons sous notre seule responsabilité que l’appareil, auquel se réfère cette déclaration, est conforme aux standards suivants:
EN60065, EN55013, EN55020, EN61000-3-2 et EN61000-3-3.
D’après les dispositions de la Directive 73/23/EEC, 89/336/EEC et 93/68/EEC.
•DICHIARAZIONE DI CONFORMITÀ
Dichiariamo con piena responsabilità che questo prodotto, al quale la nostra dichiarazione si riferisce, è conforme alle seguenti normative:
EN60065, EN55013, EN55020, EN61000-3-2 e EN61000- 3-3.
In conformità con le condizioni delle direttive 73/23/EEC, 89/336/EEC e 93/68/EEC.
QUESTO PRODOTTO E’ CONFORME AL D.M. 28/08/95 N. 548
•DECLARACIÓN DE CONFORMIDAD
Declaramos bajo nuestra exclusiva responsabilidad que este producto al que hace referencia esta declaración, está conforme con los siguientes estándares:
EN60065, EN55013, EN55020, EN61000-3-2 y EN61000- 3-3.
Siguiendo las provisiones de las Directivas 73/23/EEC, 89/336/EEC y 93/68/EEC.
•EENVORMIGHEIDSVERKLARING
Wij verklaren uitsluitend op onze verantwoordelijkheid dat dit produkt, waarop deze verklaring betrekking heeft, in overeenstemming is met de volgende normen:
EN60065, EN55013, EN55020, EN61000-3-2 en EN61000-3-3.
Volgens de bepalingen van de Richtlijnen 73/23/EEC, 89/336/EEC en 93/68/EEC.
•ÖVERENSSTÄMMELSESINTYG
Härmed intygas helt på eget ansvar att denna produkt, vilken detta intyg avser, uppfyller följande standarder: EN60065, EN55013, EN55020, EN61000-3-2 och EN61000-3-3.
Enligt stadgarna i direktiv 73/23/EEC, 89/336/EEC och 93/68/EEC.
CLASS 1 LASER PRODUCT
LUOKAN 1 LASERLAITE
KLASS 1 LASERAPPARAT
|
,,CLASS 1 |
|
LASER PRODUCT,, |
ADVARSEL: |
USYNLIG LASERSTRÅLING VED ÅBNING, NÅR |
|
SIKKERHEDSAFBRYDERE ER UDE AF FUNKTION. |
|
UNDGÅ UDSAETTELSE FOR STRÅLING. |
VAROITUS! |
LAITTEEN KÄYTTÄMINEN MUULLA KUIN TÄSSÄ |
|
KÄYTTÖOHJEESSA MAINITULLA TAVALLA SAATTAA |
|
ALTISTAA KÄYTTÄJÄN TURVALLISUUSLUOKAN 1 |
|
YLITTÄVÄLLE NÄKYMÄMTTÖMÄLLE LASERSÄTEILYLLE. |
VARNING– |
OM APPARATEN ANVÄNDS PÅ ANNAT SÄTT ÄN I DENNA |
|
BRUKSANVISNING SPECIFICERATS, KAN ANVÄNDAREN |
|
UTSÄTTAS FÖR OSYNLIG LASERSTRÅLNING SOM |
|
ÖVERSKRIDER GRÄNSEN FÖR LASERKLASS 1. |
4
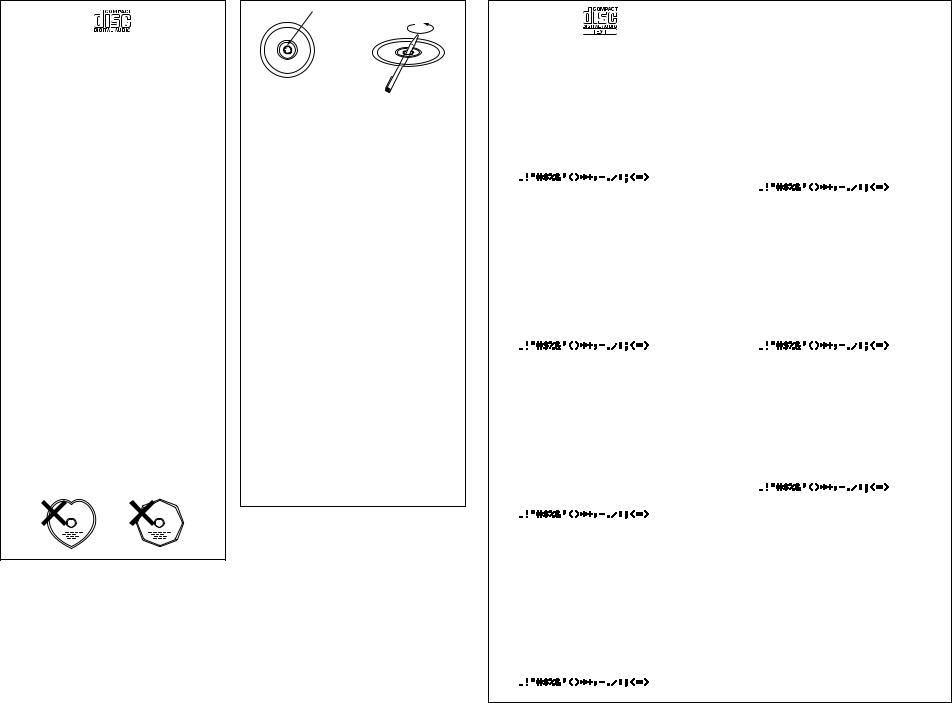
•Use compact discs that include the  mark.
mark.
CD’s with special shapes (heart-shaped CD’s, octagonal CD’s etc.) cannot be played on this set.
Attempting to do so may damage the set. Do not use such CD’s.
•Benutzen Sie Compact Discs, die das  Zeichen tragen.
Speziell geformte CD’s (herzförmige CDs, achteckige CDs, usw.) können auf dieser Anlage nicht abgespielt werden.
Der Versuch derartige CDs abzuspielen kann die Anlage beschädigen. Verzichten Sie auf die Benutzung solcher CDs.
•Utiliser des disques compacts portant le logo  . Des CD avec des formes spéciales (CD en forme de coeur, des CD octogonaux, etc.) ne peuvent pas être lus sur cet appareil.
Le fait de l’essayer, risque d’endommager le lecteur. Ne pas utiliser de tels CD.
•Usare compact disc che includono il marchio  .
.
I CD con forme particolari (CD a forma di cuore, CD ottogonali ecc.) non possono essere riprodotti su questo apparecchio.
L’apparecchio si potrebbe danneggiare se si cerca di farlo. Non utilizzare questi CD.
•Use discos compactos con la marca  .
.
En este equipo no es posible reproducir CDs con formas especiales (CDs con forma de corazón, CDs octagonales, etc.).
Si intenta hacerlo, el equipo podrá resultar dañado. No use este tipo de CDs.
•Gebruik compact discs voorzien van het logo  . CD’s met speciale vormen (bijv. CD’s in de vorm van een hart, achthoekige CD’s, enz.) kunnen met dit toestel niet worden afgespeeld.
Wanneer u dit toch probeert, zal u het toestel beschadigen. Speel dergelijke CD’s dus niet af.
•Använd CD-skivor med  -märket.
Specialformade CD-skivor (hjärtformade, åttkantiga, m m) går inte att spela på den här apparaten.
Utrustningen kan skadas om du försöker göra detta. Använd inte CD-skivor av denna typ.
|
Residue |
|
Rückstand |
|
Résidu |
|
Residuo |
|
Residuos |
Disc |
Oneffenheid |
Plastrester |
•The disc may not play normally if there is residue along the edges of the center hole.
•When using new discs in particular, use a pen, etc., to remove the residue.
•Die Disk kann nicht normal abgespielt werden, wenn sich ein Rückstand entlang der Mittellochenden befindet.
•Insbesondere, wenn Sie neue Disks benutzen, dann entfernen Sie mit einem Stift, etc. den Rückstand.
•Le disque peut ne pas être lu normalements s’il y a un résidu le long des bord du trou central.
•Lors de l’utilisation de nouveaux disques en particulier, utiliser un stylo à bille, etc., pour enlever le résidu.
•Il disco può non essere riprodotot in modo normale se ci sono dei residui lungo I bordi del foro centrale.
•Usate una penna, ecc., per rimuovere I residui, specialmente quando usate dischi nuovi.
•El disco no puede ser reproducido normalmente debido a la terminación deficiente de los bordes del agujero central.
•Para quitar estos residuos de material, especialmente cuando vaya a re-producir discos nuevos, utilice un bolígrafo, o algo similar.
•Het is mogelijk dat de disc niet normaal wordt weergegeven als de randen van het middengat van de schijf oneffenheden vertonen.
•Verwijder vooral bij gebruik van nieuwe discs de oneffenheden met een pen of iets dergelijks.
•Det kan uppstå fel vid CD-avspelningen om det finns plastrester kvar i mitthålet.
•Tänk på att bort dessa med en penna, e d, särskilt om CD-skivan är ny.
•This unit can display text information on the display when playing CD text discs which contain text information in English category.
The CD text disc includes the mark shown at the right.
NOTE:
•This unit can provide a text display of the following types of characters. Other types of characters will result in “ ” being displayed.
•Alphabet
ABCDEFGHIJKLMNOPQRSTUVWXYZ abcdefghijklmnopqrstuvwxyz
•Numbers
0123456789
•Symbols


 SPACE
SPACE
•Bei der Wiedergabe von CD-Textdiscs, die Funktionstasten in englischer Kategorie enthalten, kann dieses Gerät auf dem Display Funktionstasten anzeigen. Die CD-Textdiscs sind mit dem rechts dargestellten Logo versehen.
HINWEIS:
•Dieses Gerät kann aus den nachfolgend aufgeführten Zeichenarten bestehende Texte anzeigen. Bei anderen Zeichenarten wird “ ” angezeigt.
•Alphabet
ABCDEFGHIJKLMNOPQRSTUVWXYZ abcdefghijklmnopqrstuvwxyz
•Zahlen
0123456789
•Symbole


 SPACE
SPACE
•Cet appareil peut afficher les textes d'information lors de la lecture de CD qui comportent ces textes, dans la catégorie anglaise.
Les CD avec texte se repèrent à la marque indiquée à droite.
REMARQUE:
•Cet appareil permet l’affichage de textes composés avec les types de caractère suivants. Tous les autres types de caractère seront affichés ainsi “ ”.
•Alphabétiques
ABCDEFGHIJKLMNOPQRSTUVWXYZ abcdefghijklmnopqrstuvwxyz
•Chiffres
0123456789
•Symboles


 SPACE
SPACE
•Quest’unità può visualizzare dei testi sul display durante la riproduzione di CD che contengono dei testi in inglese. Il disco CD con testi include il marchio mostrato qui a destra.
NOTA:
•Quest’unità è in grado di fornire una visualizzazione dei testi usando i seguenti tipi di caratteri. Altri tipi di caratteri causeranno la visualizzazione dell’indicazione “ ”.
•Alfabeto
ABCDEFGHIJKLMNOPQRSTUVWXYZ abcdefghijklmnopqrstuvwxyz
•Numeri
0123456789
•Simboli


 SPACE
SPACE
•Esta unidad puede mostrar información de texto en la pantalla cuando se reproducen discos CD de Texto que contengan información de texto en la categoría de Inglés. Los discos CD de Texto incluyen la marca indicada a la derecha.
NOTA:
•Esta unidad puede mostrar visualizaciones de texto de los siguientes tipos de caracteres.Otros tipos de caracteres harán que se visualice “ ”.
•Alfabeto
ABCDEFGHIJKLMNOPQRSTUVWXYZ abcdefghijklmnopqrstuvwxyz
•Números
0123456789
•Símbolos


 SPACE
SPACE
•Dit toestel kan tekstinformatie op het display tonen bij het weergeven van CD-Text discs met tekstinformatie in de categorie Engels.
Een CD-Text disc is voorzien van het logo rechts.
OPMERKING:
•Dit toestel kan de volgende tekens als tekst weergeven. Voor andere types van tekens verschijnt “ ” op het display.
•Alfabet
ABCDEFGHIJKLMNOPQRSTUVWXYZ abcdefghijklmnopqrstuvwxyz
•Getallen
0123456789
•Symbolen


 SPACE
SPACE
•Denna apparat kan visa text på displayen när du spelar CD-textskivor innehållande information på engelska.
CD text-skivor bär märket som anges på höger sida.
OBSERVERA:
•Apparaten kan visa text med följande teckentyper. För övriga tecken kommer “ ” att visas.
•Alfabetiska
ABCDEFGHIJKLMNOPQRSTUVWXYZ abcdefghijklmnopqrstuvwxyz
•Siffror
0123456789
•Symboler


 SPACE
SPACE
5
ENGLISH
2 INTRODUCTION
Thank you very much for purchasing the DENON component CD / MP3 player.
DENON proudly presents this advanced CD / MP3 player to audiophiles and music lovers as a further proof of DENON’s non-compromising pursuit of the ultimate in sound quality. The high quality performance and easy operation are certain to provide you with many hours of outstanding listening pleasure.
– TABLE OF CONTENTS – |
|
z Features.............................................................. |
6 |
x Part names and functions .............................. |
6, 7 |
c Connections........................................................ |
7 |
v Opening and closing the disc holder |
|
and loading a disc ............................................... |
8 |
b Normal CD playback ........................................... |
8 |
n Advanced CD playback................................. |
9, 10 |
m Playing MP3 files........................................ |
10, 11 |
, The compact disc ............................................. |
11 |
. Power on playback ........................................... |
11 |
⁄0Expanded function............................................ |
12 |
⁄1Before switching off the power ....................... |
13 |
⁄2Preset functions and operations ................ |
13, 14 |
⁄3Troubleshooting ................................................ |
15 |
⁄4Specifications ................................................... |
15 |
2 ACCESSORIES
Check that the following parts are included in addition to the main unit:
q Operating instructions ...................................... |
1 |
w Connection Cords ............................................ |
1 |
1 FEATURES
299-track programming and random play
2±12 % Variable pitch playback
2CD-R/RW playback
2Single/continuous playback function
2CD TEXT
2MP3 playback
2Instant start playback
2Cascade playback
2Power on playback
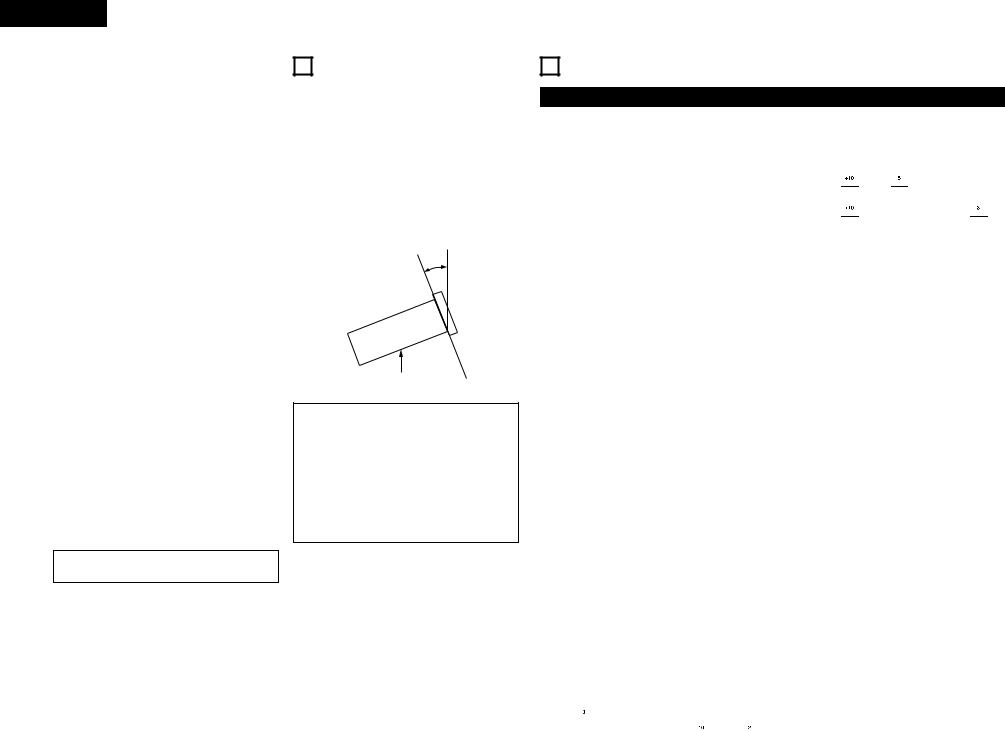
Max. 10°
DN-C615
CAUTION:
•Whenever the power operation switch is in the OFF state, the apparatus is still connected on AC line voltage.
•Please be sure to unplug the cord when you leave home for, say, a vacation.
•The DN-C615 will work normally when the player unit is mounted with the front panel within 10 degrees of the vertical plane. If the unit is tilted excessively, discs may not load or unload properly.
2 PART NAMES AND FUNCTIONS (Refer to page 3.)
(1) Front panel
qPower operation switch (POWER)
•The power turns on when the button is switched from the off position (£) to the on position (¢).
•The power turns off when the button is switched from the on position (¢) to the off position (£).
wDisc holder
•The disc placed on this holder. Pressing the disc holder OPEN/CLOSE (5) button e will open and close the holder.
When loading the CD, place it securely in the disc holder.
!4+10 button
•Press this button first when selecting track numbers over 10.
•Use together with the number buttons !3. For example, to select track number 15, press  then
then  .
.
For track number 33,
press  three times, then press
  .
.
!5!6CD pitch control button (–, +)
•Press these button to set the playing pitch within a range of ±12 % to –12 %.
•The set playing pitch is shown on the display.
eDisc holder open/close button (5 OPEN/CLOSE)
•Press to load or eject the disc. Each press will open or close the disc holder w.
rRemote control sensor (REMOTE SENSOR)
•About the wireless remote control unit : Please contact local dealer or distributor.
!7PROG./DIRECT button
•Press this button when you want to enter tracks for programmed playback. (Refer to page 9 for details.)
•When the button is pressed, the “PROG” indicator is lit.
!8RANDOM button
•When this button is pressed, the random play mode is set and the “RAND” indicator is lit.
tDisplay
• Refer to page 7 for details.
yPLAY button (1)
• Use this to start playback.
uSTOP button (2)
• Press this button to stop playback.
iPAUSE button (3)
• Use this pause playback.
o !0Track search button (8, 9)
• This button selects the track to be played.
!1!2Search button (6, 7)
•These buttons are used to accurately change the positions where playback will start.
!9REPEAT button
• Press this to perform repeat playback.
@0TIME button
•The time display switches each time this button is pressed.
•Normally “ELAPSED” appears on the time display and the current elapsed time is displayed.
•When this button is pressed once, “REMAIN” appears on the time display and the remaining time for the current track is displayed.
When pressed again, the remaining time to the end of the disc is displayed.
!3Number buttons
(1, 2, 3, 4, 5, 6, 7, 8, 9 and 0/CLEAR)
•Use these buttons for the direct search and program memory functions.
• For direct search, press for |
example |
button |
||||||||||||
|
|
|
|
if you want to hear track number 3. |
||||||||||
For track number 12, press |
|
|
|
|
then |
|
|
|
|
. |
||||
To program tracks, press the PROG./DIRECT button !7to set to the program mode.
6
@1TITLE button
•When the button is pressed, the text information (Disc title, track title, disc artist or track artits) is displayed.
•When the button is pressed while in the stop mode with a disc containing an MP3 ID3-Tag loaded, the file name is displayed. When pressed during playback, the display switches as shown below.
 Elapsed time of currently playing track
File name of currently playing track
Title name
Artist name
Album name
@2FOLDER button
•When disc containing MP3 format files is loaded, in the stop mode press this button then the folder select mode is possible.
@3Headphones jack
•For private listening, you can connect your headphones to this jack.
(3) Display
q CD transport indicator
w Mode display portion (CD)
FILE |
: This lights when the file name of |
|
MP3 is displayed. |
FOLDER |
: This lights in the folder selection |
|
mode. |
TITLE |
: This lights when the title in the MP3 |
|
ID3-Tag or CD Text is displayed. |
MP3 |
: This lights when a disc containing |
|
MP3 format file is loaded. |
PROG |
: This lights in the program mode. |
RAND |
: This lights in the random mode. |
REPEAT, 1 : This lights in the repeat mode. CASCADE : This lights in the cascade mode.
|
(Preset function) |
ALBUM |
: This lights when the album name in |
|
the MP3 ID3-Tag is displayed. |
ARTIST |
: This lights when the artist name in |
|
the MP3 ID3-Tag is displayed. |
e CD pitch display
rPlaying position display
•This indicates the current position within the track’s totalplaying time.
•In the MP3 play mode, it may be unable to display correctly.
(2) Rear panel
qANALOG OUT jacks
•These are unbalanced outputs using RCA type jacks.
The CD’s playback signals are output from these jacks.
wDIGITAL OUT jack
•This is an coaxial output using an RCA type jack.
•Signal format : SPDIF or IEC-958 Type II
eExternal synchronized control jacks (EXT. SYNC.)
• Connect these for synchronized recording.
rCascade control jacks (CASCADE)
•Connect these for continuous operation on multiple units.
•When the cascade mode is set to “ON”, the start signal is output from this output jack once operation is finished. (Preset function)
tRC IN control jack
•This is a stereo mini jack for wired remote control.
t20 tracks music calender
•In the single track play mode, only the specified track lights.
•In the continuous play mode, everything from the specified track to the last track lights.
•Track numbers are displayed up to track 20. Track 21 and on are not displayed.
•MP3 is not displayed.
yMultiple display
•This displays Track No. of CD, playing time of CD, various operational information, text message, etc.
u Time mode indicator
ELAPSED : This lights when the elapsed time is displayed.
REMAIN : This lights when the remaining time is displayed.
i Infrared remote control indicator
oPlay mode indicators
•“SINGLE” lights when in the single track play mode.
•“CONT.” lights when in the continuous play mode.
ENGLISH
3 CONNECTIONS
Leave your entire system (including the DN-C615) turned off until all connections between the DN-C615 and other components have been completed.
2Connection precautions
•Before proceeding with connections or disconnections of cables and power cords, be sure to turn all system components off.
•Ensure that all cables are connected properly to the L (left) and R (right) jacks.
•Insert plugs fully into the terminals.
•Connect the CD output jacks to the amplifier CD or AUX input jacks.
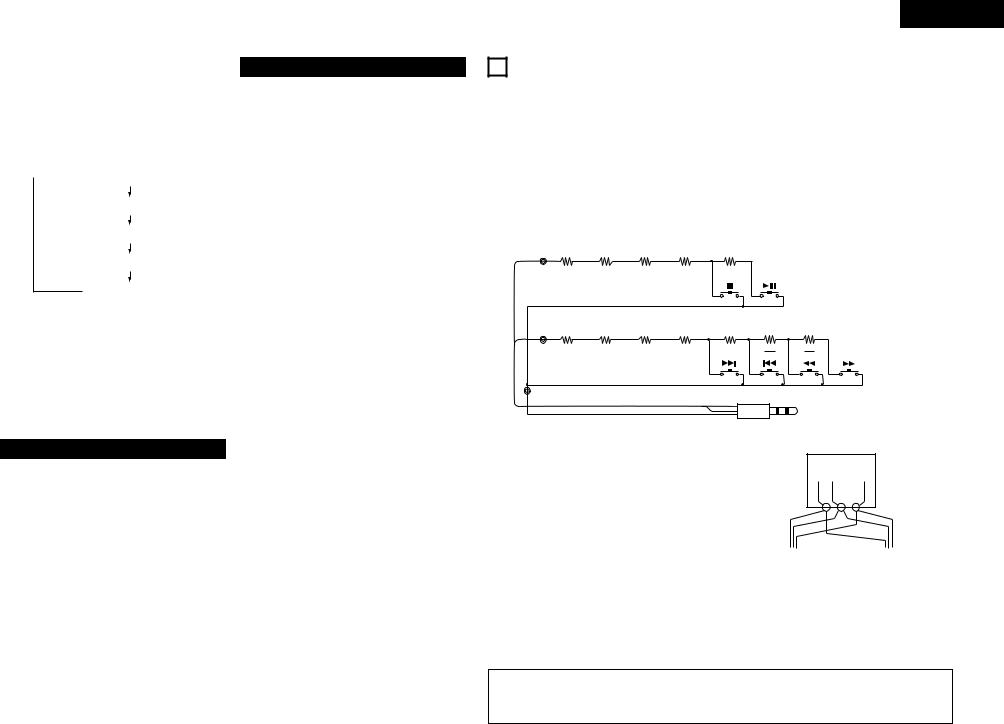
2Remote control connections (RC IN)
•For wired remote control, use the circuit shown on the diagram below.
•Design the circuit so that the wire resistance is 0.5 Ω/ohms or less.
C1 |
|
|
|
|
|
Lch |
150 |
180 |
270 |
390 |
680 |
|
|||||
|
N |
N |
N |
N |
N |
C2 |
|
|
|
|
|
Rch |
150 |
180 |
270 |
390 |
680 |
|
|||||
|
N |
N |
N |
N |
N |
GND |
|
|
|
|
|
C3 |
|
|
|
|
|
|
|
|
|
|
Rch |
|
|
|
|
|
Lch |
|
|
|
|
|
GND |
•Up to six units can be controlled simultaneously with one remote control unit.
•Wire the signal and ground lines as shown on the diagram below and connect at the remote control inputs (C1, C2 and C3).
•Design the circuit so that the resistance of the individual wires is 0.5 Ω/ohms or less.
1  N
N  6
6
(“N” is the number of DN-C615 units connected.)
1.3k |
|
3.9k |
N |
|
N |
G R |
L |
ø3.5mm |
|
|
|
|
|
Stereo mini plug |
Connecting two DN-C615 units (N = 2)
Remote Unit
C1 C2 C3
|
|
|
|
|
|
|
DN-C615 |
|
DN-C615 |
||||
1 |
|
|
2 |
|
||
|
|
|
|
|
|
|
2Installation precautions
•If the DN-C615 is placed near an amplifier, tuner or other components, noise (induced hum) or beat interference may result (especially during AM or FM reception).
If this occurs, separate the DN-C615 from other components or reorient its position.
NOTE:
•Use this unit in a horizontal orientation.
When the unit is used with the front panel facing upward (and the unit us in a vertical orientation) or when the front panel is on an incline, the unit will not operate properly.
7
ENGLISH
4OPENING AND CLOSING THE DISC HOLDER AND LOADING A DISC
Opening and closing the disc holder
. This operation only works while the power is on.
1.Press the power operation switch q to turn on the power.
2.Press the OPEN/CLOSE button e.
How to load a disc
•Make sure the disc holder is completely open.
•Hold the disc by the edges and place it on the disc tray. (Do not touch the signal surface, i.e., the glossy side.)
•When using 12 cm. diameter discs, make sure the outer edge matches the tray guide circumference and when using CD signals (8 cm. diameter) match the outer edge with the inner tray guide circumference.
•Press the OPEN/CLOSE button e to close the disc holder w.
•When the disc holder is open and a disc is loaded, you may also press the PLAY (1) button y to close the disc holder. (If the PLAY (1) button is pressed, playback will start immediately upon the disc contents having been read.)
CAUTIONS:
•If you finger should get caught in the disc holder when it closes, press the OPEN/CLOSE button.
•Do not place any foreign objects on the disc tray, and do not place more than one disc on the tray at a time. Otherwise malfunction may occur.
•Do not push in the disc tray manually when the power is off as this may cause malfunction and damage the CD player.
•This player can play CD-R/RW discs, but only if they are finalized. Note however that depending on the recording quality, the player may not be able to play some finalized CD-R/RW discs.
2Messages
Messages may appear on the display while using the DN-C615. The meanings of these messages are explained below.
Message |
Meaning |
|
|
No Disc |
No disc inserted, disc unreadable or disc inserted upside down. |
|
|
TOC Error |
The disc information has not been read properly. |
|
|
Invalid CD |
The disc is a CD-ROM that does not contain MP3 files. |
|
|
Tray Error |
The disc holder could not be opened or closed properly. |
|
|
5NORMAL CD PLAYBACK
(1)Starting playback
1.Press the power operation switch q to turn on the power.
2.Load the disc you want to play.
3.Make the presettings according to the usage purpose. (See page 13.)
• Select the play finish mode. (Preset functions)
Finish stop :
The stop mode (the servo functions turn off) is set when playback finishes.
Finish next :
The standby mode is set at the beginning of the next track when playback is finished.
After the final track is played, the standby mode is set at the beginning of the first track.
Finish recue :
When playback is finished, the standby mode is set at the position at which playback was started.
•To standby at the point where the sound begins. (Preset functions)
Set the “C Det” level.
When a track is selected, the position at which the sound begins is found when a track is cued and the standby mode is set at that point.
•Select the play mode. (Preset function) SINGLE : (single track play mode)
The stop mode is set after the specified track is played.
CONT. : (continuous play mode)
The stop mode is set after the last track is played.
4.Press the PLAY (1) button y.
(2) Pausing playback at any point
(Pause)
Playback can be temporarily halted and then continued from the same point in the track.
1.Press the PAUSE (3) button i during playback.
2.To continue playback, press the PLAY (1) button y.
(3)Stopping playback
1. Press the STOP (2) button u.
Auto Cue (Preset functions)
•Auto Cue is automatically cued to the point where audio starts.
Cueing takes place at the point where audio starts rather than where the track starts. The level at which sound is first detected can be set between –36 to –48 dB (3 steps).
End of Message (EOM) (Preset functions)
•At the end of the track, the time display flashes, providing a visual warning to the operator that the track will end shortly. The point at which the flashing beings can be set within a range of 0 to 60 seconds (7 steps) prior to the end of the track.
Sleep mode (Preset functions)
•The sleep mode is set if no operation is performed for set-up time in the standby, pause or manual search mode.
When in the sleep mode, if the PLAY/PAUSE button is pressed, playback will be started from the beginning of the track in which the sleep mode was set. If the CUE button is pressed, it will standby for the beginning of the track in which the sleep mode was set.
8
6 ADVANCED CD PLAYBACK
(1) Playing a specific track
(Direct search)
1.Use the number buttons !3and the +10 button !4 to input the number of the desired track.
• For example, to play track number 4, press  ,
,
and to play track number 12, press |
|
|
|
and |
||||
|
|
|
|
. |
|
|
|
|
Playback will begin from that track. |
|
|
|
|
||||
(2)Advancing to the next track during playback
(Automatic search)
1.Press the 9 button !0during playback.
•The pickup will advance to the beginning of the next track and playback will continue.
Pressing the button several times will forward the pickup to the corresponding number tracks.
(3)Returning to the beginning of the current track during playback
(Automatic search)
1.Press the 8 button o during playback.
•The pickup will return to the beginning of the current track and playback will continue. Pressing the button several times will return the pickup to the corresponding number tracks.
(4) Audible quick search
(Manual search)
•Using this function, you can search for a desired point quickly with in a track in the both forward or reverse direction.
•Release the search button (6or 7) !1!2when the desired point has been reached. Normal playback then continues.
•When a search button (6or 7) !1!2is pressed during the pause mode and the button is released, the pause mode is set at that point with the sound being output.
2Manual search forward
1.Press the search button (forward) (7) !2during playback.
•Playback of the track is sped up.
2Manual search in reverse
1.Press the search button (reverse) (6) !1during playback.
•Reverse playback of the track is sped up.
(5) Playing in random order
(Random play)
With this function, the tracks recorded on the disc can be played in a completely random order.
•When the RANDOM button !8 is pressed, the “RAND” indicator lights and random play begins automatically.
•If the RANDOM button !8is pressed when the repeat function is set, the tracks will be played through once in random order, then played through again in a different order, etc..
NOTE:
•The random play mode cannot be set while in the play mode or the program mode.
(6)Repeating playback of a desired interval
(Single track repeat)
1.Set the play mode to the single play mode. (Preset function)
2.Press the REPEAT button !9.
•The “REPEAT 1” indicators light on the display and the single track repeat mode is set.
3.Use the automatic search buttons (8and 9) o !0to select the track to be played repeatedly.
4.Press the PLAY button (1) y.
•Playback starts.
•Once the selected track ends, it is played again from the beginning.
•The single track repeat mode can also be set by pressing the REPEAT button !9during playback. The current track is played repeatedly.
•To cancel the single track repeat mode, press the REPEAT button !9 repeatedly until the “REPEAT 1” indicator turns off.
(All track repeat)
1.Set the play mode to the continuous play mode. (Preset function)
2.Press the REPEAT button !9.
•The “REPEAT” indicators light on the display and the all track repeat mode is set.
3.Press the PLAY button (1) y.
•The disc is played repeatedly.
•The all track repeat mode can also be set by pressing the REPEAT button !9during playback.
•If the REPEAT button !9 is pressed during programmed playback, the tracks are played repeatedly in the programmed order.
•To cancel the all track repeat mode, press the REPEAT button !9 repeatedly until the “REPEAT” indicator turns off.
ENGLISH
(7)Playing specific tracks in a specific order
(Programmed play)
•With this function, you can choose any of the tracks on the disc and program them to play in any order.
•Programming is possible when the disc holder is open.
•Up to 99 tracks can be programmed.
2Programming
•Programming is possible when the CD is in the stop mode.
1.Press the PROG./DIRECT button !7so that the “PROG” indicator lights, then use the number buttons !3and the +10 button !4to program the tracks.
• For example, to program track 3, 12, and 7,
press 
 ,
, 
 ,
, 
 ,
, 
 and
and 
 .
.
•Each time a track is programmed, the number of that track is displayed on the track number display, and the total program time is displayed on the time display. If the total program time exceeds 99 minutes, only the first two digits of the minutes are display. (The third and / or fourth digits are not displayed.)
•“01--00m00s” appears on the time display if the PROG./DIRECT button !7 is pressed when no program is set.
•“Full” appears on the time display if you attempt to program more than 99 tracks.
2Playing the programmed tracks
1.Press the PLAY (1) button y to play the tracks in the programmed order.
•“01:**Tr”, ”02:**Tr”, etc., appears on the time display when tracks are selected with the 8 or 9 button o !0.
2Clearing the program
1.The entire program is cleared when the PROG./DIRECT button !7is pressed again. The program is also cleared when the OPEN/CLOSE button w is pressed.
2Presetting program
• Programs can be stored in the preset memory. When a disc for which a program is preset is loaded, the programmed playback mode is set automatically.
• Programs can be stored for up to three discs.
1.Follow the instructions under “Programming” to input the program.
2.Follow the instructions under “(2) Presetting Procedure” to set the preset mode. (See Page 13.)
3.Press the 8or 9button o !0to select “02:Prg1” (or “03:Prg2” or “04:Prg3”).
4.Press the PLAY (1) button y.
• The character display changes as follows :
[Before change] |
[After change] |
Prg1 OFF Prg1 ON
Prg2 OFF Prg2 ON
Prg3 OFF Prg3 ON
5.Press the STOP (2) button u.
•The preset setting mode is canceled and the set return to the normal mode.
•To play a preset disc :
Load a disc for which a program is preset.
6.Press the PLAY (1) button y.
NOTES:
•Programming is not possible with the disc holder open.
•During programmed playback, tracks not in the program can be played by pressing number buttons !3and !4.
(8) Editing the program
(Call)
When tracks have been programmed, they can be called and displayed on the time display.
1.When the 6 or 7 button !1!2is pressed, the programmed track is selected.
•The displayed track can be cleared from the program by pressing the 0/CLEAR button !3 twice at this time. In addition, if a number button !3is pressed, the track corresponding to that number is inserted in the program before the displayed track.
•If a track is inserted when there are already 99 tracks in the program, the last track in the program is cleared.
(9) Playing at a different pitch
(PITCH)
1.Press the CD pitch control + and – button !5!6to set the playing pitch.
•Playback begins at the set pitch, and the “PITCH%” indicator lights.
NOTE:
•When the play speed is changed, the sampling frequency of the digital output signal also changes, so it may not be possible to receive digital signals.
9
ENGLISH
7 PLAYING MP3 FILES
There are many sites on the Internet from which you can download music files in MP3 format. These files can be downloaded following the instructions on the site and stored on CD-R/RW discs which can then be played on the DN-C615.
The music on commercially available music CDs can be converted into MP3 files on a computer using MP3 encoding programs. When this is done, the data is reduced to approximately 1/10 the original size. This MP3 data can then be stored on a CD-R/RW disc, allowing you to create a single 12 cm CD-R/RW disc containing about 10 times more music than a normal music CD, that is some 100 tracks or more (*).
*This is an approximately value for MP3 files of tracks about 5 minutes long converted at a standard bit rate (128 kbps) and stored on a CD-R/RW disc with a capacity of 650 MB.
Recordings you make are for your personal use and should not be used in ways infringing upon the copyright holder as per copyright laws.
NOTES :
•The DN-C615 is compatible with “MPEG-1 Audio Layer-3”, “MPEG-2 Audio Layer-3” and “MPEG- 2.5 Audio Layer-3”. It is not compatible with MP1 or MP2 standards.
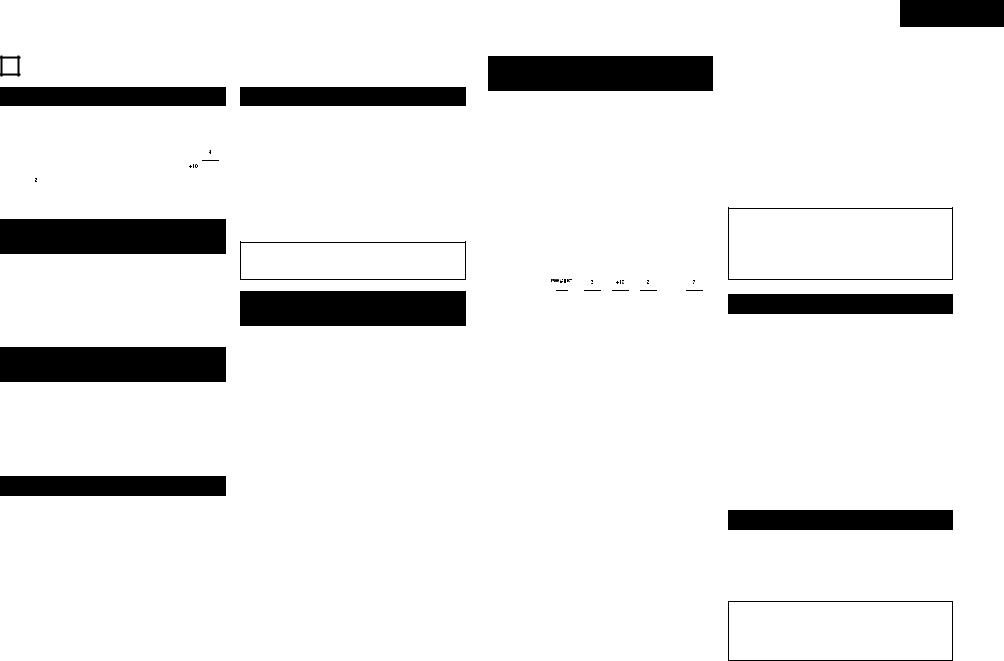
SAMPLING FREQUENCY
MPEG 1.0 |
48 kHz |
44.10 kHz |
32 kHz |
|
|
|
|
MPEG 2.0 |
24 kHz |
22.05 kHz |
16 kHz |
|
|
|
|
MPEG 2.5 |
12 kHz |
11.03 kHz |
08 kHz |
|
|
|
|
•When writing MP3 files on a CD-R/RW disc, set the writing program’s format to “ISO9660 level 1” or “ISO9660 level 2”, “Joliet” or “Romeo”. MP3 files written in other formats may not play properly. With some writing programs it is not possible to record in “ISO9660” format. Use an “ISO9660” format writing program.
•Generally speaking, the higher the MP3 file’s bit rate, the better the sound quality. With the DNC615 it is recommended to use MP3 files written with a bit rate of 128 kbps or greater.
•The writing program may change the positions of the folders and files when writing the MP3 files on the CD-R/RW disc, so the files may not be played in the expected order.
•Make sure to give MP3 files the extension “.MP3”. Files with extensions other than “.MP3” or without extensions cannot be played. (On Macintosh computers, MP3 files can be played by adding the extension “.MP3” after the file name consisting of a maximum of 8 Roman capital letters and / or numerals when recording them on CD-R/RW discs.)
•To protect copyrights, no digital signals are output when playing MP3 files.
•A maximum of 255 folders can be played on the DN-C615. Folders over 8 layers down, however, cannot be played. The maximum number of files is also 999. If there are 1,000 files, only the first 999 are played. (Files other than those with the extension “.MP3” are not counted.)
•On the DN-C615, folder and file names can be displayed like titles. Roman capital letters and/or numerals and “__” (underscores) are scrolled. (However, a maximum of 31 characters can be displayed.) In addition, folder and file names using other symbols will not be displayed properly.
•The DN-C615 is compatible with ID3-tag (Ver. 1.*, Ver. 2.0).
•It may not be possible to play some CD-R/RW discs due to dirt, scratches or the disc’s properties.
•Do not apply seals or tape to the label or signal side of CDs or CD-R/RW discs. The glue could get on the disc surface, making the disc get stuck inside the set.
•The DN-C615 is multi-session compatible.
Only music CDs can be played if the first session is a music CD, and only MP3 files can be played if the first session consists of MP3 files.
•The DN-C615 is compatible with play lists. (.m3u of WINAMP Form) (Preset functions)
NOTES:
•With some writing programs it may not play properly. In this case, please set to “PLst=OFF”.
•Play List may require time for reading.
•The maximum number of play lists is also 255. If there are over 255 play lists, only the first 255 are performed.
(1)Playing folders or files
1.Load a disc containing MP3 files.
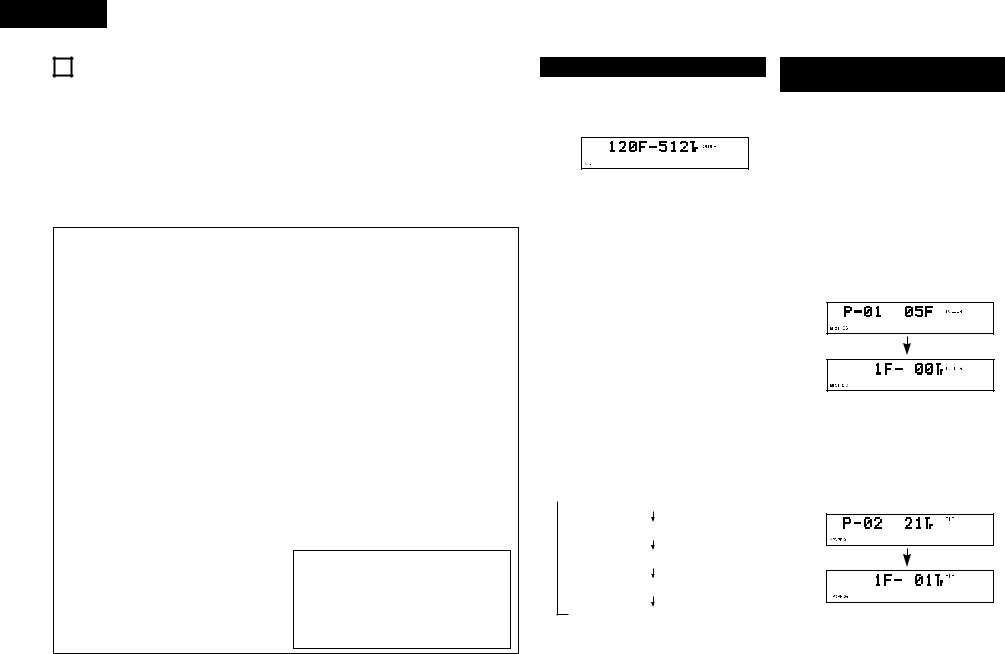
• Example
When the number of folders is “120” and the number of files is “512”
2.[ To select a folder ]
qIn the stop mode, press the FOLDER button @2 to turn on the “FOLDER” indicator.
wPress the 8 or 9 button o !0to select the folder you want to listen to.
•The folder name scrolls on the display.
eWhen the TITLE button @1is pressed at this time, files in the folder can be selected.
•Operate following the procedure under “To select a file”.
[ To select a file ]
qIn the stop mode, press the TITLE button @1to turn on the “FILE” indicator.
This operation is only necessary when the “FOLDER” indicator is lit.
wPress the 8 or 9 button o !0to select the file you want to listen to.
• The file name scrolls on the display.
3.Press the PLAY (1) button y.
When the TIME button @0 is pressed during playback, the “FOLDER” or “FILE” indicator turns off and the track number of elapsed track time are displayed.
The display switches as follows each time the TITLE button @1is pressed during playback :
 File name (The “FILE” indicator lights.)
Title name (The “TITLE” indicator lights.)
Artist name (The “ARTIST” indicator lights.)
Album name (The “ALBUM” indicator lights.)
Elapsed time of currently playing track
(2)Programmed playback of folders or files
Use this function to select certain tracks from the disc and program them to play in a certain order.
A maximum of 99 files and folders can be programmed. (Programs can included both files and folders.)
2Programming
1.In the stop mode, press the PROG./DIRECT button !7.
• The “PROG” indicator lights.
2.[ To select a folder ]
q Press the FOLDER button @2to turn on the “FOLDER” indicator.
wPress the number buttons !3!4to select the folder you want to program.
• Example : When folder “5” is programmed
in the first place
[ To select a file ]
q Press the TITLE button @1 to turn on the “FILE” indicator.
This operation is only necessary when the “FOLDER” indicator is lit.
wPress the number buttons !3!4to select the file you want to program.
• Example : When the 21st track is programmed in the second place
3. Press the PLAY (1) button y.
•The tracks are played in the programmed order.
When the TIME button @0is pressed during playback, the “FOLDER” or “FILE” indicator turns off and the track number of elapsed track time are displayed.
10
2Editting program
The programmed tracks appear in the programmed order on the display each time the 6 or 7 button !1!2is pressed.
To clear part of a program
qUse the search buttons (6, 7) !1!2to select the file or folder to be cleared. When selected, the contents of that program are displayed.
wPress the 0/CLEAR button !3twice to clear the displayed file or folder.
Adding to programs
q Use the search buttons (6, 7) !1!2to
select the file or folder to be added.
w Follow the procedure under “To select a folder ” or “To select a file” to select a file or folder and add it to the program.
To clear the entire program, press the PROG./DIRECT button !7 while in the stop mode.
To use the direct play function, first press the PROG./DIRECT button !7while in the stop mode to cancel the program mode.
NOTE:
•Programming is not possible in the play or pause mode.
2Presetting Programs
•Programs can be stored in the preset memory. When a disc for which a program is preset is loaded, the programmed playback mode is set automatically.
•Programs can be stored for up to three discs.
1.Follow the instructions under “Programming” to input the program.
2.Follow the instructions under “(2) Presetting Procedure” to set the preset mode. (See Page 13.)
3.Press the 8or 9button o !0to select “02:Prg1” (or “03:Prg2” or “04:Prg3”).
4.Press the PLAY (1) button y.
• The character display changes as follows :
[Before change] |
[After change] |
Prg1 OFF Prg1 ON
Prg2 OFF Prg2 ON
Prg3 OFF Prg3 ON
5.Press the STOP (2) button u.
•The preset setting mode is canceled and the set return to the normal mode.
•To play a preset disc :
Load a disc for which a program is preset.
6.Press the PLAY (1) button y.
(3) Random playback
2All-track random
Use this function to play all the tracks on the disc once in random order.
1.Set the play mode to the continuous play mode. (Preset function)
2.In the stop mode (The “FOLDER” indicator turns off), press the RANDOM button !8.
•The “RAND” indicator lights.
3.Press the PLAY (1) button y.
•Tracks are automatically played in random order.
To cancel the all-track random mode, press the RANDOM button !8again.
21-folder random
Use this function to play all the tracks in a single folder once in random order.
1.Set the play mode to the single play mode. (Preset function)
2.In the stop mode, press the FOLDER button @2.
•The “FOLDER” indicator lights.
3.Press the 8 or 9 button o !0to select the folder to be played in random order.
•The folder name scrolls on the display.
4.Press the RANDOM button !8once.
•The “RAND” and “FOLDER” indicator lights.
5.Press the PLAY (1) button y.
•A track in the selected folder is selected automatically and playback starts.
•The stop mode is set automatically once all
the tracks in the folder have been played.
When the TIME button @0is pressed during playback, the track number of elapsed track time are displayed. (The “FOLDER” indicator do not turns off.)
To cancel the 1-folder random mode, press the RANDOM button !8again.
NOTE:
•The random play mode cannot be set while in the play or Program mode.
ENGLISH
(4) Repeat playback
21-folder all-track repeat
1.Set the play mode to the single play mode. (Preset function)
2.In the stop mode, press the FOLDER button @2.
•The “FOLDER” indicator lights.
3.Press the 8 or 9 button o !0to select the folder you want to listen to.
•The folder name scrolls on the display.
4.Press the REPEAT button !9.
•The “REPEAT 1” indicators light on the display and the single track repeat mode is set.
5.Press the PLAY (1) button y.
•Playback starts from the first track in the selected folder.
•Once the last track in the selected folder has
been played, playback resumes from the beginning of the first track in the selected folder and the tracks are repeated.
When the TIME button @0is pressed during playback, the track number of elapsed track time are displayed. (The “FOLDER” indicator do not turns off.)
2All track repeat
1.Set the play mode to the continuous play mode. (Preset function)
2.In the stop mode, press the TITLE button @1to turn on the “FILE” indicator.
3.Press the REPEAT button !9.
•The “REPEAT” indicators light on the display and the all track repeat mode is set.
4.Press the PLAY (1) button y.
•The disc is played repeatedly.
•Once the last track on the disc is played, playback continues from the beginning of the first track.
2Single track repeat
1.Set the play mode to the single play mode. (Preset function)
2.Press the REPEAT button !9.
•The “REPEAT 1” indicators light on the display and the single track repeat mode is set.
3.Use the automatic search buttons (8 and 9) o !0to select the track to be played repeatedly.
4.Press the PLAY button (1) y.
•Playback starts.
•Once the selected track ends, it is played again from the beginning.
•The single track repeat mode can also be set by pressing the REPEAT button !9 during playback. The current track is played repeatedly.
•To cancel the single track repeat mode, press the REPEAT button !9 repeatedly until the “REPEAT” indicator turns off.
8 THE COMPACT DISC
Precautions on handling compact discs
•Do not allow fingerprints, oil or dust on the surface of the compact disc. If the signal surface is dirty, wipe it off with a soft, dry cloth. Wipe in circular motions from the center and out.
•Do not use water, benzene, thinner, record sprays, electrostatic proof chemicals, or silicone-treated cloth to clean discs.
•Always use care when handling discs to prevent damaging the surface, in particular when removing a disc from the case and returning it.
•Do not bend compact discs.
•Do not apply heat to compact discs.
•Do not enlarge the hole in the center of the disc.
•Do not write on the disc and do not attach any labels.
•Condensation will from on the disc surface if it is brought into a warm room from a cold area, such as outdoors during winter. Wait until the condensation disappears. Never dry discs with hair dryers, etc..
Precautions on storage
•After playing a disc, always return it to its case.
•Keep discs in the cases when they are not to be played. This will protect them from dust and dirt and prolong their service life.
•Do not store discs in the following places :
1)Places exposed to direct sunlight for a considerable time.
2)Places subject to accumulation of dust or high humidity.
3)Places exposed to high temperatures, such as close to heater outlets.
9 POWER ON PLAYBACK
Playback starts automatically when the power is turned on.
•The power on playback function can be set with the “PRESET FUNCTIONS AND OPERATIONS” (See page 13).
11
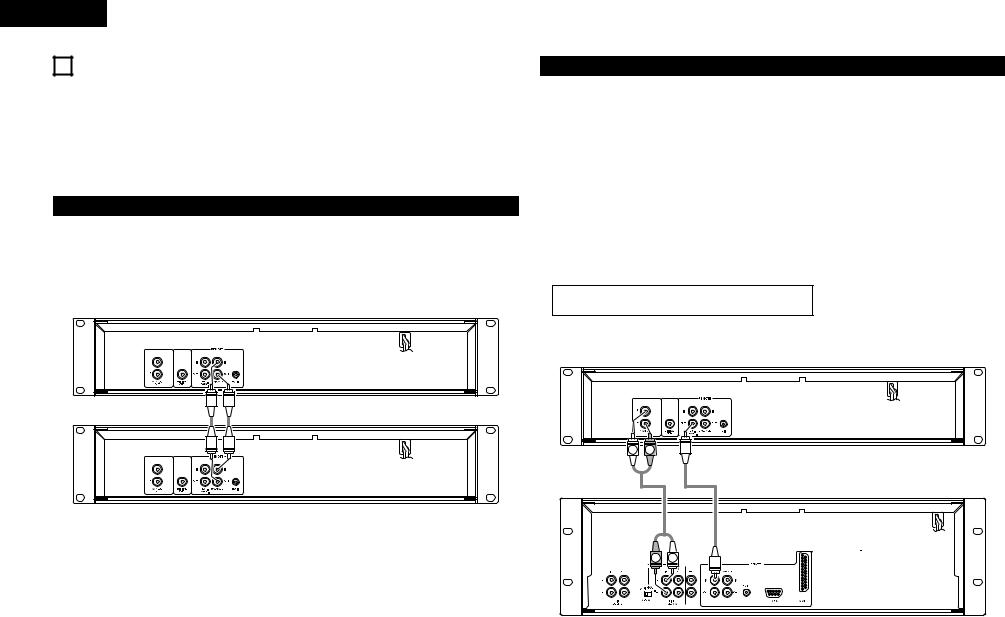
ENGLISH
10 EXPANDED FUNCTION
Multiple units of the DN-C615 or other DENON products (DN-780R etc.) can be used together for longer play time, simultaneous recording and other functions.
2CASCADE (MULTIPULE CONTINUOUS) OPERATION
•Refer to figure 1 to connect the equipment.
•Use a single RCA cable to connect the units’ CASCADE OUT jacks with the units’ CASCADE IN jacks.
•When the first and last units are connected as shown in figure 1, playback is performed endlessly.
•If the first and last units are not connected, operation stops at the last unit.
Cascade playback
1.Set the cascade mode of all unit to the “Cas=ON”. (Preset function)
2.Press the PLAY (1) button y on unit 1. Playback starts.
• Playback on unit 1 ends, playback starts on unit 2.
3.Playback stops when the stop button on the unit currently playing is pressed.
Figure 1
unit 1 |
DN-C615 |
unit 2 |
DN-C615 |
External synchronized recording
The synchronized recording can be use when the DN-C615 is used in combination with DENON other product (DN-780R etc.).
When the CD player’s play button is pressed, a synchronized signal for starting is output from the EXT. SYNC. jack. When the STOP buttons on the CD player is pressed, a synchronized signal for stopping is output from the EXT. SYNC. jack.
•Refer to figure 2 to connect the equipment.
•Use a single RCA cable to connect the units’ EXT. SYNC. OUT jacks with the units’ EXT. SYNC. IN jacks.
Set the infrared remote sensors of all the units to “OFF” when using this function. Also set the same infrared remote control codes for all the units. (Refer to “PRESET FUNCTIONS AND OPERATIONS” (See page 13).) Failure to make these settings could result in malfunction.
1.Load the CD into DN-C615. Load unrecorded cassette tapes into all decks.
2.Set the reverse mode and Dolby NR of all decks.
3.Adjust the twin recording level of DN-780Rs. (Master/Slave switch set to OFF.)
4.Press the Twin recording button of DN-780R.
5.Press the PLAY (1) button y of DN-C615. Recording starts all decks.
NOTE:
•Use tapes of the same times (lengths) as far as possible.
6.Press the STOP (2) button u of the DN-C615 to stop recording on all the connected units.
Figure 2
|
DN-C615 |
L |
R |
DN-780R
R |
L |
12

11 BEFORE SWITCHING OFF THE POWER
When you have finished using the CD player, before switching off the power be sure that the disc holder has been closed with the OPEN/CLOSE (5) button.
CAUTION:
• Do not forcibly close the disc holder when the power is off. It may damage the unit when it is transported.
12PRESET FUNCTIONS AND OPERATIONS
(1)List of Preset Functions
•Functions can be preset using the buttons on the front panel. These presettings are stored in a permanent memory, so they are not cleared even when the power is turned off.
•The functions shown on the table below can be preset. Set the functions according to the usage purpose to efficiently achieve even higher quality playback.
•One of the preset functions can be used to display information on this set (microprocessor version).
Preset function type |
Description |
Set upon shipment |
No. |
|
from factory |
||||
|
|
|
||
|
|
|
|
|
Preset type |
Selection of preset type. |
Preset Type 1 |
1 |
|
|
|
|
|
|
Program 1 |
Setting of whether or not to play program 1. |
Program 1 OFF |
2 |
|
|
|
|
|
|
Program 2 |
Setting of whether or not to play program 2. |
Program 2 OFF |
3 |
|
|
|
|
|
|
Program 3 |
Setting of whether or not to play program 3. |
Program 3 OFF |
4 |
|
|
|
|
|
|
Power on mode |
Setting of operation when power is turned on. |
Power On Stop |
5 |
|
|
|
|
|
|
Time mode |
Setting of play mode when power is turned on. |
Time ELAPSED |
6 |
|
|
|
|
|
|
Random |
Setting of time mode when power is turned on. |
Random OFF |
7 |
|
|
|
|
|
|
Finish mode |
Setting of operation when playback ends. |
Finish Stop |
8 |
|
|
|
|
|
|
Next Track Reserve |
Setting of operation when select knob is turned during |
Reserve. OFF |
9 |
|
|
playback. |
|
|
|
Play lock |
Selection of whether or not to inhibit the panel switches |
Play Lock OFF |
10 |
|
|
during playback. |
|
|
|
Panel lock |
Selection of whether or not to enable the panel buttons. |
Panel OFF |
11 |
|
|
|
|
|
|
Auto cue |
Setting of whether or not to perform the auto cue |
CueDet. OFF |
12 |
|
|
operation and the audio startup level. |
|
|
|
Play speed |
Standard playing speed setting. |
Normal Speed |
13 |
|
|
|
|
|
|
Text display |
Selection of time or text display. |
Text OFF |
14 |
|
|
|
|
|
|
Frame display |
Selection of whether or not to display frames. |
FR Disp ON |
15 |
|
|
|
|
|
|
E.O.M. |
Setting of whether or not to display the EOM and display |
E.O.M. 10 s |
16 |
|
|
time setting. |
|
|
|
Auto stop |
Setting of whether or not to automatically stop the servo |
Sleep 30min |
17 |
|
|
functions. |
|
|
|
RC cord |
RC cord setting. |
RC DENON |
18 |
|
|
|
|
|
|
IR remote |
Infrared remote control sensor setting. |
IR ON |
19 |
|
|
|
|
|
|
Play mode |
Setting of play mode when power is turned on. |
Play CONTINUE |
20 |
|
|
|
|
|
|
|
|
ENGLISH |
||
|
|
|
|
|
|
Preset function type |
Description |
Set upon shipment |
No. |
|
|
from factory |
|
||||
|
|
|
|
||
|
|
|
|
|
|
Cascade |
Selection of whether or not to output cascade signal. |
Cascade OFF |
21 |
|
|
|
|
|
|
|
|
Preset clear |
Setting for clearing presets and setting them to the initial |
Ini. Preset |
22 |
|
|
|
values. |
|
|
|
|
Set information |
Microprocessor version display. |
Ver. **** (* = number) |
23 |
|
|
|
|
|
|
|
|
Play list (MP3) |
Setting of whether or not to perform the play list. |
Play List OFF |
24 |
|
|
|
|
|
|
|
|
(2) Presetting procedure
1Press the STOP (2) button u while presetting the TITLE button @1.
2Press the 8or 9button o !0and select the preset item.
3Press the PLAY (1) button y to change the setting.
4The preset mode is canceled when the STOP (2) button u. The setting are writeen at this time.
13

ENGLISH
(3) Detailed Description of Preset Functions
(* = initial setting) |
|
|
01) |
“Preset Type (*)” (Three different sets (types) of presettings can be made and used for different purposes.) |
|
|
*01:P No=1 |
: Set to preset type 1. |
|
*01:P No=2 |
: Set to preset type 2. |
|
*01:P No=3 |
: Set to preset type 3. |
02) |
“Program 1 OFF (ON)” |
|
|
*02:Prg 1 |
: Store the contents of program 1 when on. (Initial setting - OFF) |
03) |
“Progam 2 OFF (ON)” |
|
|
*03:Prg 2 |
: Store the contents of program 2 when on. (Initial setting - OFF) |
04) |
“Program 3 OFF (ON)” |
|
|
*04:Prg 3 |
: Store the contents of program 3 when on. (Initial setting - OFF) |
05) |
“Power On (****)” |
|
|
*05:P On=Stb |
: Standby mode is set at specified track after TOC is read. |
|
*05:P On=Ply |
: Playback begins in the all repeat mode after TOC is read. |
|
*05:P On=Stp |
: Stop mode is set after TOC is read. |
06) |
“Time Mode” |
|
|
*06:Time=ELA |
: Time display is elapsed time when power is turned on. |
|
*06:Time=REM |
: Time display is remaining time when power is turned on. |
07) |
“Random ON/OFF” |
|
|
*07:Rand=OFF |
: Playback mode is normally when power is turned on. |
|
*07:Rand=ON |
: Random playback mode is set when power is turned on. |
08) |
“Finish Mode” |
|
|
*08:Fin=Stop |
: Stop mode is set after playback ends. |
|
*08:Fin=Next |
: Standby mode is set at next track after playback ends. |
|
*08:Fin=Recue |
: Standby mode is set at playback start position after playback ends. |
09) |
“Next Track Reserve” |
|
|
*09:Rsv=OFF |
: Specified track is searched for immediately when select knob is turned during |
|
|
playback. |
|
*09:Rsv=ON |
: Track to be searched for is scheduled after playback of current track ends when select |
|
|
knob is turned during playback. |
10) |
“Play Lock” |
: Inhibit all operations other than the 1, 3, TIME, 2, PITCH +, – and TITLE buttons |
|
*10:Lock=ON |
|
|
|
during playback. |
|
*10:Lock=OFF |
: Enable all functions during playback. |
11) |
“Panel Lock ON/OFF” |
|
|
*11:Pane=OFF |
: Enable operation of all the buttons on the front panel. |
|
*11:Pane=OFF |
: Inhibit operation of all panel buttons other than those use for presetting operations |
|
|
and OPEN/CLOSE button. |
12)“CueDet. Level”
*12:CDet.=–** : Set the audio detection level for cueing. (–48 / –42 / –36)
|
*12:CDet.=OFF |
: Sound startup position is not cued. |
13) |
“CD Pitch” |
|
|
*13:Pit=Norm |
: Play at normal speed. |
|
*13:Pit=+/–*.* |
: Play at variable speed. |
|
|
±(0.2 / 0.4 / 0.6 / 0.8 / 1.0 / 1.2 / 1.4 / 1.6 / 1.8 / 2.0 / 2.2 / 2.4 / 2.6 / 2.8 / 3.0), 0Fix |
14) |
“Text Display” |
|
|
*14:Text=OFF |
: Display is set time mode when power is turned on. |
|
*14:Text=ON |
: Display is set text mode when power is turned on. |
15) |
“Frame Display” |
|
|
*15:Frm=ON |
: Display the frames on the time display during playback. |
|
*15:Frm=OFF |
: Do not display the frames on the time display during playback. (The frames are |
|
|
displayed in the manual search, standby, pause and end monitor modes.) |
16) |
“EOM Time” |
|
|
*16:EOM=**s |
: Set the EOM time. (5 / *10 / 15 / 20 / 30 / 60) |
|
*16:EOM=OFF |
: Do not use the EOM function. |
17) |
“Sleep ON (OFF)” |
|
|
*17:Sleep=** |
: Automatically turn the servo functions off if no button is operated for ** minutes in |
|
|
the pause, standby or manual search mode. (1 / 2 / 5 / 10 / 15 / *30) |
|
*17:Slp=OFF |
: Do not automatically turn the servo functions off. |
18) |
“IR Code” |
|
|
*18:RC=DENON |
: Receive denon codes. |
|
*18:RC=RC5 |
: RC-5 codes can be received. |
19) |
“IR Remote” |
|
|
*19:IR=ON |
: Accept infrared remote control signals. |
|
*19:IR=OFF |
: Do not accept infrared remote control signals. |
20) |
“Play Mode” |
|
|
*20:Play=CON |
: Play mode is continuous when power is turned on. |
|
*20:Play=SIN |
: Play mode is single when power is turned on. |
21) |
“Cascade ON/OFF” |
|
|
*21:Cas=ON |
: Output the cascade signal (Cascade operation possible) |
|
*21:Cas=OFF |
: Do not output the cascade signal. |
22) |
“Preset Clear (Ini. Preset)” |
|
|
*22:P Init? |
: Clear the presettings (set to the initial factory values). |
23) |
“Ver = xxxx” |
: Display the microprocessor version. (“xxxx” is a number.) |
24) |
“Play List” |
|
|
*24:PLst=OFF |
: Play List does not perform. |
|
*24:PList=ON |
: MP3 is performed according to Play List. |
14

13 TROUBLESHOOTING
Make sure of the followings before you consider as any malfunctions :
1.Are all the connections correct?
2.Are all system components being operated correctly in accordance with the operating instructions?
3.Are the speakers and amplifier/receiver functioning correctly?
If the tape deck still does not function properly, check the symptom against the list below. If the symptom does not correspond to the check list, please contact your DENON dealer.
Problem |
Cause |
|
|
Remedy |
|
|
|
|
|||
Disc holder does not open/close. |
• Power operation switch is not |
• Turn the power operation switch |
|||
|
turned on. |
|
|
|
on. |
|
|
|
|
||
When a disc is loaded, “TOC Error” |
• Disc is not properly loaded. |
|
• Reload the disc. |
||
or “No Disc” is displayed. |
|
|
|
|
|
|
|
|
|
||
When the PLAY (1) button is |
• Disc is dirty or scratched. |
|
• Clean the disc. |
||
pressed, playback does not start. |
|
|
|
|
|
|
|
|
|
|
|
There is no sound, or it is distorted. |
• Output cord |
is not |
properly |
• Connect the output cord properly. |
|
|
connected. |
|
|
|
|
|
• Amplifier |
adjustment |
is |
• Readjust the amplifier. |
|
|
inappropriate. |
|
|
|
|
|
|
|
|
||
A specific section of the disc will |
• Disc is dirty or scratched. |
|
• Clean the disc. |
||
not play. |
|
|
|
|
|
|
|
|
|
|
|
Programmed playback does not |
• Programmed |
playback |
operation |
• Restart programmed playback. |
|
work. |
has been performed improperly. |
|
|||
|
|
|
|
|
|
ENGLISH
14 SPECIFICATIONS
2 CD SECTION |
Single-mechanism compact disc player |
Type : |
|
Audio Channel : |
2 channel stereo |
Quantization : |
16-bit Liner |
Sampling Frequency : |
44.1 kHz at Normal Pitch |
Oversampling Ratio : |
8 times |
Frequency Response : |
20 to 20,000 Hz |
Total Harmonic Distortion : |
0.007 % |
Signal-to-noise Ratio : |
107 dB |
Dynamic Range : |
98 dB |
Channel Separation : |
90 dB |
Analog Output : |
RCA jack |
Output Level : |
2.0 V at 0 dB disc |
Load Impedance : |
10 kΩ / kohms or more |
Digital Output : |
RCA jack |
Signal Format : |
SPDIF or IEC-958 Type II |
Variable Pitch Control : |
±12 % max. |
Frame Search Accuracy : |
1/75 second |
Discs : |
Standard compact discs (12 cm and 8 cm) |
CD Mechanism Service Life : |
1000 hours (continuous playback) |
2 REMOTE |
Wired Remote Control Connection (Stereo mini jack) |
|
Remote Control Sensor |
2 GENERAL |
Stereo |
Headphone Output : |
|
Outputs Level : |
410 mW |
Load Impedance : |
33 Ω / ohms |
Power supply : |
120 V AC ±10 %, 60 Hz (for U.S.A. & Canada models) |
|
230 V AC ±10 %, 50 Hz (for European & U.K. models) |
Power Consumption : |
13 W |
Dimensions : |
482 (W) x 88 (H) x 280 (D) mm |
Installation : |
19-inch rack mountable (2U) |
Mass : |
4.7 kg |
For improvement purposes, specifications and design are subject to change without notice.
15

DEUTSCH
2 EINFÜHRUNG |
1 |
|
MERKMALE |
Wir danken Ihnen sehr für den Kauf des DENON |
|
|
|
Komponenten-CD/MP3-Players. |
2 |
99-Titel-Programmierung und Zufallswiedergabe |
|
DENON ist stolz darauf, Audio-Freunden und |
2 |
Wiedergabe-Geschwindigkeit variabel um ±12 % |
|
Musikliebhabern diesen erweiterten CD/MP3-Player |
2 |
CD-R/RW-Wiedergabe |
|
als einen weiteren Beweis der kompromisslosen |
2 |
Einzel-/Endlos-Wiedergabe |
|
Bestrebungen von DENON nach Erreichen der |
2 |
CD-Text (CD TEXT) |
|
ultimativen Klangqualität zu präsentieren. |
2 |
MP3-Wiedergabe |
|
Aufgrund der hochqualitativen Leistungsfähigkeit und |
2 |
Schnellstart-Wiedergabe |
|
der leichten Bedienung dieses Gerätes werden Sie |
2 |
Kaskadenwiedergabe |
|
beim Zuhören viele Stunden lang Ihre Freude haben. |
2 |
Wiedergabe bei Stromeinschaltung |
|
– INHALT – |
|
z Merkale............................................................. |
16 |
x Bauteilbezeichnungen und funktionen ....... |
16, 17 |
c Anschlüsse ................................................. |
17, 18 |
v Öffnen und schliessen der plattenlade und |
|
einlegen einer CD-platte................................... |
18 |
b Normale-CD-platten-wiedergabe ...................... |
18 |
n Zusätzliche funktionen................................ |
19, 20 |
m Wiedergabe von MP3-dateien ................... |
20~22 |
, Wissenswertes über CD-platten ...................... |
22 |
. Wiedergabestart beim einschal |
|
ten des gerätes ................................................ |
22 |
⁄0Erweiterte funktion..................................... |
22, 23 |
⁄1Vor dem abschalten des stromes..................... |
23 |
⁄2Gespeicherte funktionen und betriebe ...... |
23~25 |
⁄3Fehlersuche ...................................................... |
25 |
⁄4Technische daten.............................................. |
25 |
2 ZUBEHÖR
Überprüfen Sie, daß die nachstehend aufgeführten Teile im Karton des Hauptgerätes enthalten sind:
q Bedienungsanleitung |
........................................1 |
w Anschlußkabel ................................................. |
1 |
Max. 10°
DN-C615
VORSICHT:
•Auch wenn der Netzschalter auf “OFF” steht, bleibt das Gerät an den Wechselstromkreis angeschlossen.
•Wenn Sie z. B. auf Urlaub gehen, achten Sie bitte darauf, daß das Netzkabel gezogen wird.
•Der ordnungsgemäße Betrieb des DN-C615 ist sichergestellt, wenn Sie das Gerät so montieren, daß sich die Frontplatte in einem 10-Grad-Winkel zur Senkrechtebene befindet. Wenn das Gerät extrem schräg steht, ist das Einlegen von Discs unter Umständen gar nicht oder nur fehlerhaft möglich.
2 BAUTEILBEZEICHNUNGEN UND FUNKTIONEN (Beziehen Sie sich auf Seite 3.)
(1) Frontplatte
qNetzbetriebschalter (POWER)
•Die Stromzufuhr schaltet sich ein, wenn die Taste von der Aus-Position (£) in die EinPosition (¢) umgeschaltet wird.
•Die Stromzufuhr schaltet sich aus, wenn die Taste von der Ein-Position (¢) in die AusPosition (£) umgeschaltet wird.
wPlattenhalter
•Die auf dieser Lade platzierte Disc. Das Drücken und Halten der OPEN/CLOSE-Taste (5) e führt zum Öffnen und Schließen der Lade.
Legen Sie die CD beim Einlegen sicher und ordnungsgemäß in den Disc-Halter.
eÖffnen-/Schließen-Taste des Plattenhalters (5 OPEN/CLOSE)
•Drücken Sie diese Taste zum Einlegen oder Auswerfen der CD-Platte. Mit jedem Tastendruck öffnet bzw. schließt sich der Plattenhalter w.
r Fernbedienungssensor
!3Nummerntasten
(1, 2, 3, 4, 5, 6, 7, 8, 9 und 0/CLEAR)
•Diese Tasten benutzen Sie für die Direktsucheund für Programmspeicherfunktionen.
• Für Direktsuche, drücken Sie z.B. die Taste  , wenn Sie Titel Nummer 3 hören
möchten.
Für Titelnummer 12 drücken Sie  und dann
  .
.
Zum Programmieren von Titeln drücken Sie die PROG./DIRECT-Taste !7, um in den Programmierbetrieb zu kommen.
!4Taste +10
•Diese Taste drücken Sie zuerst, wenn Sie eine Titelnummer wählen, die größer als 10 ist.
•Benutzen Sie sie auch zusammen mit den anderen Nummerntasten !3.
Wenn Sie z.B. die Titelnummer 15 wählen,
so drücken Sie zuerst die Taste 
 und dann die Taste
 .
.
Für Titelnummer 33 drücken Sie die Taste
dreimal und dann die Taste |
|
|
|
. |
(REMOTE SENSOR)
•Über die drahtlose Fernbedienung :
Wenden Sie sich bitte an den örtlichen Händler oder Großhändler.
tDisplay
•Lesen Sie hinsichtlich der Einzelheiten die Seite 17.
!5!6CD Pitch-Steuertaste (–, +)
•Drücken Sie diese Taste, um den WiedergabePitch zwischen ±12 % und –12 % einzustellen.
•Die eingestellte Wiedergabe-Geschwindigkeit wird auf dem Display angezeigt.
!7Programm-Direkt-Taste
yPLAY-Taste (1)
•Betätigen Sie diese Taste zum Starten der Wiedergabe.
uSTOP-Taste (2)
•Drücken Sie diese Taste zum Stoppen der Wiedergabe.
(PROG./DIRECT)
•Drücken Sie diese Taste, wenn Sie Titel für die programmierte Wiedergabe eingeben wollen. (Beziehen Sie sich hinsichtlich von Details auf Seite 19).
•Wenn diese Taste gedrückt wird, leuchtet die Programm-Anzeige “PROG”.
iPAUSE-Taste (3)
•Drücken Sie diese Taste zum zeitweiligen Unterbrechen der Wiedergabe.
o!0Titelsuchtaste (8, 9)
•Wählen Sie mit dieser Taste den Titel aus, den Sie wiedergeben möchten.
!1!2Suchlauftasten (6, 7)
•Diese Tasten werden verwendet, um die Startposition der Wiedergabe genau zu ändern.
!8Zufallswiedergabe-Taste (RANDOM)
•Wenn diese Taste gedrückt wird, wird der Zufallswiedergabe-Modus eingestellt und die Zufallswiedergabe-Anzeige “RAND” leuchtet.
!9REPEAT-Taste
•Drücken Sie diese Taste, um die Wiederholungswiedergabe durchzuführen.
@0Zeit-Taste (TIME)
•Das Zeitdisplay schaltet jedesmal um, wenn diese Taste gedrückt wird.
•Normalerweise erscheint “ELAPSED” auf dem Zeitdisplay und die verstrichene Zeit wird angezeigt.
16
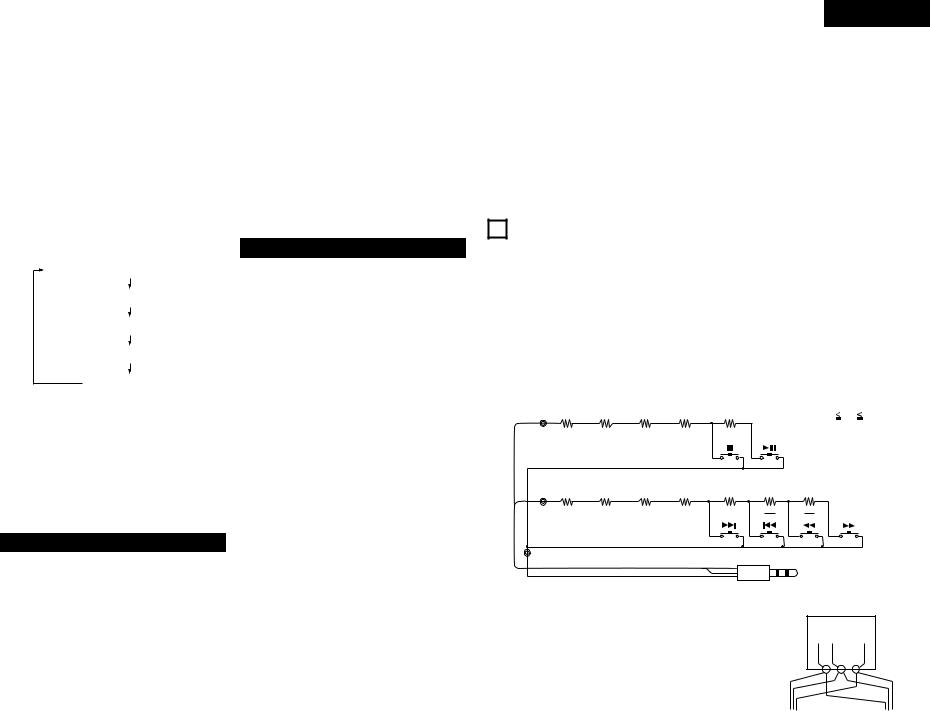
•Wenn diese Taste einmal gedrückt wird, erscheint “REMAIN” auf dem Zeitdisplay und die verbleibende Zeit für den gegenwärtigen Titel wird angezeigt. Wenn die Taste wieder gedrückt wird, wird die verbleibende Zeit bis zum Ende der CD angezeigt.
@1Titel-Taste (TITLE)
•Wenn die nächste Taste gedrückt wird, wird die Textinformation (Disc-Titel, Titel, DiscInterpret oder Titel-Interpret) angezeigt.
•Wenn die Taste während des Stopp-Modusmit eingelegter Disc mit einem MP3 ID3-Tag gedrückt wird, wird der Dateiname angezeigt. Wenn die Taste während der Wiedergabe gedrückt wird, schaltet sich die Anzeige wie unten dargestellt um.
Verstrichene Zeit des gegenwärtig abgespielten Titels
Dateiname des gegenwärtig abgespielten Titels
Titelname
Interpretenname
Albumname
@2Ordner-Taste (FOLDER)
•Wenn eine Disc mit MP3-Dateien eingelegt wird, drücken Sie im Stopp-Modus diese Taste, um den Ordnerauswahl-Modus zu ermöglichen.
@3Kopfhörerbuchse
•Für ungestörten Musikgenuß können Sie an diese Buchse Kopfhörer anschließen.
(2)RückwandRückwand
qANALOG OUT-Buchsen
•Hierbei handelt es sich um asymmetrische Ausgänge, die Cinch-Buchsen verwenden. Die Wiedergabesignale des CD-Spielers werden von diesen Buchsen ausgegeben.
wDigitalausgangs-Buchse (DIGITAL OUT)
•Dies ist ein koaxialer Ausgang mit CinchBuchse.
•Signalformat : SPDIF oder IEC-958 Type II
eExterne synchronisierte Steuerbuchsen (EXT. SYNC.)
•Schließen Sie Siese Buchsen für die synchronisierte Aufnahme an.
rKaskaden-Steuerbuchsen (CASCADE)
•Schließen Sie diese Buchsen für den kontinuierlichen Betrieb auf mehreren Geräten an.
•Wenn der Kaskadenmodus auf Kaskade “ON” eingestellt wurde, wird das Startsignal von dieser Ausgangsbuchse ausgegeben, wenn der Betrieb der Deckseite abgeschlossen ist. (Voreinstellungsfunktion)
tRC IN-Steuerbuchse
•Hierbei handelt es sich um eine StereoMinibuchse für die verdrahtete Fernbedienung.
(3)Display
q CD-Transportanzeige
w Modus-Anzeigebereich (CD)
FILE |
: Diese leuchtet, wenn der Dateiname |
|||
|
der MP3 angezeigt wird. |
|
||
FOLDER |
: Diese leuchtet im Ordnerauswahl- |
|||
|
Modus. |
|
|
|
TITLE |
: Diese leuchtet, wenn der Titel im MP3 |
|||
|
ID3-Tag oder CD-Text angezeigt wird. |
|||
MP3 |
: Diese leuchtet, wenn eine Disc |
|||
|
eingelegt ist, die eine MP3-Datei |
|||
|
enthält. |
|
|
|
PROG |
: Diese leuchtet im Programm-Modus. |
|||
RAND |
: Diese leuchtet im Zufallswiedergabe- |
|||
|
Modus. |
|
|
|
REPEAT, 1 : Diese |
Anzeige |
leuchtet |
im |
|
|
Wiederholungsmodus auf. |
|
||
CASCADE : Diese |
Anzeige |
leuchtet |
im |
|
|
Kaskadenmodus auf. |
|
|
|
|
(Gespeicherte Funktion) |
|
||
ALBUM : Diese |
leuchtet, |
wenn |
der |
|
|
Albumname im MP3 ID3-Tag |
|||
|
angezeigt wird. |
|
|
|
ARTIST |
: Diese leuchtet, wenn der Name des |
|||
|
Interpreten im MP3 ID3-Tag |
|||
|
angezeigt wird. |
|
|
|
e CD Pitch-Anzeige
rWiedergabeposition-Display
•Hier wird die aktuelle Position innerhalb der Gesamtspielzeit des Titels angezeigt.
•Im MP3-Wiedergabemodus ist eine ordnungsgemäße Anzeige unter Umständen nicht möglich.
t20 Spuren-Musikkalender
•Im Modus für die Wiedergabe einzelner Titel leuchtet nur der für die Wiedergabe festgelegte Titel.
•Im Dauerwiedergabemodus leuchten alle Titel vom für die Wiedergabe festgelegten bis zum letzten Titel.
DEUTSCH
•Titelnummern werden bis zum 20. Titel angezeigt. Titel 21 und nachfolgende Titel erscheinen nicht im Display.
•MP3 wird nicht angezeigt.
yMehrfachdisplay
•Zeigt die Titelnummer der CD, die Wiedergabezeit der CD, die verschiedenen Betriebsinformationen, Textmitteilungen usw. an.
u Zeitmodus-Anzeige
ELAPSED : Leuchtet, wenn die verstrichene Zeit angezeigt wird.
REMAIN : Leuchtet, wenn die restliche Zeit angezeigt wird.
i Infrarotfernbedienungs-Anzeige
oWiedergabemodus-Anzeigen
•Im Einzeltitel-Modus leuchtet “SINGLE” auf.
•Im kontinuierlichen Wiedergabe-Modus leuchtet “CONT.” auf.
3 ANSCHLÜSSE
Lassen Sie Ihr ganzes System (einschließlich DN-C615) ausgeschaltet, bis alle Verbindungen zwischen dem DNC615 und den anderen Komponenten vorgenommen wurden.
2Vorsichtshinweise zum Anschluß
•Vor dem Anschließen oder Abtrennen der Kabel müssen alle Geräte ausgeschaltet werden.
•Beim Anschluß auf Seitenrichtigkeit achten (L an L, R an R).
•Die Stiftstecker müssen bis zum Anschlag in die Buchsen eingesteckt werden.
•Verbinden Sie die CD-Ausgangsklemmen an die CDoder AUX-Eingangsklemmen des Verstärkers.
2Fernbedienungsanschlüsse (RC IN)
•Beziehen Sie sich für die verdrahtete Fernbedienung auf die im nachfolgenden Diagramm aufgeführte Schaltung.
•Gestalten Sie die Schaltung so, daß der Drahtwiderstand 0,5 Ω/Ohm beträgt oder weniger beträgt.
C1 |
|
|
|
|
|
|
|
1 N 6 |
Lch |
150 |
180 |
270 |
390 |
680 |
|
|
(“N” ist die Anzahl der |
|
N |
N |
N |
N |
N |
|
|
angeschlossenen DN-C615 |
|
|
|
|
|
|
|
|
Einheiten.) |
C2 |
|
|
|
|
|
|
|
|
Rch |
150 |
180 |
270 |
390 |
680 |
1.3k |
|
3.9k |
|
|
|||||||
|
N |
N |
N |
N |
N |
N |
|
N |
GND |
|
|
|
|
|
|
|
|
C3 |
|
|
|
|
|
|
|
|
|
|
|
|
|
Rch |
G R |
L |
ø3,5mm |
|
|
|
|
|
Lch |
|
|
|
|
|
|
|
|
GND |
|
|
STEREO-MINISTECKER |
•Bis zu sechs Einheiten können gleichzeitig mit einer Fernbedienung gesteuert werden.
•Verdrahten Sie die Signalund Erdungsleitungen wie unten im Diagramm gezeigt, und schließen Sie sie an die Fernbedienungseingänge (C1, C2 und C3) an.
•Gestalten Sie die Schaltung so, daß der Widerstand der einzelnen Drähte 0,5 Ω/Ohm
oder weniger beträgt.
Zwei DN-C615 Einheiten (N = 2) anschließen
Fernbedienungs-
einheit
C1 C2 C3
|
|
|
|
|
|
|
DN-C615 |
|
DN-C615 |
||||
1 |
|
|
2 |
|
||
|
|
|
|
|
|
|
17
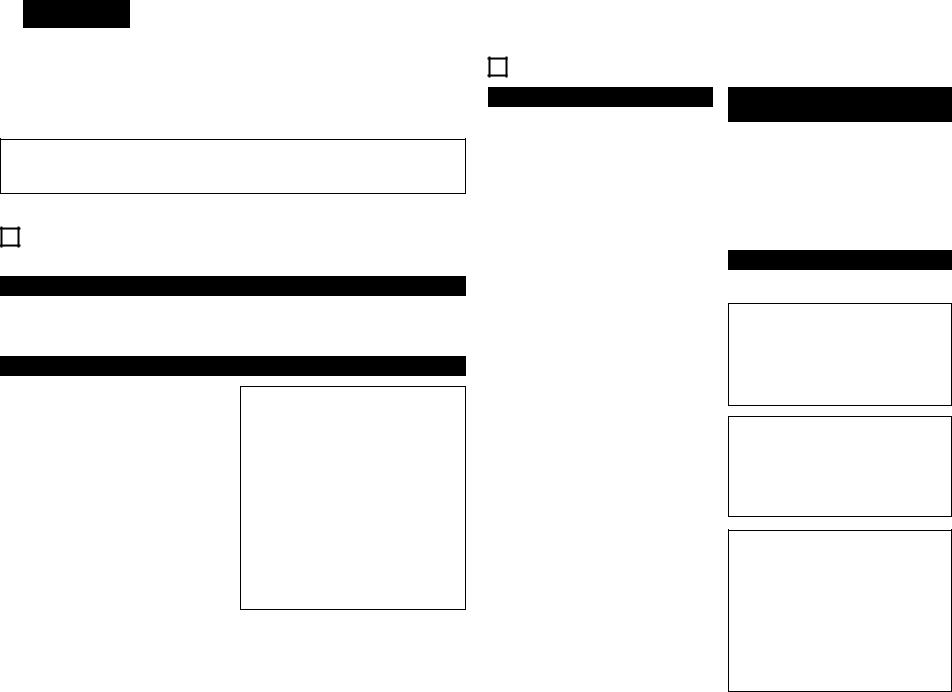
DEUTSCH
2Vorsichtsmaßnahmen bei der Aufstellung
•Wenn sich der DN-C615 in der Nähe des Verstärkers, Tuners oder anderer Komponenten befindet, kann dies zu Rauschen (einschließlich Brummen) oder Überlagerungen führen (speziell während des UKWoder MW-Empfangs).
Wenn dies auftritt, trennen Sie den DN-C615 von den anderen Komponenten oder orientieren Sie seine Position um.
HINWEIS:
•Benutzen Sie dieses Gerät in horizentaler Stellung.
Wenn Sie das Gerät mit nach oben zeigender Frontplatte benutzen, (und sich das Gerät in einer vertikalen Stellung befindet) oder wenn die Frontplatte geneigt ist, arbeitet das Gerät nicht ordnungsgemäß.
4ÖFFNEN UND SCHLIESSEN DER PLATTENLADE UND EINLEGEN EINER CD-PLATTE
Öffnen und schliessen der plattenlade
. Dieser Betrieb ist nur bei eingeschaltetem Gerät möglich.
1.Drücken Sie den Netzbetriebschalter q, um den CD-Spieler einzuschalten.
2.Drücken Sie die OPEN/CLOSE-Taste e.
Einlegen einer CD-Platte
•Vergewissern Sie sich, daß die Plattenlade vollständig geöffnet ist.
•Fassen Sie die CD-Platte an der äußeren Kante an und placieren Sie sie im Plattenfach. (Berühren Sie nicht die Signalseite — die spiegelnde Fläche).
•12 cm CD-Platten in den äußeren Ring der Lade legen, und 8 cm CD-Platten in den inneren Ring.
•Drücken Sie die OPEN/CLOSE-Taste e, um die Plattenlade zu schließen w.
•Wenn der CD-Halter geöffnet und eine CD eingelegt ist, können Sie auch die PLAY-Taste (1) y, um den CD-Halter zu schließen. (Wenn die PLAY-Taste (1) gedrückt wird, startet die Wiedergabe sofort, nachdem der CD-Inhalt gelesen wurde.)
VORSICHT :
•Falls Sie ihren Finger in der Plattenlade einklemmen, drücken Sie die OPEN/CLOSETaste.
•Bringen Sie keine Fremdkörper auf die Plattenlade. Dies kann Betriebsstörungen zur Folge haben.
•Wenn der CD-Spieler ausgeschaltet ist, darf die Plattenlade nicht von Hand eingeschoben werden, da dies Betriebbstörungen zur Folge haben kann.
•Auf diesem Player können CD-R/RW-Discs abgespielt werden; aber nur, wenn diese finalisiert sind.
Beachten Sie jedoch, dass abhängig von der Aufnahmequalität, die Wiedergabe einiger finalisierter CD-R/RW-Discs unter Umständen nicht möglich ist.
2Meldungen
Möglicherweise werden während des Betriebes des DN-C615s Meldungen auf dem Display angezeigt. Die Bedeutungen dieser Meldungen sind nachfolgend erläutert.
Meldung |
Bedeutung |
|
|
No Disc |
Keine Disc eingelegt, Disc unlesbar oder Disc falsch herum eingelegt. |
|
|
TOC Error |
Die Disc-Information wurde nicht ordnungsgemäß gelesen. |
|
|
Invalid CD |
Bei der Disc handelt es sich um eine CD-ROM, die keinerlei MP3-Dateien enthält. |
|
|
Tray Error |
Der CD-Halter konnte nicht ordnungsgemäß geöffnet oder geschlossen werden. |
|
|
5 NORMALE-CD-PLATTEN-WIEDERGABE
(1)Wiedergabestart
1.Drücken Sie den Netzbetriebschalter q, um den CD-Spieler einzuschalten.
2.Legen Sie eine beliebige CD-Platte ein.
• Wenn der CD-Halter geschlossen ist, wird die CD gelesen, die Nummer des Starttitels erscheint auf dem Titeldisplay und die verstrichene Zeit erscheint auf dem Zeitdisplay.
3.Führen Sie die Speicherungen entsprechend des Anwendungszweckes aus. (Siehe Seite 23.)
• Wählen Sie den Wiedergabe-Beendigungsmodus. (Gespeicherte Funktion)
Finish stop :
Nach Beendigung der Wiedergabe wird der Stoppmodus (die Servofunktionen schalten sich aus) eingestellt.
Finish next :
Nach Beendigung der Wiedergabe wird am Anfang des nächsten Titels der Standby-Modus eingestellt.
Nach der Wiedergabe des letzten Titels wird am Anfang des ersten Titels der StandbyModus eingestellt.
Finish recue :
Nach Beendigung der Wiedergabe wird der Standby-Modus an der Stelle eingestellt, an der die Wiedergabe gestartet worden ist.
•Standby an der Stelle, an der der Ton einsetzt. (Gespeicherte Funktion)
Den “C Det.”-Pegel einstellen.
Wenn ein Titel angewählt ist, wird die Stelle, an der der Ton einsetzt durch das Absuchen eines Titels ausfindig gemacht. An dieser Stelle wird dann der Standby-Modus eingestellt.
•Wählen Sie den Wiedergabemodus. (Gespeicherte Funktion)
SINGLE : (Modus zur Wiedergabe eines einzelnen Titels)
Der Stoppmodus wird nach der Wiedergabe des festgelegten Titels eingestellt.
CONT. : (Endlos-Wiedergabe)
Der Stoppmodus wird nach der Wiedergabe des letzten Titels eingestellt.
4.Drücken Sie die PLAY-Taste (1) y.
(2)Zeitweilige Unterbrechung der Wiedergabe an einem beliebigen Punkt
(Pause)
Die Wiedergabe kann an einem beliebigen Punkt unterbrochen und von dort aus wieder fortgesetzt werden.
1.Drücken Sie die Wiedergabe-/Pause-Taste (13) t während der Wiedergabe.
2.Um die Wiedergabe fortzusetzen, drücken Sie die PLAY-Taste (1) y noch einmal.
(3)Wiedergabestopp
1. Drücken Sie die STOP-Taste (2) u.
Auto Cue (Gespeicherte funktioen)
•Der automatische Einsatz wird automatisch an der Stelle eingesetzt, an der der Ton beginnt. Das Absuchen findet an dem Punkt statt, an dem der Ton einsetzt oder besser gesagt, an dem der Titel beginnt. Der Pegel, an dem der Ton zuerst als solcher erkannt wird, ist zwischen –36 und –48dB (3 Stufen) einstellbar.
Avisierung des Titelendes (EOM) (Gespeicherte funktioen)
•Am Ende des Titels blinkt das Zeitdisplay und gibt dem Betreiber damit ein optisches Signal, daß der Titel in Kürze zu Ende ist. Der Zeitpunkt, an dem das Blinken beginnt, ist innerhalb eines Bereiches von 0 bis 60 Sekunden (7 Stufen) vom Titelende aus gesehen, einstellbar.
Schlafmodus (Gespeicherte funktioen)
•Der Schlafmodus wird eingestellt, wenn im Standby-, Pauseoder manuellen Suchlaufmodus innerhalb der Einstellzeit kein Betrieb ausgeführt worden ist.
Wenn die PLAY/PAUSE-Taste (Wiedergabe- /Pausetaste) im Schlafmodus gedrückt wird, wird die Wiedergabe vom Anfang des Titels, bei dem der Schlafmodus eingestellt wurde, gestartet. Wenn die CUE-Taste (Aufruftaste) gedrückt wird, wird der Standby-Modus am Anfang des Titels, mit dem der Schlafmodus eingestellt worden ist, eingestellt.
18
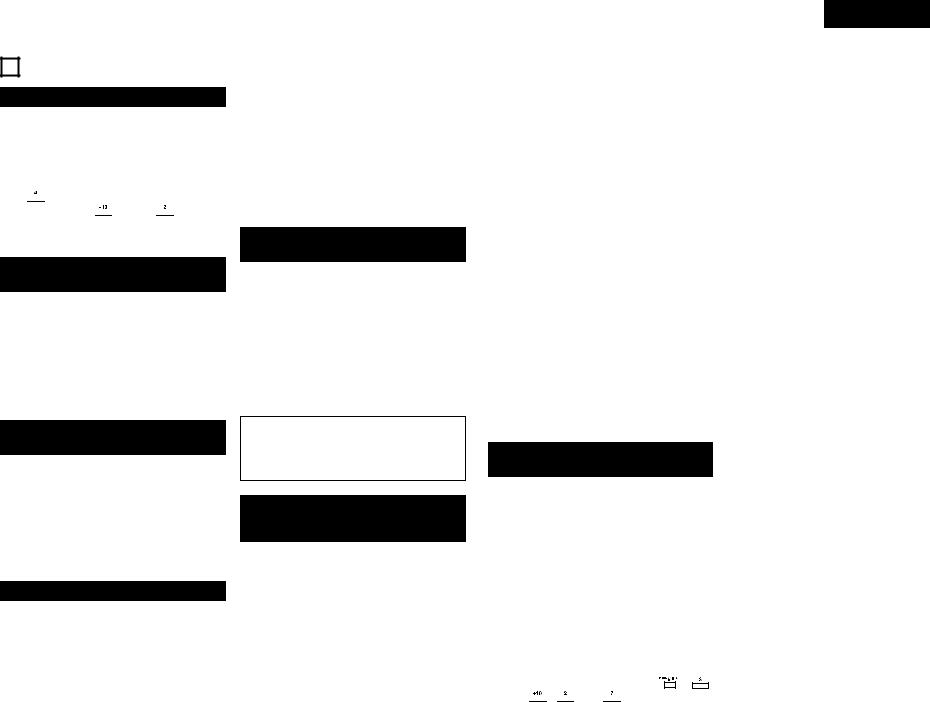
6 ZUSÄTZLICHE FUNKTIONEN
(1) Abspielen eines bestimmten titel
(Titel-Direktabruf)
1.Zur Eingabe der gewünschten Titelnummer benutzen Sie die Nummerntasten !3und die Taste +10 !4.
•Wenn Sie z.B. die Titel Nummer 4 hören möchten, so drücken Sie die Nummerntaste  und zur Wiedergabe von Titel Nummer 12
drücken Sie die 
 und die
 .
.
Die Wiedergabe setzt dann von diesem Titel aus ein.
(2)Sprung zum nachfolgenden Titel während der Wiedergabe
(Automatischer Suchlauf)
1.Drücken Sie während der Wiedergabe die 9- Taste !0.
•Der Abtaster setzt sich an den Anfang des nachfolgenden Titels und die Wiedergabe wird dann von dort aus fortgesetzt.
Durch mehrmaliges Drücken dieser Taste setzt sich der Abtaster um die entsprechende Anzahl Titel nach vorn.
(3)Sprung zum Beginn des gerade spielenden Titels während der Wiedergabe
(Automatischer Suchlauf))
1.Drücken Sie während der Wiedergabe die 8- Taste o.
•Der Abtaster setzt sich an den Anfang des gerade laufenden Titels zurück und die Wiedergabe wird dann von dort aus fortgesetzt. Durch mehrmaliges Drücken dieser Taste setzt sich der Abtaster um die entsprechende Anzahl Titel zurück.
(4) Mithörbarer Schnell-Suchlauf
(Manueller Suchlauf)
•Mit Hilfe dieser Funktion können Sie innerhalb eines Titels schnell einen gewünschten Punkt in Vorwärtsoder Rückwärtsrichtung suchen.
•Lassen Sie die Such-Taste (6oder 7) !1!2los, wenn die gewünschte Stelle erreicht wurde. Die normale Wiedergabe wird dann fortgesetzt.
•Wenn eine Such-Taste (6 oder 7) !1 !2 während des Pause-Modus gedrückt und die Taste wieder losgelassen wird, dann ist der Pause-Modus dort eingestellt, wo die Tonausgabe beginnt.
2Manueller Suchlauf vorwärts
1.Drücken Sie die Such-Taste (vorwärts) (7) !2 während der Wiedergabe.
•Die Wiedergabe des Titels wird beschleunigt.
2Manueller Suchlauf rückwärts
1.Drücken Sie die Such-Taste (rückwärts) (6) !1 während der Wiedergabe.
•Die Rückwärtswiedergabe des Titels wird beschleunigt.
(5)Wiedergabe in zufällig gewählter Reihenfolge
(Random Wiedergabe)
Mit dieser Funktion können die auf der CD aufgenommenen Titel vollkommen zufällig gewählter Reihenfolge wiedergegeben werden.
•Wenn die RANDOM-Taste !8 gedrückt wird, leuchtet die Zufallswiedergabe-Anzeige “RAND” und die Zufallswiedergabe startet automatisch.
•Wenn die RANDOM-Taste !8 gedrückt wird, während die Wiederholungs-Funktion gesetzt ist, werden die Titel einmal in zufällig gewählter Reihenfolge abgespielt und dann wieder in einer anderen Reihenfolge abgespielt, usw.
HINWEIS:
•Der Zufallswiedergabe-Modus kann nicht eingestellt werden, während sich das Gerät im Wiedergabe-Modus oder im Programm-Modus befindet.
(6)Wiederholte Wiedergabe eines durch zwei Punkte bestimmten Plattenabschnittes
(Einzeltitelwiederholung)
1.Stellen Sie den Wiedergabemodus auf den Einzelwiedergabemodus.
(Gespeicherte Funktion)
2.Drücken Sie die REPEAT-Taste !9.
•Die “REPEAT 1”-Anzeigen leuchten auf dem Display und der Modus zur Wiederholung eines einzelnen Titels ist eingestellt.
3.Verwenden Sie die automatischen Suchtasten (8 und 9) o !0, um den wiederholt wiederzugebenden Titel auszuwählen.
4.Drücken Sie die PLAY-Taste (1) y.
•Die Wiedergabe beginnt.
•Nach Beendigung des ausgewählten Titels wird der Titel noch einmal von Anfang an wiedergegeben.
DEUTSCH
•Der Modus zur Wiederholung eines einzelnen Titels kann auch durch Betätigung der REPEATTaste !9 während der Wiedergabe eingestellt werden. Der gegenwärtig wiedergegebene Titel wird noch einmal wiedergegeben.
•Drücken Sie zum Entaktivieren des Modus zur Wiederholung eines einzelnen Titels mehrmals die REPEAT-Taste !9, bis die “REPEAT 1”–Anzeige erlischt.
(Wiederholung sämtlicher Titel)
1.Stellen Sie den Wiedergabemodus auf den kontinuierlichen Wiedergabemodus. (Gespeicherte Funktion)
2.Drücken Sie die REPEAT-Taste !9.
•Die “REPEAT”-Anzeigen leuchten auf dem Display und der Modus zur Wiederholung aller Titel ist eingestellt.
3.Drücken Sie die PLAY-Taste (1) y.
•Die Disc-Wiedergabe wird wiederholt.
•Der Modus zur Wiederholung aller Titel kann auch durch Drücken der REPEAT-Taste !9 während der Wiedergabe eingestellt werden.
•Wenn Sie die REPEAT-Taste !9 während der programmierten Wiedergabe drücken, werden die Titel noch einmal in der programmierten Reihenfolge wiedergegeben.
•Drücken Sie zum Entaktivieren des Modus zur Wiederholung aller Titel mehrmals die REPEATTaste !9, bis die “REPEAT”-Anzeige erlischt.
(7)Wiedergabe bestimmter Titel in einer bestimmten Reihenfolge
(Programmierte Wiedergabe)
•Mit dieser Funktion können Sie jeden auf der Disc befindlichen Titel wählen und ihn zur Wiedergabe in jeder beliebigen Reihenfolge einprogrammieren.
•Die Programmierung ist möglich, wenn der CDHalter geöfnet ist.
•Es können bis zu 99 Titel einprogrammiert werden.
2Programmieren
•Wenn sich die CD im Stopp-Betrieb befindet, ist eine Programmierung möglich.
1.Drücken Sie die PROG./DIREC-Taste !7, so dass die Programm-Anzeige “PROG” leuchtet; verwenden Sie dann die Zifferntasten !3und die +10-Taste !4, um Titel zu programmieren.
• Drücken Sie zum Beispiel für die
Programmtitel 3, 12 und 7 |
, |
, 
 ,
, 
 und
und 
 .
.
•Immer wenn ein Titel programmiert ist, wird die Nummer des Titels auf dem Titelnummerdisplay angezeigt und die Gesamtprogrammzeit wird auf dem
Zeitdisplay angezeigt. Wenn die Gesamtprogrammzeit 99 Minuten überschritten hat, dann werden nur die ersten zwei Zahlen der Minuten angezeigt. (Die dritte und/oder vierte Zahl wird nicht angezeigt.)
•“01--00m00s” erscheint auf dem Zeitdisplay, wenn die PROG./DIRECT-Taste !7 gedrückt wird und wenn kein Programm eingestellt ist.
•“Full” erscheint auf dem Zeitdisplay, wenn Sie versuchen, mehr als 99 Titel zu programmieren.
2Wiedergabe der programmierten Titel
1.Drücken Sie die PLAY-Taste (1) y, um die Titel in der programmierten Reihenfolge wiederzugeben.
•Wenn die Titel mit der 8- oder 9-Taste o !0 ausgewählt worden sind, wird “01:**Tr”, ”02:**Tr”usw. auf dem Zeitdisplay angezeigt.
2Löschen des Programms
1.Das ganze Programm wird gelöscht, wenn die PROG./DIRECT-Taste !7 erneut gedrückt wird. Das Programm wird auch duch Drücken der OPEN/CLOSE-Taste w gelöscht.
2Speichern von Programmen
• Programme können im Speicher festgehalten werden. Wenn eine Disc, für die ein Programm gespeichert ist, eingelegt wird, wird automatisch der Modus für die programmierte Wiedergabe aktiviert.
• Es können Programme für bis zu 3 Discs gespeichert werden.
1.Folgen Sie der Anleitung unter “Programmierung”, um das Programm einzugeben.
2.Verfahren Sie zum Einstellen des Speichermodus wie im Abschnitt “(2) Voreinstellungsverfahren” beschrieben (Siehe Seite 24.)
3.Drücken Sie die 8- oder 9-Taste o !0, um “02:Prg1” (oder “03:Prg2” oder “04:Prg3”) auszuwählen.
4.Drücken Sie die PLAY-Taste (1) y.
•Das Zeichen-Display ändert sich wie folgt:
[Vor dem Ändern] [Nach dem Ändern]
Prg1 OFF Prg1 ON Prg2 OFF Prg2 ON Prg3 OFF Prg3 ON
5.Drücken Sie die STOP-Taste (2) u.
•Der Speicher-Einstellmodus ist entaktiviert und das Gerät setzt sich in den Normalbetrieb-Modus zurück.
19
DEUTSCH
•Wiedergabe einer gespeicherten Disc:
Legen Sie eine Disc ein, für die ein Programm gespeichert ist.
6.Drücken Sie die PLAY-Taste (1) y.
HINWEISE:
•Mit geöffnetem CD-Halter ist die Programmierung nicht möglich.
•Titel, die sich nicht im Programm befinden, können während der programmierten Wiedergabe durch Drücken der Nummerntasten !3 und !4 wiedergegeben werden.
(8) Bearbeiten des Programms
(Aufruf)
Wenn die Titel programmiert wurden, können sie aufgerufen und auf dem Zeitdisplay angezeigt werden.
1.Wenn die 6- oder 7-Taste !1!2gedrückt wird, wird der programmierte Titel ausgewählt.
•Der angezeigte Titel kann aus dem Programm gelöscht werden, indem Sie die Löschen-Taste (0/CLEAR) !3 zu diesem Zeitpunkt zweimal drücken. Zudem wird beim Drücken einer Nummern-Taste !3der Titel mit der zugehörigen Nummer vor den angezeigten Titel in das Programm eingefügt.
•Wenn ein Titel hinzugefügt wird, während sich schon 99 Titel im Programm befinden, wird der letzte Titel im Programm gelöscht.
(9) Wiedergabe mit einer anderen Geschwindigkeit
(PITCH)
1.Drücken Sie die CD-Pitchsteuerungs-Taste + und – !5!6, um die Wiedergabehöhe einzustellen.
•Die Wiedergabe startet mit dem eingestellten Pitch und die Pitch-Anzeige “PITCH%” leuchtet.
HINWEIS:
•Wenn die Wiedergabegeschwindigkeit verändert ist, verändern sich auch die Schaltfrequenzen der digitalen Ausgangssignale, so daß es unmöglich sein kann, digitale Signale zu empfangen.
7 WIEDERGABE VON MP3-DATEIEN
Im Internet gibt es viele Sites, von denen Sie Musikdateien im MP3-Format herunterladen können. Diese Dateien können mit Hilfe der auf der Site angegebenen Anleitung heruntergeladen und auf CD-R/RW-Discs gespeichert werden, die mit dem DN-C615 abgespielt werden können.
Die auf handelsüblichen Musik-CDs enthaltene Musik kann auf einem Computer mit Hilfe von MP3Codierprogrammen in MP3-Dateien konvertiert werden. Danach sind die Daten auf etwa 1/10 der Originalgröße reduziert.
Diese MP3-Daten können auf einer CD-R/RW-Disc gespeichert werden, wobei eine einzige 12 cm CD-R/RW-Disc etwa 10 Mal mehr Musik als eine normale Musik-CD enthalten kann, das sind etwa 100 Titel oder mehr (*).
*Dies ist ein Näherungswert für MP3-Dateien, bei denen die Titel etwa 5 Minuten lang sind und mit einer Standard-Bitrate (128 kbps) konvertiert und einer CD-R/RW-Disc mit einer Kapazität von 650 MB gespeichert werden.
Aufnahmen sind nur für den privaten Gebrauch bestimmt und dürfen in keiner Weise gegen die Urheberrechte des Urheberrechteinhabers verstoßen.
HINWEISE: |
|
|
|
|
|
|
|
|
|
|
|
|
|
|
|
|
|
|
|
|
|
|
|
|
|||
• |
Der DN-C615 ist mit “MPEG-1 Audio Layer-3”, |
• |
Maximal 255 Ordner können auf dem DN-C615 |
||||||||||||||||||||||||
|
“MPEG-2 Audio Layer-3” und “MPEG-2.5 Audio |
|
abgespielt werden. Ordner mit 8 Schichten |
||||||||||||||||||||||||
|
Layer-3” kompatibel. Er ist nicht mit MP1oder |
|
darunter können nicht abgespielt werden. Die |
||||||||||||||||||||||||
|
MP2-Standards kompatibel. |
|
|
|
|
|
|
|
maximale Dateianzahl ist demnach 999. Wenn |
||||||||||||||||||
|
|
|
ABTASTFREQUENZ |
|
|
|
|
|
1.000 Dateien vorhanden sind, werden nur die |
||||||||||||||||||
|
|
|
|
|
|
|
|
ersten 999 abgespielt. (Dateien mit einer anderen |
|||||||||||||||||||
|
MPEG 1.0 |
48 kHz |
|
44.10 kHz |
|
32 kHz |
|
|
Dateikennung als “.MP3” werden nicht gezählt.) |
||||||||||||||||||
|
|
|
|
|
|
|
|
|
|
|
|
|
|
|
|
||||||||||||
|
MPEG 2.0 |
24 kHz |
|
22.05 kHz |
|
16 kHz |
|
• |
Beim DN-C615 können Ordnerund Dateinamen |
||||||||||||||||||
|
|
|
|
|
|
|
|
|
|
|
|
|
|
|
|
wie |
Titel |
angezeigt |
werden. |
Römische |
|||||||
|
MPEG 2.5 |
12 kHz |
|
11.03 kHz |
|
08 kHz |
|
|
|||||||||||||||||||
|
|
|
|
|
Großbuchstaben und/oder Ziffern und “__” |
||||||||||||||||||||||
|
|
|
|
|
|
|
|
|
|
|
|
|
|
|
|
||||||||||||
• |
Stellen Sie beim Schreiben von MP3-Dateien auf |
|
(Unterstriche) |
werden gescrollt. |
(Es |
können |
|||||||||||||||||||||
|
maximal |
31 |
Zeichen |
angezeigt |
werden.) |
||||||||||||||||||||||
|
eine |
CD-R/RW-Disc |
das |
Format |
des |
|
|||||||||||||||||||||
|
|
Außerdem werden Ordnerund Dateinamen, die |
|||||||||||||||||||||||||
|
Schreibprogramms auf “ISO9660 level 1” oder |
|
|||||||||||||||||||||||||
|
|
andere |
Symbole |
enthalten, |
nicht |
einwandfrei |
|||||||||||||||||||||
|
“ISO9660 level 2”, “Joliet” oder “Romeo”. Die in |
|
|||||||||||||||||||||||||
|
|
angezeigt. |
|
|
|
|
|
|
|
|
|||||||||||||||||
|
einem |
anderen |
Format |
geschriebenen MP3- |
|
|
|
|
|
|
|
|
|
||||||||||||||
|
Dateien |
werden |
möglicherweise |
nicht |
• |
Der DN-C615 ist mit dem ID3-Tag (Ver. 1.*, Ver. |
|||||||||||||||||||||
|
|
2.0) kompatibel. |
|
|
|
|
|
|
|
||||||||||||||||||
|
einwandfrei |
|
abgespielt. |
Bei |
|
einigen |
|
|
|
|
|
|
|
|
|||||||||||||
|
|
|
• Es ist unter Umständen nicht möglich, einige CD- |
||||||||||||||||||||||||
|
Schreibprogrammen |
ist |
es |
nicht |
möglich, |
||||||||||||||||||||||
|
Aufnahmen |
im |
“ISO9660”-Format zu |
|
machen. |
|
R/RW-Discs aufgrund von Schmutz, Kratzern oder |
||||||||||||||||||||
|
|
|
der Disc-Eigenschaften abzuspielen. |
|
|
|
|||||||||||||||||||||
|
Verwenden |
Sie |
ein Schreibprogramm |
mit |
|
|
|
|
|||||||||||||||||||
|
• |
Befestigen Sie keine Aufkleber oder Klebeband |
|||||||||||||||||||||||||
|
“ISO9660”-Format. |
|
|
|
|
|
|
|
|
|
|
||||||||||||||||
• Im Allgemeinen gilt, je höher die Bitrate der MP3- |
|
auf den Etiketten oder Signalseiten der CDs oder |
|||||||||||||||||||||||||
|
CD-R/RW-Discs. Die Klebemasse könnte auf die |
||||||||||||||||||||||||||
|
Datei, desto besser die Soundqualität. Beim DN- |
|
|||||||||||||||||||||||||
|
|
Disc-Oberfläche |
gelangen, |
wodurch |
sie im |
||||||||||||||||||||||
|
C615 ist es |
empfehlenswert, |
MP3-Dateien zu |
|
|||||||||||||||||||||||
|
verwenden, die mit einer Bitrate von 128 kbps |
|
Inneren des Gerätes stecken bleiben könnte. |
||||||||||||||||||||||||
|
• Der DN-C615 ist Multi-Session-kompatibel. |
||||||||||||||||||||||||||
|
oder höher geschrieben sind. |
|
|
|
|
|
|
||||||||||||||||||||
|
|
|
|
|
|
|
|
Es können |
nur |
Music-CDs |
abgespielt |
werden, |
|||||||||||||||
• Das Schreibprogramm ändert beim Schreiben von |
|
||||||||||||||||||||||||||
|
MP3-Dateien |
auf |
die |
CD-R/RW-Disc |
|
wenn |
die |
erste |
Session |
aus einer Musik-CD |
|||||||||||||||||
|
|
besteht, |
und |
es können |
nur MP3-Dateien |
||||||||||||||||||||||
|
möglicherweise |
die |
Positionen |
der Ordner |
und |
|
|||||||||||||||||||||
|
|
abgespielt werden, wenn die erste Session aus |
|||||||||||||||||||||||||
|
Dateien, so |
dass |
|
die |
Dateien nicht |
in |
der |
|
|||||||||||||||||||
|
erwarteten Reihenfolge abgespielt werden. |
|
|
|
MP3-Dateien besteht. |
|
|
|
|
|
|||||||||||||||||
|
|
|
• |
Der DN-C615 ist mit Wiedergabelisten kompatibel. |
|||||||||||||||||||||||
• |
Stellen |
Sie |
sicher, |
dass |
MP3-Dateien |
mit |
der |
||||||||||||||||||||
|
(.m3u im WINAMP-Format) (Gespeicherte funktioen) |
||||||||||||||||||||||||||
|
Dateikennung “.MP3” versehen werden. Dateien |
|
|||||||||||||||||||||||||
|
mit einer anderen Dateikennung als “.MP3” oder |
|
|
|
|
|
|
|
|
|
|
|
|
||||||||||||||
|
|
HINWEISE: |
|
|
|
|
|
|
|
|
|||||||||||||||||
|
ohne Dateikennung können nicht abgespielt |
|
|
|
|
|
|
|
|
|
|||||||||||||||||
|
werden. (Bei Macintosh-Computern können MP3- |
|
• Bei einigen Schreibprogrammen erfolgt die |
|
|||||||||||||||||||||||
|
Dateien abgespielt werden, wenn während der |
|
Wiedergabe unter Umständen nicht ordnungsgemäß. |
|
|||||||||||||||||||||||
|
Aufnahme auf CD-R/RW-Discs die Dateikennung |
|
Stellen Sie in diesem Fall auf “PLst=OFF”. |
|
|
||||||||||||||||||||||
|
“.MP3” hinter dem Dateinamen geschrieben |
|
• Die |
|
Wiedergabeliste |
|
benötigt |
unter |
|
||||||||||||||||||
|
wird, der aus maximal 8 römischen |
|
Umständen einige Zeit für das Lesen. |
|
|
||||||||||||||||||||||
|
Großbuchstaben und/oder Ziffern besteht.) |
|
|
|
• Die maximale Anzahl der Wiedergabelisten |
|
|||||||||||||||||||||
• Zum Schutz von Urheberrechten werden |
|
beträgt ebenfalls 255. Wenn über 255 |
|
||||||||||||||||||||||||
|
während der Wiedergabe von MP3-Dateien keine |
|
Wiedergabelisten vorhanden sind, werden nur |
|
|||||||||||||||||||||||
|
digitalen Signale ausgegeben. |
|
|
|
|
|
|
|
die ersten 255 ausgeführt. |
|
|
|
|
||||||||||||||
|
|
|
|
|
|
|
|
|
|
|
|
|
|
|
|
|
|
|
|
|
|
|
|
|
|
|
|
|
|
|
|
|
|
|
|
|
|
|
|
|
|
|
|
|
|
|
|
|
|
|
|
|
|
|
|
(1) Wiedergabe von Ordnern oder Dateien
1. Legen Sie eine Disc mit MP3-Dateien ein. |
wDrücken Sie die 8- oder 9-Taste o !0, |
|||
• Beispiel |
um den Ordner auszuwählen, die Sie sich |
|||
Wenn die Anzahl der Ordner “120” lautet und die |
anhören möchten. |
|||
Anzahl der Dateien “512” |
• Der Ordnername scrollt über das Display. |
|||
|
|
|
eWenn die TITLE-Taste @1zu diesem Zeitpunkt |
|
|
|
|
gedrückt wird, können die Dateien im Ordner |
|
|
|
|
ausgewählt werden. |
|
|
|
|
• Gehen Sie wie unter Auswahl einer Datei |
|
|
|
|
||
2. [ Auswahl eines Ordners ] |
“Auswahl einer Datei“ beschrieben vor. |
|||
qDrücken Sie im Stopp-Modus die FOLDER-Taste |
[ Auswahl einer Datei ] |
|||
@2, um die Ordner-Anzeige “FOLDER” |
||||
qDrücken Sie im Stopp-Modus die TITLE-Taste @1, |
||||
aufleuchten zu lassen. |
||||
um die Datei-Anzeige “FILE” aufleuchten zu |
||||
|
|
|
||
|
|
|
lassen. |
|
20
Dies ist nur notwendig, wenn die OrdnerAnzeige “FOLDER” nicht leuchtet.
wDrücken Sie die 8- oder 9-Taste o !0, um die Datei auszuwählen, die Sie sich anhören möchten.
• Der Dateiname scrollt über das Display.
3.Drücken Sie die PLAY-Taste (1) y.
Wenn die TIME-Taste @0 während der Wiedergabe gedrückt wird, wird die Ordner- “FOLDER” oder Datei-Anzeige “FILE” ausgeschaltet und die Titelnummer der verstrichenen Titelzeit wird angezeigt.
Das Display wird bei jeder Betätigung der TITLETaste @1 während der Wiedergabe wie folgt umgeschaltet :Verstrichene Zeit des gegenwärtig abgespielten Titels
Dateiname (Die Datei-Anzeige “FILE” leuchtet.)
Titelname (Die Titel-Anzeige “TITLE” leuchtet.)
Name des Interpreten (Die Interpreten-Anzeige “ARTIST” leuchtet.)
Albumname (Die Album-Anzeige “ALBUM” leuchtet.)
Verstrichene Zeit des gegenwärtig abgespielten Titels
(2)Programmierte Wiedergabe von Ordnern oder Dateien
Verwenden Sie diese Funktion, um bestimmte Titel der Disc auszuwählen und für die Wiedergabe in einer bestimmten Reihenfolge zu programmieren.
Es können maximal 99 Dateien und Ordner programmiert werden. (Programme können sowohl Dateien als auch Ordner enthalten.)
2Programmierung
1.Drücken Sie im Stopp-Modus die PROG./DIRECT-Taste !7.
• Die Programm-Anzeige “PROG” leuchtet.
2.[ Auswahl eines Ordners ]
q Drücken Sie die FOLDER-Taste @2, um die Ordner-Anzeige “FOLDER” aufleuchten zu
lassen
wDrücken Sie die Nummern-Tasten !3!4, um den zu programmierenden Ordner
auszuwählen.
• Beispiel : Wenn Ordner “5” an erster Stelle programmiert werden soll
[ Auswahl einer Datei ]
q Drücken Sie die TITLE-Taste @1, um die DateiAnzeige “FILE” aufleuchten zu lassen.
Dieser Betrieb ist nur bei Aufleuchten der Ordner-Anzeige “FOLDER” erforderlich.
wDrücken Sie die Nummern-Tasten !3!4, um die zu programmierende Datei auszuwählen.
• Beispiel : Wenn der 21. Titel an zweiter
Stelle programmiert werden soll
3. Drücken Sie die PLAY-Taste (1) y.
•Die Titel werden in der programmierten Reihenfolge abgespielt.
Wenn die TIME-Taste @0 während der Wiedergabe gedrückt wird, wird die Ordner- “FOLDER” oder Datei-Anzeige “FILE” ausgeschaltet und die Titelnummer der verstrichenen Titelzeit wird angezeigt.
2Bearbeiten des Programms
Bei jedem Drücken der 6- oder 7-Taste !1 !2 werden die programmierten Titel in der programmierten Reihenfolge auf dem Display angezeigt.
Löschen eines Programmteils
q Wählen Sie mit den Suchen-Tasten (6, 7) !1!2die Datei oder den Ordner aus, die/der gelöscht werden soll. Nach der Auswahl wird der Inhalt dieses Programms angezeigt.
w Drücken Sie die 0/CLEAR-Taste !3zwei Mal, um die angezeigte Datei oder den angezeigten Ordner zu löschen.
Hinzufügen eines Programmteils
q Wählen Sie mit den Suchen-Tasten (6, 7) !1!2die Datei oder den Ordner aus, die/der hinzugefügt werden soll.
w Gehen Sie wie unter Auswahl eines Ordners “Auswahl eines Ordners“ oder Auswahl einer Datei “Auswahl einer Datei“ beschrieben vor, um eine Datei oder einen Ordner zu dem Programm hinzuzufügen.
Drücken Sie im Stopp-Modus die PROG./DIRECT-Taste !7, um das gesamte Programm zu löschen.
Drücken Sie für die Verwendung der Direktwiedergabe-Funktion zuerst die PROG./DIRECT-Taste !7 im Stopp-Modus, um den Programm-Modus abzubrechen.
HINWEIS:
•Eine Programmierung ist nicht im Wiedergabeoder Pause-Modus möglich.
DEUTSCH
2Speichern von Programmen
•Programme können im Speicher festgehalten werden. Wenn eine Disc, für die ein Programm gespeichert ist, eingelegt wird, wird automatisch der Modus für die programmierte Wiedergabe aktiviert.
•Es können Programme für bis zu 3 Discs gespeichert werden.
1.Folgen Sie der Anleitung unter “Programmierung”, um das Programm einzugeben.
2.Verfahren Sie zum Einstellen des Speichermodus wie im Abschnitt “(2) Voreinstellungsverfahren” beschrieben (Siehe Seite 24.)
3.Drücken Sie die 8- oder 9-Taste o !0, um “02:Prg1” (oder “03:Prg2” oder “04:Prg3”) auszuwählen.
4.Drücken Sie die PLAY-Taste (1) y.
• Das Zeichen-Display ändert sich wie folgt:
[Vor dem Ändern] |
|
[Nach dem Ändern] |
||
Prg1 OFF |
|
Prg1 ON |
||
Prg2 |
OFF |
|
Prg2 |
ON |
Prg3 |
OFF |
|
Prg3 |
ON |
5.Drücken Sie die STOP-Taste (2) u.
•Der Speicher-Einstellmodus ist entaktiviert und das Gerät setzt sich in den NormalbetriebModus zurück.
•Wiedergabe einer gespeicherten Disc:
Legen Sie eine Disc ein, für die ein Programm gespeichert ist.
6.Drücken Sie die PLAY-Taste (1) y.
(3) Zufallswiedergabe
2Zufallswiedergabe aller Titel
Verwenden Sie diese Funktion, um alle Titel auf der Disc ein Mal in zufälliger Reihenfolge abzuspielen.
1.Stellen Sie den Wiedergabemodus auf den kontinuierlichen Wiedergabemodus. (Gespeicherte Funktion)
2.Drücken Sie im Stopp-Modus (die Ordner-Anzeige “FOLDER” schaltet sich aus) die RANDOM-Taste !8.
•Die Zufallswiedergabe-Anzeige “RAND” leuchtet.
3.Drücken Sie die PLAY-Taste (1) y.
•Die Titel werden in zufälliger Reihenfolge automatisch abgespielt.
Drücken Sie die RANDOM-Taste !8erneut, um den Modus für Zufallswiedergabe aller Titel aufzuheben.
2Zufallswiedergabe eines einzelnen Ordners
Verwenden Sie diese Funktion, um alle Titel in einem einzelnen Ordner in zufälliger Reihenfolge abzuspielen.
1.Stellen Sie den Wiedergabemodus auf den Einzelwiedergabemodus.
(Gespeicherte Funktion)
2.Drücken Sie im Stopp-Modus die RANDOMTaste @2.
•Die Ordner-Anzeige “FOLDER” leuchtet.
3.Drücken Sie die 8- oder 9-Taste o !0, um den in Zufallswiedergabe wiederzugebenden Ordner auszuwählen.
•Der Ordnername scrollt über das Display.
4.Drücken Sie einmal die RANDOM-Taste !8.
•Die Zufallswiedergabe- “RAND” und OrdnerAnzeige “FOLDER” leuchten.
5.Drücken Sie die PLAY-Taste (1) y.
•Im eingestellten Ordner wird ein Titel automatisch ausgewählt, und die Wiedergabe wird gestartet.
•Der Stopp-Modus wird automatisch eingestellt, wenn alle Titel in dem Ordner
abgespielt wurden
Wenn die TIME-Taste @0 während der Wiedergabe gedrückt wird, wird die Titelnummer der verstrichenen Titelzeit angezeigt. (Die Ordner-Anzeige “FOLDER” wird nicht ausgeschaltet.)
Drücken Sie die RANDOM-Taste !8erneut, um den Modus für die Zufallswiedergabe eines Ordners aufzuheben.
HINWEIS:
•Der Zufallswiedergabe-Modus kann nicht eingestellt werden, während sich das Gerät im WiedergabeModus oder im Programm-Modus befindet.
21
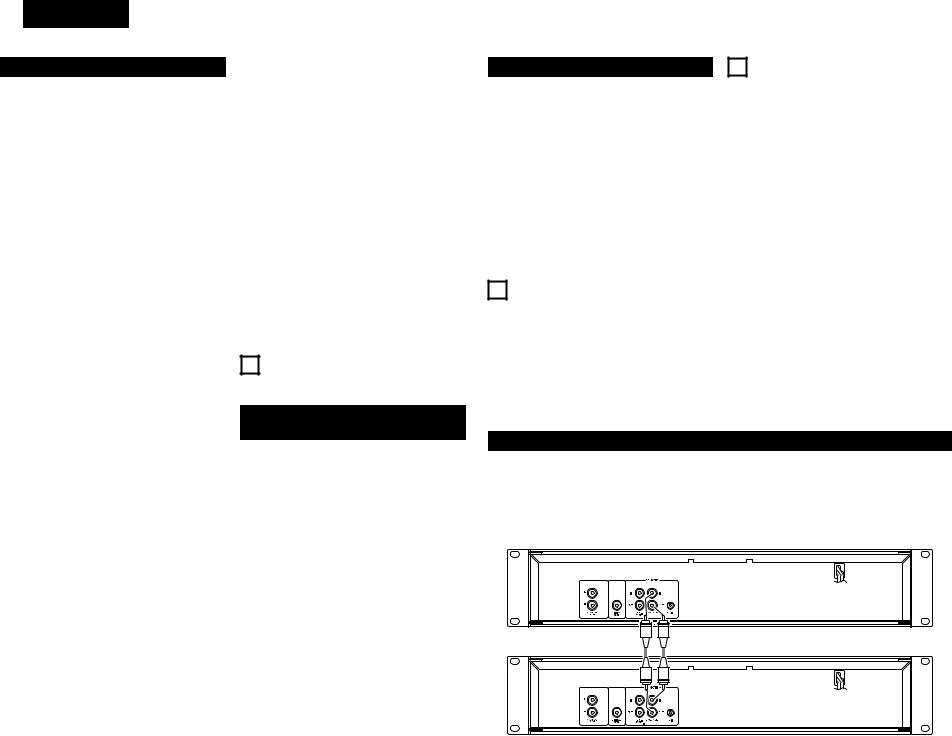
DEUTSCH
(4) Wiedergabewiederholung
2Wiedergabewiederholung aller Titel in einem einzelnen Ordner
1.Stellen Sie den Wiedergabemodus auf den Einzelwiedergabemodus.
(Gespeicherte Funktion)
2.Drücken Sie im Stopp-Modus die FOLDER-Taste
@2.
•Die Ordner-Anzeige “FOLDER” leuchtet.
3.Drücken Sie die 8- oder 9-Taste o !0, um den Ordner auszuwählen, die Sie sich anhören möchten.
•Der Ordnername scrollt über das Display.
4.Drücken Sie die REPEAT-Taste !9.
•Die “REPEAT 1”-Anzeigen leuchten auf dem Display und der Modus zur Wiederholung eines einzelnen Titels ist eingestellt.
5.Drücken Sie die PLAY-Taste (1) y.
•Die Wiedergabe startet vom ersten Titel im ausgewählten Ordner.
•Wenn der letzte Titel im ausgewählten Ordner
abgespielt worden ist, wird die Wiedergabe vom Anfang des ersten Titels im ausgewählten Ordner fortgesetzt und die Titel werden wiederholt wiedergegeben.
Wenn die TIME-Taste @0 während der Wiedergabe gedrückt wird, wird die Titelnummer der verstrichenen Titelzeit angezeigt. (Die Ordner-Anzeige “FOLDER” wird nicht ausgeschaltet.)
2Wiedergabewiederholung aller Titel
1.Stellen Sie den Wiedergabemodus auf den kontinuierlichen Wiedergabemodus. (Gespeicherte Funktion)
2.Drücken Sie im Stopp-Modus die TITLE-Taste @1, um die Datei-Anzeige “FILE” aufleuchten zu lassen.
3.Drücken Sie die REPEAT-Taste !9.
•Die “REPEAT”-Anzeigen leuchten auf dem Display und der Modus zur Wiederholung aller Titel ist eingestellt.
4.Drücken Sie die PLAY-Taste (1) y.
•Die Disc wird wiederholt abgespielt.
•Wenn der letzte Titel auf der Disc abgespielt worden ist, wird die Wiedergabe vom Anfang des ersten Titels fortgesetzt.
2Einzeltitelwiederholung
1.Stellen Sie den Wiedergabemodus auf den Einzelwiedergabemodus.
(Gespeicherte Funktion)
2.Drücken Sie die REPEAT-Taste !9.
•Die “REPEAT 1”-Anzeigen leuchten auf dem Display und der Modus zur Wiederholung eines einzelnen Titels ist eingestellt.
3.Verwenden Sie die automatischen Suchtasten (8 und 9) o !0, um den wiederholt wiederzugebenden Titel auszuwählen.
4.Drücken Sie die PLAY-Taste (1) y.
•Die Wiedergabe beginnt.
•Nach Beendigung des ausgewählten Titels wird der Titel noch einmal von Anfang an wiedergegeben.
•Der Modus zur Wiederholung eines einzelnen Titels kann auch durch Betätigung der REPEAT-Taste !9 während der Wiedergabe eingestellt werden. Der gegenwärtig wiedergegebene Titel wird noch einmal wiedergegeben.
•Drücken Sie zum Entaktivieren des Modus zur Wiederholung eines einzelnen Titels mehrmals die REPEAT-Taste !9, bis die “REPEAT”–Anzeige erlischt.
8WISSENSWERTES ÜBER CD-PLATTEN
Vorsichtsmaßregeln zur
Handhabung von CD-Platten
•Die Oberfläche der CD-Platten darf nicht mit den Fingern berührt werden bzw. mit Öl oder Staub in Berührung kommen. Die Oberfläche kann mit einem weichen, trockenen Tuch saubergewischt werden.
•Zur Reinigung von CD-Platten dürfen weder Wasser, Benzin, Verdünner, Schallplattenreiniger, Antistatik-Mittel noch silikonbehandelte Tücher verwendet werden.
•Die CD-Platten müssen vorsichtig gehandhabt werden, um eine Beschädigung der Oberfläche zu vermeiden. Besondere Vorsicht ist bei der Entnahme der Platten aus der Box, bzw. beim Zurücklegen in die Box, geboten.
•Biegen Sie CD-Platten nicht.
•Erwärmen Sie CD-Platten nicht.
•Erweitern Sie nicht das Loch in der Mitte der CDPlatten.
•Beschriften Sie die CD-Platte nicht und kleben Sie auch keine Etiketten auf.
•Wenn die CD-Platten von einem warmen an einen kalten Ort gebracht werden, z.B. im Winter ins Freie, schlägt sich Feuchtigkeit auf den CD-Platten nieder. Es darf keinesfalls versucht werden, die CDPlatten mit einem Haartrockner oder dergleichen zu trocknen. Warten Sie bis sich die Feuchtigkeit von allein verflüchtigt hat.
Vorsichtsmaßregeln zur Lagerung
•CD-Platten sollten nach der Wiedergabe immer in ihre dazugehörige Box zurückgelegt werden.
•Die CD-Platten bei Nichtbenutzung in ihrer dazugehörigen Box lagern, um Staub und Verschmutzung vorzubeugen und damit die Lebenszeit der CD-Platten zu verlängern.
•Die CD-Platten dürfen nicht an folgenden Orten gelagert werden:
1)An Orten, wo sie längere Zeit direkter Sonneneinstrahlung ausgesetzt sind.
2)An staubigen oder feuchten Orten.
3)An Orten, wo sie starker Wärmeeinwirkung ausgesetzt sind, z.B. in der Nähe von Heizkörpern usw.
9WIEDERGABESTART BEIM EINSCHALTEN DES GERÄTES
Die Wiedergabe beginnt automatisch, wenn das Gerät eingeschaltet worden ist.
•Die Funktion zum automatischen Starten der Wiedergabe beim Einschalten des Gerätes kann mit der “GESPEICHERTE FUNKTIONEN UND BETRIEBE” (Seite 23) eingestellt werden.
10 ERWEITERTE FUNKTION
Mehrere Einheiten des DN-C615 oder anderer Produkte von DENON (DN-780R, usw.) können für längere Wiedergabe zeiten, simultane Aufnahmen und andere Funktionen kombiniert werden.
2KASKADEN (MULTI-KONTINUIERLICHER)-BETRIEB
•Sehen Sie hinsichtlich des Anschlusses der Geräte Abbildung 1 an.
•chließen Sie die CASCADE OUT-Buchsen mit einem einzelnen RCA-Kabel an die CASCADE IN-Buchsen des Gerätes an.
•Wenn die ersten und die letzten Geräte wie in Abbildung 1 dargestellt angeschlossen sind, wird die Wiedergabe endlos durchgeführt.
•Wenn das erste und das letzte Gerät nicht angeschlossen ist, stoppt der Betrieb beim letzten Gerät.
Kaskaden-Wiedergabe
1.Stellen Sie den Kaskadenmodus aller Geräte auf Kaskade=ein “Cas=ON”. (Gespeicherte Funktion)
2.Drücken Sie die PLAY-Taste (1) y auf Gerät 1. Die Wiedergabe startet.
• Die Wiedergabe an Gerät 1 endet und die Wiedergabe an Gerät 2 startet.
3.Die Wiedergabe stoppt, wenn die Stopptaste auf dem gegenwärtigen Wiedergabegerät gedrückt wird.
Abbildung 1
Gerät 1 |
DN-C615 |
Gerät 2 |
DN-C615 |
22
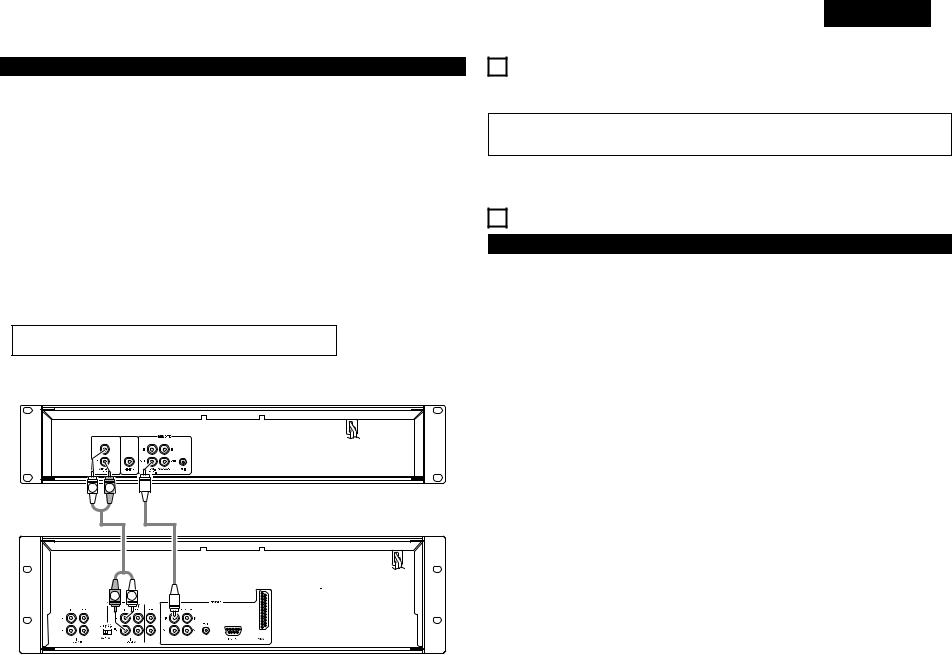
Extern synchronisierte Aufnahme
Die synchronisierte Aufnahme kann verwendet werden, wenn der DN-C615 mit einem anderen Produkt von DENON (DN-780R usw.) kombiniert wird.
Wenn die Wiedergabetaste des CD-Players gedrückt wird, wird von der Extern-
Synchron-Buchse (EXT. SYNC.) ein synchronisiertes Startsignal ausgegeben. Wenn die Stopp-Tasten (STOP) auf dem CD-Player gedrückt werden, , wird von der Extern-Synchron-Buchse (EXT. SYNC.) ein synchronisiertes Stoppsignal ausgegeben.
•Sehen Sie sich hinsichtlich des Anschlusses der Geräte die Abbildung 2 an.
•Schließen Sie die EXT. SYNC. OUT-Buchsen mit einem einzelnen RCA-Kabel an die EXT. SYNC. IN-Buchsen des Gerätes an.
Stellen Sie den Infrarot-Sensor aller Geräte auf “OFF”, wenn Sie diese Funktion verwenden. Stellen Sie zudem die Infrarot-Fernbedienungscodes aller Geräte ein. (Lesen Sie dazu den Abschnitt Voreinstellungsfunktion “GESPEICHERTE FUNKTIONEN UND BETRIEBE” (Siehe Seite 23).)
Wenn Sie diese Einstellungen nicht durchführen, könnte dies zu einer Fehlfunktion führen.
1.Legen Sie eine CD in den DN-C615 ein. Legen Sie leere Kassetten in alle Decks.
2.Stellen Sie bei allen Decks den Rückwärts-Modus und Dolby NR ein.
3.Stellen Sie den Doppelaufnahmepegel der DN-780Rs ein. (Master/Slave-Schalter ist auf Aus (OFF) gestellt.)
4.Drücken Sie die Doppelaufnahme-Taste des DN-780R.
5.Drücken Sie die PLAY-Taste (1) y des DN-C615. Die Aufnahme startet bei allen Decks.
HINWEIS:
•Benutzen Sie soweit wie möglich Bänder mit derselben Spielzeit (Länge).
6.Drücken Sie die STOP-Taste (2) u auf einem der Geräte. Alle Geräte werden in den Stopp-Modus geschaltet.
Abbildung 2
|
DN-C615 |
L |
R |
DN-780R
R |
L |
DEUTSCH
11 VOR DEM ABSCHALTEN DES STROMES
Wenn Sie den CD-Spieler nicht mehr benutzen wollen, achten Sie vor dem Abschalten des Stromes darauf, daß der Plattenhalter mit der OPEN/CLOSE-Taste (5) geschlossen worden ist.
VORSICHT:
•Schließen Sie den Plattenhalter nicht mit Gewalt, wenn der Strom abgeschaltet ist. Dies kann zu einer Beschädigung des Gerätes während des Transportes führen.
12GESPEICHERTE FUNKTIONEN UND BETRIEBE
(1)Auflistung der Speicher-Funktionen
•Funktionen können mit Hilfe der Tasten an der Frontplatte des Gerätes gespeichert werden. Diese Einstellungen werden in einem energieunabhängigem Speicher abgelegt, so daß Sie selbst beim Ausschalten des Gerätes erhalten bleiben.
•Die in nachfolgender Tabelle aufgeführten Funktionen können gespeichert werden. Stellen Sie die Funktionen abhängig vom Nutzungszweck ein, um eine noch wesentlich bessere Wiedergabequalität zu erreichen.
•Mit einer der Speicherfunktionen können Sie sich Informationen über dieses Gerät anzeigen lassen (Mikroprozessor-Version).
Art der |
|
Werkseitig vor der |
|
|
gespeicherten |
Beschreibung |
Auslieferung |
Nr. |
|
Funktion |
|
eingestellt |
|
|
|
|
|
|
|
Voreinstell-Typ |
Anwahl der Speicherart. |
Preset Type 1 |
1 |
|
|
|
|
|
|
Programm 1 |
Einstellung, ob das Programm 1 wiedergegeben |
Program 1 OFF |
2 |
|
werden soll. |
||||
|
|
|
||
|
|
|
|
|
Programm 2 |
Einstellung, ob das Programm 2 wiedergegeben |
Program 2 OFF |
3 |
|
werden soll. |
||||
|
|
|
||
|
|
|
|
|
Programm 3 |
Einstellung, ob das Programm 3 wiedergegeben |
Program 3 OFF |
4 |
|
werden soll. |
||||
|
|
|
||
|
|
|
|
|
Strom-Einschaltmodus |
Betrieb nach Einschalten des Gerätes. |
Power On Stop |
5 |
|
|
|
|
|
|
Parallelsignal |
Auswahl, ob parallele Fernsteuerungssignale |
Time = ELAPSED |
6 |
|
akzeptiert werden sollen. |
||||
|
|
|
||
|
|
|
|
|
Zufallswiedergabe |
Einstellung des Zufallswiedergabe-Modus bei |
Random OFF |
7 |
|
Einschaltung der Stromversorgung. |
||||
|
|
|
||
|
|
|
|
|
Beendigungsmodus |
Betrieb nach Beendigung der Wiedergabe. |
Finish Stop |
8 |
|
|
|
|
|
|
Nächste Spur |
Betrieb, wenn der Wähler während der Wiedergabe |
Reserve. OFF |
9 |
|
reservieren |
gedreht wird. |
|||
|
|
|||
|
|
|
|
|
Wiedergabesperre |
Aktivierung-/Entaktivierung der Bedienfeldtasten |
Play Lock OFF |
10 |
|
während der Wiedergabe. |
||||
|
|
|
||
|
|
|
|
|
Bedienfeldsperre |
Auswählen, ob die Bedienfeldtasten aktiviert sein |
Panel OFF |
11 |
|
sollen oder nicht. |
||||
|
|
|
||
|
|
|
|
|
Automatisches |
Einstellung, ob der automatische Cue-Betrieb |
|
|
|
ausgeführt und der Tonstartpegel eingestellt werden |
CueDet. OFF |
12 |
||
Aufrufen |
||||
soll. |
|
|
||
|
|
|
||
|
|
|
|
23
Loading...