


Delonghi 95FLSS STEEL, 95FLC, 95FL, 93FL, O 195 User Manual
...Aerizovmeno" fouvrno"
Odhgive" crhvshs-Euntagev"
1

A |
B |
C |
|
|
D |
|
|
E |
|
|
F |
H |
|
G |
I |
|
|
|
L |
|
|
M |
|
|
N |
|
O |
M |
|
|
N |
|
A |
TOP HEATING ELEMENT |
E |
ON/OFF AND PROGRAMMING KNOB |
I |
CRUMB TRAY |
|
|
RESISTANCE SUPERIEURE |
|
BOUTON ALLUMAGE ET PROGRAMMATION |
|
PLAQUE DE RECOLTE DES MIETTES |
|
|
HEIZELEMENT OBERHITZE |
|
EIN/AUSUND PROGRAMMSCHALTER |
|
KRÜMELBLECH |
|
|
RESISTENZA SUPERIORE |
|
MANOPOLA ACCENSIONE E PROGRAMMAZIONE |
VASSOIO RACCOGLIBRICIOLE |
||
|
BOVENSTE VERWARMINGSELEMENT |
|
AAN/UITPROGRAMMAKEUZEKNOP |
|
KRUIMELOPVANGPLAAT |
|
|
RESISTENCIA SUPERIOR |
|
PERILLA DE ENCENDIDO Y PROGRAMACION |
|
BANDEJA RECOLECTORA DE MIGAS |
|
|
RESISTÊNCIA SUPERIOR |
|
MANÍPULO LIGAÇÃO E PROGRAMACÃO |
|
BANDEJA P/RECOLHER MIGALHAS |
|
|
ANW ANTISTASH |
|
DIAKOPTHS LEITOURGIAS KAI |
|
DIAKOPTHS EPILOGHS LEITOURGIAS |
|
B |
OVEN LIGHT ( ) |
F |
FUNCTION SELECTOR KNOB |
L |
DIETETIC GRILL (IF SUPPLIED) |
|
|
LUMIÈRE INTÉRIEURE FOUR ( ) |
|
BOUTON SELECTION FONCTIONS |
|
GRILLE DIETETIQUE (SI PREVUE) |
|
|
INNENBELEUCHTUNG ( ) |
|
FUNKTIONSWAHLSCHALTER |
|
DIÄTROST (FALLS VORGESEHEN) |
|
|
LUCE INTERNA FORNO ( ) |
|
MANOPOLA SELETTORE FUNZIONI |
|
GRIGLIA DIETETICA (SE PREVISTA) |
|
|
OVENVERLICHTING ( ) |
|
FUNCTIEKEUZEKNOP |
|
DIEETGRIL (INDIEN VOORZIEN) |
|
|
LUZ INTERIOR DEL HORNO ( ) |
|
PERILLA SELECTOR DE FUNCIONES |
|
PARILLA DIETETICA (SI EXISTE) |
|
|
LUZ INTERNA DO FORNO ( ) |
|
MANÍPULO SELETOR DAS FUNÇÕES |
|
GREHLA DIETÉTICA (SE FOR PREVISTA) |
|
|
ESWTERIKH LAMPA FOURNOU ( ) |
|
DIAKOPTHS EPILOGHS LEITOURGIAS |
|
DIATHTIKH SCARA (AN PROBLEVPETAI) |
|
C CONTROL PANEL |
G |
PILOT LIGHT |
M |
DRIPPING-PAN |
|
|
|
PANNEAU COMMANDES |
|
TEMOIN LUMINEUX |
|
LECHEFRITE |
|
|
BEDIENUNGSBLENDE |
|
BETRIEBSANZEIGE |
|
FETTPFANNE |
|
|
PANNELLO COMANDI |
|
LAMPADA SPIA |
|
LECCARDA |
|
|
BEDIENINGSPANEEL |
|
CONTROLELAMPJE |
|
BAKPLAAT |
|
|
TABLERO DE MANDOS |
|
LUZ PILOTO |
|
GRASERA |
|
|
PAINEL DE COMANDOS |
|
LUZ PILOTO |
|
PINGADEIRA |
|
|
KONSOLA |
|
ENDEIKTIKH LUCNIA |
|
LIPODOXH |
|
D |
THERMOSTAT KNOB |
H |
BOTTOM HEATING ELEMENT |
N |
WIRE RACK |
O HANDGRIP |
|
BOUTON THERMOSTAT |
|
RESISTANCE INFERIEURE |
|
GRILLE |
POIGNEE |
|
THERMOSTATKNOPF |
|
HEIZELEMENT UNTERHITZE |
|
ROST |
HANDGRIFF |
|
MANOPOLA TERMOSTATO |
|
RESISTENZA INFERIORE |
|
GRIGLIA |
IMPUGNATURA |
|
TERMOSTAATKNOP |
|
ONDERSTE VERVARMINGSELEMENT |
|
ROST |
HANDVAT |
|
PERILLA TERMOSTATO |
|
RESISTENCIA INFERIOR |
|
PARILLA |
PUNHO |
|
MANÍPULO TERMÓSTATO |
|
RESISTÊNCIA INFERIOR |
|
GREHLA |
MANGO |
|
QERMOSTATHS |
|
KATW ANTISTASH |
|
SCARA |
EXARTHMA |
2 |
|
|
|
|
|
|
SUMMARY OF OPERATION
|
Function |
Thermostat |
Position of |
Notes/Tips |
|
Program |
selector knob |
wire rack and |
|
||
knob setting |
|
||||
|
|
||||
|
setting |
|
accessories |
|
|
DEFROSTING |
|
● |
|
_ |
|
|
|
|
|
||
KEEPING |
|
|
|
_ |
|
FOOD |
|
60° |
|
|
|
WARM |
|
|
|
|
|
|
|
|
|
|
|
|
|
|
|
Ideal for cooking lasagna, meat, |
|
CONVECTION |
|
|
|
pizza, cakes in general, food which |
|
|
|
|
needs to be crispy on the surface |
||
OVEN |
|
60°230° |
|
(or gratinated dishes) and bread. |
|
COOKING |
|
|
|
See tips in the table on page 7 on |
|
|
|
|
|
how to use the accessories. |
|
|
|
|
|
This function is also ideal for |
|
|
|
|
|
simultaneous cooking |
on two |
|
|
|
|
different levels. Consult page 9 |
|
|
|
|
|
and 10 for tips on how to use this |
|
|
|
|
|
function. |
|
TRADITIONAL |
|
|
|
Ideal for cooking |
stuffed |
|
60°230° |
|
vegetables, fish, plum cake and |
||
OVEN |
|
|
|||
|
|
small fowl. See page 7 on how to |
|||
|
|
|
|||
COOKING |
|
|
|
||
|
|
|
use the accessories. |
|
|
|
|
|
|
|
|
|
|
|
|
Ideal for every type of traditional |
|
GRILLING |
|
|
|
grill: hamburgers, frankfurters, |
|
|
|
|
kebabs, etc., toast. The dripping- |
||
|
|
|
|
||
|
|
|
|
pan should be positioned above |
|
|
|
|
|
the bottom heating element. |
|
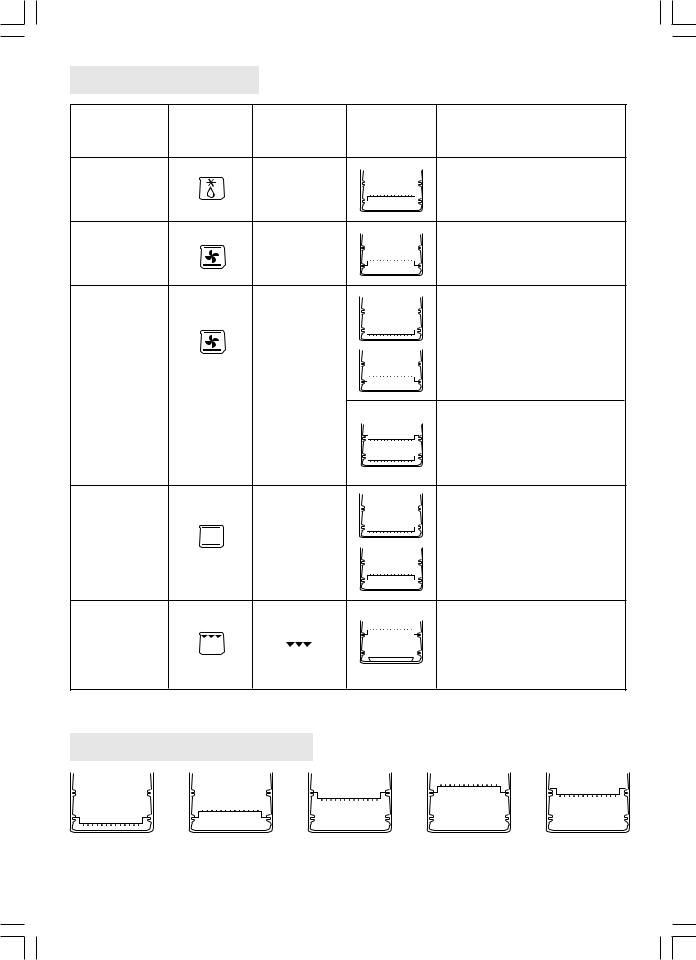
CORRECT WIRE RACK POSITIONS:
(1) |
(2) |
(3) |
(4) |
(5) |
N.B.: The recipes refer to the wire rack positions as numbered above.
3
SPECIFICATIONS
Operating voltage .................................................................................................... |
See rating label |
Maximum power absorbed ...................................................................................... |
See rating label |
POWER CONSUMPTION (CENELEC STANDARD HD 376) |
|
To reach 200°C ....................................................................................................... |
kW 0,1 |
To maintain 200°C for one hour .............................................................................. |
kW 0,5 |
Total ........................................................................................................................ |
kW 0,6 |
This appliance complies with EEC Directive 89/336, relating to electro-magnetic compatibility.
The materials and objects destined to come into contact with food products comply with the regulations in EEC directive 89/109.
ELECTRICAL CONNECTION (U.K. ONLY)
A)If your appliance comes fitted with a plug, it will incorporate a 13 Amp fuse. If it does not fit your socket, the plug should be cut off from the mains lead, and an appropriate plug fitted, as below.
WARNING: Very carefully dispose of the cut off plug after removing the fuse: do not insert in a 13 Amp socket elsewhere in the house as this could cause a shock hazard.
With alternative plugs not incorporating a fuse, the circuit must be protected by a 15 Amp fuse.
If the plug is a moulded-on type, the fuse cover must be refitted when changing the fuse using a 13 Amp Asta approved fuse to BS 1362. In the event of losing the fuse cover, the plug must NOT be used until a replacement fuse cover can be obtained from your nearest electrical dealer. The colour of the correct replacement fuse cover is that as marked on the base of the plug.
B)If your appliance is not fitted with a plug, please follow the instructions provided below:
WARNING: THIS APPLIANCE MUST BE EARTHED
IMPORTANT
The wires in the mains lead are coloured in accordance
with the following code: |
|
E |
Green and yellow: |
Earth |
L |
Blue: |
Neutral |
N |
Brown: |
Live |
|
As the colours of the wires in the mains lead may not correspond with the coloured markings identifying the
terminals in your plug, proceed as follows:
The green and yellow wire must be connected to the terminal in the plug marked with the letter E or the earth symbol  or coloured green or green and yellow.
The blue wire must be connected to the terminal marked with the letter N or coloured black.
The brown wire must be connected to the terminal marked with the letter L or coloured red.
( ) OPTIONAL: OVEN LIGHT
The oven light is always on when the oven is on. Proceed as follows to replace the bulb: pull the plug out of the mains power supply socket, unscrew the protective glass cover and replace the burnt-out light bulb with a new one of the same type (resistant to high temperatures), then replace the protective glass cover.
WARNINGS
1.This oven has been designed to cook food. It must not be used for other purposes and must not be modified or tampered with in any way.
2.The appliance is not intended for use by young children or infirm persons without supervision.
3.Young children should be supervised to ensure that they do not play with the appliance.
4.Before using the oven, make sure it has not suffered any damage during transport.
5.Position the oven on a horizontal surface at a height of at least 85 cm, out of the reach of children.
6.The temperature of the door or the outer surface may be high when the appliance is operating: only ever touch the plastic knobs and handles.
7.Do not place anything on top of the oven while in use.
8.Before plugging the oven into the power supply socket, make sure that:
-the mains power supply is the same as that shown on the rating plate located under the oven;
-the power supply socket has a capacity of at least 10 A and is fitted with a sufficient earth connection; the manufacturer declines all responsibility if this safety standard is not complied with.
9.Wash all the accessories thoroughly before use.
10.Before using the oven for the first time, operate it empty with the thermostat set to maximum for at least 15 minutes to eliminate any “new” smell. The room must be ventilated during this operation.
11.Never move the oven when it is operating.
12.In case of replacement use only power cords which meet current norms, made of H05 RRF rubber and having the same section size as that of the cord which comes with the equipment.
WARNING: Once having removed the appliance from the packaging, check that the door is intact. As the door is made from glass, it is fragile, and should be replaced if visibly chipped, scored or scratched. Furthermore, when using, cleaning or moving the appliance, do not slam or bang the door or pour cold liquids on the glass when the appliance is hot.
4

HANDGRIP
Use handgrip to bring the wire rack out of the oven when it is hot.
USE OF THE CONTROLS
● THERMOSTAT KNOB
Select the temperature desired as follows:
- |
Defrosting (see Page 6) |
: |
Thermostat knob in position ●. |
- |
Keeping food warm (see Page 6) |
: |
Thermostat knob in 60° position. |
-Traditional or convection oven cooking
(see Page 6 - 7) |
: |
Thermostat knob set to from 60°C to 230°C. |
|
- All types of grilling (see Page 8) |
: |
Thermostat knob in position |
. |
● |
ON/OFF AND PROGRAMMING KNOB |
|
|
- |
To switch the oven on |
: |
Turn knob to position . |
- |
To switch the oven off |
: |
Turn knob to position “0”. |
- |
To program cooking time |
: |
Turn knob clockwise to time desired (max. 120 minutes). |
|
|
|
A bell will ring (*) when the time set has been reached and |
|
|
|
the oven will automatically switch itself off. |
(*) Not all models.
For cooking times of less than ten (10) minutes, you must turn the timer all the way to the end and then set the time you want.
● FUNCTION SELECTOR KNOB
This knob is used to select the function desired:
DEFROSTING
(fan only in operation).
TRADITIONAL
OVEN COOKING
(top heating element and bottom heating element only in operation).
CONVECTION OVEN
COOKING,
KEEPING FOOD WARM
(top heating element, bottom heating element and fan in operation).
● PILOT LIGHT
GRILLING
(top heating element only in operation at maximum power).
The light comes on to indicate that the oven is heating up and goes off when the oven has reached its temperature setting.
The pilot light is always off in the DEFROST function.
5
USE OF THE OVEN
● GENERAL ADVICE
-When cooking using the convection oven, traditional oven or grill functions, it is always advisable to preheat the oven until it reaches its temperature setting to obtain the best results.
-Cooking times depend on the type and temperature of the food as well as the personal taste of the cook. The times given in the table are only intended as a guide and may need to be varied and do not take the time required to preheat the oven into account.
-When cooking frozen food, follow the recommendations on the package.
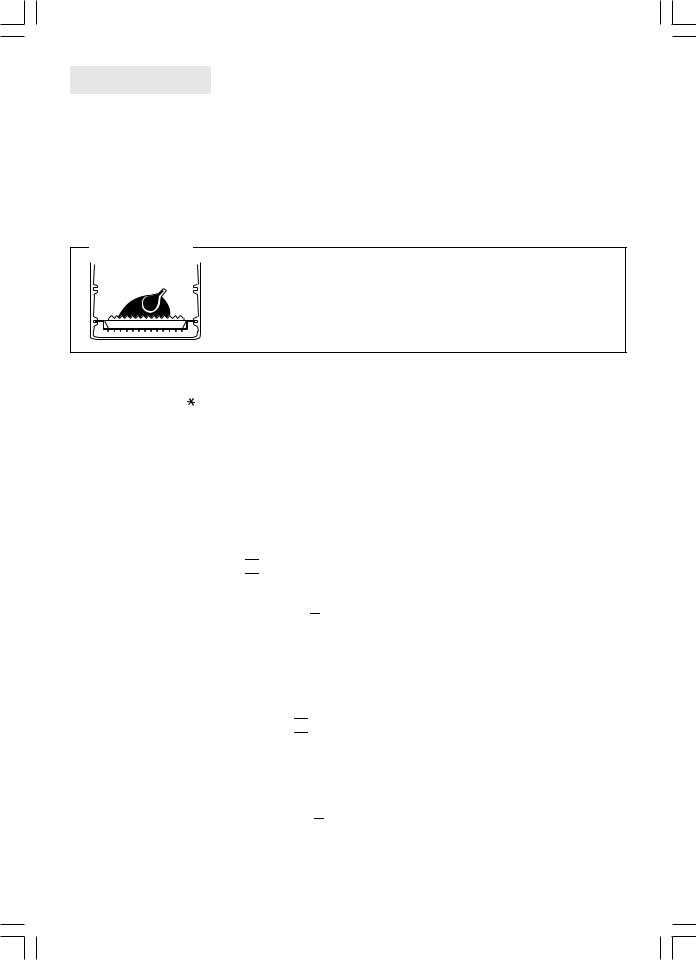
IMPORTANT
If your oven is also fitted with the dietetic grill:
we recommend cooking chicken, roasts and small fowl directly on the dietetic grill resting on the dripping-pan (see Fig. on the left) to avoid fat spattering onto the sides of the oven and dripping onto the bottom. See the following sections for further details.
● DEFROSTING 
Operate as follows to obtain fast and thorough defrosting:
-Set the function selector knob to position  .
.
-Turn the ON/OFF and programming knob to position 
 .
.
-Fit the wire rack in position 2 (see page 3), place the food to be defrosted on it on a plate and close the door. Example of defrosting: 1 kg of meat in 80-90 minutes without turning.
● KEEPING FOOD WARM 
-Set the thermostat knob to the 60°C position.
-Set the function selector knob to position  .
.
-Turn the ON/OFF and programming knob to position 
 .
.
-Fit the wire rack in position 2 (see page 3) and place the plate of food on it.
It is advisable not to keep food warm in the oven for a long time since it could become too dry.
● CONVECTION OVEN COOKING 
This function is ideal for obtaining excellent pizzas, lasagna, gratinated dishes, all types of meat-based main dishes (apart from small fowl), roast potatoes, cakes in general and bread. It is also suitable for simultaneous cooking on two different levels. Operate as follows:
-Fit the wire rack in the position shown in the table or recipe.
-Set the selector function knob to position  .
.
-Set the temperature required on the thermostat knob..
-Set the ON/OFF and programming knob to position 
 or to the position for the cooking time desired (see section on "Use of the controls").
-Wait for the oven to reach the temperature set (pilot light goes out) and then place the dish of food inside.
6
 Loading...