Crate Amplifiers GFX-1200H User Manual

GFX-1200H
GUITAR AMPLIFIER WITH DIGITAL SIGNAL PROCESSING
OWNER’S MANUAL
Congratulations!
You are now the proud owner of the Crate GFX-1200H guitar amplifier. This rugged amp head combines outstanding features with serious clean and distorted sounds. An easy to operate DSP section lets you dial in a variety of digital effects such as delay, flange, chorus and reverb – with separate level control. Channel selection, Crate’s exclusive Shape circuit, and DSP on/off are controllable by the supplied three-button footswitch. An insert jack allows virtually noise-free connection of your favorite effects.
Like all Crate products, your GFX-1200H is Musician Made in the U.S.A., using only the best components. Extensive testing at the hands (and ears) of skilled technicians and musicians insures you that this amplifier is the absolute best it can be.
In order to get the most out of your new amplifier, we strongly urge you to go over the information contained in this manual before you begin playing.
And thank you for choosing

GFX-1200H Amplifier
|
|
|
|
|
|
|
|
|
|
|
|
|
|
|
|
|
|
|
|
|
|
|
|
|
|
|
|
|
|
|
|
|
|
|
|
|
|
|
|
|
|
|
|
|
|
|
|
|
|
|
|
|
|
|
|
|
|
|
|
|
|
|
|
|
|
|
|
|
|
|
|
|
|
|
|
|
|
|
|
|
|
|
|
|
|
|
|
|
|
|
|
|
|
|
|
|
|
|
|
|
|
|
|
|
|
|
|
|
|
|
|
|
|
|
|
|
|
|
|
|
|
|
|
|
|
|
|
|
|
|
|
|
|
|
|
|
|
|
|
|
|
|
|
|
|
|
|
|
|
|
|
|
|
|
|
|
|
|
|
|
|
|
|
|
|
|
|
|
|
|
|
|
|
|
|
|
|
|
|
|
|
|
|
|
|
|
|
|
|
|
|
|
|
|
|
|
|
|
|
|
|
|
|
|
|
|
|
|
|
|
|
|
|
|
|
|
|
|
|
1 |
2 |
3 |
4 |
5 |
6 |
7 |
8 |
9 |
10 |
||||||||||||
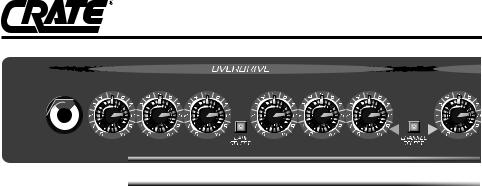
1: INPUT: Connect your guitar here using a shielded instrument cable.
OVERDRIVE CHANNEL: A high gain channel giving you sounds from a slight edge to serious overdrive.
2:GAIN 1: When active, sets the amount of compression and distortion from the amplifier. At far left, the sound will have a thick compressed quality. As you turn the control to the right the amount of distortion increases. Gain 1 produces less intense distortion than Gain 2 and is active only when the Gain Select switch (#5) is out.
3:GAIN 2: When active, sets the amount of compression and distortion from the amplifier. At far left, the sound will have a thick compressed quality. As you turn the control to the right the amount of distortion increases. Gain 2 produces more intense distortion than Gain 1 and is active only when the Gain Select switch (#5) is in.
4:SHAPE: Working in conjunction with the Gain 2 control, rotate the Shape control until you find the sound you’re looking for. Turning the control towards the left enhances the mid frequencies; turning it to the right enhances the low and high frequencies. (Only affects Gain 2 when active.)
5:GAIN SELECT: Switches between Gain 1 (out) and Gain 2 (in). A footswitch (#22) overrides this switch.
6:LOW: Adjusts the low frequency output level: to the left reduces the low frequency output; to the right increases it. This control allows a range of 11dB at 80Hz.
7:HIGH: Adjusts the high frequency output level: to the left reduces the high frequency output, to the right increases it. This control allows a range of 10dB at 10kHz.
8:LEVEL: Sets the output volume level from the
Overdrive Channel: in the far-left position there is
no output; turning the control to the right increases the output. Use this control along with the Gain and Shape controls (#2, 3 & 4) to create a wide variety of sounds.
9: CHANNEL SELECT: When this switch is pressed in the Overdrive Channel is engaged. The Clean Channel is selected when this switch is out. A footswitch (#22) overrides this switch. The adjacent LEDs indicate which channel is selected.
CLEAN CHANNEL: A normal gain channel designed to give you crystal clear sounds.
10:LEVEL: Sets the output volume level from the Clean Channel: in the far-left position there is no output; turning the control to the right increases the output level.
11:LOW: Adjusts the low frequency output level: to the left reduces the low frequency output; to the right increases it. This control allows a range of 22dB at 80Hz.
12:MID: Adjusts the mid frequency output level: to the left reduces the midrange output; turning it to the right increases it. This control allows a range of 14dB at 600Hz.
13:HIGH: Adjusts the high frequency output level: to the left reduces the high frequency output; to the right increases it. This control allows a range of 28dB at 10kHz.
14:DSP LEVEL: Adjust the amount of digital signal processing with this control: in the full-left position the output signal is “dry” (no effect); rotating the control to the right increases the amount of effect. The DSP can be turned on and off with a footswitch (#23).
15:DSP MODE: Select the type of digital effect(s) desired with this control. Each category and its central location is called out (delay, flange, etc.) by the markings around the control; there are two variations per effect, as follows:
 Loading...