


|
CONTENTS |
|
1. |
Features .................................................................................................... |
4 |
2. |
Before Using.............................................................................................. |
4 |
3. |
Names of Components............................................................................. |
8 |
4. |
Hand Reference Position Check and Correction ................................. |
12 |
|
• Reference Position Check |
|
|
• Returning to Local Time Mode After Checking Reference Position |
|
|
• Reference Position Correction |
|
5. |
Switching the Mode (Display Function)................................................ |
20 |
6. |
Setting the Time ...................................................................................... |
22 |
|
• Procedure for Setting the Time |
|
7. |
Setting the Date....................................................................................... |
24 |
|
• Procedure for Setting the Date |
|
8. |
Using the Alarm ...................................................................................... |
29 |
|
• Setting the Alarm Time |
|
|
• Switching Alarm ON and OFF |
|
|
• Alarm Tone Monitor |
|
2
• Stopping the Alarm Tone |
|
English |
• Alarm ON/OFF Check |
|
|
|
|
|
9. Setting the Local Time............................................................................ |
33 |
|
• Procedure for Setting Local Time |
|
|
10. Functions Unique to Solar-Powered Watches ..................................... |
35 |
|
• Insufficient Charge Warning Feature |
|
|
• Over Charge Prevention Feature |
|
|
• Power Save Feature |
|
|
11. General Reference for Charging Times ................................................ |
41 |
|
12. Solar-Powered Watch Handling Precautions ....................................... |
43 |
|
• Charging Precautions |
|
|
• Handling of Secondary Battery |
|
|
• Only Use the Specified Secondary Battery |
|
|
13. Replacing the Secondary Battery.......................................................... |
45 |
|
14. All-Reset .................................................................................................. |
46 |
|
• All-Reset Procedure |
|
|
15. Precautions ............................................................................................. |
48 |
|
16. Specifications.......................................................................................... |
54 |
|
|
3 |
|
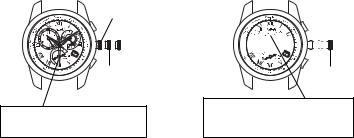
1. Features
This watch is a solar-powered watch that contains a solar cell in its face that drives the watch by converting light energy into electrical energy. It is also equipped with numerous functions including a perpetual calendar that changes the date automatically (changes the number of years from the most recent leap year, month, date and day automatically until February 28, 2100 including leap years), a daily alarm that can be set based on a 24 hour clock, and a local time function that enables setting of time differences in one hour units.
2. Before Using
<Be careful not to pull the crown too far out when switching the mode.>
The mode of this watch can be changed with the crown pulled out to Position 1.
If the crown is pulled out to Position 2, the second hand will move to the 0 seconds position and the watch will enter the correction mode for each mode (when in the time mode or alarm mode; when in the calendar mode, the second hand moves to the month display, and when in the local time mode, the second hand continues to move at 1-
4
second intervals).
second hand stops causing the time to be incorrect. In addition, since the set time, date, alarm time and so forth will end up changing if the crown is pulled out to Position 2 in each mode, be careful not to pull out the crown too strongly.
Refer to “5. Switching the Mode (Display Function)” for information on how to properly switch the watch to each mode.
[Crown in Proper Position]
Normal position
Position 1
When the crown is pulled out to Position 1, the second hand moves to the 30 seconds position and stops.
[Crown Pulled Out Too Far]


 M
M

Position 2
When the crown is pulled out too far to Position 2, the second hand moves to the 0 seconds position and stops, and the watch enters the correction mode.
5

This watch is a solar-powered watch. Please fully charge the watch before using by exposing it to light by referring to “11. General Reference for Charging Times”.
A secondary battery is used in this watch to store electrical energy. This secondary battery is a clean energy battery that does not contain mercury or other toxic substances. Once fully charged, the watch will continue to run for about 1.5 years without additional charging (when the power save feature is operating).
V Power Save Feature:
When power generation stops as a result of light not shining on the solar cell during the time (TME) or local time (L-TM) mode, the power save feature is activated and the second hand stops at the 0 seconds position to save power. The 24 hour hand, hour hand and minute hand continue to move normally. When light once again begins to shine on the solar cell, the power save feature is canceled and the second hand rapidly moves to the current time and returns to moving at 1-second intervals.
Although varying according to the design, the power save feature is activated when light does not shine continuously on the solar cell for 30 minutes or more, and the second hand has reached the 0 seconds position.
6
<Proper Use of this Watch>
To use this watch comfortably, make sure to charge it before it stops running completely. Since there is no risk of overcharging no matter how much the watch is charged (Over Charge Prevention Feature), it is recommended that the watch be charged every day.
7

3. Names of Components
|
Mode |
Time (TME) |
Calendar (CAL) |
|
Name |
||||
|
|
|||
|
|
|
||
(1) Mode hand |
TME |
CAL |
||
|
|
|
|
|
(2) |
Function hand |
Displays day |
Displays day |
|
|
|
|
|
|
(3) |
Date |
Displays date |
Displays date |
|
|
|
|
|
|
(4) |
Hour hand |
Displays hours |
Displays hours |
|
|
|
|
|
|
(5) |
Minute hand |
Displays minutes |
Displays minutes |
|
|
|
|
|
|
(6) |
Second hand |
Displays seconds |
Displays month |
|
|
|
|
|
|
(7) |
24 hour hand |
24-hour time display in |
24-hour time display in |
|
coordination with hour hand |
coordination with hour hand |
|||
|
|
|||
|
|
|
|
|
Alarm (ALM) |
Local Time (L-TM) |
|
|
ALM |
L-TM |
|
|
Displays alarm ON/OFF |
Displays day |
|
|
Displays date |
Display date |
|
|
Displays alarm hours |
Displays local time (hours) |
|
|
Displays alarm minutes |
Displays local time (minutes) |
|
|
Stops at 0 seconds position |
Displays seconds |
|
|
24-hour alarm time display in |
24-hour local time display in |
coordination with alarm hour hand |
coordination with local time (hours) |
|
|
8 |
9 |

Name |
Crown position |
Crown and button operation |
|
Normal position |
Not used |
Not used |
|
|
|
|
(8) Crown |
Position 1 |
Mode switching (second hand |
Mode switching (second hand |
||||
stops at 30 seconds position) |
stops at 30 seconds position) |
||||||
|
|
||||||
|
Position 2 |
Time correction (second hand |
Date correction (second |
|
|||
|
stops at 00 seconds) |
indicates the month) |
|
|
|||
|
|
|
|
||||
|
Normal position |
Not used |
Function hand indicates years |
||||
|
since leap year while pressed |
||||||
|
|
|
|||||
Button (A) |
Position 1 |
Not used |
cNot used |
|
|
|
|
|
|
|
c |
|
|
||
|
|
|
|
c |
|
||
|
|
|
|
|
|
||
|
|
|
Switches date correction location |
||||
|
Position 2 |
Not used |
(leap year |
month |
date |
day) |
|
|
Normal position |
Function hand indicates alarm |
Not used |
|
|
|
|
|
ON or OFF while pressed |
|
|
|
|||
|
|
|
|
|
|
||
Button (B) |
Position 1 |
Not used |
Not used |
|
|
|
|
|
Position 2 |
Not used |
Not used |
|
|
|
|
10 |
|
|
|
|
|
|
|
Crown and button operation
Not used |
Not used |
|
|
|
|
Mode switching (second hand stops at 30 |
Mode switching (second hand stops at 30 |
|
seconds position) |
seconds position) |
|
Alarm correction (second hand stops at 00 |
Local time correction (second hand continues |
|
seconds) |
moving in 1-second intervals) |
|
Not used |
Switches watch to reference position check mode |
|
when pressed continuously for 10 seconds |
||
|
||
Not used |
Not used |
|
|
|
|
Not used |
Not used |
|
|
|
|
Alarm tone monitor (alarm tone sounds while |
Not used |
|
pressed) |
||
|
||
Not used |
Not used |
|
|
|
|
Alarm ON/OFF setting |
Not used |
|
|
|
|
|
11 |

4. Hand Reference Position Check and Correction
Reference position: This refers to the base position of each hand for enabling this watch to function properly. Refer to the illustration below for the reference position of each hand. If the reference position is not set properly, the time, date, alarm ON/OFF positions and other watch functions will not be displayed properly.
Before using this watch, check that the functions of the watch operate properly by performing the following procedure.
[Reference Position Check]
1.After pulling out the crown to Position 1 (second hand moves to the 30 seconds position and waits), turn the crown to set the mode hand to the local time [L-TM] mode.
2.Return the crown to the normal position.
3.Press button (A) for at least 10 seconds and then release after each hand begins to move in coordination.
•The second hand rapidly advances forward (clockwise rotation), while the other hands, including the function hand, rapidly move forward or backward.
•The date changes by one day when the function hand completes four revolutions.
12
<Correct Reference Positions of Each Hand>
Button (A)
(1) Mode switching position
(0) Normal position
<Reference Positions of Each Hand>
24 hour hand: 24:00
Hour hand, minute hand: 00:00 Second hand: 0 seconds
Function hand: SUN (SUN immediately after the date has changed to “1”) Date: 1st
Perform the “Reference Position Correction” procedure if any of the hands or date are not at the positions indicated above.
13
[Returning to Local Time Mode After Checking Reference Position]
•After the date and each hand has displayed the reference position, pressing button
(A) returns the watch to the local time mode. Alternatively, the watch automatically returns to the local time mode if the crown or buttons are not operated for two consecutive minutes.
•The reference position check is canceled when the mode is switched by pulling the crown out to Position 1 while the reference position is displayed.
Note:
•The watch will not return to the local time mode even if button (A) is pressed if the crown is pulled out to Position 1 or Position 2. In addition, it will not automatically return to the local time mode after 2 minutes.
14
[Reference Position Correction]
•Perform steps 5 through 10 below if continuing to correct the reference position after just having checked the reference position.
1.Pull the crown out to Position 1 (the second hand moves to the 30 seconds position and waits).
2.Turn the crown to set the mode hand to the local time mode [L-TM].
3.Return the crown to the normal
position.
4. Press button (A) for at least 10 seconds and release when each hand begins to move to the reference position.
• The second hand rapidly advances forward (clockwise rotation), while the other hands, including the function hand, rapidly move forward or backward.
• The date changes by one day when the function hand completes four revolutions.
15
5.After the date has changed, pull the crown out to Position 2 once the function hand has stopped moving.
6.Click (turn) the crown to the right.
•The second hand advances by 1 second for each click.
•Turning the crown continuously (rapidly by two clicks or more) causes the second hand to advance continuously. Turn the crown by one click to the right or left to stop the second hand from advancing. The second hand will advance by 60 seconds and then stop automatically if it is not interrupted.
•First stop the second hand near the 55 seconds position and then move it slowly one
second at a time to correctly align at the 0 seconds position.
Note: The second hand cannot be corrected in the reverse direction (counterclockwise rotation).
7.Press button (A).
•After the minute hand completes a demonstration movement (by moving back by 5 minutes and then moving forward by 5 minutes), the hour hand and minute hand enter the correction mode.
16
8. Click (turn) the crown.
• Turn the crown by one click to the right causes the hour hand and minute hand to advance by 1/4 minute (and 4 clicks cause them to advance by 1 minute).
• Turn the crown by one click to the left to move back the hour hand and minute hand by 1/4 minute (and 4 clicks cause them to move back by 1 minute).
• Continuously turning the crown causes the hour hand and minute hand to advance continuously. Turn the crown by one click to the right or left to stop the hour hand and minute hand from advancing. The hour and minute hands will advance by 24 hours and then stop automatically if they are not interrupted.
• First stop the hands at about 12:00 and then slowly move them one step at a time to correctly align them at the 12:00 position.
9. Press button (A).
• After the function hand and date complete a demonstration movement (the function hand rotates backward by 180 degrees and then returns to its original position, while the date moves in coordination with the function hand), the watch enters the calendar correction mode.
10. Turn the crown to align the function hand at “SUN” immediately after the date has changed to “1”.
• Turning the crown by one click to the right advances the function hand by one step.
• Turning the crown by one click to the left moves back the function hand by one
step.
17
 Loading...