


 Loading...
Casio XJ-M256, XJ-M251, XJ-M241, XJ-M146, XJ-M156 User Manual
...EN
DATA PROJECTOR
XJ-A Series
XJ-A142/XJ-A147*
XJ-A242/XJ-A247*
XJ-A252/XJ-A257*
XJ-M Series
XJ-M141/XJ-M146*
XJ-M151/XJ-M156*
XJ-M241/XJ-M246*
XJ-M251/XJ-M256*
*USB Models
User’s Guide
zIn this manual, “XJ-A Series” and “XJ-M Series” refer only to the specific models listed above.
zBe sure to read the “Safety Precautions” and “Operating Precautions” in the “Setup Guide” document that comes with the Data Projector, and make sure you use this product correctly.
zKeep this manual in a safe place for future reference.
zVisit the site below for the latest version of this manual. http://world.casio.com/manual/projector/
1

z DLP is a registered trademark of Texas Instruments of the United States.
z Microsoft, Windows, and Windows Vista are registered trademarks or trademarks of Microsoft Corporation in the United States and other countries.
zHDMI, the HDMI Logo and High-Definition Multimedia Interface are trademarks or registered trademarks of HDMI Licensing, LLC.
zMac OS is a trademark or registered trademark of Apple, Inc. in the United States and other countries.
zPJLink is a pending trademark or a registered trademark in Japan, the United States, and other countries and areas.
zCrestron is a registered trademark of Crestron Electronics, Inc. of the United States.
zAMX is a registered trademark of AMX LLC of the United States.
zXGA is a registered trademark of IBM Corporation of the United States.
zOther company and product names may be registered product names or trademarks of their respective owners.
zPortions of this product are based in part on the work of the Independent JPEG Group.
zThe contents of this User’s Guide are subject to change without notice.
zCopying of this manual, either in part or its entirety is forbidden. You are allowed to use this manual for your own personal use. Any other use is forbidden without the permission of CASIO COMPUTER CO., LTD.
zCASIO COMPUTER CO., LTD. shall not be held liable for any lost profits or claims from third parties arising out of the use of this product or this manual.
zCASIO COMPUTER CO., LTD. shall not be held liable for any loss or lost profits due to loss of data due to malfunction or maintenance of this product, or any other reason.
zThe sample screens shown in this manual are for illustrative purposes only, and may not be exactly the same as the screens actually produced by the product.
2

Contents |
|
Projector Features and Main Functions ....................... |
7 |
Features Common to All Models ................................................................................. |
7 |
USB Model Features.................................................................................................... |
7 |
Other Model-specific Features .................................................................................... |
8 |
Getting Ready.................................................................. |
9 |
Setting Up the Projector......................................................................... |
9 |
Setup Precautions ..................................................................................................... |
10 |
Connecting Projector Cables ............................................................... |
11 |
Remote Controller ................................................................................ |
12 |
To load remote controller batteries ........................................................................ |
13 |
To replace remote controller batteries ................................................................... |
13 |
Projecting an Image...................................................... |
14 |
Selecting the Input Source ................................................................... |
14 |
To select the input source ...................................................................................... |
15 |
Resolution .................................................................................................................. |
15 |
3D Input Mode (XJ-M Series Only)....................................................... |
16 |
Entering the 3D Input Mode ................................................................................... |
16 |
Returning to the Normal Input Mode from the 3D Input Mode .............................. |
17 |
Horizontal Flipping in the 3D Input Mode .................................................................. |
17 |
To swap the left and right images .......................................................................... |
17 |
Projecting with File Viewer (USB Model Only)...................................... |
18 |
File Viewer Overview.................................................................................................. |
18 |
Projecting Files Located in Projector Internal Memory.............................................. |
18 |
To copy files from a computer to projector internal memory ................................. |
19 |
Starting Projection of Files Located in Projector Internal Memory ......................... |
21 |
To format projector internal memory ...................................................................... |
22 |
Projecting Files from a Memory Device Connected by USB ..................................... |
23 |
To connect a USB flash drive to the projector ....................................................... |
23 |
To connect a memory card to the projector........................................................... |
24 |
To connect a digital camera to the projector.......................................................... |
24 |
To start projection of files that are on a memory device connected via USB......... |
25 |
Projecting Files .......................................................................................................... |
27 |
To project a presentation file .................................................................................. |
27 |
To project a PDF file ............................................................................................... |
28 |
To project an image file .......................................................................................... |
29 |
3
To project a movie file ............................................................................................ |
29 |
File Menu Operations................................................................................................. |
31 |
To toggle the file menu between the list view and icon view ................................. |
31 |
To scroll the file menu ............................................................................................ |
31 |
To open a folder ..................................................................................................... |
31 |
To exit the current folder and move up to the next level ........................................ |
31 |
To return to the main screen from the file menu .................................................... |
31 |
Configuring File Viewer Settings................................................................................ |
32 |
To configure File Viewer settings............................................................................ |
32 |
Autorun ...................................................................................................................... |
34 |
To auto project images files or a movie file from a USB flash drive ....................... |
34 |
To auto project images files or a movie file from projector internal memory.......... |
35 |
File Viewer Troubleshooting....................................................................................... |
36 |
File Viewer Error Messages ....................................................................................... |
37 |
Using EZ-Converter FA to Convert PowerPoint Files to ECA or PtG Files................ |
38 |
To convert a PowerPoint file to an ECA file or PtG file........................................... |
39 |
To specify the screen resolution of the ECA file or PtG file.................................... |
41 |
To specify the maximum animation display time.................................................... |
41 |
To play back an ECA file or PtG file on your computer .......................................... |
41 |
Projecting with the USB Display Function (USB Model Only).............. |
43 |
USB Display Function Overview ................................................................................ |
43 |
Projecting Computer Screen Contents Over a USB Connection .............................. |
43 |
To project Windows computer screen contents over a USB connection |
|
for the first time ...................................................................................................... |
44 |
To project Mac OS computer screen contents over a USB connection |
|
for the first time ...................................................................................................... |
45 |
To project computer screen contents over a USB connection |
|
after the first time.................................................................................................... |
47 |
Projecting the Screen Image of a Graphing Calculator |
|
(USB Model Only) ................................................................................. |
48 |
To project the screen image of a graphing calculator ............................................ |
48 |
Operating the Projector................................................ |
49 |
Output Image and Audio Operations ................................................... |
49 |
To use manual keystone correction (KEYSTONE) .................................................. |
49 |
To zoom an image (D-ZOOM)................................................................................. |
49 |
To adjust the volume level (VOLUME) .................................................................... |
49 |
To mute the audio (VOLUME)................................................................................. |
50 |
To momentarily blank the image and mute the audio (BLANK).............................. |
50 |
To freeze an image (FREEZE) ................................................................................. |
50 |
To auto adjust an image (AUTO)............................................................................. |
50 |
4
To change the aspect ratio of the projected image (ASPECT) |
............................... 51 |
To adjust image brightness (FUNC)........................................................................ |
52 |
To change the color mode (FUNC)......................................................................... |
52 |
Eco Mode (ECO)................................................................................... |
53 |
To select the Eco Mode.......................................................................................... |
53 |
Using the Presentation Timer (TIMER) ................................................. |
54 |
To display the timer ................................................................................................ |
54 |
To display the timer function menu ........................................................................ |
54 |
To configure timer settings..................................................................................... |
55 |
To start a countdown timer operation .................................................................... |
55 |
To pause the timer countdown............................................................................... |
56 |
To resume a paused timer countdown................................................................... |
56 |
To reset the timer to its start time........................................................................... |
56 |
Using the Setup Menu (MENU) ............................................................ |
57 |
Basic Setup Menu Operations................................................................................... |
57 |
Setup Menu Settings ................................................................................................. |
57 |
Password Protection ............................................................................ |
62 |
Using the Password Feature...................................................................................... |
62 |
To change the password ........................................................................................ |
63 |
To change the power on password setting ............................................................ |
64 |
To change the projector internal storage function password ................................. |
64 |
Control Panel Lock............................................................................... |
65 |
To lock the control panel ........................................................................................ |
65 |
To unlock the control panel .................................................................................... |
65 |
Cleaning the Projector.................................................. |
66 |
Cleaning the Projector Exterior ............................................................ |
66 |
Cleaning the Lens................................................................................. |
66 |
Cleaning Vents ..................................................................................... |
66 |
Troubleshooting ............................................................ |
67 |
Indicators.............................................................................................. |
67 |
Error Indicators and Warning Messages .............................................. |
68 |
Projector Troubleshooting.................................................................... |
70 |
5
Appendix ........................................................................ |
72 |
Connecting to a Component Video Output.......................................... |
72 |
Connecting to a Composite Video Output or S-Video Output |
|
(XJ-M Series Only)................................................................................ |
73 |
Updating Firmware and Transferring a User Logo............................... |
74 |
To connect the projector’s LOGO port with a computer’s USB port ..................... |
74 |
Hanging the Projector from a Ceiling ................................................... |
75 |
Projection Distance and Screen Size ................................................... |
76 |
Aspect Ratio Setting and Projection Image ......................................... |
78 |
Supported Signals................................................................................ |
80 |
Projector RS-232C Control .................................................................. |
83 |
To establish a serial connection between the projector and a computer............... |
83 |
6

Projector Features and Main Functions
Features Common to All Models
zMercury-free Hybrid Light Source
A CASIO-original laser and LED hybrid light source delivers high luminance from 2,500 to 3,000 lumens. This projector does not use a mercury lamp, making it environmentally friendly.
zA wide selection of input sources
Analog RGB, composite video, S-video (XJ-M Series only), component video (Y·Cb·Cr, Y·Pb·Pr), and HDMI input sources are supported.
zIntelligent Brightness Control function (Eco Mode)
The projector senses surrounding light levels and adjusts projection brightness automatically as required for efficient low-power operation. (Requires “Eco Mode” setting to be set to “On (Auto)”.)
zDirect Power On
The projector can be configured to turn on automatically and start projecting as soon as it is plugged into a power outlet.
zPresentation Timer
The presentation timer is a countdown timer that shows the amount of presentation timing remaining on the projection screen.
zFirmware update and user logo image data transfer
Firmware (software in the projector flash ROM) updates and user logo images can be transferred to the projector from a computer as required.
USB Model Features
USB Models: XJ-A147, XJ-A247, XJ-A257, XJ-M146, XJ-M156, XJ-M246, XJ-M256 z Projection of image, movie, and other types of files (File Viewer)
The projector’s File Viewer can be used to open and project the following types of files located in projector internal memory or on a USB flash drive connected to the projector: image files (JPG, PNG, GIF, BMP), movie files (AVI, MOV, MP4), presentation files (ECA, PtG), PDF files.
z Projection of computer screen contents over a USB connection (USB Display)
Connecting the projector to a computer with a USB cable enables projection of the computer’s screen contents. This supports projection of screen contents of even small computers that have only a USB port, but no RGB, HDMI, or other type of video output terminal.
z Graphic Scientific Function Calculator Connection
Certain CASIO graphic scientific calculator models can be connected directly to the projector’s USB-A port for projection of the calculator screen contents.
z Projection of images from a computer or smart device over a wireless LAN connection*
The projector is configured as an access point, a computer or smart device can connect directly to it over a wireless LAN connection. Or a computer or smart device can connect over a wireless LAN connection via an existing wireless LAN access point. Both screen output and audio output are supported while a computer is connected.
z Projector control using a computer or smart device over a wireless LAN connection*
The projector can be controlled from a computer or smart device connected to it over a wireless LAN connection.
* For details about wireless LAN connection, see the separate “Network Function Guide”.
7
Other Model-specific Features
XJ-A Series
z Slim and compact
A4 file size and approximately 43 mm slim. Compact enough to install or use just about anywhere.
XJ-M Series
z 3D image projection support
Projection of a 3D image signal (60Hz/120Hz field sequential protocol) via one of three input sources (analog RGB, composite video, S-video) is supported.
•Separately available 3D glasses (YA-G30) are required in order to view a projected 3D image in 3D. Also, separately available special software (CASIO 3D Converter) is required to project a 3D image with the projector when a computer (analog RGB) is the input source.
•3D image projection is not supported via an HDMI connection or component video connection.
WXGA models (XJ-A242, XJ-A247, XJ-A252, XJ-A257, XJ-M241, XJ-M246, XJ-M251, XJ-M256) z WXGA Resolution
Supports WXGA (1280 × 800) wide-screen projection resolution. This resolution is ideal for projecting wide-screen notebook computer and HD TV images.
XJ-M Series USB Models (XJ-M146, XJ-M156, XJ-M246, XJ-M256)
zProjection of screen contents of a computer connected via wired LAN*
A LAN cable can be used for a direct connection between the projector and a computer, or a LAN connection can be established via an existing network router. Once a connection is established, both screen output and audio output are supported.
zRemote control of the projector from a computer connected via wired LAN*
Projector control operations can be performed remotely using the web browser of a computer connected via a wired LAN connection.
* For details about LAN connection, see the separate “Network Function Guide”.
8

Getting Ready
This section explains how to select a location for the projector, how to connect its cables, and how to perform other operations required before using it.
Setting Up the Projector
Locate the projector on a desk, table, or stand that is firm and level. Make sure that you allow sufficient space around the sides and back of the projector for proper ventilation. The illustrations below show how the projector should be oriented relative to the screen for optimum projection.
XJ-A242/XJ-A247/XJ-A252/XJ-A257/
Other models
XJ-M241/XJ-M246/XJ-M251/XJ-M256
Screen |
|
Screen |
|
||
|
|
|
|
|
|
|
|
|
|
|
|
|
|
|
|
|
|
|
|
|
|
|
|
|
|
|
|
|
|
Position the projector so the lens side is at the edge of the table, Make sure the projector is at a right angle to the screen. etc.
 Important!
zWith an XJ-A Series Projector, the allowable vertical angle range when setting up is ±30 degrees (Figure 1). Make sure the projector is within this range. Setting up the projector outside this vertical angle range can shorten lamp life. There is no limit on the horizontal angle of the projector (Figure 2).
Figure 1 |
Figure 2 |
z With an XJ-M Series Projector, there is no limit on the vertical and horizontal setup angle.
9
Setup Precautions
z Use a conveniently located power outlet that you can reach easily when you need to unplug the projector.
z Do not located any objected within 30 cm (11.8 inches) around the projector. Particular care is required to keep objects away from projector air intake and exhaust openings.
z Airflow from air conditioning equipment can blow the heat being exhausted from the area around the projector’s lens in a way that causes heat ripples to appear in the projected image. If this happens, adjust the airflow of the air conditioning equipment or move the projector.
10
Connecting Projector Cables
Connect the projector to a power outlet and to an input source device.
XJ-A Series
Use the RGB cable that comes with the projector to connect to the RGB output terminal of a computer or other input source.
Use a commercially available HDMI cable to connect to the HDMI output terminal of a computer, video equipment, or other input source.
*1 *2
Use the supplied power cord to plug the projector into a power outlet.
Connect to the composite output terminal (pin jack type) of the video device.
Plug the mini plug end of the special AV cable that comes with the projector into this terminal. Plug the pin plugs (yellow, red, and white) into each of the applicable video (yellow) and audio (red and white) terminals of the video device.
XJ-M Series
*2 *1
Use the RGB cable that comes with the projector to connect to the RGB output terminal of a computer or other input source.
Use a commercially available HDMI cable to connect to the HDMI output terminal of a computer, video equipment, or other input source.
Connect to the composite output or S-video output of the video device. For details, see “Connecting to a Composite Video Output or S-Video Output (XJ-M Series Only)” (page 73).
Use the supplied power cord to plug the projector into a power outlet.
*1 Use this port to connect a USB flash drive (page 23), a CASIO graphic scientific calculator (page 48), or the wireless adapter that comes with the projector (see the separate “Network Function Guide”).
*2 Terminal used when accessing projector internal memory from a computer and when projecting computer screen contents from the projector over a USB connection. For more information, see “To copy files from a computer to projector internal memory” (page 19) and “Projecting with the USB Display Function (USB Model Only)” (page 43).
 Note
Note
z For more information about component video connection, see “Connecting to a Component Video Output” on page 72.
z For information about how to connect for RS-232C control of the projector, see “Projector RS-232C Control” (page 83).
z For information about how to connect in order to update the projector firmware or to transfer user logo data, see “Updating Firmware and Transferring a User Logo” (page 74).
11
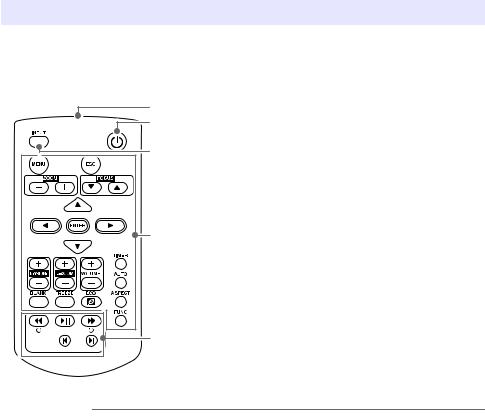
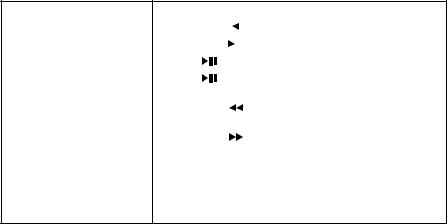
Remote Controller
Projector operations are performed using the remote controller that comes with it. Point the remote controller signal emitter at one of the signal receivers on the projector as you perform remote controller key operations. The maximum range of the remote controller signal is approximately
5 meters (16.4 feet) (between signal emitter and receiver).
1 |
2 |
3 |
4 |
5 |
1 Remote control signal emitter
2[P] (Power) key Turns power on or off.
3[INPUT] key
For changing the input source.
4Keys for performing projection operations and for configuring projector settings.
(Only XJ-A Series projectors have [ZOOM –], [ZOOM +], [FOCUST], [FOCUSS] keys.)
5These keys are used with USB models only. They are mainly used for File Viewer (page 27) projection operations.
 Important!
z To avoid running down the battery, store the remote control unit so its keys are not pressed inadvertently.
12

To load remote controller batteries
 Important!
z Be sure to use alkaline batteries only.
*Caution |
RISK OF EXPLOSION IF BATTERY IS REPLACED BY AN INCORRECT TYPE. |
|
DISPOSE OF USED BATTERIES ACCORDING TO THE INSTRUCTIONS. |
||
|
||
|
|
1. Open the battery cover on the back of the remote controller.
2. Load two new batteries into the case, making sure that their positive
(+) and negative (–) ends are facing correctly.
3. Close the battery cover on the back of the remote controller.
To replace remote controller batteries
Open the battery cover on the back of the remote controller, replace the old batteries with new ones, and then close the battery cover.
13

Projecting an Image
This section provides information about how to project images from various different input sources.
Selecting the Input Source
Input source selection provides the options described in the table below.
Input Source Name |
Output Projection Image (and Audio) |
Computer |
Screen image of a computer connected to the projector’s computer terminal. |
|
|
Video |
XJ-A Series: Images and audio from a video device connected to the projector’s AV |
|
terminal. |
|
XJ-M Series: Images and audio from a video device connected to the projector’s |
|
VIDEO terminal and AUDIO IN R/L terminals. |
|
|
S-Video (XJ-M Series) |
Images and audio from a video device connected to the projector’s S-VIDEO terminal |
|
and AUDIO IN R/L terminals. |
|
|
HDMI |
Images and audio from a computer or video device connected to the projector’s |
|
HDMI terminal. |
|
|
File Viewer |
Images (and audio in the case of a movie file) contained in the following types of files |
|
located in projector internal memory or on a memory device connected to the |
|
projector’s USB-A port: image files, movie files, presentation files, PDF files. |
|
|
CASIO USB Tool |
Screen contents of a CASIO graphic scientific calculator or electronic dictionary |
|
connected to the projector’s USB-A port. |
|
|
Wireless (XJ-A Series) |
Screen contents and audio of a computer connected to the projector via wireless |
|
LAN. |
|
|
Network (XJ-M Series) |
Screen contents and audio of a computer connected to the projector via wireless LAN |
|
or wired LAN |
|
|
USB Display |
Screen contents and audio of a computer connected to the projector’s USB-B port. |
|
|
14

To select the input source
1. Press the [INPUT] key. This will display the “Input” dialog box.
2. Depending on the input source, perform one of the operations described in the table below.
To select this input source: |
Perform this operation: |
|
|
Computer, Video, |
Use the [T] and [S] keys to select the name of the input source you |
S-Video (XJ-M Series), HDMI, |
want to select and then press the [ENTER] key. |
Wireless (XJ-A Series), |
|
Network (XJ-M Series), USB Display |
|
|
|
File Viewer |
1. Use the [T] and [S] keys to select “Viewer” and then press the |
|
[ENTER] key. |
|
2. On the dialog box that appears, confirm that “File Viewer” is |
|
selected and then press the [ENTER] key. |
|
|
CASIO USB Tool |
1. Use the [T] and [S] keys to select “Viewer” and then press the |
|
[ENTER] key. |
|
2. Press the [T] key to select “CASIO USB Tool” and then press the |
|
[ENTER] key. |
|
|
z The name of the input source you selected will appear in the upper right corner of the projection screen for a few seconds.
z The message “No signal input” will appear if no input signal can be detected.
 Note
Note
z For more information about the operation required to select Wireless, Network, USB Display, File Viewer, or CASIO USB Tool as the input source and perform projection, refer to the following.
Wireless or Network: Separate Network Function Guide
USB Display: “Projecting with the USB Display Function (USB Model Only)” (page 43) File Viewer: “Projecting with File Viewer (USB Model Only)” (page 18)
CASIO USB Tool: “Projecting the Screen Image of a Graphing Calculator (USB Model Only)” (page 48)
Resolution
Depending on the projector model, its video resolution will be fixed at XGA (1024 × 768 pixels) or WXGA (1280 × 800 pixels). Images may appear coarse, text and other figures may be difficult to read or a moire pattern may appear when the input signal from a computer does not match the projector’s video resolution. If this happens, try doing the following.
z Change the computer’s output resolution setting so it matches the projector’s video resolution. For information about the video resolution of your projector, see “Specifications” in the Setup Guide. See the user documentation that comes with your computer for details about changing its settings.
z Change the “Aspect Ratio” setting to “True” (Applies only to models that support WXGA video resolution). With the “True” setting, the projector projects the input signal at its actual size (1 input source dot equal to one projector output pixel dot).
For information about configuring the Aspect Ratio setting, see “To change the aspect ratio of the projected image (ASPECT)” (page 51).
15

3D Input Mode (XJ-M Series Only)
Your projector supports projection of 3D images. To project a 3D image, first enter the projector’s 3D input mode, and then select the input source.
 Important!
zSeparately available 3D glasses (YA-G30) are required in order to view a projected 3D image in 3D.
zSeparately available special software (CASIO 3D Converter) is required to project a 3D image with the projector when a computer (analog RGB) is the input source.
z3D image projection is not supported via an HDMI connection or component video connection.
The input sources described below can be selected for projection in the 3D Input Mode.
Input Source |
Projection Conditions |
Computer (Analog RGB) |
z Any of the following types of 3D image data played back using separately available |
|
special software (CASIO 3D Converter). |
|
– 2D image file converted to a 3D image file using CASIO 3D Converter |
|
– Side-by-side 3D format files |
|
z Signal with 60Hz/120Hz vertical scan frequency |
|
|
Composite Video, S-video |
z Field sequential 3D format files recorded with field sequential DVD software, etc. |
|
z Signal with 60Hz vertical scan frequency |
|
|
 Note
Note
See “3D Signals (3D Input Mode)” (page 82) for a list of 3D image signals supported by this projector.
Entering the 3D Input Mode
1. Press the [INPUT] key to display the input source selection screen.
2. Select Computer (RGB), S-video, or Video as the input source.
3. Use the [T] and [S] keys to move the highlighting to “To 3D input mode” and then press the [ENTER] key.
z This enters the 3D input mode and closes the input source selection screen.
 Important!
z You cannot select HDMI, File Viewer, CASIO USB Tool, Network, or USB Display as the input source in the 3D input mode. To use either of these input sources, change the input source setting back to normal input mode.
z When Computer is selected as the input source in the 3D input mode, a component video signal input through the projector’s COMPUTER IN terminal is treated as an RGB signal resulting in abnormal image projection.
z Except when using the projector for 3D image projection, you should normally leave it in the normal input mode.
16
Returning to the Normal Input Mode from the 3D Input Mode
1. Press the [INPUT] key to display the input source selection screen.
2. Use the [T] and [S] keys to move the highlighting to “To normal input mode” and then press the [ENTER] key.
z This enters the normal input mode and closes the input source selection screen.
Horizontal Flipping in the 3D Input Mode
In side-by-side 3D, a full frame consists of two halves on the left and right for each eye. In rare cases, the left and right images may be reversed, which causes a loss of 3D depth. If this happens, try using the following procedure to swap the left and right images with each other.
To swap the left and right images
In the 3D input mode, press the [ENTER] key.
17

Projecting with File Viewer (USB Model Only)
File Viewer Overview
File Viewer is an application you can use for viewing or playing back different types of files located in projector internal memory or on a memory device connected to the projector’s USB port.
Supported Playback Files
File Type |
|
|
|
Supported File Conditions |
|
Image File:*1 |
JPEG: Up to approximately 15 M pixels (baseline JPEG) |
||||
|
|
Up to approximately 8 M pixels (progressive JPEG) |
|||
|
PNG: Less than 6 |
MB and up to approximately 8 |
M pixels*2 |
||
|
GIF: |
Less than 6 |
MB and up to approximately 8 |
M pixels*2 |
|
|
BMP: |
Less than 6 |
MB and up to approximately 8 |
M pixels (for 24-bit color) |
|
|
|
|
|
||
Movie File:*3 |
AVI: |
20 |
Mbps maximum 720/30P (MJPEG video, ADPCM audio) |
||
|
MOV: |
20 |
Mbps maximum 1080/30P (H.264 video, ADPCM audio or AAC audio) |
||
|
MP4: |
20 |
Mbps maximum 1080/30P (H.264 video, AAC audio) |
||
|
|
|
|||
Presentation File |
ECA or PtG file created with EZ-Converter FA*4 |
|
|||
PDF Files |
PDF Ver 1.4 |
|
|
||
|
|
|
|
|
|
*1 Even if you are using a WXGA model projector (page 8), the maximum projection resolution for image data is 1024 × 768, except for baseline JPEG. In the case of baseline JPEG image data, maximum projection resolution is 1280 × 800.
*2 Transparent colors in PNG and GIF format image files that have transparent colors enabled will all be displayed as black. Animation GIFs are displayed as still images, without animation.
*3 Performing fast forward or fast reverse with a movie file with a large bit rate may cause the operation to be performed at a slower speed than normal or to stop part way through. Though a movie with one of the maximum bit rates shown above will play back normally, fast forward and fast reverse not supported.
*4 PowerPoint files can be converted using EZ-Converter FA (available from the CASIO website). See “Using EZ-Converter FA to Convert PowerPoint Files to ECA or PtG Files” (page 38).
Projecting Files Located in Projector Internal Memory
File Viewer can be used to project the following types of files when they are located in projector internal memory: image files, movie files, presentation files, PDF files. To use the procedure in this section, the file(s) to be projected must first be copied to projector internal memory. You can copy files using either of the following methods.
z Connect the projector to a computer with a USB cable and copy the files to projector internal memory.
z Use a LAN to copy (upload) files from a computer or smart device to projector internal memory.
The procedures in this manual are all based on copying files over a USB connection. For information about how to copy a file using a LAN, see the separate “Network Function Guide”.
18

To copy files from a computer to projector internal memory
 Note
Note
z This procedure is supported on a computer running one of the operating systems below. Windows: XP, Vista, 7, 8, 8.1 (Logged in with admin privileges)
Mac OS: 10.6, 10.7, 10.8, 10.9 (Logged in with a root account or user account)
1.
2.
3.
Press the [MENU] key to display the setup menu.
Use the [T] key to select “Multimedia Settings”, and then press the [ENTER] key.
Use the [T] key to select “Internal Storage Function”, and then press the [ENTER] key.
4. When the “Turns off the projector to use internal storage.” message appears, press the [ENTER] key.
z This will cause projector power to turn off. The POWER/STANDBY indicator will light amber and the TEMP indicator will light red.
5. Press the projector’s [P] (Power) key to turn on power.
z The POWER/STANDBY indicator will light green and the TEMP indicator will light red. This indicates that the projector’s internal storage function is operational. You will not be able to project images with the projector at this time.
6. If the computer has a USB flash drive or any other removable media connected, disconnect it.
7. Use a commercially available USB cable to connect the projector’s USB-B port (Micro USB B type) to your computer’s USB port.
zThe location of the USB-B port of this projector is indicated by “*2” in the illustration under “Connecting Projector Cables” (page 11).
zWhen you do, projector internal memory will be recognized by your computer as removable disk drive named “InternalMem”.
8.On the computer, open the “InternalMem” drive.
Windows:
When the “AutoPlay” dialog box appears on your computer screen, click “Open folder to view files”. If the “AutoPlay” dialog box does not appear, perform the following operation: [Start] 3 [Computer] 3 Double-click “InternalMem”.
Mac OS:
An “InternalMem” drive icon will appear on the Mac desktop. Double-click to open it.
9.Copy the file(s) you want to project to the “InternalMem” drive.
19

10. After you copy all of the files you want, perform one of the operations below to unmount the “InternalMem” drive.
Windows:
Click the “Safely Remove Hardware” icon in the task tray (in the lower right corner of the screen). On the menu that appears, select “USB Flash Drive”. Check to make sure that a “Safe To Remove Hardware” message appears.
Mac OS:
Drag the “InternalMem” drive icon to the trash can icon. Check to make sure that the “InternalMem” drive icon is no longer on the Mac desktop.
11.
12.
Disconnect the USB cable from the projector and the computer.
Turn the projector back on.
z This stops internal storage function operation and returns to normal projection.
z For information about how to project a file copied to projector internal memory, see “Starting Projection of Files Located in Projector Internal Memory” (page 21).
 Note
Note
z The above is presented only as a typical example of the file copy operation on a computer. The actual steps you will need to perform may differ slightly in accordance with your computer’s operating system and setup.
z If “On” is selected for “Internal Storage Password” on the setting menu, a password input dialog box will appear when you press the [ENTER] key in step 3 of the procedure above. If this happens, enter the appropriate password and then press the [ENTER] key to advance to step 4 of the procedure. For details, see “Password Protection” (page 62).
20
Starting Projection of Files Located in Projector Internal
Memory
1. If a USB flash drive or some other USB device is connected to the projector’s USB-A port, disconnect it.
2.
3.
4.
5.
Press the [INPUT] key. This will display the “Input” dialog box.
Use the [T] and [S] keys to select “Viewer” and then press the [ENTER] key.
On the dialog box that appears, confirm that “File Viewer” is selected and then press the [ENTER] key.
z This will start up File Viewer and display the File Viewer main screen like the one shown below.
Depending on the type of file you want to project, perform one of the operations below.
To project this type of file: |
Perform this operation: |
Presentation Files |
“To project a presentation file” (page 27) |
|
|
PDF Files |
“To project a PDF file” (page 28) |
|
|
Image Files |
“To project an image file” (page 29) |
|
|
Movie Files |
“To project a movie file” (page 29) |
|
|
21

To format projector internal memory
 Important!
z Performing the procedure below will delete all of the folders and files currently in the projector internal memory.
1. Perform steps 1 through 7 under “To copy files from a computer to projector internal memory” (page 19).
2. Perform one of the procedures below to format the “InternalMem” drive on your computer.
Windows:
(1)Right click the “InternalMem” drive icon. On the menu that appears, select “Format”.
(2)On the “Format” dialog box that appears, check to make sure that “FAT32 (recommended)” is selected for “File system” and then click [Start].
(3)On the warning dialog box that appears, click the [OK] button.
(4)When a dialog box telling you that formatting is complete appears, click [OK] to close it.
(5)Click [Close] to close the format dialog box.
Mac OS:
(1)On the Mac desktop menu bar “Go” menu, select “Utilities” to display the “Utilities” folder.
(2)Double-click “Disk Utility” to start it up.
(3)In the left pane of the disk utility window, click the line above “InternalMem” and then click [Erase] at the top of the right pane.
(4)In the “Format” box, select “MS-DOS (FAT)”.
(5)At the bottom of the right pane, select [Erase].
(6)On the warning dialog box that appears, click the [OK] button.
(7)The screen will return to the disk utility window when formatting is complete. Close the window.
22

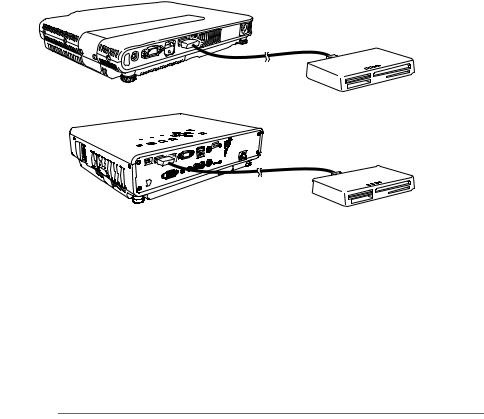
Projecting Files from a Memory Device Connected by USB
Use the procedures in this section when you want to use File Viewer to project image files, movie files, presentation files, or PDF files from a USB flash drive or other memory device.
Supported Memory Devices
The Data Projector’s USB-A port supports connection of a FAT/FAT32 format memory device supported by the USB interface. The following are supported memory devices.
z USB flash drive z Memory cards
A commercially available USB card reader is required to connect a memory card to the Data Projector.
z USB storage class (USB Mass Storage Class) compatible digital cameras
To connect a USB flash drive to the projector
Connect USB flash drive to the Data Projector’s USB-A port as shown below.
XJ-A Series |
XJ-M Series |
23
To connect a memory card to the projector
1. Load the memory card into a USB card reader’s card slot.
z For details about how to load a memory card into the USB card reader, see the user documentation that comes with the reader.
2. Connect the USB card reader to the Data Projector’s USB-A port.
XJ-A Series
XJ-M Series
To connect a digital camera to the projector
1.
2.
3.
If necessary, configure the digital camera’s USB mass storage class setting.
Turn off the digital camera and connect a USB cable to it.
Connect the other end of the USB cable (Type A connector) to the Data Projector’s USB-A port.
4. Turn on the digital camera.
 Note
Note
z For details about steps 1, 2, and 4, see the user documentation that comes with your digital camera.
24
To start projection of files that are on a memory device connected via USB
1. Connect the memory device where files you want to project are stored to the projector’s USB-A port.
z If the File Viewer main screen appears automatically, advance to step 5 of this procedure. If it doesn’t, go to step 2. Note that the File Viewer main screen will appear automatically if “On” is selected for the “Plug and Play” setting on the projector’s Setup Menu.
2.
3.
4.
Press the [INPUT] key. This will display the “Input” dialog box.
Use the [T] and [S] keys to select “Viewer” and then press the [ENTER] key.
On the dialog box that appears, confirm that “File Viewer” is selected and then press the [ENTER] key.
z This will start up File Viewer and display the File Viewer main screen.
5. Depending on the type of file you want to project, perform one of the operations below.
To project this type of file: |
Perform this operation: |
||||||
Presentation File |
Use the [T] and [S] keys to select “Presentation” and then press the [ENTER] |
||||||
|
|
|
key. |
||||
|
|
|
|
|
|
|
|
PDF File |
Use the [T] and [S] keys to select “PDF Viewer” and then press the [ENTER] |
||||||
|
|
|
key. |
||||
|
|
|
|
|
|
|
|
Image File |
Use the [T] and [S] keys to select “Slide” and then press the [ENTER] key. |
||||||
|
|
|
|
|
|
|
|
Movie File |
Use the [T] and [S] keys to select “Movie” and then press the [ENTER] key. |
||||||
|
|
|
|
|
|
|
|
z The screen that will appear depends on the function you selected. |
|||||||
Function name |
|
|
|
|
|
Folder path |
|
|
|
|
|
|
|
||
|
|
|
|
|
|
||
|
|
|
|||||
|
|
|
|
|
|
||
|
|
|
|
|
|
|
|
|
|
|
|
|
|
|
|
6. Use the file list displayed on the screen to check the contents of the USB flash drive you connected in step 1 of this procedure or the contents of internal memory.
z If the file list shows the contents of a USB flash drive, go to step 8 of this procedure. If the file list shows the contents of internal memory, go to step 7.
7. Press the [FUNC] key. On the menu that appears, select “Drive Switching” and then press the [ENTER] key.
25
8. Depending on the function you selected in step 5 of this procedure, perform one of the operations below.
If you selected this function: |
Perform this operation: |
|
|
Presentation |
Perform the procedure from step 2 under “To project a presentation file” |
|
(page 27). |
|
|
PDF Viewer |
Perform the procedure from step 2 under “To project a PDF file” (page 28). |
|
|
Slide |
Perform the procedure from step 2 under “To project an image file” (page |
|
29). |
|
|
Movie |
Perform the procedure from step 2 under “To project a movie file” (page 29). |
|
|
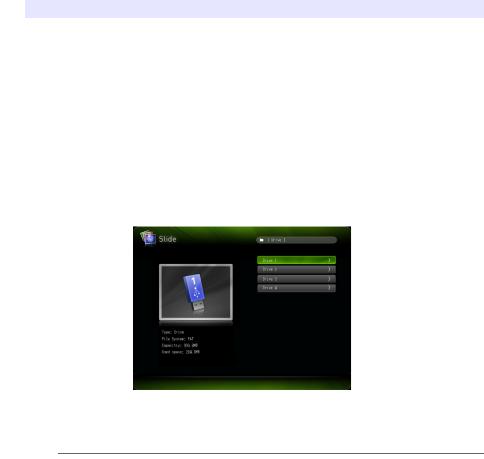
Drive Menu
Entering the Presentation Mode, PDF Viewer Mode, Slide Mode, or Movie Mode while there are multiple memory devices connected to the Data Projector’s USB-A port (multiple USB flash drive devices connected via a USB hub, multiple memory cards loaded in the memory card reader connected to the Data Projector, etc.) will cause a menu like the one shown below to appear on the projection screen.
When this happens, use the cursor keys to move the highlighting to the drive you want to use and then press the [ENTER] key. This will display a menu of files for the mode you are entering.
 Note
Note
z The Data Projector can recognize up to four drives.
z The message “NOUSB” will appear in the Drive Menu if there is no memory device connected to the projector’s USB-A port when you perform Drive Switching ([FUNC] 3 “Drive Switching” 3 [ENTER]). If this happens, perform Drive Switching again to restore the previous screen.
26
Projecting Files
This section explains procedures you can project each type of file using File Viewer.
To project a presentation file
1. On the File Viewer main screen, select “Presentation” and then press the [ENTER] key.
z This displays a menu of presentation (ECA or PtG) files.
2.
3.
Use the [T] and [S] keys to select the presentation file you want to play and then press the [ENTER] key (or [ ] key).
z This will start playback of the currently selected presentation file.
Perform page change and other operations as required.
z You can perform the operations described in the table below while presentation playback is in progress.
To do this: |
Perform this operation: |
|||||
Go to the previous page |
Press the [W] or [ |
|
|
|
] key. |
|
|
||||||
|
|
|
|
|
|
|
Go to the next page |
Press the [X] or [ |
|
] key. |
|||
|
||||||
|
|
|
|
|
|
|
Pause playback |
Press the [ |
] key. |
||||
|
|
|
|
|
|
|
Resume playback from where it |
Press the [ |
] key. |
||||
was paused |
|
|
|
|
|
|
|
|
|
|
|
|
|
Move back to the position of the |
Press the [S] or [ |
|
] key |
|||
previous animation delimiter |
|
|
|
|
|
|
|
|
|
|
|
|
|
Move forward to the position of |
Press the [T] or [ |
|
] key. |
|||
the next animation delimiter |
|
|
|
|
|
|
|
|
|
|
|
||
Select a particular page from a |
1. Press the [FUNC] key. |
|||||
menu of thumbnails and play back |
2. On the menu that appears, select “Page Selection” and then press |
|||||
that page |
the [ENTER] key. |
|
|
|||
3.Use the cursor keys to select the thumbnail of the page you want to play back and then press the [ENTER] key.
4.To return to the file menu, press the [ESC] key.
5.To return to the main screen, press the [FUNC] key and then the [ENTER] key.
27

To project a PDF file
1. On the File Viewer main screen, select “PDF Viewer” and then press the [ENTER] key.
z This displays a list of PDF files.
2.
3.
Use the [T] and [S] keys to select the PDF file you want to open and then press the [ENTER] key (or [ ] key).
z This will open the selected PDF file.
Perform page change, zoom, and other operations as required. z The following operations are supported during PDF file projection.
To do this: |
Perform this operation: |
|||
Go to the previous page |
Press the [W] or [ |
|
|
] key. |
|
||||
|
|
|
|
|
Go to the next page |
Press the [X] or [ |
|
|
] key. |
|
|
|||
|
|
|
|
|
Adjust the image to the |
Press the [FUNC] key. On the menu that appears, select “Adjust to Screen |
|||
screen width |
Width” and then press the [ENTER] key. |
|||
|
|
|
|
|
Return to a full page view |
Press the [FUNC] key. On the menu that appears, select “Show Entire |
|||
|
Page” and then press the [ENTER] key. |
|||
|
|
|
|
|
Select a page from a |
1. Press the [FUNC] key. |
|||
thumbnail list and display it |
2. On the menu that appears, select “Page Selection” and then press the |
|||
|
[ENTER] key. |
|
|
|
3.Use the cursor keys to select the thumbnail of the page you want to display and then press the [ENTER] key.
4.To return to the file menu, press the [ESC] key.
5.To return to the main screen, press the [FUNC] key and then the [ENTER] key.
28

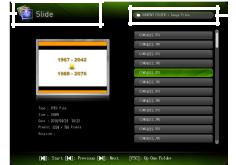
To project an image file
1. On the File Viewer main screen, select “Slide” and then press the [ENTER] key. z This displays a list of image files.
2. Use the [T] and [S] keys to select image file you want to open and then press the [ENTER] key.
z This will project the selected image file.
z Pressing the [ ] key instead of the [ENTER] key will start an image file slideshow starting from the currently selected file.
3. Perform the rotate image and image scrolling operations described below as required.
z The following operations are supported during image file projection.
To do this: |
Perform this operation: |
||||||
Project the previous image file |
Press the [W] or [ |
|
|
|
|
] key. |
|
|
|||||||
|
|
|
|
|
|
|
|
Project the next image |
Press the [X] or [ |
|
|
] key. |
|||
|
|||||||
|
|
|
|
|
|
|
|
Rotate the image leftwards 90 degrees* |
Press the [ |
] key. |
|
||||
|
|
|
|
|
|
|
|
Rotate the image rightwards 90 degrees* |
Press the [ |
] key. |
|
||||
|
|
|
|
|
|
|
|
Start a slideshow |
Press the [ |
] key. |
|||||
|
|
|
|
|
|
|
|
Stop an ongoing slideshow |
Press the [ |
] key. |
|||||
|
|
|
|
|
|
|
|
*Supported for JPEG files only.
4.To return to the file menu, press the [ESC] key.
5.To return to the main screen, press the [FUNC] key and then the [ENTER] key.
To project a movie file
1. On the File Viewer main screen, select “Movie” and then press the [ENTER] key. z This displays a list of movie files.
2. Use the [T] and [S] keys to select the movie file you want to open and then press the [ENTER] key or [ ] key.
z This will start playback of the selected movie file.
29
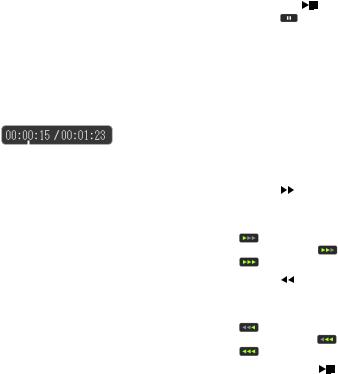
3. Perform fast forward, fast reverse, pause, and other operations as required. z The operations described below are supported during movie file playback.
To do this: |
Perform this operation: |
|
|||||
Pause and resume movie playback |
Press the [ENTER] or [ |
] key. |
|||||
|
|
|
|
z A pause icon ( |
) is displayed in the upper left |
||
|
|
|
|
corner of the projection screen while movie |
|||
|
|
|
|
projection is paused. |
|
||
|
|
|
|
|
|
||
Re-play the file from the beginning |
1. Press the [FUNC] key. |
|
|||||
|
|
|
|
2. On the menu that appears, select “Play from |
|||
|
|
|
|
Beginning” and then press the [ENTER] key. |
|||
|
|
|
|
|
|||
Toggle display of the movie playback time |
Press the [FUNC] key. On the menu that appears, |
||||||
between show and hide |
select “Time Indicator On/Off” and then press the |
||||||
|
|
|
|
[ENTER] key. |
|
|
|
|
|
|
|
|
|
|
|
|
|
|
play time |
|
|
|
|
|
|
Total movie |
|
|
|
|
|
Elapsed |
|
movie play time |
|
|
|
|
|
|
|
|
|
|
|||
|
|
|
|
|
|
|
|
Fast forward at 2X, 8X, or 32X normal speed |
Press the [X] or [ |
] key. |
|
||||
|
|
|
|
z The first press starts 2X speed fast forward, the |
|||
|
|
|
|
second press increases to 8X, and the third press |
|||
|
|
|
|
increases to 32X. |
|
|
|
|
|
|
|
z The |
indicator appears in the upper left corner |
||
|
|
|
|
during 2X fast forward, |
during 8X fast forward, |
||
|
|
|
|
and |
during 32X fast forward. |
||
|
|
|
|
|
|
|
|
Fast reverse at 2X, 8X, or 32X normal speed |
Press the [W] or [ |
] key. |
|
||||
|
|
|
|
z The first press starts 2X speed fast reverse, the |
|||
|
|
|
|
second press increases to 8X, and the third press |
|||
|
|
|
|
increases to 32X. |
|
|
|
|
|
|
|
z The |
indicator appears in the upper left corner |
||
|
|
|
|
during 2X fast reverse, |
during 8X fast reverse, |
||
|
|
|
|
and |
during 32X fast reverse. |
||
|
|
|
|
|
|
||
Return from fast forward or fast reverse to |
Press the [ENTER] key or [ |
] key twice. Pressing |
|||||
normal playback |
either of these keys only once will pause playback. |
||||||
|
|
|
|
Press once more to start normal playback. |
|||
|
|
|
|
|
|||
Jump to the final movie frame |
Press the [FUNC] key. On the menu that appears, |
||||||
|
|
|
|
select “Go to End” and then press the [ENTER] key. |
|||
|
|
|
|
|
|
|
|
Stop movie file playback and return to the file |
Press the [ESC] key. |
|
|
||||
menu |
|
|
|
|
|||
|
|
|
|
|
|
|
|
4. To return to the file menu, press the [ESC] key.
5. To return to the main screen, press the [FUNC] key and then the [ENTER] key.
30
Loading...