


 Loading...
Office All-In-One


 series
Getting Started
=Read Me First=
Make sure to read this manual before using the machine. Please keep it in hand for future reference.
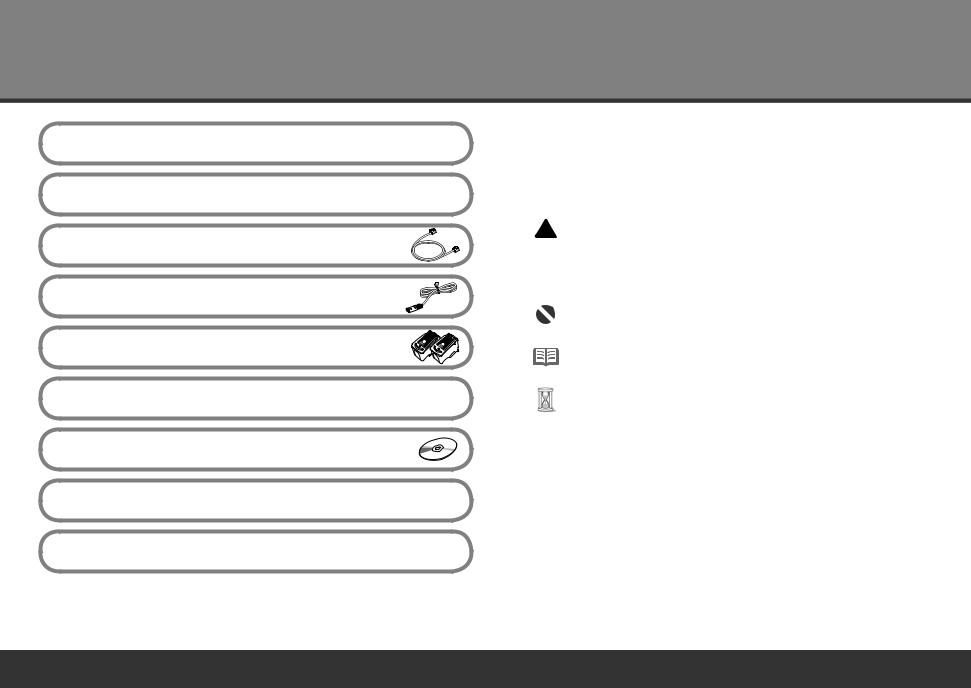
Contents
1 Preparation
2 Remove the Protective Material
3 Connect the Telephone Line
4 Turn the Power On
5 Install the FINE Cartridges
6 Set Up for Fax Reception
7 Install the Software
8 Loading Paper
After Installing the Machine
■ Symbols
The following symbols are used to mark important instructions. Observe these instructions.
 Caution
Instructions that, if ignored, could result in personal injury or material damage.
Instructions that must be observed for safe operation.
Additional explanations.
Descriptions for operations that take some time to complete.
•Microsoft is a registered trademark of Microsoft Corporation.
•Windows is a trademark or registered trademark of Microsoft Corporation in the U.S. and/or other countries.
•Windows Vista is a trademark or registered trademark of Microsoft Corporation in the
U.S. and/or other countries.
•Macintosh and Mac are trademarks of Apple Inc., registered in the U.S. and other countries.
Model Number: K10332 (MX320)
|
1 Preparation |
1 |
2 |
3 |
4 |
5 |
6 |
7 |
8 |
||
|
|
|
|
|
|
|
|
|
|
|
|
|
|
|
|
|
|
|
|
|
|
|
|
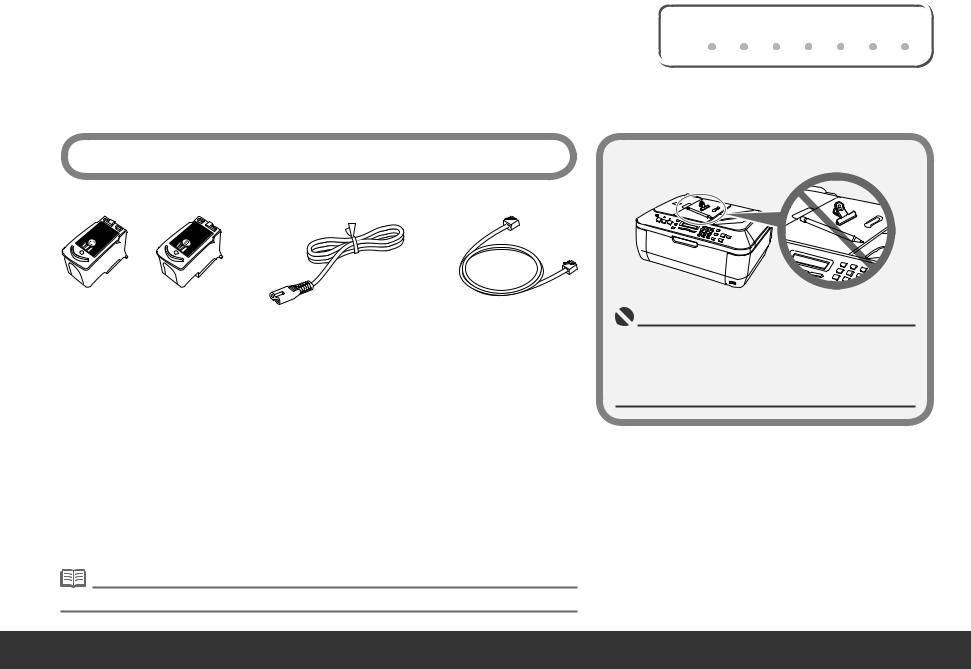
■ Check the Included Items
Before turning on the machine, remove all the orange tapes and the protective sheets. |
□ Choosing a Location |
Color |
Black |
|
|
FINE cartridges |
power cord |
telephone line cable |
|
•Manuals
•Setup CD-ROM (containing the drivers, applications and on-screen manuals)
•Warranty
• A USB cable is necessary to connect the machine with your computer.
•Do not install the machine where an object may fall on it. The object may fall into the Rear Tray, resulting in malfunction.
•Do not place any object on the Document Cover. It may fall into the Rear Tray when opening the Document Cover, resulting in malfunction.
2 Remove the Protective Material |
1 |
2 |
3 |
4 |
5 |
6 |
7 |
8 |
||
|
|
|
|
|
|
|
|
|
|
|
|
|
|
|
|
|
|
|
|
|
|
1 2
B
C
A
Open the Paper Output |
Lift the Scanning Unit (Cover) (B) until it |
Tray (A). |
locks into place. |
|
The Scanning Unit Support (C) is fixed |
|
automatically. |
3 4
E B
C
D |
|
Pull the orange protective tape |
Then, lift the Scanning Unit (Cover) (B) slightly |
(D) and remove the protective |
and fold the Scanning Unit Support (C), then |
material (E). |
gently close the Scanning Unit (Cover) (B). |
|
3 Connect the Telephone Line |
1 |
2 |
3 |
4 |
5 |
6 |
7 |
8 |
||
|
|
|
|
|
|
|
|
|
|
|
|
|
|
|
|
|
|
|
|
|
|
|
|
To use the machine as a fax, a telephone line needs to be connected.
This section describes the basic method of telephone line connection.
For other connection methods, refer to the onscreen manual: Basic Guide.
When not using as a fax:
When using as  both a fax and telephone:
Go to "4 Turn the Power On" on page 4.
|
When using as |
|
only |
|
a fax only: |
|
|
|
|
||
|
|
|
•If you cannot send faxes after installing the machine, check the telephone line type. For details, refer to "Confirming the Telephone Line Connection" in the on-screen manual: Basic Guide.
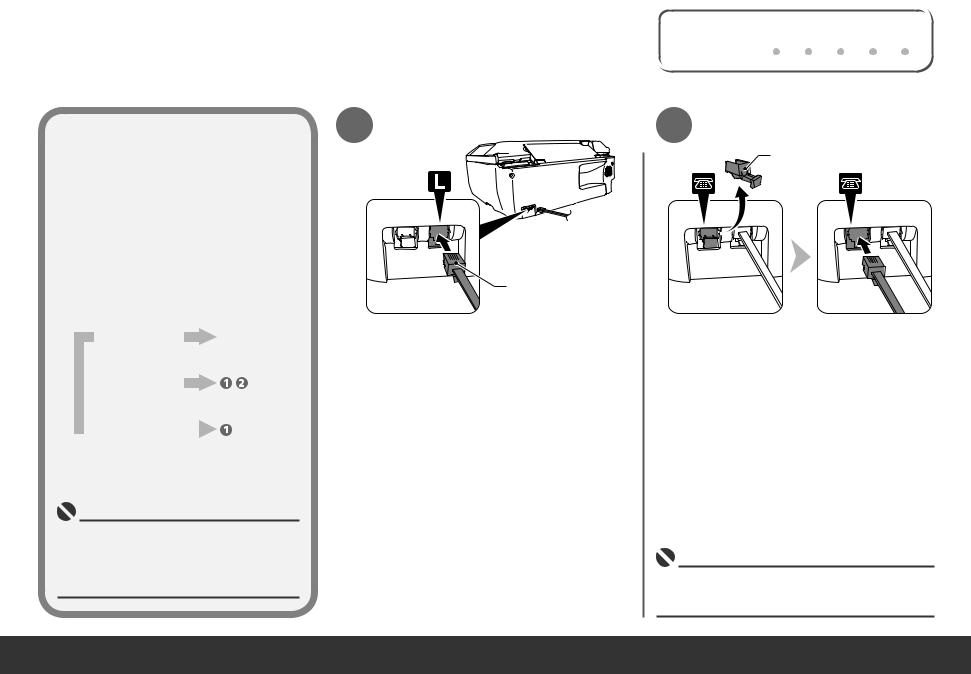
1
A
Connect the machine with a telephone line using the supplied telephone line cable (A).
When using as a fax only:
 Go to "4 Turn the Power On" on page 4.
2 Only when connecting a telephone:
B
Remove the telephone connector cap (B), then connect a telephone with the telephone line cable.
•Do not connect the machine and a telephone in parallel to the same telephone line using a distribution adapter. The machine may not operate properly.
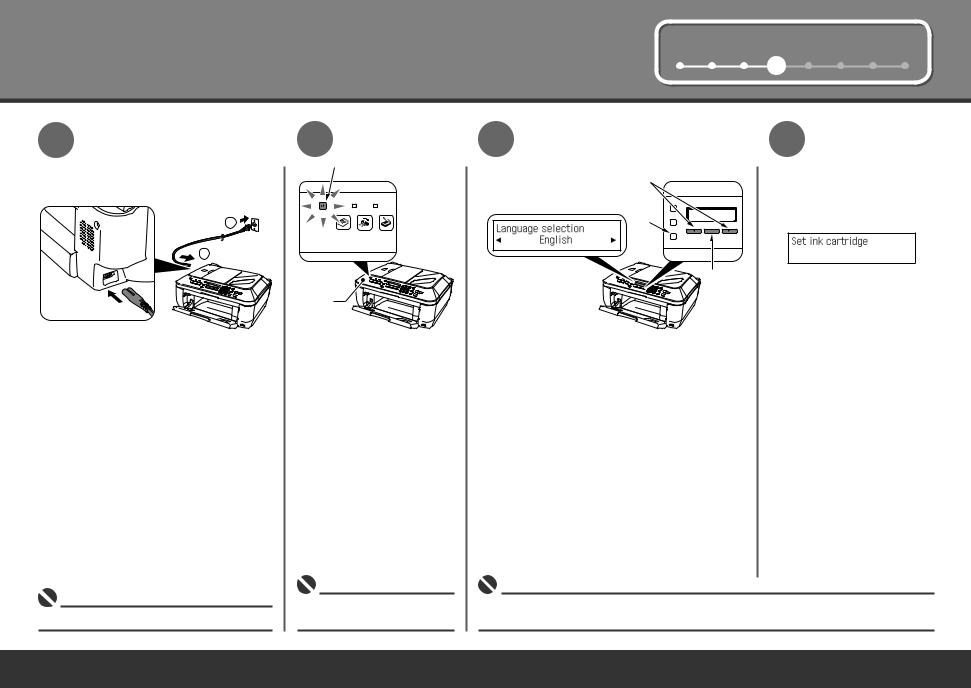
4 Turn the Power On |
1 |
2 |
3 |
4 |
5 |
6 |
7 |
8 |
|
|
|
|
|
|
|
|
1
2 |
1
Plug the power cord into the left side of the machine, then connect the other end to the wall outlet.
• Do NOT connect the USB cable at this stage.
2
A
B
Turn on the machine (A).
•Make sure that the Document Cover (B) is closed.
3 |
4 |
|
C |
|
D |
|
OK |
Use the [ or ] button (C) on the Operation |
The standby screen is |
Panel to select the language for the LCD, then |
displayed. |
press the OK button. |
|
•If an unintended language is displayed on the LCD, press the Back button (D) to return to the
Language selection screen.
5 Install the FINE Cartridges |
1 |
2 |
3 |
4 |
5 |
6 |
7 |
8 |
|||
|
|
|
|
|
|
|
|
|
|
|
|
|
|
|
|
|
|
|
|
|
|
|
|
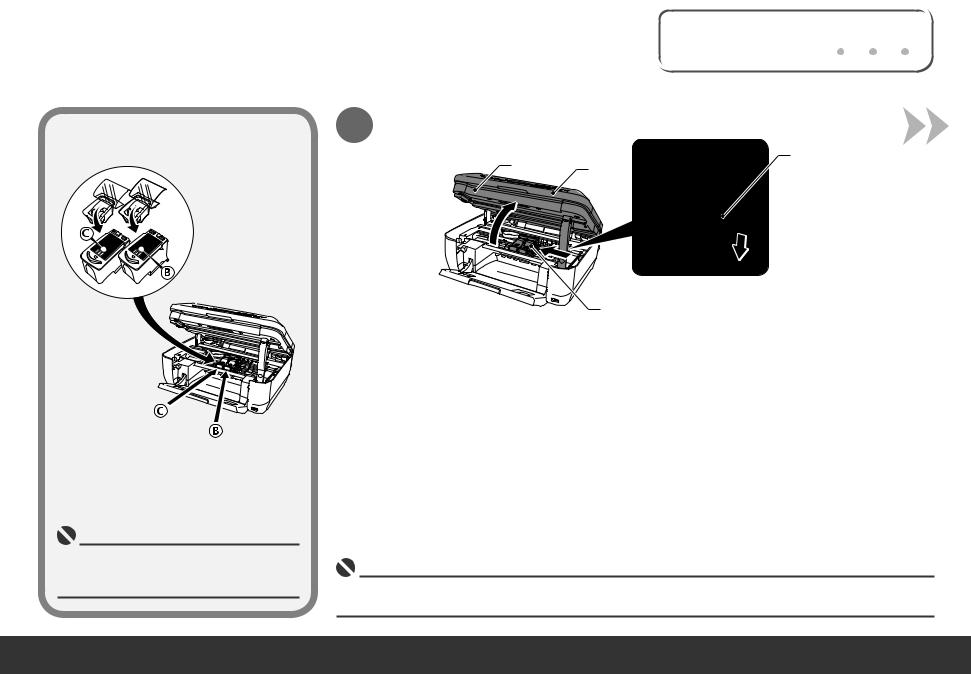
•Handle the FINE Cartridges carefully. Do not drop or apply excessive pressure to them.
•Be sure to use the supplied FINE Cartridges.
1
E
A D
F
Lift the Scanning Unit (Cover) (A) until it locks into place.
Close the Document Cover (D) and lift it with the Scanning Unit (Cover). The Scanning Unit Support (E) is fixed automatically.
The FINE Cartridge Holder (F) comes out. (This is where you install the cartridges.)
•If the FINE Cartridge Holder returns to the right, close the Scanning Unit (Cover) and reopen it.
•If the FINE Cartridge Holder does not come out, make sure that the machine is turned on.
5
2 |
3 |
4 |
G
Open the Ink Cartridge Locking Cover on the right side.
Pinch (G) firmly and pull up the cover.
|
H |
Remove the Black FINE Cartridge |
Pull the orange protective tape (H) in the direction of |
from its box. |
the arrow and remove it gently. |
• Be careful not to stain your hands or surrounding work area with ink on the removed protective tape.

1 |
2 |
3 |
4 |
5 |
6 |
7 |
8 |
||
|
|
|
|
|
|
|
|
|
|
|
|
|
|
|
|
|
|
|
|
5 |
6 |
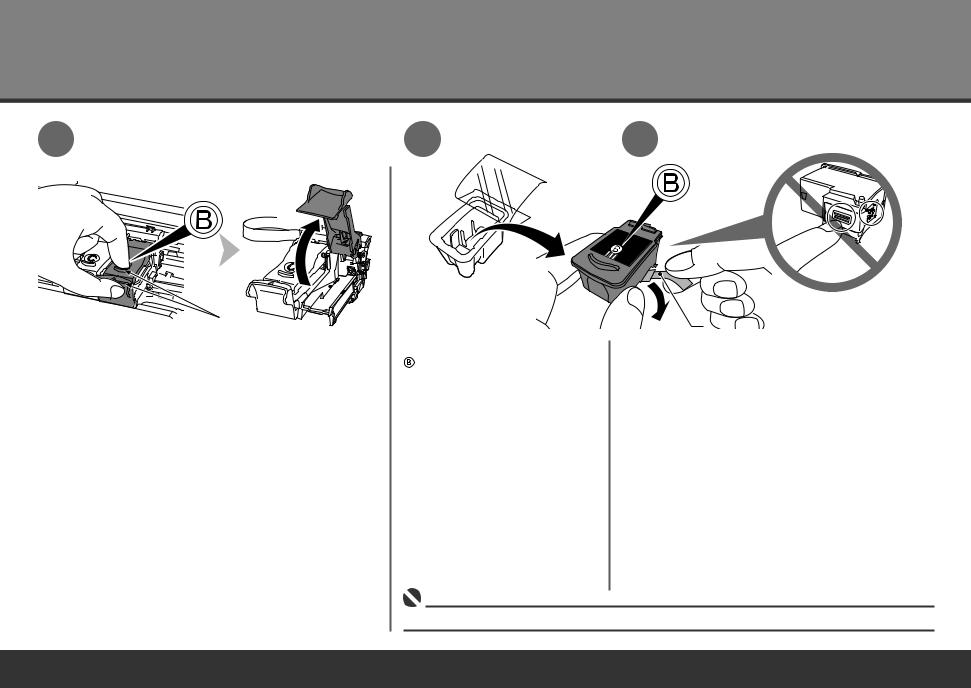
Place the Black FINE Cartridge into the right slot
  .
.
•Do not knock the FINE Cartridge against the sides of the holder.
•Install in a well-lit environment.
•Install the Black FINE Cartridge into the right slot, and the Color FINE Cartridge into the left slot.
Push down  of the Ink Cartridge Locking Cover until you hear a click to close it completely.
View the Ink Cartridge Cover straight on and check that it is locked correctly (not at an angle).
Insert the Color FINE Cartridge into the left FINE Cartridge Holder
 in the same way.
5 |
1 |
2 |
3 |
4 |
5 |
6 |
7 |
8 |
|
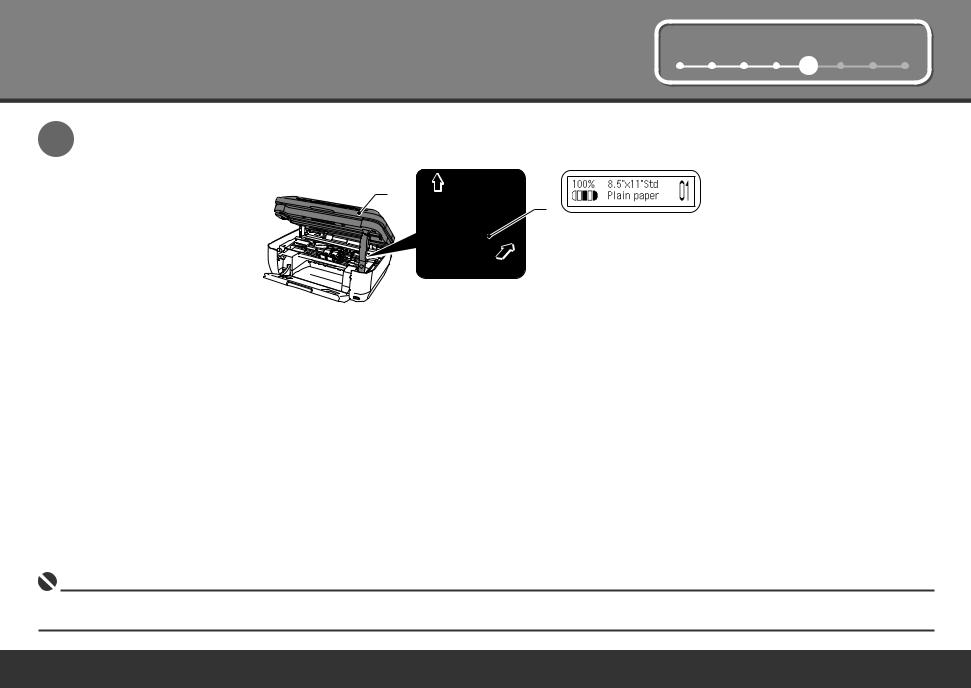
7
A
E
Lift the Scanning Unit (Cover) (A) slightly and fold the Scanning Unit Support (E), then gently close the Scanning Unit (Cover) (A).
 • Wait until the standby screen appears on the LCD (about 1-2 minutes) and go to the next step.
•Once you have installed the FINE Cartridges, do not remove them unnecessarily.
•If an error message is displayed on the LCD, make sure that the FINE Cartridges are correctly installed.
6 Set Up for Fax Reception |
1 |
2 |
3 |
4 |
5 |
6 |
7 |
8 |
||
|
|
|
|
|
|
|
|
|
|
|
|
|
|
|
|
|
|
|
|
|
|
If you are not using the machine as a fax, go to "7 Install the Software" on page 11. Select a receive mode according to your needs to receive faxes easily.
You can change the receive mode any time. For details, refer to the on-screen manual: Basic Guide.
When using as a fax only:
When you want to receive only faxes (FAX only mode)
When a call arrives:
Voice call:
You cannot answer the call.
Fax call:
The machine does not ring.
Faxes are received automatically.
When you want to switch the line between fax and telephone automatically (FAX priority mode)
When a call arrives:
Voice call:
The machine rings.
Pick up the handset, then press the
Stop button to answer the call.
Fax call:
The machine does not ring.
Faxes are received automatically.
When using as both a fax and telephone:
When you receive more voice calls than faxes (TEL priority mode)
When a call arrives:
Voice call:
Pick up the handset to answer the call.
Fax call:
If you pick up the handset and hear the fax tone, the machine will switch to the fax automatically and receive the fax.
If you use Distinctive Ring Pattern
Detection (DRPD) service
When a call arrives:
Voice call:
The telephone continues to ring.
Pick up the handset to answer the call.
Fax call:
Faxes are received automatically when the machine detects the fax ring pattern.
• When a telephone is connected to the machine, the telephone rings for incoming calls regardless of the selected mode.
Loading...