


CANNONDALE® EASY
RIDERTM RECUMBENT BICYCLE OWNER’S MANUAL SUPPLEMENT
READ THIS MANUAL
CAREFULLY!
It contains important safety information.
TABLE OF CONTENTS
EASY RIDER CABLE ROUTING.................. |
2 |
SOME RECUMBENT-SPECIFIC RIDING |
|
CHARACTERISTICS................ |
4-7 |
SET UP AND ADJUSTMENT.................. |
8-10 |
Frame Size |
8 |
The Seat |
8 |
The Handlebars and Stem |
10 |
MECHANICAL ADJUSTMENTS............ |
11-21 |
Holding the Bike in a Work Stand |
11 |
Suspension Set Up |
11 |
Easy Rider Fork |
12 |
Preload Adjustment |
13 |
HeadShok Scheduled Maintenance |
16 |
HeadShok Warranty |
18 |
Fox Rear Shock Service and Warranty |
18 |
Tire Choice and Pressure |
18 |
Shifter Choice and Positioning |
19 |
Mid-Drive / Mid-Drive Bearing |
19 |
Front Chain Tensioner |
20 |
Chainring Bolts |
21 |
Front Derailleur Adjustment |
21 |
Brake Set Up |
21 |
CARRYING STUFF..................................... |
21 |
ACCESSORIES........................................... |
22 |
TRANSPORTATION.................................... |
23 |
REFERENCES............................................. |
23 |
CANNONDALE WARRANTY .................... |
24 |
CONTACT INFORMATION......................... |
24 |

CANNONDALE EASY RIDER CABLE ROUTING
Front
Derailleur
Cable
Rear Brake 

Cable
Front Brake
Cable
Front
Derailleur
Cable
Front Brake 

 Cable.
Housing must be 11-3/8”
(29cm) long!
Rear
Derailleur
Cable
|
|
|
|
|
|
Rear |
|
|
|
|
|
Derailleur |
|
||
|
|
|
|
|
|
Cable |
|
|
|
|
|
|
|
|
|
|
|
|
|
|
|
Rear Brake |
|
|
|
|
|
|
|
Cable |
|
|
|
Front |
|
|
|||
|
|
|
|
|
|
||
|
Derailleur |
|
|
|
|
||
|
|
Cable |
|
|
|
|
|
|
|
|
|
|
|
|
|
Rear |
|
|
|
|
|
|
|
Derailleur |
|
|
|
|
|
||
Cable |
|
|
|
|
|
||
|
|
|
|
|
|
|
|

 Rear Brake
Cable
Thanks for purchasing the most sophisticated, comfortable and well crafted Mid Wheelbase (MWB) recumbent.
Please take the time to read and understand this Owners Manual supplement, the Cannondale Bicycle Owners Manual and any other literature included with the bike. All contain important safety warnings and performance tips. If you have any questions about your bicycle or the content of any of this literature please contact Cannondale.
Your Easy Rider should have included both a standard owner’s manual and this supplement. If you did not receive both of these documents, please download and print one from the Cannondale website Tech Center or call our customer service line at 1-800-BIKE-USA in the U.S. or Canada to have one sent to you. See the back page for other phone numbers and e-mail contacts.
WARNING: A Recumbent bicycle is different from a conventional bicycle. To help avoid serious or fatal injury and to minimize risk you must learn and practice new skills. Before riding, read this Recumbent Owners Manual Supplement, and learn and practice the skills described below.
Note that a manual alone cannot teach you how to ride, and a manual the size of an encyclopedia could not cover every combination of bicycle, rider and conditions. Thus, as a reasonable person would expect, our manuals focus on the bicycle and important cautions and warnings, not on teaching you how to ride.
Many hazards are described in the warnings, and we have attempted to explain how to avoid or minimize the hazards. Because any fall or crash can result in serious injury or even death we do not repeat the warning of these potential consequences every time we call attention to a hazard. The reality is that the exact nature of the consequences is not predictable.
2 |
3 |
SOME RECUMBENT-SPECIFIC RIDING CHARACTERISTICS
Handling: Recumbents have handling characteristics that are different from conventional bicycles, and the Cannondale Easy Rider may handle differently than other recumbents you may have ridden. Take time to become familiar and comfortable by doing practice rides in safe, open, level areas with little or no traffic.
Starting off: Getting your recumbent started is a basic skill you must master. Make sure you are in a moderate gear (with the chain on the middle chainring and the middle of the cassette). Position the pedal under your stronger or favored leg with the crank arm straight up (at 12 o’clock). Be sure your path is clear. Relax your arms and lean against the seat back. Give a strong push with this leg and promptly get your other foot off the ground and then patiently position the other foot on the other pedal. It is very helpful to learn this skill with the seat further forward than you may ultimately place it. Err on the side of a closer seat until starting off is second nature. This shorter pedal-to-seat back position and more upright seat back will allow you to use your legs in a more controlled, knees bent position and minimize the tendency that most people have to hunch forward towards the handlebars.
Slow speed maneuvering: You will find that as you practice tight turns and small circles at walking speeds, the handlebars can come close to your knees, your inside hand grip will get closer to your body and your outside hand grip will move away from your body. Recumbent enthusiasts call this the “tiller effect”. Make adjustments (See the SET UP AND ADJUSTMENT section below) and get used to these characteristics. Remember that these characteristics are not significant once you start to ride even a little faster but are significant when maneuvering slowly.
Coming to a stop: This is easier than on a conventional bicycle, but you will want to practice. As you brake to a stop (see important braking section below) take one foot off the pedal, and then the other. As your feet come close to touching the ground be sure you are going very slowly –slower than walking – and that you heel is down and your toe is up. If you are going too fast, or try to use your feet as brakes, you may catch the ground with your foot and injure your foot or leg.
Braking: This recumbent has great braking power, and it is easier to use this power than it is on a conventional bicycle. Braking characteristics have a lot to do with weight distribution and weight transfer. When you apply brakes, weight
shifts forward. On a conventional bicycle you have long been taught respect for the power of front brakes and the need to modulate their use to avoid pitching yourself over the handlebars (See section 4 C of the Cannondale Owners Manual). You also have been taught that applying a lot of rear brake will result in a skid, with little effect on reducing speed.
On this recumbent your weight is relatively lower and much more to the rear. This means you can use much more rear brake power without skidding the rear tire. You can brake harder without the hazard of pitching yourself over the handlebars. In a panic braking situation think, “rear brake hard!”
The front tire of this recumbent is lightly loaded. If you use the front brake too hard for the circumstances you can cause a skid, lose control, and crash. In particular, do not apply too much front braking force when the front wheel is turned or on a loose or slippery surface. Do not over-inflate the front tire (see Front Tire Pressure section below) as over-inflation will minimize the tire contact patch and decrease potential braking power.
Maintaining a course: The front wheel is relatively small. It is also relatively light. These characteristics mean that it has less gyroscopic effect than the larger front wheel on a conventional bicycle. The gyroscopic effect of a front wheel adds stability to a bicycle, particularly at speed. The smaller gyroscopic effect of the front wheel of this recumbent means that you should ride with both hands on the hand grips and pay attention to your course.
Choice of pedals: Assuming you have prior experience and second nature familiarity with clipless pedals, we highly recommend the use of clipless pedals. The forward, relatively high position of the pedals on a recumbent bicycle maximizes the benefits of their use.
However, if you are not experienced and very familiar with clipless pedals, do not attempt to learn recumbent riding and clipless pedal use at the same time. (See section 4 F of the Cannondale Owners Manual and the instructions from the manufacturer of your clipless pedal system).
The same advice is given for use of pedals with toe clips and straps: Do not attempt to learn recumbent riding and toe clip & strap use at the same time (See section 4 E of the Cannondale Owners Manual).
Do not use flat, slippery plastic pedals or wear slippery-soled shoes. You do not
4 |
5 |
want your foot to slide off, strike or catch the ground and cause injury to your foot or leg.
Passengers: Do not carry any passengers, including children, on this recumbent bicycle. The extra weight of passengers could compromise steering or braking performance. A passenger could also compromise control.
Off-road riding: These are not mountain bikes. The Easy Rider is similar to a conventional hybrid in terms of off-road capability. (See section C of the Cannondale Owners Manual) These bikes work well on roads or bike paths that are relatively smooth and hard packed, such as cinders, good dirt roads and “rails to trails” paths. These bikes are not intended or designed for off-road use, such as trails, “single track” with logs, rocks, roots, or loose dirt.
Recumbents are further limited in the complex and ever changing terrain of offroad riding because the recumbent rider has very little ability to use two techniques that are fundamental to mountain biking: shifting weight and use of the legs to absorb shock. For these reasons do not jump a recumbent, on or off the road.
Recumbents also have a lightly loaded front tire that will be more likely to slide out or slip than the tire of a conventional bicycle.
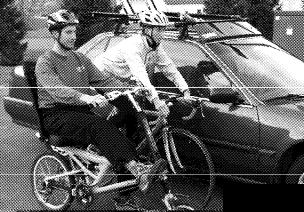
Riding in traffic: See Fig. 1 for a generalized look at your eye height relative to a conventional bicycle and a typical passenger car. On the Easy Rider, you may sit slightly lower than on a traditional bicycle, but still high enough to make eye contact with automobile drivers. You will need to use caution, adapt and practice this new position, just as you would when driving a sports car one day and a tall four wheel
drive the next.
Note that the front wheel of this recumbent sticks out further than the front wheel of a conventional bicycle. You are sitting further back on the
recumbent bicycle.
Fig. 1 5
Use care “sticking” the front wheel out into a roadway, particularly when you enter an intersection.
Rearward vision: On a conventional bicycle, a rider can stand up on the pedals and swivel the upper torso around to look to the rear. This swiveling motion is more limited on a recumbent. We recommend your practice riding include learning to both turn your head and use a rear view mirror. We have included a rear view mirror as original equipment. Adjusted for the rider and used properly this mirror can reduce risk but not eliminate risk.
Pedaling technique: On the Easy Rider, you will be able to use more leg power than on a traditional bicycle, because you can push against the seat back, much like using a leg press machine at a gym. Be careful not to overpower and injure your knees, particularly before your body becomes used to the new riding position. Our advice? Use lower gears, and spin, spin, spin.
On a conventional bike you can briefly use a gear that is too high by getting out of the saddle for a few strokes, using gravity and body weight. We often do this after temporarily slowing the bike, or when climbing a hill. On a recumbent you cannot get out of the saddle. Our advice? Anticipate changes in speed and terrain, and shift to lower gears early.
On a conventional bike you will also pull against the handlebars as you push on the pedals. On a recumbent you can push against the seat back. Learn to relax your upper body and not to pull on the handlebars. This is the key to the comfort and pleasure of recumbent riding. This upper body relaxation will also minimize the small inadvertent steering corrections that often affect new recumbent riders.
Different muscles: The different riding position of the Easy Rider will use different muscles and different motions. You will need to train your whole body. As with any fitness program involving a new sport or new equipment, consult with your doctor regarding your fitness, start slowly, work up progressively, cross train, stretch, and listen to your body. If you feel pain, work with your retailer on adjustments and see your doctor.
6 |
7 |
 Loading...