


Thank you for purchasing the Brother operation panel. Before using the operation panel, please be sure to read this instruction manual. To obtain the best performance from this product, and also to ensure safe operation, it is important to have a full understanding of the correct method of operation.
Furthermore, because we are continually improving our products as a result of continuing research, the specifications for the product which you have purchased may differ slightly from those listed in this manual.
Vielen Dank fur den Kauf der Bedienungstafel von Brother. Lesen Sie bitte diese Bedienungsanleitung vor lnbetriebnahme der Bedienungstafel sorgfi:iltig durch. Fur eine optimale Leistung und einen sicheren Betrieb ist es sehr wichtig, sich uber die richtige Betriebsmethode zu informieren.
Wegen der stetigen Weiterentwicklung unserer Produkte ist es moglich, daB die technischen Daten geringfUgig von denen in dieser Bedienungsanleitung angegebenen abweichen konnen.
Nous vous remercions d'avoirachete le panneau de commande de Brother. Avant d'utiliserle panneau de commande, lire attentivement le present manuel d'instructions.Pour profiter au mieux des possibilites de ce produit, et pour l'utiliseren toute securite, il est important de bien comprendre comment le faire fonctionner.
De plus, en raison des ameliorations que nous apportons continuellement a nos produits suite a nos recherches permanentes, il se peut que les specifications du produit que vous avez achete different legerement de celles figurant dans le present manuel.
Gracias por haber adquirido un panel de control de Brother. Antes de usar el panel de control, debe leer este manual de instrucciones. Para obtener los majores resultados de este producto, y asegurarse de que funcionara correctamente, es muy importante que comprenda completamente Ia manera de usarlo.
Ademas, como resultado de las mejoras que constantemente realizamos en nuestros productos las cuales son el resultado de investigaciones que realizamos continuamente, las especificaciones del producto que haya adquirido pueden ser un poco diferentes de las especificadas en este manual.
SAFETY INSTRUCTIONS
SAFETY INDICATIONS AND THEIR MEANINGS
This instruction manual and the indications and symbols that are used on the machine itself are provided in order to ensure safe operation of this machine and to prevent accidents and injury to yourself or other people. The meanings of each indication and symbol are classified as shown below in accordance with the degree and type of damage or injury that each one represents. The instructions following each indication and symbol must always be strictly observed.
SICHERHEITSHINWEISE
SICHERHEITSHINWEISE UNO IHRE BEDEUTUNG
Diese Bedienungsanleitung und die Hinweise und Symbole auf der Maschine sollen einen sicheren Betrieb der Maschine sicherstellen und die Unfallund Verletzungsgefahr verringern.
Die Bedeutung der einzelnen Ausdrucke und Symbole sind wie folgt nach dem Grad der Beschi:idigungsund Verletzungsgefahr eingeteilt. Die Anweisungen, die den Ausdrucken und Symbolen folgen, mussen strikt eingehalten werden.
INSTRUCTIONS DE SECURITE
INDICATIONS DE SECURITE ET LEUR SIGNIFICATION
Ce manuel d'instructionset les indications et symboles figurant sur Ia machine elle-meme permettent d'utiliser Ia machine en toute securite et d'eviterdes accidents et des blessures a votre entourage eta vous-meme.
Les significations de chaque indication et de chaque symbole sont classees comma indique ci-dessous salon le degre et le type d'endommagementou de blessure que chacun d'euxrepresente. Les instructions suivant chaque indication et chaque symbole doivent etre toujours strictement respectees.
INSTRUCCIONES DE SEGURIDAD
INDICACIONES DE SEGURIDAD V SUS SIGNIFICADOS
Las indicaciones y simbolos usados en este manual de instrucciones y en Ia misma maquina son para asegurar el funcionamiento seguro de Ia maquina y para evitar accidentes y heridas.
Los significados de cada indicaci6n y simbolo se clasifican de Ia manera indicada a continuaci6n de acuerdo con el grado y tipo de daiio o herida que representan. Las instrucciones que acompaiian estes indicaciones y simbolos se deben tener muy en cuenta.
From the library of: Superior Sewing Machine & Supply LLC

Indications Hinweise Indications lndicaciones
The indications which are used in this manual and their meanings are shown below.
Die in dieser Bedienungsanleitung verwendeten Ausdrucke und ihre Bedeutung sind nachstehend aufgefUhrt
Les indications utilisees dans le present manuel et leurs significations sont indiquees ci-dessous.
Las indicaciones que se usan en este manual y sus significados se indican a continuaci6n.
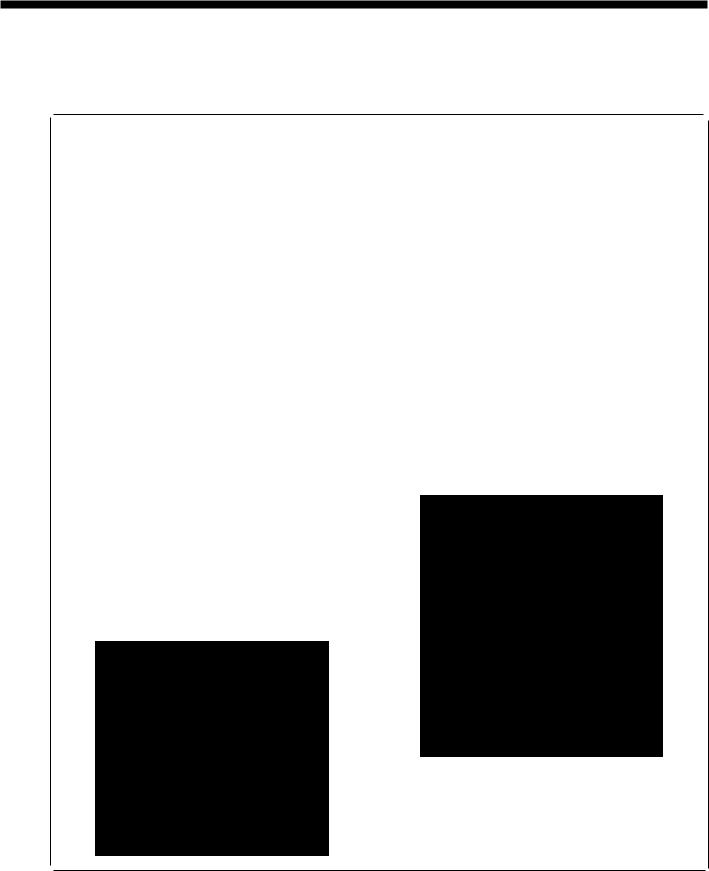
A
A
Warning .....................
Warnung ...................
Failure to observe the instructions which appear after this indication while using the motor will almost certainly result in death or severe injury to the user.
Die Anweisungen, die diesem Ausdruck folgen, sind fur Gefahrensituationen bei Verwendung des Motors, bei deren MiBachtung eine hohe Verletzungsgefahr oder sogar Lebensgefahr besteht
A A
Si I'on ne respecte pas les instructions mentionnees apres cette Avertissement indication lorsqu'onutilise le moteur, il y aura une tres grande
probabilite de blessures ou de deces de l'utilisateur.
Las instrucciones a continuaci6n de esta indicaci6n representan
Advertencia .......... situaciones en las cuales el no respetar las instrucciones al usar el motor seguramente puede resultar en heridas serias o muer-
te.
A Caution |
Failure to observe the instructions which appear after this indi- |
cation while using the motor could possibly result in slight to |
|
|
moderate injury to the user, or physical damage. |
A
A
Vorsicht .....................
Precaution
Die Anweisungen, die diesem Ausdruck folgen, sind fur Gefahrensituationen bei Verwendung des Motors, bei deren MiBachtung eine geringere Verletzungsgefahr oder Beschadigungsgefahr besteht
Si I'on ne respecte pas les instructions mentionnees apres cette indication lorsqu'onutilise le moteur, il y aura un risque de blessures legeres ou moyennes de l'utilisateur,ou d'endommagement de Ia machine.
A Precaucion |
Las instrucciones a continuaci6n de esta indicaci6n representan |
situaciones en las cuales el no respetar las instrucciones al usar |
|
|
el motor posiblemente puede resultar en heridas moderadas a |
|
leves o daiios. |
From the library of: Superior Sewing Machine & Supply LLC
Symbols
Symbole
Symboles
Simbolos
The symbols which are used in this manual and their meanings are shown below.
Die in dieser Bedienungsanleitung verwendeten Symbole und ihre Bedeutung sind nachstehend aufgefOhrt. Les symboles utilises dans ce manuel et leurs significations sont indiques ci-dessous.
Los simbolos que se usan en este manual y sus significados se indican a continuaci6n.
This symbol is used to indicate the danger of electric shocks.
Mit diesem Symbol wird auf die Gefahr von elektrischen Schlagen hingewiesen.
Ce symbole indique le danger d'electrocution.
Este simbolo se usa para indicar que existe peligro de golpes electricos.
.................................... This symbol is used to indicate general cautions that should be observed.
Mit diesem Symbol wird auf allgemeine VorsichtsmaBnahmen hingewiesen, die beachtet warden mussen.
Ce symbole indique les precautions generales aprendre.
Este simbolo se usa para indicar que se debe tener cuidado en general.
From the library of: Superior Sewing Machine & Supply LLC

INSTALLING THE OPERATION PANEL |
INSfALLATION DU PANNEAU DE COMMANDE |
INSfALLATION DER BEDIENUNGSfAFEL |
INSfALACION DEL PANEL DE CONTROL |
|
|
|
|
Ill Installing the operation panel to the machine/Installation der Bedienungstafel an der Nahmaschine/lnstallation du panneau de commande sur Ia machine/ lnstalacion del panel de control en Ia maquina
There are two types of operation panel: an external type and a built-in type. The type of operation panel to be used depends on the type of machine used.
Es gibt zwei Arten von 8edienungstafeln, externe und eingebaute. Die zu verwendende 8edienungstafel hangt vom Nahmaschinentyp ab.
II existe deux types de panneaux de commande: un type externe et un type incorpore. Le type de panneau de commande autiliser depend du type de machine utilise.
Existen dos tipos de panel de control: uno tipo externo y otro tipo incorporado. El tipo de panel de control a usar depende del tipo de maquina usada.
External type/Externe Bedienungstafei/Type externe/Tipo externo
1.Remove the three screws 0 on the rear side of the arm bed.
2.Install the operation panel mounting bracket E) to the rear side of the arm bed with the accessory screws 8.
1.Entfernen Sie die drei Schrauben 0 auf der ROckseite des Nahmaschinenarms.
2.Montieren Sie die 8edienungstafelhalterung E) mit den mitgelieferten Schrauben 8 an der ROckseite des Nahmaschinenarms.
1.Retirer les trois vis 0 situees al'arrieredu plateau du bras.
2.Installer le support de montage E) du panneau de commande sur le cote arriere du plateau du bras aI'aide des vis fournies8.
1.Quitar los tres tornillos 0 dellado de atras de brazo.
2.lnstalar Ia mensula de montaje del panel de control E) dellado de atras del brazo con los tornillos accesorios 8.
082-8748 |
082-8774 |
e e
082-8791
LT2-8842, LT2-8845,
LT2-8847, LT2-8848,
LT2-8872,LT2-8875
082-8798
From the library of: Superior Sewing-1- Machine & Supply LLC
Built-in type/Eingebaute Bedienungstafei/Type incorpore/Tipo incorporado
Remove the panel (F-0) from the sewing machine, and then install the operation panel.
Entfernen Sie die Tafel (F-0) und bringen Sie die 8edienungstafel an.
Deposer le panneau (F-0) de Ia machine acoudre, puis installer le panneau de commande.
Desmontar el panel (F-0) de Ia maquina de coser, y luego instalar el panel de control.
D82-8737 |
Set screw |
|
|
|
Schraube |
|
Vis de fixation |
|
Tomi!lo de fijaci6n |
Panel guide bracket
Bedienungstafelhalterung
Support du guide de panneau
Mensula de guia de panel
*You can turn the removed panel upside down and use it as an accessory box. Secure the panel to the right edge of the work table with the screws.
*Die entfernte Abdeckung kann als Ablagefach verwendet werden, wenn Sie sie umgekehrt am Nahtisch anbringen. 8efestigen Sie die Abdeckung auBen auf der rechten Seite des Nahtisches mit den Schrauben.
*II est possible de retourner le panneau depose et de l'utiliser comme boite aaccessoires. Fixer le panneau sur le cote droit de Ia table de travail avec les vis.
*El panel desmontado se puede dar vuelta y usar como una caja de accesorios. Asegurar el panel al borde derecho de Ia mesa de trabajo con los tornillos.
Cord holder Kabelhalter Porte-cordon Soporte del cable
From the library of: Superior-2Sewing- Machine & Supply LLC

INSTALLING THE OPERATION PANEL INSTALLATION DER BEDIENUNGSTAFEL
Ill Connecting the cord/AnschlieBen des Kabels
lA .&Warning
~Wait at least 3 minutes after turning off the power switch before opening the cover of the control box. Touching areas where high voltages are present can result in severe injury.
It\ A Caution
~Be careful not to clamp the cord which is inside the control box when closing the control box cover.
lA AWarnung
~Warten Sie nach dem Ausschalten des Netzschalters mindestens 3 Minuten, bevor Sie die Schaltkastenabdeckung offnen. Weil Hochspannung vorhanden ist, besteht bei Beri.ihrung von Teilen eine hohe Verletzungsgefahr.
II\ A Vorsicht
~Kontrollieren Sie, daB beim SchlieBen des Schaltkastendeckels das Kabel nicht im Schaltkasten eingeklemmt ist.
a.Disconnect the synchronizer cord 0.
b.Remove the screws 8, and then gently open the cover 8 by pulling it toward you.
c.Open the pawl on the circuit board connector 0, align the "'YII mark on the operation panel connector 0 and circuit board connector 0, and then insert the operation panel connector 0 securely until the pawl closes.
d.Pass the operation panel cord 0 through the rubber stopper 0 and then install the stopper 0 to the control box as shown in the illustration, while being careful not to damage the cord G.
e.Close the cover 8 and then tighten the screws $.
f.Connect the synchronizer cord 0.
a.Losen Sie das Synchronisatorkabel 0.
b.Entfernen Sie die Schrauben 8 und offnen Sie den Deckel 8 vorsichtig.
c.Offnen Sie die Verrieglung des Schaltplatinensteckers 0, richten Sie die Markierungen II 'Y"des Bedienungstafel-
steckers 0 und des Schaltplatinensteckers 0 aus und stecken Sie den Bedienungstafelstecker 0 richtig hinein, bis die Verrieglung schlieBt. ·
d.Fi.ihren Sie das Bedienungstafelkabel 0 durch den Gummiring 0 und befestigen Sie den Gummiring 0 wie in der Abbildung gezeigt, so daB das Kabel G nicht beschiidigt wird.
e. SchlieBen Sie den Deckel 8 und ziehen Sie die Schrauben 8 fest. f. SchlieBen Sie das Synchronisatorkabel 0 wieder an.
From the library of: Superior Sewing-3- Machine & Supply LLC

INSTALLATION DU PANNEAU DE COMMANDE INSTALACION DEL PANEL DE CONTROL
Ill Branchement du cordon/Conexi6n del cable
/A A Advertissement
~Attendre au moins 3 minutes apres avoir mis l'interrupteurprincipal en position d'arretavant d'ouvrirle couvercle du boitier de commande. Certains composants se trouvant sous haute tension, on risque de graves blessures si on
les touche.
A\ A Precaution
~Veiller ace que le cordon place a l'interieurdu boitier de commande ne soit pas pince lorsqu'onreferme de couvercle du boitier de commande.
/A A Advertencia
~Despues de desconectar el interrupter principal esperar al menos 3 minutos antes de abrir Ia tapa de Ia caja de controles. El tocar las areas donde exista alto voltaje puede ocasionar heridas graves.
A\ A Precauci6n
~Se debe tener cuidado de no apretar el cable que se encuentra dentro de Ia caja de controles al cerrar Ia cubierta de Ia caja de controles.
a.Debrancher le cordon 0 du synchroniseur.
b.Retirer les vise, puis ouvrir doucement le couvercle E) en le tirant vers soi.
c.Ouvrir le cliquet d'arretdu connecteur de Ia carte a circuits 0, aligner les reperes ".,." marques sur le connecteur 0 du panneau de commande et sur le connecteur 0 de Ia carte a circuits, puis inserer fermement le connecteur 0 du panneau de commande jusqu'ace que le cliquet d'arretse verrouille.
d.Faire passer le cordon 8 du panneau de commande atravers Ia butee en caoutchouc 0, puis installer Ia butee 0 sur le boitier de commande comme indique sur !'illustration,en veillant a ne pas endommager le cordon G.
e.Refermer le couvercle E) puis resserrer les vis e.
f.Brancher le cordon 0 du synchroniseur.
a.Desconectar el cable del sincronizador 0.
b.Quitar los tornillos e. y luego suavemente abrir Ia cubierta E) tirando de ella hacia adelante.
c.Abrir Ia uiia del conector del tablero de circuitos 0, alinear Ia marca ""'"delconector del panel de control0 y el conectar de tablero de circuitos 0, y luego insertar el conector del panel de control 0 hasta que Ia uiia se cierre.
d.Pasar el cable del panel de control 8 a traves del tope de caucho 0 y luego instalar el tope 0 en Ia caja de controles tal como se indica en Ia figura, teniendo cuidado de no daiiar el cable G.
e.Cerrar Ia cubierta E) y luego apretar los tornillos e.
f.Conectar el cable del sincronizador 0.
From the library of: Superior-4Sewing- Machine & Supply LLC

USING THE OPERATION PANEL |
UTHJSATION DU PANNEAU DE COMMANDE |
VERWENDUNG DER BEDIENUNGSfAFEL |
USO DEL PANEL DE CONTROL |
|
|
*Key operations and the number of stitches cannot be changed while sewing. Be sure to confirm all key settings and the stitch number before beginning to sew. Note that the end backtack key can be canceled while sewing.
*Each key is turned on when the indicator is illuminated. When the key is pressed again, the indicator switches off and the key is then turned off.
*The settings for the number of stitches, the step and the pattern increase when the II A" key is pressed, and decrease when the II "i1" key is pressed.
*Wahrend dem Nahen konnen keine Tasten betatigt oder Stichzahlen eingestellt warden. Daher muB vor dem Nahbeginn genau kontrolliert warden, ob die Tasten und Stichzahlen richtig eingestellt sind. Das Zurucknahen am Ende kann jedoch durch Tastenbetatigung ausgeschaltet warden.
*Wenn eine Taste zum Einschalten gedruckt wird, leuchtet die entsprechende Anzeige. Beim nochmaligen Drucken wird
die Taste wieder ausgeschaltet und die Anzeige erlischt.
* Die Einstellungen fUr die Stichzahl, die Schritte und die Nahmuster warden mit der Taste II A II erhoht und mit der Taste
II "i1 II verringert.
*II n'estpas possible de modifier le fonctionnement des touches et le nombre de points en cours de couture. Veiller par consequent a verifier le reglage de toutes les touches et le nombre de points avant de commencer a coudre. Remarquer qu'encours de couture, il est possible d'annulerIa touche de points d'arn3ten fin de couture.
*Chaque touche est mise en circuit lorsque le temoin est allume. Lorsqu'onappuie anouveau sur Ia touche, le temoin s'eteintet Ia touche est alors mise hers circuit.
*Les valeurs des reglages du nombre de points, de l'etapeet du motif augmentent lorsqu'onappuie sur Ia touche II A 11 ,
et diminuent lorsqu'onappuie sur Ia touche "v ".
*No se puedn hacer cambios en el funcionamiento de Ia Ia maguina con las teclas, o en el numero de puntadas, durante Ia costura. Se deben confirmar todas las posiciones de las teclas y el numero de puntadas antes de comenzar a coser. Sin embargo, se puede cancelar Ia tecta del rematado per atras final.
*AI presionar una tecta el indicador correspondiente se encendera. Cuando se vuelve a presionar Ia misma tecta, el indicador se apagara y se desactivara Ia funcion correspondiente.
*Los ajustes para el numero de puntadas, el paso y el patron aumentan cuando se presiona Ia tecla "A", y disminuiran cuando se presiona Ia tecla 11 "il".
Ill Part names and functions/Teilebezeichnung und Funktionen/
Nome et functions des pieces/Denominaci6n de las piezas y funcionamiento
|
|
|
|
|
|
|
|
|
|
|
~~ |
|
||||
|
|
|
|
|
|
|
|
|
|
|
|
|
|
|
|
|
|
|
|
|
|
|
|
|
|
|
|
|
|
|
|
|
|
|
|
|
|
1 : |
|
111 |
[] |
A B c D |
98 |
~ |
|
|
|
|||
|
|
|
|
PATTERN |
ec |
|
|
|
|
|
|
|||||
|
|
|
|
• |
lm |
[§][§][§][§] |
|
|
98 |
00 |
|
|
|
|||
|
F·1DD |
|
STEP |
[] |
|
|
|
|
|
|||||||
|
|
0 |
|
LSTEp.J LNO.OFsmatJ ® |
|
|
|
|||||||||
|
88 |
|
:b~ |
|
|
t0V |
~8 |
OCD |
|
|
||||||
|
|
|
|
|
|
|
||||||||||
|
|
|
|
4!/l |
v |
-I!!. |
|
~~~~ ~ |
~8 |
:® |
|
|
|
|||
|
|
|
|
|
|
|
|
|
|
|
|
|
|
|
|
|
|
|
|
|
|
|
|
|
|
|
|
|
|
|
|
|
|
|
|
|
|
|
|
|
|
|
|
|
|
|
|
|
|
|
0 4~·
0 Needle up/down key/Nadeltaste/Touche d'elevement/Abaissementde l'aiguille
• When this key is pressed so that the II "i1" indicator illuminates while the machine is operating and the treadle is at the neutral position, the needle will drop below the needle plate and stop.
• When this key is pressed so that the 11 A" indicator illuminates while the machine is operating and the treadle is at the neutral position, the needle will rise above the needle plate and stop.
• Wenn wahrend des Maschinenbetriebs das Pedal in die Neutralposition gestellt wird und diese Taste gedruckt wird, so daB die Anzeige, "i1 11 leuchtet, so stoppt die Nahmaschine mit abgesenkter Nadel.
• Wenn wahrend des Maschinenbetriebs das Pedal in die Neutralposition gestellt wird und diese Taste gedruckt wird, so daB die Anzeige , A II leuchtet, so stoppt die Nahmaschine mit angehobener Nadel.
• Lorsqu'onappuie sur cette touche de maniere que le temoin "V" s'allumependant que Ia machine fonctionne et que Ia pedale est sur Ia position neutre, l'aiguilles'abaisseraau-dessous de Ia plaque aaiguille et s'arretera.
• Lorsqu'onappuie sur cette touche de maniere que le temoin II A" s'allumependant que Ia machine fonctionne et que Ia pedale est sur Ia position neutre, l'aiguilles'eleveraau-dessus de Ia plaque aaiguille et s'arretera.
• Cuando se presiona esta tecta de manera que se encienda el indicador ""i1 II mientras Ia maquina esta funcionando y el pedal se encuentra en Ia posicion neutral, Ia aguja bajara por debajo de Ia placa de aguja y se parara.
• Cuando se presiona esta tecla de manera que se encienda el indicador II A II mientras Ia maquina esta funcionando y el pedal esta en Ia posicion neutral, Ia aguja subira por encima de Ia placa de
aguja y se parara.
From the library of: Superior Sewing-5- Machine & Supply LLC
8 Slow start key/Langsamstarttaste/Touche de demarrage avitesse lente/Tecla de comienzo Iento
|
|
• When this key is pressed, the first two stitches at the sewing start (after the thread is trimmed and |
|
|
|
OCZ) |
the needle stops in the up position) are sewn at low speed. After this, sewing continues at the |
|
speed determined by the amount that the treadle is depressed. |
||
• Beim Drucken dieser Taste werden die ersten zwei Stiche am Nahbeginn (nach dem Abschneiden |
||
|
|
des Fadens und dem Hochstellen der Nadel) Iangsam genaht Danach kann die Nahgeschwindig- |
|
|
keit mit dem Pedal eingestellt werden. |
|
|
• Lorsqu'onappuie sur cette touche, les deux premiers points du debut de couture (une fois que les |
|
|
|
|
|
fils ont ete coupes et que l'aiguilleest en position relevee) sont cousus avitesse lente. Ensuite, Ia |
|
|
couture continue aIa vitesse determinee par Ia quantite d'enfoncementde Ia pedale. |
|
|
• Cuando se presiona esta tecla, las dos primeras puntadas al comienzo de Ia costura (despues de |
|
|
cortar el hilo y de que Ia aguja se haya levantado) se cosen lentamente. Despues, Ia costura conti- |
|
|
nua a Ia velocidad determinada por Ia fuerza con que se pise el pedal. |
8 Correction key/Korrekturtaste/Touche de correction/Tecla de correcci6n
•When this key is pressed, correction sewing (slow speed) is carried out if the actuator on the machine head is pressed while the machine is stopped. Correction sewing is not carried out after the thread has been trimmed and the needle is in the up position.
If the actuator is pressed while the machine is operating, the sewing direction is reversed.
•Nach dem Drucken dieser Taste konnen Korrekturstiche (langsame Nahgeschwindigkeit) genaht werden, wenn am Maschieneoberteil bei stillstehender Maschine die Betatigung gedruckt wird. Nach dem Fadenabschneiden und dem Hochstellen der Nadel konnen keine Korrekturstiche genaht werden.
Wenn die Betatigung bei laufender Nahmaschine gedruckt wird, so wird die Nahrichtung umgekehrt.
•Lorsqu'onappuie sur cette touche, Ia couture de correction (a vitesse lente) est effectuee si on appuie sur l'actuateursitue sur Ia tete de machine pendant que Ia machine est arretee. La couture de correction n'estpas effectuee apres que les fils ont ete coupes et que l'aiguilleest en position relevee.
Si on appuie sur l'actuateurpendant que Ia machine fonctionne, Ia direction de couture sera inversee.
•Cuando se presiona esta tecla, se realiza Ia costura de correcci6n (baja velocidad) si se presiona el actuador de Ia cabeza de Ia maquina mientras Ia maquina esta parada. La costura de correcci6n no se realiza despues de haberse cortado el hilo y cuando Ia aguja esta levantada.
Si se presiona el actuador mientras Ia maquina esta funcionando, Ia direcci6n de costura se invertira.
QHalf stitch key/Halbstichtaste/Touche de demi-point/Tecla de media puntada
•This key is used to raise or lower the needle when machine operation is interrupted. (This key does not function after thread trimming has been carried out.)
•Diese Taste wird bei einer Unterbrechung des Nahens zum Anheben oder Absenken der Nadel verwendet. (Nach dem Fadenabschneiden kann diese Taste nicht betatigt werden.)
•Cette touche permet d'eleverou d'abaisserl'aiguillelorsque le fonctionnement de Ia machine est interrompu. (Cette touche n'estpas utilisable apres que les fils ont ete coupes.)
•Esta tecla se usa para levantar o bajar Ia aguja cuando no se puede usar Ia maquina. (Esta tecta no funciona despues de haberse cortado el hilo.)
From the library of: Superior-Sewing6- Machine & Supply LLC
|
|
|
|
|
|
|
T |
|
T |
•• |
~~ |
|
|
||
|
|
|
|
|
|
|
|
|
|
|
|
|
|
|
|
|
|
|
|
|
|
|
|
|
|
|
|
|
|
|
|
|
|
|
|
|
I |
PATTERN II |
|
I A B c D |
I |
|
9~ |
era:> |
|
||
|
|
|
|
|
|
|
1 l ~ |
!~ ~~lmlm |
0~. |
|
|||||
|
|
|
|
|
|
|
98 |
o<Z) |
|
||||||
|
|
|
|
F·1DD |
2 ~E |
0 |
LSTEp...J LNO.OFsmat-1 |
~ |
OCD |
|
|||||
|
|
|
|
|
a |
•0~ |
@ |
~~~~ ~ |
'®8 |
:oo |
|
||||
|
|
|
|
|
|
||||||||||
|
|
|
|
|
|
||||||||||
|
|
|
|
|
|
|
4l/l v |
v v v v |
~ |
~8 |
|
||||
|
|
|
|
|
|
|
|
|
|
|
|
|
|
|
|
|
|
|
|
|
|
|
|
|
|
4!» |
|
|
|
|
|
|
|
|
|
|
|
|
|
|
|
|
|
|
|
||
|
|
|
|
|
|
|
|
|
|
|
|
|
|
||
|
|
|
|
|
|
|
|
|
|
|
|
ajuste de diserio |
|
||
0 Pattern setting key/Stichmustertaste/Touche de reglage des motifs/Tecla de • |
|
||||||||||||||
|
|
|
|
|
• This key is used to set the pattern to be sewn (1 - 9). |
|
|
|
|
||||||
|
|
|
|
|
Press 6 to increase a setting from 0 up to 9. |
|
|
|
|
||||||
|
|
|
|
|
Press v to decrease a setting from 9 down to 0. |
|
|
|
|
||||||
•The number of the current pattern setting is displayed.
Note: Set the pattern to be sewn after thread trimming is carried out
•Mit dieser Taste konnen die zu nahenden Stichmuster (1 - 9) eingestellt werden.
Drucken Sie die Taste 6, um eine hohere Zahl von 0 bis 9 einzustellen. Drucken Sie die Taste v, um eine niedrigere Zahl von 9 bis 0 einzustellen.
•Die Nummer des eingestellten Stichmusters wird angezeigt
Hinweis: Stellen Sie das zu nahende Stichmuster nach dem Abschneiden des Fadens ein.
•Cette touche permet de regler le motif acoudre (1 - 9).
Appuyer sur Ia touche 6 pour augmenter Ia valeur d'unreglage entre 0 et 9.
Appuyer sur Ia touche v pour diminuer Ia valeur d'unreglage entre 9 et 0.
•Le numero du reglage du motif actuellement regie s'affiche. Remarque: Regier le motif acoudre apres que le fil a ete coupe.
•Esta tecla se usa para ajustar el diserio a coser (1 - 9). Presionar 6 para aumentar el ajuste de 0 a 9.
Presionar v para reducir el ajuste de 9 a 0.
•El numero del ajuste de diserio actual se exhibe en Ia pantalla. Nota: Ajuste el diseiio a coser despues de que se corte el hilo.
0Start backtack key/Anfangsriegeltaste/Touche de point d'arreten debut de couture/Tecla de remate por atras inicial
•When this key is pressed, the number of stitches set for A and 8 (0 - 9) will be sewn as start backtack stitches.
•Durch Drucken dieser Taste wird die fUr A und 8 eingestellte Stichzahl (0 - 9) fUr den Anfangsriegelgenaht.
•Lorsqu'onappuie sur cette touche, le nombre de points regie pour A et 8 (0 - 9) est cousu en points d'arreten debut de couture.
•AI presionar esta tecla, se cose el numero de puntadas de remate por atras inicial para A y 8 (0 - 9) como puntadas de remate por atras inicial.
G End backtack key/Endriegeltaste/Touche de point d'arreten fin de couture/Tecla de remate por atras final
•When this key is pressed, the number of stitches set for C and D (0 - 9) will be sewn as end backtack stitches.
•Durch Dri.icken dieser Taste wird die fi.ir C und D eingestellte Stichzahl (0- 9) fi.ir den Endriegel genaht.
•Lorsqu'onappuie sur cette touche, le nombre de points regie pour C et 0 (0 - 9) est cousu en points d'arreten fin de couture.
•AI presionar esta tecla, se cose el numero de puntadas de remate para C y 0 (0 - 9) como puntadas de remate por atras final.
From the library of: Superior Sewing-7- Machine & Supply LLC
 Loading...