


Harrier
41
CODE
410A |
. 411A . |
412A |
(Push) |
(Auto Drive) |
(Electric Start |
|
|
Variable Speed) |
OWNER'S HANDBOOK
(English Version) |
|
FROM SERIAL NO: |
|
410A001001, 411A001001, 412A001001 |
HANDBOOK: 410066 (REV .2.) |
ISSUE 08.07.02 |
|

MAIN FEATURES /SPECIFICATIONS
Main Features
Cleaner
Filler
Filler Cap
Start-
Control
Stop
Drive
Speed
of Cut No.
Guard (412 Key
Deflector Plug
8
7

 9 6
9 6 

 16
16
5
10
17
11
12
1C411A02
|
Briggs & Stratton Quantum XTS 45 |
|
|
type |
12F802-1325-01 (410) |
12F802-1325-01 (411) |
12F807-1324-01 (412) |
speed |
3000 rpm |
|
|
|
Unleaded petrol |
|
|
|
1.5 litres |
|
|
|
SAE 30 engine oil |
|
|
capacity |
0.6 litres |
|
|
width |
410mm |
|
|
height |
13 - 60mm |
|
|
dimensions |
1050 x 446 x 1375mm |
|
|
|
35 Kg (410) |
36.5 Kg (411) |
39.5 Kg (412) |
1.2

CONTENTS
1.2 |
Main Features/Specifications |
1.19 - 1.25 |
|
|
1.19 |
1.3 |
Contents |
1.19 |
|
|
1.19 |
1.4 |
Introduction |
1.20 |
|
|
1.20 |
1.5 |
Warranty |
1.21 |
|
|
1.21 |
1.6 - 1.9 |
Safety Precautions |
1.21 |
|
|
1.22 |
1.9 |
Safety Symbols |
1.22 |
1.9 |
Decal Symbols |
1.22 |
|
|
1.23 |
1.10 |
Assembling the Mower |
1.23 |
1.10 |
- Delivery Checklist |
1.24 |
1.10 |
- Handlebar |
1.24 |
1.10 |
- Grassbag Attachment |
1.25 |
|
|
1.26 |
1.11 |
Before Starting the Engine |
|
1.11- Prevent Engine Damage
1.11- Oil Type
1.11 |
- Check Oil Level |
1.27 - 1.28 |
1.11- Fuel Type
|
|
1.29 |
1.12 - 1.15 |
Operating The Mower |
|
1.12 |
- Controls |
1.30 - 1.31 |
1.12- Starting Step 1
1.12 |
- |
Step 2 |
1.32 |
1.12- Step 3
1.13 |
- Electric Start |
1.33 |
1.13- Forward Travel
1.13- Turning
1.13- Stopping
1.14- Slopes
1.14- Height of Cut
1.14- Before Mowing
1.14- Grassbag
1.15- Without Grass Collection
1.15- Heavy Growth
1.15- Friction Disc
1.15- Non-Grassed Areas
1.16- 1.17 - Lawn Care Calendar - Guide Only
1.17- Lawn Stripes
1.18Maintenance Schedule
1.3

INTRODUCTION
Thank you for purchasing a Hayter mower. The following pages are designed to help you gain safe and efficient service from your mower.
IMPORTANT: This ‘Owners Handbook’ should be regarded as part of the mower as it gives essential information regarding mower safety, operation, maintenance and specifications. Read and understand this handbook prior to operating your mower for the first time. Make sure you are familiar with all the controls and points of regular maintenance. If you have any doubts, consult your local Hayter authorised dealer who will be pleased to give you assistance.
IMPORTANT: This mower is designed solely for use in a domestic grass cutting environment. Use in any other way is considered as contrary to the intended use. Compliance with and strict adherence to the conditions of operation, service and repair as specified in this handbook also constitute essential elements of the intended use.
This mower should be operated, serviced and repaired only by persons who are familiar with its particular characteristics and who are acquainted with the relevant safety procedures.
The safety precautions listed in this handbook and all other generally recognised regulations on safety must be observed at all times.
Any arbitrary modifications carried out to this machine may relieve Hayter Limited of liability for any resulting damage or injury.
Hayter mowers are robustly constructed and designed for efficient economical performance under normal mowing conditions. Correct operation and maintenance will ensure a long and satisfactory service life. Prior to despatch from our factory every effort is made to ensure that your mower is delivered in perfect condition.
Throughout this handbook all references to left and right are as viewed from behind the handlebar, in the direction of forward travel.
This handbook is based on information available at the time of publication.
HAYTER LIMITED reserve the right to amend product specifications without prior notification.
1.4

WARRANTY
LIMITED WARRANTY
Hayter Limited warrants to the original user/purchaser that this unit shall be free from defects in material and workmanship under normal use and service for a period of three years from the date of purchase. The manufacturer of the engines furnish their own warranty and services are provided through their authorised network (Refer to "Engine Warranty Statement"). To qualify for the full benefit of the warranty, the warranty registration card must be returned within 60 days of purchase. Subject to the conditions and exclusions noted in this limited warranty, we shall at our option, repair or replace any warranted part during the applicable period. If you are in doubt or experience any difficulty, please consult a Hayter Authorised Service Dealer for clarification.
To qualify for the extended warranty (second and third year) of the three year limited warranty the machine must have annual services carried out by an Authorised Hayter Service Dealer. These chargeable services should be carried out within 12 and 24 months of the date of purchase.
Excluded from the extended warranty period are those items which are subject to normal wear and tear e.g. tyres, wheels, cutterblades, cables, batteries and other consumable wearing parts.
All consumer machines which are fitted with a genuine Hayter friction disc as original equipment before use, are covered by a Lifetime Warranty against the engine crankshaft bending. Note: friction washers, blade brake units and other such devices are not applicable. Only machines fitted with a genuine Hayter friction disc, which are used in accordance with the recommended operating and maintenance procedures, are covered.
This warranty does not apply to any unit that has been tampered with, altered, misused, abused or used for hire, and will become invalid if non genuine Hayter parts are fitted. This warranty does not cover minor mechanical adjustments unless they are due to defective material or workmanship. Consult the Owner’s Handbook or a Hayter Authorised Service Dealer for assistance when making these adjustments.
A warranty period of 90 days applies to machines used for commercial purposes.
To make a warranty claim, return the unit to a Hayter authorised dealer along with proof of purchase stating the machine serial number and date of purchase. The service receipt(s) or this Owners Handbook with the 1st/2nd year service boxes fully completed, must be produced as proof of entitlement to the extended warranty period. Subject to the conditions and exclusions in this limited warranty, the authorised dealer will, at our option, repair or replace any warranted part within the duration of the warranty period.
This limited warranty gives you specific legal rights and is in addition to any statutory rights to which you may be entitled and your statutory rights are not affected by this warranty. If you need additional information concerning this written warranty, or assistance in obtaining services, please write to : HAYTER LIMITED, Service Department, Spellbrook, Bishop’s Stortford,
Hertfordshire CM23 4BU
UK ONLY: Details of your local Hayter authorised dealer are contained in Yellow Pages or contact:- Freephone 0800 616298.
1st Year Service Record
|
|
P |
|
|
M |
|
|
A |
|
T |
|
R |
S |
|
E |
|
|
L |
|
|
A |
|
|
E |
|
|
D |
|
|
2nd Year Service Record
|
|
P |
|
|
M |
|
|
A |
|
T |
|
R |
S |
|
E |
|
|
L |
|
|
A |
|
|
E |
|
|
D |
|
|
Issue: 12.10.00
Date.................................................................... |
Date............................................................. |
Signed................................................................ |
Signed.......................................................... |
1.5

SAFETY PRECAUTIONS
Safety Alert Symbol
indicates important safety messages. When alert to the possibility of injury. Carefully read
others.
safe if used correctly. Failure to observe the may result in serious injury.
Training
read the owners handbook carefully. Pay parsafety precautions. Ensure that you are familiar the proper use of the equipment. Learn how to
in an emergency.
or people unfamiliar with these instructions to
especially children, or pets are nearby.
the user is responsible for accidents or hazards or their property.
While mowing, always wear substantial footwear and long trousers.
Do not operate the equipment when barefoot or wearing sandals.
Thoroughly inspect the area where the mower is to be used and remove all objects which may be thrown by the machine.
WARNING: Petrol is highly flammable.
-Store fuel in containers specifically designed for this purpose.
-Add fuel before starting the engine. Never remove the cap from the fuel tank or add petrol while the engine is running or when the engine is hot. Allow the engine to cool for at least two minutes before refuelling.
-Do not attempt to start the engine if petrol is spilled or a smell of petrol is present. Move the mower away from the area of spillage and avoid creating any source of ignition until petrol vapours have dissipated.
1.6

SAFETY 
Preparation
-
-
A use,
in good condition. A damaged cutterblade must be replaced immediately with a genuine Hayter replacement part
Operation
Do not operate the engine in a confined space where exhaust fumes (carbon monoxide) can collect. Refuel outdoors only and do not smoke while refuelling.
Always pull the starter cord slowly until resistance is felt. Then pull the cord rapidly to avoid kickback and prevent hand or arm injury.
Mow only in daylight or good artificial light.
Avoid using the mower on wet grass, where feasible.
Always be sure of your footing on slopes.
Walk, never run.
Mow across the face of slopes, never up and down.
Exercise extreme caution when changing direction on slopes.
Do not mow excessively steep slopes of more than 20 degrees.
Use extreme caution when reversing or pulling the mower towards you.
Stop the engine before moving the mower across areas other than grass.
Never operate the mower unless the guards are securely in position and in good condition.
Do not change the engine governor settings or overspeed the engine.
Disengage the rear roller drive clutch before starting the engine.
Start the engine carefully, with feet well away from the cutterblade.
Variable speed control must only be operated whilst the engine is run-
ning
1.7

SAFETY PRECAUTIONS
Operation
parts.
engine is running.
running.
fins when the engine
lead:
discharge chute.
mower.
mower for damage and -starting.
(check immediately).
Maintenance & Storage
Keep all nuts, bolts and screws tight to ensure that the equipment is in safe operating condition.
Frequently check fuel lines and fittings for cracks or leaks and replace if necessary.
Never check for a spark when the spark plug is removed. (Use approved tester)
Inspect the exhaust periodically and replace if worn or leaking.
Never crank the engine with the spark plug removed.
Never start the engine with the air-cleaner or air-cleaner cover removed.
Never store the mower with petrol in the tank within an enclosed area where fumes may reach an open flame or spark.
SAFETY PRECAUTIONS
Maintenance & Storage
Allow the engine to cool before storing fire hazard, keep the engine and the grass, leaves, or excessive grease.
Check the rear deflector and grassbag
Replace worn or damaged parts for safety
If the fuel tank has to be drained, this when the engine is cool.
Wear strong work gloves when removing terblade.
Always replace worn or faulty parts with
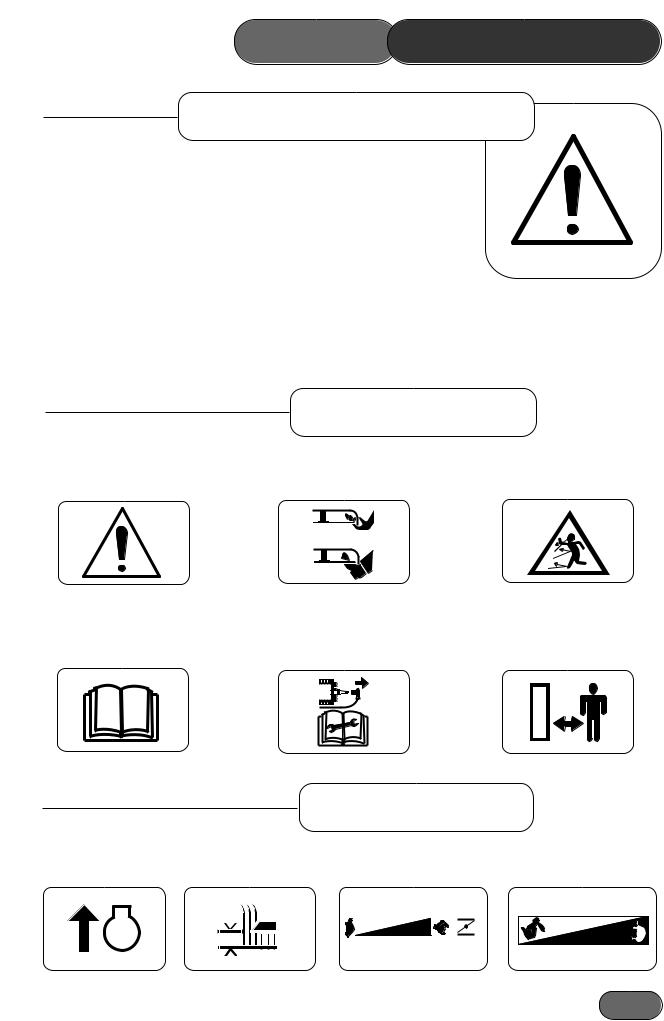
Safety Symbols
Safety Alert - Be aware to the possibility of injury.
Danger of severing toes or fingers in cutting mechanism.
Danger of being hit by thrown objects.
Stop engine and remove spark the plug lead before working on
the mower.
Keep bystanders at a safe distance from the mower.
Decal Symbols
Engine Stop |
Height of Cut Adjustment |
Variator Control |
(Symbol) |
(Symbol) |
(Symbols) |
STOP
305113
CS198
1.9
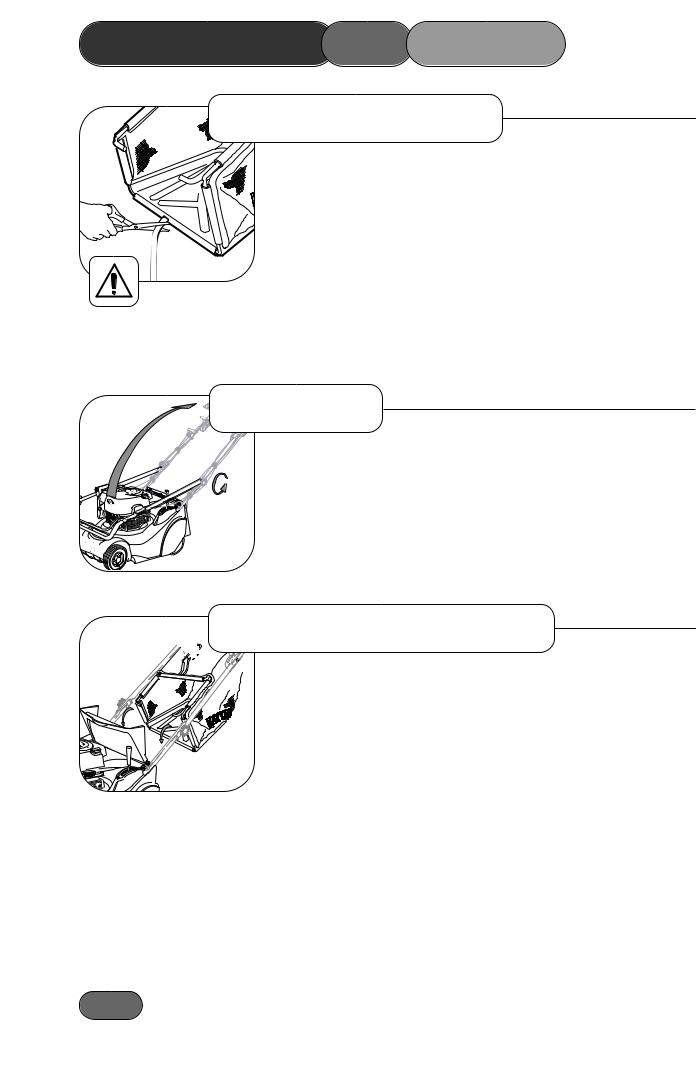
ASSEMBLING THE MOWER
Delivery Checklist
check that the following are missing contact,
attached to the grass-
to allow the handlefrom the engine to avoid position. Make sure handlebar and tighten to
not become snagged at
 Grassbag Attachment
handlebar and
1.10
BEFORE STARTING 
Prevent Engine Damage
To prevent petrol. The petrol before
Oil Type
Always use high quality detergent oil additives with recommended oil.
To prolong the life of your engine it is after the first 5 hours of use - refer to
Check Oil Level
FULL
Clean around the oil filler cap before removing. With |
|
|||
level surface, unscrew and remove the oil filler - |
|
|
|
|
ADD |
||||
|
||||
from it with a clean cloth. Screw the oil filler - dipstick |
||||
|
||||
then unscrew and remove it to check the oil level. |
|
|||
The oil level is correct when it is at the full mark on |
|
|||
DO NOT OVERFILL. |
|
|||
Fuel Type
Always use clean, fresh unleaded petrol. Purchase fuel in quantities that can be used within 30 days. Never mix oil with petrol. For added engine protection Briggs & Stratton recommend the use of their fuel additive which is available from an authorised Briggs & Stratton service dealer.
Fill to base of neck to allow for fuel expansion. Do not overfill the fuel tank.
L
I
O
1.11
 Loading...