

Boss Audio MR2020G, MR2020W Owner Manual

CONTENTS
Installation ....................................................................................................3
Wiring Connection ........................................................................................4
Operation.......................................................................................................5
General Operation ................................................................................................5
Radio Operation ...................................................................................................7
CD Operation ........................................................................................................8
CD Changer Operation ..........................................................................................9
Marine remoto .....................................................................................................10
Specification................................................................................................13
Trouble Shooting.........................................................................................14
2
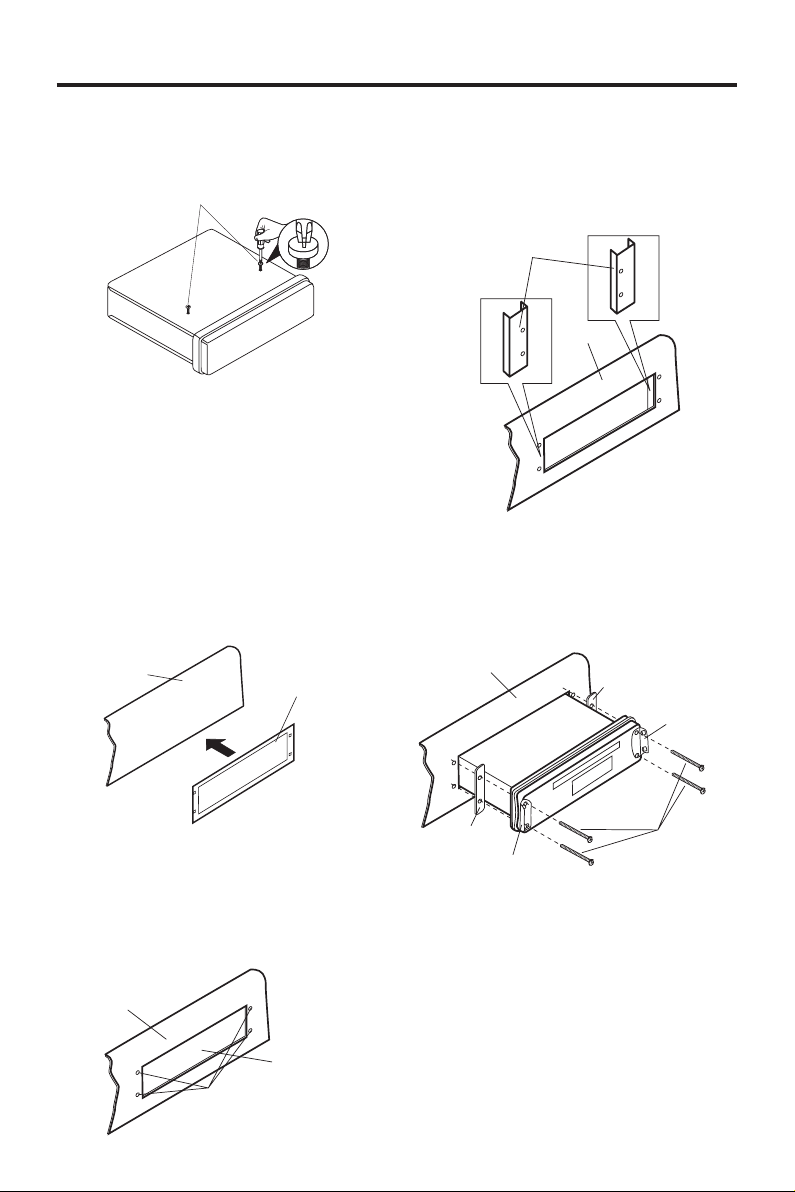
INSTALLATION
TAKE OUT SCREWS BEFORE INSTALL
Before install the unit, please remove the
two screws.
Take out screw before install.
NOTE: This unit is installed on the ship,
so you should use two pieces of plastic
film (30mmX20mm) supplied with the unit
to seal the two holes after remove the
screws. And this will be waterproof.
INSTALL THE UNIT
1. According to the mounting paper
supplied with the unit, determine the
mounting location in the dashboard,
and then stick the paper to the
dashboard.
Dashboard
Mounting paper
3. Use the glue paper to stick the two
mounting bracket to the back of the
dashboard. The screw holes of the
brackets must respectively aim at the
mounting holes in order to fix the unit
to the dashboard.
Mounting Bracket
Dashboard
4. Open the two pieces of rubber cover
on the unit to display the four screw
holes, and then use four screws
(M4X30) to mount the unit to the
dashboard with the mounting plate
between the dashboard and the unit.
Dashboard
Mounting plate
Rubber cover
2. Then cut and remove the part of the
dashboard in a rectangle shape the
same as the hatching area on the
mounting paper. And then drill four
mounting holes (ø5) in the exact
position also according to the mounting
paper.
Dashboard
Mounting Location
Mounting holes
Mounting plate
Rubber cover
Note: If you don’t install the unit
according to the installation instructions
above, the main unit will not be up to
the IPX5 waterproof standard.
3
Screw (M4x30)
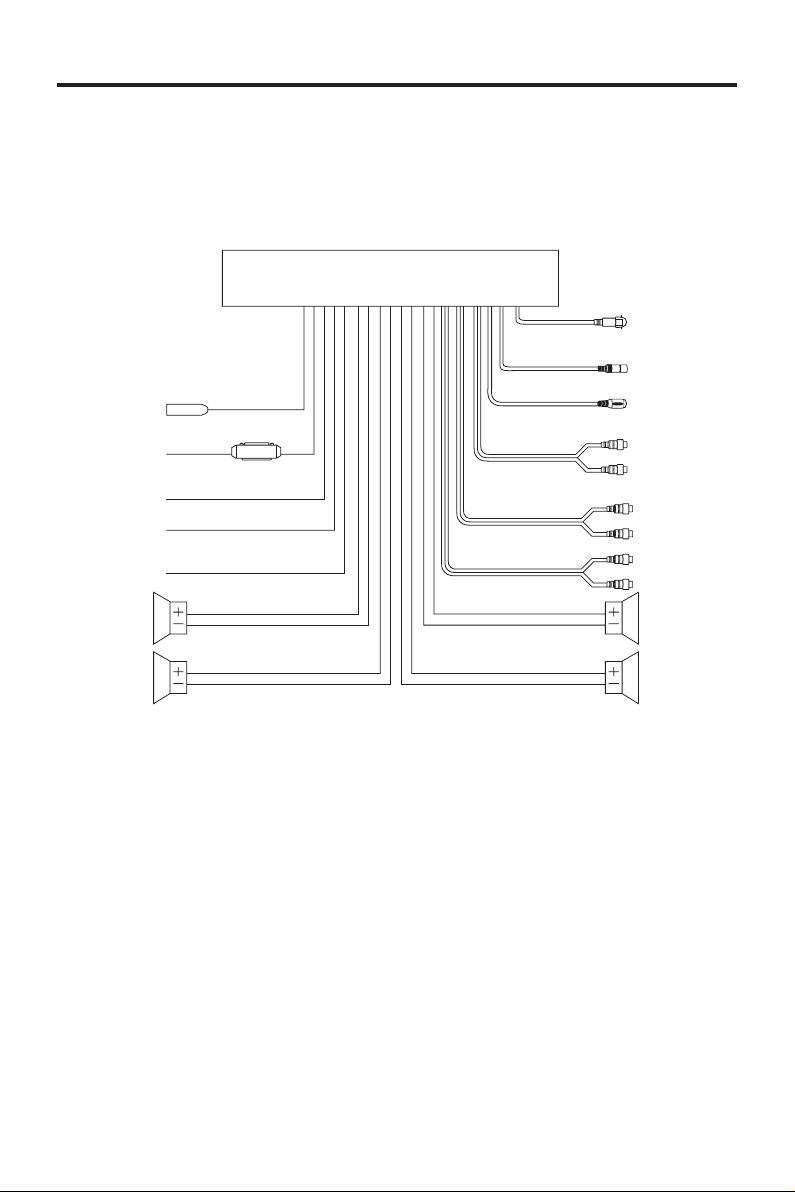
WIRING CONNECTION
ANTENNA CONNECTOR
IGNITION
SWITCH (B+)
Constant
12 Volts
GROUND (B–)
POWER
ANTENNA
FRONT Lch
SPEAKER
REAR Lch
SPEAKER
RED
YELLOW
BLACK
BLUE
WHITE
WHITE/BLACK
GREEN
GREEN/BLACK
MAIN UNIT
AUX IN
FRONT RCA CABLE
REAR RCA CABLE
GREY
GREY/BLACK
VIOLET
VIOLET/BLACK
(BLACK)
(BLACK)
(BLACK)
(YELLOW)
(BROWN)
(GREY)
I.R. REMOTE
SENSOR SOCKET
WIRING REMOTE
CONNECTOR
SOCKET
CD CHANGER
CONNECTOR
SOCKET
Rch RED
Lch WHITE
Rch RED
Lch WHITE
Rch RED
Lch WHITE
FRONT Lch
SPEAKER
REAR Rch
SPEAKER
4
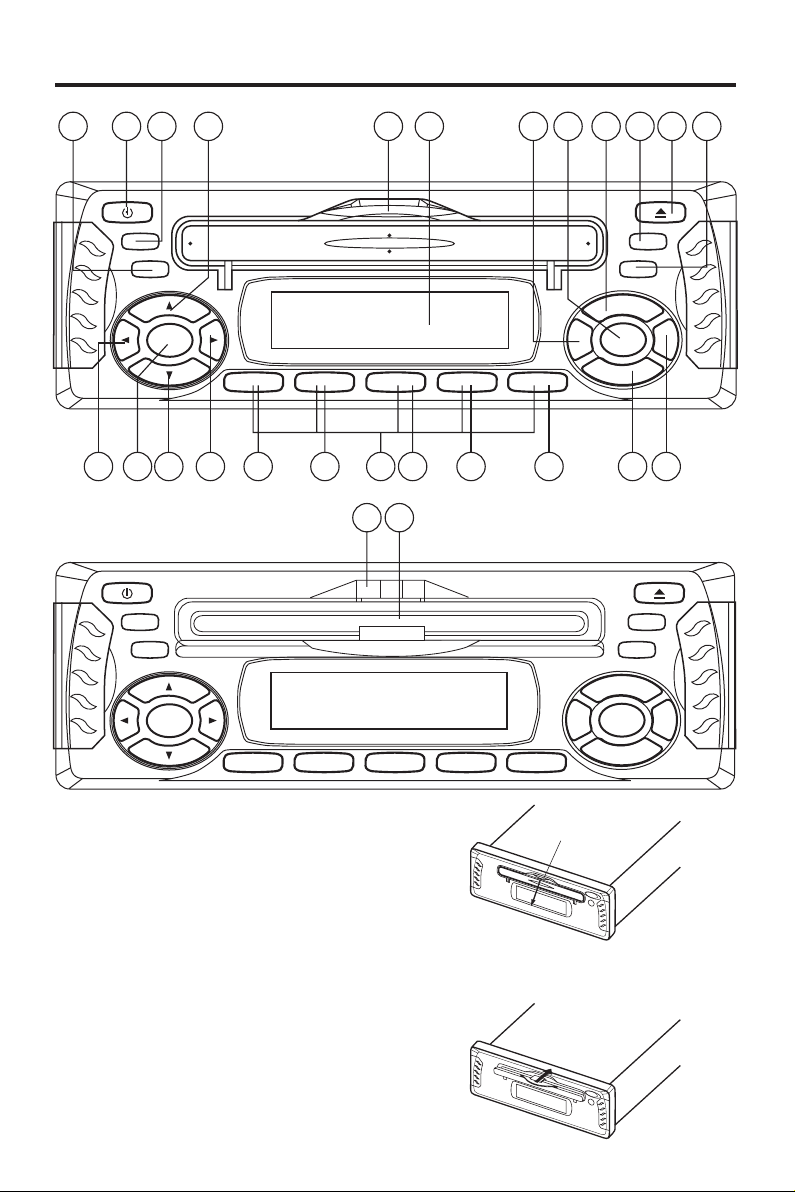
OPERATION
6 15
12
10
16
119
17
7
8
2321 22
18
2 4
241420
1332519
1
When pull open the disc cover:
GENERAL OPERATION
• ON/OFF
Switch on the unit by pressing POWER
button (9). When system is on, press
POWER button (9) again to turn off the
unit.
• DISPLAY THE DISC SLOT
Press the hook (7) of the plastic disc
cover then poke it at a slight downward
force to let the cover open, then you
can see the disc slot (5).
526
Hook
When you want to close the disc cover,
push the hook into proper location at
a horizontal force.
5
 Loading...