

Boss Audio 748UAI User Manual

10 R - 03 1817
4
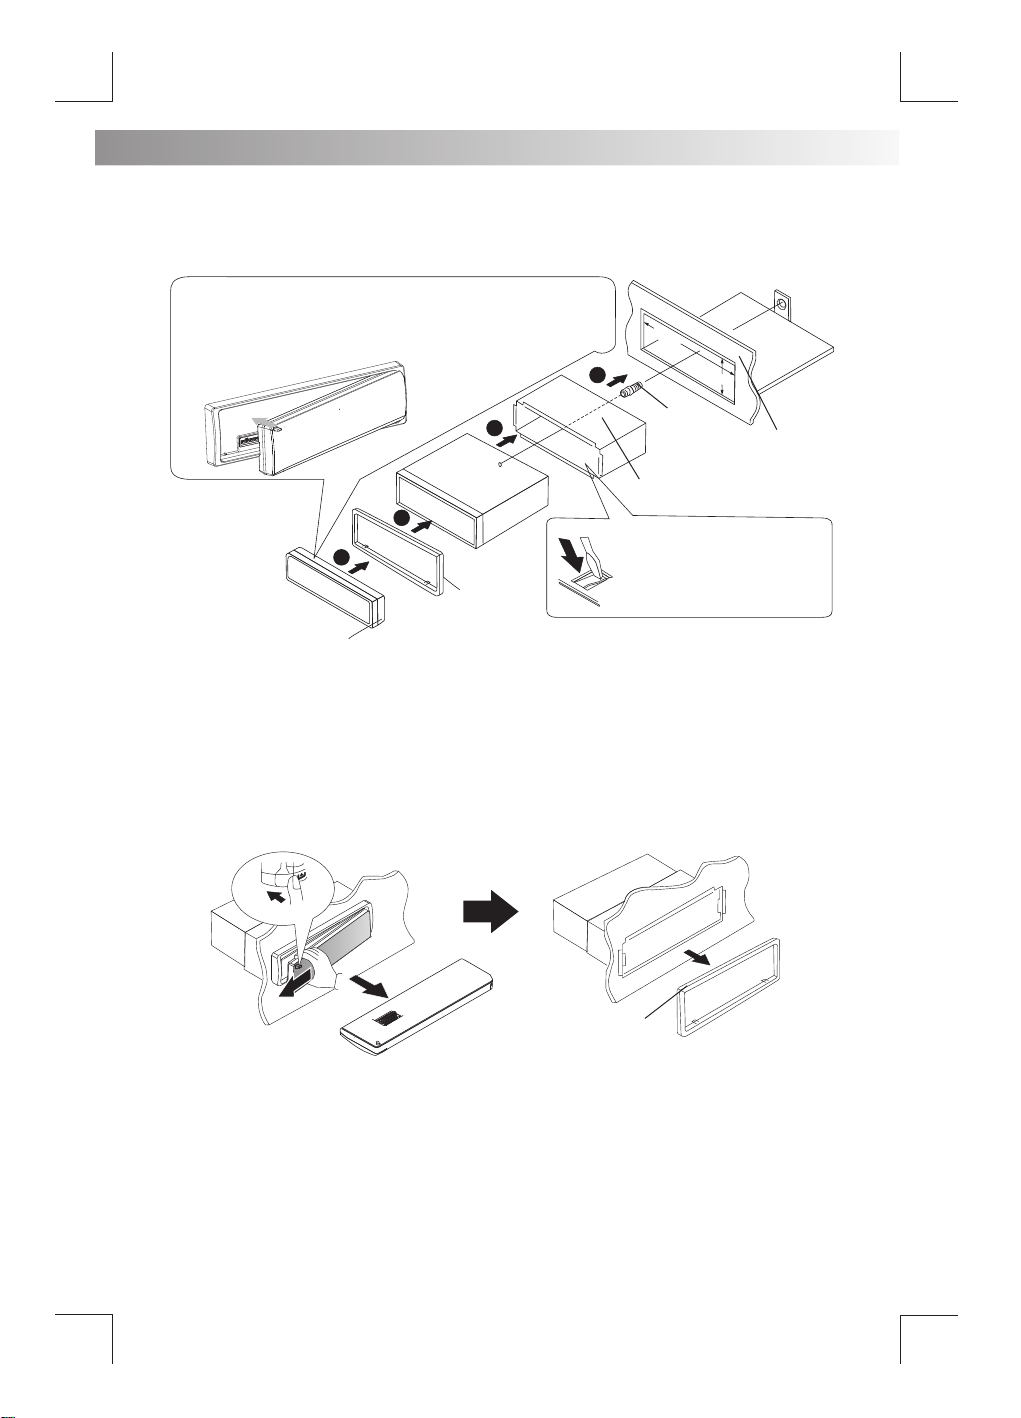
1. INSTALLATION
The following illustration shows a typical installation. If you have any questions or require information
regarding installation kits, consult your customer car audio dealer or a company suppling kits.
If you are not sure how to install this unit correctly, have it installed by a qualified technician.
To attach the front panel back to the unit chassis,
please insert the right side of the panel in the chassis
until it is correctly engaged. Press the left side of the
panel until the mechanism locks it into place.
1
182
m
m
53mm
2
3
4
Tr i m
Plate
Control
Panel
Remove the unit
1. Press the Panel Release button.
2. Push the left side of the panel rightward
3. Pull the panel towards you to disengage it from the chassis.
Rel ease
1
Screw
Dashboard
Sleeve
Bend the appropriate
tabs to hold the sleeve
firmly in place.
E - 1
Trim Plate
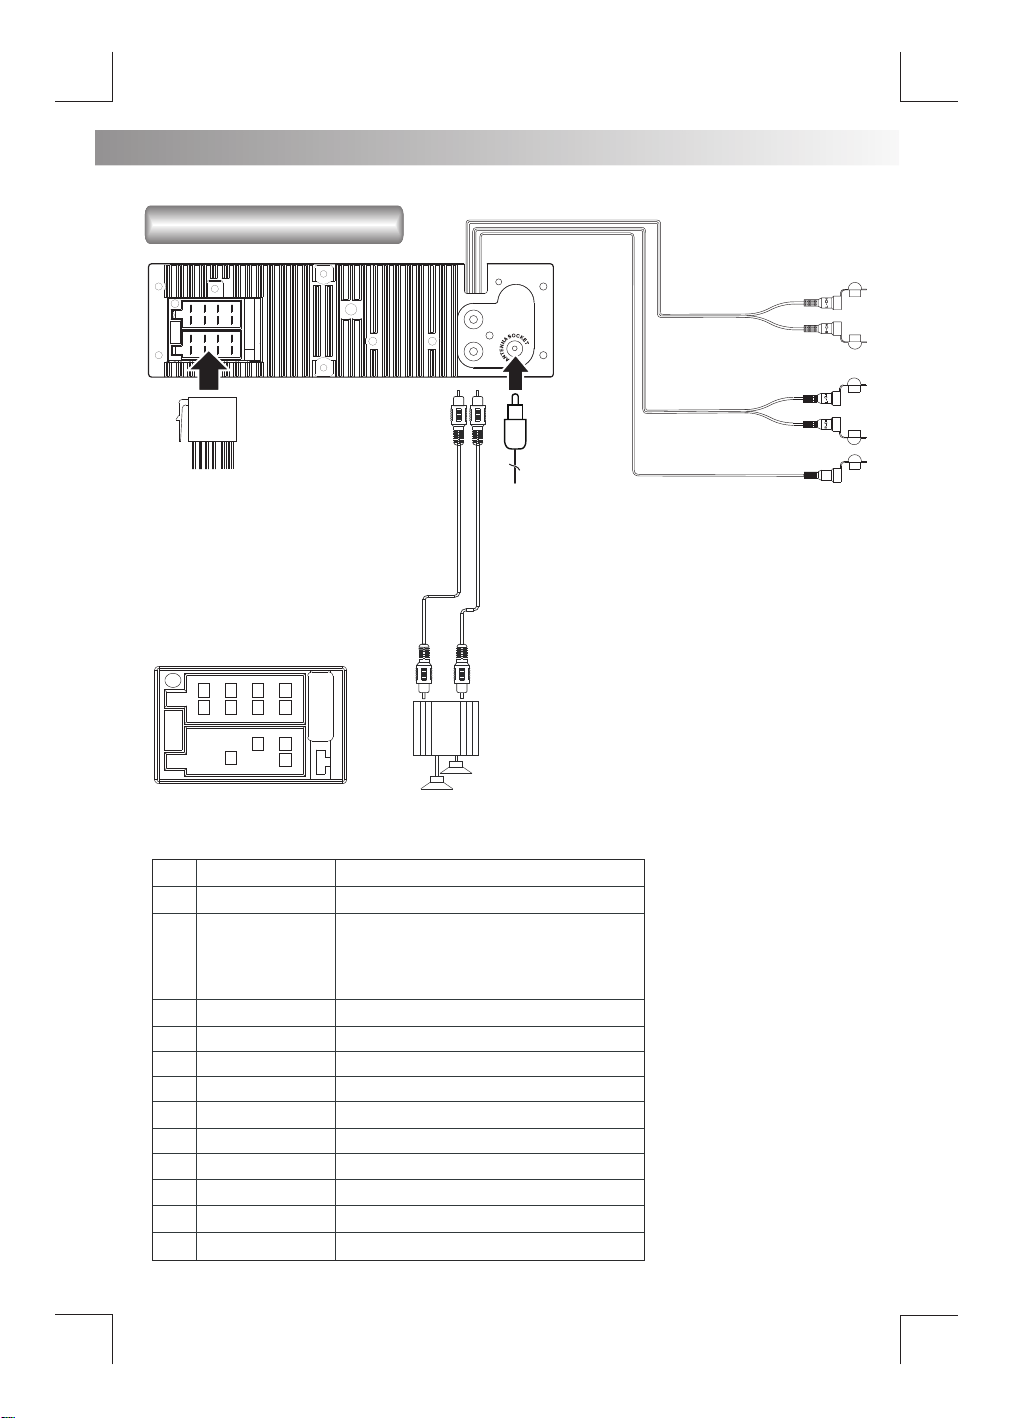
2. CONNECTING THE SYSTEM
Wiring Diagram
FUSE
REAR
ISO
CONNECTOR
REAR LINE OUT R-CH
1234567
B
A
8
FUSE
5 7
4
8
AMP
Figure 2
ISO CONNECTOR WIRING CHART
WIRE COLOR
PIN
YELLOW
A4
A5
BLUE
REDA7
A8
BLACK
B1
VIOLET
VIOLET/BLACK
B2
GREY
B3
GREY/BLACK
B4
WHITE
B5
WHITE/BLACK
B6
GREEN
B7
GREEN/BLACK
B8
FUNCTION/LABEL
BATTERY(+)
CONNECT TO SYSTEM CONTROL
TERMINAL OF THE POWER AMP OR
AUTO ANTENNA RELAYCONTROL
TERMINAL(max 150mA 12VDC)
IGNITION(ACC)
GROUND
RIGHT REAR SPEAKER (+)
RIGHT REAR SPEAKER (-)
RIGHT FRONT SPEAKER (+)
RIGHT FRONT SPEAKER (-)
LEFT FRONT SPEAKER (+)
LEFT FRONT SPEAKER (-)
LEFT REAR SPEAKER (+)
LEFT REAR SPEAKER (-)
L
R
ANTENNA
JACK
REAR LINE OUT L-CH
E - 2
FRONT LINE OUT
BLACK
AUX-IN
YELLOW
SUBWOOFER
WHITE
RED
WHITE
RED
BLUE
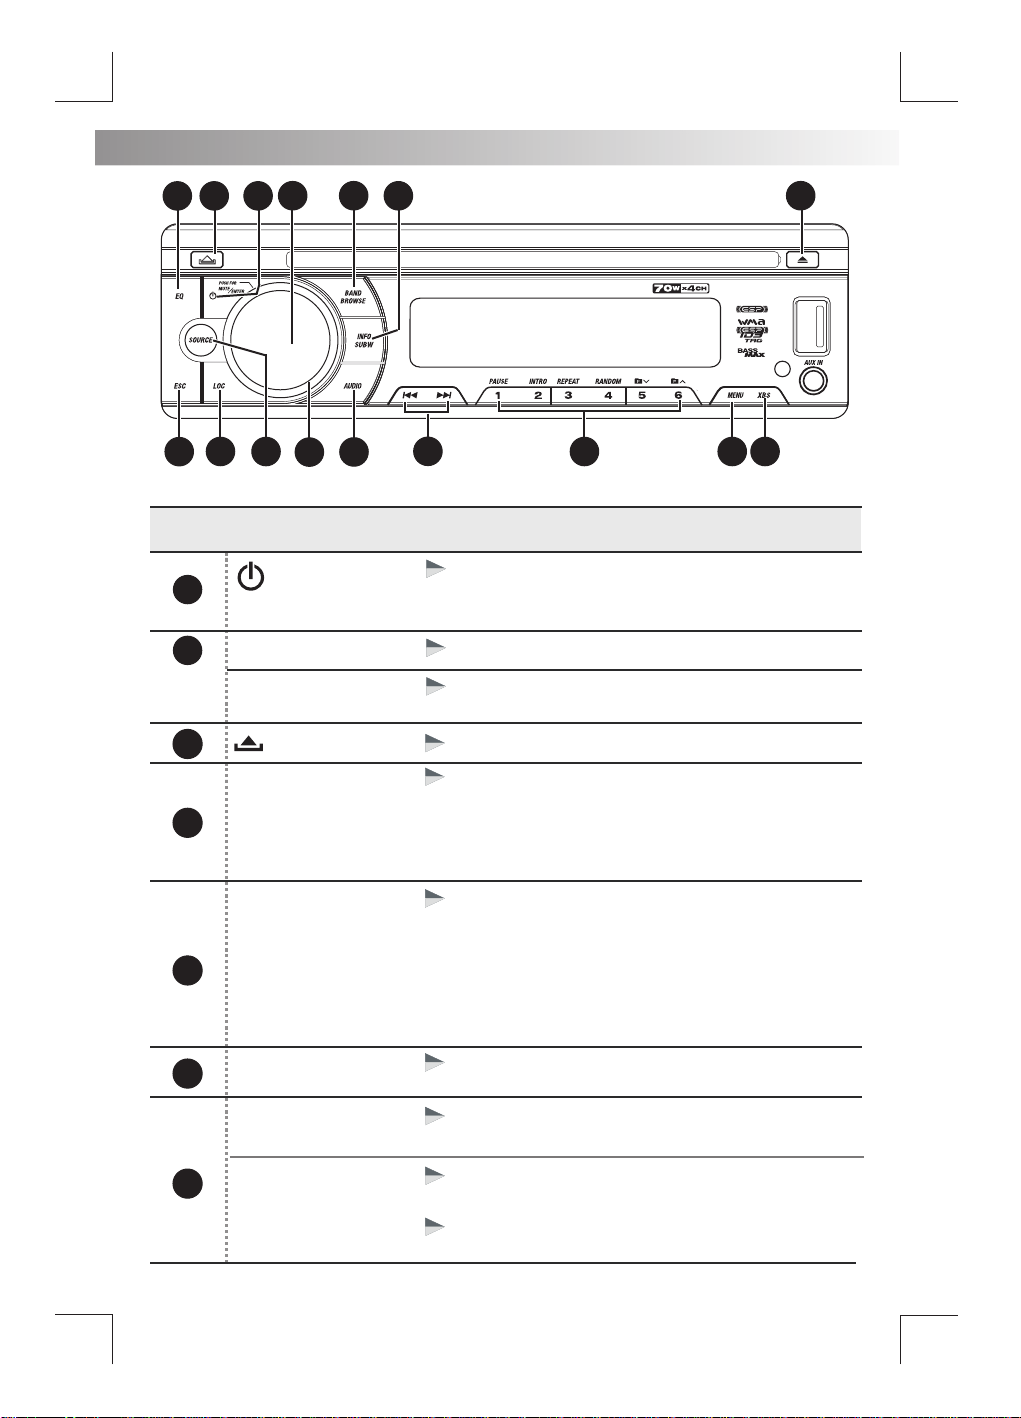
3. THE MAJOR FUNCTION OF THIS UNIT
8
3
9
No.
1
2
3
4
5
3
5
(Power)
MUTE
ENTER
AUDIO
LOC
2
1
10
6
Item
(Release)
(Audio Menu)
(Local/Distance)
12
7
4
11
14
15 16
13
Decriptions
Press this button or any other button on the front
panel (except Release/Eject) to turn the unit on.
Press this button again to turn the unit off.
Press this button to turn the Mute On/Off.
Under Media playback mode, press this button to
confirm the selection.
Press this button to open the control panel.
Press to access into the Audio Menu mode to
adjust the below options:
BASS(Bass Level) / TRE (Treble Level) / BAL
(Balance) / FAD (Fader) / EQ(Preset Equalizer)
/xBAS(iX-Bass)
Press this button adjust the tuner sensitivity if
you want to receive more radio stations or only
stations with strong signal.
[LOCAL]: only stations with strong signal can
be recevied.
[DISTANCE]: Stations with strong and weak
signals can be recevied.
VOLUME KNOB
6
BAND
BROWSE
7
Rotate the encoder volume to increase and
decrease the volume.
Short press this button to change between BAND
FM1,FM2,FM3, AM1(MW1) or AM2 (MW2).
Under Media playback mode, press to access into
the music folder / file searching mode.
Under iPhone / iPode mode, press this button to
access into the Playlist, Artist, etc searching mode.
E - 3
 Loading...