


OBJ_DOKU-36097-002.fm Page 1 Monday, February 9, 2015 7:50 AM
Robert Bosch GmbH
Power Tools Division
70764 Leinfelden-Echterdingen
GERMANY
www.bosch-professional.com
GRA Professional
53 | 48
F 016 L70 940 (2015.02) O / 114 WEU
|
|
|
|
|
|
|
|
|
|
|
|
|
|
|
|
|
|
|
|
|
|
|
|
|
|
|
|
|
|
|
|
|
|
|
|
|
|
|
|
|
|
|
|
|
|
|
|
|
|
|
|
|
|
|
|
|
|
|
|
|
|
|
|
|
|
|
|
|
|
|
|
|
|
|
|
|
|
|
|
|
|
|
|
|
|
|
|
|
|
|
|
|
|
|
|
|
|
|
|
|
|
|
|
|
|
|
|
|
|
|
|
|
|
|
|
|
|
|
|
|
|
|
|
|
|
|
|
|
|
|
|
|
|
|
|
|
|
|
|
|
|
|
|
|
|
|
|
|
|
|
|
|
|
|
|
|
|
|
|
|
|
|
|
|
|
|
|
|
|
|
|
|
|
|
|
|
|
|
|
|
|
|
|
|
|
|
|
|
|
|
|
|
|
|
|
|
|
|
|
|
|
|
|
|
|
|
|
|
|
|
|
|
|
|
|
|
|
|
|
|
|
|
|
|
|
|
|
|
|
|
|
|
|
|
|
|
|
|
|
|
|
|
|
|
|
|
|
|
|
de |
Originalbetriebsanleitung |
el |
Πρωτότυπο οδηγιών χρήσης |
|
|
||||||||||
|
|
|
|
|
|
|
|
|
|
|
|
|
|
|
|
|
|
|
|
|
|
en |
Original instructions |
tr |
Orijinal işletme talimatı |
|
|
||||||||||
|
|
|
|
|
|
|
|
|
|
|
|
|
|
|
|
|
|
|
|
|
|
fr |
Notice originale |
|
|
|
|
|
|
|
|
|
|
|
|
|
|
|
|
|
|
|
|
|
|
|
|
|
|
|
|
|
|
|
|
|
|
|
|
es |
Manual original |
|
|
|
|
|
|
|
|
|
|
|
|
|
|
|
|
|
|
|
|
|
|
|
|
|
|
|
|
|
|
|
|
|
|
|
|
pt |
Manual original |
|
|
|
|
|
|
|
|
|
|
|
|
|
|
|
|
|
|
|
|
|
|
|
|
|
|
|
|
|
|
|
|
|
|
|
|
it |
Istruzioni originali |
|
|
|
|
|
|
|
|
|
|
|
|
|
|
|
|
|
|
|
|
|
|
|
|
|
|
|
|
|
|
|
|
|
|
|
|
nl |
Oorspronkelijke |
|
|
|
|
|
|
|
|
|
|
|
|
|
|
|
|
|
|
|
|
|
|
|
|
|
|
|
|
|
|
|
|
|
|
|
|
|
|
gebruiksaanwijzing |
|
|
|
|
|
|
|
|
|
|
|
|
|
|
|
|
|
|
|
|
|
|
|
|
|
|
|
|
|
|
|
|
|
|
|
da |
Original brugsanvisning |
|
|
|
|
|
|
|
|
|
|
|
|
|
|
|
|
|
|
|
|
|
|
|
|
|
|
|
|
|
|
|
|
|
|
|
|
sv |
Bruksanvisning i original |
|
|
|
|
|
|
|
|
|
|
|
|
|
|
|
|
|
|
|
|
|
|
|
|
|
|
|
|
|
|
|
|
|
|
|
|
|
|
|
|
|
|
|
|
|
|
|
|||||
|
|
|
|
|
|
|
|
|
|
|
|
|
|
|
|
|
|
|
|
|
|
no |
Original driftsinstruks |
|
|
|
|
|
|
|
|
|
|
|
|
|
|
|
|
|
|
|
|
|
|
|
|
|
|
|
|
|
|
|
|
|
|
|
|
fi |
Alkuperäiset ohjeet |
|
|
|
|
|
|
|
|
|
|
|
|
|
|
|
|
|
|
|
|
|
|
|
|
|
|
|
|
|
|
|
|
|
|
|
|
|
|
|
|
|
|
|
|
|
|
|
|
|
|
|
|
|
|
|
|
|
|
|
|
|
|
|
|
|
|
|
|
|
|
|
|
|
|
|
|
|
|
|
|
|
|
|
|
|
|
|
|
|
|
|
|
|
|
|
|
|
|
|
|
|
|
|
|
|
|
|
|
|
|
|
|
|
|
|
|
|
|
|
|
|
|
|
|
|
|
|
|
|
|
|
|
|
|
|
|
|
|
|
|
|
|
|
|
|
|
|
|
|
|
|
|
|
|
|
|
|
|
|
|
|
|
|
|
|
|
|
|
|
|
|
|
|
|
|
|
|
|
|
|
|
|
|
|
|
|
|
|
|
|
|
|
|
|
|
|
|
|
|
|
|
|
|
|
|
|
|
|
|
|
|
|
|
|
|
|
|
|
|
|
|
|
|
|
|
|
|
|
|
|
|
|
|
|
|
|
|
|
|
|
|
|
|
|
|
|
|
|
|
|
|
|
|
|
|
|
|
|
|
|
|
|
|
|
|
|
|
|
|
|
|
|
|
|
|
|
|
|
|
|
|
|
|
|
|
|
|
|
|
|
|
|
|
|
|
|
|
|
|
|
|
|
|
|
|
|
|
|
|
|
|
|
|
|
|
|
|
|
OBJ_BUCH-2017-002.book Page 2 Monday, February 9, 2015 7:54 AM
2 |
Deutsch . . . . . . . . . . . . . . . . . . . . . . . . . . . . . . . . . . . . . . . . |
. Seite |
3 |
English . . . . . . . . . . . . . . . . . . . . . . . . . . . . . . . . . . . . . . . . . |
. Page |
11 |
Français . . . . . . . . . . . . . . . . . . . . . . . . . . . . . . . . . . . . . . . . |
. Page |
18 |
Español . . . . . . . . . . . . . . . . . . . . . . . . . . . . . . . . . . . . . . . . |
Página |
26 |
Português. . . . . . . . . . . . . . . . . . . . . . . . . . . . . . . . . . . . . . . |
Página |
35 |
Italiano . . . . . . . . . . . . . . . . . . . . . . . . . . . . . . . . . . . . . . . . . |
Pagina |
43 |
Nederlands . . . . . . . . . . . . . . . . . . . . . . . . . . . . . . . . . . . . . |
Pagina |
52 |
Dansk . . . . . . . . . . . . . . . . . . . . . . . . . . . . . . . . . . . . . . . . . . |
. Side |
59 |
Svenska . . . . . . . . . . . . . . . . . . . . . . . . . . . . . . . . . . . . . . . . |
. Sida |
66 |
Norsk . . . . . . . . . . . . . . . . . . . . . . . . . . . . . . . . . . . . . . . . . . |
. Side |
74 |
Suomi . . . . . . . . . . . . . . . . . . . . . . . . . . . . . . . . . . . . . . . . . . |
. .Sivu |
81 |
Ελληνικά . . . . . . . . . . . . . . . . . . . . . . . . . . . . . . . . . . . . . . . . |
Σελίδα |
88 |
Türkçe . . . . . . . . . . . . . . . . . . . . . . . . . . . . . . . . . . . . . . . . . |
Sayfa |
97 |
|
F 016 L70 940 | (9.2.15) |
|
|
Bosch Power Tools |
|||
|
|
|
|
|
|
|
|
|
|
|
|
|
|
|
|
|
|
|
|
|
|
|
|
OBJ_DOKU-42365-002.fm Page 3 Monday, February 9, 2015 9:42 AM
Deutsch
Sicherheitshinweise
Achtung! Lesen Sie die nachfolgenden Anweisungen sorgfältig durch. Machen Sie sich mit den Bedienelementen und dem ordnungsgemäßen Gebrauch des Gartengeräts vertraut. Bewahren Sie die Betriebsanleitung für eine spätere Verwendung bitte sicher auf.
Benutzen Sie die Maschine nur, wenn Sie alle Funktionen genau verstehen und ohne Einschränkungen anwenden können, oder eine entsprechende Einweisung erhalten haben.
Erläuterung der Symbole auf dem Gartengerät
Allgemeiner Gefahrenhinweis.
Lesen Sie die Betriebsanleitung.
Achten Sie darauf, dass in der Nähe stehende Personen nicht durch weggeschleuderte Fremdkörper verletzt werden. Warnung: Halten Sie einen sicheren Abstand zum Gartengerät, wenn es arbeitet.
Vorsicht: Berühren Sie nicht die rotierenden Messer. Die Messer sind scharf. Hüten Sie sich vor dem Verlust von Zehen und Fingern.
Deutsch | 3
Schalten Sie das Gartengerät aus und lösen Sie den Stromkreisunterbrecher bevor Sie Wartungsoder Reinigungsarbeiten durchführen oder wenn Sie das Gartengerät auch nur für kurze Zeit unbeaufsichtigt lassen.
Warten Sie, bis alle Teile des Gartengeräts vollständig zur Ruhe gekommen sind, bevor Sie diese anfassen. Die Messer rotieren nach dem Abschalten des Gartengeräts noch weiter und können Verletzungen verursachen.
Bedienung
Niemals Kindern oder mit diesen Anweisungen nicht vertrauten Personen erlauben das Gartengerät zu benutzen. Nationale Vorschriften beschränken möglicherweise das Alter des Bedieners. Bewahren Sie das Gartengerät für Kinder unerreichbar auf, wenn es nicht in Gebrauch ist.
Dieses Gartengerät ist nicht dafür bestimmt, von Personen (einschließlich Kinder) mit eingeschränkten physischen, sensorischen oder geistigen Fähigkeiten oder mangelnder Erfahrung und/oder mangelndem Wissen benutzt zu werden, es sei denn, sie werden durch eine für ihre Sicherheit zuständige Person beaufsichtigt oder erhalten von ihr Anweisungen, wie das Gartengerät zu benutzen ist. Kinder sollten beaufsichtigt werden, um sicherzustellen, dass sie nicht mit dem Gartengerät spielen.
|
Bosch Power Tools |
|
|
F 016 L70 940 | (9.2.15) |
|||
|
|
|
|
|
|
|
|
|
|
|
|
|
|
|
|
|
|
|
|
|
|
|
|

OBJ_DOKU-42365-002.fm Page 4 Monday, February 9, 2015 9:42 AM
4 | Deutsch
Mähen Sie niemals während sich Personen, insbesondere Kinder oder Haustiere, in unmittelbarer Nähe aufhalten.
Der Bediener oder Nutzer ist für Unfälle oder Schäden an anderen Menschen oder deren Eigentum verantwortlich.
Benutzen Sie das Gartengerät nicht barfuß oder mit offenen Sandalen. Tragen Sie stets festes Schuhwerk und eine lange Hose.
Inspizieren Sie die zu bearbeitende Fläche sorgfältig und beseitigen Sie Steine, Stöcke, Drähte, Knochen und sonstige Fremdkörper.
Arbeiten Sie nicht in Bereichen in denen Kabel vorhanden sind.
Prüfen Sie vor der Benutzung immer, ob das Messer, die Messerschrauben und die Schneidbaugruppe abgenutzt oder beschädigt sind. Tauschen Sie das abgenutzte oder beschädigte Messer sowie die Messerschrauben immer im ganzen Satz aus, um Unwucht zu vermeiden.
Arbeiten Sie nur bei Tageslicht oder gutem künstlichem Licht.
Bei schlechten Wetterbedingungen insbesondere bei einem aufziehenden Gewitter nicht mit dem Gartengerät arbeiten.
Bitte achten Sie auf Ihre Sicherheit beim Betrieb der Maschine im nassen Gras.
Betreiben Sie das Gartengerät niemals mit defekten Schutzvorrichtungen, Abdeckungen oder ohne Sicherheitseinrichtungen, wie z. B. Prallschutz und/oder Grasfangkorb.
Untersuchen Sie das Gartengerät vor Gebrauch und nach einem Schlag auf Abnutzung oder Schäden und lassen Sie es gegebenenfalls reparieren.
Benutzen Sie das Gartengerät nicht, wenn Sie müde oder krank sind oder unter dem Einfluss von Alkohol, Drogen oder Medikamenten stehen.
Das Arbeiten an Böschungen kann gefährlich sein.
–Mähen Sie keine besonders steilen Abhänge.
–Achten Sie auf schrägen Flächen oder auf nassem Gras stets auf sicheren Tritt.
–Mähen Sie auf schrägen Flächen immer quer und niemals aufund abwärts.
–Gehen Sie beim Richtungswechsel an Abhängen äußerst vorsichtig vor.
Gehen Sie beim Rückwärtsgehen oder Ziehen des Gartengeräts äußerst vorsichtig vor.
Schieben Sie das Gartengerät beim Mähen immer vorwärts und ziehen Sie dieses niemals zum Körper hin.
Stoppen Sie das Messer, wenn die Maschine gekippt werden muss, außer zum Starten in hohem Gras. Kippen Sie keinesfalls weiter als unbedingt erforderlich, und nur die von Ihnen abgewandte Seite. Achten Sie immer darauf, dass Sie den Bediengriff mit beiden Händen halten, bevor Sie die Maschine zum Boden absenken.
Schalten Sie das Gartengerät wie in der Betriebsanleitung beschrieben ein und achten Sie darauf, dass Ihre
|
F 016 L70 940 | (9.2.15) |
|
|
Bosch Power Tools |
|||
|
|
|
|
|
|
|
|
|
|
|
|
|
|
|
|
|
|
|
|
|
|
|
|

OBJ_DOKU-42365-002.fm Page 5 Monday, February 9, 2015 9:42 AM
Füße ausreichend weit von dem rotierenden Messer entfernt sind.
Halten Sie Abstand zur Auswurfzone, wenn Sie mit dem Gartengerät arbeiten.
Heben bzw. tragen Sie das Gartengerät niemals bei laufendem Motor.
Nehmen Sie keine Veränderungen am Gartengerät vor. Unzulässige Veränderungen können die Sicherheit Ihres Gartengerätes beeinträchtigen und zu verstärkten Geräuschen und Vibrationen führen.
Verwenden Sie nur von Bosch empfohlene Professional Gartengeräte und deren Zubehör.
Stromkreisunterbrecher und Akkus lösen:
–immer wenn Sie sich vom Gartengerät entfernen,
–vor dem Beseitigen von Blockierungen,
–wenn Sie das Gartengerät überprüfen, reinigen oder an ihm arbeiten,
–nach der Kollision mit einem Fremdkörper. Überprüfen Sie das Gartengerät sofort auf Beschädigungen und lassen Sie es wenn notwendig instandsetzen,
–wenn das Gartengerät über einen längeren Zeitraum ungenutzt gelagert wird.
–wenn das Gartengerät ungewöhnlich zu vibrieren beginnt (sofort prüfen).
–wenn Sie den Griff zusammenklappen
–vor dem Transport der Maschine
Deutsch | 5
Wartung
Zu Ihrer Sicherheit
Achtung! Schalten Sie das Gartengerät aus, lösen Sie den Stromkreisunterbrecher und entfernen Sie die Akkus bevor Sie Wartungsoder Reinigungsarbeiten durchführen.
Vorsicht – das rotierende Schneidmesser nicht berühren. Nachdem das Gartengerät abgeschaltet wurde, drehen sich die Messer noch einige Sekunden weiter.
Tragen Sie immer Schutzhandschuhe, wenn Sie in der Nähe der scharfen Messer hantieren oder arbeiten.
Führen Sie regelmäßig folgende
Wartungsarbeiten aus, und eine langen und zuverlässigen Gebrauch sicherzustellen:
Stellen Sie den Festsitz aller Muttern, Bolzen und Schrauben sicher, damit ein sicherer Arbeitszustand des Gartengeräts gewährleistet ist.
Überprüfen Sie nach jeder Benutzung den Grasauffangbehälter auf dessen Zustand und Abnutzung.
Überprüfen Sie das Gartengerät und ersetzen Sie sicherheitshalber abgenutzte oder beschädigte Teile.
Stellen Sie sicher, dass auszuwechselnde Teile von Bosch stammen.
Schneidmesser
Schneidmesser können nachgeschliffen werden.
Entfernen Sie die Schneidreste von der Mäheroberfläche.
|
Bosch Power Tools |
|
|
F 016 L70 940 | (9.2.15) |
|||
|
|
|
|
|
|
|
|
|
|
|
|
|
|
|
|
|
|
|
|
|
|
|
|
OBJ_DOKU-42365-002.fm Page 6 Monday, February 9, 2015 9:42 AM
6 | Deutsch
Entfernen Sie die Schneidreste immer von beiden Enden der Klinge, damit das Messer immer in der Ballance ist.
Prüfen Sie das Gleichgewicht des Messers mit einem Schraubendreher durch die zentrale Bohrung.
Reinigung
Stellen Sie vor dem Transport und der Lagerung sicher, dass das Gartengerät sauber und frei von Rückständen ist. Wenn nötig, mit einer weichen trockenen Bürste reinigen.
Benutzen Sie einen Wasserschlauch, um den Grasfangkorb zu reinigen. Verwenden Sie keine starken Wasserstrahl.
Verwenden Sie einen kräftigen Wasserstrahl, um die Unterseite des Mähgehäuses von Rückständen frei zu machen. Festsitzende Rückstände abkratzen.
Eine saubere Mähgehäuse-Unterseite verbessert die Leistung.
Hinweise für den optimalen Umgang mit dem Akku und Ladegerät
Warnung! Versuchen Sie keinesfalls nicht-aufladbare Batterien mit dem Ladegerät zu laden.
Zu Ihrer Sicherheit! Stellen Sie sicher, dass der Stromkreisunterbrecher und die Bedienhebel ausgeschaltet sind oder sich in Parkposition befinden, bevor Sie einen Akku einsetzen. Es kann gefährlich sein, die Akkus bei eingeschaltetem Gartengerät einzusetzen.
Den Akku einschieben, bis die Verriegelung einrastet. Betätigen Sie den Entriegelungshebel, um den Akku herauszunehmen.
Hinweise zu Pflege und Wartung von Akku und Ladegerät entnehmen Sie bitte den Betriebsanleitungen, die den Gartengeräten beiliegen oder unter www.bosch-garden.com verfügbar sind.
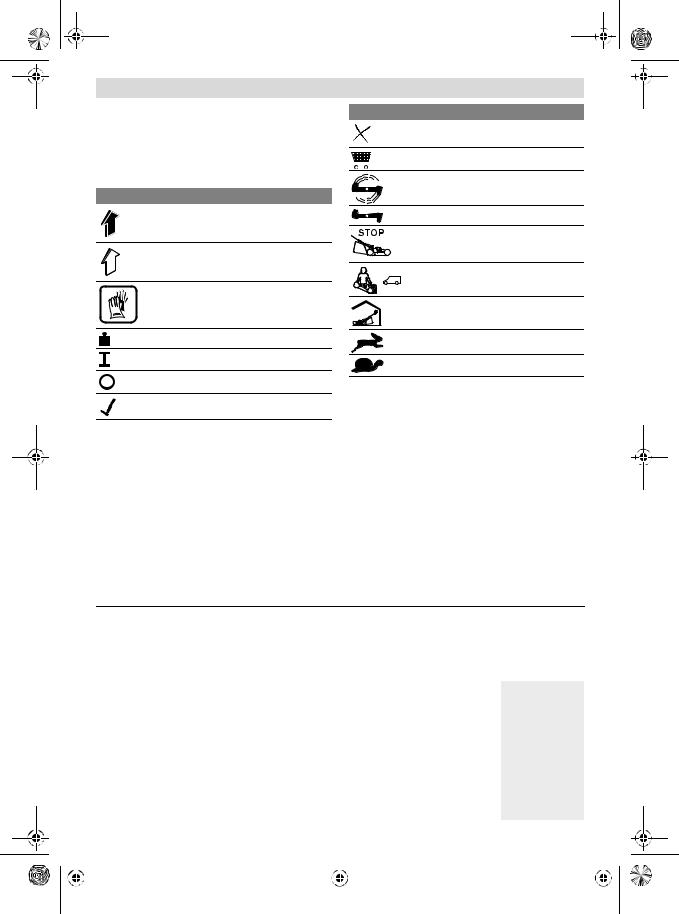
Symbole
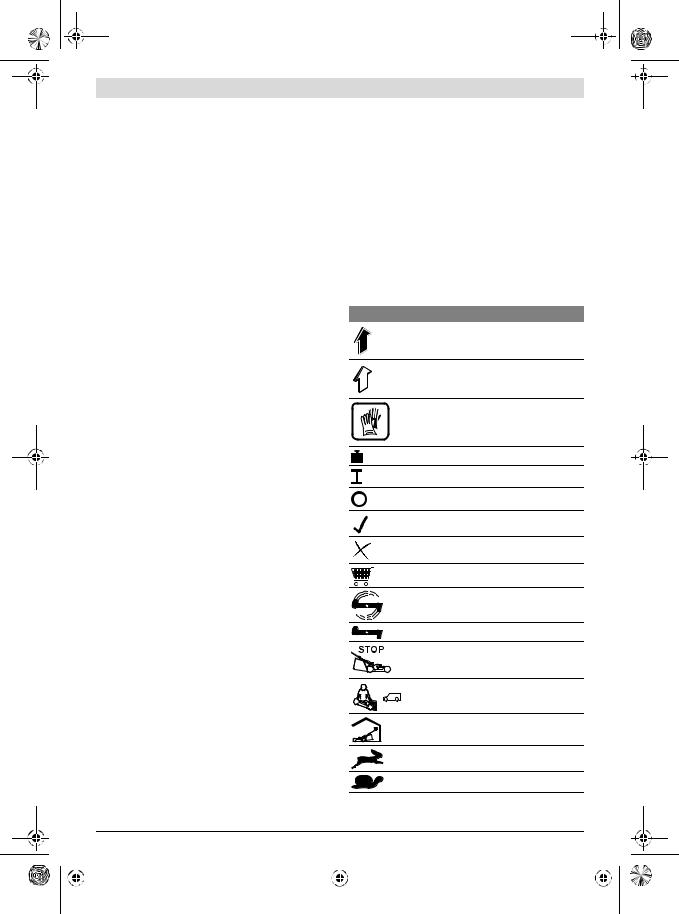
Die nachfolgenden Symbole sind für das Lesen und Verstehen der Betriebsanleitung von Bedeutung. Prägen Sie sich die Symbole und ihre Bedeutung ein. Die richtige Interpretation der Symbole hilft Ihnen, das Gartengerät besser und sicherer zu gebrauchen.
Symbol Bedeutung
Reaktionsrichtung
Bewegungsrichtung
Tragen Sie Schutzhandschuhe
Gewicht
Einschalten
Ausschalten
Gestattete Handlung
Verbotene Handlung
Zubehör/Ersatzteile
Messer dreht sich
Messer dreht sich nicht
Radantrieb
Transport
Lagerung
schnell
langsam
|
F 016 L70 940 | (9.2.15) |
|
|
Bosch Power Tools |
|||
|
|
|
|
|
|
|
|
|
|
|
|
|
|
|
|
|
|
|
|
|
|
|
|
OBJ_DOKU-42365-002.fm Page 7 Monday, February 9, 2015 9:42 AM
|
|
|
Deutsch | 7 |
Bestimmungsgemäßer Gebrauch |
|
|
|
Das Gartengerät ist zum gewerblichen Gebrauch bestimmt. |
|
|
|
Technische Daten |
|
|
|
|
|
|
|
Akku-Rasenmäher |
|
GRA 53 |
GRA 48 |
|
|
Professional |
Professional |
Sachnummer |
|
3 600 J11 000 |
3 600 J11 001 |
Messerbreite |
cm |
53 |
48 |
Schnitthöhe |
mm |
20 – 70 |
20 – 70 |
Grasauffangbehälter, Volumen |
l |
75 |
69 |
Gewicht (ohne Akkus) entsprechend EPTA-Procedure 01/2003 |
kg |
48 |
47,5 |
Seriennummer |
|
siehe Typenschild am |
siehe Typenschild am |
|
|
Gartengerät |
Gartengerät |
Bitte beachten Sie die Sachnummer auf dem Typenschild Ihres Gartengeräts. Die Handelsbezeichnungen einzelner Gartengeräte können variieren.
Für diesen Rasenmäher können nur Li-Ion-Akkus (Art.-Nr. 2 607 336 065) und das Batterieladegerät AL 36100 CV Professional (Art.-Nr. 1 600 A00 1..) verwendet werden.
Bitte in diesem Gartengerät keine nicht-aufladbaren Batterien verwenden, sondern nur solche, die vom Hersteller zugelassen sind.
Geräusch-/Vibrationsinformation
Geräuschemissionswerte ermittelt entsprechend EN 60335-2-77. |
|
3 600 J11 000 |
3 600 J11 001 |
Der A-bewertete Geräuschpegel des Gerätes beträgt typischerweise: |
dB(A) |
81 |
80 |
Schalldruckpegel |
|||
Schallleistungspegel |
dB(A) |
91 |
90 |
Unsicherheit K |
dB |
=1,5 |
=1 |
Gehörschutz tragen! |
|
|
|
Schwingungsgesamtwerte ah (Vektorsumme dreier Richtungen) und |
|
|
|
Unsicherheit K ermittelt entsprechend EN 60335-2-77: |
m/s2 |
1,2 |
0,6 |
Schwingungsemissionswert a |
|||
h |
m/s2 |
=1,5 |
=1,5 |
Unsicherheit K |
|||
Konformitätserklärung |
|
|
|
|
|
3 600 J11 000 |
3 600 J11 001 |
|
|
||
Wir erklären in alleiniger Verantwortung, dass das unter „Technische |
|
|
|
Daten“ beschriebene Produkt allen einschlägigen Bestimmungen der |
|
|
|
Richtlinien 2011/65/EU, 2004/108/EG, 2006/42/EG, 2000/14/EG |
|
|
|
einschließlich ihrer Änderungen entspricht und mit folgenden Normen |
dB(A) |
92 |
91 |
übereinstimmt: EN 60335-1, EN 60335-2-77. |
|||
2000/14/EG: Garantierter Schallleistungspegel: |
|
|
|
Bewertungsverfahren der Konformität gemäß Anhang VI. |
|
|
|
|
|
|
|
Produktkategorie: 32
Benannte Stelle:
DEKRA Certification B.V. Meander 1051
6825 MJ Arnhem Netherlands
Nr. 0344
Technische Unterlagen (2006/42/EG, 2000/14/EG) bei: Bosch Lawn and Garden Ltd., PT-HG/ENS-PA2, Stowmarket, Suffolk IP14 1EY, England
Henk Becker |
Helmut Heinzelmann |
Executive Vice President |
Head of Product Certification |
Engineering |
PT/ETM9 |
Robert Bosch GmbH, Power Tools Division Leinfelden-Echterdingen, GERMANY 09.02.2015
|
Bosch Power Tools |
|
|
F 016 L70 940 | (9.2.15) |
|||
|
|
|
|
|
|
|
|
|
|
|
|
|
|
|
|
|
|
|
|
|
|
|
|
OBJ_DOKU-42365-002.fm Page 8 Monday, February 9, 2015 9:42 AM
8 | Deutsch
Montage und Betrieb
Die Nummerierungen verweisen auf die Abbildungen auf den Bildseiten.
Handlungsziel |
Figure |
Page |
Lieferumfang |
1 |
106 |
Montage der Griffbügel |
2 |
106–107 |
Montage der Griffbügel |
|
|
Montage Kabelklemmen |
3 |
107 |
Grassack zusammensetzen |
|
|
Grassack einfügen |
4 |
108 |
Akkus einsetzen |
5 |
109 |
Stromkreisunterbrecher einsetzen |
6 |
109 |
und in Parkposition stellen |
||
Schnitthöhe einstellen |
7 |
110 |
Bedienung |
8 |
110 |
Arbeitshinweise |
9 |
111 |
Akkus entnehmen |
10 |
112 |
Messerwartung |
11 |
112 |
Zubehör auswählen |
12 |
113 |
Verwendung des Akkus
Das Gartengerät kann mit einem Akku in einem beliebigen Einschub verwendet werden.
Für maximale Leistung sollten vorzugsweise 2 Akkus verwendet werden.
Es ist von Vorteil, wenn beide Akkus voll geladen sind.
Bei unterschiedlichem Ladezustand der Akkus (z. B. Akku I = 50 %, Akku II = 70 %) werden beide Akkus gleichmäßig entladen.
Arbeitshinweise
Mulchen
Das Gartengerät kann zum Mulchen verwendet werden, mit dem Zubehör „mulching kit“ . (Bild 12 auf den Bildseiten zeigt die Details.)
Schnittleistung (Akku-Laufzeit)
Die Schnittleistung (Akku-Laufzeit) ist abhängig von den Eigenschaften des Rasens z. B. Grasdichte, Feuchtigkeit, Graslänge sowie der Schnitthöhe.
Häufiges Einund Ausschalten des Gartengeräts während des Mähvorgangs reduziert ebenfalls die Schnittleistung (AkkuLaufzeit).
Zur Optimierung der Schnittleistung (Akku-Laufzeit) wird empfohlen, öfters zu mähen, die Schnitthöhe zu vergrößern und die Geschwindigkeit einem angemessenem Tempo anpassen.
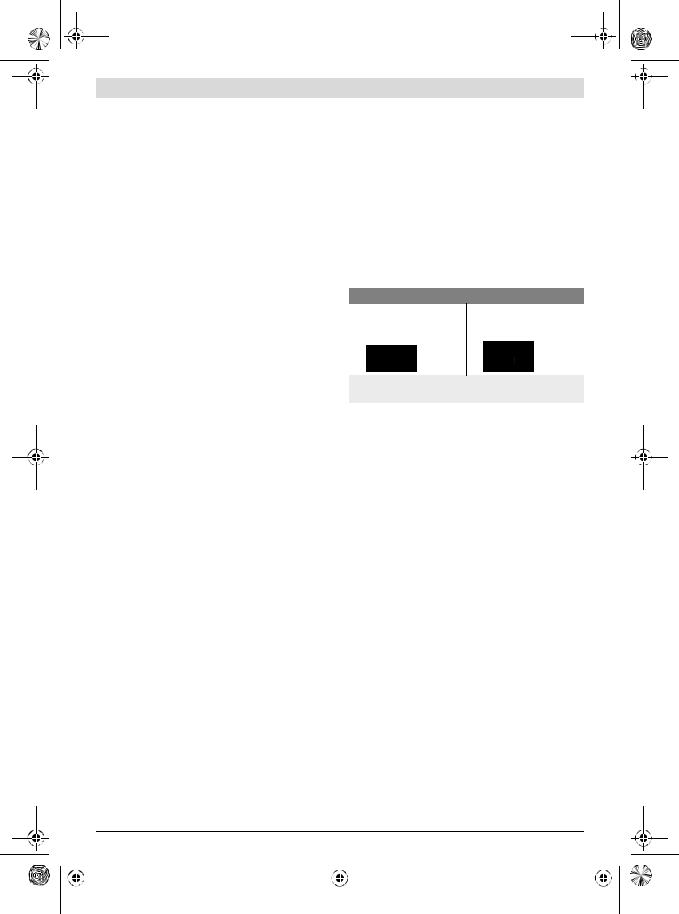
Das unten aufgeführte Beispiel zeigt den Zusammenhang zwischen Schnitthöhe und Schnittleistung in Bezug auf beide Akkus.
Schnittbedingungen
Sehr dünnes, trockenes Gras Dünnes, trockenes Gras
|
|
|
|
|
|
GRA 53
Schnittleistung
bis zu 1500 m2 |
bis zu 1050 m2 |
GRA 48 |
|
Schnittleistung |
|
bis zu 1400 m2 |
bis zu 1000 m2 |
Transport des Gartengerätes
Stellen Sie sicher, dass der Stromkreisunterbrecher abgezogen ist oder sich in Parkposition befindet, bevor das Gartengerät transportiert oder der Griffbügel zusammengeklappt wird. (Der Stromkreisunterbrecher trennt sowohl den Fahrmotor als auch den Schneidwerkmotor).
Verwenden Sie die vorderen und hinteren Tragegriffe zum Befestigen des Gartengerätes während des Transports.
Verwenden Sie geeignete Ladehilfsmittel (Laderampen oder Heber), um das Gartengerät auf und neben das Transportfahrzeug zu laden. Der Mäher muss immer von zwei Personen getragen werden.
Fehlersuche
Symptome |
Mögliche Ursache |
Abhilfe |
Gartengerät läuft nicht |
Akku entladen |
Akku laden |
|
Akkus zu heiß/zu kalt |
Akku erwärmen/abkühlen lassen |
Gartengerät läuft mit |
Interne Verkabelung des Gartengerätes |
Kundendienst aufsuchen |
Unterbrechungen |
defekt |
|
|
Motorschutz hat angesprochen |
Motor/Elektronik 5 Minuten abkühlen lassen und Schnitt |
|
|
höher einstellen |
|
Äußere Verkabelung defekt |
Kundendienst aufsuchen |
|
F 016 L70 940 | (9.2.15) |
|
|
Bosch Power Tools |
|||
|
|
|
|
|
|
|
|
|
|
|
|
|
|
|
|
|
|
|
|
|
|
|
|
OBJ_DOKU-42365-002.fm Page 9 Monday, February 9, 2015 9:42 AM
|
|
Deutsch | 9 |
|
|
|
|
|
Symptome |
Mögliche Ursache |
Abhilfe |
|
Gartengerät hinter- |
Schnitthöhe zu niedrig |
Den Schnitt höher einstellen oder die Fahrgeschwindigkeit |
|
lässt unregelmäßiges |
|
reduzieren |
|
Schnittbild |
|
|
|
Messer stumpf |
Schneidmesser ersetzen oder schärfen |
||
und/oder |
|
|
|
Schneidmesser behindert |
Unterseite des Gartengerätes prüfen und ggf. frei machen |
||
Motor arbeitet schwer |
|||
|
|
(tragen Sie immer Gartenhandschuhe) |
|
|
Messer falsch herum montiert |
Schneidmesser richtig einsetzen (siehe Bild 11) |
|
Motor startet und |
Akkus nicht voll geladen |
Akku-Anzeige prüfen. Wenn nötig, Akku laden. |
|
stoppt anschließend |
|
|
|
Stromkreisunterbrecher nicht ganz ge- |
Stellen Sie sicher, dass der Batterietrennschalter auf Positi- |
||
wieder |
dreht |
on „1“ steht |
|
|
Akkus nicht vollständig eingesetzt |
Akku vollständig einsetzen |
|
|
Akkus zu heiß/zu kalt |
Akku warm werden/abkühlen lassen. Akku-Anzeige über- |
|
|
|
prüfen. |
Schlechte SchnittleisSchnitthöhe zu niedrig tung/Grasaufnahme
Den Schnitt höher einstellen oder die Fahrgeschwindigkeit reduzieren
|
|
|
|
Gras zu hoch |
Den Schnitt höher einstellen oder die Fahrgeschwindigkeit |
|
|
||||
|
|
|
|
|
|
|
reduzieren |
|
|
||
|
|
|
|
Gras zu nass oder feucht |
Warten bis das Gras trocken ist oder Fahrgeschwindigkeit |
|
|
||||
|
|
|
|
|
|
|
reduzieren |
|
|
||
|
|
|
|
Gras zu dicht |
Den Schnitt höher einstellen, die Fahrgeschwindigkeit re- |
|
|
||||
|
|
|
|
|
|
|
duzieren, und/oder Gras häufiger schneiden |
|
|
||
|
|
|
|
Niedriger Akku-Ladezustand |
Vor Gebrauch für volle Akku sorgen |
|
|
||||
|
|
|
|
Unterseite schmutzverkrustet |
Unterseite reinigen |
|
|
||||
|
|
|
|
Schneidmesser |
Schneidmesser ersetzen oder schärfen |
|
|
||||
|
|
|
|
Grasfangkorb schmutzverkrustet |
Grasfangkorb innen reinigen |
|
|
||||
|
|
|
|
Keine Grasaufnahme |
Stellen Sie sicher, dass der Mulch-Einsatz abgenommen ist |
|
|
||||
|
|
|
|
Keine Grasaufnahme |
Das Gartengerät ausschalten, den Stromkreisunterbrecher |
|
|
||||
|
|
|
|
|
|
|
und Akku herausziehen. Die Unterseite des Gartengerätes |
|
|
||
|
|
|
|
|
|
|
frei machen (dabei stets Gartenhandschuhe tragen). |
|
|
||
|
|
|
|
Schlechte Ergebnisse |
Prüfen, ob richtiges Messer eingesetzt ist. |
|
|
||||
|
|
Schneidmesser dreht |
Schneidmesser behindert |
Das Gartengerät ausschalten, den Stromkreisunterbrecher |
|
|
|||||
|
|
sich nicht |
|
|
|
und Akku herausziehen. Die Unterseite des Gartengerätes |
|
|
|||
|
|
|
|
|
|
|
frei machen (dabei stets Gartenhandschuhe tragen). |
|
|
||
|
|
|
|
Messerschraube ist lose |
Messerschraube festziehen |
|
|
||||
|
|
|
|
Niedriger Ladezustand |
Akku aufladen |
|
|
||||
|
|
|
|
Stromkreisunterbrecher aus |
Stromkreisunterbrecher in Stellung 1 drehen |
|
|
||||
|
|
|
|
schlechter Akku-Kontakt |
Batterie abziehen und wieder einsetzen |
|
|
||||
|
|
|
|
Gras zu hoch |
Den Schnitt höher einstellen und/oder die Fahrgeschwin- |
|
|
||||
|
|
|
|
|
|
|
digkeit reduzieren. Das Gartengerät nach hinten kippen, um |
|
|
||
|
|
|
|
|
|
|
den Anlauf zu erleichtern, kann ebenfalls helfen. |
|
|
||
|
|
|
|
|
|
|
Seien Sie sich bewusst, dass dies zu Schmutzablagerungen |
|
|
||
|
|
|
|
|
|
|
führt |
|
|
||
|
|
|
|
Akkus zu heiß/zu kalt |
Akku warm werden/abkühlen lassen. Akku-Anzeige über- |
|
|
||||
|
|
|
|
|
|
|
prüfen. |
|
|
||
|
|
|
|
Motorschutzschalter hat angesprochen |
Motor/Elektronik 5 Minuten abkühlen lassen und Schnitt |
|
|
||||
|
|
|
|
|
|
|
höher einstellen |
|
|
||
|
|
Starke Vibratio- |
Messermutter/-schraube lose |
Die Messerschraube mit 30 Nm festziehen. Beachten Sie, |
|
|
|||||
|
|
nen/Geräusche |
|
|
|
dass die Scheibe immer verwendet wird (dabei stets Gar- |
|
|
|||
|
|
|
|
|
|
|
tenhandschuhe tragen). |
|
|
||
|
|
|
|
Messer beschädigt |
Messer wechseln |
|
|
||||
|
|
|
|
|
|
|
|
|
|
|
|
|
|
Bosch Power Tools |
|
|
|
|
F 016 L70 940 | (9.2.15) |
|
|
||
|
|
|
|
|
|
|
|
|
|
|
|
|
|
|
|
|
|
|
|
|
|
|
|
|
|
|
|
|
|
|
|
|
|
|
|
OBJ_DOKU-42365-002.fm Page 10 Monday, February 9, 2015 9:42 AM
10 | Deutsch
Symptome
Radantrieb funktioniert nicht
Mögliche Ursache |
Abhilfe |
Gras zu hoch |
Schnitt höher einstellen oder durch Schieben unterstützen |
|
|
Untergrund zu weich |
Durch Schieben unterstützen |
Geringe Akku-Kapazität |
Akku-Kapazität an der Akku-Anzeige prüfen |
Stromkreisunterbrecher aus |
Stellen Sie sicher, dass der Batterietrennschalter auf Positi- |
|
on „1“ steht |
schlechter Akku-Kontakt |
Stellen Sie sicher, dass die Akkus vollständig eingeschoben |
|
sind |
Akkus zu heiß/zu kalt |
Akku warm werden/abkühlen lassen. Akku-Anzeige über- |
|
prüfen. |
Motorschutzschalter hat angesprochen |
Motor/Elektronik 5 Minuten abkühlen lassen und Schnitt |
|
höher einstellen |
Wenn Sie das Problem mit Hilfe der Fehlersuchtabelle nicht lösen können, wenden Sie sich bitte Sie zuerst an Ihren Händler.
Nach Gebrauch/Aufbewahrung
Die vorschriftsmäßige Lagerung ist wesentlich für die Erhaltung der Lebensdauer des Erzeugnisses. Die Lagerung in Bereichen mit hoher Feuchtigkeit möglichst vermeiden, da Feuchtigkeit die Bildung von Rost oder Korrosion begünstigt.
Lagerung am Ende der Gartensaison: Die Batterien herausnehmen. Batterien und Maschine an einem trockenen sicheren und nicht dem direkten Sonnenlicht ausgesetzten Ort aufbewahren.
Keine Gegenstände auf dem Gartengerät ablegen.
Reinigen Sie vor einer längeren Lagerung das Gartengerät gründlich.
Kundendienst und Anwendungsberatung
www.bosch-professional.com
Geben Sie bei allen Rückfragen und Ersatzteilbestellungen bitte unbedingt die 10-stellige Sachnummer laut Typenschild des Gartengerätes an.
Deutschland
Robert Bosch GmbH Servicezentrum Elektrowerkzeuge Zur Luhne 2
37589 Kalefeld – Willershausen
Unter www.bosch-pt.com können Sie online Ersatzteile bestellen oder Reparaturen anmelden.
Kundendienst: Tel.: (0711) 40040480 Fax: (0711) 40040481
E-Mail: Servicezentrum.Elektrowerkzeuge@de.bosch.com Anwendungsberatung: Tel.: (0711) 40040480
Fax: (0711) 40040482
E-Mail: Anwendungsberatung.pt@de.bosch.com
Österreich
Unter www.bosch-pt.at können Sie online Ersatzteile bestellen.
Tel.: (01) 797222010
Fax: (01) 797222011
E-Mail: service.elektrowerkzeuge@at.bosch.com
Schweiz
Unter www.bosch-pt.com/ch/de können Sie online Ersatzteile bestellen.
Tel.: (044) 8471511
Fax: (044) 8471551
E-Mail: Aftersales.Service@de.bosch.com
Luxemburg
Tel.: +32 2 588 0589
Fax: +32 2 588 0595
E-Mail: outillage.gereedschap@be.bosch.com
Transport
Die enthaltenen Li-Ionen-Akkus unterliegen den Anforderungen des Gefahrgutrechts. Die Akkus können durch den Benutzer ohne weitere Auflagen auf der Straße transportiert werden.
Beim Versand durch Dritte (z.B.: Lufttransport oder Spedition) sind besondere Anforderungen an Verpackung und Kennzeichnung zu beachten. Hier muss bei der Vorbereitung des Versandstückes ein Gefahrgut-Experte hinzugezogen werden.
Versenden Sie Akkus nur, wenn das Gehäuse unbeschädigt ist. Kleben Sie offene Kontakte ab und verpacken Sie den Akku so, dass er sich nicht in der Verpackung bewegt.
Bitte beachten Sie auch eventuelle weiterführende nationale Vorschriften.
Entsorgung
Werfen Sie Gartengeräte, Ladegeräte und Akkus/Batterien nicht in den Hausmüll!
Nur für EU-Länder:
Gemäß der europäischen Richtlinie 2012/19/EU müssen nicht mehr gebrauchsfähige Elektround Elektronikgeräte und gemäß der europäischen Richtlinie 2006/66/EG müssen defekte oder ver-
brauchte Akkus/Batterien aus dem Gerät entfernt und getrennt gesammelt werden.
|
F 016 L70 940 | (9.2.15) |
|
|
Bosch Power Tools |
|||
|
|
|
|
|
|
|
|
|
|
|
|
|
|
|
|
|
|
|
|
|
|
|
|
OBJ_DOKU-42365-002.fm Page 11 Monday, February 9, 2015 9:42 AM
Umweltgerecht entsorgen entsprechend der lokalen Vorschriften.
Nicht mehr gebrauchsfähige Akkus/Batterien können direkt abgegeben werden bei:
Deutschland
Recyclingzentrum Elektrowerkzeuge Osteroder Landstraße 3
37589 Kalefeld
Schweiz
Batrec AG
3752 Wimmis BE
Akkus/Batterien:
Li-Ion:
Bitte beachten Sie die Hinweise im Abschnitt „Transport“.
Änderungen vorbehalten.
English
Safety Notes
Warning! Read all safety warnings and all instructions. Failure to follow the warnings and instructions may result in serious injury.
Please keep the instructions safe for later use!
Use the machine only when you fully understand and can perform all functions without limitation, or have received appropriate instructions.
Explanation of symbols on the machine
General hazard safety alert.
Read instruction manual.
Pay attention that bystanders are not injured through foreign objects thrown from the machine.
English | 11
Warning: Keep a safe distance
from the machine when operating.
Caution: Do not touch rotating
blades. Sharp blade(s). Beware of severing toes or fingers.
Switch off and remove isolator
key before adjusting, cleaning and before leaving the product unattended for any period.
Wait until all machine compo-
nents have completely stopped before touching them. The blades continue to rotate after the machine is switched off, a rotating blade can cause injury.
Operation
Never allow children or people unfamiliar with these instructions to use the machine. Local regulations may restrict the age of the operator. When not in use store the machine out of reach of children.
This machine is not intended for use by persons (including children) with reduced physical, sensory or mental capabilities, or lack of experience and knowledge, unless they have been given supervision or instruction concerning use of the machine by a person responsible for their safety. Children should be supervised to ensure that they do not play with the machine.
Never mow while people, especially children, or pets are nearby.
The operator or user is responsible for accidents or hazards occurring to other people or their property.
|
Bosch Power Tools |
|
|
F 016 L70 940 | (9.2.15) |
|||
|
|
|
|
|
|
|
|
|
|
|
|
|
|
|
|
|
|
|
|
|
|
|
|

OBJ_DOKU-42365-002.fm Page 12 Monday, February 9, 2015 9:42 AM
12 | English
Do not operate the machine when barefoot or wearing open sandals, always wear substantial footwear and long trousers.
Thoroughly inspect the area where the machine is to be used and remove all stones, sticks, wires, bones and other foreign objects.
Do not operate in areas where live cables may be present.
Before using, always visually inspect to see that the blade, blade bolts and cutter assembly are not worn or damaged. Replace worn or damaged blade and bolts in sets to preserve balance.
Work only in daylight or in good artificial light.
Avoid operating the machine in bad weather conditions especially when there is a risk of lightning.
Please take care for your safety while operating the machine in wet grass.
Never operate the appliance with defective guards or shields, or without safety devices, for example deflectors and/or grass catchers in place.
Before using the machine and after impact, check for signs of wear or damage and repair if necessary.
Never operate the product when you are tired, ill or under the influence of alcohol, drugs or medicine.
Working on banks can be dangerous.
–Do not mow on excessively steep slopes.
–Always be sure of your footing on slopes or wet grass.
–Mow across the face of slopes – never up and down.
–Exercise extreme caution when changing direction on slopes.
Use extreme caution when stepping back or pulling the machine towards you.
Never mow by pulling the mower towards you.
Stop the blade if the machine has to be tilted, except if the machine has to be tilted for starting in long grass. In this case, do not tilt it more than absolutely necessary and tilt only the part which is away from the operator. Always ensure that both hands are in the operating position before returning the machine to the ground.
Switch on the motor according to the instructions with feet well away from rotating blade.
Always stand clear of the discharge zone when operating the machine.
Never pick up or carry the machine while the motor is running.
Do not modify this product. Unauthorized modifications may impair the safety of your product and may result in increased noise and vibration.
Only use Bosch Professional Garden Tool recommended and approved accessories.
Remove the Isolator key and the Batteries:
–Whenever you leave the machine.
–before clearing a blockage,
–before checking, cleaning or working on the machine,
|
F 016 L70 940 | (9.2.15) |
|
|
Bosch Power Tools |
|||
|
|
|
|
|
|
|
|
|
|
|
|
|
|
|
|
|
|
|
|
|
|
|
|

OBJ_DOKU-42365-002.fm Page 13 Monday, February 9, 2015 9:42 AM
–after striking a foreign object. Inspect the machine for damage and make repairs as necessary,
–If the machine is to be stored unused for a long period.
–if the machine starts to vibrate abnormally (check immediately).
–Folding the handle
–Before transporting machine
Maintenance For Your Safety
Warning! Switch off, remove the isolator key and the batteries before adjusting or cleaning.
Caution – do not touch the rotating blade. The blades continue to rotate for a few seconds after the machine is switched off.
Always wear protective gloves when handling or working near the sharp blades.
To ensure long and reliable service, carry out the following maintenance regularly:
Keep all nuts, bolts and screws tight to be sure that the machine is in safe working condition.
Check the grass catcher after each use for wear or deterioration.
Examine the machine and replace worn or damaged parts for safety.
Ensure replacement parts fitted are Bosch approved.
Blade Sharpening
Blade cutting edges can be resharpened.
Remove material from the top surface only.
English | 13
Remove material from both ends of the blade evenly to maintain balance.
Check the blade balance with a screwdriver through the central hole.
Cleaning
Before transport or storage ensure machine is clean and free from debris, if necessary clean with a soft, dry brush.
To clean the grass catcher, use water from a hose. Do not use high pressure water.
To clear the inside of the cutting bowl of grass, use a high pressure stream of water. For hard debris, scrape to remove.
Keeping the underside of the bowl clean will improve performance.
Recommendations for Optimal Handling of the Battery and Charger
Warning! Do not attempt to charge non rechargeable batteries with the charger.
For your safety! Ensure the isolator key and operator controls are in the off or park position before inserting battery pack.Inserting the battery packs into machines that have the switch on can be dangerous.
Insert the battery until the locking mechanism clicks. To remove the battery, operate locking lever.
For care use and maintenance please use charger and battery manuals which are supplied with the products or available at www.bosch-gar- den.com.
|
Bosch Power Tools |
|
|
F 016 L70 940 | (9.2.15) |
|||
|
|
|
|
|
|
|
|
|
|
|
|
|
|
|
|
|
|
|
|
|
|
|
|
OBJ_DOKU-42365-002.fm Page 14 Monday, February 9, 2015 9:42 AM
14 | English
Symbols
The following symbols are important for reading and understanding the operating instructions. Please take note of the symbols and their meaning. The correct interpretation of the symbols will help you to use the garden product in a better and safer manner.
Symbol Meaning
Reaction direction
Movement direction
Wear protective gloves
Weight
Switching On
Switching Off
Permitted action
Technical Data
Symbol Meaning
Prohibited action
Accessories/Spare Parts
Blade rotating
Blade not rotating
Land drive
Transport
Storage
fast
slow
Intended Use
The garden product is intended for Professional use.
Cordless Lawnmower |
|
GRA 53 |
GRA 48 |
|
|
Professional |
Professional |
Article number |
|
3 600 J11 000 |
3 600 J11 001 |
Blade width |
cm |
53 |
48 |
Height of cut |
mm |
20 – 70 |
20 – 70 |
Grass catcher, capacity |
l |
75 |
69 |
Weight (without batteries) |
kg |
48 |
47.5 |
according to EPTA-Procedure 01/2003 |
|||
Serial number |
|
see type plate on the garden product |
see type plate on the garden product |
Please observe the article number on the type plate of your garden product. The trade names of the individual garden products may vary.
Only Li-ion batteries GBA 36V 6.0Ah Hw-D (Art. No. 2 607 336 065) and battery charger AL 36100 CV Professional (Art. No. 1 600 A00 1..) can be used with this machine.
Please do not use non-rechargeable batteries with this appliance, only those specified by the manufacturer.
Noise/Vibration Information
|
|
Sound emission values determined according to EN 60335-2-77. |
|
3 600 J11 000 |
3 600 J11 001 |
|
|
||||
|
|
Typically the A-weighted noise levels of the product are: |
|
|
|
|
|
|
|||
|
|
Sound pressure level |
dB(A) |
81 |
80 |
|
|
||||
|
|
Sound power level |
dB(A) |
91 |
90 |
|
|
||||
|
|
Uncertainty K |
dB |
=1.5 |
=1 |
|
|
||||
|
|
Wear hearing protection! |
|
|
|
|
|
|
|||
|
|
Vibration total values ah (triax vector sum) and uncertainty K deter- |
|
|
|
|
|
|
|||
|
|
mined according to EN 60335-2-77: |
m/s2 |
1,2 |
0.6 |
|
|
||||
|
|
Vibration emission value ah |
|
|
|||||||
|
|
Uncertainty K |
m/s2 |
=1.5 |
=1.5 |
|
|
||||
|
|
|
|
|
|
|
|
|
|
|
|
|
|
F 016 L70 940 | (9.2.15) |
|
|
Bosch Power Tools |
|
|
||||
|
|
|
|
|
|
|
|
|
|
|
|
|
|
|
|
|
|
|
|
|
|
|
|
|
|
|
|
|
|
|
|
|
|
|
|
OBJ_DOKU-42365-002.fm Page 15 Monday, February 9, 2015 9:42 AM
|
|
|
English | 15 |
Declaration of Conformity |
|
|
|
|
|
3 600 J11 000 |
3 600 J11 001 |
|
|
||
We declare under our sole responsibility that the product described |
|
|
|
under “Technical data” is in conformity with all relevant provisions of |
|
|
|
the directives 2011/65/EU, 2004/108/EC, 2006/42/EC, |
|
|
|
2000/14/EC including their amendments and complies with the fol- |
dB(A) |
92 |
91 |
lowing standards: EN 60335-1, EN 60335-2-77. |
|||
2000/14/EC: Guaranteed sound power level: |
|
|
|
Conformity assessment procedure according to Annex VI. |
|
|
|
|
|
|
|
Equipment category: 32
Notified body:
DEKRA Certification B.V. Meander 1051
6825 MJ Arnhem Netherlands
Nr. 0344
Technical file (2006/42/EC, 2000/14/EC) at: Bosch Lawn and Garden Ltd., PT-HG/ENS-PA2, Stowmarket, Suffolk IP14 1EY, England
Henk Becker |
Helmut Heinzelmann |
Executive Vice President |
Head of Product Certification |
Engineering |
PT/ETM9 |
Robert Bosch GmbH, Power Tools Division 70764 Leinfelden-Echterdingen, GERMANY 09.02.2015
Mounting and Operation
The numbering of the figures refer to the illustrations of the machine on the graphics page.
Action |
Figure |
Page |
Delivery Scope |
1 |
106 |
Handle Assembly |
2 |
106 –107 |
Handle Assembly |
|
|
Cable clips Assembly |
3 |
107 |
Assemble the grass catcher |
|
|
Insert the grass catcher |
4 |
108 |
Inserting batteries |
5 |
109 |
Insert Isolator Key and fit in the Stor- |
6 |
109 |
age Position |
||
Adjusting the Cutting Height |
7 |
110 |
Operation |
8 |
110 |
Working Advice |
9 |
111 |
Removing the Batteries |
10 |
112 |
Blade Maintenance |
11 |
112 |
Selecting Accessories |
12 |
113 |
Battery Usage
The machine can use 1 battery in either battery slot and still have full functionality.
However it is preferable to use 2 batteries to achieve maximum performance.
Ideally both batteries should have a similar level of charge.
If batteries have differing charge levels (e. g. Battery I = 50 %, Battery II = 70 %) the machine will generally empty both batteries at the same rate.
Working Advice
Mulching
The product can be used to mulch, using an optional mulching kit. (See figure 12 of illustrations for details)
Area of Cut (Battery Duration)
The area of cut (battery duration) depends on lawn conditions, grass density, mositure content, grass length and height of cut.
Switching the machine on and off frequently during cutting will also reduce the area of cut (battery duration).
To improve the area of cut (battery duration) it is recommended to cut more frequently, raise the cutting height and use land drive at normal walking pace.
The example below shows impact of conditions against run time, when using the machine with two batteries.
Cutting Conditions |
|
|
|
|
|||
Very light, dry grass |
Light, dry grass |
||||||
|
|
|
|
|
|
|
|
|
|
|
|
|
|
|
|
|
|
|
|
|
|
|
|
|
|
|
|
|
|
|
|
|
|
|
|
|
|
|
|
GRA 53 |
|
|
|
|
|||
Area of cut |
|
|
|
|
|||
up to 1500 m2 |
up to 1050 m2 |
||||||
GRA 48 |
|
|
|
|
|||
Area of cut |
|
|
|
|
|||
up to 1400 m2 |
up to 1000 m2 |
||||||
|
Bosch Power Tools |
|
|
F 016 L70 940 | (9.2.15) |
|||
|
|
|
|
|
|
|
|
|
|
|
|
|
|
|
|
|
|
|
|
|
|
|
|
OBJ_DOKU-42365-002.fm Page 16 Monday, February 9, 2015 9:42 AM
16 | English
Product Transportation
Ensure that isolator key is removed or in park position before transporting machine or folding handle. (The isolator key isolates both land-drive and blade-drive motor).
Use the front and rear carrying handles for securing the machine during transportation.
Use suitable loading aids (loading ramps or lifters) to load the product on and off the transport vehicle. The mower must always be carried by two persons.
Troubleshooting
|
|
S T OP |
|
|
|
|
|
|
|
|
|
||
|
|
|
|
|
|
|
|
|
|
|
|||
|
|
|
|
|
|
|
|
|
|
|
|||
|
|
|
|
|
|
|
|
|
|
|
|
|
|
|
|
Problem |
Possible Cause |
Corrective Action |
|
|
|||||||
|
|
Machine fails to op- |
Battery discharged |
Battery Charging |
|
|
|||||||
|
|
erate |
|
Batteries too hot/cold |
Allow to cool/warm |
|
|
||||||
|
|
Machine functions |
Internal wiring of machine damaged |
Contact Service Agent |
|
|
|||||||
|
|
intermittently |
|
|
|
|
|
|
|
|
|
||
|
|
|
Motor protector has activated |
Allow motor/electronics to cool for 5 minutes and increase height of cut |
|
|
|||||||
|
|
|
|
|
External cabling damaged |
Contact Service Agent |
|
|
|||||
|
|
Machine leaves rag- |
Height of cut too low |
Increase height of cut and/or set land drive to a slower speed |
|
|
|||||||
|
|
ged finish |
|
|
|
|
|
|
|
|
|
||
|
|
|
Cutting blade blunt |
Replace/re-sharpen blade |
|
|
|||||||
|
|
and/or |
|
|
|
|
|
|
|
|
|
|
|
|
|
|
Cutting blade obstructed |
Check underneath the machine and clear out as necessary (always |
|
|
|||||||
|
|
Motor labours |
|
|
|||||||||
|
|
|
|
|
wear protective gloves) |
|
|
||||||
|
|
|
|
|
|
|
|
|
|
||||
|
|
|
|
|
Blade fitted upside down |
Re-fit blade correctly (see figure 11) |
|
|
|||||
|
|
Motor starts and |
Batteries not fully charged |
Check battery display – charge batteries if necessary |
|
|
|||||||
|
|
stops immediately |
|
|
|
|
|
|
|
|
|
||
|
|
|
Isolator key not fully located |
Check that the isolator switch is in the “1” position |
|
|
|||||||
|
|
|
|
|
Batteries not fully inserted |
Fully insert batteries |
|
|
|||||
|
|
|
|
|
Batteries too hot/cold |
Allow batteries to warm up/cool down – check battery display |
|
|
|||||
|
|
Poor cutting and |
Height of cut too low |
Increase height of cut and/or set land drive to a slower speed |
|
|
|||||||
|
|
collection perfor- |
|
|
|
|
|
|
|
|
|
||
|
|
|
Grass too high |
Increase height of cut and/or set land drive to a slower speed |
|
|
|||||||
|
|
mance |
|
|
|
|
|
|
|
|
|
|
|
|
|
|
Grass wet or damp |
Wait until grass is dry or set land drive to a slower speed |
|
|
|||||||
|
|
|
|
|
|
|
|||||||
|
|
|
|
|
Grass is dense |
Increase height of cut and/or set land drive to a slower speed or cut |
|
|
|||||
|
|
|
|
|
|
|
|
grass more frequently |
|
|
|||
|
|
|
|
|
Low battery capacity |
Ensure that batteries are fully charged before use |
|
|
|||||
|
|
|
|
|
Cutting bowl encrusted with mud |
Clean inside of cutting bowl |
|
|
|||||
|
|
|
|
|
Cutting blade blunt |
Replace/re-sharpen blade |
|
|
|||||
|
|
|
|
|
Grass catcher encrusted with mud |
Clean inside of grass catcher |
|
|
|||||
|
|
|
|
|
No collection |
Make sure that the mulching plug is removed |
|
|
|||||
|
|
|
|
|
No collection |
Switch off product, remove isolator key and batteries. Check under- |
|
|
|||||
|
|
|
|
|
|
|
|
neath the product and clear obstruction as necessary (always wear |
|
|
|||
|
|
|
|
|
|
|
|
protective gloves). |
|
|
|||
|
|
|
|
|
Poor collection |
Check for correct blade |
|
|
|||||
|
|
Cutting blade fails to |
Cutting blade obstructed |
Cutting blade blunt |
|
|
|||||||
|
|
operate |
|
|
|
|
|
|
|
|
|
||
|
|
|
Blade bolt loose |
Tighten blade bolt |
|
|
|||||||
|
|
|
|
|
Low battery charge |
Recharge battery |
|
|
|||||
|
|
|
|
|
Isolator key off |
Turn key to position 1 |
|
|
|||||
|
|
|
|
|
Poor battery contact |
Remove battery and re-insert |
|
|
|||||
|
|
|
|
|
Grass too high |
Increase height of cut and/or set land drive to a slower speed. Tilting |
|
|
|||||
|
|
|
|
|
|
|
|
the product backwards slightly to reduce starting load can also help. |
|
|
|||
|
|
|
|
|
|
|
|
Be aware that this may result in thrown debris |
|
|
|||
|
|
|
|
|
|
|
|
|
|
|
|
|
|
|
|
|
|
|
Batteries too hot/cold |
Allow batteries to warm up/cool down – check battery display |
|
|
|||||
|
|
|
|
|
Motor protector has activated |
Allow motor/electronics to cool for 5 minutes and increase height of |
|
|
|||||
|
|
|
|
|
|
|
|
cut |
|
|
|||
|
|
|
|
|
|
|
|
|
|
|
|
|
|
|
|
F 016 L70 940 | (9.2.15) |
|
|
|
|
|
Bosch Power Tools |
|
|
|||
|
|
|
|
|
|
|
|
|
|
|
|
|
|
|
|
|
|
|
|
|
|
|
|
|
|
|
|
|
|
|
|
|
|
|
|
|
|
|
|
|
|

OBJ_DOKU-42365-002.fm Page 17 Monday, February 9, 2015 9:42 AM
|
|
English | 17 |
|
|
|
Problem |
Possible Cause |
Corrective Action |
Excessive vibra- |
Blade nut/bolt loose |
Tighten blade bolt to 30 Nm ensuring that washer is present (always |
tions/noise |
|
wear protective gloves) |
|
Cutting blade damaged |
Replace the blade |
Land drive fails to |
Grass too high |
Increase height of cut or provide manual assistance |
operate |
|
|
Ground conditions too soft |
Provide manual assistance |
|
|
Low battery capacity |
Check the charge remaining in the batteries – shown on the battery |
|
|
display |
|
Isolator key off |
Check that the isolator switch is in the “1” position |
|
Poor battery contact |
Ensure that batteries are fully inserted |
|
Batteries too hot/cold |
Allow batteries to warm up/cool down – check battery display |
|
Motor protector has activated |
Allow motor/electronics to cool for 5 minutes and increase height of |
|
|
cut |
If you are unable to resolve the problem using the Troubleshooting guide then please contact your dealer in the first instance.
After use/Storage
Correct storage is essential for maintaining the life of the product. If possible, avoid storage areas with high humidity which could cause rust or corrosion.
End of season storage: Remove batteries and store both machine and batteries in a dry safe place away from direct sunlight.
Do not place objects on top of the machine.
When storing for extended periods, thoroughly clean the product beforehand.
After-sales Service and Application
Service
www.bosch-professional.com
In all correspondence and spare parts orders, please always include the 10-digit article number given on the type plate of the garden product.
Great Britain
Robert Bosch Ltd. (B.S.C.) P.O. Box 98
Broadwater Park
North Orbital Road Denham
Uxbridge
UB 9 5HJ
At www.bosch-pt.co.uk you can order spare parts or arrange the collection of a product in need of servicing or repair. Tel. Service: (0344) 7360109
E-Mail: boschservicecentre@bosch.com
Ireland
Origo Ltd.
Unit 23 Magna Drive
Magna Business Park
City West
Dublin 24
Tel. Service: (01) 4666700
Fax: (01) 4666888
Australia, New Zealand and Pacific Islands
Robert Bosch Australia Pty. Ltd. Power Tools
Locked Bag 66
Clayton South VIC 3169
Customer Contact Center Inside Australia:
Phone: (01300) 307044 Fax: (01300) 307045 Inside New Zealand: Phone: (0800) 543353 Fax: (0800) 428570 Outside AU and NZ: Phone: +61 3 95415555 www.bosch.com.au
Republic of South Africa
Customer service
Hotline: (011) 6519600
Gauteng – BSC Service Centre
35 Roper Street, New Centre Johannesburg
Tel.: (011) 4939375
Fax: (011) 4930126 E-Mail: bsctools@icon.co.za
KZN – BSC Service Centre
Unit E, Almar Centre
143 Crompton Street Pinetown
Tel.: (031) 7012120
Fax: (031) 7012446
E-Mail: bsc.dur@za.bosch.com
Western Cape – BSC Service Centre
Democracy Way, Prosperity Park Milnerton
Tel.: (021) 5512577
Fax: (021) 5513223 E-Mail: bsc@zsd.co.za
|
Bosch Power Tools |
|
|
F 016 L70 940 | (9.2.15) |
|||
|
|
|
|
|
|
|
|
|
|
|
|
|
|
|
|
|
|
|
|
|
|
|
|
OBJ_DOKU-42365-002.fm Page 18 Monday, February 9, 2015 9:42 AM
18 | Français
Bosch Headquarters
Midrand, Gauteng
Tel.: (011) 6519600
Fax: (011) 6519880
E-Mail: rbsa-hq.pts@za.bosch.com
Transport
The contained lithium-ion batteries are subject to the Dangerous Goods Legislation requirements. The user can transport the batteries by road without further requirements.
When being transported by third parties (e.g.: air transport or forwarding agency), special requirements on packaging and labelling must be observed. For preparation of the item being shipped, consulting an expert for hazardous material is required.
Dispatch batteries only when the housing is undamaged. Tape or mask off open contacts and pack up the battery in such a manner that it cannot move around in the packaging. Please also observe possibly more detailed national regulations.
Disposal
Do not dispose of garden products, battery chargers and batteries/rechargeable batteries into household waste!
Only for EC countries:
According to the European law 2012/19/EU, electrical and electronic equipments that are no longer usable, and according to the European law 2006/66/EC, defective or used battery packs/batteries, must be separated
from the tool and collected separately. Dispose of in an environmentally correct manner according to local regulations.
Batteries no longer suitable for use can be directly returned at:
Great Britain
Robert Bosch Ltd. (B.S.C.) P.O. Box 98
Broadwater Park
North Orbital Road Denham
Uxbridge
UB 9 5HJ
At www.bosch-pt.co.uk you can order spare parts or arrange the collection of a product in need of servicing or repair. Tel. Service: (0344) 7360109
E-Mail: boschservicecentre@bosch.com
Battery packs/batteries:
Li-Ion:
Please observe the instructions in section “Transport”.
Subject to change without notice.
Français
Avertissements de sécurité
Attention ! Lisez avec attention toutes les instructions suivantes. Fa- miliarisez-vous avec les éléments de commande et l’utilisation appropriée de l’outil de jardin. Conservez la notice d’utilisation pour une utilisation ultérieure.
N’utilisez la machine qu’après vous être familiarisé avec toutes ses fonctions et que vous êtes en mesure de l’utiliser sans réserve ou après avoir reçu des instructions correspondantes.
Explication des symboles se trouvant sur l’outil de jardin
Indications générales sur d’éventuels dangers.
Lisez soigneusement ces instructions d’utilisation.
Faites attention à ce que les personnes se trouvant à proximité ne soient pas blessées par des projections provenant de la machine.
Avertissement : Gardez une distance de sécurité quand l’outil de jardin est en marche.
Attention : Ne touchez pas les lames en rotation. Les lames sont coupantes. Attention à ne pas se couper les orteils ou les doigts.
|
F 016 L70 940 | (9.2.15) |
|
|
Bosch Power Tools |
|||
|
|
|
|
|
|
|
|
|
|
|
|
|
|
|
|
|
|
|
|
|
|
|
|
OBJ_DOKU-42365-002.fm Page 19 Monday, February 9, 2015 9:42 AM
Arrêtez l’outil de jardin et reti-
rez le sectionneur avant d’effectuer des réparations ou de nettoyer l’outil de jardin ou s’il est laissé sans surveillance même pour une courte durée.
Attendez l’arrêt total de tous les
éléments de l’outil de jardin avant de les toucher. Après la mise hors tension de l’outil de jardin, les lames continuent à tourner, pouvant provoquer ainsi des blessures.
Mode d’emploi
Ne laissez jamais un enfant ou une autre personne n’ayant pas pris connaissance des instructions d’utilisation se servir de l’outil de jardin. Il est possible que les réglementations locales fixent une limite d’âge minimum de l’utilisateur. Gardez l’outil de jardin non utilisé hors de la portée des enfants.
Cet outil de jardin doit être utilisé par des personnes disposant des capacités physiques adaptées et de l’expérience et/ou des connaissances nécessaires. Si tel n’était pas le cas ou en cas d’utilisation de cet outil par des enfants, cette utilisation ne sera possible que sous la surveillance d’une personne responsable de la sécurité des utilisateurs ou que ces derniers aient été instruits quant au maniement de l’outil. Dans le cas contraire, un risque de mauvaise utilisation et de blessures existe.
Les enfants doivent etre surveilles pour assurer qu’ils ne jouent pas avec l’outil de jardin.
Français | 19
Ne tondez jamais la pelouse lorsque des personnes, en particulier des enfants ou des animaux domestiques se trouvent à proximité.
L’opérateur ou l’utilisateur de la tondeuse est responsable des accidents et des dommages causés à autrui ou à ses biens.
Ne faites jamais fonctionner l’outil de jardin si vous marchez pieds nus ou portez des sandales ouvertes. Portez toujours des chaussures fermées et des pantalons longs.
Inspectez soigneusement la surface à travailler et éliminez pierres, bâtons, fils métalliques, os et autres objets étrangers.
Ne travaillez pas dans des zones dans lesquelles il y a des câbles.
Avant de mettre la machine en fonctionnement, contrôlez toujours si la lame, les vis de la lame et le sousgroupe de coupage sont usés ou endommagés. Remplacez la lame usée ou endommagée toujours en même temps que les vis des lames pour éviter tout balourd.
Ne travaillez que de jour ou sous un bon éclairage artificiel.
Ne pas travailler avec l’outil de jardin dans des conditions météorologiques défavorables et plus particulièrement en cas d’approche d’orage.
Veiller à votre sécurité si vous utilisez la machine dans de l’herbe humide.
N’utilisez jamais l’outil de jardin quand les équipements de sécurité sont défectueux, sans coque ou sans équipements de protection tels que
|
Bosch Power Tools |
|
|
F 016 L70 940 | (9.2.15) |
|||
|
|
|
|
|
|
|
|
|
|
|
|
|
|
|
|
|
|
|
|
|
|
|
|

OBJ_DOKU-42365-002.fm Page 20 Monday, February 9, 2015 9:42 AM
20 | Français
par exemple le pare-chocs et/ou le bac de ramassage.
A la suite d’un choc et avant l’utilisation de l’outil, contrôlez les éventuels dommages ou l’usure et, le cas échéant, faites effectuer des réparations.
Ne pas utiliser la machine lorsque vous êtes fatigué ou sous l’emprise de drogues, d’alcool ou de médicaments.
Travailler sur des talus peut être dangereux.
–Ne tondez pas des pentes très abruptes.
–Sur des pentes ou de l’herbe mouillée, faites attention à ne pas perdre l’équilibre.
–Tondez toujours perpendiculairement à la pente – jamais de haut en bas ou de bas en haut.
–Faites très attention lors d’un changement de direction sur une pente.
Faites très attention en reculant ou en tirant l’outil de jardin vers vous.
Lors des travaux de tonte, poussez l’outil de jardin toujours vers l’avant et ne le tirez jamais vers vous.
Arrêtez la lame si la machine doit être basculée, sauf pour démarrer dans des herbes hautes. Ne jamais basculer la machine davantage qu’absolument nécessaire et n’effectuer cela que sur le côté opposé à vous. Veillez toujours à tenir la poignée par les deux mains avant de poser la machine sur le sol.
Mettez l’outil de jardin en marche conformément aux instructions du mode d’emploi et veillez à ce que vos
pieds soient suffisamment éloignés de la lame en rotation.
Gardez une distance suffisante par rapport à la zone d’éjection lorsque vous travaillez avec l’outil de jardin.
Ne soulevez ni transportez jamais l’outil de jardin pendant que le moteur est en marche.
N’effectuez aucune modification sur l’outil de jardin. Des modifications non autorisées peuvent s’avérer préjudiciables à la sécurité de votre outil de jardin et conduiront à une augmentation des émissions de bruit et des vibrations.
N’utilisez que des outils de jardin Professional recommandés par Bosch et leurs accessoires.
Déconnecter le sectionneur et les accumulateurs :
–à chaque fois que vous vous éloignez de l’outil de jardin,
–avant d’éliminer un engorgement,
–pour contrôler, nettoyer ou effectuer des travaux sur l’outil de jardin,
–après avoir heurté un objet étranger. Vérifiez immédiatement que l’outil de jardin ne présente pas d’endommagements, et, si nécessaire, faites-le réparer,
–si l’outil de jardin non utilisé est stocké pendant une période prolongée.
–si l’outil de jardin commence à vibrer anormalement (vérifier immédiatement).
–si vous repliez la poignée
–avant de transporter la machine
|
F 016 L70 940 | (9.2.15) |
|
|
Bosch Power Tools |
|||
|
|
|
|
|
|
|
|
|
|
|
|
|
|
|
|
|
|
|
|
|
|
|
|
OBJ_DOKU-42365-002.fm Page 21 Monday, February 9, 2015 9:42 AM
Entretien
Pour votre sécurité
Attention ! Arrêtez l’outil de jardin, déconnectez le sectionneur et retirez les accumulateurs avant d’effectuer des réparations ou de nettoyer l’outil de jardin.
Attention - ne pas toucher la lame en rotation. Une fois l’outil de jardin mis hors tension, les lames continuent encore à tourner pendant quelques secondes.
Portez toujours des gants de protection, si vous manipulez ou travaillez près des lames aigues.
Effectuez régulièrement les travaux d’entretien suivants pour assurer une utilisation de longue durée et fiable :
Vérifiez que tous les écrous, boulons et vis sont bien serrés afin d’assurer que l’outil de jardin se trouve dans un état de fonctionnement ne présentant aucun danger.
Après chaque utilisation, contrôlez le bac de ramassage pour vous assurer de son état d’usure.
Contrôlez l’outil de jardin et, pour des raisons de sécurité, remplacez les pièces usées ou endommagées.
Veillez à ce que les pièces de rechange soient des pièces d’origine Bosch.
Lame
Les lames sont réaffûtables.
Éliminez les restes de coupe de sur la surface de la tondeuse.
Français | 21
Éliminez les restes de coupe des deux extrémités de la lame pour que cette dernière soit toujours en équilibre.
Vérifiez l’équilibre de la lame en introduisant un tourne-vis dans l’alésage central.
Nettoyage
Avant de transporter ou de stocker l’outil, assurez-vous qu’il est propre est bien entretenu. Si nécessaire, nettoyer à l’aide d’une brosse sèche et douce.
Nettoyez le bac de ramassage à l’aide d’un jet d’eau. Ne pas utiliser un jet d’eau fort.
Nettoyez la face inférieure du carter de résidus à l’aide d’un jet d’eau fort. Éliminez les résidus collés en grattant.
Maintenir la face inférieure du carter propre améliore la performance.
Indications pour le maniement optimal de l’accumulateur et du chargeur
Avertissement ! Ne pas essayer de charger des batteries non rechargeables avec le chargeur.
Pour votre sécurité ! Assurez-vous que le sectionneur et les leviers de commande sont éteints ou se trouvent en position d’arrêt avant d’insérer un accumulateur. Insérer les accumulateurs alors que l’outil de jardin est en marche peut être dangereux.
Insérer l’accumulateur jusqu’à ce que le verrouillage s’encliquette. Actionnez le levier de déverrouillage pour retirer l’accumulateur.
|
Bosch Power Tools |
|
|
F 016 L70 940 | (9.2.15) |
|||
|
|
|
|
|
|
|
|
|
|
|
|
|
|
|
|
|
|
|
|
|
|
|
|

OBJ_DOKU-42365-002.fm Page 22 Monday, February 9, 2015 9:42 AM
22 | Français
Pour les indications relatives au |
Symbole |
Signification |
maintien et l’entretien de l’accumula- |
|
Arrêt |
teur et du chargeur, voir les notices |
|
Action autorisée |
d’utilisation jointes aux outils de jar- |
|
|
din ou disponibles sur le site |
|
Interdit |
www.bosch-garden.com. |
|
Accessoires/pièces de rechange |
Symboles |
|
La lame tourne |
Les symboles suivants sont importants pour pouvoir lire et |
|
|
mieux comprendre le mode d’emploi. Veuillez mémoriser ces |
|
La lame ne tourne pas |
symboles et leur signification. L’interprétation correcte des |
|
Entraînement de roue |
symboles vous permettra de mieux utiliser votre outil de jar- |
|
|
din en toute sécurité. |
|
|
Symbole Signification
Direction de réaction
Direction de déplacement
Portez des gants de protection
Poids
Mise en marche
Caractéristiques techniques
Transport
Stockage
rapide
lent
Utilisation conforme
L’outil de jardin est conçu pour usage industriel.
Tondeuse sans fil |
|
GRA 53 |
GRA 48 |
|
|
Professional |
Professional |
N° d’article |
|
3 600 J11 000 |
3 600 J11 001 |
Largeur de la lame |
cm |
53 |
48 |
Hauteur de coupe |
mm |
20 – 70 |
20 – 70 |
Bac de ramassage, volume |
l |
75 |
69 |
Poids (sans accumulateurs) sui- |
kg |
48 |
47,5 |
vant EPTA-Procedure 01/2003 |
|||
Numéro de série |
|
voir plaque signalétique sur l’outil de jardin |
voir plaque signalétique sur l’outil de jardin |
Respectez impérativement le numéro d’article se trouvant sur la plaque signalétique de l’outil de jardin. Les désignations commerciales des différents outils de jardin peuvent varier.
Pour cette tondeuse, seuls des accus à ions lithium (n° d’article 2 607 336 065) et le chargeur AL 36100 CV Professional (n° d’article1 600 A00 1..) peuvent être utilisés.
Ne pas utiliser des batteries non rechargeables pour cet outil de jardin, mais seulement des batteries agréées par le fabricant.
|
F 016 L70 940 | (9.2.15) |
|
|
Bosch Power Tools |
|||
|
|
|
|
|
|
|
|
|
|
|
|
|
|
|
|
|
|
|
|
|
|
|
|

OBJ_DOKU-42365-002.fm Page 23 Monday, February 9, 2015 9:42 AM
|
|
|
Français | 23 |
Niveau sonore et vibrations |
|
|
|
Valeurs d’émissions sonores déterminées selon la norme |
|
3 600 J11 000 |
3 600 J11 001 |
|
|||
EN 60335-2-77. |
|
||
Les mesures réelles (A) des niveaux sonores de l’appareil sont : |
|
|
|
Niveau de pression acoustique |
dB(A) |
81 |
80 |
Niveau d’intensité acoustique |
dB(A) |
91 |
90 |
Incertitude K |
dB |
=1,5 |
=1 |
Porter une protection acoustique ! |
|
|
|
Valeurs totales des vibrations ah (somme vectorielle des trois axes di- |
|
|
|
rectionnels) et incertitude K relevées conformément à la norme |
|
|
|
EN 60335-2-77 : |
m/s2 |
1,2 |
0,6 |
Valeur d’émission vibratoire ah |
|||
Incertitude K |
m/s2 |
=1,5 |
=1,5 |
Déclaration de conformité |
|
|
|
|
|
3 600 J11 000 |
3 600 J11 001 |
|
|
||
Nous déclarons sous notre propre responsabilité que le produit décrit |
|
|
|
sous « Caractéristiques techniques » est en conformité avec toutes les |
|
|
|
dispositions des directives 2011/65/UE, 2004/108/CE, |
|
|
|
2006/42/CE, 2000/14/CE et leurs modifications ainsi qu’avec les |
dB(A) |
92 |
91 |
normes suivantes : EN 60335-1, EN 60335-2-77. |
|||
2000/14/CE : Niveau d’intensité acoustique garanti : |
|
|
|
Procédures d’évaluation de la conformité conformément à l’annexe VI. |
|
|
|
Catégorie des produits : 32
Office désigné :
DEKRA Certification B.V. Meander 1051
6825 MJ Arnhem Netherlands
Nr. 0344
Dossier technique (2006/42/CE, 2000/14/CE) auprès de : Bosch Lawn and Garden Ltd., PT-HG/ENS-PA2, Stowmarket, Suffolk IP14 1EY, England
Henk Becker |
Helmut Heinzelmann |
Executive Vice President |
Head of Product Certification |
Engineering |
PT/ETM9 |
Robert Bosch GmbH, Power Tools Division Leinfelden-Echterdingen, GERMANY 09.02.2015
Montage et mise en service
Les numérotations réfèrent aux illustrations sur les pages graphiques.
Opération |
Figure |
Page |
Accessoires fournis |
1 |
106 |
Montage des guidons |
2 |
106 –107 |
Montage des guidons |
|
|
Montage des serre-câbles |
3 |
107 |
Opération |
Figure |
Page |
Assemblage du bac de ramassage |
|
|
Montage du bac de ramassage |
4 |
108 |
Montage des accus |
5 |
109 |
Déconnecter le sectionneur et le |
6 |
109 |
mettre en position d’arrêt |
||
Réglage de la hauteur de coupe |
7 |
110 |
Mode d’emploi |
8 |
110 |
Instructions d’utilisation |
9 |
111 |
Enlever les accus |
10 |
112 |
Entretien des lames |
11 |
112 |
Sélection des accessoires |
12 |
113 |
Utilisation de l’accumulateur
L’outil de jardin peut être utilisé avec un accu monté dans n’importe quel logement.
Pour une performance maximum, il est recommandé d’utiliser 2 accumulateurs.
Il est recommandé d’utiliser deux accus qui sont entièrement chargés.
Si les accumulateurs présentent un état de charge différent (par ex. accu I = 50 %, accu II = 70 %), les deux accumulateurs sont déchargés uniformément.
|
Bosch Power Tools |
|
|
F 016 L70 940 | (9.2.15) |
|||
|
|
|
|
|
|
|
|
|
|
|
|
|
|
|
|
|
|
|
|
|
|
|
|
OBJ_DOKU-42365-002.fm Page 24 Monday, February 9, 2015 9:42 AM
24 | Français
Instructions d’utilisation
Paillage
À l’aide de l’accessoire « mulching kit » (kit de paillage), l’outil de jardin peut être utilisé pour le paillage. (pour les détails, voir figure 12 sur les pages de graphiques.)
Puissance de coupe (durée de fonctionnement de l’accu)
La puissance de coupe (durée de fonctionnement de l’accu) dépend des propriétés du gazon, p. ex. de l’épaisseur du gazon, de l’humidité, de la longueur du gazon et de la hauteur de coupe.
Mettre en marche/arrêter fréquemment l’outil de jardin pendant la tonte réduit également la puissance de coupe (autonomie de l’accu).
Pour optimiser la puissance de coupe (durée de fonctionnement des accus), il est recommandé de tondre plus souvent, d’augmenter la hauteur de coupe et d’avancer à une vitesse appropriée.
L’exemple indiqué ci-dessous montre la relation entre hauteur de coupe et puissance de coupe pour un chargement d’accu.
Conditions de coupe |
|
|
|
|
|||
Herbe très fine, sèche |
Herbe fine, sèche |
||||||
|
|
|
|
|
|
|
|
|
|
|
|
|
|
|
|
|
|
|
|
|
|
|
|
|
|
|
|
|
|
|
|
|
|
|
|
|
|
|
|
GRA 53 |
|
|
|
|
|||
Puissance de coupe |
|
|
|
|
|||
jusqu’à 1500 m2 |
jusqu’à 1050 m2 |
||||||
GRA 48 |
|
|
|
|
|||
Puissance de coupe |
|
|
|
|
|||
jusqu’à 1400 m2 |
jusqu’à 1000 m2 |
||||||
Transport de l’outil de jardin
Assurez-vous que le sectionneur est retiré ou se trouve en position d’arrêt avant de transporter l’outil de jardin ou de replier l’étrier. (Le sectionneur déconnecte le moteur d’entraînement aussi bien que le moteur du mécanisme de coupe).
Pendant le transport, attachez l’outil de jardin à l’aide des poignées avant et arrière.
Utilisez des auxiliaires de chargement appropriés (rampes ou tiges) pour placer l’outil de jardin sur le véhicule de transport ou pour le déposer à côté du véhicule de transport. Toujours porter la tondeuse à deux.
Dépistage d’erreurs
Problème |
Cause possible |
Remède |
|
L’outil de jardin |
Accu déchargé |
Chargement de l’accu |
|
ne fonctionne |
|
|
|
La batterie est trop chaude / trop |
Laisser refroidir/chauffer la batterie |
||
pas |
froide |
|
|
|
|
|
|
L’outil de jardin |
Le câblage interne de l’outil de |
Contactez le Service Après-Vente |
|
fonctionne par |
jardin est défectueux |
|
|
intermittence |
|
|
|
Le dispositif de protection de |
Laisser refroidir le moteur/l’électronique pendant 5 minutes et régler la |
||
|
surcharge est déclenché |
hauteur de coupe plus haut |
|
|
Câblage extérieur défectueux |
Contactez le Service Après-Vente |
|
L’outil de jardin |
Hauteur de coupe trop basse |
Régler la hauteur de coupe plus haut ou réduire la vitesse d’avance |
|
donne un résul- |
|
|
|
Les lames sont émoussées |
Remplacer ou affûter la lame |
||
tat irrégulier |
|
|
|
Lame bloquée |
Contrôler la face inférieure de l’outil de jardin et, le cas échéant, la dégager |
||
et/ou |
|||
|
(portez toujours des gants de jardin) |
||
Le moteur fonc- |
|
||
tionne avec diffi- Lames montées dans le faux |
Monter la lame correctement (see figure 11) |
||
culté |
sens |
|
|
Le moteur dé- |
Les batteries ne sont pas com- |
Contrôler l’écran accumulateur. Si nécessaire, recharger l’accumulateur |
|
marre et s’arrête |
plètement chargées |
|
|
aussitôt |
|
|
|
Le sectionneur n’est pas entière- |
Assurez-vous que le disjoncteur de batterie est entièrement tourné sur la |
||
|
ment tourné |
position « 1 » |
|
|
Les batteries ne sont pas com- |
Monter l’accu complètement |
|
|
plètement montées |
|
|
|
La batterie est trop chaude / trop |
Laisser chauffer/refroidir l’accu. Contrôler l’écran accumulateur. |
|
|
froide |
|
|
|
F 016 L70 940 | (9.2.15) |
|
|
Bosch Power Tools |
|||
|
|
|
|
|
|
|
|
|
|
|
|
|
|
|
|
|
|
|
|
|
|
|
|
OBJ_DOKU-42365-002.fm Page 25 Monday, February 9, 2015 9:42 AM
|
|
Français | 25 |
|
|
|
|
|
Problème |
Cause possible |
Remède |
|
Mauvaise puis- |
Hauteur de coupe trop basse |
Régler la hauteur de coupe plus haut ou réduire la vitesse d’avance |
|
sance de |
|
|
|
Herbe trop haute |
Régler la hauteur de coupe plus haut ou réduire la vitesse d’avance |
||
coupe/mauvais |
|
|
|
L’herbe est mouillée ou humide |
Attendre jusqu’à ce que les herbes aient séchées ou réduire la vitesse |
||
ramassage |
|||
|
d’avance |
||
|
|
||
|
|
|
|
|
L’herbe est trop épaisse |
Régler la hauteur de coupe plus haut, réduire la vitesse d’avance et/ou cou- |
|
|
|
per les herbes plus souvent |
|
|
Faible état de charge de l’accu- |
Avant l’utilisation, mettre à disposition des accus chargés |
|
|
mulateur |
|
|
|
Face inférieure encrassée |
Nettoyer la face inférieure |
|
|
Lame |
Remplacer ou affûter la lame |
|
|
Bac de ramassage trop sale |
Nettoyer l’intérieur du bac de ramassage |
|
|
Pas de ramassage |
Assurez-vous que l’insert de paillage est retiré |
|
|
Pas de ramassage |
Éteindre l’outil de jardin, retirer le sectionneur et l’accu. Débloquer la face |
|
|
|
inférieure de l’outil de jardin (toujours porter des gants de jardin). |
|
|
Mauvais résultats |
Contrôler si la lame correcte a été montée |
|
La lame ne |
Lame bloquée |
Éteindre l’outil de jardin, retirer le sectionneur et l’accu. Débloquer la face |
|
tourne pas |
|
inférieure de l’outil de jardin (toujours porter des gants de jardin). |
|
|
La vis de la lame est desserrée |
Resserrer la vis de lame |
|
|
Faible état de charge |
Recharger la batterie |
|
|
Le sectionneur est éteint |
Mettre le sectionneur en position 1. |
|
|
Mauvais contact de la batterie |
Sortir les batteries puis les remettre en place |
|
|
Herbe trop haute |
Régler la hauteur de coupe plus haut et/ou réduire la vitesse d’avance. Pen- |
|
|
|
cher l’outil de jardin vers l’arrière pour faciliter le démarrage pourrait aider. |
|
|
|
Tenez compte que ceci entraîne des dépôts de salissures |
|
|
La batterie est trop chaude / trop |
Laisser chauffer/refroidir l’accu. Contrôler l’écran accumulateur. |
|
|
froide |
|
|
|
Le disjoncteur de protection du |
Laisser refroidir le moteur/l’électronique pendant 5 minutes et régler la |
|
|
moteur a déclenché |
hauteur de coupe plus haut |
|
Vibra- |
Ecrou/vis de la lame desserré |
Serrer la vis de la lame de 30 Nm. Veiller à toujours utiliser le disque (tou- |
|
tions/bruits ex- |
|
jours porter des gants de jardin). |
|
cessifs |
|
|
|
La lame est endommagée |
Remplacer la lame |
||
L’entraînement |
Herbe trop haute |
Régler la hauteur de coupe plus haut ou aider en poussant |
|
de roue ne fonc- |
|
|
|
Surface trop tendre |
Aider en poussant |
||
tionne pas |
|
|
|
Faible capacité de l’accu |
Contrôler la capacité de l’accu sur l’écran |
||
|
|||
|
Le sectionneur est éteint |
Assurez-vous que le disjoncteur de batterie est entièrement tourné sur la |
|
|
|
position « 1 » |
|
|
Mauvais contact de la batterie |
Assurez-vous que les batteries sont entièrement insérées |
|
|
La batterie est trop chaude / trop |
Laisser chauffer/refroidir l’accu. Contrôler l’écran accumulateur. |
|
|
froide |
|
|
|
Le disjoncteur de protection du |
Laisser refroidir le moteur/l’électronique pendant 5 minutes et régler la |
|
|
moteur a déclenché |
hauteur de coupe plus haut |
Si vous ne pouvez pas remédier au problème à l’aide du tableau d’erreurs, contactez votre détaillant.
Après l’utilisation/rangement de l’appareil
Un stockage conforme est indispensable pour maintenir la durée de vie du produit. Éviter un stockage dans des endroits présentant une humidité élevée car l’humidité favorise la formation de rouille.
Stockage à la fin de la saison de jardinage : Sortir les batteries. Stocker les batteries et la machine à un endroit sûr à l’abri d’un rayonnement solaire direct.
Ne pas poser d’autres objets sur l’outil de jardin.
Avant un stockage prolongé, nettoyer soigneusement l’outil de jardin.
|
Bosch Power Tools |
|
|
F 016 L70 940 | (9.2.15) |
|||
|
|
|
|
|
|
|
|
|
|
|
|
|
|
|
|
|
|
|
|
|
|
|
|

OBJ_DOKU-42365-002.fm Page 26 Monday, February 9, 2015 9:42 AM
26 | Español
Service Après-Vente et Assistance
www.bosch-professional.com
Pour toute demande de renseignement ou commande de pièces de rechange, précisez-nous impérativement le numéro d’article à dix chiffres de l’outil de jardin indiqué sur la plaque signalétique.
France
Passez votre commande de pièces détachées directement en ligne sur notre site www.bosch-pt.fr.
Vous êtes un utilisateur, contactez :
Le Service Clientèle Bosch Outillage Electroportatif Tel. : 0811 360122
(coût d’une communication locale) Fax : (01) 49454767
E-Mail : contact.outillage-electroportatif@fr.bosch.com Vous êtes un revendeur, contactez :
Robert Bosch (France) S.A. S. Service Après-Vente Electroportatif 126, rue de Stalingrad
93705 DRANCY Cédex
Tel. : (01) 43119006
Fax : (01) 43119033
E-Mail : sav.outillage-electroportatif@fr.bosch.com
Belgique, Luxembourg
Tel. : +32 2 588 0589
Fax : +32 2 588 0595
E-Mail : outillage.gereedschap@be.bosch.com
Suisse
Passez votre commande de pièces détachées directement en ligne sur notre site www.bosch-pt.com/ch/fr.
Tel. : (044) 8471512
Fax : (044) 8471552
E-Mail : Aftersales.Service@de.bosch.com
Transport
Les batteries Lithium-ion sont soumises aux règlements de transport des matières dangereuses. L’utilisateur peut transporter les batteries par voie routière sans mesures supplémentaires.
Lors d’une expédition par tiers (par ex. : transport aérien ou entreprise de transport), les mesures à prendre spécifiques à l’emballage et au marquage doivent être observées. Dans un tel cas, lors de la préparation de l’envoi, il est impératif de faire appel à un expert en transport des matières dangereuses.
N’expédiez les accus que si le carter n’est pas endommagé. Recouvrez les contacts non protégés et emballez l’accu de manière à ce qu’il ne puisse pas se déplacer dans l’emballage. Veuillez également respecter les règlementations supplémentaires éventuellement en vigueur.
Élimination des déchets
Ne jetez pas les outils de jardin, les chargeurs et les batteries/piles avec les ordures ménagères !
Seulement pour les pays de l’Union Européenne :
Conformément à la directive européenne 2012/19/UE, les équipements électriques et électroniques dont on ne peut plus se servir, et conformément à la directive européenne 2006/66/CE, les accus / batteries usés ou défectueux doivent être retirés de l’appareil et collectés séparément.
Eliminer conformément aux directives locales.
Les batteries/piles dont on ne peut plus se servir peuvent être déposées directement auprès de :
Suisse
Batrec AG
3752 Wimmis BE
Batteries/piles :
Ion lithium :
Veuillez respecter les indications se trouvant dans le chapitre « Transport ».
Sous réserve de modifications.
Español
Instrucciones de seguridad
¡Atención! Lea detenidamente las siguientes instrucciones. Familiarícese con los elementos de manejo y el uso reglamentario del aparato para jardín. Guarde estas instrucciones de servicio en un lugar seguro para posteriores consultas.
Únicamente utilice la máquina, si además de haber entendido por completo todas sus funciones sabe aplicarlas sin limitación alguna, o si ha sido correspondientemente instruido al respecto.
Explicación de la simbología utilizada en el aparato para jardín
Advertencia general de peligro.
Lea las instrucciones de servicio con detenimiento.
|
F 016 L70 940 | (9.2.15) |
|
|
Bosch Power Tools |
|||
|
|
|
|
|
|
|
|
|
|
|
|
|
|
|
|
|
|
|
|
|
|
|
|
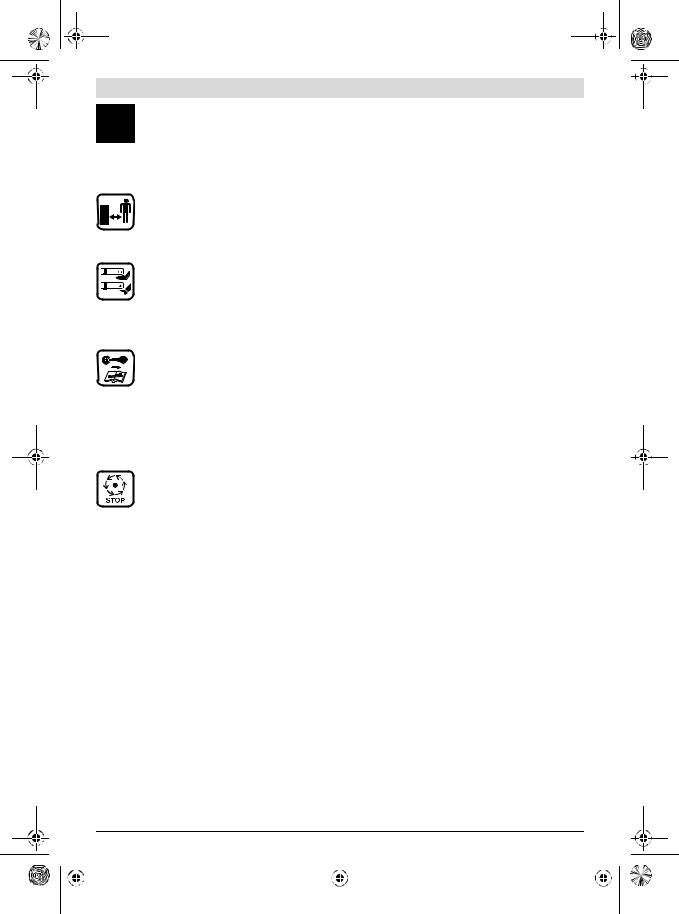
OBJ_DOKU-42365-002.fm Page 27 Monday, February 9, 2015 9:42 AM
Preste atención a que las personas circundantes no resulten lesionadas por los cuerpos extraños que pudieran salir proyectados.
Advertencia: Mantenga una se-
paración de seguridad respecto al aparato para jardín en funcionamiento.
Atención: No toque las cuchillas
en funcionamiento. Las cuchillas están muy afiladas. Tenga cuidado de no cercenarse los dedos de los pies y de las manos.
Desconecte el aparato para jar-
dín y desenchufe el disyuntor antes de realizar trabajos de mantenimiento o limpieza, o siempre que deje desatendido el aparato para jardín, incluso durante un tiempo breve.
Espere a que todas las piezas
del aparato para jardín se hayan detenido por completo antes de tocarlas. Al desconectar el aparato para jardín, las cuchillas se mantienen todavía en movimiento cierto tiempo, y pueden lesionarle.
Manejo
Jamás permita que usen el aparato para jardín niños, ni aquellas personas que no estén familiarizadas con estas instrucciones. Tenga en cuenta la edad mínima que pudiera prescribirse en su país para el usuario. Guarde el aparato para jardín fuera del alcance de los niños cuando no lo utilice.
Este aparato para jardín no ha sido diseñado para ser utilizado por personas o niños que presenten una disca-
Español | 27
pacidad física, sensorial o mental, o que dispongan de una experiencia y/o conocimientos insuficientes, a no ser que sean supervisados por una persona encargada de velar por su seguridad o de instruirles en el manejo del aparato para jardín.
Los niños deberán ser vigilados con el fin de evitar que jueguen con el aparato para jardín.
Nunca corte el césped si en las inmediaciones se encuentran personas, y muy en especial niños, así como animales domésticos.
El usuario es responsable de los accidentes o daños provocados a otras personas o a sus pertenencias.
No utilice el aparato para jardín si está descalzo o si lleva puestas sandalias. Siempre lleve puesto calzado fuerte y pantalones largos.
Examine con detenimiento la superficie a trabajar y retire piedras, palos, alambres, huesos, y demás cuerpos extraños que pudieran existir.
No use el aparato en zonas en las que existan cables.
Antes de su uso, verifique siempre que la cuchilla, los tornillos de sujeción de la misma y el conjunto de corte no estén desgastados ni dañados. Siempre sustituya a la vez la cuchilla y los tornillos de sujeción desgastados o dañados para evitar que se produzca un desequilibrio.
Únicamente trabaje con luz diurna o con buena iluminación artificial.
No trabaje con el aparato para jardín bajo condiciones climáticas adversas, especialmente si se avecina una tormenta.
|
Bosch Power Tools |
|
|
F 016 L70 940 | (9.2.15) |
|||
|
|
|
|
|
|
|
|
|
|
|
|
|
|
|
|
|
|
|
|
|
|
|
|

OBJ_DOKU-42365-002.fm Page 28 Monday, February 9, 2015 9:42 AM
28 | Español
Proceda con especial cautela al trabajar con la máquina estando húmedo el césped.
Jamás trabaje con el aparato para jardín si los dispositivos protectores o cubiertas estuviesen defectuosos, o sin estar montados los dispositivos de seguridad como, p. ej., la cubierta de protección y/o el cesto colector de césped.
Antes de su uso, o si el aparato ha sufrido un golpe, verifique si éste presenta síntomas de desgaste o daño y hágalo reparar, si procede.
No utilice la máquina si estuviese cansado o indispuesto, ni tampoco después de haber consumido alcohol, drogas o medicamentos.
El trabajo en pendientes puede resultar peligroso.
–No corte el césped en pendientes muy pronunciadas.
–Cuide en mantener un paso seguro al trabajar superficies inclinadas o césped húmedo.
–Siempre corte el césped en superficies inclinadas procediendo de un lado a otro y jamás hacia arriba o hacia abajo.
–Proceda con especial cautela al invertir la dirección de marcha en pendientes.
Preste gran atención al andar hacia atrás o al tirar del aparato para jardín hacia Ud.
Siempre corte el césped empujando el aparato para jardín hacia delante y jamás atrayéndolo hacia su cuerpo.
Detenga la cuchilla si tuviese que inclinar la máquina, excepto si lo hace
para facilitar su arranque con césped alto. Nunca la incline más de lo necesario, elevándola solamente por el lado opuesto al que se encuentra Ud.
Siempre cuide que ambas manos sujeten la empuñadura al descender de nuevo la máquina.
Ponga a funcionar el aparato para jardín según se indica en las instrucciones de uso, prestando atención a que sus pies queden a suficiente distancia de la cuchilla en rotación.
Guarde una separación respecto a la zona de expulsión al trabajar con el aparato para jardín.
Jamás alce o sustente el aparato para jardín con el motor en marcha.
No modifique en manera alguna el aparato para jardín. Las modificaciones improcedentes pueden afectar a la seguridad de su aparato para jardín y provocar mayor ruido y vibraciones.
Únicamente use los accesorios homologados que Bosch recomienda para aparatos para jardín Professional.
Retirar el disyuntor y los acumuladores:
–Siempre que se aparte del aparato para jardín.
–Antes de eliminar una obstrucción de material.
–Al examinar, limpiar o manipular en el aparato para jardín.
–Tras chocar contra un cuerpo extraño. Examine de inmediato si está dañado el aparato para jardín y hágalo reparar, si procede.
|
F 016 L70 940 | (9.2.15) |
|
|
Bosch Power Tools |
|||
|
|
|
|
|
|
|
|
|
|
|
|
|
|
|
|
|
|
|
|
|
|
|
|

OBJ_DOKU-42365-002.fm Page 29 Monday, February 9, 2015 9:42 AM
–si no va a usar el aparato para jardín y pretende almacenarlo durante largo tiempo.
–Si el aparato para jardín comienza a vibrar de forma anormal (verificarlo de inmediato).
–Al plegar el estribo
–Antes de transportar la máquina
Mantenimiento Para su seguridad
¡Atención! Desconecte el aparato para jardín, retire el disyuntor, y desmonte los acumuladores antes de realizar trabajos de ajuste y limpieza.
Atención - no tocar la cuchilla en rotación. Tras la desconexión del aparato para jardín, las cuchillas siguen girando todavía durante algunos segundos.
Póngase siempre unos guantes de protección al manipular o trabajar en las proximidades de las cuchillas.
Realice periódicamente los siguientes trabajos de mantenimiento para asegurar un funcionamiento prolongado y fiable:
Asegúrese de que todas las tuercas, pernos y tornillos están firmemente sujetos para garantizar un trabajo seguro con el aparato para jardín.
Controle después de cada uso el estado y el nivel de desgaste del colector de césped.
Controle el aparato para jardín y sustituya las piezas desgastadas o dañadas para mayor seguridad.
Español | 29
Únicamente deberán emplearse piezas de recambio originales Bosch.
Cuchilla de corte
Las cuchillas de corte pueden reafilarse.
Solamente afile la cuchilla por la cara superior.
Siempre afile por igual ambos extremos de la cuchilla para no desequilibrarla.
Compruebe tras el afilado si sigue estando equilibrada la cuchilla insertando un destornillador por el agujero central.
Limpieza
Asegúrese de que el aparato para jardín esté limpio y exento de residuos antes de transportarlo y almacenarlo. Si fuese preciso, limpiarlo con un cepillo blando y seco.
Use una manguera para limpiar el cesto colector de césped. No aplique el agua a alta presión.
Desprenda los restos de césped en la parte inferior de la carcasa con un chorro de agua a alta presión. Rasque los restos de material adherido.
Para mantener las prestaciones del aparato deberá conservarse limpia la parte inferior de la carcasa.
Indicaciones para el trato óptimo del acumulador y del cargador
¡Advertencia! Jamás intente recargar baterías no recargables con el cargador.
¡Para su seguridad! Asegúrese de que estén desconectados o que se encuentren en la posición de reposo el disyuntor y las palancas de mando antes de
|
Bosch Power Tools |
|
|
F 016 L70 940 | (9.2.15) |
|||
|
|
|
|
|
|
|
|
|
|
|
|
|
|
|
|
|
|
|
|
|
|
|
|

OBJ_DOKU-42365-002.fm Page 30 Monday, February 9, 2015 9:42 AM
30 | Español
montar el acumulador. El montaje del acumulador estando conectado el aparato para jardín puede ser peligroso.
Insertar el acumulador de manera que quede retenido por el mecanismo. Accione la palanca de desbloqueo para sacar el acumulador.
Indicaciones sobre el cuidado y mantenimiento del acumulador y del cargador las encuentra en las instrucciones de uso que se adjuntan con los aparatos para jardín o que estándisponibles bajo www.bosch-garden.com.
Símbolos
Los símbolos siguientes le ayudarán a entender las instrucciones de servicio al leerlas. Es importante que retenga en su memoria estos símbolos y su significado. La interpretación correcta de estos símbolos le ayudará a manejar mejor, y de forma más segura, el aparato para jardín.
Simbología Significado
Dirección de reacción
Dirección de movimiento
Utilice guantes de protección
Datos técnicos
Simbología Significado
Peso
Conexión
Desconexión
Acción permitida
Acción prohibida
Accesorios/Piezas de recambio
Cuchilla girando
Cuchilla detenida
Tracción de las ruedas
Transporte
Almacenaje
rápido
lento
Utilización reglamentaria
Aparato para jardín previsto para su uso en el ámbito profesional.
Cortacésped accionado por acu- |
|
GRA 53 |
GRA 48 |
mulador |
|
Professional |
Professional |
Nº de artículo |
|
3 600 J11 000 |
3 600 J11 001 |
Ancho de la cuchilla |
cm |
53 |
48 |
Altura de corte |
mm |
20 – 70 |
20 – 70 |
Colector de césped, capacidad |
l |
75 |
69 |
Peso (sin acumuladores) según EP- |
|
|
|
TA-Procedure 01/2003 |
kg |
48 |
47,5 |
Número de serie |
|
ver placa de características del aparato pa- |
ver placa de características del apa- |
|
|
ra jardín |
rato para jardín |
Preste atención al nº de artículo en la placa de características de su aparato para jardín. Las denominaciones comerciales de algunos aparatos para jardín pueden variar.
|
F 016 L70 940 | (9.2.15) |
|
|
Bosch Power Tools |
|||
|
|
|
|
|
|
|
|
|
|
|
|
|
|
|
|
|
|
|
|
|
|
|
|
 Loading...