


Radio / CD / MP3
Acapulco MP54 US 7 644 275 310 Casablanca MP54 US 7 644 295 310
Operating instructions
http://www.blaupunkt.com

Open here
2
1 |
2 |
3 |
4 |
5 |
6 |
7 |
8 |
16 |
15 |
14 |
13 |
12 |
11 |
10 |
9 |
17
DEUTSCH ENGLISH FRANÇAIS ITALIANO NEDERLANDS SVENSKA ESPAÑOL PORTUGUÊS DANSK
3

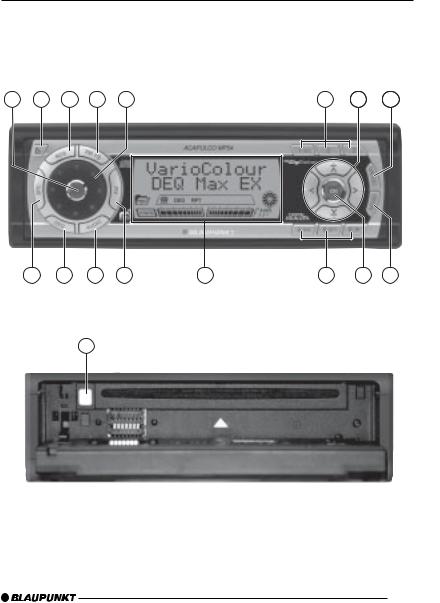
CONTROLS
1Button to switch the device on/ : OK button to confirm menu en-
off and operate the volume mute feature
2
 button to open the flip-release control panel
3RDS button to switch the RDS function on/off (Radio Data System).
4FM button to select FM radio mode as the source and select the FM memory banks.
TS to start the Travelstore function
5Volume control
6Keys 1 - 3
7Arrow buttons
8DIS•ESC button to change the display content and close menus.
9MENU button to open the basic settings menu.
Long press: Deactivate / activate demo mode.
tries and activate the scan function.
;Keys 4 - 6
<Display
=AM button to select AM radio mode as the source and select the AM memory banks.
>AUDIO button to adjust the bass, treble, balance and fader.
?DEQ button to activate/deactivate and set up the equalizer.
@SRC button to switch between the CD/MP3, CD changer (if connected) and AUX sources.
A button to eject the CD from the device
4

CONTENTS
Notes and accessories ............ |
7 |
Road safety ..................................... |
7 |
Installation ....................................... |
7 |
Accessories .................................... |
7 |
Activating / |
|
deactivating demo mode .................. |
8 |
Detachable control panel ......... |
8 |
Theft protection ............................... |
8 |
Detaching the control panel ............. |
8 |
Attaching the control panel .............. |
9 |
Switching on/off ...................... |
9 |
Adjusting the volume ............. |
10 |
Setting the power-on volume ......... |
10 |
Instantaneously decreasing the |
|
volume (mute) ................................ |
10 |
Telephone audio / navigation audio .. |
10 |
Setting the volume of the |
|
confirmation beep .......................... |
11 |
Automatic sound ........................... |
11 |
Radio mode ............................ |
12 |
Switching to radio mode ................ |
12 |
RDS function (only FM) ................. |
12 |
Selecting the waveband / |
|
memory bank ................................. |
13 |
Tuning into a station ....................... |
13 |
Setting the sensitivity of station |
|
seek tuning .................................... |
13 |
Storing stations ............................. |
14 |
Storing stations automatically |
|
(Travelstore) .................................. |
14 |
Listening to stored stations ............ |
14 |
Scanning receivable stations |
|
(SCAN) ......................................... |
14 |
Setting the scanning time .............. |
14 |
Programme type (PTY) .................. |
15 |
Optimising radio reception ............. |
16 |
Switching bandwidth during |
|
interference (SHARX) .................... |
16 |
Configuring the display .................. |
16 |
Naming radio stations (only FM) .... |
17 |
Activating/deactivating the radio |
|
text display .................................... |
17 |
CD mode ................................ |
18 |
Switching to CD mode .................. |
18 |
Selecting tracks ............................ |
18 |
Fast track selection ....................... |
18 |
Fast searching (audible) ................ |
18 |
Random track play (MIX) ............... |
18 |
Scanning tracks (SCAN) ............... |
19 |
Repeating tracks (REPEAT) ........... |
19 |
Pausing playback (PAUSE) ............ |
19 |
Changing the display ..................... |
19 |
Displaying CD text/CD name ......... |
20 |
Naming CDs ................................. |
20 |
Ejecting a CD ................................ |
22 |
MP3 mode .............................. |
22 |
Preparing an MP3-CD ................... |
22 |
Switching to MP3 mode ................ |
24 |
Configuring the display .................. |
24 |
Selecting a directory ...................... |
24 |
Selecting tracks ............................ |
25 |
Fast searching |
|
(not in MP3 browse mode) ............ |
25 |
Random track play – MIX |
|
(not in MP3 browse mode) ............ |
25 |
Scanning tracks – SCAN |
|
(not in MP3 browse mode) ............ |
26 |
Repeating individual tracks or |
|
whole directories – REPEAT |
|
(not in MP3 browse mode) ............ |
26 |
Pausing playback (PAUSE) ............ |
26 |
DEUTSCH ENGLISH FRANÇAIS ITALIANO NEDERLANDS SVENSKA ESPAÑOL PORTUGUÊS DANSK
5

CONTENTS
CD-changer mode ................. |
27 |
Switching to CD-changer mode ..... |
27 |
Selecting CDs ............................... |
27 |
Selecting tracks ............................ |
27 |
Fast searching (audible) ................ |
27 |
Changing the display ..................... |
28 |
Repeating individual tracks or |
|
whole CDs (REPEAT) .................... |
28 |
Random track play (MIX) ............... |
28 |
Scanning all tracks on all CDs |
|
(SCAN) ......................................... |
29 |
Pausing playback (PAUSE) ............ |
29 |
Naming CDs ................................. |
29 |
CLOCK time ........................... |
31 |
Displaying the time ........................ |
31 |
Setting the clock automatically ....... |
31 |
Setting the clock manually ............. |
31 |
Selecting 12/24-hour clock mode .. |
31 |
Displaying the time continuously |
|
when the device is off and the |
|
ignition is on .................................. |
32 |
Sound ..................................... |
32 |
Adjusting the bass ......................... |
32 |
Adjusting the treble ....................... |
32 |
Setting the left/right volume |
|
distribution (balance) ..................... |
33 |
Adjusting the front/rear volume |
|
distribution (fader) ......................... |
33 |
X-BASS .................................. |
33 |
Equalizer ................................ |
34 |
Switching the equalizer on/off ........ |
34 |
Selecting sound presets ................ |
34 |
Selecting vehicle presets ............... |
34 |
Automatic equalizer calibration |
|
(only Acapulco MP54) ................... |
35 |
Manually adjusting the equalizer ..... |
36 |
Help adjusting the equalizer ........... |
37 |
Adjusting the display settings 38 |
|
Switching the bar graph on/off ....... |
38 |
Switching the power meter on/off .. |
38 |
Adjusting the display brightness ..... |
38 |
Adjusting the viewing angle ........... |
39 |
Setting the display illumination |
|
colour (only Acapulco MP54) ......... |
39 |
External audio sources .......... |
41 |
Switching the AUX input on/off ...... |
41 |
Specifications ........................ |
42 |
Amplifier ........................................ |
42 |
Tuner ............................................. |
42 |
CD ................................................ |
42 |
Pre-amp out .................................. |
42 |
Input sensitivity .............................. |
42 |
6

NOTES AND ACCESSORIES
Notes and accessories
Thank you for choosing a Blaupunkt product. We hope you enjoy using this new piece of equipment.
Please read these operating instructions before using the equipment for the first time.
The Blaupunkt editors are constantly working on making the operating instructions clearer and easier to understand. However, if you still have any questions on how to operate the device, please contact your dealer or the telephone hotline for your country. You will find the telephone number printed at the back of this booklet.
We provide a manufacturer guarantee for our products bought within the European Union. You can view the guarantee conditions at www.blaupunkt.de or ask for them directly at:
Blaupunkt GmbH
Hotline
Robert Bosch Str. 200
31139 Hildesheim
Germany
Road safety
 Road safety has absolute priority. Only operate your car sound system if the road and traffic conditions allow you to do so. Familiarise yourself with the device before setting off on your journey.
You should always be able to hear police, fire and ambulance sirens in good time from inside your vehicle. For this reason, listen to your car sound system at a suitable volume level during your journey.
Installation
If you want to install your car sound system yourself, please read the installation and connection instructions that follow these operating instructions.
Accessories
Only use accessories approved by Blaupunkt.
Remote control
The optional RC08 or RC10 remote control allows you to access the most important functions of your car sound system safely and conveniently from your steering wheel.
You cannot switch the device on/off using the remote control.
Amplifiers
You can use all Blaupunkt and Velocity amplifiers.
DEUTSCH ENGLISH FRANÇAIS ITALIANO NEDERLANDS SVENSKA ESPAÑOL PORTUGUÊS DANSK
7
NOTES AND ACCESSORIES |
CONTROL PANEL |
CD changers
You can connect the following Blaupunkt CD changers:
CDC A 08, IDC A 09 and CDC A 03.
Compact Drive MP3
You can connect the Compact Drive MP3 instead of a CD-changer in order to play MP3 music tracks. If you decide to connect a Compact Drive MP3, you will first need to use a computer to store the MP3 music tracks on the Microdrive™ hard disk that is inside the Compact Drive MP3. Then, when the Compact Drive MP3 is connected to the car sound system, you can play the tracks like normal CD music tracks.
The Compact Drive MP3 is operated in a similar way to a CD-changer. Most of the CD-changer functions can also be used with the Compact Drive MP3.
Activating / deactivating demo
mode
The device is supplied from the factory with demo mode activated. The various functions of the device are displayed graphically as animations in the display during demo mode. You can also deactivate demo mode.
Press and hold down the MENU button 9for longer than four seconds to activate/deactivate demo mode.
Detachable control panel
Theft protection
The device is equipped with a detachable control panel (flip-release panel) as a way of protecting your equipment against theft. The device is worthless to a thief without this control panel.
Protect your device against theft by taking the control panel with you whenever you leave your vehicle. Do not leave the control panel inside your vehicle - not even in a hiding place.
The control panel has been designed to be easy to use.
Note:
●Never drop the control panel.
●Never expose the control panel to direct sunlight or other heat sources.
●Avoid direct skin contact with the control panel’s electrical contacts. If necessary, clean the contacts with a lint-free cloth and some alcohol.
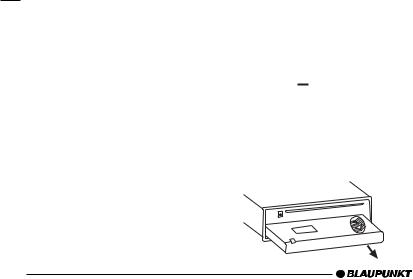
Detaching the control panel
Press button 
 2.
2.
The control panel opens out towards you.
Hold the control panel by its right side and then pull the control panel straight out of the bracket.
8
CONTROL PANEL |
SWITCHING ON/OFF |
Note:
●All the current settings are saved.
●Any CD already inserted in the device remains there.
●The device switches off automatically after approx. one minute.
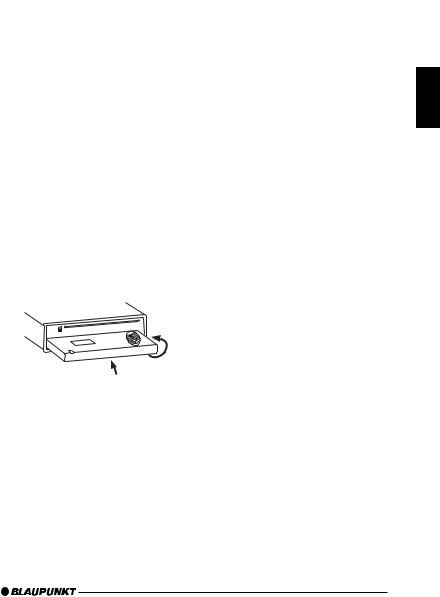
Attaching the control panel
Hold the control panel at approximately right angles to the device.
Slide the control panel into the device’s guides that are positioned on the left and right at the lower edge of the housing. Push the control panel carefully into the bracket until it clicks into place.
Flip up the control panel and carefully press it into the device until it clicks into place.
2.
1.
Note:
●When attaching the control panel, make sure you do not press the display.
If the device was still switched on when you removed the control panel, it will automatically switch on with the last setting activated (radio, CD/MP3, CD changer or AUX) when the panel is replaced.
Switching on/off
There are various ways of switching the device on/off:
Switching on/off using the vehicle ignition
The device will switch on/off simultaneously with the ignition if the device is correctly connected to the vehicle’s ignition and you did not switch the device off by pressing button 1.
Switching the device on/off using the detachable control panel
Detach the control panel.
The device switches off automatically after approx. one minute.
Attach the control panel again.
The device switches on. The last setting (radio, CD, CD changer or AUX) will be reactivated.
Switching on/off using button 1
To switch on the device, press button 1.
To switch off the device, press and hold down button 1for longer than two seconds.
The device switches off.
Note:
●To protect the vehicle battery, the device will switch off automatically after one hour if the ignition is off.
DEUTSCH ENGLISH FRANÇAIS ITALIANO NEDERLANDS SVENSKA ESPAÑOL PORTUGUÊS DANSK
9

ADJUSTING THE VOLUME
Adjusting the volume
You can adjust the volume in steps from 0 (off) to 50 (maximum).
To increase the volume,
turn the volume control 5clockwise.
To decrease the volume,
turn the volume control 5anticlockwise.
Setting the power-on volume
You can set the default volume level at which the device plays when it is switched on.
Press the MENU button 9.
Press the  or
or  button 7repeatedly until “VOLUME MENU” appears in the display.
Press the OK button :to display the volume menu.
“ON VOLUME” and the currently set value are displayed or “LAST VOLUME” is displayed.
Adjust the power-on volume using the 
 buttons 7.
To help you adjust the setting more easily, the device will increase or decrease the volume as you make your changes.
If you change the setting to “LAST VOLUME”, the volume when the device switches on will be the same as the volume level that was set the last time you switched the device off.
 Risk of injury! If the power-on volume is set to maximum, the volume level can be very high when the device is switched on.
If the volume was set to maximum before the device was switched off and the power-on volume is set to “LAST VOLUME”, the volume level can be very high when the device is switched on again.
Severe damage to your hearing can be caused in both cases!
When you have finished making your changes,
press the MENU button 9.
Instantaneously decreasing the volume (mute)
You can instantaneously decrease the volume (mute) to a level preset by you.
Briefly press button 1.
“MUTE” appears in the display.
Cancelling mute
To return to your previously set volume level,
briefly press button 1again.
Telephone audio / navigation audio
If your car sound system is connected to a mobile telephone or a navigation system, the sound system’s volume will be muted as soon as you “pick up” the phone or as soon as a navigation announcement is made. You will then hear the caller or navigation announcement over the car sound system’s loudspeak-
10
ers. In order for this feature to work, the mobile telephone or navigation system must be connected to the car sound system as described in the installation instructions.
You will need a cable for this with the following Blaupunkt number: 7 607 001 503.
You can find out from your Blaupunkt dealer which navigation systems can be used with your car sound system.
You can set the volume level at which telephone calls and navigation announcements will initially be heard.
Press the MENU button 9.
Press the  or
or  button 7repeatedly until “VOLUME MENU” appears in the display.
Press the OK button :to display the volume menu.
Press the  or
or  button 7repeatedly until “PHONE/NAVI” appears in the display.
Set your preferred volume level using the 
 buttons 7.
When you have finished making your changes,
press the MENU button 9.
Note:
●You can use the volume control 5 to adjust the volume of telephone calls and navigation announcements whilst you are listening to them.
ADJUSTING THE VOLUME
Setting the volume of the |
|
DEUTSCH |
|||
|
|
|
|
||
confirmation beep |
|
||||
|
|
||||
The system will output a confirmation |
|
|
|||
beep for some functions if you keep a |
|
|
|||
button pressed down for longer than two |
|
ENGLISH |
|||
seconds, for instance, when assigning |
|||||
|
|||||
a radio station to a station preset but- |
|
||||
ton. You can adjust the volume of this |
|
||||
beep. |
|
|
|
||
|
|
FRANÇAIS |
|||
Press the MENU button 9. |
|
|
|||
|
|
|
|||
Press the or button 7repeat- |
|
|
|
||
edly until “VOLUME MENU” ap- |
|
|
|
||
pears in the display. |
|
|
ITALIANO |
||
Press the OK button :to display |
|
|
|||
|
|
|
|||
the volume menu. |
|
|
|
||
Press the or button 7repeat- |
|
|
|
||
edly until “BEEP VOL” appears in |
|
|
NEDERLANDS |
||
buttons 7. “0” means that the |
|
|
|||
the display. |
|
|
|
||
Adjust the volume using the |
|
|
|
||
beep is deactivated, “6” means that |
|
|
SVENSKA |
||
the maximum beep volume is set. |
|
|
|||
|
|
|
|||
When you have finished making your |
|
|
|
||
changes, |
|
|
|
||
press the MENU button 9. |
|
|
ESPAÑOL |
||
Automatic sound |
|
|
|||
This feature automatically adjusts the |
|
|
|||
volume of the car sound system to suit |
|
|
|
||
the speed at which the vehicle is travel- |
|
|
PORTUGUÊS |
||
ling. In order for this to work, your car |
|
|
|||
sound system must be connected as |
|
|
|||
described in the installation instructions. |
|
|
|||
You can adjust the automatic volume |
|
|
|
||
boost feature in six steps from (0 to 5). |
|
|
DANSK |
||
|
|
|
|
||
|
|
|
|
|
|
11

ADJUSTING THE VOLUME |
RADIO MODE |
Press the MENU button 9.
Press the  button 7repeatedly until “VOLUME MENU” appears in the display.
Press the OK button :to display the volume menu.
Press the  or
or  button 7repeatedly until “AUTO SOUND” appears in the display.
Set the volume adjustment level (0 - 5) using the 
 buttons 7.
When you have finished making your changes,
press the MENU button 9.
Note:
●The optimum setting (0 - 5) for the speed-dependent volume adjustment feature depends on how noise levels develop in your particular vehicle. You will need to test various settings in order to find out which is best suited to your vehicle.
Radio mode
This device is equipped with an RDS radio receiver. Many of the receivable FM stations broadcast a signal that not only carries the programme but also additional information such as the station name and programme type (PTY).
The station name appears in the display as soon as the tuner receives it.
Switching to radio mode
If you are in CD/MP3, CD-changer or AUX mode,
press the FM•TS button 4for FM radio mode.
Or
press the AM button =for AM radio mode.
RDS function (only FM)
The RDS function extends your radio’s range of functions. If the RDS function is activated, the device automatically tunes into the best receivable frequency for the station that is currently set.
Switching the RDS function on/off
To use the RDS function,
press the RDS button 3.
The RDS function is active when RDS lights up in the display.
12

Selecting the waveband / memory bank
Selecting the waveband / memory bank You can use this device to receive programmes broadcast over the FM and AM wavebands. There are three memory banks (FM1, FM2 and FMT) for the FM waveband and two memory banks (AM and AMT) for the AM waveband.
Six stations can be stored in each memory bank.
To switch between the FM1, FM2 and FMT memory banks,
briefly press the FM•TS button 4.
To switch between the AM and AMT memory banks,
briefly press the AM button =.
Tuning into a station
There are various ways of tuning into a station.
Automatic station seek tuning
Press the  or
or  button 7.
The radio tunes into the next receivable station.
Tuning into stations manually
You can also tune into stations manually.
Note:
●You can only tune into stations manually if the RDS function is deactivated.
Press the  or
or  button 7.
RADIO MODE
Setting the sensitivity of station |
|
|
DEUTSCH |
|||||
|
|
|
|
|
|
|
||
seek tuning |
|
|
|
|||||
|
|
|
||||||
You can choose whether the radio |
|
|
|
|||||
should only tune into stations providing |
|
|
|
|||||
good reception or whether it can also |
|
|
ENGLISH |
|||||
tune into those with a weak reception. |
|
|||||||
|
|
|||||||
Press the MENU button 9. |
|
|
||||||
“TUNER MENU” appears in the display. |
|
|
||||||
Press the OK button :to display |
|
|
FRANÇAIS |
|||||
Press the or button 7repeat- |
|
|
||||||
the tuner menu. |
|
|
|
|||||
edly until “SENS” appears in the |
|
|
|
|||||
|
|
|||||||
display. |
|
|
ITALIANO |
|||||
The display shows the currently set sen- |
|
|
|
|||||
|
|
|
||||||
sitivity level. “SENS HI3” means that the |
|
|
||||||
tuner is set to the highest sensitivity |
|
|
||||||
setting. “SENS LO1” means it is set to |
NEDERLANDS |
|||||||
the lowest sensitivity setting. |
||||||||
|
||||||||
Set the sensitivity level that you |
|
|||||||
want using the buttons 7. |
|
|||||||
|
|
|
|
|
|
|||
When you have finished making your |
|
SVENSKA |
||||||
changes, |
|
|||||||
|
|
|||||||
press the MENU button 9. |
|
|
||||||
Note: |
|
|
|
|||||
|
|
|
||||||
|
|
|
||||||
● You can set different sensitivity lev- |
|
|
ESPAÑOL |
|||||
els for FM and AM. |
|
|
||||||
|
|
|
||||||
|
|
|
|
|
|
|
|
|
|
|
|
|
|
|
|
|
|
|
|
|
|
|
|
|
PORTUGUÊS |
|
|
|
|
|
|
|
|
|
|
|
|
|
|
|
|
|
|
|
|
|
|
|
|
|
|
DANSK |
|
|
|
|
|
|
|
|
|
|
13
 Loading...