


PREMIER USER GUIDE
DEEPCLEAN
47A2, 80R4, 17N4, 36Z9 SERIES
Important Safety Instructions
Read all instructions before using your portable DEEP CLEANER.
When using an electrical appliance, basic precautions should be observed, including the following:
 WARNING
To reduce the risk of fire, electric shock, or injury:
»Connect to a properly grounded outlet only. See grounding instructions. Do not modify the 3-prong grounded plug.
»Do not leave appliance when it is plugged in. Unplug from outlet when not in use and before servicing.
»Use indoors only.
»Do not allow to be used as a toy. Close attention is necessary when used by or near children.
»Do not use for any purpose other than described in this User’s Guide. Use only manufacturer’s recommended attachments.
»Do not use with damaged cord or plug. If appliance is not working as it should, has been dropped, damaged, left outdoors, or dropped into water, have it repaired at an authorized service center.
»Always install float before any wet pick-up operation.
»Do not pull or carry by cord, use cord as a handle, close a door on cord, or pull cord around sharp edges or corners. Do not run appliance over cord. Keep cord away from heated surfaces.
»Do not unplug by pulling on cord. To unplug, grasp the plug, not the cord.
»Do not handle plug or appliance with wet hands.
»Do not put any object into openings. Do not use with any opening blocked; keep openings free of dust, lint, hair, and anything that may reduce air flow.
»Keep hair, loose clothing, fingers, and all parts of body away from openings and moving parts.
»Turn off all controls before plugging or unplugging appliance.
»Use extra care when cleaning on stairs.
»Do not use to pick up flammable or combustible materials (lighter fluid, gasoline, kerosine, etc.)
or use in areas where they may be present.
»Do not use appliance in an enclosed space filled with vapors given off by oil base paint, paint thinner, some moth proofing substances, flammable dust,
or other explosive or toxic vapors.
»Do not use to pick up toxic material (chlorine bleach, ammonia, drain cleaner, etc.).
»Do not pick up anything that is burning or smoking, such as
cigarettes, matches, or hot ashes.
»Use only BISSELL cleaning products intended for use with this appliance to prevent internal component damage. See the Cleaning Fluid section of this guide.
»Unplug before connecting TurboBrush Tool.
»Do not immerse. Use only on surfaces moistened by the cleaning process.
»Keep appliance on a level surface.
»Do not carry the appliance while in use.
SAVE THESE INSTRUCTIONS FOR FUTURE USE
This model is for household use only. Commercial use of this unit voids the manufacturer’s warranty.
 WARNING
Improper connection of the equipment-grounding conductor can result in a risk of electrical shock. Check with a qualified electrician or service person if you aren’t sure if the outlet is properly grounded.
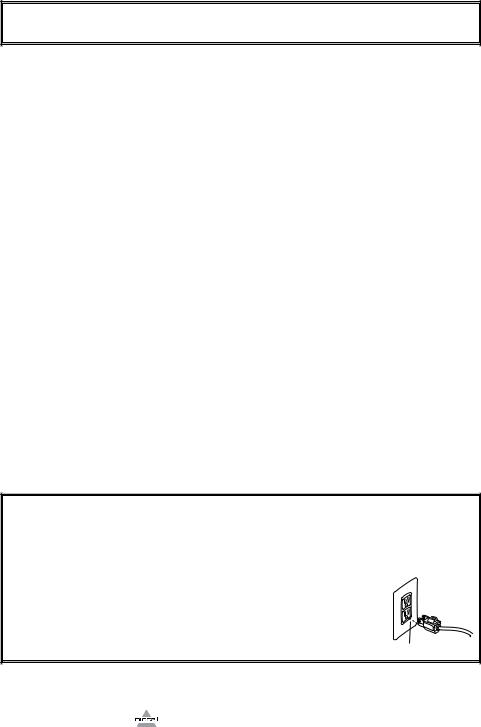
DO NOT MODIFY THE PLUG. If it will not fit the outlet, have a proper outlet installed by a qualified electrician. This appliance is designed for use on a nominal 120-volt circuit, and has a grounding attachment plug that looks like the plug in the illustration. Make certain that the appliance is connected to an outlet having the same configuration as the plug. No plug adapter should be used with this appliance.
GROUNDING INSTRUCTIONS
This appliance must be connected to a grounded wiring system. If it should malfunction or break down, grounding provides a safe path of least resistance for electrical current, reducing the risk of electrical shock. The cord for this
appliance has an equipment-grounding conductor and a grounding plug. It must only be plugged into an outlet that is properly installed and grounded in accordance with all local codes and ordinances.
www.bissell.com 
 800.237.7691
2
Quick Start Guide
Assembly
1. Slide upper handle onto machine base
2. Screw 2 screws into the marked holes
3. Place upper hose rack onto back of upper handle, and secure with screw
4. Wrap power cord to the left and flex hose to the right of the upper hose rack
5. Attach tool to hose grip
Before you begin cleaning
1.Move furniture to another area if cleaning an entire room
2.Remove large dirt and debris from carpet
3.Pre-treat spots & stains and heavy traffic areas (optional)
4.Fill the clean water tank
4a. Unlatch the top by lifting up on the latches on each side of the tank
4b. Remove the top
4c. Pour 5 ounces of formula into the heavy duty bladder (fill the included measuring cup twice). Fill the rest of the way with hot tap water (do not boil or microwave water).
4d. Re-attach top by lining up and securing the latches on the sides of the tank
5. Plug into outlet, and turn the power switch on
NOTE: Heatwave Technology™ helps keep hot water hot while the machine is in use. Simply turn the machine on to activate Heatwave.
Cleaning with attachments
1.Make sure handle of machine is locked in upright position
2.Attach the cleaning tool to the end of the hose
3.Clean by pressing the trigger to spray solution onto the area to be cleaned
4.Slowly scrub the tool back and forth over
the soiled surface
5. Tilt the tool forward and release spray trigger to suction liquid
|
www.bissell.com |
800.237.7691 |
|
3 |
|
|
|
|
|
|
|
|
|
|
|
|
|
|

Thanks for buying a BISSELL deep cleaner
We’re glad you purchased a BISSELL deep cleaner. Everything we know about floor care went into the design and construction of this complete, high-tech home cleaning system.
Your BISSELL deep cleaner is well made, and we back it with a limited three-year warranty. We also stand behind it with a knowledgeable, dedicated Consumer Care department, so, should you ever have a problem, you’ll receive fast, considerate assistance.
My great-grandfather invented the floor sweeper in 1876. Today, BISSELL is a global leader in the design, manufacture, and service of high quality homecare products like your BISSELL deep cleaner.
Thanks again, from all of us at BISSELL.
Mark J. Bissell
Chairman & CEO
Safety Instructions . . . . . 2
Quick Start Guide . . . . . .3
Product View . . . . . . . . 5
Assembly . . . . . . . . . .6
Operations . . . . . . . . 6-12
Maintenance & Care . . . 13-15
Troubleshooting . . . . . . 16
Replacement Parts . . . . . 17
Accessories . . . . . . . . 18
Warranty . . . . . . . . . 19
Consumer Care . . . . . . 19
Product Registration . . . 20
|
Tips |
» Deep cleaning stairs and high-traffic areas on a regular |
» Before turning off the machine, suction up clean |
|
basis helps prolong carpet life. |
water to thoroughly rinse out the interior of the flex |
|
|
» Check upholstery stuffing before cleaning. Colored |
hose. Then, lift the cleaning tool and point it upwards |
|
|
stuffing may bleed through the fabric when it |
to drain any remaining water into the dirty water/ |
|
|
|
becomes wet. |
collection tank. |
|
|
|
|
www.bissell.com 

 800.237.7691
4

Product View
1
13
|
|
|
2 |
|
|
|
|
3 |
4 |
|
|
|
|
|
|
|
|
|
|
|
5 |
|
|
|
6 |
|
|
|
14 |
|
|
|
|
|
|
|
7 |
|
|
|
15 |
|
|
|
|
|
|
|
8 |
|
|
|
|
|
|
|
12 |
|
|
9 |
10 |
|
|
|
|
|
|
|
|
|
|
|
|
11 |
|
|
|
|
1 |
|
Spray Trigger |
9 |
Surround Suction® |
|
2 |
|
Extra Long Power Cord |
10 |
Easy To Remove Nozzle |
|
3 |
|
Upper Handle |
11 |
EdgeSweep® Brushes |
|
4 |
|
Flex Hose |
12 |
Lower Base |
|
5 |
|
Power Switch |
13 |
Upper Hose Rack |
|
6 |
|
Easy Carry Handle |
14 |
Lower Hose Rack |
|
7 |
|
Tank Carry Handle |
15 |
Handle Recline Pedal |
|
8 |
|
Large Capacity 2-in-1 Water Tank |
|
|
www.bissell.com |
800.237.7691 |
5 |
|
|

Assembly
Your deep cleaner comes in three (four on select models) easy-to-assemble components:
Upper Handle with Screws
Lower Base 1. Upper Hose Rack
Upper Tool Holder (select models)
 WARNING
Do not plug in your deep cleaner until you are familiar with all instructions and operating procedures.
2.
The only thing you will need to assemble your cleaner is a Phillips head screwdriver.
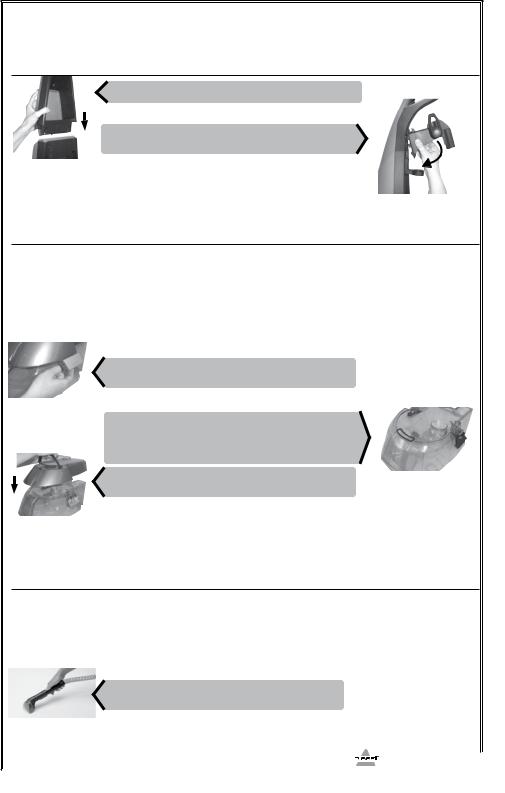
1.Slide upper handle onto lower handle.
2.Screw 2 screws into the marked holes (screws will be taped to handle).
3.Attach the upper tool holder (select models) to the upper handle by snapping the bottom half in first, then snapping in the top half.
4.Place upper hose rack onto back of
upper handle, and secure with screw.
5.Snap tools onto the Upper Tool Holder (select models).
6.Wrap power cord and flex hose. Snap hose wand into hose clip on upper hose wrap.
NOTE: Take care to wrap the hose in the right direction in order to make use of the hose clip. Make sure the hose is wrapped beginning from the back of the machine and wrapping toward the front.
3.
4a. 4b.
5.6.
Deep cleaner assembly is now complete.
Operations
Cleaning fluid
Keep plenty of genuine BISSELL 2X formula on hand so you can clean and protect whenever it fits your schedule. Always use genuine BISSELL deep cleaning formulas. Non-BISSELL
cleaning solutions may harm the machine and will void the warranty.
 WARNING
To reduce the risk of fire and electric shock due to internal component damage, use only BISSELL cleaning fluids intended for use with the deep cleaner.
|
|
|
|
|
|
|
|
|
|
|
Professional |
Pet Stain & Odor |
Deep Clean |
Allergen Cleansing |
Spring Breeze |
Crystal Springs |
Hard Floor Solutions |
Tough Stain Pretreat |
|
|
Deep Cleaning |
& Protect |
|||||||
|
|
|
|
|
|
|
|||
|
Out Cleans |
Removes tough pet |
Deep cleans carpets |
|
Powerful |
Powerful |
For use with |
Pretreat to |
|
|
stains and contains |
and protects from |
Helps remove pet & |
the Bare |
penetrate |
||||
Best for |
all other |
cleaning with a |
cleaning with |
||||||
patented odor |
future stains with |
pollen allergens |
Floor Tool |
and loosen |
|||||
|
formulas |
refreshing scent |
a refreshing scent |
||||||
|
removal technology |
Scotchgard™ Protector |
|
(select models) |
tough stains |
||||
|
|
|
|
|
|||||
|
|
|
|
|
|
|
|
|
|
2X Concentrated |
X |
X |
X |
X |
X |
X |
X |
|
|
Scotchgard™ Protection® |
X |
X |
X |
|
|
|
|
|
*ONLY BISSELL Protects from future stains with Scotchgard™ Protector
www.bissell.com 
 800.237.7691
6
 Loading...