


 Loading...
Table of contents
INTRODUCTION TO MIRASCAN . . . . . . . . . . . . . . . . . . . . . . . . . . . . . . . . . . . . . . . . . . . . . . 5
1.1 MIRASCAN . . . . . . . . . . . . . . . . . . . . . . . . . . . . . . . . . . . . . . . . . . . . . . . . . . . . . . . . . . . . . 5
1.2 MIRASCAN OPERATION MODES . . . . . . . . . . . . . . . . . . . . . . . . . . . . . . . . . . . . . . . . . . . . . . . 5
MAKING A SCAN . . . . . . . . . . . . . . . . . . . . . . . . . . . . . . . . . . . . . . . . . . . . . . . . . . . . . . . . . . |
9 |
2.1 PLACING ORIGINAL ON THE SCANNER . . . . . . . . . . . . . . . . . . . . . . . . . . . . . . . . . . . . . . . . . . |
9 |
For reflective originals . . . . . . . . . . . . . . . . . . . . . . . . . . . . . . . . . . . . . . . . . . . . . . . . . . . . 9 For transparent originals. . . . . . . . . . . . . . . . . . . . . . . . . . . . . . . . . . . . . . . . . . . . . . . . . . 10
2.2 MAKING A SCAN IN THE STANDALONE MODE . . . . . . . . . . . . . . . . . . . . . . . . . . . . . . . . . . . . 12 2.3 MAKING A SCAN IN THE PLUG-IN MODE. . . . . . . . . . . . . . . . . . . . . . . . . . . . . . . . . . . . . . . . 14 2.4 SWITCHING TO THE ADVANCED MODE . . . . . . . . . . . . . . . . . . . . . . . . . . . . . . . . . . . . . . . . . 15
MORE ABOUT MIRASCAN . . . . . . . . . . . . . . . . . . . . . . . . . . . . . . . . . . . . . . . . . . . . . . . . . . 16
3.1 MIRASCAN IN THE BASIC MODE . . . . . . . . . . . . . . . . . . . . . . . . . . . . . . . . . . . . . . . . . . . . . 16
Setting Buttons . . . . . . . . . . . . . . . . . . . . . . . . . . . . . . . . . . . . . . . . . . . . . . . . . . . . . . . . 17
Original Type Button . . . . . . . . . . . . . . . . . . . . . . . . . . . . . . . . . . . . . . . . . . . . . . . . . 17
Image Type Switch . . . . . . . . . . . . . . . . . . . . . . . . . . . . . . . . . . . . . . . . . . . . . . . . . . 17
Destination Button. . . . . . . . . . . . . . . . . . . . . . . . . . . . . . . . . . . . . . . . . . . . . . . . . . . 18
Mode Switch . . . . . . . . . . . . . . . . . . . . . . . . . . . . . . . . . . . . . . . . . . . . . . . . . . . . . . . 19
Preview Window . . . . . . . . . . . . . . . . . . . . . . . . . . . . . . . . . . . . . . . . . . . . . . . . . . . . . . . 20
Preview Area. . . . . . . . . . . . . . . . . . . . . . . . . . . . . . . . . . . . . . . . . . . . . . . . . . . . . . . 20
Frame Tools . . . . . . . . . . . . . . . . . . . . . . . . . . . . . . . . . . . . . . . . . . . . . . . . . . . . . . . 20
Command Buttons . . . . . . . . . . . . . . . . . . . . . . . . . . . . . . . . . . . . . . . . . . . . . . . . . . . . . . 22
Preview . . . . . . . . . . . . . . . . . . . . . . . . . . . . . . . . . . . . . . . . . . . . . . . . . . . . . . . . . . |
22 |
22

Scan. . . . . . . . . . . . . . . . . . . . . . . . . . . . . . . . . . . . . . . . . . . . . . . . . . . . . . . . . . . . . 22
Exit . . . . . . . . . . . . . . . . . . . . . . . . . . . . . . . . . . . . . . . . . . . . . . . . . . . . . . . . . . . . . 22
Help Button. . . . . . . . . . . . . . . . . . . . . . . . . . . . . . . . . . . . . . . . . . . . . . . . . . . . . . . . . . . 22
3.2 MIRASCAN IN THE ADVANCED MODE. . . . . . . . . . . . . . . . . . . . . . . . . . . . . . . . . . . . . . . . . . 23
Menu Bar . . . . . . . . . . . . . . . . . . . . . . . . . . . . . . . . . . . . . . . . . . . . . . . . . . . . . . . . . . . . 24
Setting Menu. . . . . . . . . . . . . . . . . . . . . . . . . . . . . . . . . . . . . . . . . . . . . . . . . . . . . . . 24
Help Menu . . . . . . . . . . . . . . . . . . . . . . . . . . . . . . . . . . . . . . . . . . . . . . . . . . . . . . . . 25
Scanner Control Box . . . . . . . . . . . . . . . . . . . . . . . . . . . . . . . . . . . . . . . . . . . . . . . . . . . . 26
Common Control Box . . . . . . . . . . . . . . . . . . . . . . . . . . . . . . . . . . . . . . . . . . . . . . . . . 26
Job Information Control Box . . . . . . . . . . . . . . . . . . . . . . . . . . . . . . . . . . . . . . . . . . . . 31
Scan Size Control Box . . . . . . . . . . . . . . . . . . . . . . . . . . . . . . . . . . . . . . . . . . . . . . . . 32
Job Selection Control Box . . . . . . . . . . . . . . . . . . . . . . . . . . . . . . . . . . . . . . . . . . . . . . 35
Destination Box . . . . . . . . . . . . . . . . . . . . . . . . . . . . . . . . . . . . . . . . . . . . . . . . . . . . . . . . 35
Image Control Box. . . . . . . . . . . . . . . . . . . . . . . . . . . . . . . . . . . . . . . . . . . . . . . . . . . . . . 36
Invert. . . . . . . . . . . . . . . . . . . . . . . . . . . . . . . . . . . . . . . . . . . . . . . . . . . . . . . . . . . . 36
Image Adjustment . . . . . . . . . . . . . . . . . . . . . . . . . . . . . . . . . . . . . . . . . . . . . . . . . . . 36
Rotate . . . . . . . . . . . . . . . . . . . . . . . . . . . . . . . . . . . . . . . . . . . . . . . . . . . . . . . . . . . 50
Image Enhancement . . . . . . . . . . . . . . . . . . . . . . . . . . . . . . . . . . . . . . . . . . . . . . . . . 51
Mirror . . . . . . . . . . . . . . . . . . . . . . . . . . . . . . . . . . . . . . . . . . . . . . . . . . . . . . . . . . . . 57
Command Buttons . . . . . . . . . . . . . . . . . . . . . . . . . . . . . . . . . . . . . . . . . . . . . . . . . . . . . . 58
Zoom . . . . . . . . . . . . . . . . . . . . . . . . . . . . . . . . . . . . . . . . . . . . . . . . . . . . . . . . . . . . 58
Preview . . . . . . . . . . . . . . . . . . . . . . . . . . . . . . . . . . . . . . . . . . . . . . . . . . . . . . . . . . 58
Scan. . . . . . . . . . . . . . . . . . . . . . . . . . . . . . . . . . . . . . . . . . . . . . . . . . . . . . . . . . . . . 58
Mode Switch . . . . . . . . . . . . . . . . . . . . . . . . . . . . . . . . . . . . . . . . . . . . . . . . . . . . . . . 58
Profile . . . . . . . . . . . . . . . . . . . . . . . . . . . . . . . . . . . . . . . . . . . . . . . . . . . . . . . . . . . 58
Exit . . . . . . . . . . . . . . . . . . . . . . . . . . . . . . . . . . . . . . . . . . . . . . . . . . . . . . . . . . . . . 59
Preview Area and Frame Tools Bar . . . . . . . . . . . . . . . . . . . . . . . . . . . . . . . . . . . . . . . . . . 60
Preview Area. . . . . . . . . . . . . . . . . . . . . . . . . . . . . . . . . . . . . . . . . . . . . . . . . . . . . . . 60
Frame Tools Bar . . . . . . . . . . . . . . . . . . . . . . . . . . . . . . . . . . . . . . . . . . . . . . . . . . . . 60
33

SCAN FUNDAMENTALS . . . . . . . . . . . . . . . . . . . . . . . . . . . . . . . . . . . . . . . . . . . . . . . . . . . . 62
BASIC SCANNING CONCEPTS. . . . . . . . . . . . . . . . . . . . . . . . . . . . . . . . . . . . . . . . . . . . . . . . . . . 62
What is scanning? . . . . . . . . . . . . . . . . . . . . . . . . . . . . . . . . . . . . . . . . . . . . . . . . . . . . . . 62 How does the scanner work? . . . . . . . . . . . . . . . . . . . . . . . . . . . . . . . . . . . . . . . . . . . . . . 62 How to get the right image from the scanner? . . . . . . . . . . . . . . . . . . . . . . . . . . . . . . . . . . 62 What can you do with a scanner? . . . . . . . . . . . . . . . . . . . . . . . . . . . . . . . . . . . . . . . . . . . 62
RESOLUTION AND FILE SIZE . . . . . . . . . . . . . . . . . . . . . . . . . . . . . . . . . . . . . . . . . . . . . . . . . . . 63
Resolution. . . . . . . . . . . . . . . . . . . . . . . . . . . . . . . . . . . . . . . . . . . . . . . . . . . . . . . . . . . . 63 Image Size . . . . . . . . . . . . . . . . . . . . . . . . . . . . . . . . . . . . . . . . . . . . . . . . . . . . . . . . . . . 64
TIPS FOR MAKING BETTER SCANS . . . . . . . . . . . . . . . . . . . . . . . . . . . . . . . . . . . . . . . . . . . . . . . 65
Controlling The Data Size . . . . . . . . . . . . . . . . . . . . . . . . . . . . . . . . . . . . . . . . . . . . . . . . . 65 Using the "Preview" Function . . . . . . . . . . . . . . . . . . . . . . . . . . . . . . . . . . . . . . . . . . . . . . 65 Using the "Zoom" Function . . . . . . . . . . . . . . . . . . . . . . . . . . . . . . . . . . . . . . . . . . . . . . . . 65 Making Adjustments. . . . . . . . . . . . . . . . . . . . . . . . . . . . . . . . . . . . . . . . . . . . . . . . . . . . . 65
TROUBLESHOOTING AND FAQ . . . . . . . . . . . . . . . . . . . . . . . . . . . . . . . . . . . . . . . . . . . . . . 66
SERVICE INFORMATION. . . . . . . . . . . . . . . . . . . . . . . . . . . . . . . . . . . . . . . . . . . . . . . . . . . 68
TECHNICAL SUPPORT . . . . . . . . . . . . . . . . . . . . . . . . . . . . . . . . . . . . . . . . . . . . . . . . . . . . . . . . 68
RE-PACKING DIRECTIONS . . . . . . . . . . . . . . . . . . . . . . . . . . . . . . . . . . . . . . . . . . . . . . . . . . . . 68
APPENDIX . . . . . . . . . . . . . . . . . . . . . . . . . . . . . . . . . . . . . . . . . . . . . . . . . . . . . . . . . . . . . . 69
MIRASCAN HOT KEYS. . . . . . . . . . . . . . . . . . . . . . . . . . . . . . . . . . . . . . . . . . . . . . . . . . . . . . . . 69
I . In the Basic Mode . . . . . . . . . . . . . . . . . . . . . . . . . . . . . . . . . . . . . . . . . . . . . . . . . . . . 69
II . In the Advanced Mode . . . . . . . . . . . . . . . . . . . . . . . . . . . . . . . . . . . . . . . . . . . . . . . . 69
44

Chapter 1: Introduction to MiraScan
1.1 MiraScan
MiraScan is the driver program for your scanner. It is TWAIN compliant and designed to be user-friendly. With its iconlized user interface and fully logical task-flow design, you can complete a satisfactory scanning job with only a few mouse clicks. You can perform all of the following tasks using MiraScan:
1.Preview, scan and import the reflective originals or transparencies into your image editing software.
2.Adjust the quality of your scanned image before you actually start editing the image in your image editing software.
3.Apply batch scan functionality, allowing you to specify and switch among multiple scanning jobs in an image.
4.Create special effects to the scanned image by applying Invert and Mirror functions.
5.Use the Color Wizard tool to adjust the image easily and quickly.
1.2 MiraScan operation modes
MiraScan provides an improved user interface and two running and work modes: the Basic Mode and the Advanced Mode.
In the Basic Mode, you are required to make only several necessary selections to get the highest quality image. In the Advanced Mode, MiraScan provides the detailed information necessary for professional users to get the most desirable images.
55

MiraScan in the Basic Mode
Preview Button |
Scan Button |
Exit Button |
Help Button
Original Type Button
Image Type Button
Scan Area (dotted frame)
Destination Button
Preview Area
Mode Switch
Frame Tools Bar
66
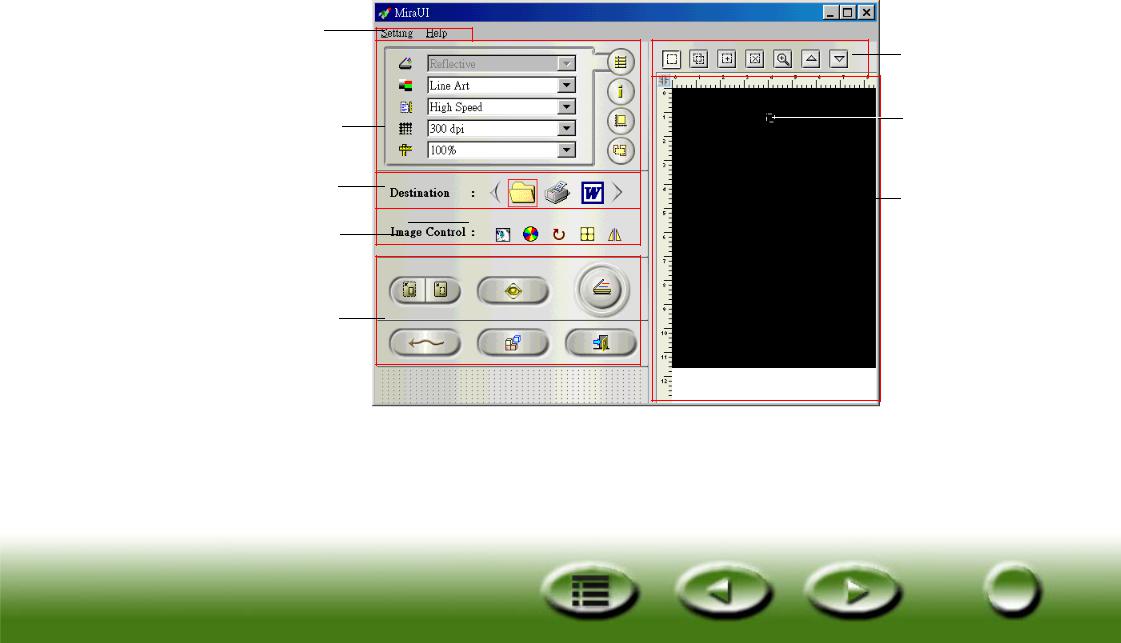
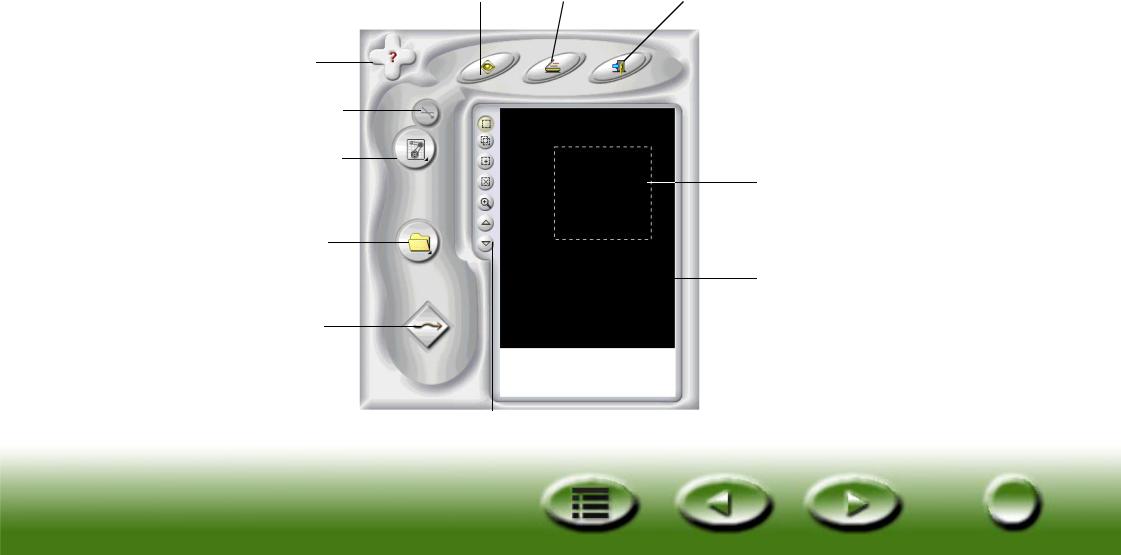
MiraScan in the Advanced Mode
Menu Bar
Scanner
Control Box
Destination
Bar
Image Control
Box
Control
Buttons
Frame Tools Bar
Scan Area (dotted frame)
Preview Area
77

In the Basic Mode, MiraScan has powerful auto-functions to get the most exciting effects for your scans, saving you time and effort. However, in the Advance Mode, you have the widest options and the most useful tools to expand your capabilities of retouching and processing images.
Besides, you can start MiraScan either directly from a shortcut on your desktop (the Standalone Mode) or from an image editing software (the Plug-In mode). The Standalone Mode allows you to scan an image and save it as a file directly, while the Plug-In Mode allows you to scan an image and transfer it to the software you use easily.
Please follow us to explore the powerful and exciting features of MiraScan and make your imaging life more splendid and colorful!
88
Chapter 2: Making A Scan
Now that you have a basic understanding about what MiraScan can do for you, let’s go on making a scan using MiraScan and your scanner.
As mentioned in Chapter 1, you can start MiraScan either independently or from an application software. Please refer to the steps below to make your scan.
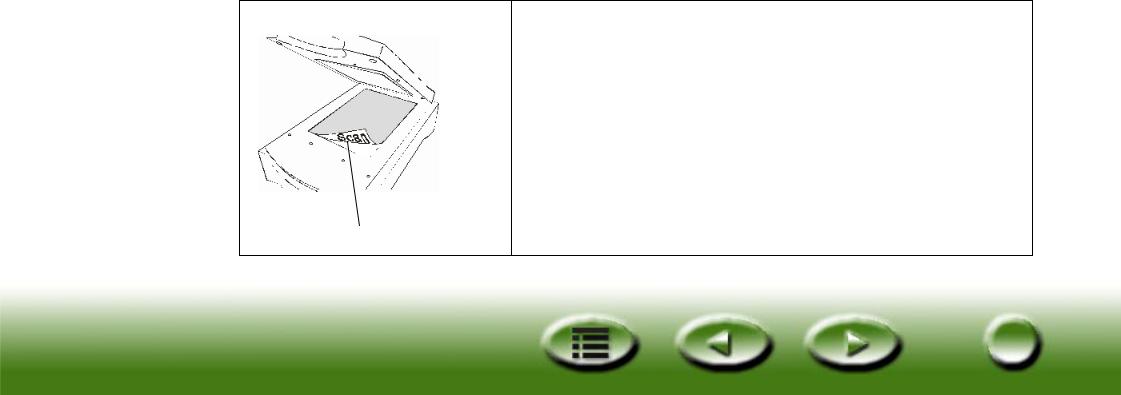
2.1 Placing original on the scanner
Note: |
the scanner illustrated here may be different from the one you purchased. However, the way |
|
to place your original is the same. |
For reflective originals
Place the original with the side to be scanned facing down on the scanner glass plate. Note the direction of the original so that you will not scan the image in the wrong direction.
Note the direction
99
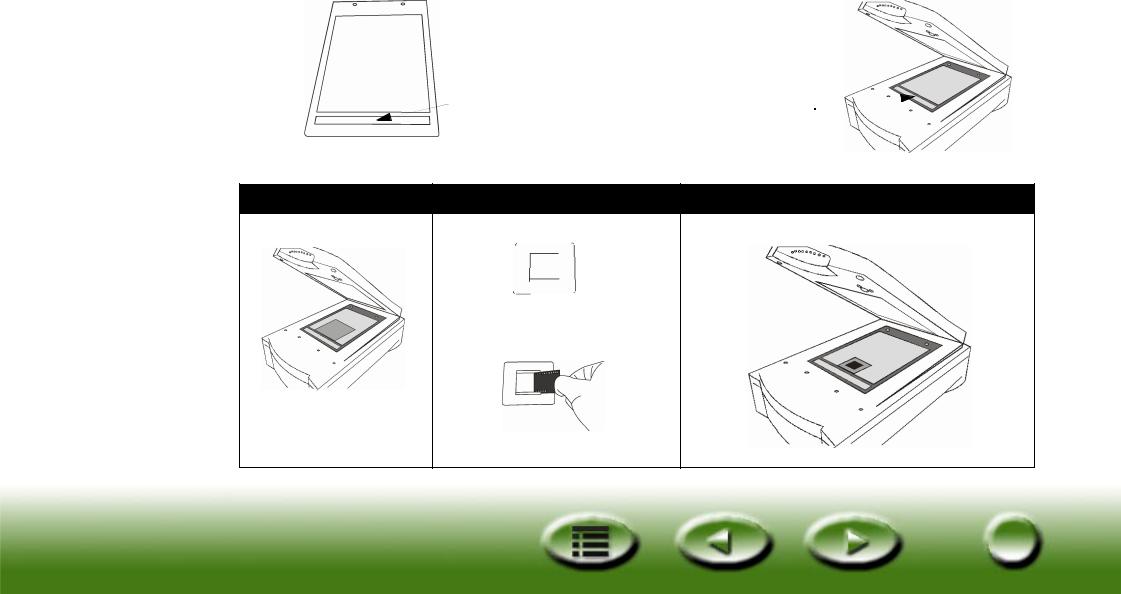
For transparent originals
Note: |
your scanner must be equipped with a TPO (the scanner model number with a "T") to scan |
|
transparent originals. Remove the optical cover from the TPO before scanning. |
Place your film in an appropriate film frame, then place on the glass plate of scanner. When doing so, make sure that the calibration area is facing the right direction (Towards the front panel of the scanner). Do not block the calibration area, or the scanner will fail to function correctly.
Calibration area |
Note the direction of the |
|
calibration area |
||
|
Transparency positioning frame
Scan Films
positive film holder
Place the film with emulsion side face down
Place the positive film in the holder
1010

Scan Mounted Slides
Slide holder
Scan Filmstrip
Filmstrip holder.
Insert the filmstrip into the holder
1111
2.2 Making a scan in the Standalone Mode
Step 1. |
Double-click the MiraScan shortcut icon on the desktop and MiraScan will appear. |
||
Step 2. |
Place the original on scanner glass plate. Close scanner lid. |
||
Step 3. |
Click the Original Type |
button to select an original type according to the original you scan. |
|
Note: |
your scanner must be equipped with a TPO (transparency option) to scan transparent originals. |
||
|
Remove the optical cover from the TPO before scanning. |
||
Step 4. |
Click Preview |
button to preview the image. When finished, the preview image will appear in the |
|
|
Preview Area. |
|
|
Step 5. |
Use your mouse to adjust the scan area (the dotted frame on the Preview Area) and include only the |
||
|
image you want to scan. Use the Frame Tools in the Frame Tools Bar to edit the scan areas: |
||
|
Click |
button to add a new frame. |
|
|
Click |
button to duplicate a frame. |
|
|
Click |
button to delete a frame. |
|
|
To move a frame, click and drag a frame to a desired position. |
||
|
To resize a frame, move the mouse cursor to an edge of a frame and when the cursor turns into a double- |
||
|
sided arrow, click and drag the frame to a desired size. |
||
|
To rotate a frame, move the mouse cursor to an edge of a scan area and when the cursor turns into a |
||
|
crooked double-sided arrow, click and drag to rotate the selected scan area. |
||
Step 6. |
Click the Image Type |
button to choose an image type used to scan the image. |
|
Step 7. |
Repeat Step 4 and 5 if you want to add more scans on an image. |
||
1212
Step 8. |
Click the Destination |
button to select a destination for the scanned image (e.g., save as a file or |
||
|
print via a printer. |
|
|
|
Step 9. |
When finished, click the Scan |
button to start scanning. |
||
Step 10. |
After the scan is completed, the image will be processed according to the destination you selected. Click the |
|||
|
Exit |
button to exit MiraScan. |
|
|
1313

2.3 Making a scan in the Plug-in Mode
Step 1. Open your application software.
Step 2. If this is your first time to scan, you may have to select the TWAIN source by choosing Select source in the File menu and then selecting MiraScan in your application software (You only need to do this once, unless you re-install your application software). Please note that the way to select the TWAIN source may differ according to the software you use. For details, please refer to the documents that come with your application software.
Step 3. Choose Acquire from your application software to bring up MiraScan (this may also differ according to the application you use).
Step 4. Follow Step 2 through 10 as described in section 2.2.
1414
2.4 Switching to the Advanced Mode
In addition to the Basic Mode that provides you a quick, simple and convenient interface, you can also change to the Advanced Mode to make detailed adjustments to a scan. To scan in the Advanced Mode:
Step 1. Open MiraScan either from a application software (Plug-in Mode) or by double-clicking the shortcut icon on the desktop (Standalone Mode) as described in section 2.1 and 2.2.
Step 2. |
Click the Mode Switch |
to change the MiraScan interface to the Advanced Mode. |
Step 3. |
Click the Preview |
button to preview the image. When finished, the preview image will appear |
|
in the Preview Area. |
|
Step 4. |
Use your mouse to adjust the Scan Area (the dotted frame on the Preview Area) and include only the |
|
|
image you want to scan. Use the Frame Tools in the Frame Tools Bar to edit the scan areas. |
|
Step 5. |
Use the options in the Scanner Control Box to adjust scan resolution, scan mode, image type and scan |
|
|
size..., etc. |
|
Step 6. |
Choose a destination of the scanned image in the Destination Bar. |
|
Step 7. |
Use the options in the Image Control Box to adjust image quality and/or apply special effects. |
|
Step 8. |
Click the Scan |
button to start scanning the image. When finished, the image will be processed |
|
according to the destination you selected. |
|
Step 9. |
Click the Exit |
button to exit MiraScan. |
1515
Chapter 3: More About MiraScan
In this chapter, you will get more information about the features and functions of MiraScan. The following sections will guide you though and prepare you for making the most out of your scanner and MiraScan.
3.1 MiraScan in the Basic Mode
Preview Button |
Scan Button |
Exit Button |
Help Button
Original Type
Button
Image Type Button
Scan Area (dotted frame)
Destination
Button
Preview Area
Mode Switch
Frame Tools Bar
1616
Setting Buttons
Original Type Button
MiraScan can be used to scan reflective originals and transparencies. Click the button to switch between the two kinds
of originals. |
represents reflective originals while |
represents transparent originals. |
Note: your scanner must be equipped with a TPO (transparency option) to scan transparent originals.
Image Type Switch
The Image Type Switch is used to select a particular data type for a scan job. You will need to select a correct image type according to the media type you will scan. If Reflective is selected in Original Type, the following options will be available:
 AUTO
AUTO
If this option is selected, MiraScan will detect the type of an image to be scanned automatically and scan it in the proper type.
 PHOTO
PHOTO
To select the option is to scan an image with the following properties: Color, High Speed, No Descreen and the original size (e.g. 100% of scaling).
 MAGAZINE
Selecting the option is scanning an image in the following settings: Color, High Speed, 175lpi (descreen) and 100% of original size.
1717

 NEWSPRINT
To select this option is to scan an image in the following settings: Color, High Speed, 85lpi (descreen) and 100% of original size.
 TEXT
TEXT
To choose this option is to scan an image in the following settings: Line Art, High Speed, No descreen and 100% of original size.
If Transparent Original is selected in Original Type, the following options will be available:
 TRANSPARENCY
If the item is selected, MiraScan will scan transparent films with the following settings: Color, High Speed, No Descreen and 100% of Original size.
 NEGATIVE FILM
If the item is selected, MiraScan will scan negative films with the following settings: Color, High Speed, No Descreen and 100% of Original size.
Destination Button
When MiraScan is launched by a TWAIN-compliant application (the Plug-in Mode), the application will be the only destination to which the scanned image is transferred. When MiraScan is in Standalone Mode, all the default supported applications that MiraScan can get from your computer will be displayed after this button is pressed. You can select an application as the destination, otherwise, "Scan to File" will be the default destination.
 SCAN TO FILE
If this option is selected, you will be prompted to save the scanned image as a file when a scan is completed. The default-supported file formats are: BMP, GIF, TIF, PCX, JPG, TGA and PNG.
1818

 SCAN TO PRINTER
If this option is selected, the scanned image will be printed via your printer (make sure that your printer is powered on and installed properly).
 SCAN TO WEB
If this option is selected, the scanned image will be displayed in an Internet browser (Internet Explorer or Netscape Navigator).
SCAN TO OTHER APPLICATIONS
If you have other compatible applications installed in your computer, the program icon will also appear here.
For example, by selecting  , the scanned image will be transferred to Microsoft Word automatically.
If a destination is deleted or added in the Advance Work Mode, the destination options will also be changed in Basic Mode.
Mode Switch
Click this button to switch to the Advanced work mode and all the settings in the Basic Mode will retain except that the preview image is reset to original size.
1919

Preview Area
Frame Tools
Preview Window
Preview Window contains two parts: Preview Area and Frame Tools.
Preview Area
The Preview Area is where you can preview an image to be scanned in rough quality. The scan area is also adjusted in this area (the scan area is the dotted frame in the Preview Area). Only the part of image enclosed in the frame will be scanned. In order to minimize the size of the scanned image file, it is better to select and scan only the necessary part of the image with the frame.
You can:
Move a frame by pointing the mouse cursor to the frame. When the cursor turns into a crossed arrow, click and drag your mouse to move the frame in the Preview Area.
Adjust the size of a frame by moving the cursor over the edge of the frame. When the cursor turns into a double-sided arrow, click and drag your mouse to expand or shrink the frame.
Rotate a frame by moving the mouse cursor to an edge of the frame and when the cursor turns into a crooked doublesided arrow, click and drag to rotate the selected frame.
Frame Tools
The Frame Tools allow you to add more scan jobs to an image (each frame in the Preview Area represents an independent scan job). That is, you can scan different parts of an image (or several images in one scan) in a scan session. We call this batch scanning. You can add up to 18 scan jobs to one single scan session.
 SELECTION
You can add a new scan job by clicking this button and drawing a new frame in the Preview Area.
2020
 DUPLICATE
You can duplicate a scan job by clicking an existing frame in the Preview Area and then this button. A new scan job with the same scan setting will appear in the Preview Area.
 ADD
ADD
You can click this button to add a new scan frame in the Preview Area.
 DELETE
You can click to choose a frame in the Preview Area and click this button to delete it.
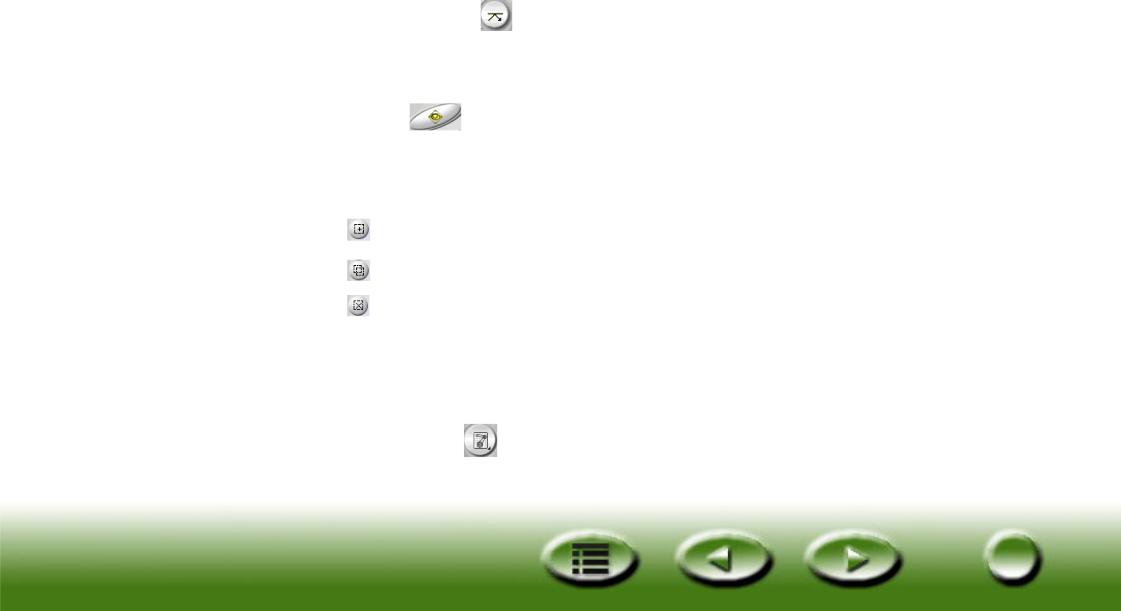
 ZOOM
ZOOM
You can click this button to zoom in on the preview image in the Preview Area.
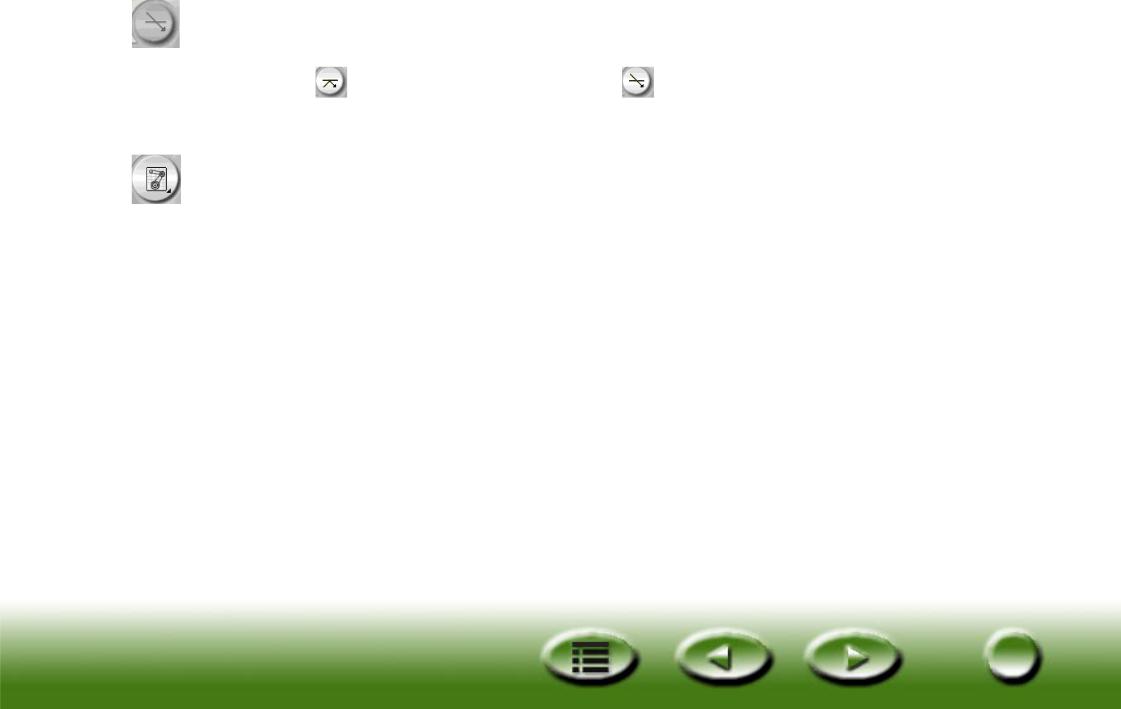
 PREVIOUS JOB
Click this button to jump to the previous scan job.
 NEXT JOB
Click this button to jump to the next scan job.
In addition to the Frame Tools above, you can also right-click your mouse on a scan job in the Scan Area. The following submenu will appear:
Add: add a new frame.
2121
Loading...