


ULTRACURVE PRO DEQ2496


User’s Manual
Version 1.1 July 2003
ENGLISH
ULTRACURVE PRO DEQ2496
IMPORTANT SAFETY INSTRUCTIONS
CAUTION: To reduce the risk of electric shock, do not remove the top cover (or the rear section). No user serviceable parts inside; refer servicing to qualified personnel.
WARNING: To reduce the risk of fire or electric shock, do not expose this appliance to rain and moisture.
This symbol, wherever it appears, alerts you to the presence of uninsulated dangerous voltage inside the enclosure—voltage that may be sufficient to constitute a risk of shock.
This symbol, wherever it appears, alerts you to important operating and maintenance instructions in the accompanying literature. Please read the manual.
DETAILED SAFETY INSTRUCTIONS:
1)Read these instructions.
2)Keep these instructions.
3)Heed all warnings.
4)Follow all instructions.
5)Do not use this device near water.
6)Clean only with a dry cloth.
7)Do not block any ventilation openings. Install in accordance with the manufacturer’s instructions.
8)Do not install near any heat sources such as radiators, heat registers, stoves, or other apparatus (including amplifiers) that produce heat.
9)Do not defeat the safety purpose of the polarized or grounding-type plug. A polarized plug has two blades with one wider than the other. A grounding type plug has two blades and a third grounding prong. The wide blade or the third prong are provided for your safety. If the provided plug does not fit into your outlet, consult an electrician for replacement of the obsolete outlet.
10)Protect the power cord from being walked on or pinched particularly at plugs, extension cords, and the point at which they exit the unit.
11)Only use attachments/accessories specified by the manufacturer.
12)Use only with the cart, stand, tripod, bracket, or table specified by the manufacturer, or sold with the device. When a cart is used, use caution when moving the cart/ device combination to avoid injury from stumbling over it.
13)Unplug this device during lightning storms or when not used for long periods of time.
14)Refer all servicing to qualified service personnel. Servicing is required when the unit has been damaged in any way, such as power supply cord or plug is damaged, liquid has been spilled or objects have fallen into the device, the unit has been exposed to rain or moisture, does not operate normally, or has been dropped.
2
ULTRACURVE PRO DEQ2496
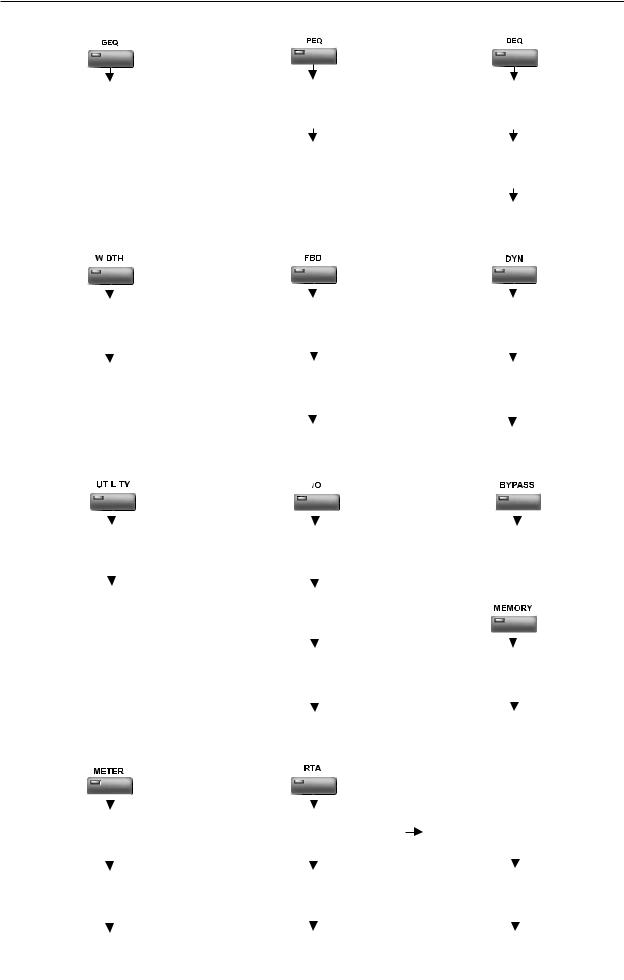
MENU STRUCTURE
|
|
|
|
|
|
|
|
|
|
|
|
|
|
|
|
|
|
|
|
|
|
|
|
|
|
|
|
|
|
|
|
|
|
|
|
|
|
|
|
|
|
|
|
|
|
|
|
|
|
|
|
|
|
|
|
|
|
|
|
|
|
|
|
|
|
|
|
|
|
|
|
|
|
|
|
|
|
|
|
|
|
|
|
|
|
|
|
|
|
|
|
|
|
|
|
|
|
|
|
|
|
|
|
|
|
|
|
|
|
|
|
|
|
|
|
|
|
|
|
|
|
|
|
|
|
|
|
|
|
|
|
|
|
|
|
|
|
|
|
|
|
|
|
|
|
|
|
|
|
|
|
|
|
|
|
|
|
|
|
|
|
|
|
|
|
|
|
|
|
|
|
|
|
|
|
|
|
|
|
|
|
|
|
|
|
|
|
|
|
|
|
|
|
|
|
|
|
|
|
|
|
|
|
|
|
|
|
|
|
|
|
|
|
|
|
|
|
|
|
|
|
|
|
|
|
|
|
|
|
|
|
|
|
|
|
|
|
|
|
|
|
|
|
|
|
MENU STRUCTURE |
3 |
||||
ULTRACURVE PRO DEQ2496
ULTRACURVE PRO
Ultra high-precision digital 24-bit/96 kHz EQ/RTA mastering processor
sUltra high-resolution processor for all EQ, RTA and dynamic applications, especially forDEQ2496PA and audiophile mastering
s4 concurrently selectable EQ modules (31-band graphic EQ, 10-band parametric EQ, Feedback Destroyer plus three Dynamic EQs per stereo channel)
sFlexible Compressor/Expander function with Peak Limiter per stereo channel as well as additional Stereo Imager and Stereo Delay for delay line applications
sUnique VPQ (Virtual Paragraphic EQ) option allows parametric control of graphic EQs
sUltra high-resolution 61-band real-time FFT Analyzer with additional auto EQ function for room and loudspeaker equalization
sMulti-functional level meters (peak/RMS, VU and SPL meter with dBA/dBC weighting via RTA mic input)
s64 user memories for complete setups and/or individual module configurations
sSeparate RTA mic/line input with phantom power, professional wordclock input and MIDI connections for full remote control, preset dumps and system updates
sUltra high-quality AKM® 24-bit/96 kHz A/D- and D/A converters (113 dB dynamic range)
sOpen architecture allowing future software updates via MIDI
sTwo high-performance 32/40-bit floating-point SHARC® digital signal processors for ultimate sonic resolution
sBalanced inputs and servo-balanced outputs with gold-plated XLR connectors, stereo aux output, AES/EBU and S/PDIF inputs and outputs (XLR and optical)
sInternal switch-mode power supply for maximum flexibility (100 - 240 V~), noise-free audio, superior transient response and lowest possible power consumption
sDesigned in Germany. Manufactured under ISO9000 certified management system
4
ULTRACURVE PRO DEQ2496
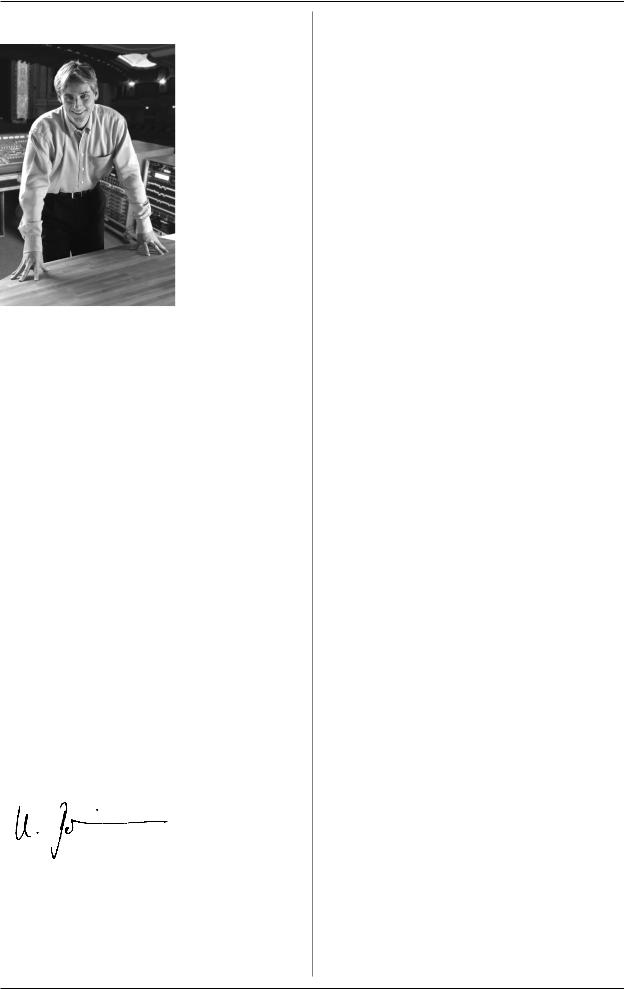
FOREWORD
Dear Customer,
welcome to the team of ULTRACURVE PROusers and thank you very much for expressing your confidence in us by purchasing the DEQ2496.
Writing this foreword for you gives me great pleasure, because it represents the culmination of many months of hard work delivered by our engineering team to achieve a very ambitious goal: to offer you a high-quality device whose flexibility makes it suitable for studio and live applications. The
task of designing our new ULTRACURVE PRO DEQ2496 certainly meant a great deal of responsibility which we assumed by focusing on you, the discerning user and musician. Meeting your expectations also meant a lot of work and night shifts. But it was fun, too. Developing a product usually brings a lot of people together, and what a great feeling it is when all who participated in such a project can be proud of what they’ve achieved.
It is our philosophy to share our enjoyment with you, because you are the most important member of the BEHRINGER team. With your highly competent suggestions for new products you’ve made a significant contribution to shaping our company and making it successful. In return, we guarantee you uncompromising quality as well as excellent technical and audio properties at an extremely reasonable price. All of this will enable you to give free rein to your creativity without being hampered by budget constraints.
We are often asked how we manage to produce such high-quality devices at such unbelievably low prices. The answer is quite simple: it’s you, our customers! Many satisfied customers mean large sales volumes enabling us to get better purchasing terms for components, etc. Isn’t it only fair to pass this benefit on to you? Because we know that your success is our success too!
I would like to thank all of you who have made the ULTRACURVE PRO possible. You have all made your own personal contributions, from the developers to the many other employees at this company, and to you, the BEHRINGER user.
My friends, it’s been worth the effort!
Thank you very much,
Uli Behringer
TABLE OF CONTENTS
1. INTRODUCTION ......................................................... |
6 |
||
1.1 |
Before you get started ................................................... |
6 |
|
|
1.1.1 |
Shipment ............................................................... |
6 |
|
1.1.2 |
Initial operation ...................................................... |
6 |
|
1.1.3 |
Warranty .............................................................. |
6 |
1.2 |
About this manual ........................................................... |
6 |
|
2. CONTROL ELEMENTS ............................................... |
6 |
|
2.1 |
Front panel ...................................................................... |
6 |
2.2 |
Rear panel ...................................................................... |
7 |
3. MENUSTRUCTURE AND EDITING ............................. |
8 |
|
3.1 |
General operation and display structures ..................... |
8 |
3.2 |
Equalizer modules .......................................................... |
8 |
|
3.2.1 GEQ menu ............................................................ |
8 |
|
3.2.2 PEQ menu ............................................................. |
8 |
|
3.2.3 DEQ menu ............................................................. |
9 |
|
3.2.4 FBD menu ........................................................... |
10 |
3.3 |
WIDTH menu ................................................................. |
11 |
3.4 |
DYN menu ..................................................................... |
11 |
|
3.4.1 LIMITER menu ..................................................... |
12 |
3.5 |
UTILITY menu ................................................................ |
12 |
3.6 |
I/O menu ........................................................................ |
13 |
3.7 |
BYPASS menu .............................................................. |
14 |
3.8 |
RTA menu (Real-Time Analyzer) .................................. |
14 |
|
3.8.1 AUTO EQ function (AEQ) ................................... |
15 |
3.9 |
MEMORY menu ............................................................. |
15 |
3.10 METER menu ............................................................... |
16 |
|
3.11 RTA/MIC input .............................................................. |
16 |
|
|
3.11.1Connecting a measurement microphone ........... |
16 |
|
3.11.2Connecting a line signal ..................................... |
16 |
4. APPLICATIONS ........................................................ |
17 |
|
4.1 |
Sum-signal equalizer for live applications ................... |
17 |
4.2 |
Equalizer in the monitor path ........................................ |
18 |
4.3 |
Using the ULTRACURVE PRO in the studio .................. |
18 |
4.4 |
Using the ULTRACURVE PRO as a delay unit ............. |
18 |
5. CONNECTIONS ........................................................ |
19 |
|
5.1 |
MIDI connections .......................................................... |
19 |
5.2 |
Analog connections ..................................................... |
19 |
5.3 |
Digital connections (AES/EBU and S/PDIF) .................. |
19 |
5.4 |
WORDCLOCK connection ............................................ |
20 |
6. OPERATINGSOFTWARE.......................................... |
20 |
|
7. SPECIFICATIONS ..................................................... |
20 |
|
7.1 |
MIDI implementation ....................................................... |
21 |
8. WARRANTY .............................................................. |
22 |
|
5
ULTRACURVE PRO DEQ2496
1. INTRODUCTION
Thank you very much for expressing your confidence in BEHRINGER products by purchasing the ULTRACURVE PRO DEQ2496, an extremely high-quality DSP-based digital audio processor with built-in 24-bit/96 kHz A/D and D/A converters, making it an ideal tool for both live and studio applications.
The ULTRACURVE PRO gives you a variety of EQs (graphic, parametric and dynamic) plus a real-time analyzer with Auto EQ function, dynamics processors such as compressor, expander and peak limiter and a complete set of analog and digital interface options.
With these and many more features the DEQ2496 is an absolutely all-purpose device for your recording or mastering studio and will definitely upgrade your live equipment.
+This manual first describes the terminology used, so that you can fully understand the DEQ2496 and its functions. Please read the manual carefully and keep it for future reference.
1.1Before you get started
1.1.1 Shipment
The ULTRACURVE PRO was carefully packed at the factory and the packaging is designed to protect the unit from rough handling. Nevertheless, we recommend that you carefully examine the packaging and its contents for any signs of physical damage which may have occurred during transit.
+If the unit is damaged, please do NOT return it to BEHRINGER, but notify your dealer and the shipping company immediately. Otherwise claims for damage or replacement may not be granted.
1.1.2 Initial operation
Be sure that there is enough space around the unit for cooling and, to avoid overheating, do not place the DEQ2496 on top of power amps or near radiators, etc.
+Blown fuses must be replaced by fuses of the same type and rating. Please refer to the “SPECIFICATIONS” for further details.
The mains connection is made using the enclosed power cord and a standard IEC receptacle. It meets all of the international safety certification requirements.
+Please make sure that all units have a proper ground connection. For your own safety, never remove or disable the ground conductor from the unit or the AC power cord.
1.1.3 Warranty
The DEQ2496’s serial number is located on its top cover. Please take the time to fill in and return the warranty card within 14 days after the date of purchase, so as to benefit from our extended warranty. Or register online at www.behringer.com.
1.2 About this manual
This manual has been designed so that you can get a clear overview of all control elements and at the same time find detailed information on how to use them. If you need more information on specific topics, please visit our web site at www.behringer.com, where we explain effects processing and power amp applications.
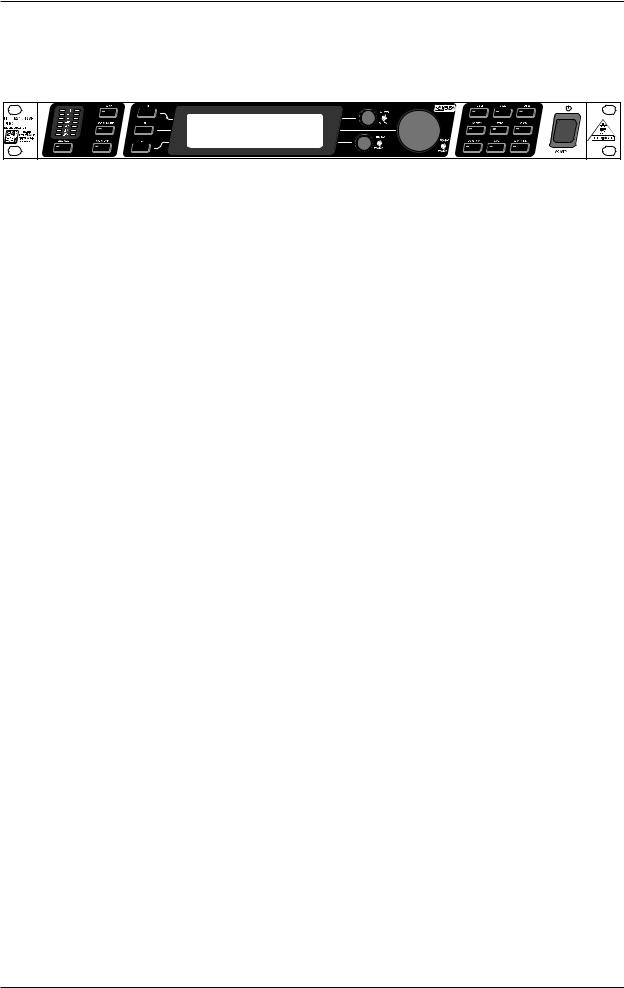
2.CONTROL ELEMENTS
2.1Front panel
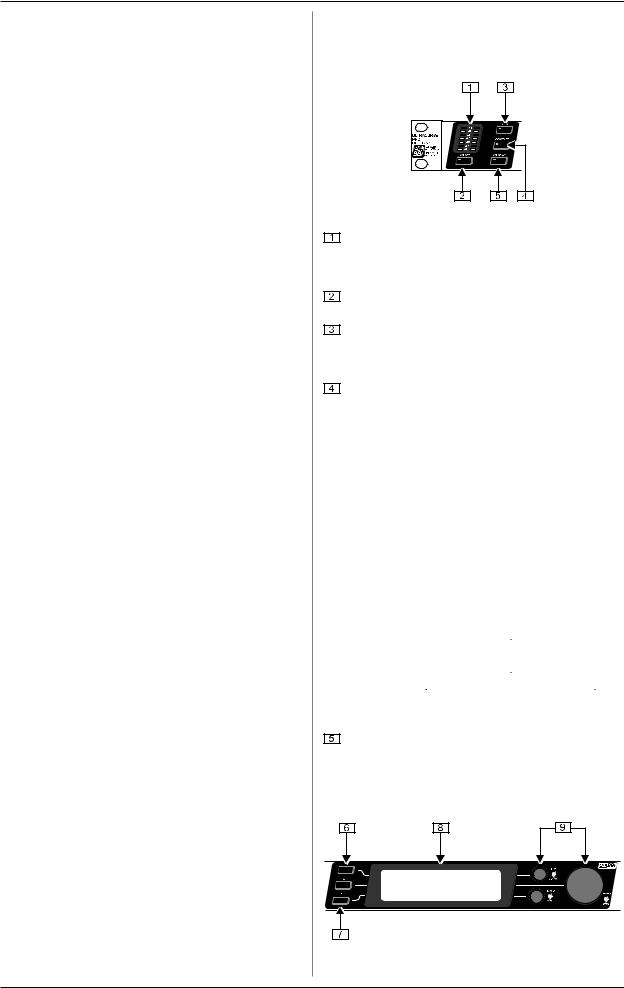
Fig. 2.1: LED meter and menu keys
The LED METER indicates the DEQ2496’s input signal. The top CLIP LED lights up as soon as the input signal level is too high or the peak limiter in the Dynamics menu (see chapter 3.4) has been activated.
Use the METER key to select the METER menu (see chapter 3.10).
The DEQ2496 features a built-in real-time analyzer displaying the entire frequency range. Use the RTA key to select the corresponding menu and adjust the various settings (see chapter 3.8).
Depending on the currently selected menu, the COMPARE key allows you to compare either complete presets or individual modules. The following table shows how the COMPARE key works in each module:
|
COMPARE |
COMPARE |
|
|
(complete |
||
|
(module only) |
||
|
preset) |
|
|
|
|
|
|
GEQ |
|
|
X |
PEQ |
|
|
X |
DEQ |
|
|
X |
FBD |
X |
|
|
WIDTH |
|
|
X |
DYN |
|
|
X |
UTIL |
X |
|
|
I/O |
|
|
X |
BYPASS |
X |
|
|
RTA |
|
not active |
|
MEMORY |
X |
|
|
METER |
|
not active |
|
|
|
|
|
Tab. 2.1: COMPARE function for individual ULTRACURVE PRO modules
Press the MEMORY key to select the MEMORY menu (see chapter 3.9). Here, you can save or recall complete presets or individual modules from one preset (e.g. GEQ, PEQ etc.). The MEMORY LED lights up as soon as the parameter values of the preset selected in the MEMORY menu differ from currently active settings.
Fig. 2.2: Keys, display and rotary controls
6 |
2. CONTROL ELEMENTS |

ULTRACURVE PRO DEQ2496
The PAGE key allows you to select the various pages within one menu.
The functions performed by the keys A and B depend on the selected menu and are indicated in the display.
This is the LC display of your ULTRACURVE PRO.
The DEQ2496 has three DATA WHEELS, which can be used to select and edit various parameters—again depending on the currently selected menu. Often, they perform a dual function, i.e. you can edit by turning and pressing a data wheel. Pressing the data wheels also changes the scaling of many parameters (step width) or confirms/resets previously made entries.
Fig. 2.3: The menu keys of the DEQ2496
With the menu keys you can select the individual menus of the various modules. They can also be used to select specific pages from these menus (like PAGE key). Each of these keys has a built-in LED, which lights up when the corresponding module starts modifying the sound. When the DEQ2496 receives MIDI data, the LED of the UTILITY key lights up briefly. Keep this key pressed for about 1 s to bypass active modules or re-activate disabled ones. This function refers only to those modules which can be edited in the BYPASS menu (see chapter 3.7).
Use the POWER switch to put the DEQ2496 into operation. This switch should be set to “Off” before you connect the unit to the mains.
2.2 Rear panel
Fig. 2.4: Mains, MIDI and wordclock connectors
The FUSE HOLDER holds the mains fuse of the DEQ2496. Blown fuses must be replaced by fuses of the same type and rating. Please see the “SPECIFICATIONS” for further details.
The mains connection is made using the enclosed power cord and a standard IEC receptacle.
The MIDI jacks enable the DEQ2496 to communicate with a computer or other MIDI equipment. Incoming MIDI data are received on the MIDI IN, outgoing MIDI data are sent via the MIDI OUT. Received MIDI data are also present at the MIDI THRU jack, so as to pass them on unmodified to other devices.
Use the WORDCLOCK input to synchronize your DEQ2496 to external equipment via a wordclock signal. This connector is on a BNC coaxial jack.
Fig. 2.5: Digital interfaces and RTA microphone input
Your DEQ2496 features a digital optical interface for the transmission/reception of data in both AES/EBU and S/PDIF formats.
The digital AES/EBU interface (XLR connectors) also sends/receives AES/EBU or S/PDIF signals.
The AUX OUT phone jack is an additional stereo output, which allows you to tap the audio signal present at the digital outputs in analog form.
The RTA/MIC IN XLR connector can be used to connect a measurement microphone providing an input signal for the real-time analyzer or SPL meter. This connector has a switchable +15 V phantom power supply for condenser microphones and can be set to microphone or line sensitivity (see chapter 3.11).
The MAX switch raises the maximum level present at the MAIN inputs/outputs from +12 dBu to +22 dBu.
Fig. 2.6: Input and output connectors
These balanced XLR connectors provide the analog output signal of the DEQ2496.
These balanced XLR inputs are used to connect analog input signals.
2. CONTROL ELEMENTS |
7 |
 Loading...