


MD475LL-A
Table of contents
 Loading...
iPod nano
User Guide

Contents
4 Chapter 1: iPod nano at a Glance
4 iPod nano overview
5 Accessories
5 The Home screen
6 Status icons
7 Chapter 2: Getting Started
7 Setting up iPod nano
9 Chapter 3: Basics
9 Using Multi-Touch
11 Setting preferences
13 Connecting and disconnecting iPod nano
13 About the battery
15 Setting up iTunes syncing
17 Chapter 4: Music and Other Audio
17 Playing music
20 Playing podcasts, audiobooks, and iTunes U collections
22 Creating playlists on iPod nano
25 Controlling the volume
27 Chapter 5: Videos
27 Adding videos to iPod nano
27 Watching videos on iPod nano
28 Watching rented movies
29 Chapter 6: FM Radio
29 Listening to FM radio
30 Pausing live radio
31 Finding local stations and setting favorites
32 Tagging songs for review and purchase
32 Setting your radio region
34 Chapter 7: Fitness
34 Setting Fitness preferences
35 Counting steps
36 Creating workouts with music
37 Calibrating iPod nano
38 Viewing and managing tness data
2

39 Chapter 8: Photos
39 Viewing photos on iPod nano
41 Syncing photos
43 Chapter 9: Clock
43 Customizing the clock
44 Using the stopwatch
44 Using the timer
46 Chapter 10: Voice Memos
46 Recording voice memos
46 Listening to recordings
47 Managing recordings
48 Chapter 11: Accessibility
48 Universal Access features
49 Using VoiceOver
50 Setting Mono Audio
51 Inverting the screen colors
51 Quickly activating accessibility features
52 Chapter 12: EarPods and Bluetooth accessories
52 Using the Apple EarPods
53 Using the Apple EarPods with Remote and Mic
54 Connecting to Bluetooth accessories
55 Switching between audio output devices
56 Chapter 13: Tips and Troubleshooting
56 General suggestions
60 Updating and restoring iPod software
61 Chapter 14: Safety and Handling
61 Important safety information
63 Important handling information
64 Chapter 15: Learning More, Service, and Support
65 Regulatory Compliance Information
Contents 3
1
4
iPod nano at a Glance
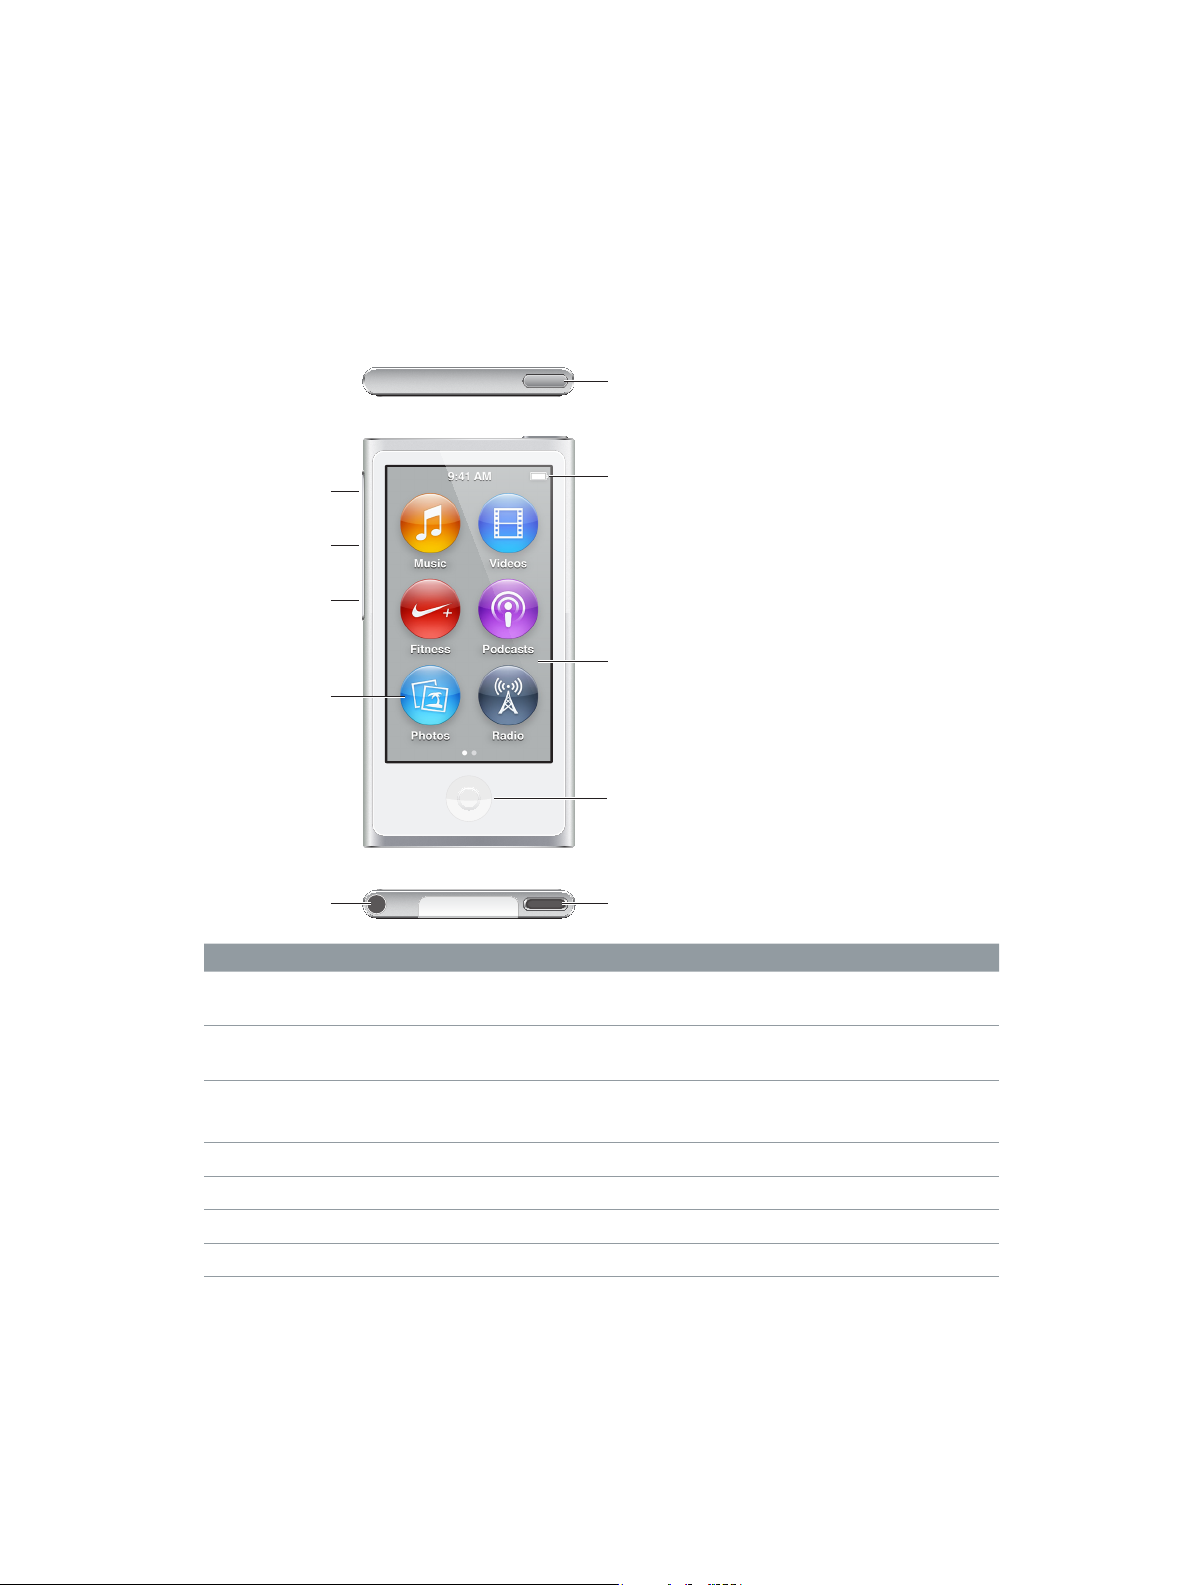
iPod nano overview
Lightning connector
Sleep/Wake
Status bar
Multi-Touch screen
Home button
Menu and app icons
Headphone jack
Volume Down
Volume Up
Play/Pause
To Do this
Turn the screen on or o while
you listen to music or other audio
Press the Sleep/Wake button.
Turn iPod nano o completely, or
to turn it back on
Hold down the Sleep/Wake button for a few seconds.
Adjust the volume while listening
to songs or other media
Press the Volume Up or Volume Down button.
These buttons also control the volume for alerts and other sounds.
Play or pause audio Press the Play/Pause button.
Skip to the next audio track Press the Play/Pause button twice.
Skip to the previous audio track Press the Play/Pause button three times.
Return to the Home screen Press the Home button.
Chapter 1 iPod nano at a Glance 5
Accessories
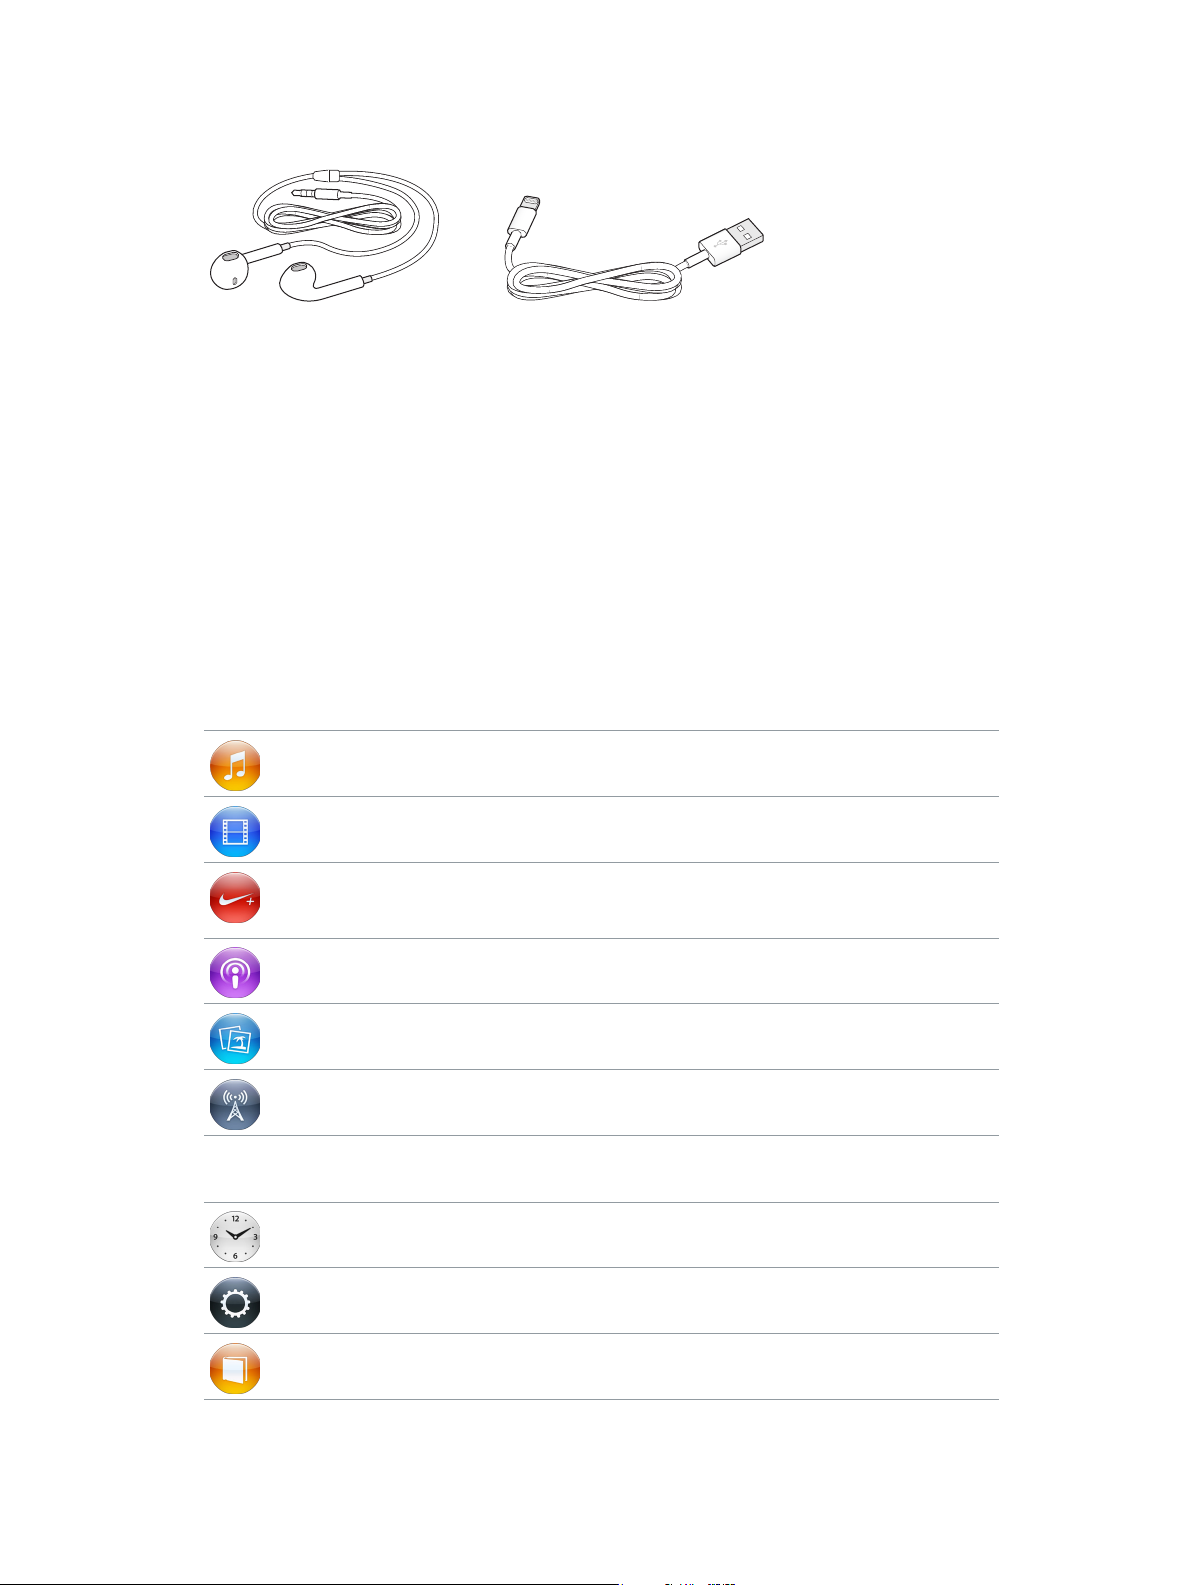
The following accessories come with iPod nano:
Lightning to USB Cable
Apple EarPods
Use the Lightning to USB Cable to connect iPod nano to your computer, sync content, and charge
the battery. You can also use the cable with the Apple USB Power Adapter (sold separately).
Use the Apple EarPods to listen to music, audiobooks, and podcasts. The EarPods also double as
an antenna for listening to radio broadcasts.
For information about using accessories with iPod nano, including optional headsets and
Bluetooth® devices, see Chapter 12 , EarPods and Bluetooth accessories, on page 52.
The Home screen
When you turn on iPod nano, you see the Home screen. Tap an icon on the Home screen to open
it, then use gestures to navigate (see Using Multi-Touch on page 9).
You’ll see these Home screen icons when you rst turn on iPod nano:
Music Provides quick access to your music and other audio content
organized by playlists, artists, songs, and more.
Videos Provides quick access to your movies and videos, organized by type.
Fitness Opens the Fitness feature, where you can count your steps for
walks or runs and track time, distance, pace, and calories burned
for workouts.
Podcasts Lists the podcasts synced from your iTunes library.
Photos Displays the photos synced from your computer.
Radio Opens the FM radio tuner, if EarPods or headphones are connected
to iPod nano.
Swipe left to see these additional icons on a second screen:
Clock Opens the clock, stopwatch, and timer.
Settings Opens settings for iPod nano and many of its features.
Audiobooks Lists audiobooks synced from your iTunes library (it doesn’t appear if
you have no audiobooks).
Chapter 1 iPod nano at a Glance 6
iTunes U Lists iTunes U collections synced from your iTunes library (it doesn’t
appear if you have no collections).
Voice Memos Opens the controls for recording and managing voice memos. It’s
visible only if a microphone is connected to iPod nano, or if there are
voice memo recordings on iPod nano.
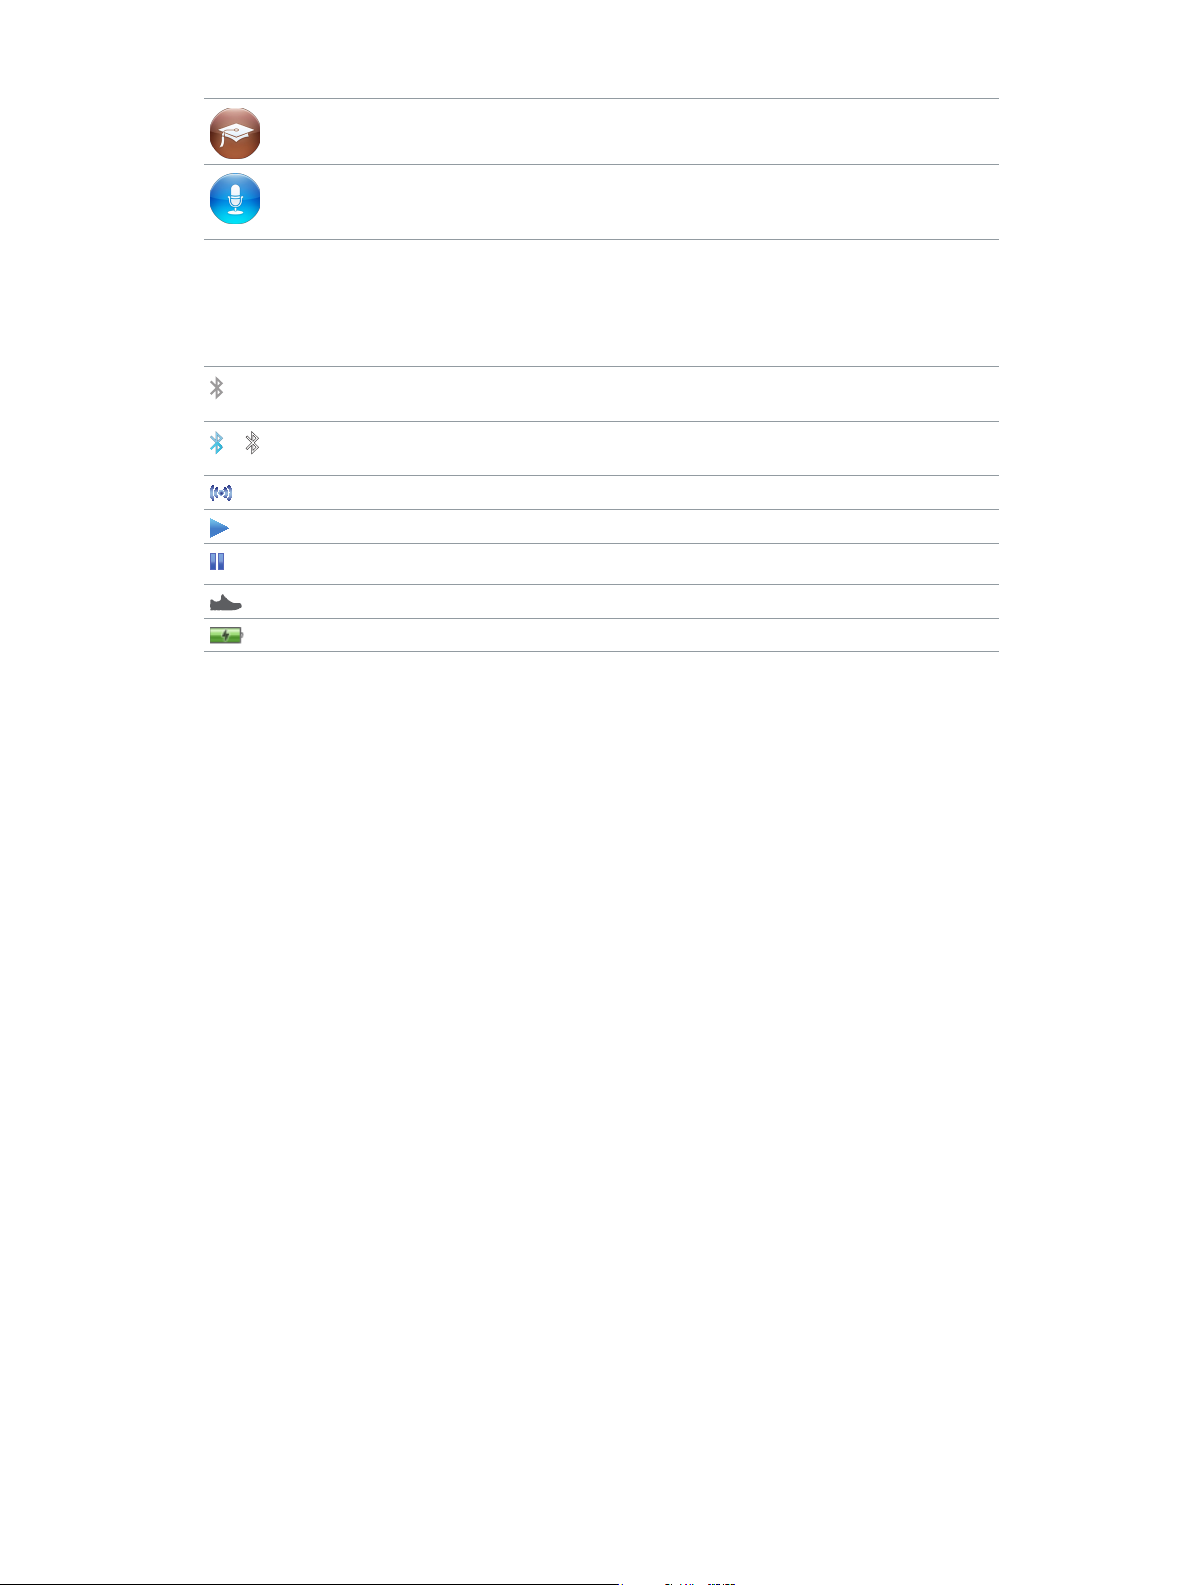
Status icons
The icons in the status bar at the top of the screen give information about iPod nano:
Bluetooth is turned on but not paired or connected with a Bluetooth device, or the paired
device is out of range or turned o.
or
Bluetooth is turned on and connected with a Bluetooth device. The color depends on the
color of the status bar.
The radio is playing.
A song, podcast, audiobook, or iTunes U episode is playing.
A song, podcast, audiobook, iTunes U episode, or radio broadcast is paused.
Steps are being counted.
Shows the battery level or charging status.
2
7
Getting Started
·
WARNING: To avoid injury, read Important safety information on page 61 before using
iPod nano.
Setting up iPod nano
To get started, set up iPod nano using iTunes on your computer. During setup, you create an
iTunes Store account or use an existing account. (The iTunes Store may not be available in all
countries or regions.) iTunes also displays and records the serial number of your iPod nano when
it’s connected, in case you need it.
Set up iPod nano:
1 Download and install the latest version of iTunes from www.itunes.com/download. You need
iTunes 10.7 or later.
2 Connect iPod nano to a high-power USB 2.0 port or USB 3.0 port on your Mac or PC, using the
cable that came with iPod nano.
3 Follow the onscreen instructions in iTunes to register iPod nano and sync iPod nano with songs
from your iTunes library.
If you need help using the iPod nano Setup Assistant, see Setting up iTunes syncing on page 15.
When iPod nano is syncing with your computer, iPod nano shows “Sync in Progress.” When
syncing is complete, iTunes shows “iPod sync is complete.”
4 For best results, the rst time you use iPod nano, let it charge for about three hours or until the
battery icon shows that the battery is fully charged.
If iPod nano is connected to the USB port, the battery will not charge if the computer is turned
o or asleep.
You can disconnect iPod nano before the battery is fully charged, and you can sync while the
battery charges. For more information, see About the battery on page 13.
5 Disconnect the cable from iPod nano when you nish.

Chapter 2 Getting Started 8
Don’t disconnect iPod nano if you see the “Connected” or “Synchronizing” message. To avoid
damaging les on iPod nano, eject iPod nano before disconnecting the cable if you see one of
these messages.
For more information about safely disconnecting iPod nano, see Disconnecting iPod nano from
your computer on page 13.
3
9
Basics
You control iPod nano with quick gestures on the Multi-Touch screen, with buttons on the
top and side of iPod nano, and with controls on compatible accessories. You can customize
iPod nano with preference settings, and sync with your computer using iTunes. Learn how
to properly connect and disconnect iPod nano, and how to charge the battery and conserve
battery power.
Using Multi-Touch
The Multi-Touch screen and simple nger gestures make it easy to use iPod nano.
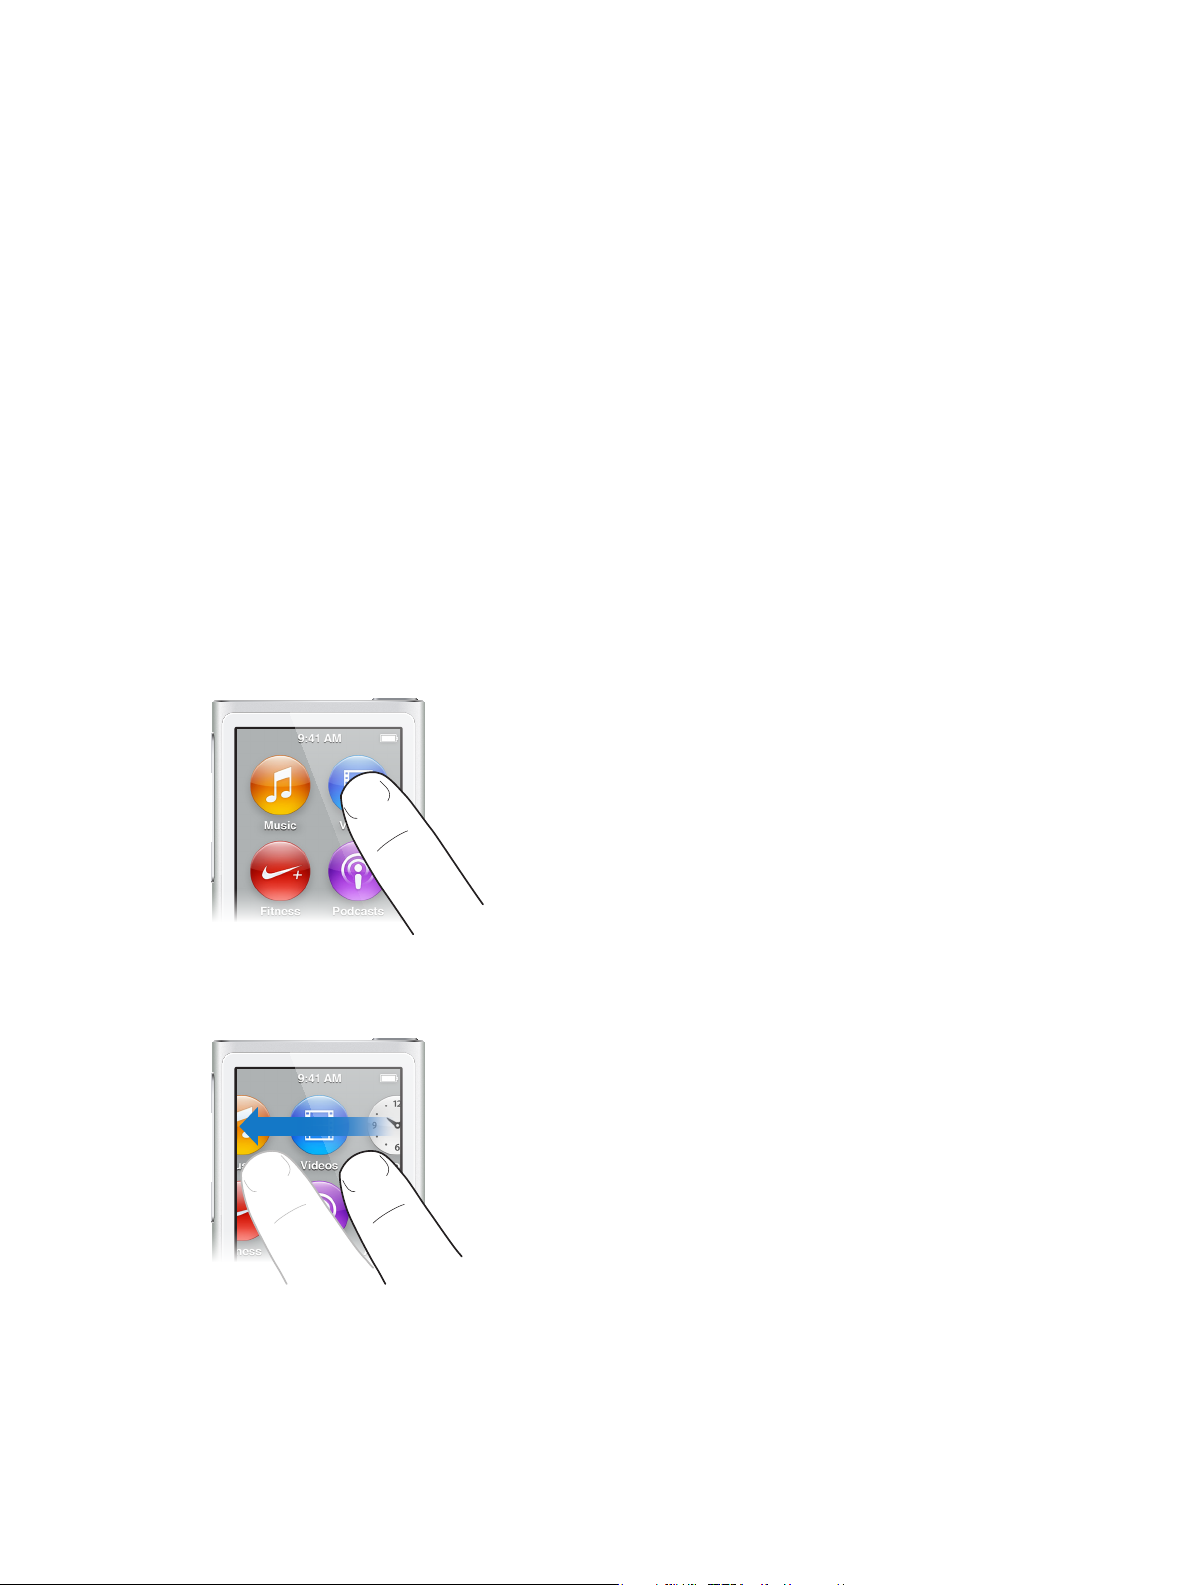
Tap and double-tap
Tap an icon to open it, or to select an item in a menu or list. You can tap a photo twice quickly
to zoom in, then double-tap again to quickly zoom out. When watching a video, double-tap to
change how the video ts the screen.
Swipe
Swipe sideways to move to the next or previous screen.
Chapter 3 Basics 10
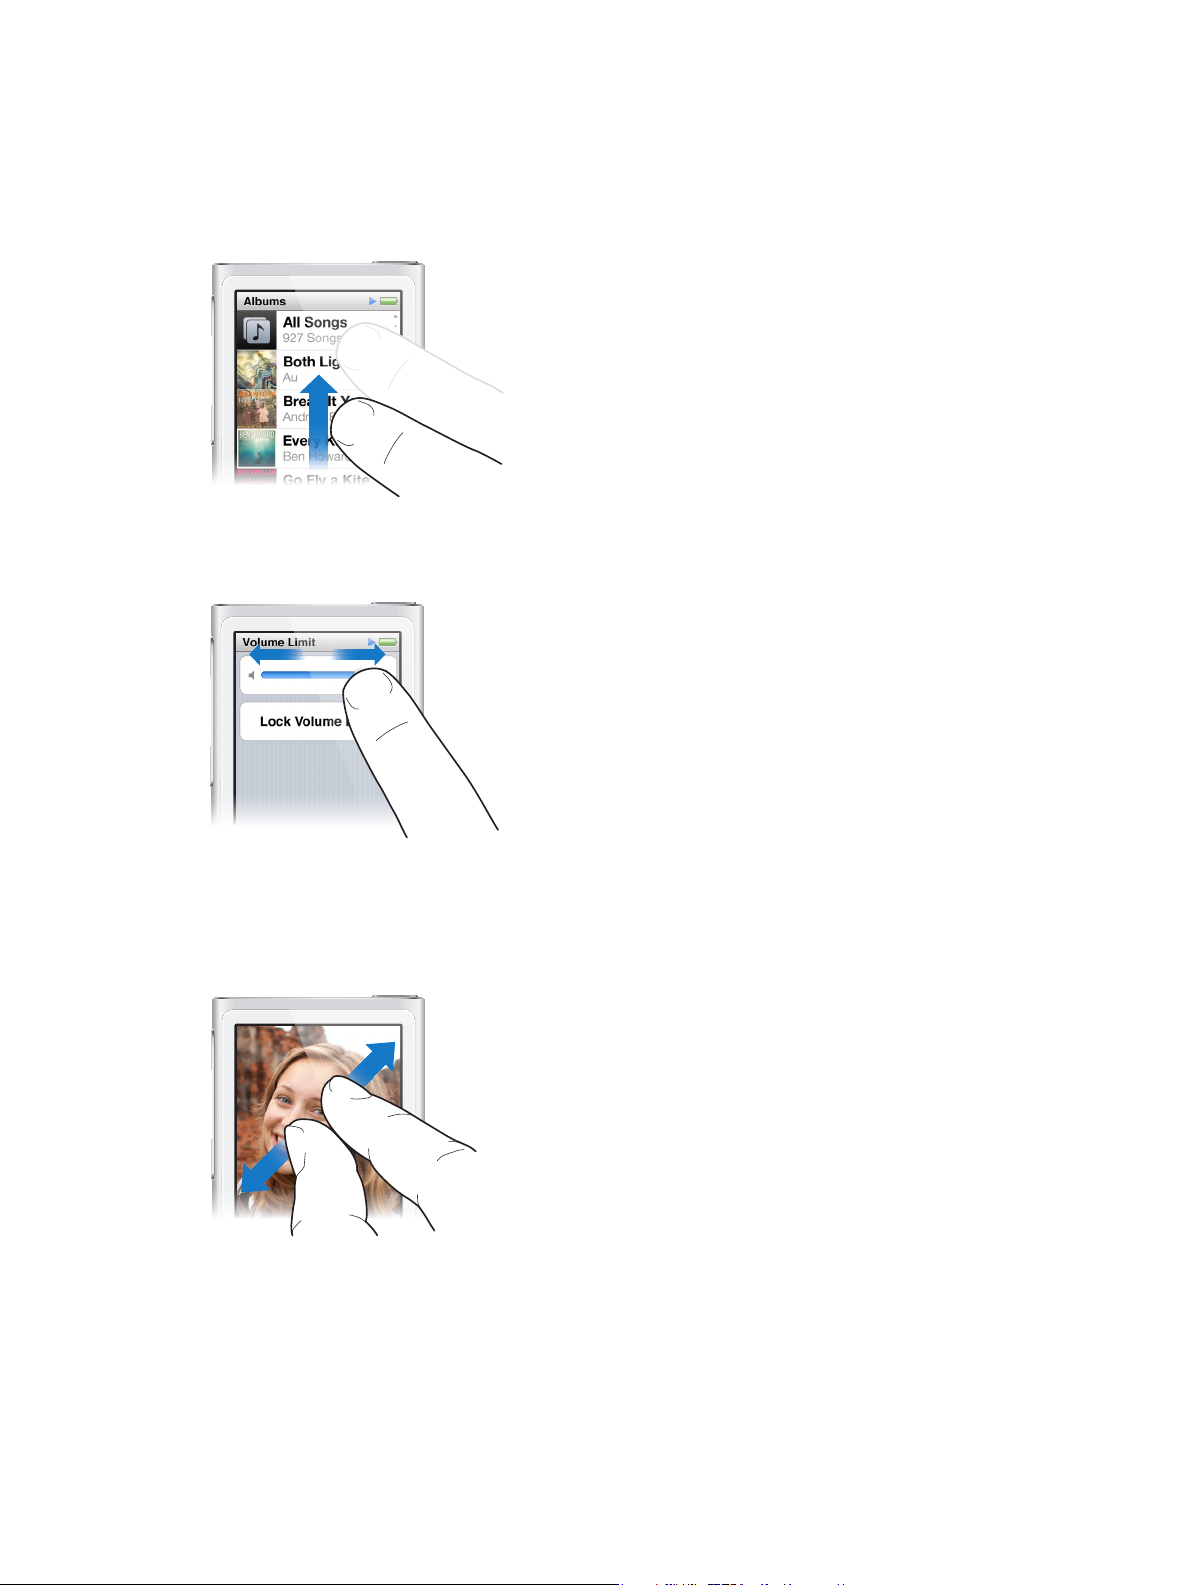
Flick
Flick your nger quickly up or down to scroll rapidly. You can wait for scrolling to stop, or
touch anywhere on the screen to stop it immediately. Touching the screen won’t choose or
activate anything.
In some lists, such as Playlists, you can ick down to show editing controls at the top.
Drag
Drag over scrubber bars or sliders to move their controls.
Zoom in or out
When viewing photos, you can zoom in or out gradually. Pinch your ngers apart to make
the photo grow larger, or pinch your ngers together to make the photo smaller. You can also
double-tap to zoom to the maximum size, then double-tap again to zoom all the way out.

Chapter 3 Basics 11
Here are more ways to control iPod nano using gestures and the iPod nano buttons:
Turn iPod nano o completely, or
turn it on again
Hold down the Sleep/Wake button for several seconds to turn iPod nano
o completely. Any audio that’s playing is turned o. To turn iPod nano
back on after turning it o this way, hold down the Sleep/Wake button for
a few seconds.
Wake iPod nano from sleep Press the Sleep/Wake button.
Turn o the screen Press the Sleep/Wake button. Music or other audio that’s playing
continues to play.
Turn on the backlight Tap the screen if the backlight is dimmed.
Reset iPod nano
(if it isn’t responding)
Press and hold the Sleep/Wake button and the Home button for
six seconds, until the screen goes dark. The Apple logo appears after a
few seconds, and then the Home screen.
Choose an item Tap the item.
Go to the previous screen Swipe right.
Go to the next screen
(if available)
Swipe left.
Go to the top of a list Tap the status bar at the top of the screen.
See all of a song, artist, or
album name
Swipe lightly across the name.
Go directly to the Home screen Press the Home button
.
Go directly to the Now Playing
screen
Press the Home button twice.
Setting preferences
You can customize the iPod nano screen, change how you view the date and time, turn on
Bluetooth, and set other preferences in Settings. Settings is also where you set your preferences
for enjoying music, videos, photos, and radio.
Open Settings for iPod nano:
m Swipe left on the Home screen, then tap Settings.
Getting information about iPod nano
You can get these details about your iPod nano in Settings > General > About:
•
Capacity and amount of space available
•
Number of songs, photos, and videos on iPod nano
•
Serial number, model, and software version
•
Bluetooth address
•
Copyright, regulatory, and legal information

Chapter 3 Basics 12
General settings
Tap Settings > General to see these preferences:
Brightness Adjust the screen brightness. Set a lower brightness to use less
battery power.
Wallpaper Set the background image for the Home screen. Tap a pattern to see how
it looks onscreen, then tap Cancel or Set.
Date & Time Set the date, time, and time zone. Change the time display to a 24-hour
clock. Show the clock on waking. Choose a clock face (see Customizing
the clock
on page 43).
Language Set the language for iPod nano.
Accessibility Turn on VoiceOver and mono audio. Invert the screen colors. Set a
shortcut for switching accessibility features on and o.
For information about accessibility features, see Universal Access
features
on page 48.
Music settings
Tap Settings > Music to set these preferences:
Shake to Shue Turn o or on the ability to give iPod nano a quick shake to skip to a
random song.
Sound Check Automatically adjust the volume of songs, so they play at the same
relative volume level.
EQ Choose an equalizer setting.
Volume Limit Set a maximum volume limit on iPod nano, and assign a passcode to
prevent the setting from being changed without your knowledge.
Audio Crossfade Automatically fade out at the end and fade in at the beginning of
each song.
Group Compilations Group together songs from compilations. Compilations are shown as
subcategories under Artists and specic Genres, in Music.
Settings for videos, photos, and radio
You can set preferences in Settings for how you watch videos, listen to radio, and view photos.
For more information, see:
•
Chapter 5, Videos, on page 27.
•
Chapter 6, FM Radio, on page 29.
•
Chapter 8, Photos, on page 39.
Resetting preferences
You can reset iPod nano to its default settings without aecting your synced content.
Reset all settings:
1 On the Home screen, tap Settings.
2 Tap Reset Settings.
3 Tap Reset, or tap Cancel if you change your mind.
4 Tap your language, then tap Done.

Chapter 3 Basics 13
Connecting and disconnecting iPod nano
You connect iPod nano to your computer to sync les and charge the iPod nano battery. You can
sync songs and charge the battery at the same time.
Important: The battery doesn’t charge while your computer is in sleep or standby mode.
Connecting iPod nano to your computer
iTunes syncs songs on iPod nano automatically when you connect it to your computer, unless
you select other sync settings in iTunes.
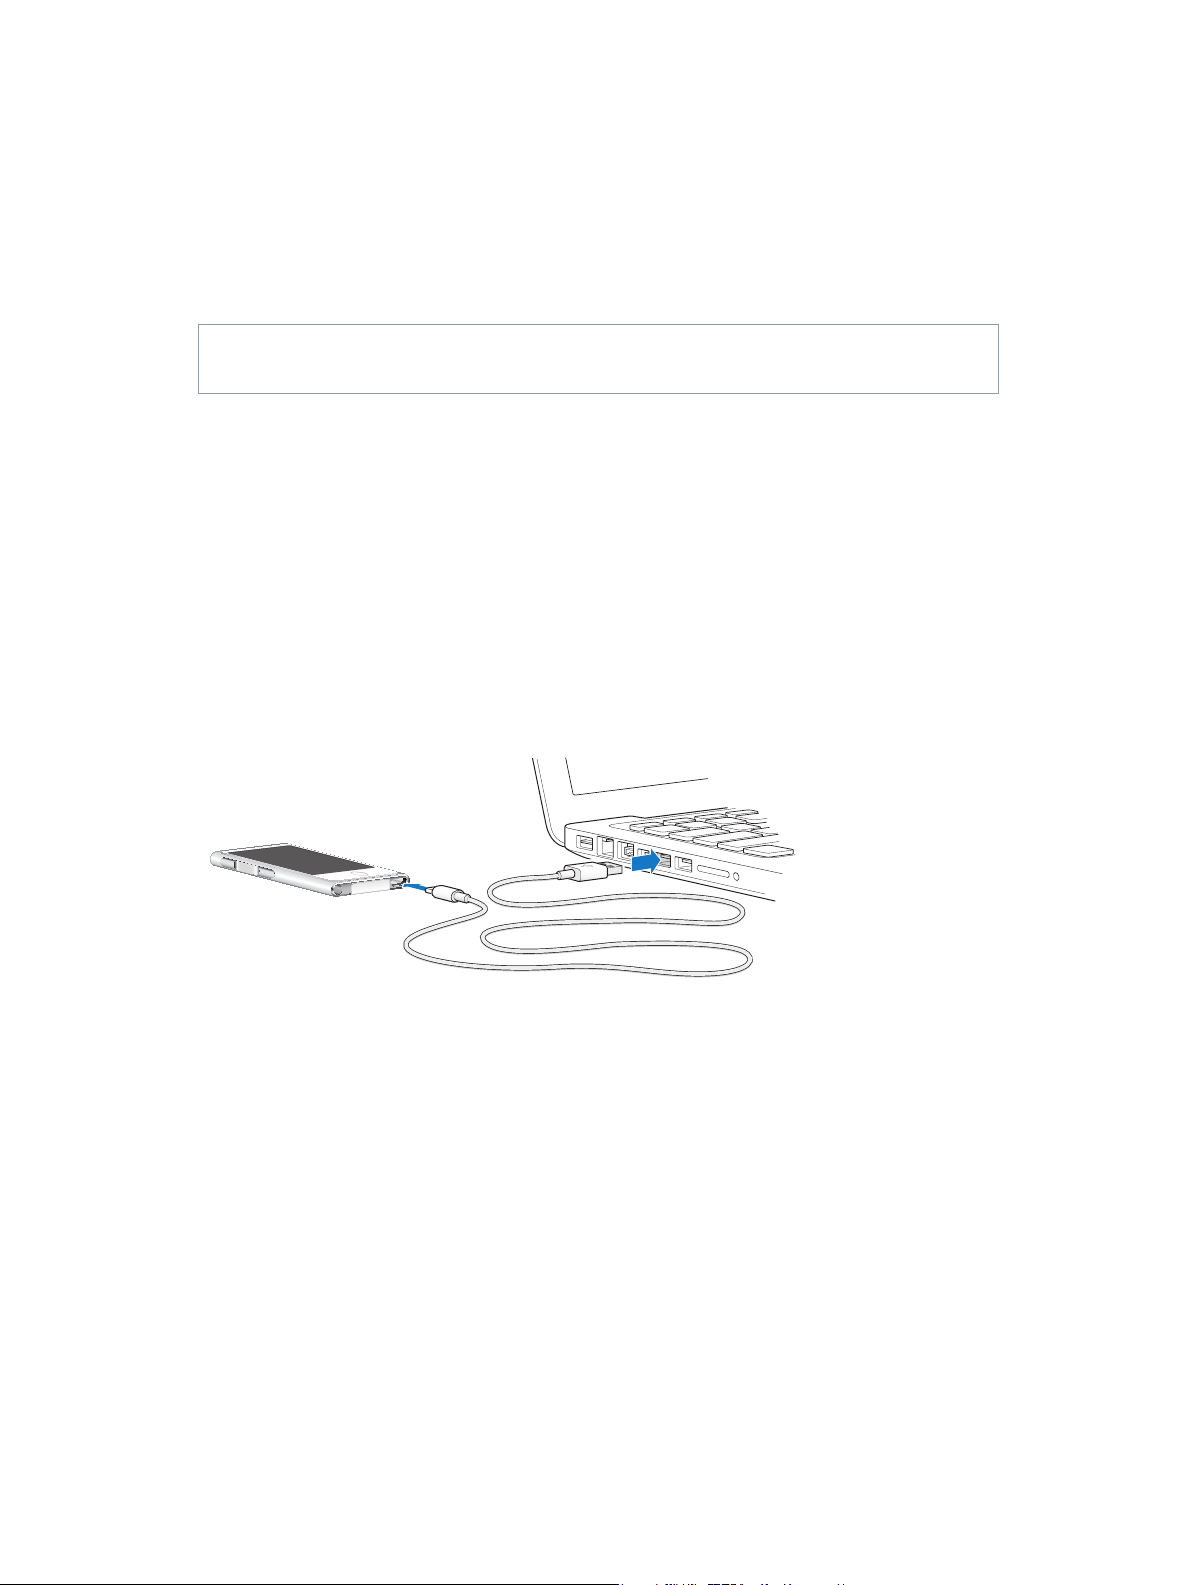
Connect iPod nano to your computer:
m Connect the included Lightning to USB Cable to a USB 3.0 port or high-power USB 2.0 port on
your computer. Connect the other end to iPod nano.
The USB port on most keyboards doesn’t provide enough power to charge iPod nano.
Disconnecting iPod nano from your computer
If the backlight is o, press the Sleep/Wake button to turn on the backlight, so you can see if it’s
safe to disconnect.
Disconnect iPod nano:
m Wait until you see the Home screen, or a message that says it’s OK to disconnect, then disconnect
the cable from iPod nano.
Don’t disconnect iPod nano if you see the “Connected” or “Synchronizing” message. To avoid
damaging les on iPod nano, you must eject iPod nano before disconnecting when you see
these messages.
Eject iPod nano:
m In iTunes, choose Controls > Eject Disk, or click the Eject button next to iPod nano.
m If you’re using a Mac, you can drag the iPod nano icon on the desktop to the Trash.
m If you’re using a Windows PC, you can eject iPod nano in My Computer, or by clicking the Safely
Remove Hardware icon in the Windows system tray, then selecting iPod nano.
If you accidentally disconnect iPod nano without ejecting it, reconnect iPod nano to your
computer and sync again.
About the battery
WARNING: For important safety information about the battery and charging iPod nano, see
Important safety information on page 61.
iPod nano has an internal, non–user-replaceable battery. For best results, the rst time you use
iPod nano, let it charge for about three hours or until the battery icon shows that the battery is
fully charged.
The iPod nano battery is 80-percent charged in about one and a half hours, and fully charged
in about three hours. If you charge iPod nano while adding les, playing music, listening to the
radio, or viewing a slideshow, it might take longer.
Chapter 3 Basics 14
Charging the battery
You can charge the iPod nano battery by connecting iPod nano to your computer, or by using
the Apple USB Adapter (available separately).
Charge the battery using your computer:
m Connect iPod nano to a USB 3.0 port or high-powered USB 2.0 port on your computer. The
computer must be turned on and not in sleep.
Important: If a “Connect to Power” message appears on the iPod nano screen, the battery needs
to be charged before iPod nano can communicate with your computer. See If iPod nano displays
a “Connect to Power” message on page 57.
If you want to charge iPod nano when you’re away from your computer, you can purchase the
Apple USB Power Adapter.
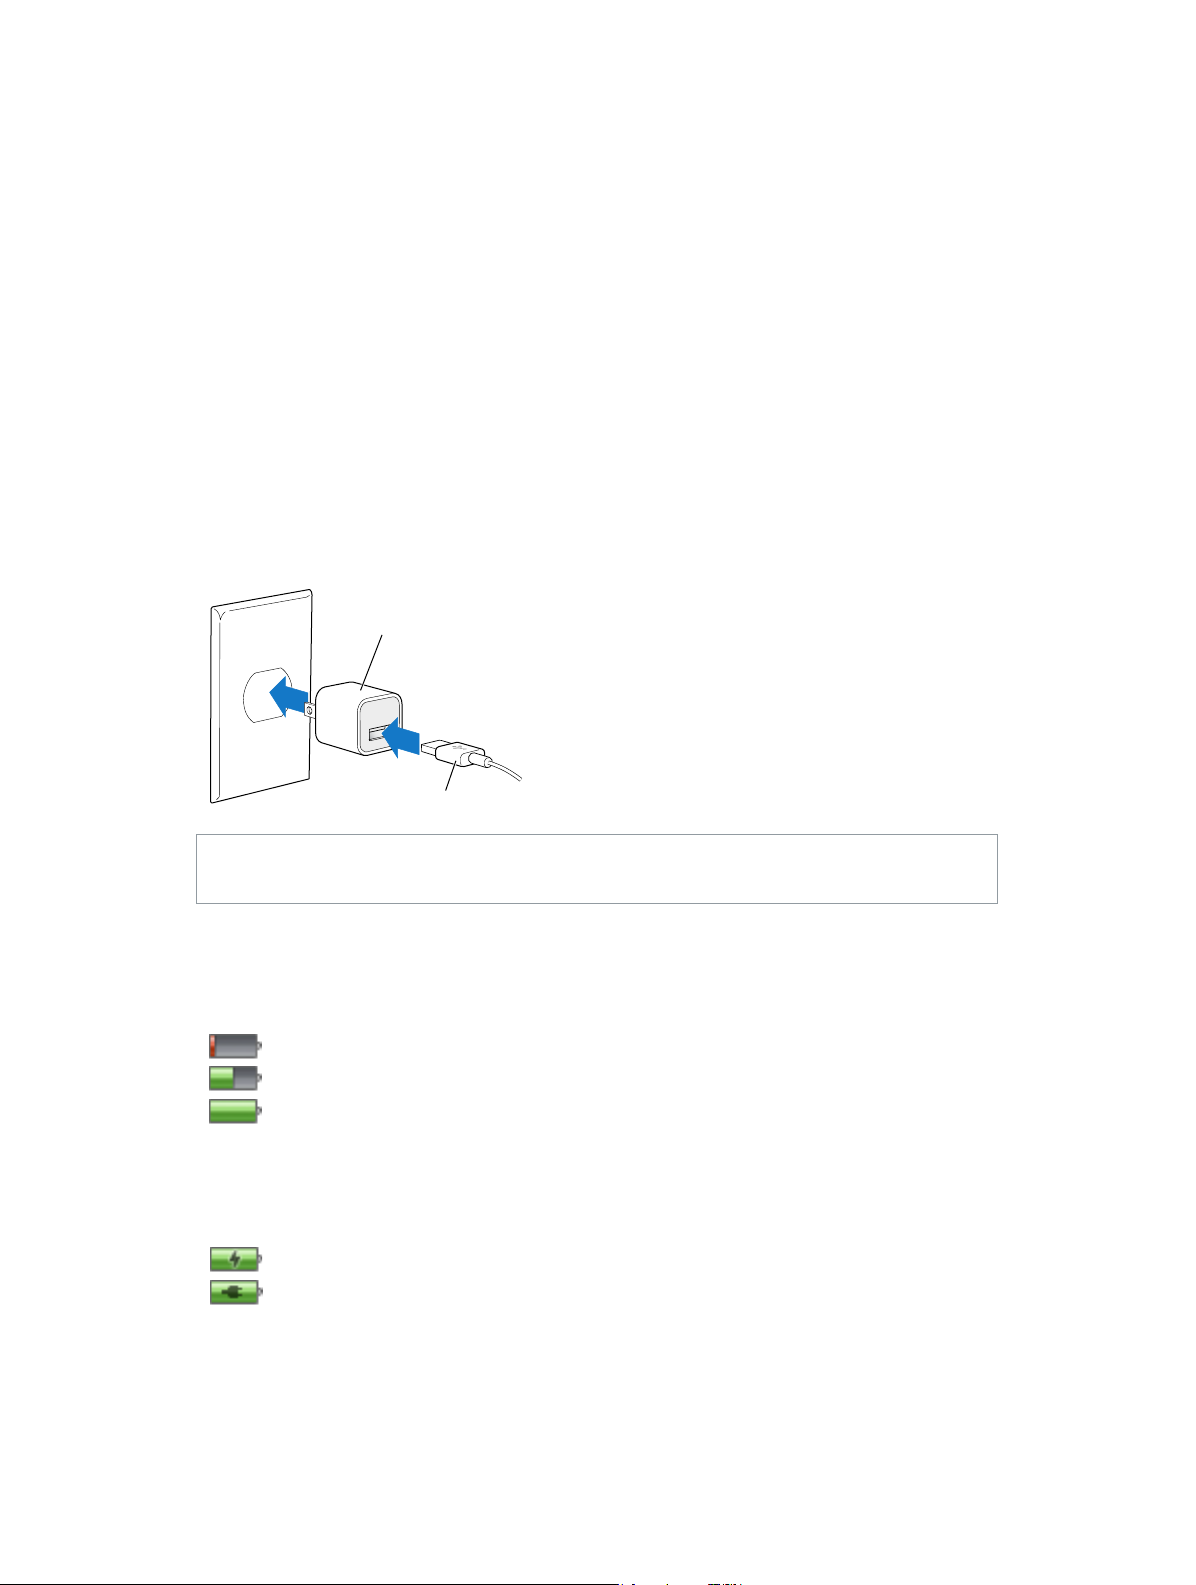
Charge the battery using the Apple USB Power Adapter:
1 Connect the Lightning to USB Cable to the Apple USB Power Adapter.
2 Connect the other end of the Lightning to USB Cable to iPod nano.
3 Plug the Apple USB Power Adapter into a working electrical outlet.
Apple USB Power Adapter
(your adapter may look different)
Lightning to USB Cable
WARNING: Make sure the power adapter is fully assembled before plugging it into an
electrical outlet.
Understanding battery states
When iPod nano isn’t connected to a power source, a battery icon in the upper-right corner of
the iPod nano screen shows approximately how much charge is left.
Battery less than 20% charged
Battery about halfway charged
Battery fully charged
When iPod nano is connected to a power source, the battery icon changes to show that
the battery is charging or fully charged. You can disconnect and use iPod nano before it’s
fully charged.
Battery charging (lightning bolt)
Battery fully charged (plug)
Note: Rechargeable batteries have a limited number of charge cycles and might eventually need
to be replaced by an Apple Authorized Service Provider. Battery life and number of charge cycles
vary by use and settings. For information, go to www.apple.com/batteries.

Chapter 3 Basics 15
Conserving power
iPod nano intelligently manages battery life while you listen. To save power, the iPod nano screen
dims if you don’t touch it for twenty seconds, and then turns o. To turn the screen on or o
again, press the Sleep/Wake button.
When there’s no activity on iPod nano (no audio or video is playing and no motion is detected if
steps are being counted), it turns o automatically. To turn iPod nano back on when it turns o
this way, press the Sleep/Wake button.
You can also turn o iPod nano completely by holding down the Sleep/Wake button for a few
seconds. When you turn iPod nano o this way, hold down the Sleep/Wake button for a few
seconds to turn it back on.
Turning iPod nano o:
•
Stops music or other audio that’s playing
•
Clears paused radio
•
Stops a slideshow if one is playing
•
Stops playing video if one is playing
•
Saves a voice memo if one is being recorded
•
Stops counting steps
•
Stops and saves Nike+ workout data
While iPod nano is turned o, you won’t hear any alarm if a timer expires. When you turn
iPod nano on again, alarms that haven’t expired will occur as scheduled.
If you’re not connected to or using a Bluetooth device, turn o Bluetooth in Settings > Bluetooth
to conserve power.
Setting up iTunes syncing
iTunes is the free software application you use to sync music, audiobooks, podcasts, photos,
videos, and iTunes U collections between your computer and iPod nano, and to send workouts
to the Nike+ website. You need iTunes 10.7 or later to use iPod nano features.
You can preview and download content from the iTunes Store (available in selected countries)
to iTunes on your computer. To learn about iTunes and the iTunes Store, open iTunes and choose
Help > iTunes Help.
Syncing automatically
When you connect iPod nano to your computer, iPod nano is automatically updated to match
the items in your iTunes library. When the update is done, a message in iTunes says “iPod update
is complete,” and a bar at the bottom of the iTunes window displays how much disk space is
used by dierent types of content. You can sync iPod nano automatically with only one computer
at a time.
Important: The rst time you connect iPod nano to a computer that it’s not synced with, a
message asks if you want to sync songs automatically. If you accept, all songs, audiobooks,
and other content are erased from iPod nano and replaced with songs and other items from
that computer.
You can prevent iPod nano from syncing when you connect it to a computer other than the one
you usually sync with.

Chapter 3 Basics 16
Turn o automatic syncing for iPod nano:
1 Connect iPod nano to your computer, then open iTunes.
2 In the iTunes Summary pane, deselect “Open iTunes when this iPod is connected.”
3 Click Apply.
If you turn o automatic syncing, you can still sync by clicking the Sync button.
Managing iPod nano manually
If you manage iPod nano manually, you can add content from multiple computers to iPod nano
without erasing items already on iPod nano.
Setting iPod nano to manually manage music turns o the automatic sync options in the Music,
Podcasts, iTunes U, and Photos panes. You can’t manually manage some and automatically sync
others at the same time.
Note: Genius Mixes don’t work if you manually manage content. You can still manually sync
Genius playlists to iPod nano, and create Genius playlists on the iPod after a manual sync of
Genius content. See Playing Genius Mixes on page 24.
Set iTunes to manage content manually:
1 Open iTunes Preferences (in the menu under iTunes), then click Devices.
2 Select “Prevent iPods, iPhones, and iPads from syncing automatically,” then click OK.
3 In the iTunes window, select iPod nano, then click Summary.
4 In the Options section, select “Manually manage music and videos.”
5 Click Apply.
When you manually manage content on iPod nano, you must always eject iPod nano from iTunes
before you disconnect it. See Disconnecting iPod nano from your computer on page 13 . You can
reset iPod nano to sync automatically at any time—deselect “Manually manage music,” then click
Apply. You may need to reselect your sync options.
Transferring purchased content to another computer
Content that you purchase in iTunes on one computer can be transferred from iPod nano to an
iTunes library on another computer. The other computer must be authorized to play content
from your iTunes Store account.
Transfer purchased content to another computer:
1 Open iTunes on the other computer and choose Store > Authorize This Computer.
2 Connect iPod nano to the newly authorized computer.
3 In iTunes, choose File > “Transfer Purchases from iPod.”
4
17
Music and Other Audio
iPod nano makes it easy to nd and listen to songs, podcasts, and iTunes U programs. You can
repeat songs, fast-forward, shue, and create playlists using the Multi-Touch screen. You can play
a Genius Mix—songs from your library that go great together—or create a Genius playlist based
on a favorite song.
WARNING: For important information about avoiding hearing loss, see Chapter 14, Safety and
Handling, on page 61.
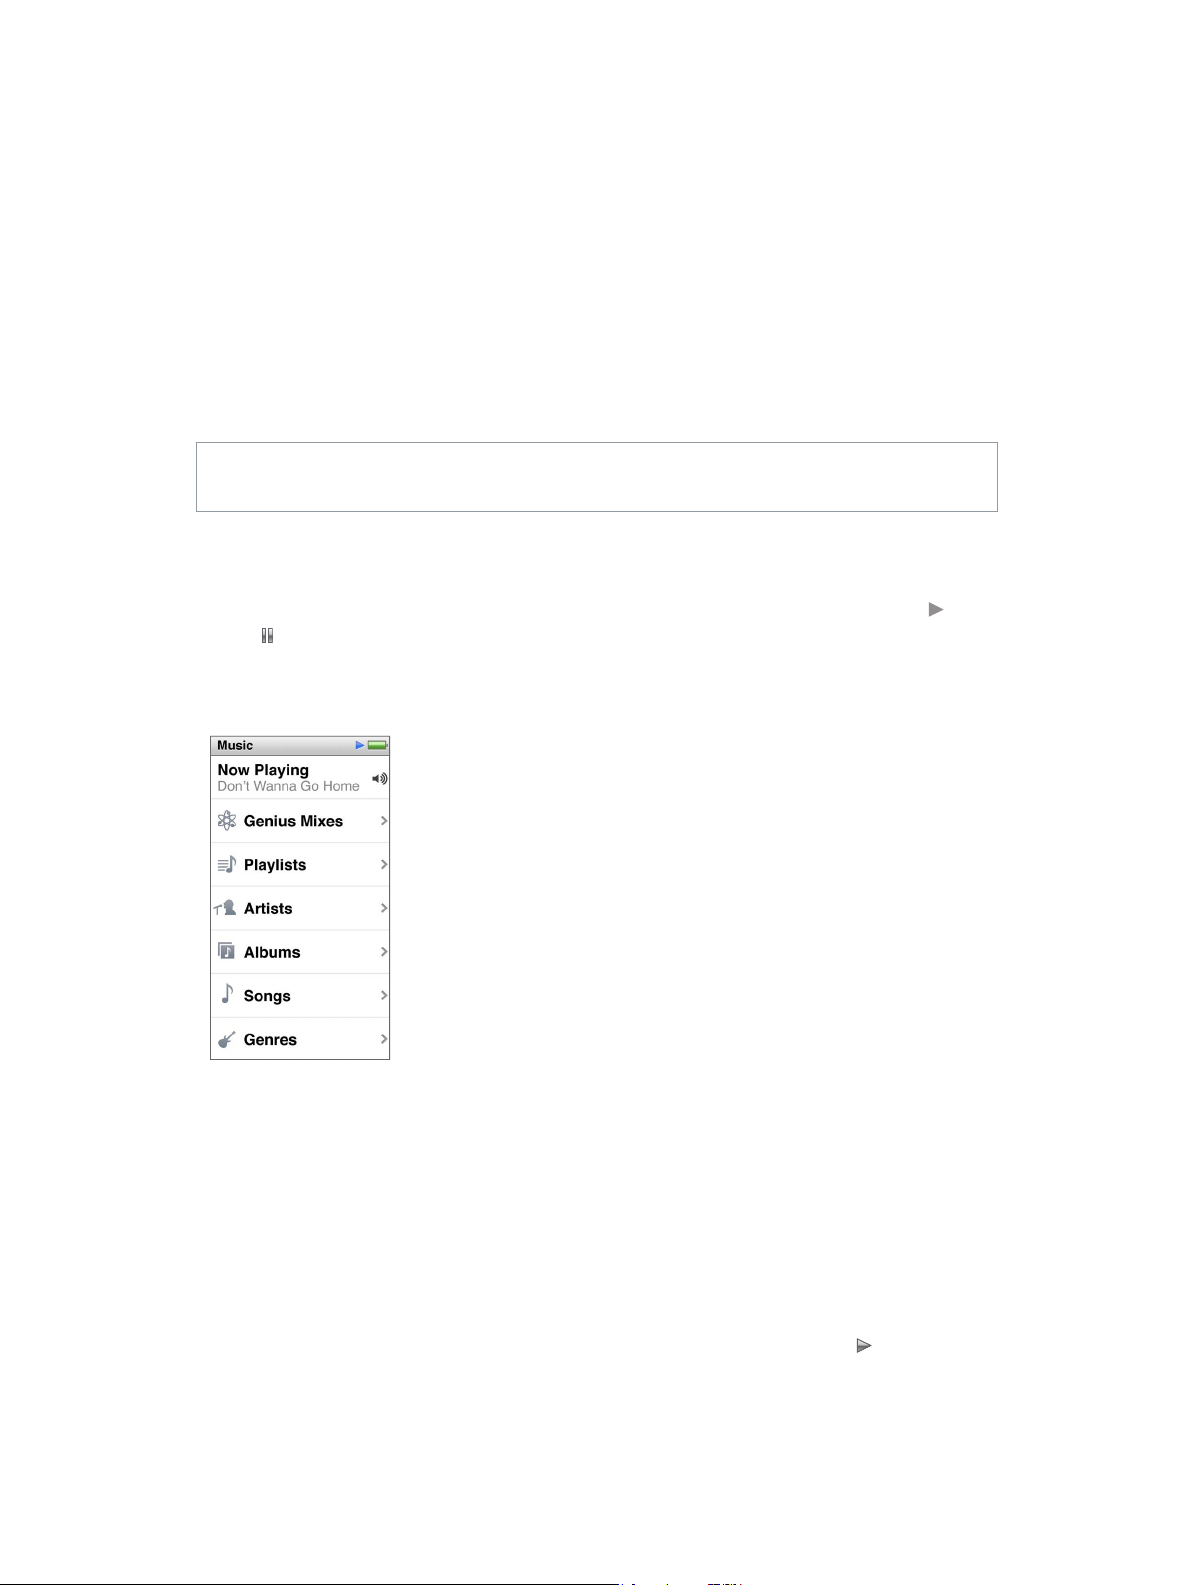
Playing music
While a song plays, its album artwork is displayed on the Now Playing screen, and a Play or
Pause icon appears in the status bar at the top of other screens. You can browse music on iPod
nano and change settings while you listen to music or other audio content.
Note: iPod nano must be ejected from your computer in order to play songs and other audio.
Play a song:
Do any of the following:
m Tap Music on the Home screen, tap a category (Playlists, Albums, or another grouping), then tap
a song.
m Press the Play/Pause button (between the volume buttons) to play a random song. If a song is
paused, the paused song resumes playing.
m Give iPod nano a quick shake to play shued songs.
If you turn o iPod nano while music or other audio is playing (by pressing and holding the
Sleep/Wake button), the track is paused. When you turn iPod nano back on, tap or press the
Play/Pause button to resume playback.
Chapter 4 Music and Other Audio 18
Find songs in your music library:
Do any of the following:
m Flick to scroll quickly through song and album lists, then tap the menu bar to return to the top of
the list.
m Swipe lightly across a title from right to left to see all of the text (the title scrolls so you can read
all of it).
m Drag your nger down an index list to show a large letter superimposed over the list. When you
reach the letter you want, lift your nger.
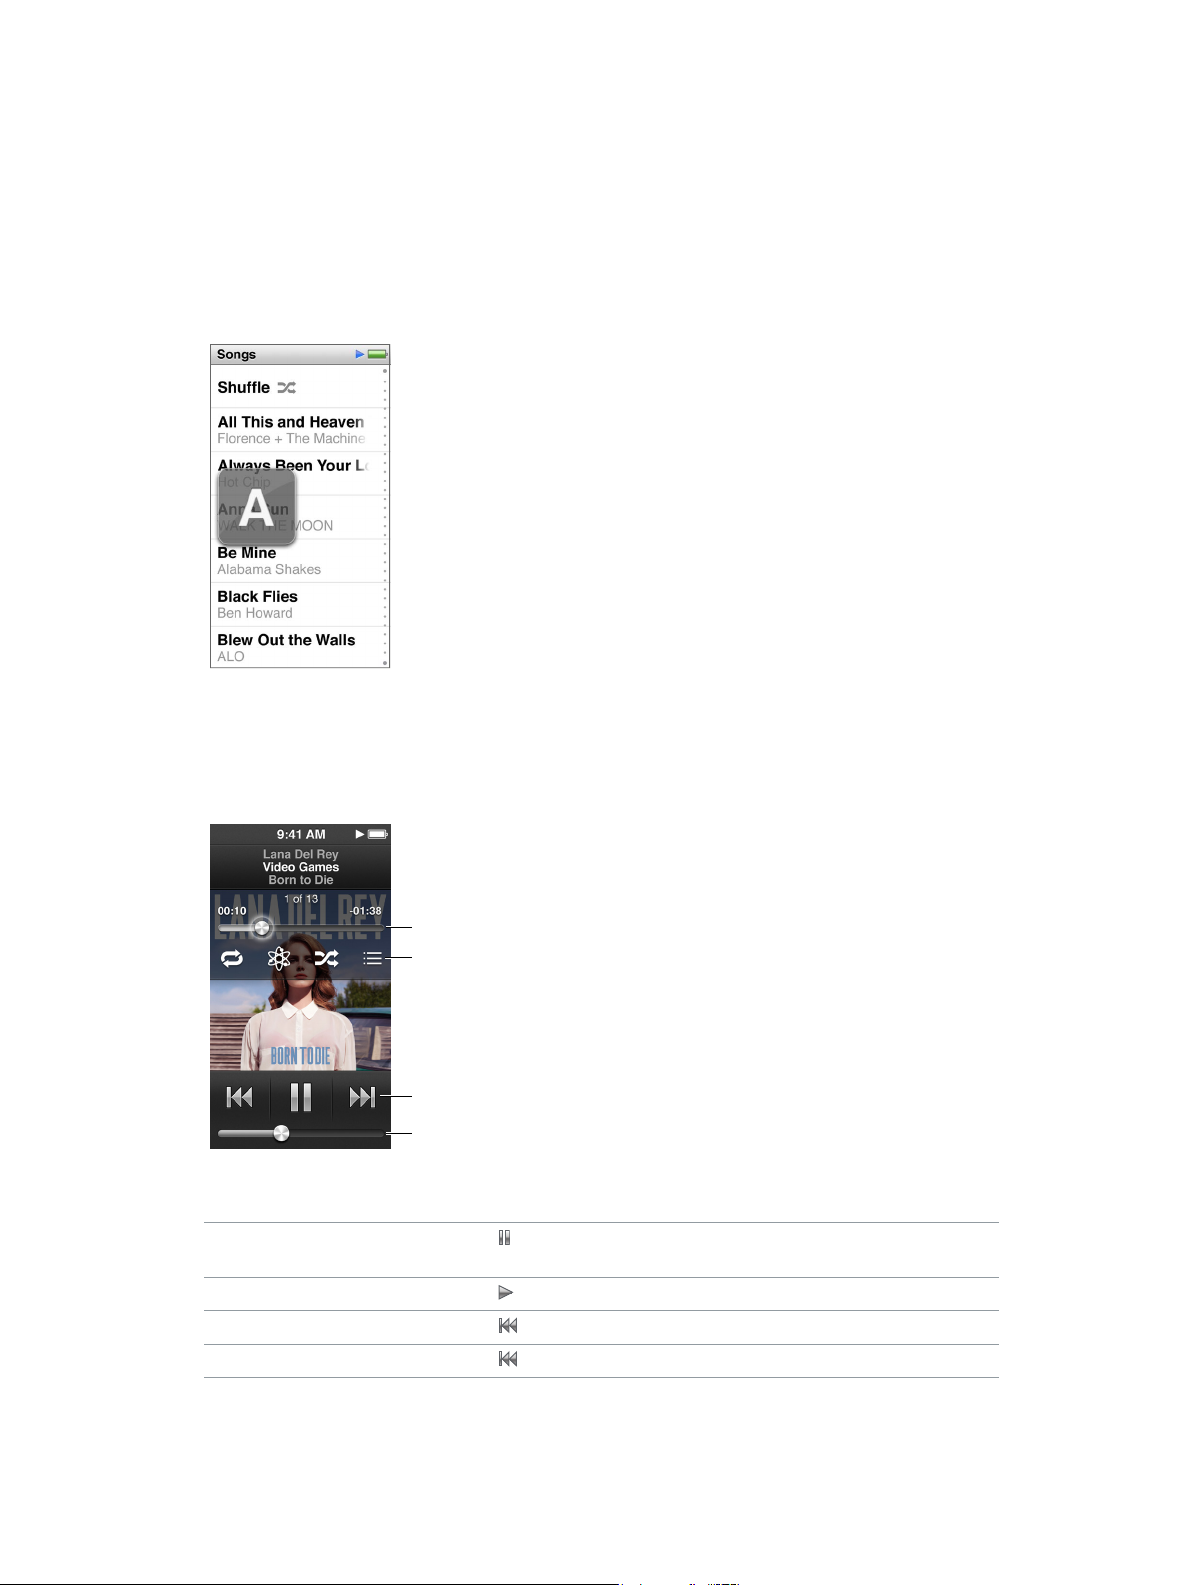
Controlling playback for songs
You can control playback using song controls on the Now Playing screen, the Play/Pause button
(between the volume buttons on iPod nano), the buttons on Apple EarPods with Remote and
Mic (available separately), and other compatible audio equipment.
Track position
Song controls
Volume
Tap the screen to
show these controls.
Here’s what you can do with the iPod nano song controls and buttons:
Pause a song Tap , press the Play/Pause button (between the volume buttons), or
disconnect your EarPods.
Play a paused song Tap
, or press the Play/Pause button (between the volume buttons).
Start a song over Tap .
Play the previous song Tap twice.
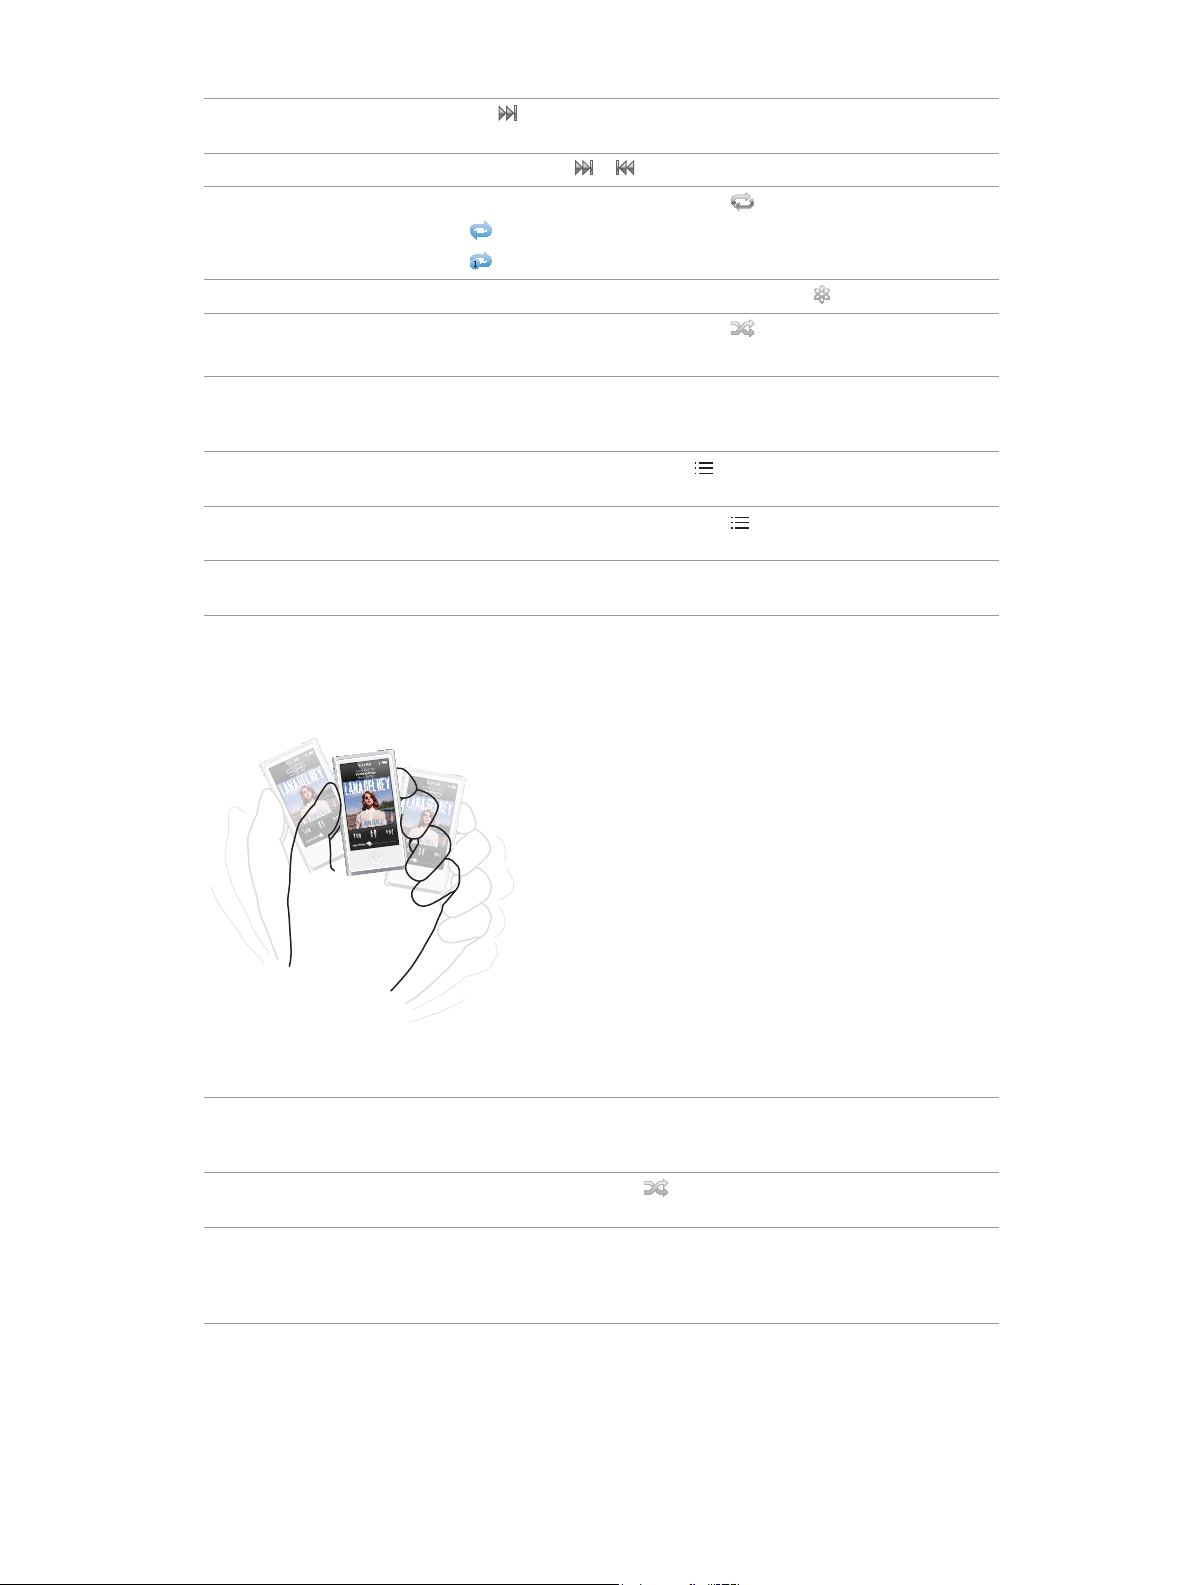
Chapter 4 Music and Other Audio 19
Skip to the next song Tap , or press the Play/Pause button (between the volume buttons)
twice.
Fast-forward or rewind a song Press and hold
or .
Repeat songs
Tap the Now Playing screen, then tap
. Tap again for more options:
= Repeat all songs in the current album or list.
= Repeat only the current song over and over.
Create a Genius playlist
Play a song, tap the Now Playing screen, then tap
.
Shue songs
Tap the Now Playing screen, then tap
.
If “Shake to Shue” is turned on in Settings, give iPod nano a quick shake.
Skip to any point in a song Drag the playhead along the track position control. Slide your nger down
to slow the rate for greater precision. The farther down you slide your
nger, the smaller the increments.
Rate songs Tap the Now Playing screen, tap
, then drag your nger across the dots
at the top of the screen.
See songs from an album Tap the Now Playing screen, then tap
, or tap the album in the
Albums list.
Change where audio is routed Tap the audio routing icon next to the volume control, then tap the
device where you want audio to play.
Shuing songs
You can play songs, albums, or playlists in random order, and set iPod nano to shue songs
when you give it a quick shake.
Here are ways to shue your music:
Shue and play all your songs Tap Shue at the top of the Songs list. iPod nano begins playing songs
from your iPod nano music library in random order, skipping audiobooks,
podcasts, and iTunes U collections.
Shue songs from the Now
Playing screen
Tap the screen, then tap
.
Use “Shake to Shue” When the screen is on, you can give iPod nano a quick shake to skip to a
random song. If the screen is o, press the Sleep/Wake button before you
shake. “Shake to Shue” is on by default, but you can turn it o in Settings
> Music.

Chapter 4 Music and Other Audio 20
Playing podcasts, audiobooks, and iTunes U collections
Podcasts are free, downloadable shows available in the iTunes Store. Podcasts are organized by
shows, episodes within shows, and chapters within episodes. If you stop playing a podcast and
return to it later, the podcast begins playing where you left o.
Audiobooks are available for purchase and download from the iTunes Store. When you listen to
audiobooks purchased from the iTunes Store or audible.com, you can adjust the playback speed
to be faster or slower than normal. You only see an Audiobooks icon on the Home screen if you
synced audiobooks from your iTunes Library.
iTunes U is a part of the iTunes Store featuring free lectures, language lessons, and more, which
you can download and enjoy on iPod nano. iTunes U content is organized by collections, items
within collections, authors, and providers. You only see an iTunes U icon on the Home screen if
you synced iTunes U content from your iTunes Library.
Find podcasts, audiobooks, and iTunes U Collections:
m On the Home screen, tap Podcasts (or Audiobooks, or iTunes U), then tap a show or title.
Podcasts, Audiobooks, and iTunes U are also listed in Music.
Podcast shows and iTunes U collections appear in chronological order, so you can play them in
the order in which they were released. A blue dot marks unplayed shows and episodes. When
you nish listening to a podcast episode or iTunes U program, the next unplayed or partially
played episode begins automatically.
For more information about downloading and listening to podcasts, open iTunes and choose
Help > iTunes Help. Then search for “podcasts.”
Chapter 4 Music and Other Audio 21
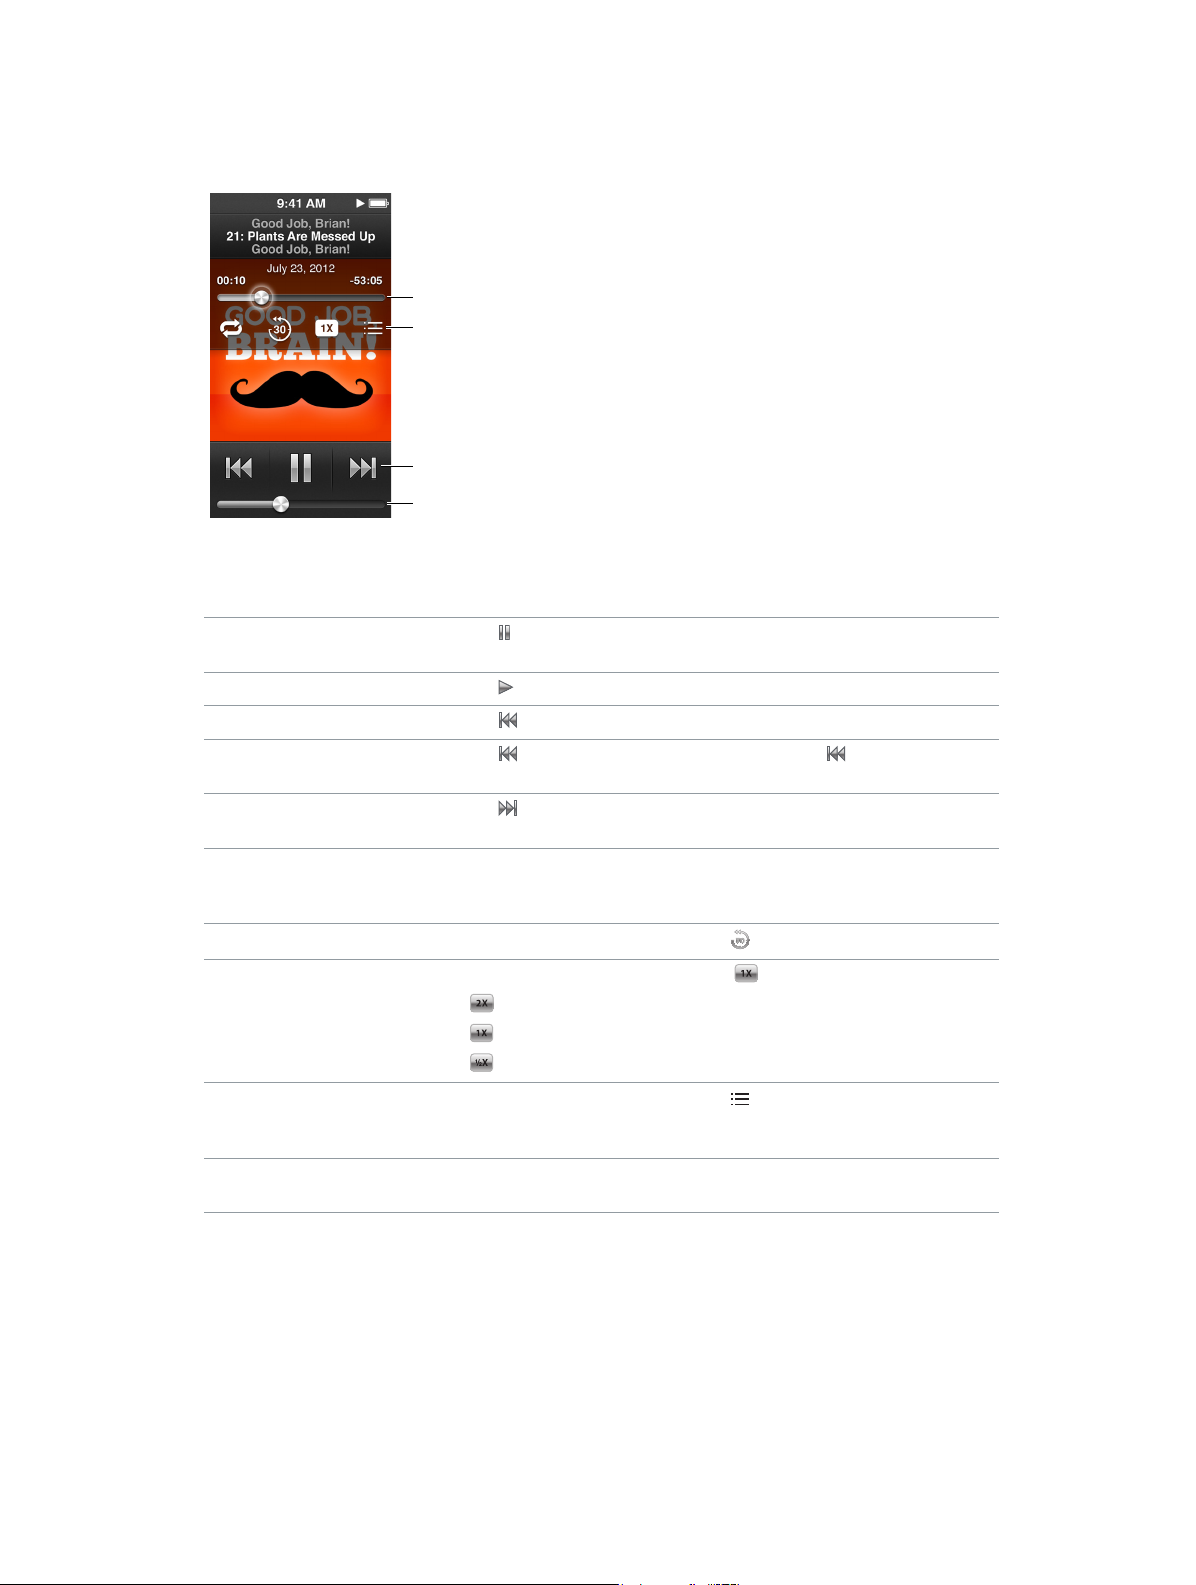
Controlling playback for podcasts, audiobooks, and iTunes U collections
The controls for podcasts, audiobooks, and iTunes U collections are slightly dierent than the
controls for songs.
Track position
Song controls
Volume
Tap the screen to
show these controls.
Here are ways to use the onscreen controls and iPod nano buttons for controlling podcast,
iTunes U, and audiobook playback:
Pause Tap , disconnect your EarPods, or press the Play/Pause button (between
the volume buttons).
Resume a paused program Tap
, or press the Play/Pause button (between the volume buttons).
Start over Tap .
Play the previous episode
or chapter
Tap at the start of the episode or chapter, or tap twice
during playback.
Play the next episode or chapter Tap
, or press the Play/Pause button (between the volume buttons)
twice.
Skip to any point in a podcast,
audiobook, or iTunes U collection
Drag the playhead along the track position control. Slide your nger down
to slow the rate for greater precision. The farther down you slide your
nger, the smaller the increments.
Play back the last 30 seconds
Tap the Now Playing screen, then tap
.
Set the playback speed
Tap the Now Playing screen, then tap
. Tap again to change the speed.
= Play at double speed.
= Play at normal speed.
= Play at half speed.
See episodes or chapters
for podcasts, iTunes U,
or audiobooks
Tap the Now Playing screen, then tap
.
See information about podcasts,
iTunes U, or audiobooks
Tap the Now Playing screen.
Loading...