


 Loading...
iPod touch User Guide
For iOS 4.1 Software

Contents
9 |
Chapter 1: iPod touch at a Glance |
9 |
iPod touch Overview |
11 |
Buttons |
13 |
iPod touch Apps |
16Status Icons
17Chapter 2: Getting Started
17Viewing the User Guide on iPod touch
17What You Need
18Setting Up iPod touch
18Disconnecting iPod touch from Your Computer
19Connecting to the Internet
19 Adding Mail, Contacts, and Calendar Accounts
23 Chapter 3: Basics
23 Using Apps
27 Customizing the Home Screen
30 Typing
38Searching
39Voice Control
40Bluetooth Devices
41Battery
42Security Features
44Cleaning iPod touch
44Restarting and Resetting iPod touch
45 Chapter 4: Syncing and File Sharing
45About Syncing
45Syncing Accounts
46Syncing with iTunes
47iPod touch Settings Panes in iTunes
50Automatic iTunes Syncing
51Manually Managing Content
51Transferring Purchased Content to Another Computer
2
52File Sharing
53Chapter 5: Music and Videos
53Getting Music, Videos, and More
53Music and Other Audio
62Videos
65Setting a Sleep Timer
66Changing the Browse Buttons
67 Chapter 6: FaceTime
67About FaceTime
68Signing In
69Making a Call
69 While You’re Talking
71 Chapter 7: Camera
71About Camera
72Taking Photos and Recording Videos
73Viewing and Sharing Photos and Videos
73Trimming Videos
74Uploading Photos and Videos to Your Computer
75Chapter 8: Photos
75 About Photos
75Syncing Photos and Videos with Your Computer
76Viewing Photos and Videos
77Deleting Photos and Videos
78Slideshows
78 Sharing Photos and Videos
80Assigning a Photo to a Contact
81Wallpaper
82Chapter 9: Game Center
82About Game Center
82Setting Up Game Center
84Games
88Friends
90Your Status and Account Information
91 Chapter 10: Mail
91Setting Up Email Accounts
92Checking and Reading Email
94Using Links and Detected Data
95Viewing Attachments
Contents |
3 |
|
|
96 Sending Email
98Organizing Email
99Searching Email
100Chapter 11: Safari
100Viewing Webpages
103Searching
103Bookmarks
104Web Clips
105 Chapter 12: Calendar
105About Calendar
105Syncing Calendars
106Viewing Your Calendars
107Searching Calendars
107Adding and Updating Events on iPod touch
108Responding to Meeting Invitations
110Subscribing to Calendars
110Alerts
111Chapter 13: YouTube
111Finding and Viewing Videos
112Controlling Video Playback
113Managing Videos
113Getting More Information
114Using YouTube Account Features
115Changing the Browse Buttons
116Chapter 14: Stocks
116Viewing Stock Quotes
117Getting More Information
118Chapter 15: Maps
119Finding and Viewing Locations
122Getting Directions
124Showing Traffic Conditions
124Finding and Contacting Businesses
125Sharing Location Information
125Bookmarking Locations
126 Chapter 16: Weather
126Viewing Weather Summaries
127Getting More Weather Information
4 |
Contents |
|
|
128 Chapter 17: Notes
128About Notes
128Syncing Notes
129Writing and Reading Notes
130Searching Notes
130Emailing Notes
131Chapter 18: Clock
131World Clocks
131Alarms
132Stopwatch
132Timer
133Chapter 19: Calculator
133Using the Calculator
133Standard Memory Functions
134Scientific Calculator Keys
136 Chapter 20: Voice Memos
136Recording Voice Memos
137Listening to Voice Memos
137Managing Voice Memos
138Trimming Voice Memos
139Sharing Voice Memos
139Syncing Voice Memos
140Chapter 21: iTunes Store
140About the iTunes Store
141Finding Music, Videos, and More
142Following Artists and Friends
143Purchasing Music or Audiobooks
144Purchasing or Renting Videos
145Streaming or Downloading Podcasts
145Checking Download Status
146Syncing Purchased Content
146Changing the Browse Buttons
147Viewing Account Information
147Verifying Downloads
148Chapter 22: App Store
148About the App Store
149Browsing and Searching
150Info Screen
151Downloading Apps
Contents |
5 |
|
|
152Deleting Apps
152Writing Reviews
153Updating Apps
153Syncing Purchased Apps
154Chapter 23: Settings
154Airplane Mode
155Wi-Fi
156VPN
156Notifications
157Sounds
157Brightness
157Wallpaper
158General
166Music
166Video
167Photos
167FaceTime
168Store
168Mail, Contacts, Calendars
172Safari
173Nike + iPod
174 Chapter 24: Contacts
174About Contacts
174Adding Contacts
175Searching Contacts
176Managing Contacts on iPod touch
176Using Contact Information
177Unified Contacts
179 Chapter 25: Nike + iPod
179Activating Nike + iPod
180Linking a Sensor
180Working Out with Nike + iPod
181Sending Workouts to Nikeplus.com
181Calibrating Nike + iPod
182Nike + iPod Settings
183Chapter 26: iBooks
183About iBooks
184Syncing Books and PDFs
184Using the iBookstore
6 |
Contents |
|
|
185Reading Books
186Viewing a PDF
186Changing a Book’s Appearance
187Searching Books
187Looking up the Definition of a Word
187Having a Book Read to You
187Organizing Your Bookshelf
188Bookmark and Note Syncing
189Chapter 27: Accessibility
189Universal Access Features
190VoiceOver
202Zoom
203Large Text
203White on Black
203Mono Audio
203Speak Auto-text
203Triple-click Home
204Closed Captioning and Other Helpful Features
205Appendix A: Support and Other Information
205Apple iPod touch Support Site
205Restarting and Resetting iPod touch
205Backing Up iPod touch
207Updating and Restoring iPod touch Software
209Safety, Software, and Service Information
209Using iPod touch in an Enterprise Environment
210Disposal and Recycling Information
211Apple and the Environment
212 Index
Contents |
7 |
|
|

iPod touch at a Glance |
1 |
|
|
|
|
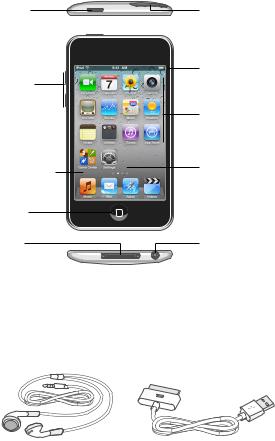
iPod touch Overview
iPod touch 4th generation
On/Off |
Microphone |
Sleep/Wake |
(on back) |
Front |
Main camera |
camera |
(on back) |
Volume |
Status bar |
buttons |
|
(on side) |
|
|
Application |
|
icons |
Touchscreen |
|
Home |
Dock |
button |
connector |
|
Headphones |
Speaker |
port |
9
iPod touch 3rd generation
On/Off |
Wi-Fi antenna |
|
Sleep/Wake |
|
|
|
Status bar |
|
Volume |
|
|
buttons |
|
|
|
Application |
|
|
icons |
|
Touchscreen |
Internal |
|
speaker |
||
|
||
Home |
|
|
button |
|
|
Dock |
Headphones |
|
connector |
port |
Your Home screen may look different, depending on the model of iPod touch you have and whether you have rearranged its icons.
Accessories
The following accessories are included with iPod touch:
Apple Earphones |
Dock Connector to USB Cable |
|
|
|
|
Item |
|
What you can do with it |
|
|
|
Apple Earphones |
|
Listen to music and videos, FaceTime calls, |
|
|
audiobooks, podcasts, and games. |
|
|
|
Dock Connector to USB Cable |
Use the cable to connect iPod touch to your |
|
|
|
computer to sync and charge, or to the USB |
|
|
power adapter (sold separately) to charge. The |
|
|
cable can be used with the optional dock or |
|
|
plugged directly into iPod touch. |
|
|
|
10 |
Chapter 1 iPod touch at a Glance |
|
|
Buttons
A few simple buttons make it easy to turn iPod touch on or off, and adjust the volume.
On/OffSleep/Wake Button
When you’re not actively using iPod touch, you can lock it to turn off the display and save the battery.
When iPod touch is locked, nothing happens if you touch the screen. You can still listen to music and, while listening to music, adjust the volume using the buttons on the side of iPod touch.
By default, iPod touch locks if you don’t touch the screen for a minute.
On/Off Sleep/
Wake button
Lock iPod touch |
Press the On/Off Sleep/Wake button. |
|
|
Unlock iPod touch |
Press the Home button or the On/Off Sleep/ |
|
Wake button, then drag the slider. |
|
|
Turn iPod touch completely off |
Press and hold the On/Off Sleep/Wake button for |
|
a few seconds until the red slider appears, then |
|
drag the slider. |
|
|
Turn iPod touch on |
Press and hold the On/Off Sleep/Wake button |
|
until the Apple logo appears. |
|
|
For information about changing how long before iPod touch locks, see “Auto-Lock” on page 160. For information about setting iPod touch to require a passcode to unlock it, see “Passcode Lock” on page 160.
Chapter 1 iPod touch at a Glance |
11 |
|
|

Home Button
Press the Home  button at any time to go to the Home screen, which contains your iPod touch apps. Tap any app icon to get started. To see apps you’ve recently used, double-click the Home button (iPod touch 3rd generation or later). See “Opening and Switching Apps” on page 23.
Volume Buttons
When you’re listening to songs, movies, or other media, the buttons on the side of iPod touch adjust the audio volume. Otherwise, the buttons control the volume for alerts and other sound effects.
WARNING: For important information about avoiding hearing loss, see the Important Product Information Guide at www.apple.com/support/manuals/ipodtouch.
To adjust the volume, use the buttons on the side of iPod touch.
Volume up
Volume down
To set a volume limit for music and videos on iPod touch, see “” on page 166.
12 |
Chapter 1 iPod touch at a Glance |
|
|
iPod touch Apps
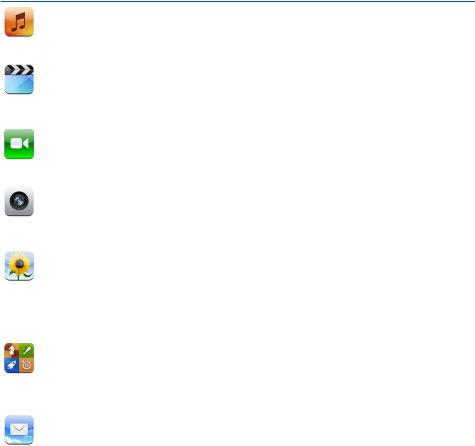
The following apps are included with iPod touch:
Note: App functionality and availability may vary, depending on the country or region where you purchase and use iPod touch.
|
Listen to your songs, audiobooks, and podcasts. Create on-the-go playlists, or use |
|
|
Genius to create playlists for you. Listen to Genius Mixes of songs from your library. See |
|
Music |
Chapter 5,“Music and Videos,” on page 53. |
|
|
||
|
|
|
|
Watch purchased or rented movies and TV shows, music videos, and video podcasts on |
|
|
the go. Or connect iPod touch to your TV to watch on a larger screen (TV connection |
|
Videos |
requires cable available for purchase separately). See Chapter 5,“Music and Videos,” on |
|
page 53. |
||
|
||
|
|
|
|
Make video calls to other iPod touch 4th generation or iPhone 4 users over Wi-Fi. Use |
|
|
the front camera to talk face to face, or the main camera to share what you see. See |
|
FaceTime |
Chapter 6,“FaceTime,” on page 67. |
|
|
||
|
|
|
|
Take photos and record videos (iPod touch 4th generation). View them on iPod touch, |
|
|
email them, or upload them to your computer.Tap to set the exposure for a specific |
|
Camera |
object or area.Trim and save video clips. Upload videos directly to YouTube or |
|
MobileMe. See Chapter 7,“Camera,” on page 71. |
||
|
||
|
|
|
|
View photos and videos you sync from your computer or save from Mail messages |
|
|
(videos only on iPod touch 4th generation or later). Zoom in on photos for a closer |
|
Photos |
look. Watch a slideshow. Email photos and videos, or publish them to a MobileMe |
|
gallery. Assign images to contacts, and use them as wallpaper. View photos by place, |
||
|
||
|
and if you sync with iPhoto 8.0 (part of iLife ‘09) or later, you can view photos by events |
|
|
and faces. See Chapter 8,“Photos,” on page 75. |
|
|
|
|
|
Discover new games and share your game experiences with friends around the world. |
|
|
Invite a friend, or request a match with other worthy opponents. Check player ranking |
|
Game |
on the leaderboards. Gain achievements for extras points. See Chapter 9,“Game |
|
Center,” on page 82. |
||
Center |
||
|
||
|
|
|
|
iPod touch works with MobileMe, Microsoft Exchange, and many of the most popular |
|
|
email systems—including Yahoo!, Google, and AOL—as well as most industry-standard |
|
POP3 and IMAP email systems. View PDFs and other attachments within Mail. Save |
||
attached photos and graphics to your Photo Library. See Chapter 10,“Mail,” on page 91. |
||
|
||
|
|
Chapter 1 iPod touch at a Glance |
13 |
|
|
|
Browse websites over Wi-Fi. Rotate iPod touch sideways for widescreen viewing. |
|
|
Double-tap to zoom in or out—Safari automatically fits the webpage column to the |
|
Safari |
iPod touch screen for easy reading. Open multiple pages. Sync bookmarks with Safari |
|
or Microsoft Internet Explorer on your computer. Add Safari web clips to the Home |
||
|
||
|
screen for fast access to favorite websites. Save images from websites to your Photo |
|
|
Library. See Chapter 11,“Safari,” on page 100. |
|
|
|
|
|
View and search your MobileMe, iCal, Microsoft Entourage, Microsoft Outlook, or |
|
|
Microsoft Exchange calendars. Enter events on iPod touch and they sync back to the |
|
Calendar |
calendar on your computer. Subscribe to calendars. See the birthdays you’ve entered |
|
in Contacts. Set alerts to remind you of events, appointments, and deadlines. See |
||
|
||
|
Chapter 12,“Calendar,” on page 105. |
|
|
|
|
|
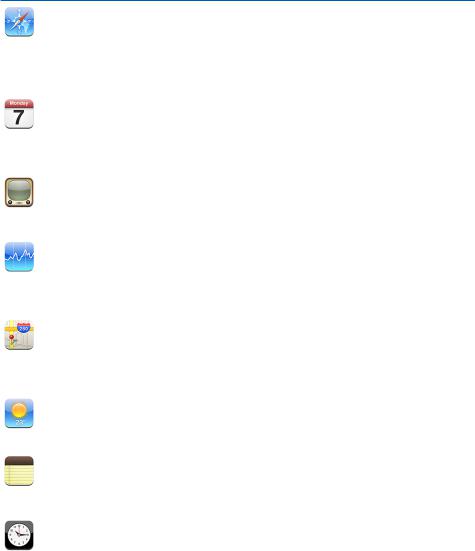
Play videos from YouTube’s online collection. Search for any video, or browse featured, |
|
|
most viewed, most recently updated, and top-rated videos. Set up and log in to your |
|
YouTube |
YouTube account—then rate videos, sync your favorites, show subscriptions, and more. |
|
See Chapter 13,“YouTube,” on page 111. |
||
|
||
|
|
|
|
Watch your favorite stocks, updated automatically from the Internet. View company |
|
|
news and current trading information, such as opening or average price, trading |
|
Stocks |
volume, or market capitalization. Rotate iPod touch to see detailed charts in landscape |
|
orientation. Drag your finger along the charts to track price points, or use two fingers |
||
|
||
|
to see a range between points. See Chapter 14,“Stocks,” on page 116. |
|
|
|
|
|
See a street map, satellite view, or hybrid view of locations around the world. Zoom in |
|
|
for a closer look, or check out the Google Street View. Find your current approximate |
|
Maps |
location. Get detailed driving, public transit, or walking directions and see current |
|
highway traffic conditions. Find businesses in the area. See Chapter 15,“Maps,” on |
||
|
||
|
page 118. |
|
|
|
|
|
Get current weather conditions and a six-day forecast. Add your favorite cities for a |
|
|
quick weather report anytime. See Chapter 16,“Weather,” on page 126. |
|
Weather |
|
|
|
|
|
|
Jot notes on the go—reminders, grocery lists, brilliant ideas. Send them in email. Sync |
|
|
notes to Mail on your Mac, or Microsoft Outlook or Outlook Express on your PC. Sync |
|
Notes |
notes over the air (iPod touch 3rd generation or later) with your MobileMe, Google, |
|
Yahoo!, or iMAP accounts. See Chapter 17,“Notes,” on page 128. |
||
|
||
|
|
|
|
In the Utilities folder. View the time in cities around the world—create clocks for your |
|
|
favorites. Set one or more alarms. Use the stopwatch, or set a countdown timer. See |
|
Clock |
Chapter 18,“Clock,” on page 131. |
|
|
||
|
|
14 |
Chapter 1 iPod touch at a Glance |
|
|
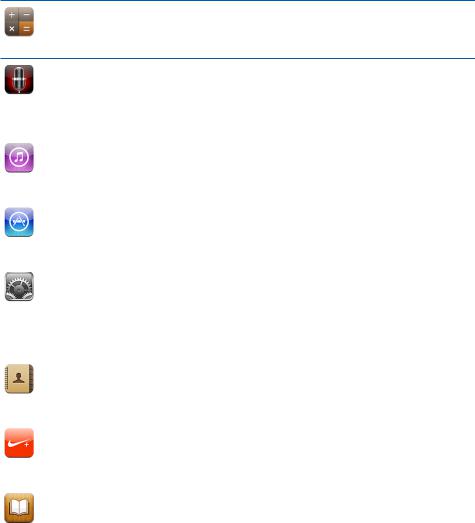
In the Utilities folder. Add, subtract, multiply, and divide. Rotate iPod touch sideways to use expanded scientific functions. See Chapter 19,“Calculator,” on page 133.
Calculator
|
In the Utilities folder. Record voice memos using the built-in microphone on iPod touch |
|
|
4th generation or a compatible external microphone or headset with microphone. Play |
|
Voice |
them back on iPod touch or sync them with iTunes to listen to voice memos on your |
|
computer. Attach voice memos to email messages. See Chapter 20,“Voice Memos,” on |
||
Memos |
||
page 136. |
||
|
||
|
|
|
|
Search the iTunes Store for music, movies, TV shows, audiobooks, and more. Browse, |
|
|
preview, and download new releases, or see what’s popular in the top charts. Rent |
|
iTunes |
movies and TV shows to view on iPod touch. Stream and download podcasts. See |
|
Chapter 21,“iTunes Store,” on page 140. |
||
|
||
|
|
|
|
Search the App Store for iPod touch apps you can purchase or download using your |
|
|
Wi-Fi connection. Read reviews or write your own reviews for your favorite apps. |
|
App Store |
Download and install the apps on your Home screen. See Chapter 22,“App Store,” on |
|
page 148. |
||
|
||
|
|
|
|
Adjust all iPod touch settings in one convenient place. Set your own volume limit for |
|
|
listening comfort. Set your wallpaper, screen brightness, and settings for network, |
|
Settings |
mail, web, music, video, photos, and more. Use Location Service settings to set |
|
location privacy options for Maps and applicable third-party apps. Set auto-lock and a |
||
|
||
|
passcode for security. Restrict access to explicit iTunes content and certain apps. Reset |
|
|
iPod touch. See Chapter 23,“Settings,” on page 154. |
|
|
|
|
|
Get contact information synced from MobileMe, Mac OS X Address Book, Yahoo! |
|
|
Address Book, Google Contacts, Windows Address Book (Outlook Express), Microsoft |
|
Contacts |
Outlook, or Microsoft Exchange. Search, add, change, or delete contacts, which get |
|
synced back to your computer. See Chapter 24,“Contacts,” on page 174. |
||
|
||
|
|
|
|
When activated in Settings, Nike + iPod turns your iPod touch into a workout |
|
|
companion. Track your pace, time, and distance from one workout to the next, and |
|
Nike + iPod |
choose a song to power through your routine. (Requires select Nike shoes and a Nike + |
|
iPod Sensor, sold separately.) See Chapter 25,“Nike + iPod,” on page 179. |
||
|
|
|
|
Download the free iBooks app from the App Store for a great way to read and buy |
|
|
books. Get everything from classics to best sellers from the built-in iBookstore. Add |
|
iBooks |
ePub and PDF books to your bookshelf using iTunes. See Chapter 26,“iBooks,” on |
|
page 183. |
||
|
||
|
|
Chapter 1 iPod touch at a Glance |
15 |
|
|

Status Icons
The icons in the status bar at the top of the screen give information about iPod touch:
|
Status icon |
What it means |
||||
|
|
|
|
|
|
|
|
|
|
|
|
Wi-Fi* |
Shows that iPod touch is connected to the |
|
|
|
|
|
|
Internet over a Wi-Fi network. The more |
|
|
|
|
|
|
bars, the stronger the connection. See |
|
|
|
|
|
|
“Joining a Wi-Fi Network” on page 19. |
|
|
|
|
|
|
|
|
|
|
|
|
Network activity |
Shows network activity. Some third-party |
|
|
|
|
|
|
apps may also use this icon to indicate an |
|
|
|
|
|
|
active process. |
|
|
|
|
|
|
|
|
|
|
|
|
VPN |
Shows that you are connected to a |
|
|
|
|
|
||
|
|
|
|
|
|
network using VPN. See “Network” on |
|
|
|
|
|
|
page 158. |
|
|
|
|
|
|
|
|
|
|
|
|
Lock |
Shows that iPod touch is locked. See “On/ |
|
|
|
|
|
|
Off Sleep/Wake Button.” |
|
|
|
|
|
|
|
|
|
|
|
|
Play |
Shows that a song, audiobook, or podcast |
|
|
|
|
|
|
is playing. See “Playing Songs and Other |
|
|
|
|
|
|
Audio” on page 54. |
|
|
|
|
|
|
|
|
|
|
|
|
Portrait orientation lock |
Shows that the iPod touch screen is locked |
|
|
|
|
|
|
in portrait orientation. See “Viewing in |
|
|
|
|
|
|
Portrait or Landscape Orientation” on |
|
|
|
|
|
|
page 26. |
|
|
|
|
|
|
|
|
|
|
|
|
Alarm |
Shows that an alarm is set. See “Alarms” on |
|
|
|
|
|
||
|
|
|
|
|
||
|
|
|
|
|
|
page 131. |
|
|
|
|
|
|
|
|
|
|
|
|
Location services |
Shows that an app is using location |
|
|
|
|
|
|
services. See “Location Services” on |
|
|
|
|
|
|
page 159. |
|
|
|
|
|
|
|
|
|
|
|
|
Bluetooth* |
Blue or white icon: Bluetooth is on and a |
|
|
|
|
|
|
device, such as a headset, is connected. |
|
|
|
|
|
|
Gray icon: Bluetooth is on, but no device |
|
|
|
|
|
|
is connected. No icon: Bluetooth is turned |
|
|
|
|
|
|
off. See“Bluetooth Devices” on page 40. |
|
|
|
|
|
|
|
|
|
|
|
|
Battery |
Shows battery level or charging status. See |
|
|
|
|
|
||
|
|
|
|
|
|
“Charging the Battery” on page 41. |
|
|
|
|
|
|
|
* The use of certain accessories with iPod touch may affect wireless performance.
16 |
Chapter 1 iPod touch at a Glance |
|
|

Getting Started |
2 |
|
|
|
|
·WARNING: To avoid injury, read all operating instructions in this guide and safety information in the iPod touch Important Product Information Guide at www.apple.com/support/manuals/ipodtouch before using iPod touch.
Viewing the User Guide on iPod touch
The iPod touch User Guide, optimized for viewing on iPod touch, is available at help. apple.com/ipodtouch.
View the guide on iPod touch: In Safari, tap  , then tap the iPod touch User Guide bookmark.
Add an icon for the guide to the Home screen: When viewing the guide, tap  , then tap “Add to Home Screen.”
The iPod touch User Guide is available in many languages.
View the guide in a different language: Tap “Change Language” at the bottom of the screen on the main contents page, then choose the language you want.
What You Need
To use iPod touch, you need:
ÂÂ A Mac or a PC with a USB 2.0 port and one of the following operating systems: ÂÂ Mac OS X v10.5.8 or later
ÂÂ Windows 7, Windows Vista, or Windows XP Home or Professional (SP3) ÂÂ iTunes 10 or later, available at www.itunes.com/download
ÂÂ An Apple account (such as an iTunes Store account or MobileMe account) for purchases from the iTunes Store or App Store
ÂÂ An Internet connection for your computer (broadband recommended)
17
Setting Up iPod touch
Before you can use iPod touch, you must set it up in iTunes. During setup, you can create a new Apple account or specify an existing Apple account to enable purchases with iPod touch. (The iTunes Store may not be available in all countries or regions.) iTunes also records the serial number of your iPod touch in case you need it.
Set up iPod touch:
1Download and install the latest version of iTunes from www.itunes.com/download.
2Connect iPod touch to a USB 2.0 port on your Mac or PC using the cable that came with iPod touch.
3Follow the onscreen instructions in iTunes to register iPod touch and sync iPod touch with songs, videos, and apps from your iTunes library, and with your photos on your computer. For information about customizing your sync contacts, see “Syncing with iTunes” on page 46.
Note: If you have a visual impairment, VoiceOver (iPod touch 3rd generation or later) can help you set up iPod touch without a sighted assistant. VoiceOver describes aloud what appears on the screen, so you can use iPod touch without seeing it. When you connect iPod touch to your computer, iTunes detects whether you’re using a compatible screen reader on your computer, such as VoiceOver (Mac) or
GW Micro Window-Eyes (PC), and automatically enables VoiceOver on iPod touch. A sighted user can also enable VoiceOver on iPod touch using Accessibility settings. See “VoiceOver” on page 190. VoiceOver may not be available in all languages.
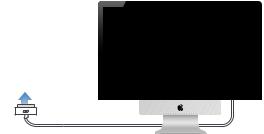
Disconnecting iPod touch from Your Computer
You can disconnect iPod touch from your computer at any time. However, if you disconnect it while a sync is in progress, some data may not get synced until the next time you connect iPod touch to your computer.
When iPod touch is syncing with your computer, iPod touch shows “Sync in Progress.”
If you disconnect iPod touch before it finishes syncing, some data may not get transferred. When the sync is complete, iTunes shows “iPod touch sync is complete.”
Cancel a sync: Drag the slider on iPod touch.
18 |
Chapter 2 Getting Started |
|
|
Connecting to the Internet
iPod touch connects to the Internet via Wi-Fi  networks. iPod touch can join AirPort and other Wi-Fi networks at home, at work, or at Wi-Fi hotspots around the world.
When joined to a Wi-Fi network that’s connected to the Internet, iPod touch accesses the Internet automatically whenever you use Mail, Safari, YouTube, FaceTime, Game Center, Stocks, Maps, Weather, the App Store, or the iTunes Store.
Joining a Wi-Fi Network
The Wi-Fi settings let you turn on Wi-Fi and join Wi-Fi networks.
Turn on Wi-Fi: Choose Settings > Wi-Fi and turn Wi-Fi on.
Join a Wi-Fi network: Choose Settings > Wi-Fi, wait a moment as iPod touch detects networks in range, then select a network (fees may apply to join some Wi-Fi networks).
If necessary, enter a password and tap Join (networks that require a password appear with a lock  icon).
Once you join a Wi-Fi network manually, iPod touch automatically connects to it whenever the network is in range. If more than one previously used network is in range, iPod touch joins the one last used.
When iPod touch is connected to a Wi-Fi network, the Wi-Fi  icon in the status bar at the top of the screen shows the connection strength. The more bars you see, the stronger the connection.
For information about configuring Wi-Fi settings, see“Wi-Fi” on page 155.
VPN Access
VPN (virtual private network) provides secure access over the Internet to private networks, such as the network at your company or school. Use Network settings to configure and turn on VPN. See“Network” on page 158.
Adding Mail, Contacts, and Calendar Accounts
iPod touch works with MobileMe, Microsoft Exchange, and many of the most popular Internet-based email, contacts, and calendar service providers. If you don’t already have an email account, you can get a free account online at www.yahoo.com, www.google.com, or www.aol.com. You can also try MobileMe, free for 60 days, at www.me.com.
You can add contacts using an LDAP or CardDAV account if your company or organization supports it. See “Adding Contacts” on page 174.
You can add a CalDAV calendar account. See “Syncing Calendars” on page 105.
You can subscribe to iCal (.ics) calendars. See “Subscribing to Calendars” on page 110.
Chapter 2 Getting Started |
19 |
|
|
Setting Up MobileMe Accounts
To use MobileMe on iPod touch, you need to add an account with your MobileMe account settings. When setting up the account, you can choose which MobileMe services you want to use with iPod touch:
ÂÂ Mail
ÂÂ Contacts
ÂÂ Calendars
ÂÂ Bookmarks
ÂÂ Notes (iPod touch 3rd generation or later) ÂÂ Find My iPod touch
Services you turn on are synced automatically over the air without having to connect iPod touch to your computer. See “Syncing Accounts” on page 45.
The Find My iPod touch service (not available in all countries or regions) helps you locate iPod touch if it’s been lost or stolen, and remotely lock, set a passcode, or erase the information on iPod touch if necessary. See “Security Features” on page 42.
You can set up multiple MobileMe accounts; however, only one MobileMe account at a time can be used for Find My iPod touch and for syncing contacts, calendars, and bookmarks.
Set up a MobileMe account:
1In Settings, tap “Mail, Contacts, Calendars.”
2Tap Add Account, then tap MobileMe.
3Enter your name, complete email address, password, and a description. The description can be whatever you like.
4Tap the items you want to use on iPod touch—mail, contacts, calendars, bookmarks, notes, and Find My iPod touch.
Setting Up Microsoft Exchange Accounts
To use Microsoft Exchange on iPod touch, you need to add an account with your Microsoft Exchange account settings. See your service provider or system administrator for those settings.
iPod touch uses the Exchange ActiveSync protocol to sync email, calendars, and contacts over the air with the following versions of Microsoft Exchange:
ÂÂ Exchange Server 2003 Service Pack 2
ÂÂ Exchange Server 2007 Service Pack 1 ÂÂ Exchange Server 2010
20 |
Chapter 2 Getting Started |
|
|
When setting up the account, you can choose which Exchange services you want to use with iPod touch:
ÂÂ Mail
ÂÂ Contacts
ÂÂ Calendars
Services you turn on are synced automatically over the air without having to connect iPod touch to your computer. See “Syncing Accounts” on page 45.
You can set up multiple Exchange accounts.
Set up an Exchange account:
1In Settings, tap “Mail, Contacts, Calendars.”
2Tap Add Account, then tap Microsoft Exchange.
3Enter your complete email address, domain (optional), user name, password, and a description. The description can be whatever you like.
iPod touch supports Microsoft’s Autodiscovery service, which uses your user name and password to determine the address of the Exchange server. If the server’s address can’t be determined, you’re asked to enter it. (Enter the complete address in the Server field.) Once you connect to the Exchange server, you may be prompted to change your passcode to match the policies set on the server.
4Tap the items you want to use on iPod touch (mail, contacts, and calendars) and set how many days of email you want to sync to iPod touch.
Setting Up Google, Yahoo!, and AOL Accounts
For many popular accounts (Google, Yahoo!, AOL), iPod touch enters most of the settings for you. When setting up the account, you can choose which account services you want to use with iPod touch. Services you turn on are synced automatically
over the air without having to connect iPod touch to your computer. See “Syncing Accounts” on page 45.
Set up an account:
1In Settings, tap “Mail, Contacts, Calendars.”
2Tap Add Account, then tap Google, Yahoo!, or AOL.
3Enter your name, complete email address, password, and a description. The description can be whatever you like.
4Tap the items you want to use on iPod touch. Available items depend upon the service provider.
Chapter 2 Getting Started |
21 |
|
|
Setting Up Other Accounts
Choose Other Accounts to set up other accounts for mail (such as POP), contacts (such as LDAP or CardDAV), or calendars (such as CalDAV). Contact your service provider or system administrator to get the account settings you need.
Set up an account:
1In Settings, tap “Mail, Contacts, Calendars.”
2Tap Add Account, then tap Other.
3Choose the account type you want to add (Mail, Contacts, or Calendars).
4Enter your account information and tap Save.
22 |
Chapter 2 Getting Started |
|
|

Basics |
3 |
|
|
|
|
Using Apps
The high-resolution Multi-Touch screen and simple finger gestures make it easy to use iPod touch apps.
Opening and Switching Apps
You open an app on iPod touch by tapping its icon on the Home screen.
Return to the Home screen: Press the Home  button below the display.
Switch to another Home screen: Flick left or right, or tap to the left or right of the row of dots.
Go to the first Home screen: Press the Home  button.
On iPod touch 3rd generation or later, you can quickly switch between the apps you’re using; multitasking also allows certain apps to run in the background.
23
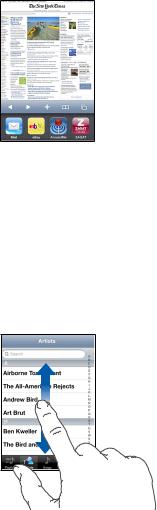
View the most recently used apps (iPod touch 3rd generation or later): Double-click the Home button.
The four most recently used app are shown at the bottom of the screen. Flick left to see more apps.
Note: On iPod touch 2nd generation, double-clicking the Home button performs the action specified by the Home Button setting. See“Home Button” on page 159.
Remove an app from the recents list: Touch and hold the app icon until it begins to jiggle, then tap  .
.
The app is added to recent apps again the next time you open it.
Scrolling
Drag up or down to scroll. On some screens such as webpages, you can also scroll side to side.
Dragging your finger to scroll won’t choose or activate anything on the screen.
24 |
Chapter 3 Basics |
|
|
Flick to scroll quickly.
You can wait for the scrolling to come to a stop, or touch anywhere on the screen to stop it immediately. Touching the screen to stop scrolling won’t choose or activate anything.
To quickly scroll to the top of a list, webpage, or email, just tap the status bar.
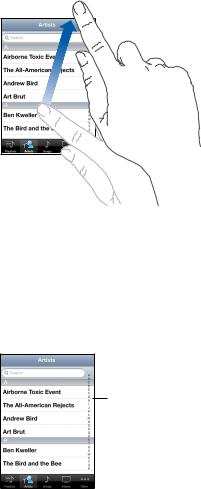
Find items in an indexed list: Tap a letter to jump to items starting with that letter. Drag your finger along the index to scroll quickly through the list.
Index
Choose an item: Tap an item in the list.
Depending on the list, tapping an item can do different things—for example, it may open a new list, play a song, open an email, or show someone’s contact information.
Chapter 3 Basics |
25 |
|
|
Zooming In or Out
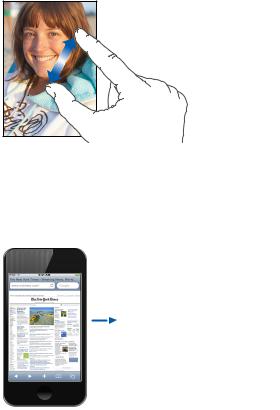
When viewing photos, webpages, email, or maps, you can zoom in and out. Pinch your fingers together or apart. For photos and webpages, you can double-tap (tap twice quickly) to zoom in, then double-tap again to zoom out. For maps, double-tap to zoom in and tap once with two fingers to zoom out.
Viewing in Portrait or Landscape Orientation
Many iPod touch apps let you view the screen in either portrait or landscape orientation. Rotate iPod touch and the display rotates too, adjusting automatically to fit the new screen orientation.
You may prefer landscape orientation for viewing webpages in Safari, or when entering text, for example. In landscape orientation:
ÂÂ Webpages scale to the wider screen, making the text and images larger.
ÂÂ The onscreen keyboard is larger, which may help increase your typing speed and accuracy.
The following apps support both portrait and landscape orientation: ÂÂ Music and Videos
ÂÂ Mail
ÂÂ Safari
ÂÂ Notes
26 |
Chapter 3 Basics |
|
|
ÂÂ Contacts
ÂÂ Stocks
ÂÂ Photos
ÂÂ Calculator
Movies viewed in Videos and YouTube appear only in landscape orientation. Street views in Maps also appear only in landscape orientation.
Lock the iPod touch screen in portrait orientation (iPod touch 3rd generation or later): Double-click the Home button, flick the bottom of the screen from left-to-right, then tap  .
.
The portrait orientation lock  icon appears in the status bar when the screen orientation is locked.
Customizing the Home Screen
You can customize the layout of icons on the Home screen—including the Dock icons along the bottom of the screen. If you want, arrange them over multiple Home screens. You can also organize apps by grouping them in folders.
Rearranging Icons
You can arrange the icons on your Home screen in any order you want.
Rearrange icons:
1Touch and hold any icon on the Home screen until it begins to jiggle.
2Arrange the icons by dragging them.
3Press the Home  button to save your arrangement.
You can also add links to your favorite webpages on the Home screen. See “Web Clips” on page 104.
When iPod touch is connected to your computer, you can rearrange icons on the Home screen and the order of the screens. In iTunes, select iPod touch in the Devices list, then click Apps at the top of the screen.
Chapter 3 Basics |
27 |
|
|
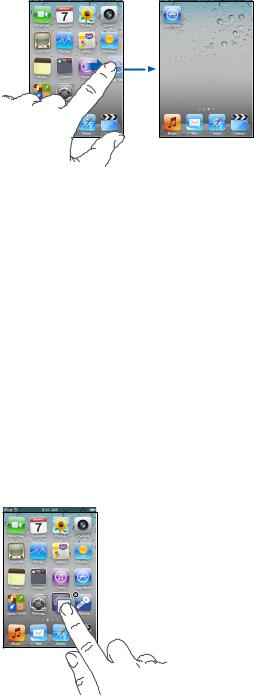
Move an icon to another screen: While arranging icons, drag an icon to the side of the screen.
Create additional Home screens: While arranging icons, flick to the right-most Home screen and drag an icon to the right edge of the screen until a new screen appears.
You can create up to 11 screens. The number of dots above the Dock shows the number of screens you have, and which screen you’re viewing.
Reset your Home screen to the default layout: Choose Settings > General > Reset and tap Reset Home Screen Layout.
Resetting the Home screen removes any folders you’ve created and applies the default wallpaper to your Home screen.
Organizing with Folders
Folders let you organize icons on the Home screen. You can put up to 12 icons in a folder. iPod touch automatically names a folder when you create it, based on the icons you use to create the folder, but you can change the name anytime you want. Like icons, folders can be rearranged by dragging them around the Home screen. You can move folders to a new Home screen or to the Dock.
Create a folder: Touch and hold an icon until the Home screen icons begin to jiggle, then drag the icon onto another icon.
28 |
Chapter 3 Basics |
|
|
iPod touch creates a new folder that includes the two icons, and shows the folder’s name.You can tap the name field and enter a different name.
You can also create folders within iTunes.
Create a folder using iTunes: With iPod touch connected to your computer, select iPod touch in the Devices list in iTunes. Click Apps at the top of the screen, and on the Home screen near the top of the window, drag an app on top of another.
Add an icon to a folder |
While arranging icons, drag the icon onto |
|
the folder. |
|
|
Remove an icon from a folder |
While arranging icons, tap to open the folder, |
|
then drag the icon out of the folder. |
|
|
Open a folder |
Tap the folder. You can then tap an app icon to |
|
open that app. |
|
|
Close a folder |
Tap outside the folder, or press the Home button. |
|
|
Delete a folder |
Move all icons out of the folder. |
|
The folder is deleted automatically when empty. |
|
|
Rename a folder |
While arranging icons, tap to open the folder, |
|
then tap the name at the top and use the |
|
keyboard to enter a new name. Press the Home |
|
button to save your changes. |
|
|
When you finish organizing your Home screen, press the Home  button to save your changes.
Some apps, such as Mail and the App Store, display a badge on their Home screen icon with a number (to indicate incoming items) or exclamation mark (to indicate a problem). If these apps are contained in a folder, the badge appears on the folder. A numbered badge shows the total number of items you haven’t attended to, such as incoming email messages and updated apps to download. An alert badge indicates a problem with an app in the folder.
Chapter 3 Basics |
29 |
|
|
Adding Wallpaper
You can set an image or photo as wallpaper for the Lock screen. On iPod touch 3rd generation or later, you can also set wallpaper for your Home screen. You can choose an image that came with iPod touch, or a photo synced to iPod touch from your computer.
Set wallpaper (iPod touch 3rd generation or later):
1In Settings, choose Wallpaper, tap the image of the Lock and Home screens, then tap Wallpaper or an album.
2Tap to choose an image or photo. If you chose a photo, drag to position it and pinch to zoom in or out, until it looks the way you want.
3Tap Set, then choose whether you want to use the photo as wallpaper for your Lock Screen, Home screen, or both.
Set wallpaper (iPod touch 2nd generation):
1Choose Settings > Wallpaper, then tap Wallpaper or an album.
2Tap to choose an image or photo. If you choose a photo, drag it to position it and pinch to zoom in or out, until it looks the way you want.
3Tap Set Wallpaper.
Typing
The onscreen keyboard appears anytime you need to type.
Entering Text
Use the keyboard to enter text, such as contact information, email, and web addresses. The keyboard corrects misspellings, predicts what you're typing, and learns as you use it.
Depending on the app you’re using, the intelligent keyboard may suggest corrections as you type, to help prevent mistyped words.
Enter text:
1Tap a text field, such as in a note or new contact, to bring up the keyboard.
2Tap keys on the keyboard.
Start by typing with just your index finger. As you get more proficient, you can type more quickly using two thumbs.
30 |
Chapter 3 Basics |
|
|
Loading...