


 Loading...
Getting Started
K Apple Inc.
© 2007 Apple Inc. All rights reserved.
Under the copyright laws, this manual may not be copied, in whole or in part, without the written consent of Apple.
The Apple logo is a trademark of Apple Inc., registered in the U.S. and other countries. Use of the “keyboard” Apple logo (Option-Shift-K) for commercial purposes without the prior written consent of Apple may constitute trademark infringement and unfair competition in violation of federal and state laws.
Every effort has been made to ensure that the information in this manual is accurate. Apple is not responsible for printing or clerical errors.
Apple
1 Infinite Loop Cupertino, CA 95014-2084 408-996-1010 www.apple.com
Apple, the Apple logo, iLife, iPhoto, iPod, iTunes, Keynote, Mac, the Mac logo, Macintosh, Mac OS, Pages, and QuickTime are trademarks of Apple Inc., registered in the U.S. and other countries.
Aperture, Finder, GarageBand, iWeb, iWork, and Safari are trademarks of Apple Inc.
AppleCare and Apple Store are service marks of Apple Inc., registered in the U.S. and other countries.
.Mac is a service mark of Apple Inc.
Adobe, the Adobe logo, Acrobat, the Acrobat logo, Distiller, PostScript, and the PostScript logo are trademarks or registered trademarks of Adobe Systems Incorporated in the U.S. and/or other countries.
Other company and product names mentioned herein are trademarks of their respective companies. Mention of third-party products is for informational purposes only and constitutes neither an endorsement nor a recommendation. Apple assumes no responsibility with regard to the performance or use of these products.
034-4051-A 06/2007

Contents
7 Welcome to iWork ’08
8 Welcome to Pages ’08
10 Welcome to Numbers ’08
12 Welcome to Keynote ’08
14 About This Book
14 Where to Go for More Help
16 Overview of iWork Tools
16The Toolbar and Format Bar
17The Inspector Window
18The Media Browser
19The Font Panel
20The Colors Window
21Keyboard Shortcuts
23Chapter 1: Getting Started with Pages
23What You’ll Learn
24Step 1: Create a New Document and Choose a Template
26Step 2: Add and Format Text
27Changing Font Color and Other Text Attributes
3

30 Using Styles and Creating Lists
35 Step 3: Add Objects
35Using Media Placeholders
36Adding Objects
37Wrapping Text Around Objects
39Adding Shapes
40Step 4: Use Writing Tools
40 Checking Spelling and Proofreading Your Document
42 Researching Information
42Step 5: Share Your Document
43Working with Page Layout Documents
45 Creating and Linking Text Boxes
48Adding and Reordering Pages
49Masking (Cropping) Images
52 Removing Unwanted Areas from an Image
54Continue to Explore
55Chapter 2: Getting Started with Numbers
55What You’ll Learn
56Step 1: Create a New Spreadsheet
58Step 2: Get Familiar with the Numbers Window
59Introducing Tables
63Introducing Charts
64Introducing Sheets
4Contents

65 Step 3: Create a New Table
65Adding a Table
66Defining Table Elements
69Formatting a Table
70Working with Columns and Rows
73 Adding Data
76Using Cell Controls
77Formatting Cells
80Step 4: Use Formulas and Functions
81Adding a Quick Formula
82Using the Formula Editor
84 Using the Function Browser to Add a Function
86Performing Instant Calculations
87Using Your Results in the Loan Comparison Table
88Step 5: Enhance Your Spreadsheet
88 Adding Charts
95 Adding Text, Shapes, and Other Objects
97 Step 6: Share Your Spreadsheet
97 Preparing a Sheet for Sharing
99 Printing and Exporting Your Spreadsheet
99 Continue to Explore
Contents 5

101Chapter 3: Getting Started with Keynote
101What You’ll Learn
102Step 1: Create a New Document and Choose a Theme
105The Slide Organizer
106The Notes Field
106 Step 2: Create Slides
108 Adding and Formatting Text
108 Adding Graphics and Other Media
113 Step 3: Organize Your Slides
115 Step 4: Enhance Your Slideshow with Motion
115 Adding Transitions Between Slides
117 Making Objects Move
124 Step 5: Rehearse and Share Your Slideshow
124Rehearsing Your Presentation
125Customizing a Presentation for the Audience
126Continue to Explore
127Index
6Contents

Welcome to iWork ’08
This book will help you quickly create your first documents, spreadsheets, and slideshows.
iWork ’08 includes three applications that integrate seamlessly with your Mac experience:
ÂPages. The word processor with an incredible sense of style.
ÂNumbers. Powerful, compelling spreadsheets made easy.
ÂKeynote. Cinema-quality presentations for everyone.
Preface
7
Welcome to Pages ’08
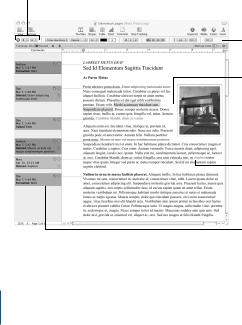
Just open Pages and start typing to create compelling letters, reports, and other word processing documents. You can also create beautifully designed brochures, flyers, and newsletters with the powerful page layout mode. Pages features change tracking, rich graphics and text tools, and more than 140 templates.
Use paragraph and character styles to make your documents consistent.
Use the Format Bar to change fonts, colors, line spacing, and more.
Text automatically flows around inserted images.
Track changes directly in the text, or hide tracking.
Use change tracking to edit documents with multiple authors.
Above, a Word Processing template is shown.
8 Preface Welcome to iWork ’08
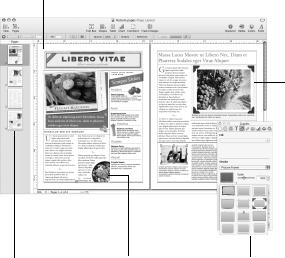
Below, a Page Layout template is shown.
Position text and |
The Format Bar options |
graphics anywhere |
change based on the object |
on your canvas. |
selected. |
|
|
Drag images from the Media Browser directly into templates.
The thumbnail view shows your entire document at a glance.
Use Instant Alpha to remove the background from an image.
Add a picture frame to any image using the Graphic Inspector.
Preface Welcome to iWork ’08 |
9 |
|
|

Welcome to Numbers ’08
Numbers is a new and innovative—yet familiar—spreadsheet application with over
150 functions and fundamentally better ways to organize data, perform calculations, and manage lists. Numbers includes intelligent tables, customizable checkboxes and sliders, 2D and 3D charts, an interactive print view, and templates for home, education and business.
Create multiple sheets, |
Each table contains data |
tables, and charts in a |
calculations that work |
spreadsheet. |
across tables. |
Format text, numbers, cell borders, and more using the Format Bar.
Add charts based on table data.
Easily change the font, borders, and colors of tables.
Use the
Media Browser to add your photos anywhere.
10 Preface Welcome to iWork ’08
Drag here to move |
Sort and filter rows using the |
|
the table. |
column pop-up menu. |
|
|
|
|
Use headers to name rows and columns.
Click to add rows. |
|
Refer to cells by |
|
||
|
|
name in formulas. |
Preface Welcome to iWork ’08 |
11 |
|
|
Welcome to Keynote ’08
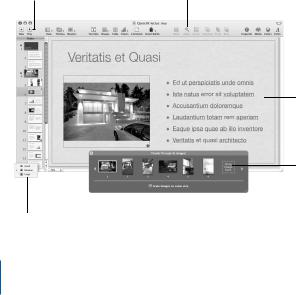
Create spectacular presentations to amaze your audiences. Start with one of over 30
Apple-designed themes, and then add gorgeous text effects and advanced animations, using Smart Builds or action builds, which move objects from point A to point B. Remove an unwanted background from an image using Instant Alpha. Record your voice with your slides for self-running presentations, kiosks, storyboards, or even podcasts.
Play cinema-quality presentations, or even record voiceovers for selfrunning presentations.
Choose the size of the thumbnails.
Use Instant Alpha on any image to easily remove the background color.
 Quickly access all your photos, movies, and music using the Media Browser.
Themes include multiple layouts with coordinated fonts, colors, image frames, and backgrounds.
Use Smart Builds with drop zones to quickly create sophisticated animations.
12 Preface Welcome to iWork ’08
|
|
|
|
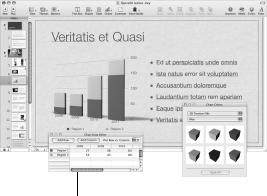
Use the Inspector to |
|
Create beautiful charts |
|
change the attributes of |
|
|
with a single click. |
|
any selected object. |
|
|
|
|||
|
|
|
|
|
|
|
|
|
|
Edit chart data directly. |
|
Choose from a library |
|
||
|
|
of lifelike 3D textures. |
Preface Welcome to iWork ’08 |
13 |
|
|

About This Book
This book contains the following chapters:
ÂChapter 1,“Getting Started with Pages,” takes you step by step through the process of creating a word processing document and a more graphics-intensive document.
ÂChapter 2,“Getting Started with Numbers,” takes you through the process of creating a simple spreadsheet.
ÂChapter 3,“Getting Started with Keynote,” takes you through the process of creating a slideshow.
These three tutorials will get you up and running quickly in each application.
Where to Go for More Help
In addition to this book, there are many other resources to help you as you use iWork ’08:
ÂiWork ’08 tour. Watch an overview of what you can do with the iWork ’08 suite. To view the tour, open an iWork ’08 application and choose Help > iWork Tour.
ÂOnline tutorials. Watch how-to videos about performing common tasks in each application. The first time you open each iWork ’08 application, a message appears with a link to these tutorials on the web. You can view an application’s tutorial anytime by choosing Help > Video Tutorials.
ÂUser’s guides. A printable PDF document, containing detailed instructions for completing any task, is available for each application. To view a user guide, open the application and choose Help > Application User Guide.
14 Preface Welcome to iWork ’08
ÂOnscreen help is provided for each application. The help contains thorough instructions for completing all iWork tasks. To open the help, open an application and choose Help > Application Help.
The first page of help also provides access to the following websites:
ÂiWork website (www.apple.com/iwork): The latest news and information about iWork.
ÂSupport website (www.apple.com/support/application): Detailed information about solving problems.
ÂHelp tags are available for many onscreen items. To see a help tag, hold the pointer over an item for a few seconds.
Preface Welcome to iWork ’08 |
15 |
|
|
Overview of iWork Tools
All three iWork applications share many of the same tools.
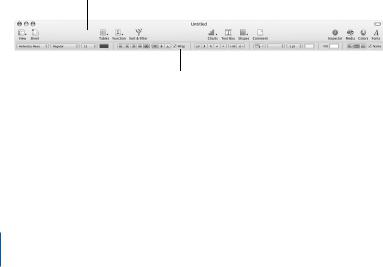
The Toolbar and Format Bar
At the top of each application window, the toolbar provides controls for common tasks. Each toolbar is described in detail in the appropriate chapter in this book. You can customize the toolbar so that it contains the tools you use most often.
To customize the toolbar:
m Choose View > Customize Toolbar.
The toolbar at the top of each window provides controls for common tasks.
The Format Bar provides additional formatting tools.
The Format Bar provides quick access to commonly used tools for formatting objects. If the Format Bar isn’t visible beneath the toolbar, click View in the toolbar and choose Show Format Bar to show it.
16 Preface Welcome to iWork ’08

The Inspector Window
You can format all elements of your document using the panes of the Inspector window. The Inspector panes are described in detail in the user’s guides.
To open the Inspector window:
m Click Inspector (a blue i) in the toolbar.
 Click the buttons along the top to see the different Inspector panes.
You can have more than one Inspector window open at a time.
To open another Inspector window:
mChoose View > New Inspector, or Option-click one of the buttons at the top of the Inspector window.
Preface Welcome to iWork ’08 |
17 |
|
|
To see what a control does, rest the pointer over it until its help tag appears.
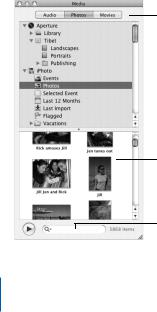
The Media Browser
This window provides quick access to all the files in your iTunes library, your iPhoto library, your Aperture library, and your Movies folder. You can drag any audio file, photo, or movie from the Media Browser directly into an iWork document.
To open the Media Browser:
m Click the Media button in the toolbar.
Click a button to view your media files.
Drag a file to a document.
Search for a file.
18 Preface Welcome to iWork ’08
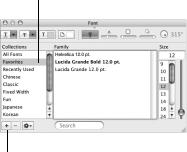
The Font Panel
All three iWork applications use the Mac OS X Font panel, so you can use any font installed on your computer in your iWork documents.
Drag favorite fonts to the
Favorites collection.
Create new font collections.
Preface Welcome to iWork ’08 |
19 |
|
|
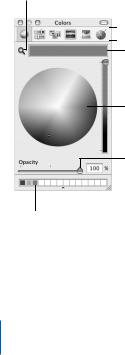
The Colors Window
Use the Mac OS X Colors window to choose colors for text, table cells, objects, shadows, and more.
To find the color of an onscreen item, click the magnifying glass and then click the item.
These buttons provide  different color models.
The color selected in the color wheel appears here. Drag from here to apply color to text or objects.
Click the color wheel to select a color. Drag the slider to change hues.
Change the color’s transparency.
To save a color for later use, drag it from the color well at the top of the window to one of these squares.
20 Preface Welcome to iWork ’08
Keyboard Shortcuts
You can perform many tasks by pressing certain keys. To see a complete list of an application’s shortcuts, choose Help > Keyboard Shortcuts.
Preface Welcome to iWork ’08 |
21 |
|
|

Getting Started with Pages |
1 |
|
|
|
|
This chapter provides an overview of the basic steps for creating documents in Pages.
What You’ll Learn
This tutorial shows you how to:
ÂCreate new documents and choose templates.
ÂAdd and format text.
ÂAdd photos and other media.
ÂAdd, delete, and reorder pages.
ÂUse writing tools such as spell checking.
ÂShare your document by printing it or exporting it for use in other applications.
23

Step 1: Create a New Document and Choose a Template
Templates are documents with placeholder content and formatting options—such as font styles and margins—already set up for you, so that you can focus on your content instead of design.
Pages provides two kinds of templates:
ÂWord Processing templates are best suited for text-intensive documents, such as letters and reports.
ÂPage Layout templates are most useful for documents that feature graphics and are more layout intensive, such as newsletters and flyers.
You complete most tasks exactly the same way in both kinds of documents. This tutorial first takes you through the steps for creating a word processing document and then presents the basics of page layout documents. For more information about the differences between the two kinds of documents, see “Working with Page Layout Documents” on page 43.
To create a new document:
1Do one of the following:
ÂIf Pages is open, choose File > New.
ÂIf Pages isn’t open, open it (click its icon in the Dock or double-click its icon in the iWork ’08 folder inside the Applications folder).
2In the Template Chooser that appears, click a template category on the left, click a template on the right, and then click Choose.
24 Chapter 1 Getting Started with Pages

This part of the tutorial uses the Project Proposal template for its examples.
Click Reports …
… and then click Project Proposal.
∏Tip: You can choose a default template for new documents. Choose Pages > Preferences, select “Use template,” and then click Choose to choose a new template.
Stopping, Saving, and Continuing
Be sure to save your work often by choosing File > Save.
You can stop this tutorial (or quit Pages) at any time and return to it later. To quit Pages, choose Pages > Quit Pages.
To reopen your document later, double-click it in the Finder, drag its icon to the Pages icon in the Dock, or open Pages and choose File > Open.
Chapter 1 Getting Started with Pages |
25 |
|
|
Step 2: Add and Format Text
Pages templates contain placeholder text, which shows you what text will look like and where it will appear. Placeholder text is either a label (Prepared by, for example), sample text (Project Proposal), or Latin text (Lorem ipsum …).
To replace placeholder text: m Click the text and type.
When you click placeholder text in a template, all the placeholder text is highlighted. When you type, the placeholder text disappears and is replaced by the text you type.
Placeholder text:
When you click it, the entire text area is selected.
∏Tip: You might find it easier to work in the document if you display formatting characters such as Return characters. Choose View > Show Invisibles.
Text you type to replace placeholder text is preformatted, but you can modify it to suit your needs.
26 Chapter 1 Getting Started with Pages

Changing Font Color and Other Text Attributes
You can format text using a variety of tools:
ÂThe Format Bar. Right below the toolbar, the Format Bar provides quick access to commonly needed tools for changing fonts, type size and color, and other attributes. To see what a tool does, rest the pointer over it for a few seconds until a help tag appears.
|
|
Choose a paragraph |
|
|
|
|
|
||
|
|
or character style. |
|
Align selected text. |
|
||||
|
|
|
|
|
|
|
|
|
|
|
|
|
|
|
|
|
|
|
|
|
|
|
|
|
|
|
|
|
|
|
|
|
|
|
|
|
|
|
|
Click to open the |
|
Change the font, |
|||||||
|
|||||||||
Styles drawer. |
|
font style, font size, |
|||||||
|
|
|
|
|
|
and color. |
|||
Change line spacing and number of columns.
Choose a
list style.
Chapter 1 Getting Started with Pages |
27 |
|
|
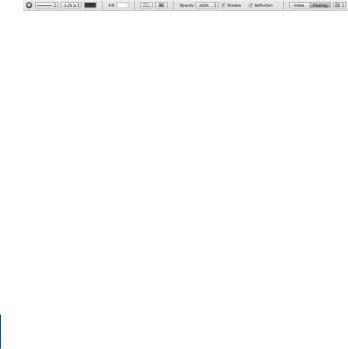
You can also use the Format Bar to modify elements other than text; the tools available change depending on what you select. When you select a graphic, for example, the Format Bar displays graphic-specific controls:
|
Choose a line style, |
|
|
|
|
Change an |
|||||
|
thickness, or color. |
|
Mask (crop) an image. |
|
|
object’s type. |
|||||
|
|
|
|
|
|
|
|
|
|
|
|
|
|
|
|
|
|
|
|
|
|
|
|
Fill an object |
|
|
Open the Adjust Image |
|
|
|
|
|
|
||
|
|
|
Change the |
|
|
||||||
|
|
|
|
||||||||
with color. |
window. |
object’s text wrap. |
|||||||||
ÂThe Format menu and Font panel. You can use the Format menu commands and the Font panel for many text formatting tasks. To open the Font panel, click Fonts in the toolbar.
ÂThe Inspector. The Text Inspector provides more formatting tools.
28 Chapter 1 Getting Started with Pages
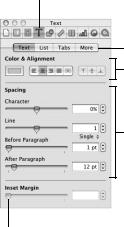
To open the Text Inspector:
1 Click Inspector in the toolbar (the blue i button).
2 Click the Text Inspector button.
The Text Inspector button
Click a button to create lists, tabs, and more.
Change text color or alignment.
Change the space between characters or lines of text.
Change the amount of “padding” (space) around text in text boxes, table cells, and shapes.
∏ Tip: You can open multiple Inspectors by choosing View > New Inspector.
Chapter 1 Getting Started with Pages |
29 |
|
|

Using Styles and Creating Lists
A style is predefined formatting for a particular kind of text, such as body text or captions. Styles are useful for quickly formatting and reformatting a document. When you apply a style to text, it automatically uses the style’s font, size, color, and more. If you want to change something—the size of body text, for example—you can simply redefine the style—all the text that uses the style updates automatically to reflect the new formatting.
Pages provides three kinds of text styles:
ÂParagraph styles can be applied only to entire paragraphs (chunks of text that end with a Return character), not to individual words within paragraphs.
ÂCharacter styles can be used to format individual words, groups of words, or letters within a paragraph. A common use of character styles is to emphasize particular words using bold or italic. Applying a character style does not change the style of the rest of the paragraph.
ÂList styles are used to create bulleted or numbered lists. Pages provides many list styles; you can modify these styles or create your own.
You can apply paragraph, character, and list styles using the Format Bar or the Styles drawer.
30 Chapter 1 Getting Started with Pages
Loading...