


 Loading...
iWeb
Getting Started
Get to know iWeb and learn how to create your own website.

1 Contents
Chapter 1 |
3 |
Welcome to iWeb |
|
3 |
About iWeb |
|
3 |
What You’ll Learn |
|
4 |
Before You Begin |
|
4 |
What You Need |
|
4 |
Useful Terms to Know |
|
6 |
iWeb Interface |
Chapter 2 |
7 |
Learn iWeb |
|
7 |
Overview of Creating a Website |
|
8 |
Step 1: Plan Your Website |
|
8 |
Step 2: Create Your Website |
|
9 |
Adding Your Own Text |
|
10 |
Adding Your Own Graphics |
|
11 |
Adding Photos and Photo Albums |
|
14 |
Creating a Blog |
|
17 |
Adding Links to Other Pages |
|
19 |
Adding a Map |
|
20 |
Organizing Your Website |
|
21 |
Renaming Your Site or Page |
|
21 |
Step 3: Publish Your Website on the Internet |
|
23 |
Making Changes to Your Website |
|
23 |
Continue to Explore iWeb |
|
24 |
Getting More Help |
2

Welcome to iWeb |
1 |
|
|
|
|
This document will help you quickly create a website using iWeb.
If you’ve always wanted your own website but weren’t sure how to create one, iWeb is an easy and fun way to accomplish that goal.
About iWeb
iWeb is the easiest way to create and publish great-looking websites. You see what each webpage will look like as you work on it—you don’t have to know anything about programming or web-authoring languages such as HTML. Use any of the special templates in iWeb to create a professional-looking website in minutes, and then publish your website to MobileMe with the click of a button.
iWeb makes it easy to update and manage your website. Because iWeb is integrated with iLife, it is easy to showcase your photos or art, create a blog or podcast, and add special features like videos, maps, and ads to your website.
What You’ll Learn
In this tutorial, you’ll learn to do the following:
ÂCreate a website using predesigned templates
ÂAdd pages for photos and photo albums
ÂStart a blog (a web journal)
ÂAdd a link to another website
ÂAdd a map
ÂAdd an Email Me button, so that your visitors can contact you
ÂPublish your website, so people can visit it
3
Before You Begin
To make it easier to complete this tutorial, you might want to print it.
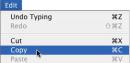
In many tasks shown in the tutorial (and in iWeb Help), you need to choose menu commands, which look like this:
Choose Edit > Copy.
The first word after Choose is the name of a menu in the iWeb menu bar. The next word (or words) indicates the item to choose from that menu.
You can stop doing the tutorial at any time by choosing iWeb > Quit iWeb, or by clicking the red close button at the top-left corner of the iWeb window. The next time you open iWeb, your website is exactly as you left it.
Make sure you save your work from time to time by choosing File > Save.
Have fun and experiment as much as you like. You can always undo an action by choosing Edit > Undo as many times as necessary to remove the changes you make. The Undo command won’t remove anything you save.
What You Need
To follow along with all the steps in the tutorial, you’ll need some photos or other graphics files on your computer. If you don’t have any, you can still do the rest of the steps.
Useful Terms to Know
Here are brief definitions of some of the terms you’ll see as you work with iWeb.
ÂAdSense ad: A service provided by Google that enables you to place advertisements relevant to the surrounding page content on any page in your website. You earn revenue from Google when your website visitors click ads.
Âblog: A web-based journal that can contain text, photos, and other media. For more information, see “Creating a Blog” on page 14.
Âbrowser: An application you use to visit websites. (Mac OS X comes with a browser called Safari.)
ÂDomain file: The file on your computer that contains all your iWeb website data.
4 |
Chapter 1 Welcome to iWeb |
|
|
Âdomain name: The root (the first part, after “http” and “www”) of your site’s web address is its domain. For example, the domain of the site www.example.com/index is “example.com.”
Âhomepage: The first page that appears when you visit a website. Sometimes called the start page or default page.
Âhyperlink: Text or an object you can click to initiate an action, such as going to another webpage or opening a document. Most text hyperlinks (also called links) look different from surrounding text (they are underlined or a different color) to indicate that you can click them.
ÂInternet: A worldwide network of computers that makes it possible for people to communicate with one another and share information.
ÂMobileMe: A membership-based Internet service provided by Apple Inc. Your
MobileMe subscription provides one-click publishing for your iWeb sites, ad-free email services, photo and video sharing, online backup, synchronization, and much more. For more information, visit www.me.com.
Ânavigation menu: The website table of contents. The navigation menu lists pages in your website as links that visitors can click to go to individual pages. iWeb automatically creates a navigation menu for your website.
Âpodcast: An audio or video file that is like an Internet radio or TV show. You can produce your own podcasts and let visitors download them one by one, or they can download new episodes automatically through a subscription.
ÂRSS: A feature that enables visitors to subscribe to the contents of a website and receive automatic updates when new blog entries, podcast episodes, or photos are added to the site. RSS stands for “really simple syndication.”When visitors subscribe to the site’s feed, the updates are sent to the RSS reader of their choosing.
ÂURL: The website address, which you enter in a browser to go to a website. (URL means “Uniform Resource Locator.”) A typical URL looks like this: http://www.apple.com
Âweb: The web (or World Wide Web) is all the sites, pages, text, media files, and links that people interact with when they get on the Internet. Although it is common to use the terms web and Internet interchangeably, the Internet is actually the hardware and software network upon which the web is built.
Âwebsite: A collection of individual webpages that are linked together into a website. Websites are usually organized around a theme, an individual, or an organization. Also called site.
Âwebpage: A single page within a website. Also called page.
Âweb widget: An object that embeds content from the web into any of your webpages. For example, a Google map or a snippet from another website such as YouTube.
Chapter 1 Welcome to iWeb |
5 |
|
|

iWeb Interface
Sidebar
All the websites and webpages you create appear here. Click a page to display it in the webpage canvas.
Webpage canvas
Edit the webpage here. Customize the text, add graphics and movies, add links, arrange items on the page, and more.
Navigation menu
All of the pages in the site are listed here. Visitors click these links to view your webpages.
Placeholder text and graphics
Click the placeholder text and type your own titles and body text. Drag your own graphics files over placeholder graphics.
Sidebar
As you create websites and webpages, they appear in the sidebar. Click the disclosure triangles to show or hide pages in a site or subpages in a blog. You can rearrange pages by dragging them in the list. You can even drag a page from one website to another.
Webpage canvas
The webpage canvas is where you create the content for a webpage. You can drag graphics files, movie files, and sound files to the canvas to add them to your website.
The webpage canvas has four different regions:
ÂThe navigation bar, which contains the navigation menu (the table of contents for the website)
ÂThe header at the top of the page
ÂThe footer at the bottom of the page
ÂThe body, between the header and the footer
For more information, see “About webpage regions” in iWeb Help.
6 |
Chapter 1 Welcome to iWeb |
|
|

Learn iWeb |
2 |
|
|
|
|
This tutorial takes you step by step through the process of creating a simple website.
Overview of Creating a Website
Plan your website.
Your first step is to decide what you want on your website. Do you want to share photos? Write a travel journal? Display a portfolio of your work? Your website will consist of one or more webpages that are linked together. They can contain text, graphics, video, audio, and more.
With iWeb, it’s easy to modify, add, or remove webpages at any time, so you don’t have to decide every detail before you begin. You may want to create multiple websites so that you can, for example, have a personal website and a website for your business.
Create your website.
After you decide how you want to use your website, the next step is to assemble and organize the website content. The iWeb templates make it easy to enter your text, add photos and movies, set up links to other websites, and so on.
Publish your website on the Internet.
After you create your website, you publish it so that others can visit it. With iWeb and a MobileMe account, this step is as easy as clicking a button.
Note: To publish your website using the instructions in this tutorial, you need at least a free trial MobileMe subscription and enough available iDisk storage space for your webpages, including your media (the movies, photos, and so on that you add to your website). If you don’t have a MobileMe account, you can sign up for one (a free 60-day trial or a paid yearly subscription) by opening System Preferences and clicking MobileMe (or by going to www.me.com).
7
If you’re not sure exactly what you want to put on your website, you can still go through the tutorial and learn how to use iWeb. Nothing will be visible to the public until you publish your website. Later, when you’re ready to “go live” with your website, you can publish it.
Step 1: Plan Your Website
iWeb provides themes and templates to help you create a beautiful site with a minimum of effort. Your website can use as many or as few of the templates as you like, depending on the content you want on your site.
Each theme provides a different style, or “look,” for your site. A template is a page layout designed for a specific purpose, such as a blog, a podcast, or a photo album. Every template is available for each theme.
Each time you add a new webpage to your site, you choose the page’s theme and template. If you decide later to change the theme for a page, you just select the page in the sidebar and click the Theme button in the toolbar to choose a new theme.
Step 2: Create Your Website
Now that you have an idea of what you want to do, start by creating a website that consists of one welcome page. You’ll add more pages to your website as you go through the tutorial. You can add pages in any order; it’s easy to rearrange them or change the theme of pages later.
To create a website:
1Do one of the following:
ÂIf iWeb isn’t open, click its icon in the Dock or double-click the iWeb application icon in your Applications folder.
ÂIf iWeb is already open and you don’t see the template chooser shown in step 2 below, click the Add (+) button at the bottom of the iWeb window (or choose File > New Page).
2 In the template chooser, click one of the themes on the left.
8 |
Chapter 2 Learn iWeb |
|
|
Loading...