


VS3251 |
User’s guide |
Guia do Usuário |
Mode d’emploi |
Guía del usuario |
|
|
|
|
2
The lightning flash with arrowhead, within an equilateral triangle, is intended to alert the user to the presence of uninsulated “dangerous voltage” within the product’s enclosure that may be of sufficient magnitude to constitute a risk of electric shock to persons.
Caution: To prevent the risk of electric shock, do not remove cover (or back). No user-serviceable parts inside. Refer servicing to qualified service personnel.
The exclamation point within an equilateral triangle is intended to alert the user to the presence of important operating and maintenance (servicing) instructions in the literature accompanying the appliance.
CAUTION
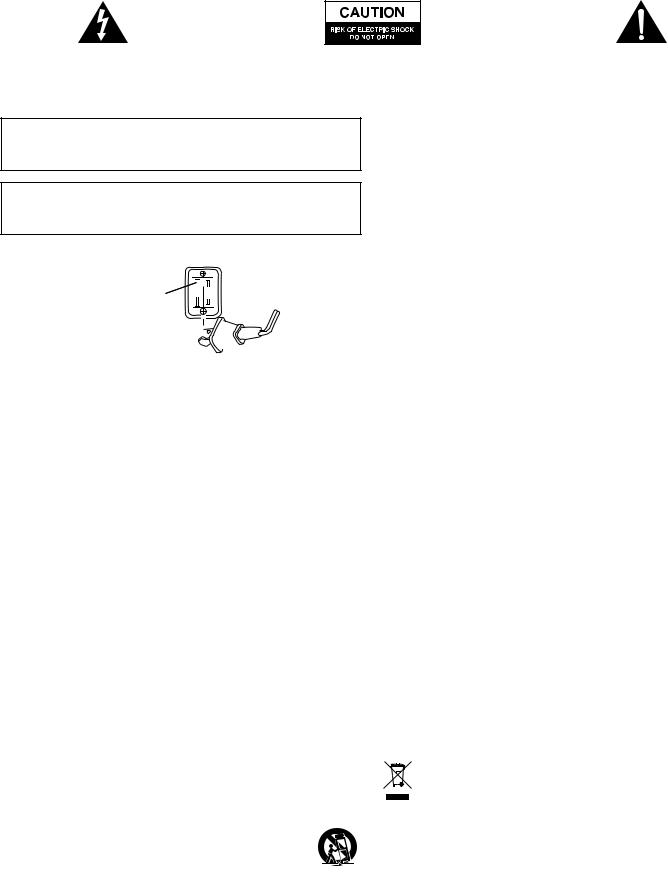
To prevent electric shock do not use this (polarized) plug with an extension cord, receptacle or other outlet unless the blades can be fully inserted to prevent blade exposure.
WARNING
TO REDUCE THE RISK OF FIRE OR ELECTRIC SHOCK, DO NOT EXPOSE THIS APPLIANCE TO RAIN OR MOISTURE.
CONNECTING THE POWER CORD (AC WALL SOCKET)
Long slot is neutral 


 (ground) side.


Insert the wide blade into 


 the ground side slot.


IMPORTANT SAFETY INSTRUCTIONS
1.Read these instructions.
2.Keep these instructions.
3.Heed all warnings.
4.Follow all instructions.
5.Do not use this apparatus near water — This apparatus shall not be exposed to dripping or splashing, and no objects filled with liquids, such as vases, shall be placed on the apparatus.
6.Clean only with dry cloth.
7.Do not block any ventilation openings. Install in accordance with the manufacturer’s instructions. The apparatus should not be situated on a bed, sofa, rug or similar surface that may block the ventilation openings. The apparatus must not be placed in a built-in installation, such as a closed bookcase or cabinet that may impede the flow of air through the ventilation openings. Ventilation should not be impeded by covering the openings with items such as newspapers, tablecloths, curtains, etc.
8.Do not install near any heat sources such as radiators, heat registers, stoves, or other apparatus (including amplifiers) that produce heat.
9.No naked flame sources, such as lighted candles, should be placed on the apparatus.
10.Do not defeat the safety purpose of the polarized or grounding-type plug. A polarized plug has two blades with one wider than the other. A grounding type plug has two blades and a third grounding prong. The wide blade or the third prong are provided for your safety. If the provided plug does not fit into your outlet, consult an electrician for the replacement of the obsolete outlet.
11.Protect the power cord from being walked on or pinched — particularly at plugs, convenience receptacles, and the point where they exit from the apparatus.
12.Do not install in an area which impedes the access to the power plug. Disconnecting the power plug is the only way to completely remove power to the product and must be readily accessible at all times.
13.Power source — Use only power supplies of the type specified in the operating instructions or as marked on the appliance. If a separate power supply is included with this apparatus, do not substitute with any other power supply — use only manufacturerprovided power supplies.
14.Unplug this apparatus during lightning storms or when unused for long periods of time.
15.Refer all servicing to qualified service personnel. Servicing is required when the apparatus has been damaged in any way, such as power-supply cord or plug is damaged, liquid has been spilled or objects have fallen into the apparatus, the apparatus has been exposed to rain or moisture, does not operate normally, or has been dropped. For service, refer to qualified service personnel, return to the dealer, or call the Altec Lansing service line for assistance.
16.For products which incorporate batteries, please refer to local regulations for proper battery disposal.
17.Only use attachments/accessories specified by the manufacturer.
18.Use only with the cart, stand, tripod, bracket, or table specified by the manufacturer or sold with the apparatus. When a cart is used, use caution when moving the cart/apparatus combination to avoid injury from tip-over.
ALTEC LANSING TECHNOLOGIES, INC. ONE YEAR LIMITED WARRANTY
(TWO-YEAR LIMITED WARRANTY IN THE EUROPEAN UNION AND ASIA)
What Does The Warranty Cover?: Altec Lansing warrants that its products shall be free from defects in materials or workmanship, with the exceptions stated below.
What Is The Period Of Coverage?: For units purchased in European Union or Asia, this warranty runs for two years from the date of purchase. For units not purchased in Europe or Asia, this warranty runs for one year from the date of purchase. The term of any warranties implied by law shall expire when your limited warranty expires. Some states and/or Member States in the European Union do not allow limitations on how long an implied warranty lasts, so the above limitation may not apply to you.
What Does The Warranty Not Cover?: This warranty does not cover any defect, malfunction or failure that occurs as a result of: improper installation; misuse or failure to follow the product directions; abuse; or use with improper, unintended or faulty equipment. (For information on proper installation, operation and use consult the manual supplied with the product. If you require a replacement manual, you may download a manual from www.alteclansing.com.) Also, consequential and incidental damages are not recoverable under this warranty. Some states do not allow the exclusion or limitation of incidental or consequential damages, so the above limitation or exclusion may not apply to you.
What Will Altec Lansing Do To Correct The Problem?: Altec Lansing will, at its option, repair or replace any product that proves to be defective in material or workmanship. If your product is no longer being manufactured, or is out of stock, at its option, Altec Lansing may replace your product with a similar or better Altec Lansing product.
How To Get Warranty Service: To get a covered product repaired or replaced, you must contact Altec Lansing during the warranty period by email (csupport@alteclansing.com). You must include in your email, your name, address, email address, telephone number, date of purchase and a complete description of the problem you are experiencing. In the United States, you may alternatively contact Altec Lansing by telephone at 1-800-ALTEC88 — please be prepared to provide the same information. If the problem appears to be related to a defect in material or workmanship, Altec Lansing will provide you a return authorization and instructions for return shipment. Return shipments shall be at the customer’s expense, and the return must be accompanied by the original proof of purchase. You should insure the shipment as appropriate because you are responsible for the product until it arrives at Altec Lansing.
How Will State Law Affect Your Rights?: This warranty gives you specific legal rights, and you may also have other rights which vary from state to state. Please note that in the European Union, you as a consumer might have other legal rights under national legislation of European Union Member States governing the sale of Altec Lansing’s goods. Those rights are not affected by this guarantee.
The above limited warranties and remedies are sole warranties and remedies available to purchaser, if, and to the extent, valid and enforceable under the applicable law.
CUSTOMER SERVICE
The answers to most setup and performance questions can be found in the Troubleshooting guide. You can also consult the FAQs in the customer support section of our Web site at www.alteclansing.com. If you live in North America and still can’t find the information you need, please call our customer service team for assistance before returning the speakers to your retailer under their return policy.
Tel: 800-258-3288
Email: csupport@alteclansing.com
If you live outside of North America, please visit our website at www.alteclansing.com and select your region to locate your country’s distributor.
For the most up-to-date information, be sure to check our Web site at www.alteclansing.com.
INTERNATIONAL DISTRIBUTION
International customers: For information regarding the distribution of Altec Lansing products in your country, please visit www.alteclansing.com and click on your region.
DISPOSAL OF OLD ELECTRICAL & ELECTRONIC EQUIPMENT
This symbol on the product or on its packaging indicates that this product shall not be treated as household waste. Instead it shall be handed over to the applicable
collection point for the recycling of electrical and electronic equipment. By ensuring this product is disposed of correctly, you will help prevent potential negative consequences for the environment and human health, which could otherwise be
caused by inappropriate waste handling of this product. The recycling of materials will help to conserve natural resources. For more detailed information about recycling of this product, please contact your local city office or your household waste disposal service.
3

VS3251 six-Piece Powered Audio System
Thank you for purchasing this Altec Lansing product. For generations, Altec Lansing has been first in audio innovation. Today, our line of powered speakers has received more performance awards than any other brand. In all kinds of environments, in every price range, Altec Lansing offers sound of distinction — giving even the most demanding customers the audio enjoyment they seek. Just listen to this!
Box Contents
•Five speakers with removable stands
•One subwoofer
•Infrared pod
•Wireless remote
•2 AAA (LR 03) batteries
•Color-coded 3.5mm stereo cables
•User’s guide and quick connect card
Placing Speakers
Subwoofer
All stereo-encoded information is heard through the satellite speakers. The subwoofer contains no stereo imaging, and its sound is non-directional. As a result, the subwoofer doesn’t have to be placed in any particular relationship to the satellites. However, placing the subwoofer on the floor close to a wall or room corner provides better bass efficiency and optimum sound.
Warning: The subwoofer is not magnetically shielded. As such, it SHOULD be placed at least 2 feet (0.6m) from TVs, computer monitors, computer hard drives or any other magnetic media (e.g., floppy disks, Zip disks, computer or audio tapes, etc.).
Front Satellite Speakers
Arrange the front satellite speakers to suit your listening tastes — from right next to the monitor to as far apart as the speaker cords allow. Use the key hole on the back of each speaker if you choose to mount them on the wall.
Center Speaker
Place the center speaker either on top or below the center of the monitor. Use the key holes on the back of the center speaker if you choose to mount it on the wall.
Rear Satellite Speakers
The rear satellite speakers should be placed slightly behind you, or as far back as the cords allow. Use the key hole on the back of each speaker if you choose to mount them on the wall.
For optimum sound, all satellites should be placed at or slightly above ear level, and in an arrangement that offers the most satisfying results.
Note: The satellite speakers ARE magnetically shielded and can be placed close to video displays such as TVs and computer monitors without distorting the image.
Infrared Eye
The infrared “eye” can be placed anywhere on your desktop where it will be able to “see” the wireless remote. The “eye” will recognize commands from the wireless remote from up to 26' (8 m) away.
Making Connections
Warning: Do not insert the speaker system’s power plug into a wall outlet until all connections are made. Also, turn off audio source (i.e., your PC, MP3 player, Sony PlayStation, etc.) before connecting the outputs to the speaker system’s inputs.
To ensure first-time operation as expected, please carefully follow the connection sequences described below in the order indicated.
Speaker System
To connect each satellite to the subwoofer, use the FRONT LEFT (front left), FRONT RIGHT (front right), REAR LEFT (rear left), REAR RIGHT (rear right) and CENTER (center) identifiers on the back of each satellite to connect them to the appropriate output on the back of the subwoofer. To make the connection, depress the color-coded spring-clip on the back of the subwoofer and insert the color-coded wire, and depress the black spring clip and insert black wire.
Inputs
Various connection schemes between your audio source and the speaker system are available. Determine if you’ll be setting up the speaker system for PC audio/PC gaming, DVD playback, console gaming or with portable audio devices (such as MP3 or portable CD players), then skip to the appropriate section.
PC Audio/PC Gaming/DVD Playback
Sound cards designed for PC gaming or DVD playback have unique audio outputs. Typically, the outputs will be marked as “front output,” “rear output” and “LFE/center output.” In some cases, slightly different terminology may be used. The sound card’s documentation should help you determine which outputs to use with your speaker system.
6-Channel/5.1 Sound Card with analog outputs
•Locate the green, black, and orange cables.
•Insert one end of the green, black, and orange cables into the computer soundcard’s green, black, and orange outputs. Plug the other end of the green, black, and orange cables into the back of the subwoofer, as follows:
•Plug the green cable into the input marked “Front Right/Left”
•Plug the black cable into the input marked “Rear Right/Left”
•Plug the orange cable into the input marked “Subwoofer/Center.”
2-Channel/Stereo Sound Cards|
•Locate the green cable.
•Insert one end of the green cable into the computer’s stereo (green) output, and the other end into the input marked AUX on the subwoofer.
Console Gaming
(Requires the use of the Console Gaming Y-Adapter, which is not included. This adapter can be purchased at www.alteclansing.com.)
Most console game systems feature dual-RCA outputs. To connect your speakers, follow the steps below:
•Locate or purchase a Console Gaming Y-Adapter with a lime green 3.5 mm stereo jack on one end and two RCA jacks on the other — one red and one white.
•Locate the red and white RCA plugs on the end of the cable connected to the back of your console gaming system. Connect them to the matching red and white RCA jacks on the Console Gaming Y-Adapter.
•Locate the green cable included with this system.
•Insert one end of the green cable into the Console Gaming Y-adapter lime green 3.5mm stereo jack, and the other end into the input marked AUX on the subwoofer.
Portable Audio Devices (MP3, Portable CD Players, etc.)
•Locate the green cable.
•Insert one end of the green cable into the headphone or line-out jack of the portable audio device, and the other end into the input marked AUX on the subwoofer.
4

POWERING ON |
Surround Volume |
|
|
•After all other connections are made, plug the AC power cord (on the back of subwoofer) into a wall outlet.
•Turn the system on by pushing the power switch on the back of the subwoofer. The LED on the subwoofer will blink slowly when the unit is in stand-by mode.
•Turn on the audio source.
•Insert 2 AAA (LR 03) batteries in the battery compartment of the wireless remote.
•Activate the system by pushing the  located on the wireless remote. The LED on the subwoofer will stop blinking when the unit is on.
Note: While in stand-by or mute mode, the system continues to receive power. To completely shut down the unit push the power switch on the back of the subwoofer and make sure the LED on the subwoofer is off.
Note: To avoid hearing a popping sound when you turn on your Altec Lansing speaker system, always turn on your audio source first.
Stereo and Surround Sound
•Push the STER/SURR button on the wireless remote to alternate between six-speaker surround sound and two-speaker stereo sound.
Note: The system will power on the surround mode (SURR), with all five speakers activated.
Master Volume
The MASTER VOLUME knob on the subwoofer and the “+” and “–“ buttons marked with the word “MASTER VOLUME” on the wireless remote control the master volume. On the subwoofer, turn the knob clockwise to increase the volume and counterclockwise to decrease the volume. On the wireless remote, push the “+” button to increase the volume, and the “–“ button to decrease it.
System Specifications*
The “+” and “–“ buttons marked with the word “REAR” on the wireless remote control the volume of the rear speakers. Push the “+” button to increase the volume, and the “–“ button to decrease it.
Center Volume
The “+” and “–“ buttons marked with the word “CENTER” on the wireless remote control the volume of the center speaker. Push the “+” button to increase the volume, and the “–“ button to decrease it.
Subwoofer Volume
The “+” and “–“ buttons marked with the word “SUBWOOFER” on the wireless remote control the volume of the subwoofer. Push the “+” button to increase the volume, and the “–“ button to decrease it.
Mute
To mute the speaker system, press the MUTE button located on the wireless remote. The LED on the subwoofer will blink fast when the unit is in
mute mode.
Headphones
To use headphones with the system, plug them into the labeled  jack on the subwoofer. When headphones are connected, the speaker system is muted.
Altec Lansing’s superior sound comes from our patented Dynamic EQ technology, which utilizes custom-built, high-fidelity drivers, state-of-the-art equalization circuitry, and a harmonious mix of the following specifications:
|
Sound Pressure Level (SPL): |
101 dB |
|
Frequency Response: |
40 Hz – 17 kHz (-10 dB) |
||
|
|
|
|
|
|
|
|
|
Total Continuous Power: |
70 Watts RMS |
|
Signal to Noise Ratio |
|
|
|
|
|
|
|
|
@ 1 kHz input: |
> 70 dB |
|
|
• Front Speakers: |
9 |
Watts/channel @ 4 ohms |
||||
|
|
|
|
|
|||
|
|
@ 10% THD @ 120 Hz – 17 kHz |
|
Drivers (per satellite): |
One full-range 2.5" driver per speaker |
||
|
|
2 |
Channels Loaded |
|
|
|
|
|
|
|
Subwoofer: |
One 5" long-throw woofer |
|||
|
|
|
|
|
|||
|
• Rear Speakers: |
9 |
Watts/channel @ 4 ohms |
|
|
|
|
|
|
@ 10% THD @ 120 Hz -– 17 kHz |
|
|
|
|
|
|
|
2 |
Channels Loaded |
|
|
|
|
|
|
|
|
|
|
|
|
|
• Center Speaker: |
9 |
Watts @ 4 ohms |
|
|
|
|
|
|
@ 10% THD @ 120 Hz – 17 kHz |
|
|
|
|
|
|
|
Single Channel Loaded |
|
|
|
|
|
|
|
|
|
|
|
|
|
|
• Subwoofer: |
25 Watts @ 4 ohms |
|
|
|
|
|
|
|
@ 10% THD @ 40 – 170 Hz |
|
|
|
|
|
|
|
Single Channel Loaded |
|
|
|
|
|
|
|
|
|
|
|
|
|
*Power rating conforms to FTC Amplifier Rule #16 C.F.R. Part 432.
5

Troubleshooting
Symptom |
Possible Problem |
Solution |
|
|
LED is not lit. |
Power isn’t turned on. |
Turn on the speaker system by (1) making sure the AC power cord is connected |
||
|
|
to a wall outlet, (2) pushing the On/Off button located on the back of the |
||
|
|
subwoofer, and (3) activating the system by pushing the |
|
button on the |
|
|
|
||
|
|
wireless remote. An LED will light on the subwoofer when the power is ON. |
||
|
|
|
|
|
|
Wireless remote batteries are dead. |
Insert 2 AAA (LR 03) batteries in the battery compartment of the wireless |
||
|
|
remote. |
|
|
|
|
|
|
|
|
AC power cord isn’t connected to the wall outlet. |
Connect the AC power cord to a wall outlet. |
|
|
|
|
|
|
|
|
Surge protector (if used) isn’t powered on. |
If the AC power cord is plugged into a surge protector, make sure the surge |
||
|
|
protector is switched on. |
|
|
|
|
|
||
|
Wall outlet not functioning. |
Plug another device into the wall outlet (same jack) to verify the wall outlet |
||
|
|
is working. |
|
|
|
|
|
||
No sound |
Volume is set too low. |
On the subwoofer, turn the knob clockwise to increase the volume. On the |
||
from one or |
|
wireless remote, push the “+” button to increase the volume. |
||
more speakers. |
|
|
|
|
|
Check volume level on the computer sound card or alternate audio source |
|||
|
|
|||
|
|
device, and set at mid-level. |
|
|
|
|
|
||
|
Speaker system isn’t connected to audio source. |
Check plug connections on the audio source. Make sure the signal cable(s) is/are |
||
|
|
inserted firmly into the correct jacks. |
|
|
|
|
|
||
|
Speaker system is connected to wrong output on |
Make sure the lime green 3.5mm stereo cable is connected and fully inserted |
||
|
audio source. |
into the “line-out,” “audio-out,” or the headphone jack of the audio source. |
||
|
|
|
||
|
Problem with audio source device. |
Test the speakers on another audio device. Remove the lime green 3.5mm |
||
|
|
stereo cable from the audio source device and connect it to the “line-out,” |
||
|
|
“audio-out,” or the headphone jack of another audio source. |
||
|
|
|
||
No sound |
The system is set to the STER (stereo) mode. |
Push the STER/SURR button on the wireless remote to enjoy six-speaker sound. |
||
from center or |
|
|
|
|
|
Increase the rear or center speaker volume level. |
|
|
|
rear satellites. |
Rear or center level is set too low. |
|
|
|
|
|
|
||
Crackling sound |
Bad connection. |
Check all cables. Make sure they are connected to the “line-out” or “audio-out” |
||
from speakers. |
|
jack on your sound card or other audio source — 7 NOT “speaker-out.” |
||
|
|
|
||
|
Volume level in computer operating system is set |
Check the computer operating system volume level and decrease it if necessary. |
||
|
too high. |
|
|
|
|
|
|
||
|
A problem with your audio source device. |
Unplug the stereo cable from the audio source. Then plug it into the |
||
|
|
headphone jack of an alternate audio source (e.g., Walkman, Discman or |
||
|
|
FM radio). |
|
|
|
|
|
||
Sound is |
Volume level set too high. |
On the subwoofer, turn the knob counterclockwise to decrease the volume. |
||
distorted. |
|
On the wireless remote, push the “–“ button to decrease the volume. |
||
|
|
|
||
|
Computer operating system volume level is set |
Adjust the computer operating system volume and balance levels to the |
||
|
too high. |
center as a starting point, then adjust the level on the speaker using the |
||
|
|
volume control. |
|
|
|
|
|
||
|
Sound source is distorted. |
WAV files are often of poor quality. So distortion and noise are easily noticed |
||
|
|
with high-powered speakers. Try a different sound source such as a music CD. |
||
|
|
|
|
|
Radio |
Too close to a radio tower. |
Move your speakers until the interference goes away. |
|
|
interference. |
|
|
|
|
|
|
|
|
|
6
Symptom |
Possible Problem |
Solution |
|
No sound |
Subwoofer volume is too low. |
Increase the subwoofer volume on the wireless remote. |
|
from subwoofer. |
|
|
|
Bad connection. |
Check to make sure that all cables are connected properly and are making a |
||
|
|||
|
|
clear connection. |
|
|
|
|
|
Low hum |
The AC in your house is at 60 cycles per second, which is |
Some low hum may be detected when your speaker system is powered on |
|
from subwoofer. |
within the audio frequency of the subwoofer. |
without an audio source playing, or when the volume is set at an extremely |
|
|
|
low level. |
|
|
|
|
|
Loud hum |
Bad connection. |
Unplug the AC power cord from the surge protector (if used), and plug directly |
|
from subwoofer. |
|
into an AC wall outlet. |
|
|
|
|
|
|
|
Move your cables. Check to ensure they are making a clear connection. |
|
|
|
|
|
|
Volume on your audio source device is set too high. |
Disconnect your 3.5mm stereo cable from the audio source. If the loud hum |
|
|
|
goes away, lower the volume on the audio source. |
|
|
|
|
|
|
|
Lower the master volume or subwoofer volume on your computer, portable |
|
|
|
device, etc. |
|
|
|
|
|
Too much bass |
Subwoofer volume is too high. |
Decrease the subwoofer volume on the wireless remote. |
|
from subwoofer. |
|
|
|
|
|
|
|
Distorted monitor. |
Subwoofer too close to monitor. |
Because the subwoofer is not magnetically shielded, it can cause distortion if |
|
|
|
it’s too close to your monitor. Move the subwoofer so it’s at least 2 feet from |
|
|
|
your monitor. |
|
|
|
|
7
Le symbole figurant un éclair dans un triangle équilatéral est destiné à attirer l’attention de l’utilisateur sur la présence d’une “tension dangereuse” non isolée pouvant être d’amplitude suffisante pour constituer un risque d’électrocution.
Attention : Pour prévenir tout risque d’électrocution, ne retirez pas le couvercle (ou le dos) de l’appareil. Il ne se trouve à l’intérieur aucune pièce susceptible d’être réparée par l’utilisateur. Confiez la réparation et l’entretien à un personnel qualifié.
Le point d’exclamation à l’intérieur d’un triangle équilatéral est destiné à prévenir l’utilisateur qu’il trouvera d’importantes instructions concernant l’utilisation et la maintenance (entretien) dans la documentation jointe à l’appareil.
ATTENTION
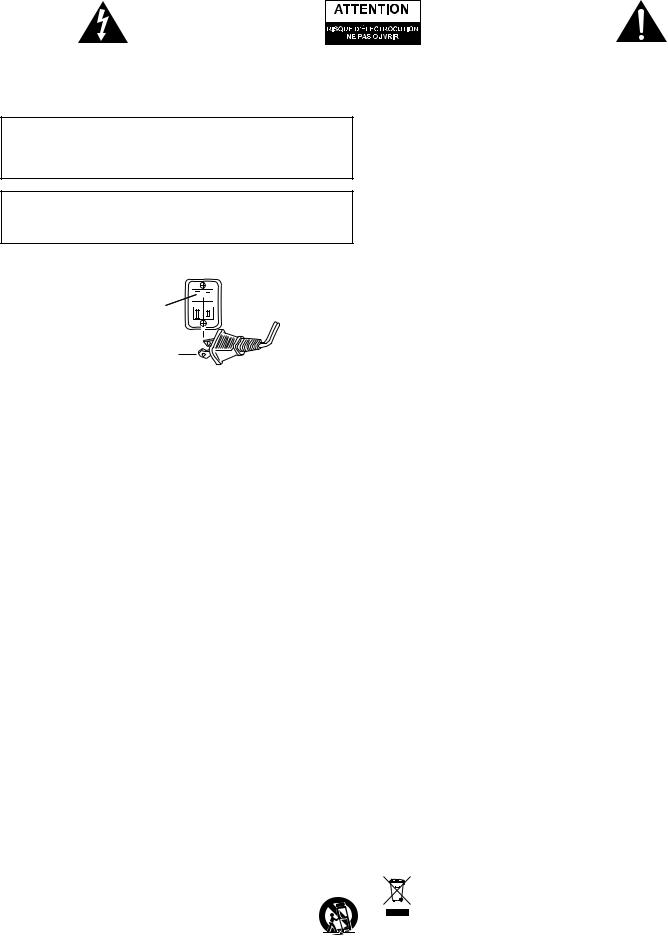
Pour éviter tout risque d’électrocution, n’utilisez pas cette fiche (polarisée) avec une rallonge électrique, une prise de courant ou une autre sortie, si les lames ne peuvent pas être insérées complètement, afin d’éviter qu’elles ne soient exposées.
AVERTISSEMENT
AFIN DE LIMITER LE RISQUE D’INCENDIE OU D’ÉLECTROCUTION, N’EXPOSEZ PAS CET APPAREIL À LA PLUIE OU À L’HUMIDITÉ.
CONNEXION DU CÂBLE D’ALIMENTATION (PRISE MURALE CA)
La fente longue correspond au 


 côté neutre (terre).
Insérez la lame la plus large dans la borne côté terre.
CONSIGNES DE SÉCURITÉ IMPORTANTES
1.Lisez ces instructions.
2.Conservez ces instructions.
3.Suivez l’ensemble des avertissements.
4.Respectez l’ensemble des instructions.
5.N’utilisez pas l’appareil à proximité d’un point d’eau. Cet appareil ne doit pas être exposé à des gouttes ou des éclaboussures. Aucun objet rempli de liquide (vase, par exemple) ne doit être placé sur l’appareil.
6.Nettoyez uniquement l’appareil à l’aide d’un chiffon sec.
7.N’obstruez pas les orifices de ventilation. Installez l’appareil conformément aux instructions du fabricant. L’appareil ne doit pas être placé sur un lit, un divan, un tapis ou une surface similaire pouvant obstruer les orifices de ventilation. L’appareil ne doit pas être inséré dans une installation intégrée, telle qu’une armoire ou une étagère fermée. Le flux d’air via les orifices de ventilation risquerait d’être bloqué. Les orifices ne doivent pas être recouverts avec des objets tels que des journaux, des nappes, des rideaux, etc. La ventilation risquerait d’être bloquée.
8.N’installez pas l’appareil à proximité de sources de chaleur telles que des radiateurs, des registres de chaleur, des fourneaux ou autres appareils produisant de la chaleur (amplificateurs inclus).
9.Aucune source de flammes nues (bougies allumées, par exemple) ne doit être placée sur l’appareil.
10.N’allez pas à la rencontre des objectifs de sécurité de la fiche polarisée ou mise à la terre. Les fiches polarisés disposent de deux lames (une plus large que l’autre). Les fiches de mise à la terre disposent de deux lames et d’une broche de mise à la terre. La lame plus large ou la broche est fournie pour votre sécurité. Si la fiche fournie ne correspond pas à votre prise électrique, consultez un électricien afin de remplacer la prise obsolète.
11.Faites-en sorte que le cordon d’alimentation ne puisse être piétiné ou plié, notamment aux points d’entrée et de sortie des fiches et des prises.
12.N’installez pas l’appareil dans une zone où l’accès à la fiche d’alimentation n’est pas garanti. Le débranchement de la fiche d’alimentation est la seule manière de mettre le produit complètement hors tension. Vous devez pouvoir accéder facilement à la fiche à tout moment.
13.Source d’alimentation — utilisez uniquement des blocs d’alimentation du type défini dans les instructions de fonctionnement ou indiqué sur l’appareil. Si un bloc d’alimentation distinct est fourni avec l’appareil, ne le remplacez par aucun autre bloc d’alimentation. Utilisez uniquement les blocs d’alimentation fournis par le fabricant.
14.Débranchez l’appareil en cas d’orage ou lorsque vous ne l’utilisez pas pendant des périodes de temps prolongées.
15.Confiez l’ensemble des travaux d’entretien à du personnel d’entretien qualifié. Des travaux d’entretien sont nécessaires lorsque l’appareil est endommagé (la fiche ou le cordon d’alimentation est endommagé, du liquide s’est renversé ou des objets sont tombés dans l’appareil, l’appareil a été exposé à la pluie ou à l’humidité, l’appareil ne fonctionne pas normalement ou l’appareil est tombé). Dans le cadre des travaux d’entretien, adressez-vous à du personnel d’entretien qualifié, retournez l’appareil au distributeur ou contactez la ligne d’assistance Altec Lansing.
16.Pour les produits comportant des piles, veuillez vous reporter aux régulations locales pour mettre les piles au rebut de manière adaptée.
17.Utilisez uniquement les accessoires spécifiés par le fabricant.
18.Utilisez uniquement le chariot, le présentoir, le pied, le support ou la table spécifié(e) par le fabricant ou vendu(e) avec l’appareil. Si vous utilisez un chariot, déplacez avec précaution l’ensemble chariot-appareil afin d’éviter toute blessure en cas de chavirage.
GARANTIE ALTEC LANSING TECHNOLOGIES, INC. LIMITÉE D’UN AN
(GARANTIE LIMITÉE DE DEUX ANS EN UNION EUROPÉENNE ET EN ASIE)
Quels éléments sont couverts par la garantie ? Altec Lansing garantit que ses produits sont dépourvus de défauts au niveau des matériaux ou de la main d’oeuvre, à l’exception des conditions détaillées ci-dessous.
Quelle est la durée de la garantie ? Pour les appareils achetés en Union européenne ou en Asie, cette garantie est valable pendant deux ans à compter de la date d’achat. Pour les appareils non achetés en Union européenne ou en Asie, cette garantie est valable pendant un an à compter de la date d’achat. Les conditions des garanties légales implicites prennent fin à l’issue de la période de validité de la garantie limitée. Certains états et/ou états membres de l’Union européenne n’acceptent pas les restrictions relatives à la durée des garanties implicites. Il est donc possible que la restriction susmentionnée ne s’applique pas à votre cas.
Quels éléments ne sont pas couverts par la garantie ? Cette garantie ne couvre pas les défauts, mauvais fonctionnements ou anomalies qui peuvent survenir à l’aide des événements suivants : installation incorrecte, utilisation incorrecte ou non-respect des instructions se rapportant au produit, utilisation abusive ou utilisation avec un équipement incorrect, inadapté ou défectueux (pour obtenir des informations relatives à l’installation, au fonctionnement et à l’utilisation du produit, consultez le manuel fourni avec le produit). Si vous avez besoin d’un manuel de remplacement, vous pouvez télécharger un manuel sous www.alteclansing.com. En outre, les dommages consécutifs ou secondaires ne sont pas pris en charge par cette garantie. Certains états n’autorisent pas l’exclusion ou la restriction des dommages consécutifs ou secondaires, il est donc possible que l’exclusion ou la restriction susmentionnée ne s’applique pas à votre cas.
Que fera Altec Lansing pour corriger le problème ? Altec Lansing réparera ou remplacera, à sa discrétion, les produits qui s’avèrent défectueux au niveau des matériaux ou de la main d’oeuvre. Si votre produit n’est plus fabriqué ou n’est plus disponible en stock, Altec Lansing remplacera à sa discrétion votre produit par un produit Altec Lansing similaire ou de meilleure qualité.
Comment obtenir un service de garantie : pour obtenir la réparation ou le remplacement d’un produit sous garantie, vous devez contacter Altec Lansing par courrier électronique (csupport@alteclansing.com) au cours de la période de garantie. Le courrier électronique doit inclure votre nom, votre adresse, votre adresse électronique, votre numéro de téléphone, la date d’achat ainsi qu’une description détaillée du problème rencontré. Aux Etats-Unis, vous pouvez également contacter Altec Lansing par téléphone au 1-800-ALTEC88 — soyez prêt à fournir les mêmes informations. Si le problème s’avère lié à une anomalie au niveau des matériaux ou de la main d’oeuvre, Altec Lansing vous enverra une autorisation de retour et des instructions relatives au retour du produit. Le retour du produit s’effectue aux frais du client et le retour doit être accompagné de la preuve originale d’achat. Vous devez assurer l’expédition de manière adaptée : vous êtes en effet responsable du produit jusqu’à ce qu’il parvienne à Altec Lansing.
Dans quelle mesure les lois nationales affectent vos droits ? Cette garantie vous accorde des droits légaux spécifiques. Vous pouvez également disposer de droits qui varient d’un état à l’autre. Veuillez noter qu’au sein de l’Union européenne, vous, en tant que consommateur, pouvez disposer d’autres droits légaux selon la législation nationale des états membres de l’Union européenne gouvernant la vente des marchandises Altec Lansing. Ces droits ne sont pas affectés par cette garantie.
Les garanties et remèdes limités détaillés ci-dessus sont les seuls garanties et remèdes disponibles à l’acheteur si et dans la mesure où ils sont valables et applicables selon la loi en vigueur.
SERVICE CLIENTÈLE
Les réponses à la plupart des questions relatives à la configuration et aux performances sont disponibles dans le guide de dépannage. Vous pouvez également consulter la foire aux questions de la section service clientèle de notre site Internet (www.alteclansing.com). Si vous vivez en Amérique du Nord et ne parvenez pas à trouver les informations dont vous avez besoin, veuillez demander l’aide de notre équipe d’assistance clientèle avant de renvoyer l’unité au détaillant selon la politique de retour en vigueur.
Tel: 800-258-3288
Courrier électronique : csupport@alteclansing.com
Si vous ne vivez pas en Amérique du Nord, veuillez consulter notre site Internet (www.alteclansing.com) et sélectionnez le pays dans lequel vous vivez pour localiser le distributeur de votre pays.
Pour obtenir les informations les plus récentes, veuillez consulter notre site Internet à l’adresse suivante www.alteclansing.com.
DISTRIBUTION INTERNATIONALE
Clients internationaux : pour plus d’informations au sujet de la distribution des produits Altec Lansing dans votre pays, veuillez consulter le site Internet (www.alteclansing.com) et cliquez sur votre pays.
ÉLIMINATION DE L’ÉQUIPEMENT ÉLECTRIQUE ET ÉLECTRONIQUE OBSOLÈTE
Ce symbole sur le produit ou sur son emballage indique que ce produit ne sera pas traité en tant que déchet ménager. Ledit produit sera remis au point de collecte
applicable au recyclage de l’équipement électrique et électronique. En vous assurant que ce produit est éliminé correctement, vous contribuerez à la prévention des conséquences néfastes potentielles pour l’environnement et la santé de l’homme qui
sont susceptibles d’être engendrées par une mise au rebut inadéquate de ce produit dans le cas contraire. Le recyclage des matériaux contribuera à la préservation des ressources naturelles. Pour toute information complémentaire concernant le recyclage de ce produit, veuillez contacter votre mairie ou votre service local de traitement des déchets.
8
 Loading...