


R |
EN
DVA-7996R
FM/MW/LW/RDS DVD Player
DE
DIGITAL VIDEO
• OWNER'S MANUAL
Please read before using this equipment.
• BEDIENUNGSANLEITUNG
Lesen Sie diese Bedienungsanleitung bitte vor Gebrauch des Gerätes.
• MODE D'EMPLOI
Veuillez lire avant d’utiliser cet appareil.
• MANUAL DE OPERACIÓN
Léalo antes de utilizar este equipo.
• ISTRUZIONI PER L’USO
Si prega di leggere prima di utilizzare il attrezzatura.
• ANVÄNDARHANDLEDNING
Innan du använder utrustningen bör du läsa igenom denna användarhandledning.
ALPINE ELECTRONICS MARKETING, INC. |
ALPINE ELECTRONICS OF AUSTRALIA PTY. LTD. |
ALPINE ELECTRONICS FRANCE S.A.R.L. |
|
1-1-8 Nishi Gotanda, |
6-8 Fiveways Boulevarde Keysborough, |
(RCS PONTOISE B 338 101 280) |
|
Shinagawa-ku, Tokyo 141-0031, Japan |
Victoria 3173, Australia |
98, Rue de la Belle Etoile, Z.I. Paris |
|
Phone 03-5496-8231 |
Phone 03-9769-0000 |
Nord II, B.P. 50016, 95945 Roissy |
|
ALPINE ELECTRONICS OF AMERICA, INC. |
ALPINE ELECTRONICS GmbH |
Charles de Gaulle Cedex, France |
|
Phone 01-48638989 |
|||
19145 Gramercy Place, Torrance, |
Kreuzerkamp 7, 40878 Ratingen, |
||
|
|||
California 90501, U.S.A. |
Germany |
ALPINE ITALIA S.p.A. |
|
Phone 1-800-ALPINE-1 (1-800-257-4631) |
Phone 02102-4550 |
Viale C. Colombo 8, |
|
ALPINE ELECTRONICS OF CANADA, INC. |
ALPINE ELECTRONICS OF U.K., LTD. |
20090 Trezzano Sul Naviglio (MI), Italy |
|
Phone 02-484781 |
|||
7300 Warden Ave., Suite 203, Markham, |
13 Tanners Drive, Blakelands, |
||
|
|||
Ontario L3R 9Z6, Canada |
Milton Keynes MK14 5BU, U.K. |
ALPINE ELECTRONICS DE ESPAÑA, S.A. |
|
Phone 1-800-ALPINE-1 (1-800-257-4631) |
Phone 01908-611556 |
Portal de Gamarra 36, Pabellón, 32 |
|
|
|
01013 Vitoria (Alava) - APDO 133, |
|
|
|
Spain |
|
|
|
Phone 945-283588 |
|
Designed by ALPINE Japan |
Sankei Kikaku Co., Ltd. |
Printed in Japan (S) |
1-13-38, Hinodai, Hino, Tokyo, Japan |
68P50520Y48-A |
FR
ES
IT
SE
CHM-S630
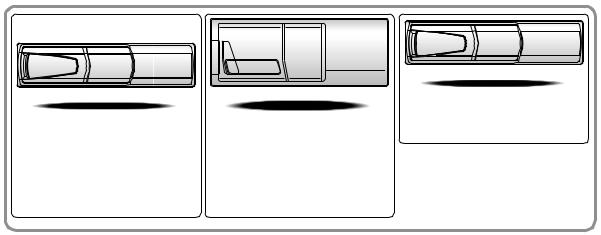
CHA-S634 |
CHA-1214 |
• CD changer for DVA-7996R |
• CD changer for DVA-7996R |
• CD-Wechsler für DVA-7996R |
• CD-Wechsler für DVA-7996R |
• Changeur CD pour le DVA-7996R |
• Changeur CD pour le DVA-7996R |
• Cambiador de CD para el DVA-7996R |
• Cambiador de CD para el DVA-7996R |
• Caricatore CD per il DVA-7996R |
• Caricatore CD per il DVA-7996R |
• CD-växlare för DVA-7996R |
• CD-växlare för DVA-7996R |
Alpine CD Changers Give You More!
More musical selections, more versatility, more convenience.
The CHA-S634 is a high-performance 6-disc changer with a new M DAC, CD-R/RW PLAY BACK, MP3 PLAY BACK and CD TEXT. The CHA-1214 Ai-NET model holds 12 discs, and the CHM-S630 M-Bus model is a super-compact 6-disc changer with a CD-R/RW PLAY BACK.
Von Alpine CD-Wechslern haben Sie mehr!
Mehr Musikauswahl, mehr Vielseitigkeit, mehr Komfort.
Der CHA-S634 ist ein Hochleistungs-Wechsler für 6 CDs mit dem neuen M-DAC, mit CD-R/RW- und MP3-Wiedergabefunktion und mit CD-TEXT. Der CHA-1214 ist ein Ai-NET-Modell für 12 CDs. Der M-Bus-kompatible CHM-S630 ist ein superkompakter Wechsler für 6 CDs mit CD-R/RW-Wiedergabefunktion.
Changeurs de CD Alpine : vous avez le choix!
Plus de sélections musicales, plus de souplesse, plus de confort.
Le modèle CHA-S634 est un changeur 6 disques ultra performant équipé des nouvelles fonctions M DAC, CD-R/RW PLAY BACK, MP3 PLAY BACK et CD TEXT. Le modèle CHA-1214 Ai-NET contient 12 disques. Le modèle CHM-S630 M-Bus est un changeur 6 disques super compact doté de la fonction CD-R/RW PLAY BACK.
¡Los cambiadores Alpine de CD le ofrecen más!
Más selecciones musicales, más versatilidad y más ventajas.
CHA-S634 es un cambiador de seis discos de alto rendimiento con nuevo M DAC, CD-R/RW PLAY BACK, MP3 PLAY BACK y CD TEXT. El modelo CHA-1214 Ai-NET alberga 12 discos y el modelo CHM-S630 M-Bus es un cambiador de seis discos de tamaño reducido con un CD-R/RW PLAY BACK.
I caricatori CD Alpine danno di più!
Più scelta, più versatilità, più comodità.
Il modello CHA-S634 è un caricatore a 6 dischi ad elevate prestazioni dotato di un nuovo M DAC, CD-R/RW PLAY BACK, MP3 PLAY BACK e CD TEXT. Il modello CHA-1214 Ai-NET è in grado di contenere 12 dischi, il modello CHM-S630 M-Bus è un caricatore a 6 dischi ultra compatto dotato di un CD-R/RW PLAY BACK.
Alpines CD-växlare ger mer!
Fler musikval, mer variation, större bekvämlighet.
CHA-S634 är en växlare för 6 skivor med mycket höga prestanda och en ny M D/A-omvandlare samt uppspelning av CD-R/RW, MP3 och CD TEXT. CHA-1214 Ai-NET rymmer 12 skivor. CHM-S630 M-Bus är en mycket kompakt växlare med kapaciteten 6 skivor med uppspelning av CD-R/RW PLAY BACK.

Contents |
|
Operating Instructions |
|
WARNING |
|
WARNING .................................................. |
3 |
CAUTION ................................................... |
3 |
PRECAUTIONS ......................................... |
3 |
Discs playable on this unit ...................... |
5 |
Notes on Using Remote Control ............. |
6 |
Battery Replacement ............................... |
6 |
Basic Operation |
|
Detaching the Front Panel ................................. |
7 |
Attaching the Front Panel ................................. |
7 |
Initial System Start-Up ..................................... |
7 |
Turning Power On and Off ............................... |
7 |
Display Angle Adjustment ................................ |
7 |
Adjusting Volume/Balance (Between Left and |
|
Right)/Fader (Between Front and Rear)/ |
|
Defeat ............................................................ |
8 |
Blackout Mode On and Off ............................... |
8 |
Changing the Audio Level Display Pattern ...... |
8 |
Setting the Bass Control ................................... |
8 |
Setting the Treble Control ................................. |
9 |
Adjusting the built-in Crossover ....................... |
9 |
About the Time Correction ............................. |
10 |
Bass Focus ...................................................... |
11 |
Time Correction .............................................. |
12 |
Setting the MX Mode ..................................... |
12 |
Quick Searching Function .............................. |
13 |
Displaying the Title/Text ................................ |
13 |
Titling Discs .................................................... |
14 |
Erasing Disc Title ............................................ |
14 |
SETUP Operation |
|
Adjusting Source Signal Levels ...................... |
15 |
Setting the Sound Quality of the Tuner .......... |
15 |
Changing Lighting Color ................................ |
15 |
Dimmer Control .............................................. |
15 |
Subwoofer On and Off .................................... |
16 |
Sound (Beep) Guide Function ........................ |
16 |
Scroll Setting ................................................... |
16 |
Setting the AUX Mode (V-Link) .................... |
17 |
Turning Mute Mode On/Off ........................... |
17 |
ENGLISH
Setting the External Input Defeat Mode ......... |
17 |
Setting the Digital Output ............................... |
17 |
Optical Digital Input Selection for an External |
|
Audio Processor .......................................... |
18 |
Demonstration ................................................. |
18 |
Adjusting Display Contrast ............................. |
18 |
Radio Operation |
|
Manual Tuning ................................................ |
19 |
Automatic Seek Tuning .................................. |
19 |
Manual Storing of Station Presets .................. |
19 |
Automatic Memory of Station Presets ............ |
19 |
Tuning to Preset Stations ................................ |
19 |
RDS Operations |
|
Setting RDS Reception Mode and Receiving |
|
RDS Stations ............................................... |
20 |
Recalling Preset RDS Stations ........................ |
20 |
Receiving RDS Regional (Local) Stations ..... |
20 |
PI SEEK Setting .............................................. |
21 |
Receiving Traffic Information ........................ |
21 |
Receiving Traffic Information While Playing |
|
CD or Radio ................................................ |
21 |
PTY (Programme Type) Tuning ..................... |
21 |
Priority PTY(Programme Type) ..................... |
22 |
Displaying Radio Text .................................... |
22 |
DAB Operation |
|
Using DAB Receiver for the Ensemble Seek |
|
Tuning (Optional) ........................................ |
23 |
Changing the Service ...................................... |
23 |
Changing the Service Component .................. |
23 |
Memorizing the Service .................................. |
24 |
Receiving the Memorized Service .................. |
24 |
Memorizing the Ensemble Automatically ...... |
24 |
PTY (Programme Type) Tuning ..................... |
24 |
Turning ON/OFF Traffic News Announcement ...... |
25 |
Setting the Announcement Select Mode ......... |
25 |
Changing the Display Mode ........................... |
25 |
Displaying the Regional Label ....................... |
26 |
Receiving Announcement Information of DAB |
|
Local Stations .............................................. |
26 |
Setting for Automatic Change from DAB to |
|
RDS ............................................................. |
26 |
Setting ON/OFF for DRC (Dynamic Range |
|
Control) .......................................................... |
26 |
1-EN

CD Player Operation |
|
Opening and Closing the Movable display ..... |
27 |
Playback .......................................................... |
27 |
Music Sensor (Skip) ........................................ |
27 |
Fast Forward and Backward ........................... |
27 |
Repeat Play ..................................................... |
28 |
M.I.X. (Random Play) .................................... |
28 |
Scanning Programmes .................................... |
28 |
Controlling CD Changer (Optional) ............... |
28 |
Multi-Changer Selection ................................. |
29 |
MP3 Operation |
|
Playing MP3 Files ........................................... |
30 |
Playing MP3 Files with the CD Changer |
|
(Optional) .................................................... |
30 |
Music Sensor (Skip) ........................................ |
30 |
Fast Forward and Backward ........................... |
30 |
Selecting Folders ............................................. |
31 |
File Search ...................................................... |
31 |
Repeat Play ..................................................... |
31 |
M.I.X. (Random Play) .................................... |
31 |
Scanning Programmes .................................... |
31 |
Setting the Range of MP3 File Selection ........ |
32 |
Playing MP3 Data ........................................... |
32 |
About MP3 ...................................................... |
32 |
DVD/Video CD Operation |
|
Playing DVD/Video CD .................................. |
34 |
Stopping playback (PRE-STOP) ...................... |
35 |
Stopping playback ............................................ |
35 |
Fast-forwarding/fast-reversing ......................... |
36 |
Finding the beginnings of chapters or tracks ... |
36 |
Playing still frames (pausing) .......................... |
36 |
Frame-by-frame playback ................................ |
36 |
Slow motion playback ..................................... |
36 |
Chapter/track/title repeat playback .................. |
37 |
Searching by title number ................................ |
37 |
Searching directly by chapter |
|
or track number ............................................ |
37 |
Switching the angle .......................................... |
38 |
Switching the audio language .......................... |
38 |
Switching the subtitles (subtitle language) |
...... 38 |
Displaying the disc status and |
|
changing the settings ................................... |
39 |
Displaying the disc status and |
|
changing the settings ........................................ |
39 |
Rear DVD function .......................................... |
40 |
Remote control sensor selector ........................ |
40 |
DVD Default Settings (SETUP) |
|
Changing the language settings ...................... |
41 |
Changing the TV screen settings .................... |
42 |
Changing the country code setting .................. |
43 |
Setting the rating level (parental lock) ............ |
44 |
Changing the down sampling setting .............. |
45 |
Changing the digital output setting ................. |
46 |
Operating DVDs and video CDs using the |
|
front panel ................................................... |
48 |
Remote Control Operation |
|
Operating audio for the DVA-7996R .............. |
49 |
Operating the DVD player/DVD changer |
|
(sold separately) .......................................... |
50 |
Operating the Navigation (sold separately) .... |
51 |
Operating a sold separately TV monitor ......... |
51 |
Information |
|
About DVDs ................................................... |
52 |
Terminology .................................................... |
53 |
List of language codes .................................... |
54 |
List of country codes ....................................... |
55 |
In Case of Difficulty ....................................... |
57 |
Specifications .................................................. |
60 |
Installation and Connections |
|
Warning ........................................................... |
61 |
Caution ............................................................ |
61 |
Precautions ...................................................... |
61 |
Installation ...................................................... |
62 |
Connections .................................................... |
63 |
System Example ............................................. |
65 |
2-EN
 WARNING
 WARNING
This symbol means important instructions. Failure to heed them can result in serious injury or death.
DO NOT OPERATE ANY FUNCTION THAT TAKES YOUR ATTENTION AWAY FROM SAFELY DRIVING YOUR VEHICLE.
Any function that requires your prolonged attention should only be performed after coming to a complete stop. Always stop the vehicle in a safe location before performing these functions. Failure to do so may result in an accident.
KEEP THE VOLUME AT A LEVEL WHERE YOU CAN STILL HEAR OUTSIDE NOISE WHILE DRIVING.
Failure to do so may result in an accident.
DO NOT DISASSEMBLE OR ALTER.
Doing so may result in an accident, fire or electric shock.
USE ONLY IN CARS WITH A 12 VOLT NEGATIVE GROUND.
(Check with your dealer if you are not sure.) Failure to do so may result in fire, etc.
KEEP SMALL OBJECTS SUCH AS BATTERIES OUT OF THE REACH OF CHILDREN.
Swallowing them may result in serious injury. If swallowed, consult a physician immediately.
USE THE CORRECT AMPERE RATING WHEN REPLACING FUSES.
Failure to do so may result in fire or electric shock.
DO NOT BLOCK VENTS OR RADIATOR PANELS.
Doing so may cause heat to build up inside and may result in fire.
USE THIS PRODUCT FOR MOBILE 12V APPLICATIONS.
Use for other than its designed application may result in fire, electric shock or other injury.
DO NOT PLACE HANDS, FINGERS OR FOREIGN OBJECTS IN INSERTION SLOTS OR GAPS.
Doing so may result in personal injury or damage to the product.
 CAUTION
This symbol means important instructions. Failure to heed them can result in injury or material property damage.
HALT USE IMMEDIATELY IF A PROBLEM APPEARS.
Failure to do so may cause personal injury or damage to the product. Return it to your authorized Alpine dealer or the nearest Alpine Service Center for repairing.
DO NOT MIX NEW BATTERIES WITH OLD BATTERIES. INSERT WITH THE CORRECT BATTERY POLARITY.
When inserting the batteries, be sure to observe proper polarity (+ and –) as instructed. Rupture or chemical leakage from the battery may cause fire or personal injury.
KEEP FINGERS AWAY WHILE THE MOTORIZED FRONT PANEL OR MOVING MONITOR IS IN MOTION.
Failure to do so may result in personal injury or damage to the product.
 PRECAUTIONS
Temperature
Be sure the temperature inside the vehicle is between +60°C (+140°F) and –10°C (+14°F) before turning your unit on.
Moisture Condensation
You may notice the disc playback sound wavering due to condensation. If this happens, remove the disc from the player and wait about an hour for the moisture to evaporate.
Damaged Disc
Do not attempt to play cracked, warped, or damaged discs. Playing a bad disc could severely damage the playback mechanism.
Maintenance
If you have problems, do not attempt to repair the unit yourself. Return it to your Alpine dealer or the nearest Alpine Service Station for servicing.
3-EN
 WARNING
 PRECAUTIONS
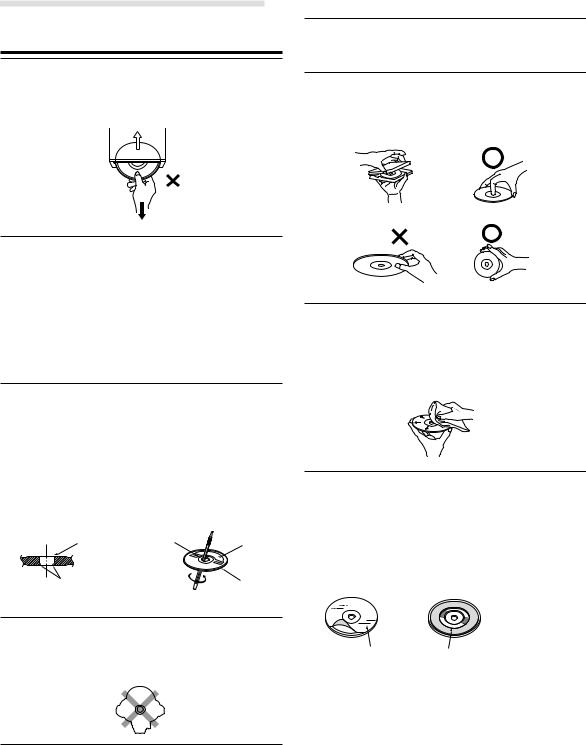
Never Attempt the Following
Do not grip or pull out the disc while it is being pulled back into the player by the automatic reloading mechanism.
Do not attempt to insert a disc into the unit when the unit power is off.
Handling the Detachable Front Panel
•Do not expose to rain or water.
•Do not drop or apply shock.
Correct Handling
Do not drop the disc while handling. Hold the disc so you will not leave fingerprints on the surface. Do not affix tape, paper, or gummed labels to the disc. Do not write on the disc.
CORRECT
Inserting Discs
Your player accepts only one disc at a time for playback. Do not attempt to load more than one disc.
Make sure the label side is facing up when you insert the disc. Your player will automatically eject any disc that is inserted incorrectly. If the player continues to eject a correctly inserted disc, push the RESET switch with a pointed object such as a ballpoint pen.
Playing a disc while driving on a very bumpy road may result in skips, but this will not scratch the disc or damage the player.
New Discs
As a protective measure to prevent the Disc from jamming, the DVD player will automatically eject discs with irregular surfaces or inserted incorrectly. When a new disc is inserted into the player and ejected after initial loading, using your finger, feel around the inside of the centre hole and outside edge of the disc. If you feel any small bumps or irregularities, this could inhibit proper loading of the disc. To remove the bumps, rub the inside edge of the hole and outside edge of the disc with a ballpoint pen or other such instrument, then insert the disc again.
Centre Hole |
Centre Hole |
New |
|
|
Disc |
Bumps |
|
Outside |
|
|
(Bumps) |
Irregular Shaped Discs
Be sure to use round shape discs only for this unit and never use any special shape discs.
Use of special shape discs may cause damage to the mechanism.
Installation Location
Make sure the DVA-7996R will not be installed in a location subjected to:
•Direct sun and heat
•High humidity and water
•Excessive dust
•Excessive vibrations
INCORRECT |
CORRECT |
Disc Cleaning
Fingerprints, dust, or soil on the surface of the disc could cause the DVD player to skip. For routine cleaning, wipe the playing surface with a clean, soft cloth from the centre of the disc to the outer edge. If the surface is heavily soiled, dampen a clean, soft cloth in a solution of mild neutral detergent before cleaning the disc.
Disc Accessories
There are various accessories available on the market for protecting the disc surface and improving sound quality. However, most of them will influence the thickness and/or diameter of the disc. Using such accessories can cause the disc to be out of standard specifications and may create operational problems. We recommend not using these accessories on discs played in Alpine DVD players.
Transparent Sheet |
Disc Stabilizer |
4-EN
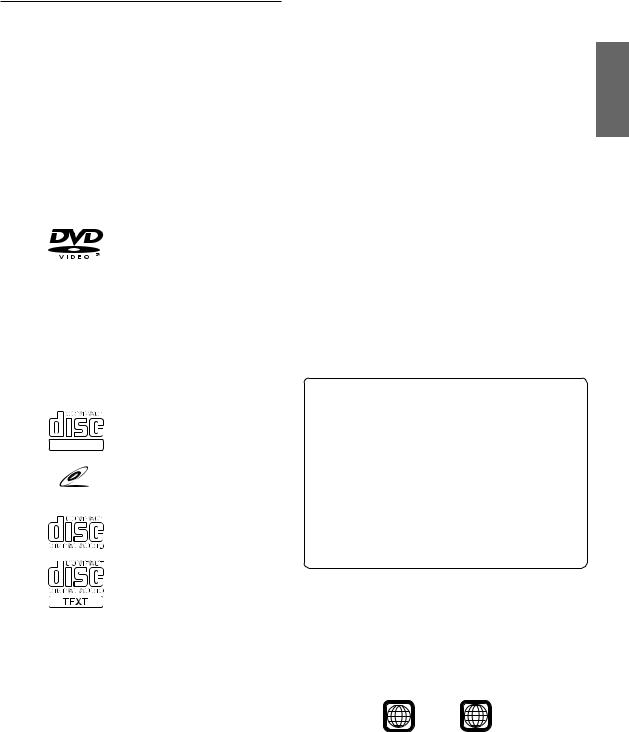
Discs playable on this unit
• Playable discs
The discs listed below can be played on this DVD head unit.
|
Mark (logo) |
Recorded |
Disc size |
Max. |
|
|
content |
|
playing time |
|
|
|
|
|
|
|
|
|
One-sided |
|
|
|
|
disc |
|
|
|
|
Approx. |
|
|
|
|
4 hours |
|
|
|
12 cm* |
|
|
|
|
Two-sided |
|
|
|
|
|
|
|
|
|
|
disc |
|
|
Audio |
|
Approx. |
|
|
|
8 hours |
|
|
|
+ |
|
|
|
|
|
|
|
DVD |
|
Video |
|
|
|
|
|||
Video |
|
(Moving |
|
One-sided |
|
|
pictures) |
|
|
|
|
|
disc |
|
|
|
|
|
|
|
|
|
|
Approx. |
|
|
|
|
80 Minutes |
|
|
|
8 cm |
|
|
|
|
Two-sided |
|
|
|
|
|
|
|
|
|
|
disc |
|
|
|
|
Approx. |
|
|
|
|
160 Minutes |
|
|
|
|
|
|
|
Audio |
12 cm |
Approx. |
|
|
74 Minutes |
||
|
|
|
||
|
|
+ |
|
|
Video |
DIGITAL VIDEO |
|
|
|
Video |
|
|
||
|
|
|||
CD |
|
(Moving |
|
Approx. |
|
|
pictures) |
8 cm |
|
|
VIDEO CD |
|
|
20 Minutes |
|
|
|
|
|
|
|
|
|
|
|
|
|
12 cm |
Approx. |
|
|
|
74 Minutes |
|
|
|
|
|
|
Music |
|
Audio |
|
|
|
8 cm |
Approx. |
||
CD |
|
|
||
|
|
|
(CD single) |
20 Minutes |
|
|
|
|
|
* Two-layer DVD disc compatible
You can play CD-Rs (CD-Recordable)/CD-RWs (CD-
ReWritable) for audio use on this unit. You can also play CD-
Rs/CD-RWs containing MP3 formatted audio files.
∙Some of the following Discs may not play on this unit:
Flawed Discs, Discs with fingerprints, Discs exposed to extreme temperatures or sunlight (e.g., left in the car or this unit), Discs recorded under unstable conditions, Discs on which a recording failed or a re-recording was attempted.
∙Use discs with MP3 files written in the format compliant with ISO 9660 level 1 or level 2. For details, see pages 32, 33.
To Customers using CD-R/CD-RW
∙If a CD-R/CD-RW cannot be played back, make sure close session (finalization) has been performed.
∙Finalize the CD-R/CD-RW if necessary, and attempt playback again.
Tips for making your own CDs
The DVA-7996R plays DVD Video, Video CD, Audio CD and has a built in MP3 decoder.
The following information is designed to help you create your own music CDs (either Audio CD or MP3 encoded CD-R/RW files).
What is the difference between an Audio and MP3 CD? An Audio CD is the same format as the commercial CDs you buy in the store (also known as CD-DA). MP3 (MPEG Audio Layer 3) is a data file that uses a compression scheme to reduce the size of the music file.*
Hybrid Audio CD and Data (MP3) CD-R/RW discs: The DVA7996R can read either sector on the disc. Choose MixDisc CD to play the CD audio section or MixDisc MP3 to play the MP3 section.*
Multisession CD-R/RW: Once a recording has been stopped, this is considered one session. If the disc is not closed (finalized), additional data may be added. Once this additional data has been recorded, this becomes a “multisession” CD. The DVA-7996R can only read multisession DATA Formatted discs (MP3 files - Not Audio CD files).
MP3 ID3 Tag Information: The DVA-7996R read and displays MP3 ID3v1 tag information. MP3 files created with ID3v2 tag information can be played back but the tag info cannot be read or displayed.
Properly formatted MP3 Discs: Use ISO-9660 formatting to insure proper playback. You may use standard ISO naming Level 1 (8.3 DOS standard), Level 2 (32 characters) or Joliet, (Windows or Macintosh long filenames) file naming conventions.*
*Please consult the Owner’s manual for additional information.
On handling Compact Discs (CD/CD-R/ CD-RW)
∙Do not touch the surface.
∙Do not expose the disc to direct sunlight.
∙Do not affix stickers or labels and do not write on the surface.
∙Clean the disc when it is dusty.
∙Make sure that there are no bumps around the disc.
∙Do not use commercially available disc accessories.
Do not leave the disc in the car or the unit for a long time. Never expose the disc to direct sunlight. Heat and humidity may damage the disc and you may not be able to play it again.
• Discs that cannot be played
DVD-ROMs, DVD-R/DVD-RAMs, DVD-RWs, DVD+RWs, CD-ROMs (excluding MP3 files), photo CDs, etc.
• DVD region number (playable region number)
This DVD head unit will play back any disc whose region number is 2 (or All). DVDs with a region number other than those listed below, cannot be played on this DVD player.
2 ALL
• Video CDs
This DVD head unit is compatible with playback control (PBC) compatible video CDs (version 2.0).
“PBC” is a function by which you can use menu screens recorded on the disc to find the scene you want to watch and view various types of information in dialog style.
Continued
5-EN
• Disc terminology
Title
If titles are programmed for the DVD, these are the largest unit of division of the information recorded on the disc.
Chapter
Each Title may also be divided into smaller divisions called Chapters. These can be specific scenes or musical selections.
*This product incorporates copyright protection technology that is protected by method claims of certain U.S. patents and other intellectual property rights owned by Macrovision Corporation and other rights owners. Use of this copyright protection technology must be authorized by Macrovision Corporation, and is intended for home and other limited viewing uses only unless otherwise authorized by Macrovision Corporation. Reverse engineering or disassembly is prohibited.
*Manufactured under license from Dolby Laboratories. “Dolby”, “Pro Logic” and the double-D symbol are trademarks of Dolby Laboratories. Confidential unpublished works. ©1992-1997 Dolby Laboratories. All rights reserved.
*“DTS” is a registered trademark of Digital Theater Systems, Inc.
Notes on Using Remote Control
Point the remote control transmitter at the remote control sensor.
Remote control sensor
•Point the remote control at the remote sensor within about 2 meter.
•It may not be possible to operate the remote control unit if the remote control sensor is exposed to direct sunlight.
•The remote control is a small, light weight precision device. To avoid damage, short battery life, operational errors and poor button response, observe the following.
-Do not apply any shock.
-Do not put in a trouser pocket.
-Keep away from food, moisture and dirt.
-Do not place in direct sunshine.
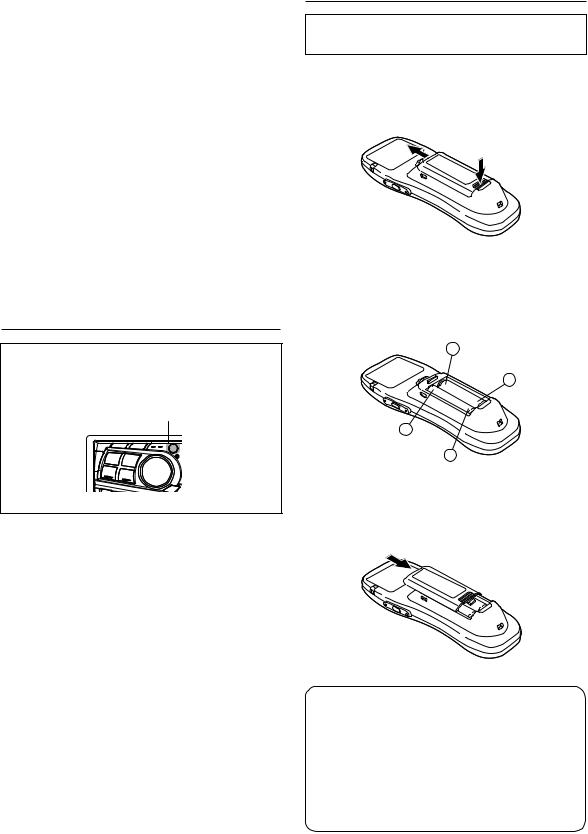
Battery Replacement
Applicable battery: Use two “AAA” sized dry batteries or equivalent.
1 Opening the battery cover.
Push on the cover and slide it as indicated by the arrows then the cover will be removed.
2 Replacing the battery.
Put the batteries in the case observing the polarities as illustrated.
−
+
+
−
3 Closing the cover.
Push the cover in the arrow direction until a click is heard.
 Warning
DO NOT OPERATE ANY FUNCTION THAT TAKES YOUR ATTENTION AWAY FROM SAFELY DRIVING YOUR VEHICLE.
Any function that requires your prolonged attention should only be performed after coming to a complete stop. Always stop the vehicle in a safe location before performing these functions. Failure to do so may result in an accident.
6-EN

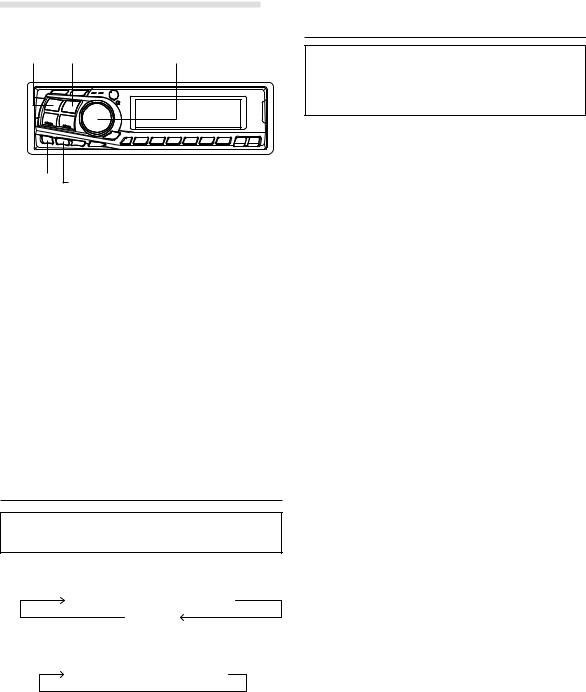
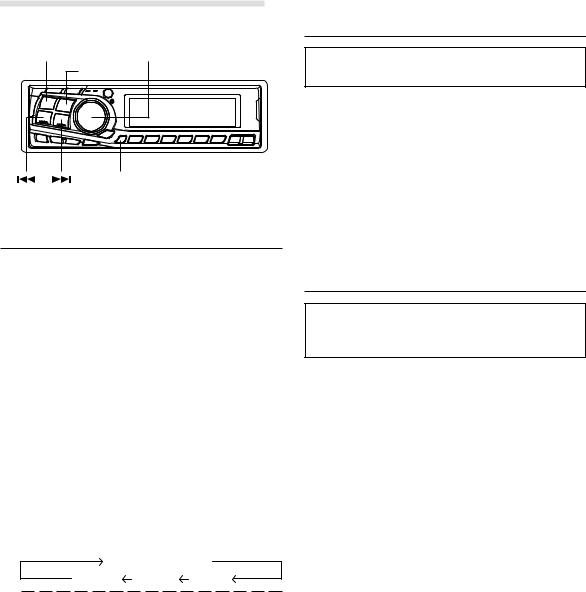
Basic Operation
POWER RESET
ANGLE 
•The DVA-7996R can be operated using both the buttons on the main unit and the included remote control unit (except for some operations). The section on audio operations (excluding DVD and video CD operations) mainly describes operations using the buttons on the main unit. For instructions on performing operations using the remote control unit, see page 49.
•About Demonstration
This unit is equipped with a Demonstration function.
Soon after resetting the unit or after turning the unit on the first time, the demonstration starts automatically.
To cancel the demonstration, refer to “Demonstration” on page 18.
•Connectable to Remote Control Interface Box
You can operate this unit from the vehicle's control unit when an Alpine Remote Control Interface Box
(optional) is connected. For details, contact your
Alpine dealer.
Detaching the Front Panel
1 Press and hold the POWER button for at least 3 seconds to turn off the power.
2 Press the  (Release) button at left side until the front panel pops out.
3 Grasp the left side of the front panel and pull it out.
NOTES
•The front panel may become hot in normal usage (especially the connector terminals), this is not a malfunction.
•To protect the front panel, place it in the supplied carrying case.
Attaching the Front Panel
1 First, insert the right side of the front panel into the main unit. Align the groove on the front panel with the projections on the main unit.
2 Push the left side of the front panel until it locks firmly into the main unit.
2 |
1 |
NOTES
•Before attaching the front panel, make sure that there is no dirt or dust on the connector terminals and no foreign object between the front panel and the main unit.
•Attach the front panel carefully by holding the sides of the front panel. This will help you to avoid pushing buttons by mistake.
Initial System Start-Up
Be sure to press the RESET switch when using the unit for the first time, after installing the CD changer, etc., or after changing the car battery.
1 Make sure that the power of the unit is off. If the power is on, press and hold the POWER button for at least 3 seconds to turn off the unit.
2 Press the RESET switch with a ballpoint pen, or any other pointed object.
Turning Power On and Off
1 Press the POWER button to turn on the unit.
NOTE
The unit can be turned on by pressing any other button except the eject button.
The volume level gradually increases to the previous level you were listening to before the unit was turned off. Press and hold the POWER button for at least 3 seconds to turn off the unit.
NOTE
The very first time the power is turned on, the volume will start from level 12.
Display Angle Adjustment
Movable display
The movable display may be adjusted to 3 different angles depending upon user preference.
1 Press the ANGLE button to adjust the angle of the movable display.
NOTES
•The adjusted angle of the display is stored in memory. There is no need to re-adjust the angle when the power is turned back on.
•When the display is fully opened, if you turn off the ignition key, after a while, the display will close fully. However, the display will not fully close when the angle of the display has been already stored in memory.
CAUTION
Keep hands (or any other object) away from the display while it is opening or closing to avoid damage or injury. The back of the movable display will get very warm under normal operating conditions. This is not a malfunction. Do not touch.
7-EN
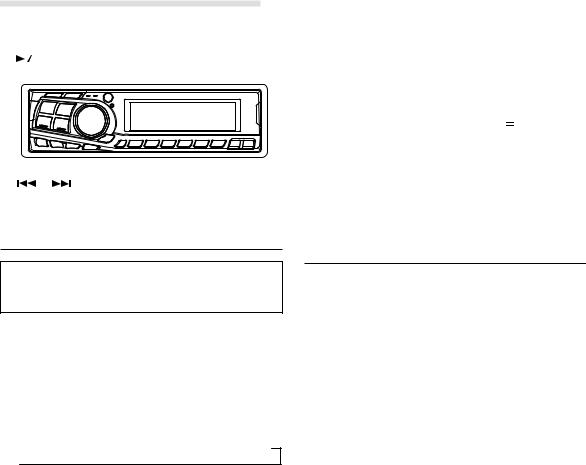
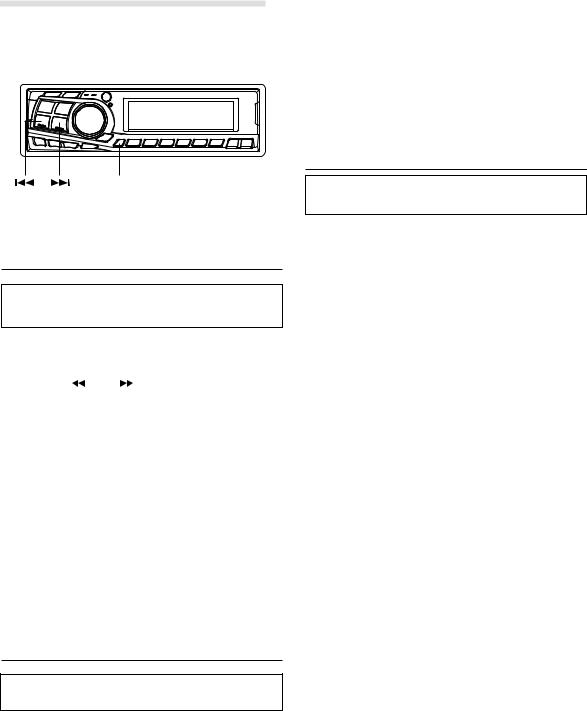
Basic Operation
DN |
BAND |
MODE (Rotary encoder) |
 DISP/B.OUT
CENTER f
UP X-OVER
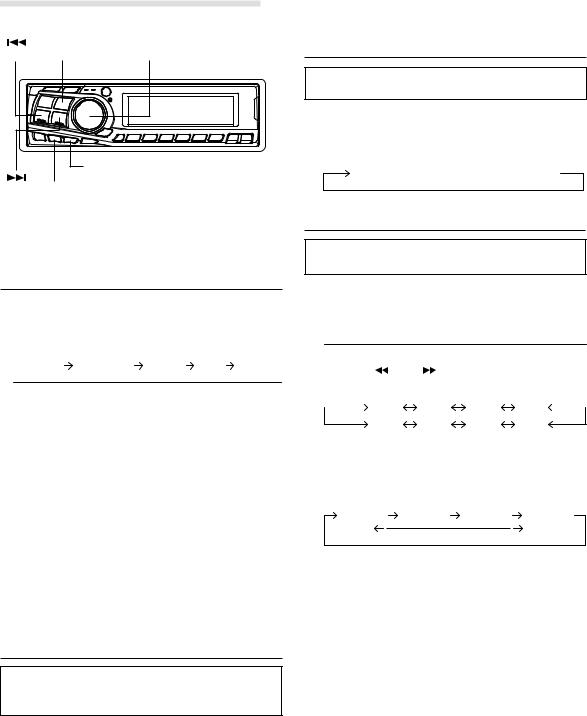
Adjusting Volume/Balance (Between
Left and Right)/Fader (Between Front
and Rear)/Defeat
1 Press the MODE (Rotary encoder) button repeatedly to choose the desired mode.
Each press changes the modes as follows:

 VOLUME SUBWOOFER BALANCE FADER DEFEAT
Volume |
: 0 ~ 35 |
Fader |
: R15 ~ F15 |
Balance |
: L15 ~ R15 |
Subwoofer |
: 0 ~ +15 |
NOTES
•If the Rotary encoder is not turned in 5 seconds after selecting the BALANCE, FADER, DEFEAT and SUBWOOFER modes, the unit automatically sets in the VOLUME mode.
•*When subwoofer mode is OFF or when LINK (rear DVD function (page 40) is set to ON), its level cannot be adjusted.
2 Turn the Rotary encoder until the desired sound is obtained in each mode.
By setting Defeat ON, previously adjusted settings of
Bass, Treble will return to the factory defaults, but MX will be turned off.
NOTE
Depending on the connected devices, some functions and display indications do not work.
Blackout Mode On and Off
When the Blackout mode is turned on, the display will turn off to reduce power consumption.
This additional power enhances the sound quality.
1 Press and hold the B.OUT button for at least 3 seconds to start the blackout mode. By doing so the display will turn off.
NOTE
If any button on the unit is pressed during the blackout mode, the function will be displayed for 5 seconds to show the operation before returning to Blackout mode.
To cancel the blackout mode, press and hold the B.OUT button for at least 3 seconds.
Changing the Audio Level Display
Pattern
You can select the display pattern mode from three display patterns.
1 Press the DISP (DISPLAY) button to select the desired Display pattern mode.
Each press changes the display patterns.
Pattern 1  Pattern 2
  Pattern 3
  OFF
OFF
Setting the Bass Control
You can change the Bass Frequency emphasis to create your own tonal preference.
1 Press the CENTER f button to select the BASS (bass Centre frequency) control mode.

 BASS
BASS  TREBLE
  normal mode
2-1 Setting the bass Centre frequency: |
|
|
||||||||
|
Press the |
|
DN or |
|
|
UP button to select the |
||||
|
|
|||||||||
|
|
|||||||||
|
desired bass centre frequency. |
|
|
|
||||||
|
|
|
60Hz |
70Hz |
80Hz |
90Hz |
|
|||
|
|
|
|
|||||||
180Hz 150Hz 130Hz 100Hz Emphasizes the displayed Bass frequency ranges.
2-2 Setting the bass Band Width (Q-Factor):
Press the BAND button to select the desired bass Band Width.
B. Width1 B. Width2 B. Width3 |
B. Width4 |
(Wide) |
(Narrow) |
Changes the bass boost band width to narrow or wide. A wide setting will boost a wide range of frequencies above and below the centre frequency. A narrower setting will boost only frequencies near the centre frequency.
2-3 Setting the bass Level:
Turn the Rotary encoder to select the desired bass Level (–7~+7).
You can emphasize or weaken the bass frequency.
NOTES
•If no buttons are pressed within 15 seconds, the Bass control setting will be turned off automatically.
•The settings of the Bass Level will be individually memorized for each source (FM, MW (LW), CD, etc.) until the setting is changed. Once you set Bass frequency and Bass Band Width for one of sources (FM, MW (LW), CD, etc.), this setting becomes effective for all those sources.
•This function is inoperable when DEFEAT is ON.
8-EN
Setting the Treble Control |
|
Adjusting the built-in Crossover |
You can change the Treble Frequency emphasis to create your own tonal preference.
1 Press the CENTER f button to select the TREBLE (treble centre frequency) control mode.

 BASS
BASS  TREBLE
  normal mode
2-1Setting the treble centre frequency:
Press  DN or
DN or 
 UP button to select the desired treble centre frequency.
10.0kHz |
12.5kHz |
15.0kHz |
17.5kHz |
Emphasizes the displayed Treble frequency ranges.
2-2 Setting the treble Level:
Turn the Rotary encoder to select the desired Treble Level (–7~+7).
You can emphasize the treble frequency.
NOTES
•If no buttons are pressed within 15 seconds, the Treble control setting will be turned off automatically.
•The settings of the Treble Level will be individually memorized for each source (FM, MW (LW), CD, etc.) until the setting is changed. Once you set Treble frequency for one of sources (FM, MW (LW), CD, etc.), this setting becomes effective for all those sources.
•This function is inoperable when DEFEAT is ON.
The High and Low Pass Filters on this unit can be adjusted to suit your personal taste.
1 Press and hold the X-OVER button for at least 2 seconds.
|
HPF |
|
<Press momentarily> LPF |
<Press momentarily> |
|
||
|
|
|
|||||
|
|
|
<Press for at least 2 seconds> |
normal mode |
|
|
|
|
|
|
|
|
|||
When the subwoofer output of this unit is turned OFF, LPF and phase are deactivated.
2 Press the  DN or
DN or 
 UP button to select the desired setting.
1.HPF (Setting the High Pass Filter):
FLAT (OFF) ↔ 80Hz ↔ 120Hz ↔160Hz
Outputs all frequencies higher than that selected according to your preference.
2.LPF (Setting the Low Pass Filter):
FLAT (OFF) ↔ 80Hz ↔ 120Hz ↔160Hz
Outputs all frequencies lower than that selected according to your preference.
(Only available when using the subwoofer output from this unit.)
NOTES
•If HPF, LPF, Bass Control and Treble Control are all set to ON, depending on the Bass Control and Treble Control settings, you may not be able to reinforce the sound effect.
•Except when the HPF and LPF is turned OFF, the subwoofer is in monaural mode.
•When the subwoofer is set to OFF, LPF mode and change of phase does not work.
•If no buttons are pressed within 15 seconds, the display for setup menu disappears while an ordinary menu appears on the display.
•These functions are inoperative when an external, Ai-NET processor is connected.
9-EN
Basic Operation
BAND |
Rotary encoder |
||
|
|
|
|
|
|
|
|
|
|
|
|
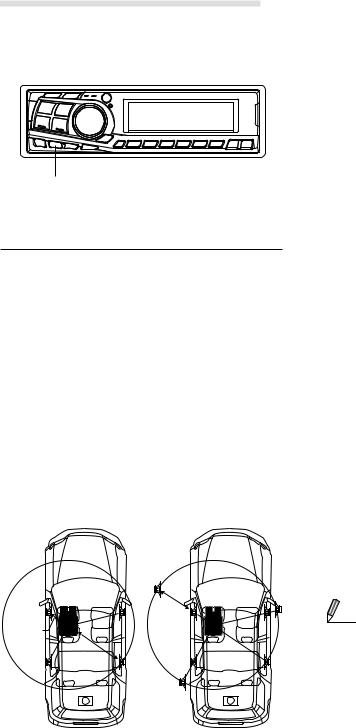
T.CORR
About the Time Correction
The distance between the listener and the speakers in a car vary widely due to the special conditions of the mobile environment. This difference in the distances from the speakers to the listener creates a shift in the sounds image and frequency characteristics. This is caused by the time delay between the sound reaching the listener’s right versus the left ear.
To correct this, the DVA-7996R is able to delay the audio signal to the speakers closest to the listener. This effectively creates a perception of increased distance for those speakers. The listener can be placed at an equal distance between the left and right speakers for optimum staging. The adjustment will be made for each speaker in a step of 0.1 ms.
Example 1. Listening Position: Front Left Seat
Adjust the time correction level of the front left speaker to a high value and the rear right to zero or a low value.
|
5.1ms |
0.5m |
|
2.25m |
|
|
|
Here we calculate the time correction value for the front left speaker in the diagram at the left.
Conditions:
Farthest Speaker – listening position : 2.25 m (88-9/16") Front left speaker – listening position : 0.5 m (19-11/16") Calculation: L = 2.25 m – 0.5 m = 1.75 m (68-7/8")
Time correction = 1.75 ÷ 343* × 1000 = 5.1 (ms) *Speed of sound: 343 m/s (765 mph) at 20˚C
In other words, giving the front left speaker a time correction value of 5.1 ms makes it seem as if the distance to the front left speaker is the same as the distance to the farthest speaker.
The sound is not balanced because the distance between the listening position and the various speakers is different. The difference in distance between the front left speaker and the rear right speaker is 1.75 m (68-7/8").
Time correction eliminates the differences in the time required for the sound to reach the listening position.
The time of the front left speaker is corrected by 5.1 ms so that its sound reaches the listening position at the same time as the sound of other speakers.
Example 2. Listening Position: All Seats
Adjust the time correction level of each speaker to almost the same level.
1 Sit in the listening position (driver’s seat, etc.) and measure the distance (in meters) between your head and the various speakers.
2 Calculate the difference between the distance to the farthest speaker and the other speakers.
L = (distance to farthest speaker) – (distance to other speakers)
3 Divide the distances calculated for the speakers by the speed of sound (343 m/s (765 mph) at 20˚C).
These values are the time correction values for the different speakers.
 Tips
Tips
*Subwoofer speaker.
You cannot change the Time Correction value for the subwoofer, but you can set the subwoofer's apparent position to the front by adjusting the Time Correction value of the front and rear speakers.
For details, refer to the “Tips” on page 11.
10-EN
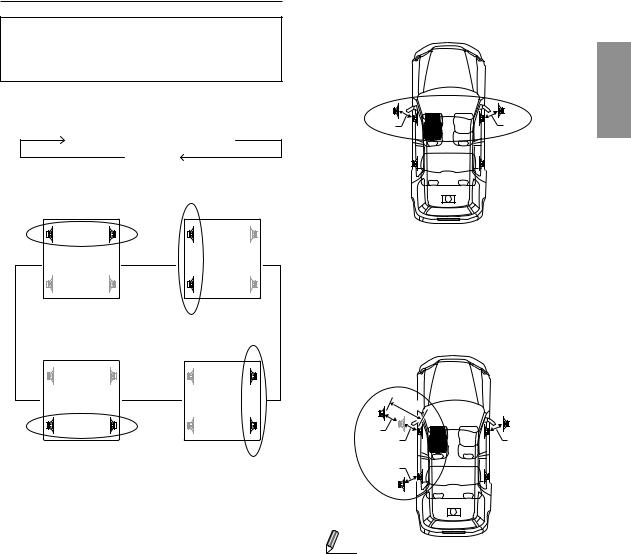
Bass Focus
The time difference between the front-rear/left-right speakers, can be adjusted at the same time. With an initial delay of 0.1 ms for each of the 0 to 99 steps, audible time correction can be done.
1 Press the T.CORR button to select the Bass Focus mode.
Bass Focus mode  Time correction mode
Normal mode
2 Press the BAND button to select the front-rear / leftright speakers.
FL |
FR |
FL |
FR |
→ RL |
RR |
→ RL |
RR |
Front (left-right) |
Left (front-rear) |
||
speakers |
|
speakers |
|
FL |
FR ← |
FL |
FR ← |
RL |
RR |
RL |
RR |
Rear (left-right) |
Right (front-rear) |
||
speakers |
|
speakers |
|
3 Turn the Rotary encoder to adjust the front-rear / leftright delay.
4 For setting another channel (speaker), repeat the steps
2 and 3.
5 After setting, press the T.CORR button to return to the normal mode.
NOTES
•Any manual time correction adjustments will also affect corrections made in Bass Focus.
•Time Correction mode is automatically cancelled if no buttons are pressed within 15 seconds.
Example of Steps 2 and 3 Setting
(1)After entering corrections for the front (left and right) speakers in STEP 15, the time difference is 1.5 ms for both front-left and front-right speakers.
1.5ms |
1.5ms |
(2)After entering corrections for the left (front and rear) speakers in STEP 15, the time difference becomes 3.0 ms* for the front left speaker and 1.5 ms for the left rear speaker.
* Because the time difference was already set to 1.5 ms for the front left speaker in STEP 1, the additional correction in STEP 15 makes the time difference of the front left speaker 3.0 ms.
|
3.0ms |
1.5ms |
|
1.5ms |
1.5ms |
1.5ms |
|
 Tips
Tips
*Subwoofer speaker.
Delay (turn the rotary encoder) the audio signal to the front (left and right) speakers to make the apparent position of the subwoofer to be at the front. In doing this, the apparent position between the front (left and right) speakers and subwoofer will appear equal to the driver. After performing above, you can change the positions of left and right speakers by delaying the time.
Continued
11-EN
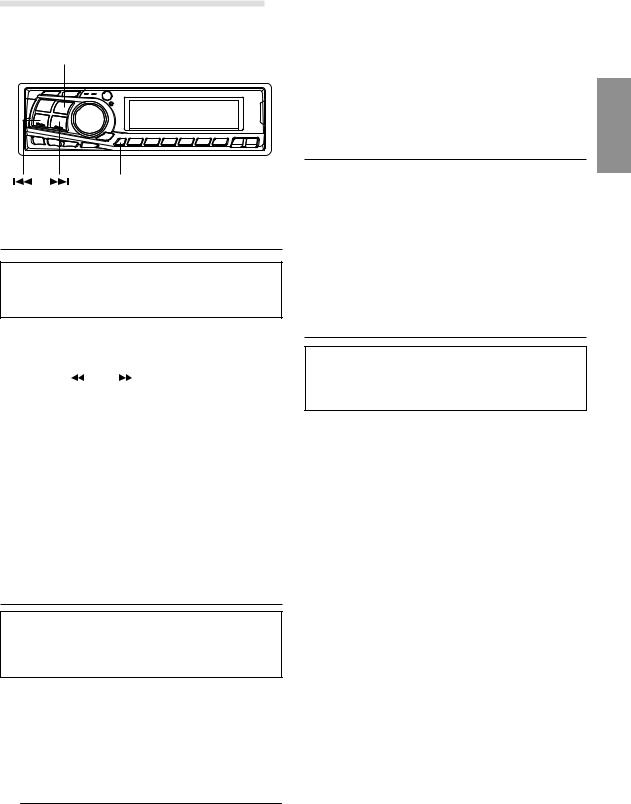
Basic Operation
SOURCE BAND |
Rotary encoder/Q. S. |
 TITLE
TITLE
MX T.CORR
Time Difference Table
Number of |
Time |
Number of |
Time |
Number of |
Time |
Difference |
Difference |
Difference |
|||
Steps |
(ms) |
Steps |
(ms) |
Steps |
(ms) |
|
|
|
|
|
|
0 |
0.0 |
14 |
1.4 |
28 |
2.8 |
|
|
|
|
|
|
1 |
0.1 |
15 |
1.5 |
29 |
2.9 |
|
|
|
|
|
|
2 |
0.2 |
16 |
1.6 |
30 |
3.0 |
|
|
|
|
|
|
3 |
0.3 |
17 |
1.7 |
31 |
3.1 |
|
|
|
|
|
|
4 |
0.4 |
18 |
1.8 |
32 |
3.2 |
|
|
|
|
|
|
5 |
0.5 |
19 |
1.9 |
33 |
3.3 |
|
|
|
|
|
|
6 |
0.6 |
20 |
2.0 |
34 |
3.4 |
|
|
|
|
|
|
7 |
0.7 |
21 |
2.1 |
35 |
3.5 |
|
|
|
|
|
|
8 |
0.8 |
22 |
2.2 |
36 |
3.6 |
|
|
|
|
|
|
9 |
0.9 |
23 |
2.3 |
37 |
3.7 |
|
|
|
|
|
|
10 |
1.0 |
24 |
2.4 |
38 |
3.8 |
|
|
|
|
|
|
11 |
1.1 |
25 |
2.5 |
39 |
3.9 |
|
|
|
|
|
|
12 |
1.2 |
26 |
2.6 |
40 - 98 |
4.0 - 9.8 |
|
|
|
|
|
|
13 |
1.3 |
27 |
2.7 |
99 |
9.9 |
Time Correction
Before performing the following procedures, refer to
“About the Time Correction” (page 10).
1 Make time corrections by pressing the T.CORR button.
Each press changes the modes as follows:
Bass Focus mode  Time correction mode
Normal mode
2 Select a speaker to be adjusted by pressing the BAND button.
F – L  F – R
F – R  R – L
R – L  R – R
R – R
3 Adjust the desired time correction value by turning the
Rotary encoder.
4 For setting another speaker, repeat the step 2 and 3.
5 After setting, press the Rotary encoder to return to the normal mode.
NOTE
Time Correction mode is automatically cancelled if no buttons are pressed within 15 seconds.
Setting the MX Mode
MX (Media Xpander) makes vocals or instruments sound distinct regardless of the music source. The radio, CD and MP3, will be able to reproduce the music clearly even in cars with a lot of road noise.
1 Press the MX button to select MX ON.
2 Press the SOURCE button to select the source you want to MX (Media Xpander)-correct.
3 Press and hold the MX button for at least 2 seconds to select the MX mode.
4 Turn the Rotary encoder to select your preferred mode or OFF.
FM (MX level 1 to 3):
The medium to high frequencies become more clear, and produces well balanced sound in all the bands. CD (MX level 1 to 3):
CD mode processes a large quantity of data. This data is used to reproduce the sound cleanly by making use of the data quantity.
MP3/DAB (MX level 1 to 3):
This corrects information that was omitted at the time of compression. This reproduces a well-balanced sound close to the original.
DVD (or Video CD):
•(MOVIE MX level 1 to 2)
The dialog portion of the video is reproduced more clearly.
•(MUSIC MX level 1)
This disc contains a large quantity of data such as music clip. MX uses this data to reproduce the sound accurately.
AUX (MX level 1):
Choose the MX mode (MP3, MUSIC, or MOVIE) that corresponds to the media connected.
5 After setting, press the Rotary encoder to return to the normal mode.
NOTES
•To cancel MX mode for all music sources, press the MX button to turn MX off.
•MX mode is automatically cancelled if no buttons are pressed within 15 seconds.
•You cannot set the MX mode while RDS and DAB are active.
•Setting to MX OFF makes MX mode of each music source OFF.
•This function is inoperable when DEFEAT is ON.
•By “Setting the External Input Defeat Mode” (page 17) to ON, operation is bypassed.
•Each music source, such as radio, CD, and MP3 can have its own MX setting.
•MX mode does not function when MX is ON for MW, LW radio.
12-EN
Quick Searching Function
You can easily select tracks and files.
1 Press the SOURCE button to set the desired source mode.
(CD mode is explained here as an example)
2 When setting the CD mode, press and hold the Q.S. button for at least 2 seconds. The mode changes to the Q.S. (Quick Search) setting.
3 Select a desired track by turning the Rotary encoder to the right or left.
•CD/Changer mode: Track can be selected.
•MP3 mode: File number can be selected.
4 When the setting is completed, the Q.S. mode is cancelled by pressing the Rotary encoder.
NOTE
The Q.S. mode is automatically cancelled after 10 seconds if no buttons are pressed during step 2 and 3.
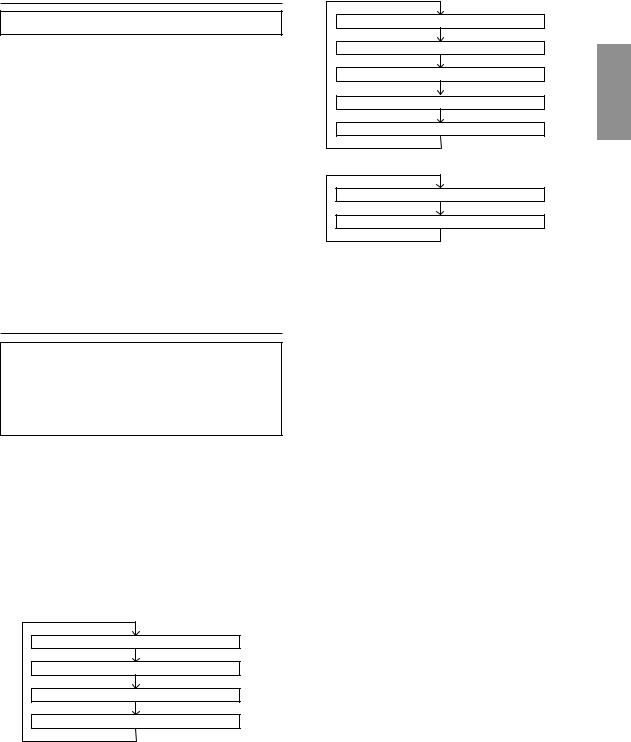
Displaying the Title/Text
It is possible to display the disc title if the title has been previously inputted. For details, see “Titling Disc” (page 14). Text information, such as the disc name and the track name, will be displayed if playing a CD text compatible disc. It is also possible to display the folder name, the file name, and the ID3 tag, etc. while playing MP3 files.
1 Press the TITLE button.
The mode will change every time the button is pressed.
About “Title” and “Text”
Title: With this device, it is possible to input the CD/DVD/ Video CD name (refer to page 14). This inputted name is referred to as a “title.”
You cannot input or display titles on MP3 discs. Text: Text compatible CDs contain text information such
as the disc name and track name. Such text information is referred to as “text.”
CD mode:
ELAPSED TIME DISPLAY
TEXT DISPLAY (DISC NAME) 1
TEXT DISPLAY (TRACK NAME) 1
TITLE DISPLAY
MP3 mode:
ELAPSED TIME DISPLAY
FOLDER NAME DISPLAY
FILE NAME DISPLAY
ID3 TAG DISPLAY 2
FRAME DISPLAY 3
DVD/Video CD mode:
ELAPSED TIME DISPLAY 4
TITLE DISPLAY
1 Displayed during playback of a disc with CD Text. “NO TEXT” will be displayed when the CD contains no text data.
2 If an MP3 file contains ID3 tag information, all the ID3 tag information is displayed (e.g., track name, artist name, and album name).
All other tag data is ignored.
“NO TAG” will be displayed when an MP3 file contains no ID3 tag information.
3 The recording sampling rate and bit rate of the MP3 file are displayed.
4 The playback elapsed time is displayed for video CD with the PBC function when PBC OFF is set.
NOTES
•Some characters may not be displayed correctly with this device, depending on the character type.
•The CD changer must also be CD Text compatible for the Text information to be displayed.
•When the Scroll Setting (refer to page 16) is set to “SCR MANUAL”, press and hold the TITLE button for at least 3 seconds to scroll the Text information only once (TEXT DISPLAY, FOLDER NAME DISPLAY, FILE NAME DISPLAY or ID3 TAG DISPLAY mode).
•“NO SUPPORT” is displayed when the desired text information cannot be displayed on this unit.
•If the title was not previously input, “NO TITLE” is displayed.
•The operations to display the title/text and to select the title input operation cannot be performed using the TITLE button on the remote control unit.
13-EN
Basic Operation
|
|
|
|
|
BAND |
Rotary encoder |
||||
|
|
|
||||||||
|
|
|
|
|
|
|
|
|
|
|
|
|
|
|
|
|
|
|
|
|
|
|
|
|
|
|
|
|
|
|
|
|
|
|
|
|
|
|
|
|
|
|
|
|
|
|
|
|
|
|
|
|
|
|
|
|
|
|
|
|
|
|
|
|
|
TITLE
DN UP
NOTES
•You can enter 18 disc titles on this unit. If you try to store beyond the limit, the audio display will show “FULL DATA”. At this point, no more titles can be stored.
•The CD Changer title length or memory capacity varies depending upon the model being used.
•To input a new title, one of the previously inputted titles must first be deleted.
•When you want to erase a title, enter the “


 ” symbol into all spaces.
•The operations described in steps 3 to 5 must be made within 10 seconds. The input mode will be cancelled if no action is taken for over 10 seconds.
•Removing power from the unit may delete these titles. Use caution when manipulating the power cord.
Titling Discs
It is possible to title your favorite Disc's (CD, DVD, Video
CD).
You cannot input or display titles on MP3 discs.
1 Press the TITLE button and select the title display mode.
For details, see “Displaying the Title/Text” (page 13).
2 Press and hold the TITLE button for at least 3 seconds. The first character will blink.
Press the BAND button to select the characters/ symbols.

 Upper case
  Lower case
  Numeral/Symbol
3 Turn the Rotary encoder to select the desired letter/ numeral/symbol available for naming.
4 Press the Rotary encoder to store the first character. The first character will stop blinking and the display will automatically advance to the next character. When that character begins to blink, you may choose the next letter or symbol of your title.
5 Repeat the steps 3 and 4 above to complete the titling. Pressing the Rotary encoder after entering the 8th character, automatically stores the title into memory.
When entering a title of less than 8 characters (for example, 3 character title):
After entering 3 characters to complete your title, the 4th character space will be blinking. Go to step 6 to complete the title.
6 Press the TITLE button to record the title.
Erasing Disc Title
1 Press the TITLE button to select the titling mode. Then, press and hold the button for at least 3 seconds.
2 Press and hold the 

 button for at least 2 seconds to activate the title scanning mode. The title in the display will blink.
3 Press the  DN or
DN or 
 UP button repeatedly until the title you want to erase is displayed.
4 Press and hold the 

 button for at least 2 seconds to erase the title displayed.
5 Press the TITLE button to cancel the title erasing mode.
NOTES
•You cannot erase CD-TEXT.
•The operations will be cancelled if no action is taken for over 10 seconds.
14-EN
SETUP Operation
BAND
SETUP
DN UP
Adjusting Source Signal Levels
If the difference in volume level between the CD player and FM radio is too great, adjust the FM signal level as follows.
1 |
Press and hold the SETUP button for at least 3 |
||||
|
seconds. |
|
|
|
|
2 |
Press the |
|
DN or |
|
UP button to select the FM-LV |
|
|
||||
|
|
||||
|
(FM LEVEL) mode. |
|
|
||
3 |
Press the BAND button to select the FM signal level HI |
||||
|
(High) or LO (Low) to make the signal levels between |
||||
|
the FM band and CD player closer. |
||||
4 |
Press the SETUP button to return to normal mode. |
||||
NOTES
•“Setting the Range of MP3 File Selection” and “Playing MP3 Data”in the “SETUP” mode section are described in MP3 Operation on page 32.
•Audio-related setup function operations cannot be performed using the SETUP button on the remote control unit.
Setting the Sound Quality of the
Tuner
The DVA-7996R incorporates the MAX TUNE Pro for the highest quality tuner audio. Moreover, you can choose between 3 settings to suit your own personal sound preferences and usage.
1 Press and hold the SETUP button for at least 3 seconds.
2 Press the  DN or
DN or 
 UP button to select “NORMAL” or “HI-FI” or “STABLE.”
3 Press the BAND button to switch the TUNER mode.

 NORMAL
  HI-FI
HI-FI  STABLE
NORMAL |
: Standard setting |
HI-FI |
: Sound quality priority setting |
STABLE |
: Noiseless priority setting |
NOTES
•The initial setting at the factory is “NORMAL.”
•If you find the sound is very noisy while listening to the tuner in the HI-FI mode, we recommend you change to the NORMAL mode.
4 When the setting is completed, press the SETUP button to return to the normal mode.
Changing Lighting Color
1 Press and hold the SETUP button for at least 3 seconds.
2 Press the  DN or
DN or 
 UP button to select “AMBER”.
3 Press the BAND button to toggle the mode between AMBER ON (amber) and AMBER OFF (green).
4 Press the SETUP button to set the selected mode.
Dimmer Control
Set the DIMMER control to AUTO to decrease the illumination brightness of the unit with the head lights of the vehicle ON. This mode is useful if you feel the unit's backlighting is too bright at night.
1 Press and hold the SETUP button for at least 3 seconds.
2 Press the  DN or
DN or 
 UP button to select “DIM” (DIMMER).
3 Press the BAND button to select the Dimmer mode. Each press toggles between DIM AUTO and DIM MANUAL.
4 Press the SETUP button to activate the normal mode.
15-EN
SETUP Operation
SOURCE |
Rotary encoder/MODE |
BAND
SETUP
DN UP
Subwoofer On and Off
1 Press and hold the SETUP button for at least 3 seconds.
2 Press the  DN or
DN or 
 UP button to select the “SUB- W (Subwoofer)” mode.
3 Press the BAND button to toggle mode between SUB-W ON or LINK and SUB-W OFF.
SUB-W ON: The subwoofer output is set to ON regardless of whether the rear DVD function (page 40) is set to ON or OFF.
SUB-W LINK: The subwoofer output is set to ON when the rear DVD function (page 40) is set to OFF.
The subwoofer output is set to OFF when the rear DVD function (page 40) is set to ON.
SUB-W OFF: The subwoofer output is set to OFF regardless of whether the rear DVD function (page 40) is set to ON or OFF.
4 Press the SETUP button after setting the SUB-W ON or LINK.
5 Press the MODE button repeatedly to select the SUB-W (Subwoofer) mode.
SUB-W  BALANCE
VOLUME DEFEAT FADER
Press the 
 DN or
DN or 
 UP button after selecting the
SUB-W mode, and the subwoofer output phase is toggled SUBW NOR (0°) or SUBW REV (180°).
6 Turn Rotary encoder until the desired sound is obtained in each mode.
NOTES
•Initial mode is “Subwoofer ON.”
•Set to “Subwoofer OFF” unless the subwoofer is used.
•The SUB-W LINK cannot be selected when our company's external processor is connected.
•It is not possible to adjust the subwoofer output level when “SUB-W LINK” is selected and the rear DVD function is turned on.
•Any subwoofer adjustment (level or phase) made while the rear DVD function is turned on, is stored in memory. The settings stored are recalled the next time the rear DVD function is turned on (only when our company's external processor is disconnected.).
Sound (Beep) Guide Function
This function will give audible feedback with varying tones depending upon the button pressed.
1 Press and hold the SETUP button for at least 3 seconds.
2 Press the  DN or
DN or 
 UP button to select “BEEP.”
3 Press the BAND button to toggle the mode between BEEP ON and BEEP OFF.
NOTE
The initial setting at the factory is BEEP ON.
4 Press the SETUP button to set the selected mode.
Scroll Setting
This CD player can scroll the disc and track names recorded on CD-TEXT discs, as well as the text information of MP3 files, folder names, and ID3 tags.
1 Press and hold the SETUP button for at least 3 seconds.
2 Press the  DN or
DN or 
 UP button to select “SCR (SCROLL).”
3 Press the BAND button to toggle the mode between SCR AUTO and SCR MANUAL.
•SCR AUTO: the CD text information, the text information of folder and file names, and the ID3 tags are scrolled automatically.
•SCR MANUAL: the display is scrolled only when a disc is loaded or when a track is changed, etc.
4 When the setting is completed, press the SETUP button to return to the normal mode.
NOTES
•Initial mode is “SCR MANUAL.”
•The unit scrolls CD text names, folder names, file names or ID3 tag display. The disc titles input manually (refer to page 14) cannot be scrolled.
16-EN

Setting the AUX Mode (V-Link)
You can input TV/video sound by connecting an optional Ai-NET/RCA Interface cable (KCA-121B) or Versatile Link Terminal (KCA-410C) to this component.
1 Press and hold the SETUP button for at least 3 seconds.
2 Press the  DN or
DN or 
 UP button to select “AUX.”
3 Press the BAND button to toggle the mode between AUX ON and AUX OFF.
NOTES
•The initial setting at the factory is AUX OFF.
•You can set the AUX mode display by pressing the
 DN or
DN or
 UP button after AUX ON is set. Select the AUX mode display setting and press the BAND button.
•When connecting the KCA-410C, you can set two AUX mode displays.
4 Press the SETUP button to return to normal mode.
5 To adjust the volume, etc., first press the SOURCE button and select the AUX mode, then make the necessary adjustment.
NOTE
When using the Versatile Link Terminal (KCA-410C), you can connect two external inputs. To select the mode, press the BAND button on the unit.
Turning Mute Mode On/Off
If a device having the interrupt feature is connected, audio will be automatically muted whenever the interrupt signal is received from the device. This function can be turned ON or OFF from the head unit by following procedure below.
1 Press and hold the SETUP button for at least 3 seconds.
2 Press the 
 DN or
DN or 
 UP button to select the MUTE mode.
3 Press the BAND button to turn on or off the MUTE mode.
Each press toggles between the MUTE ON and OFF modes.
NOTE
The initial setting at the factory is “MUTE ON.”
4 Press the SETUP button again to return to normal operation.
Setting the External Input Defeat
Mode
Turn DEFEAT ON to bypass BASS, TREBLE and MX settings for any source using the external input.
1 Press and hold the SETUP button for at least 3 seconds.
2 Press the  DN or
DN or 
 UP button to select “INT.”
3 Press the BAND button to toggle the mode between
INT ON and INT OFF.
When using Initial mode, set this to ON.
When the Initial mode is not selected, set this to OFF.
4 Press the SETUP button to return to normal mode.
Setting the Digital Output
To connect an audio processor using the optical digital output, set to “ON” with the following procedure.
1 Press and hold the SETUP button for at least 3 seconds.
2 Press the  DN or
DN or 
 UP button to select “OPTOUT” mode.
3 Press the BAND button to set ON.
NOTE
The initial setting at the factory is “OPTOUT OFF”.
4 Press the SETUP button to return to normal mode.
NOTE
Afterwards, set ACC to OFF once, then turn it ON again. The setting of Digital Output is decided.
17-EN
SETUP Operation
BAND |
Rotary encoder |
||
|
|
|
|
|
|
|
|
SETUP
DN UP
Optical Digital Input Selection for an External Audio Processor
Make sure “OPTOUT” is ON in “Setting the Digital
Output” (page 17) before switching this setting.
1 |
Press and hold the SETUP button for at least 3 |
||||
|
seconds. |
||||
2 |
Press the |
|
DN or |
|
UP button to select “APRC |
|
|
||||
|
|
||||
|
OTHER”. |
||||
|
NOTE |
||||
|
When OPTOUT is ON, “APRC OTHER” is displayed. |
||||
3 |
Press the BAND button to toggle the mode between |
||||
|
APRC OTHER and APRC H510. |
||||
|
APRC OTHER: When connecting any audio processor |
||||
|
via the optical digital cable except the PXA-H510. |
||||
|
APRC H510: When connecting PXA-H510. |
||||
4 |
Press the SETUP button to activate the normal mode. |
||||
NOTE
Afterwards, set ACC to OFF once, then turn it ON again. The setting of fiber digital input switch is decided.
Demonstration
This unit has a Demonstration feature which simulates the display functions.
1 Press and hold the SETUP button for at least 3 seconds.
2 Press the  DN or
DN or 
 UP button to select the DEMO mode.
3 Press the BAND button to turn on or off the DEMO mode.
Each press toggles between DEMO ON and DEMO OFF.
If no button is pressed for 30 seconds, the DEMO mode activates.
NOTES
•The initial setting at the factory is “DEMO ON.”
•To quit DEMO mode, set to “DEMO OFF.”
4 Press the SETUP button again to return to normal operation.
Adjusting Display Contrast
You can adjust the audio display contrast for better visibility.
1 Press and hold the SETUP button for at least 3 seconds.
2 Press the  DN or
DN or 
 UP button to select
“CONTRAST.”
3 Turn the Rotary encoder to adjust the contrast of the audio display. You can adjust in a range of –6 and +6. The initial setting at the factory is “0.”
4 Press the SETUP button to set the selected mode.
18-EN
Radio Operation
SOURCE TUNE/A.ME
BAND
4 Press the  DN or
DN or 
 UP button to automatically seek a station downward or upward respectively. The unit will stop at the next station it finds.
Press the same button again to seek the next station.


 F Preset buttons (1 through 6) DN UP
Manual Tuning
1 Press the SOURCE button to select the radio mode.
2 Press the BAND button repeatedly until the desired radio band is displayed.
Each press changes the band:
FM1  FM2
FM2  FM3
FM3  MW
MW LW
LW
3 Press the TUNE button repeatedly until “DX SEEK” and “SEEK” disappear from the display.
NOTE
The initial mode is DX SEEK.
4 Press the  DN or
DN or 
 UP button to move downward or upward one step respectively until the desired station frequency is displayed.
NOTE
The ST indicator appears on the display when a Stereo FM station is tuned in.
Automatic Seek Tuning
1 Press the SOURCE button to select the radio mode.
2 Press the BAND button repeatedly until the desired radio band is displayed.
Each press changes the band:
FM1  FM2
FM2  FM3
FM3  MW
MW LW
LW
3 Press the TUNE button to illuminate the DX and SEEK indicators in the display.
The SEEK indicator illuminates. With the DX mode activated, both strong and weak stations will be tuned in the Auto-Seek operation.
Press again to return to the local mode. The DX indicator will turn off and the SEEK indicator will illuminate. Now, only strong stations will be tuned.
Manual Storing of Station Presets
1 Select the radio band and tune in a desired radio station you wish to store in the preset memory.
2 Press the F button so that the “FUNC” indicator light goes out. Press and hold the Preset buttons (1 through 6) that you want to store the station on for at least 2 seconds.
The selected station is stored. The display shows the band, preset No. with a triangle ( ) and station frequency memorized.
3 Repeat the procedure to store up to 5 other stations onto the same band.
To use this procedure for other bands, simply select the band desired and repeat the procedure.
A total of 30 stations can be stored in the preset memory (6 stations for each band; FM1, FM2, FM3,
MW and LW).
NOTE
If you store a station in a preset memory which already has a station, the current station will be cleared and replaced with the new station.
Automatic Memory of Station Presets
1 Press the BAND button repeatedly until the desired radio band is displayed.
2 Press and hold the A.ME button for at least 2 seconds. The tuner will automatically seek and store 6 strong stations in the selected band in order of signal strength.
The frequency on the display continues to change while the automatic memory is in progress.
When the automatic memory has been completed, the tuner goes to the station stored in the preset location No. 1.
NOTE
If no stations are stored, the tuner will return to the original station you were listening to before the auto memory procedure began.
Tuning to Preset Stations
1 Press the BAND button repeatedly until the desired band is displayed.
2 Press the F button so that the “FUNC” indicator light goes out. Then press the station preset button that has your desired radio station in memory.
The display shows the band, preset number with a triangle and frequency of the station selected.
19-EN
 Loading...