


Model EOU 6330

IMPORTANT SAFETY INFORMATION
These warnings are provided in the interests of your safety. Ensure that you understand them all before installing or using the appliance. Your safety is of paramount importance. If you are unsure about any of the meanings of these warnings contact the Customer Care Department. The address is on the back page of this book.
INSTALLATION
The appliance must be installed according to the instructions supplied. The installation work must be undertaken by a qualified electrician/ competent person.
The appliance must be installed in an adequately ventilated room.
NOTE: It is imperative that the appliance is left in the base to protect both the appliance and the floor.
This appliance is heavy and care must be taken when moving it. Do not try to lift or move the appliance by pulling the door handles.
Warning: Do Not attempt to lift or move this appliance by the handles.
All packaging, both inside and outside the appliance must be removed before the appliance is used.
It is dangerous to alter the specifications or modify the appliance in any way.
After installation please dispose of the packaging with due regard for safety and the environment. Your local authority can arrange this.
CHILD SAFETY
Do not allow young children to play with any part of the packaging.
This appliance is designed to be operated by adults. Young children must not be allowed to tamper with the controls or play near or with the appliance.
CAUTION: Accessible parts may be hot when the grill is in use. Young children should be kept away.
DURING USE
This appliance is not intended to be operated by means of an external timer or separate remote control system.
This appliance has been designed for domestic use to cook edible foodstuffs only, and must not be used for any other purposes.
Take great care when heating fats and oils as they will ignite if they become too hot.
Never place plastic or any other material which may melt in or on the oven.
Do not stand too close to the oven or grill while in use as warm air will exhaust from the grill cavity and the vents on the front frame of the appliance.
Do not leave the grill pan handle in position when grilling and ensure oven gloves are used to remove and replace the handle, as it will become hot.
Always use oven gloves to remove and place food in the oven.
Ensure that all vents are left unobstructed to ensure ventilation of the oven cavity.
Never line any part of the appliance with foil. Stand clear when opening the drop down oven doors. Support the doors using the handles until fully open.
Never leave the appliance unattended when the oven door is open.
Do not place sealed cans or aerosols inside the oven. They may explode if they are heated. Ensure that all control knobs are in the OFF position when not in use.
Do not stand on the appliance or on the open oven doors.
Do not hang towels, dishcloths or clothes from the appliance or its handles. They are a safety hazard.
CLEANING AND MAINTENANCE
The appliance is heavy and care must be taken when moving it.
For hygiene and safety reasons this appliance should be kept clean at all times. A build-up of fats or other foodstuffs could result in a fire especially in the grill pan.
Do not leave cookware containing foodstuffs, e.g. fat or oil in the appliance in case it is inadvertently switched on.
Always allow the cooling fan to cool the appliance down before switching off at the wall prior to carrying out any cleaning / maintenance work.
Only clean this appliance in accordance with the instructions given in this book.
SERVICE
Repairs should not be carried out by inexperienced persons as this may cause injury or serious malfunction. This appliance should be serviced by an authorised Service Engineer and only genuine approved spare parts should be used. Details of servicing and repair arrangements are supplied on page 32 of this book.
AT THE END OF THE APPLIANCE'S LIFE
When the time comes to dispose of your appliance please contact your local Council Authority. They can arrange to dispose of the appliance in a safe and controlled manner. The number will be in the telephone book.
Please read the instruction book carefully before use and retain for future reference.
2

CONTENTS
FOR THE USER
Important Safety Information |
2 |
Description Of The Appliance |
4 |
Getting To Know Your Appliance |
5 |
The Cooling Fan For The Controls |
6 |
Control Panel Indicator Neons |
6 |
Before Using The Appliance |
7 |
When First Switching On |
7 |
Rating Plate |
7 |
Condensation And Steam |
7 |
Cookware |
8 |
Grill and Oven Furniture |
8 |
The Electronic Timer |
9 |
The Dual Grill |
13 |
Uses Of The Grill |
13 |
How To Use The Dual Grill |
13 |
Things To Note |
13 |
The Grill Pan and Handle |
14 |
Hints And Tips |
14 |
Grilling Chart |
16 |
The Top Oven |
17 |
Use Of The Top Oven |
17 |
How To Use The Top Oven |
17 |
Things to Note |
17 |
To Fit The Top Oven Shelf |
17 |
Hints And Tips |
18 |
Top Oven Grilling Chart |
19 |
The Main Fan Oven |
20 |
Uses Of The Main Fan Oven |
20 |
Preheating |
20 |
Cooking Temperatures |
20 |
Batch Baking |
20 |
How To Use The Main Fan Oven |
20 |
Things To Note |
20 |
To Fit The Main Oven Shelves |
21 |
Hints And Tips |
21 |
Main Oven Cooking Chart |
22 |
Roasting Chart |
23 |
Defrost Feature |
24 |
Use Of Defrost Feature |
24 |
How To Defrost Feature |
24 |
Things To Note |
24 |
Hints And Tips |
24 |
Care and Cleaning |
25 |
Cleaning Materials |
25 |
Cleaning The Outside Of The Appliance |
25 |
Cleaning The Control Knobs and Handles |
25 |
Cleaning The Top Oven Roof |
26 |
Cleaning The Outer And Inner Door Panels |
26 |
To Remove The Outer Door Glass |
27 |
To Replace The Outer Door Glass Panel |
27 |
To Clean The Inner Door Glass |
28 |
Cleaning Inside The Ovens |
28 |
Care of Stayclean Surfaces |
28 |
To Remove The Wirework Runners |
28 |
Cleaning The Shelves, Wirework Runners |
|
And Grill/ Oven Furniture |
28 |
Cooking To Reduce Silage |
29 |
Replacing An Oven Light Bulb |
29 |
Something Not Working |
30 |
Service and Spare Parts |
32 |
Guarantee Conditions |
33 |
FOR THE INSTALLER
Technical Details |
34 |
Things You Need To Know |
35 |
Choice Of Electrical Connection |
35 |
Things To Note |
36 |
Preparing Cabinet For Fitting Of Oven |
37 |
How To Finish Unpacking |
38 |
To Remove Cover Of Mains Terminal |
39 |
Connecting To The Mains Terminal |
40 |
Checking Electrical Connections |
41 |
Connecting To A Hob Or Cooker Point |
41 |
Fitting In The Space Between Cabinets |
42 |
Notes |
43 |
To help you the following symbols will be found in the text.
Hints and Tips
Safety Instructions
3
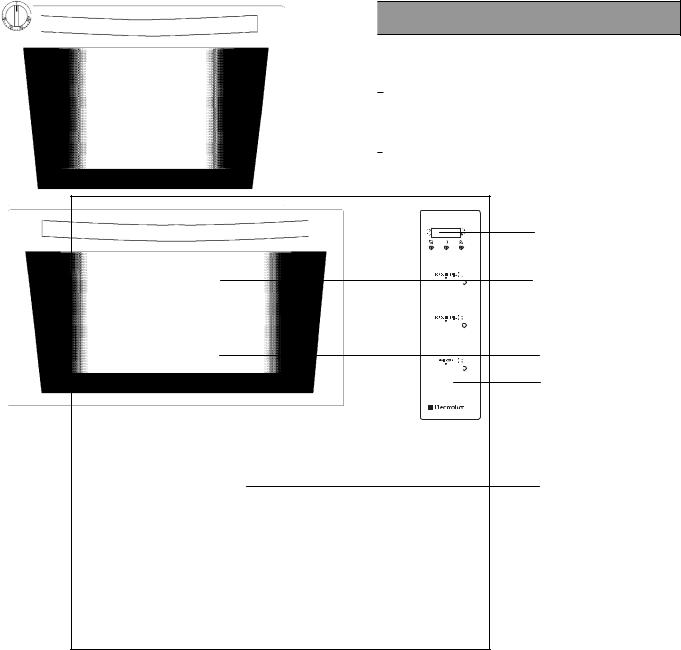
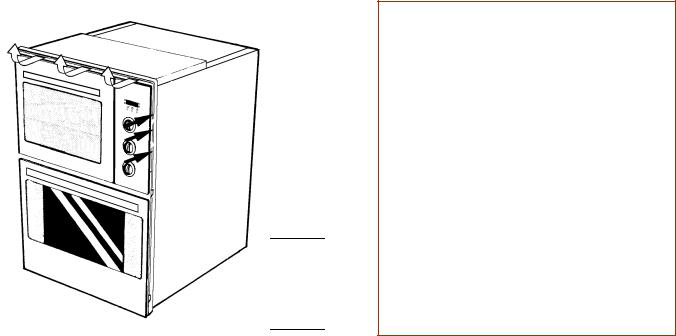
DESCRIPTION OF THE APPLIANCE
Built-under electric double oven
 WARNING: THIS APPLIANCE MUST BE EARTHED
Electronic Timer
Dual Grill
Top Oven
Control Knobs
Main Fan Oven
Your built-under appliance comprises of a conventional oven and dual grill in the top compartment. The top oven is convenient and economical for mid-week use because of its size.
The main fan oven is the larger of the two ovens. It is particularly suitable for cooking larger quantities of food.
The main fan oven can be automatically controlled by the electronic timer.
4
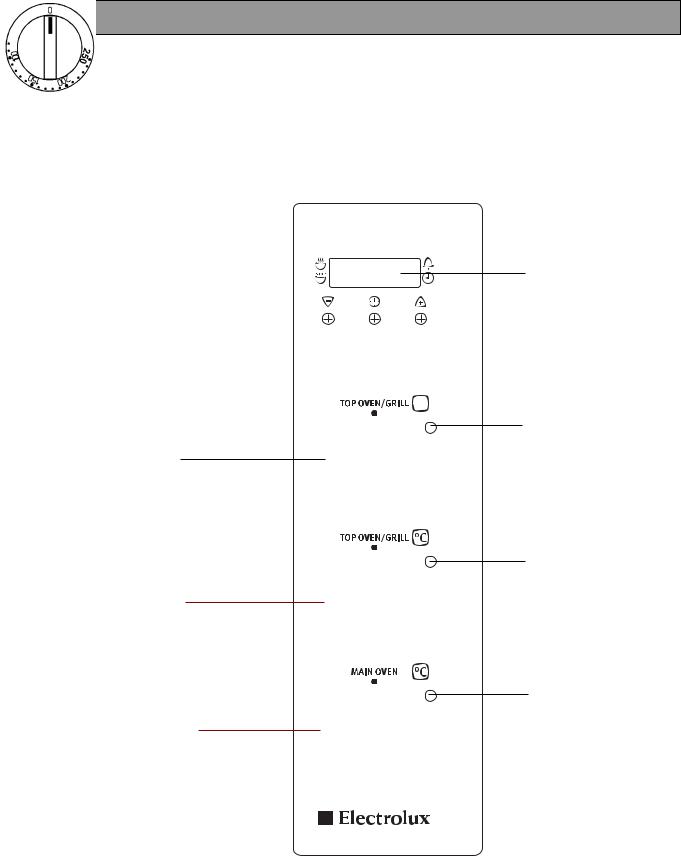
GETTING TO KNOW YOUR APPLIANCE
The Control Panel
Electronic Timer
Top Oven/Grill Selector Neon
Top Oven/Grill Selector
Top Oven Indicator Neon
Top Oven/Grill Temperature
Control
Main oven Indicator neon
Main Fan Oven Temperature
Control
5
THE COOLING FAN FOR THE CONTROLS
Your appliance has a cooling fan fitted behind the controls to prevent them from overheating.
The cooling fan will come on immediately when the grill is switched on and after a short time when either of the ovens are in use.
The cooling fan may turn on and off when the appliance is in use. This is quite normal.
The cooling fan may run on after the ovens or grill are switched off for a period of time to cool the appliance down. It may continue to switch on and off until the appliance is cool.
Always allow the cooling fan to cool the appliance down before switching off at the wall prior to carrying out any cleaning or maintenance work.
NOTE
The action of the cooling fan will depend on how long the ovens or grill have been used and at what temperature. It may not switch in at all at lower temperature settings nor run on where the grill or oven has only been used for a short time.
CONTROL PANEL INDICATOR NEONS
These lights indicate whether the ovens or grill are switched ON. In the case of the ovens, the Top and Main fan oven neons also indicate when the set temperature as been reached. They will turn on and off during use to show that the temperature is being maintained.
The grill neon does not turn on and off when the grill is in use.
The Main Fan oven neon does not operate with the Defrost setting.
If the neons do not operate as the instructions indicate the controls have been incorrectly set.
Return all controls to zero and re-set following the instructions for the required setting.
6
BEFORE USING THE APPLIANCE
WHEN FIRST SWITCHING ON
The timer must be set to manual operation before the main fan oven can be operated. This must be done whenever the appliance is switched off at the wall or when there has been a power failure. For instructions on how to set the timer see page 9.
If the main fan oven indicator neon does not glow when the oven controls are switched on, it is most likely that the timer is set for automatic cooking.
The Top Oven and the Dual grill are not controlled by the electronic timer.
RATING PLATE
This is situated on the lower front frame of the appliance upon opening the door. Alternatively the rating plate may also be found on the back or top of some models (where applicable).
The appliance must be protected by a suitably rated fuse or circuit breaker. The rating of the appliance is given on the rating plate.
Do not remove the rating plate from the appliance as this may invalidate the guarantee.
PREPARING TO USE YOUR APPLIANCE
Wipe over the base of the ovens with a soft cloth and hot soapy water and wash the grill and oven furniture before use.
We suggest that you run the oven elements for 10 – 15 minutes at 220°C to burn off any residue from their surfaces.
The procedure should be repeated with the grill for approximately 5 – 10 minutes.
During this period and odour may be emitted, it is therefore advisable to open a window for ventilation.
CONDENSATION AND STEAM
When food is heated it produces steam in the same way as a boiling kettle does. The ovens are vented to allow some of this steam to escape. However, always stand back from the appliance when opening the oven doors to allow any build up of steam or heat to be released. If the steam comes into contact with a cool surface on the outside of the appliance, e.g. a trim, it will condense and produce water droplets. This is quite normal and is not caused by a fault on the appliance.
To prevent discolouration occurring, regularly wipe away condensation and any soilage from the appliance surfaces.
7
COOKWARE
Baking trays, oven dishes etc., should not be placed directly against the grid covering the fan at the back of the main oven.
Do not use baking trays larger than 30cm x 35cm (12” x 14”) as they will restrict the circulation of heat and may affect performance.
Advice on the effect of different materials and finishes of bakeware is given in ‘Hints and Tips’ in the appropriate oven section.
GRILL AND OVEN FURNITURE
The following items of oven furniture have been supplied with the appliance.
1 grill pan
1 grill pan handle
1 grill pan grid
1 meat tin
1 shelf for grilling and Top Oven cooking
2 shelves for Fan Oven cooking
8
THE TIMERELECTRONIC TIMER
KEY
ACOOK TIME
BEND TIME
CCOUNTDOWN
DTIME OF DAY
EDECREASE CONTROL
FSELECTOR CONTROL
GINCREASE CONTROL
NOTE:
The time of day must be set before the main oven will operate manually.
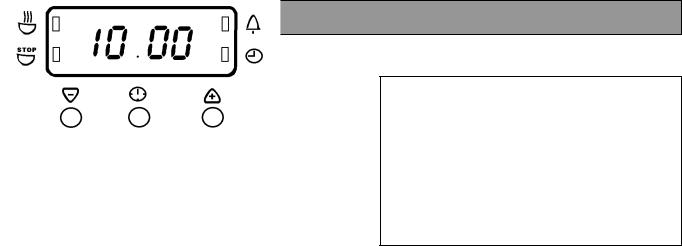
1. HOW TO SET THE TIME OF DAY
The oven has a 24 hour clock.
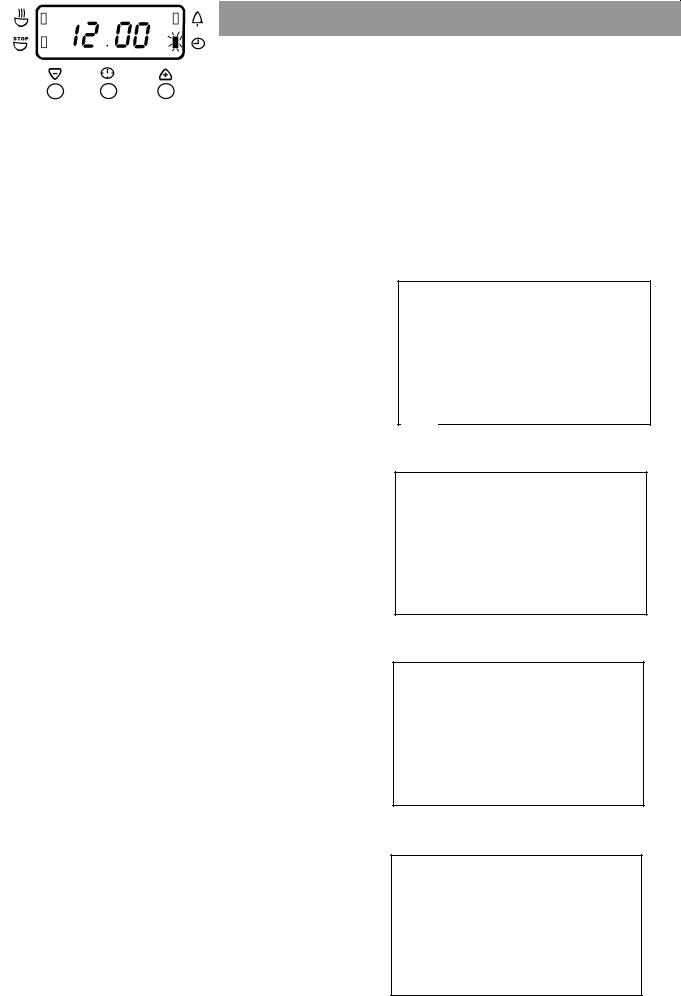
When the electricity supply is first switched ON, the display will show 12.00 and the 'Time Of Day' indicator neon will flash as Fig. 1.
To set the correct time press the increase control button (+) and if necessary, the decrease control button (-) until the correct time on the 24 hour clock is reached, e.g. 10.00am as Fig. 2. The 'Time Of Day' indicator neon will flash for 5 seconds and then go out.
NOTE: The increase and decrease control buttons operate slowly at first, and then more rapidly. They should be pressed separately.
2. HOW TO SET THE COUNTDOWN
The 'Countdown' gives an audible reminder at the end of any period of cooking. This cooking period may be up to 2 hrs 30 mins. It is not part of the automatic control.
To set, press the Selector Control button until the 'Countdown' indicator neon is illuminated and the display reads 0.00 as Fig. 3.
To set the correct time duration depress the increase control (+) until the display indicates the interval to be timed, e.g. 1hr 45 mins as Fig. 4. If necessary depress the decrease control (-) to achieve the correct time interval.
NOTE: This must be completed within 5 seconds of first pressing the Selector Control button.
During the operation of the 'Countdown', the remaining time period will be shown in the display. The 'Countdown' will sound intermittently for up to 2 minutes at the end of the timed period. The sound can be stopped by pressing any button.
A |
|
|
|
|
|
|
|
|
|
|
C |
|
|
|
|
|
|
|
|
|
|
||
B |
|
|
|
|
|
|
|
|
|
|
D |
|
|
|
|
|
|
|
|
|
|
||
|
|
|
|
|
|
|
|
|
|
|
|
|
|
|
|
|
|
|
|
|
|
|
|
|
|
|
|
|
|
|
|
|
|
|
|
E F G
Fig.1
Fig.2
Fig.3
Fig.4
9
TO CANCEL THE COUNTDOWN
If you change your mind and want to cancel the 'Countdown', press the Selector Control button until the 'Countdown' indicator neon flashes then depress the decrease control (-) until 0. 00 shows in the display as Fig. 5. The 'Countdown' indicator neon will continue to flash for a few seconds and then return to the time of day.
3. SETTING THE OVEN TIMER CONTROL
The main oven only can be automatically timed.
When using the timer control for the very first time, it is advisable to let it operate while you are at home. The displays can be checked to show that it is operating correctly and you will feel confident to leave a meal to cook automatically in the future.
A)TO SET THE TIMER TO SWITCH ON AND OFF AUTOMATICALLY
i)Ensure the electricity supply is switched ON and that the correct time of day is displayed, e.g. 9.a.m. as Fig. 6.
ii)Place food in oven.
iii)To set the length of cooking time. Press the Selector Control button until the 'Cook Time' indicator neon is illuminated. Press the increase
control (+) until the required length of cooking time is displayed, e.g. 2 hrs 15 mins as Fig. 7. If necessary depress the decrease control (-) until the correct time interval is achieved.
The maximum cooking time is 10 hours.
iv)Release the buttons. The 'Cook Time' indicator neon will be illuminated.
Remember, this must be completed within 5 seconds of first pressing the Selector Control button.
v) |
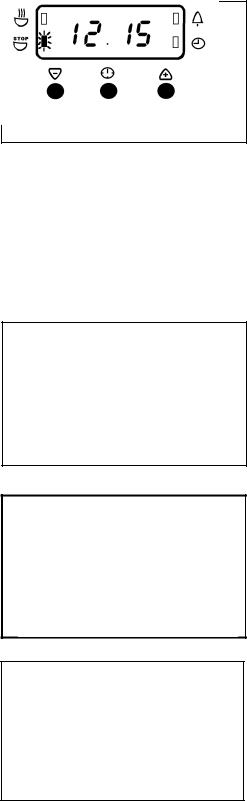
To set the 'End Time'. Press the Selector Control |
|
button until the 'End Time' indicator neon flashes. |
|
Press the increase control button (+) until the |
|
required stop time is displayed, e.g. 12.15 p.m. as |
|
Fig. 8. If necessary depress the decrease control |
|
(-) until the correct time interval is achieved. |
vi) |
Release the buttons. The time of day will be |
|
displayed after 5 seconds. The 'Cook Time' and |
|
'End Time' indicator neons will be illuminated. |
|
The 'End Time' must not be more than 23 hours |
|
59 minutes from the time of day. For example, if |
|
the time of day is 09.00 a.m., the latest 'End Time' |
|
would be 08.59 a.m. the next day. |
vii)Set the main oven control to the required temperature. The oven indicator neon should be OFF.
NOTE: When the automatic timed period starts, the oven indicator neon will turn ON and OFF periodically during cooking, showing that the temperature is being maintained.
Fig.5
Fig.6
Fig.7
Fig.8
10
BTO SET THE TIMER TO SWITCH OFF ONLY
i)Ensure the electricity supply is switched ON and that the correct time is displayed, e.g. 10.00 a.m. as Fig. 9.
ii)Place food in oven.
iii)To set the length of cooking time, press the Selector Control button until the 'Cook Time' indicator is illuminated. Press the increase control button (+) until the required length of cooking time is displayed, e.g. 2 hrs 15 mins as Fig. 10. Depress the decrease control button (-) if necessary.
iv)Release the buttons. The 'Cook Time' indicator neon will be illuminated and the time of day will be displayed after 5 seconds.
v)Set the oven temperature. The oven indicator neon should be ON.
vi)To check the 'End Time' during the cooking period, simply press the Selector Control button once and the remaining time will be displayed, as Fig. 11.
4.TO CANCEL AN AUTOMATIC PROGRAMME
i)To cancel an automatic programme press the Selector Control button until the 'Cook Time' indicator neon flashes. Press the decrease control until the display reads 0.00 as Fig. 12.
ii)Release the buttons. The 'Cook time' indicator will flash and after 5 seconds return to the time of day.
iii)Turn off oven control.
5.TO RETURN THE APPLIANCE TO MANUAL
At the end of a timed cooking period, the indicator neon will flash and an alarm will sound for up to 2 minutes.
i)To stop the sound press any of the three buttons, as Fig. 13.
ii)The display will return to the time of day.
Turn off the oven controls.
Fig.9
Fig.10
Fig.11
Fig.12
Fig.13
11
6. THINGS TO NOTE
In the event of an interruption of the electricity supply, the timer will reset itself to zero, and all programming will be cancelled.
7. AUTOMATIC COOKING
It is advisable to leave food in the oven for as short a time as possible before automatic cooking. Always ensure commercially prepared food is well within its use by date and that home prepared food is fresh and of good quality.
When cooking is complete, do not leave food to stand in the oven, but remove and cool it quickly if the food is not to be consumed immediately.
Always ensure food in the oven has been covered before cooking if it is not possible to remove food immediately after cooking.
12
THE DUAL GRILL
WARNING – Accessible parts become hot when the grill is in use. Keep children away.
USES OF THE GRILL
The grill is situated in the Top Oven compartment.
The grill is a dual circuit grill which means that the full area of the grill or the centre section only can be used. Use the full grill for cooking larger quantities of food. Use the centre section for economy purposes when cooking smaller quantities.
HOW TO USE THE DUAL GRILL
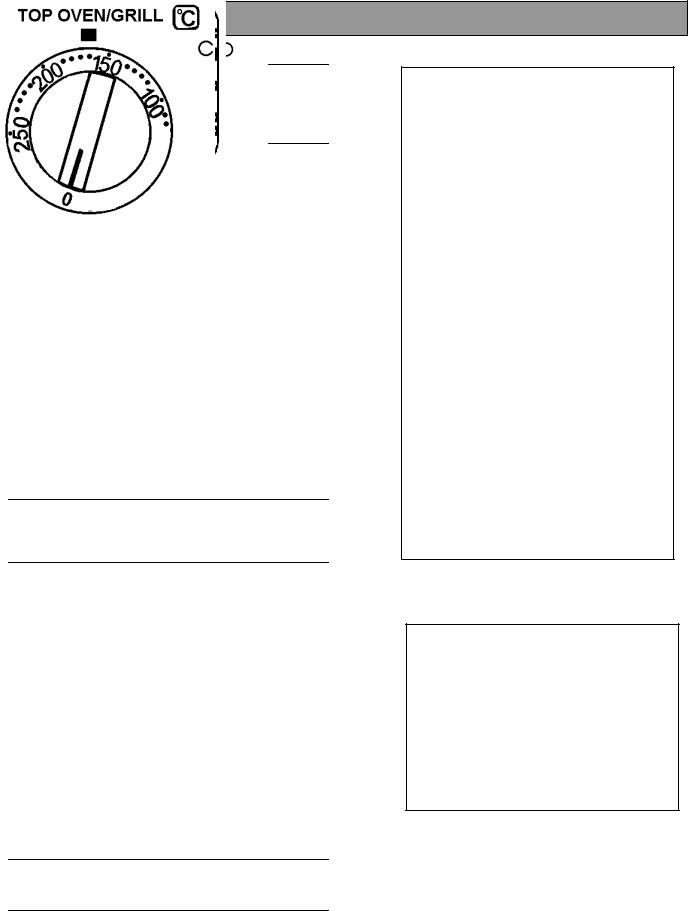
1.Select the Top Oven/Grill Selector to Full for full grill.
2.Select the Top Oven/Grill Selector to Half for centre section only. 
3.Turn the Top Oven/Grill Temperature control knob to the right as far as it will go. This is the hottest setting.
4.To use the grill at lower settings, turn the Top Oven temperature control knob to 100°C or 150°C.
The grill door must be left open when grilling.
THINGS TO NOTE
The top oven light will come on.
The cooling fan for the controls will operate as soon as the grill control is turned. For more information on the operation of the cooling fan turn to page 6.
The outer section of the grill element may appear to glow brighter than the inner section. This is quite normal.
The top oven/grill selector neon will illuminate.
We recommend using the grill pan on the shelf in positions 3 or 5.
If you use the grill pan in position 3 the shelf must be withdrawn before the pan can be located or removed.
Ensure the grill pan is properly located.
5
4
3
2
1
13

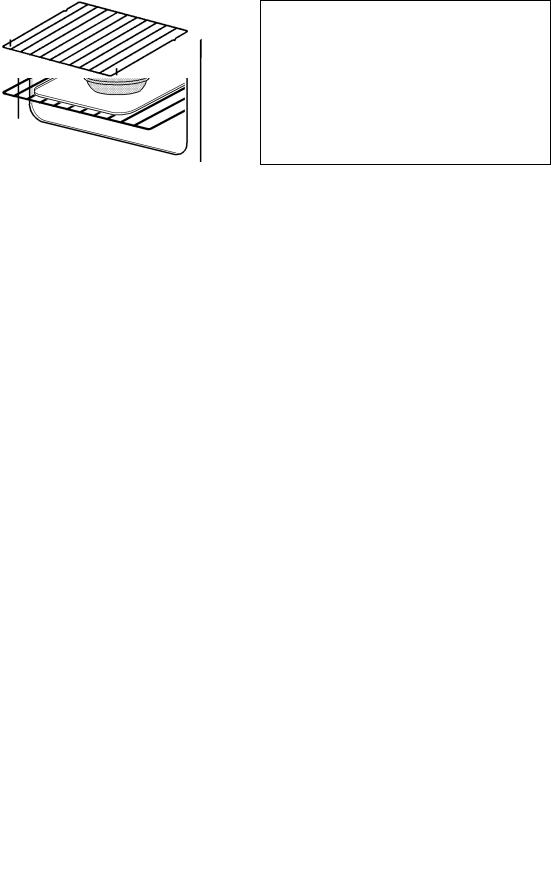
THE GRILL PAN AND HANDLE
The grill pan has a removable handle.
To insert the handle, press the button on the handle with the thumb and pivot the handle slightly upwards inserting the lip into the widest part of the bracket. Move the handle towards the left, lower into position and release the button.
Ensure the handle is positively located.
To remove the handle, press the button on the handle with the thumb and pivot the handle slightly upwards and towards the right to remove from the bracket.
Protect your hands when removing the grill pan handle.
Always remove the grill pan handle during grilling.
To correctly locate the grill pan on the shelf, ensure that the cut out on the underside of the handle bracket locates over the front bar of the shelf.
The Grill Pan must not be located in the shelf runners.
To check the progress of the food being grilled, the grill pan should be withdrawn on the shelf to attend to food during cooking.
Ensure that you support the grill pan when it is withdrawn.
HINTS AND TIPS
In order to become acquainted with the performance of the Dual Grill it is advisable to check food regularly when grilling.
Most foods should be placed on the grilling grid in the 'high' position in the grill pan. This allows maximum circulation of air by raising the food out of fats and juices.
Adjust the grid and grill pan runner to allow for different thicknesses of food. Position the food close to the element for faster cooking and further away for more gentle cooking.
14
 Loading...