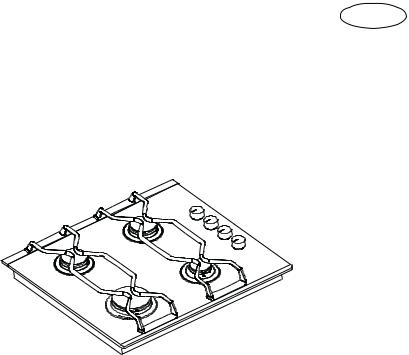
AEG 69802G-M, 69802G-A User Manual

69802 G
Gas Hob
Operating Instructions |
GB |
PERFECT IN FORM AND FUNCTION

Important Safety Information
You MUST read these warnings carefully before installing or using the hob. If you need assistance, contact our Customer Care Department on 08705 350350
Installation
zThis hob must be installed by qualified personnel, according to the manufacturer’s instructions and to the relevant British Standards.
zAny gas installation must be carried out by a registered CORGI installer.
zRemove all packaging before using the hob.
zEnsure that the gas and electrical supply complies with the type stated on the rating plate, located near the gas supply pipe.
zDo not attempt to modify the hob in any way.
Child Safety
zThis hob is designed to be operated by adults. Do not allow children to play near or with the hob.
zThe hob gets hot when it is in use. Children should be kept away until it has cooled.
zChildren can also injure themselves by pulling pans or pots off the hob.
During Use
zThis hob is intended for domestic cooking only. It is not designed for commercial or industrial purposes.
zWhen in use a gas cooking hob will produce heat and moisture in the room in which it has been installed. Ensure there is a continuous air supply, keeping air vents in good condition or installing a cooker hood with a venting hose.
zWhen using the hob for a long period time, the ventilation should be improved, by opening a window or increasing the extractor speed.
2

zDo not use this hob if it is in contact with water. Do not operate the hob with wet hands.
zEnsure the control knobs are in the ‘OFF’ position when not in use.
zWhen using other electrical appliances, ensure the cable does not come into contact with the hot surfaces of the cooking appliance.
zUnstable or misshapen pans should not be used on the hob as unstable pans can cause an accident by tipping or spillage.
zNever leave the hob unattended when cooking with oil and fats.
zNever use plastic or aluminium foil dishes on the hob.
zPerishable food, plastic items and areosols may be affected by heat and should not be stored above or below the hob unit.
Service
zThis hob should only be repaired or serviced by an authorised Service Engineer and only genuine approved spare parts should be used.
U Environmental Information
zAfter installation, please dispose of the packaging with due regard to safety and the environment.
zWhen disposing of an old appliance, make it unusable, by cutting off the cable.
Keep this instruction book for future reference and ensure it is passed on to any new owner.
These instructions are only valid for countries whose identification symbols are shown on the inside cover of this instruction booklet and on the appliance itself.
3

Contents |
|
Important Safety Information ................................................................................ |
2 |
Instructions for the User ........................................................................................ |
5 |
Description of the Hob ............................................................................................... |
5 |
Operation .................................................................................................................... |
6 |
Maintenance and Cleaning ....................................................................................... |
7 |
Something Not Working? ........................................................................................... |
8 |
Service and Spare Parts ............................................................................................ |
9 |
Guarantee Conditions .............................................................................................. |
10 |
Instructions for the Installer ............................................................................... |
11 |
Engineer technical data ........................................................................................... |
11 |
Important safety requirements ................................................................................. |
12 |
Location .................................................................................................................... |
13 |
Installation ................................................................................................................ |
13 |
Gas Connection ............................................................................................ |
14 |
Cut Out Size .................................................................................................. |
15 |
Building In ..................................................................................................... |
15 |
Electrical connections ............................................................................................. |
17 |
Wiring diagram ......................................................................................................... |
18 |
Fault Finding ............................................................................................................ |
19 |
Commissioning ........................................................................................................ |
22 |
Conversion from Natural Gas to LPG ...................................................................... |
23 |
Guide to Use the instructions
The following symbols will be found in the text to guide you throughout the Instructions:
 Safety Instructions
)Step by step instructions for an operation
 Hints and Tips
UEnvironmental Information
This appliance is manufactured according to the following EEC directives: 73/23 EEC - 90/683 EEC - 93/68 EEC -
89/336 EEC - 90/396 EEC, current edition.
4

Description of the Hob
1 |
3 |
3 |
|
|
|
5 6 7 |
8 |
|
|
|
4
2
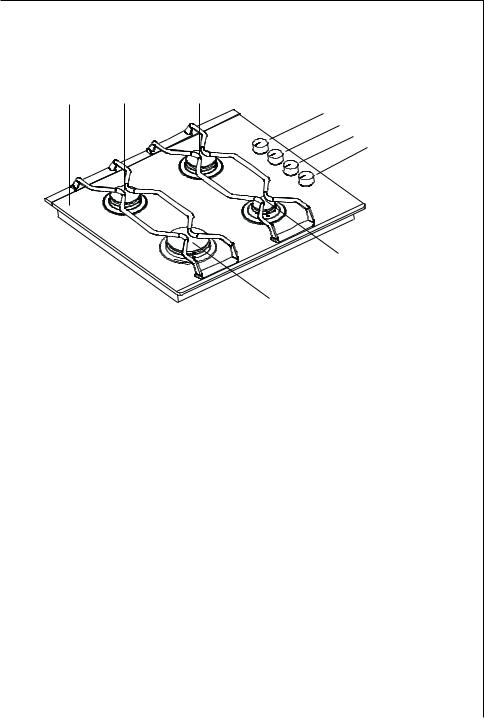
1.Hob Top
2.Rapid Burner
3.Semi-rapid Burners
4.Auxiliary Burner
5.Control knob for back right burner (semi-rapid)
6.Control knob for back left burner (semi-rapid)
7.Control knob for front left burner (rapid)
8.Control knob for front right burner (auxiliary)
INSTALLATION
Any gas installation must be carried out by a registered CORGI installer, and in accordance with existing rules and regulations.
The relevant instructions are to be found in the second section of this manual.
Please, ensure that, once the hob is installed, it is easily accessible for the engineer in the event of a breakdown.
WHEN THE HOB IS FIRST INSTALLED
Once the hob has been installed, it is important to remove any protective materials, which were put on in the factory.
5

Operation
HOB BURNERS
To light a burner, turn the relevant control knob anticlockwise to the maximum position, then push it down to ignite the burner. Upon, ignition, keep the knob pushed down about 5 seconds, then adjust the flame as required.
If the burner does not ignite, turn the control knob to zero, and try again.
Each control knob is equipped with a pilot light which gradually lights up according to the heat level that you select with the control knob.
When switching on the mains, after installation or a power cut, it is quite normal for the spark generator to be activated automatically.
To ensure maximum burner efficiency, you should only use pots and pans with a flat bottom fitting the size of the burner used (see table).
Burner |
minimum |
maximum |
|
diameter |
diameter |
Large (rapid) |
160 mm. |
260 mm. |
Medium (semi-rapid) |
120 mm. |
220 mm. |
Small (Auxiliary) |
80 mm. |
160 mm. |
|
|
|
As soon as a liquid starts boiling, turn down the flame so that it will barely keep the liquid simmering.
If you use a saucepan which is smaller than the recommended size, the flame will spread beyond the bottom of the vessel, causing the handle to overheat.
Take care when frying food in hot oil or fat, as the overheated splashes could easily ignite.
If the control knobs become difficult to turn, please contact your local AEG Service Force Centre.
6

Maintenance and Cleaning
Before any maintenance or cleaning can be carried out, you must DISCONNECT the hob from the electricity supply.
The hob is best cleaned whilst it is still warm, as spillage can be removed more easily than if it is left to cool.
Pan Supports
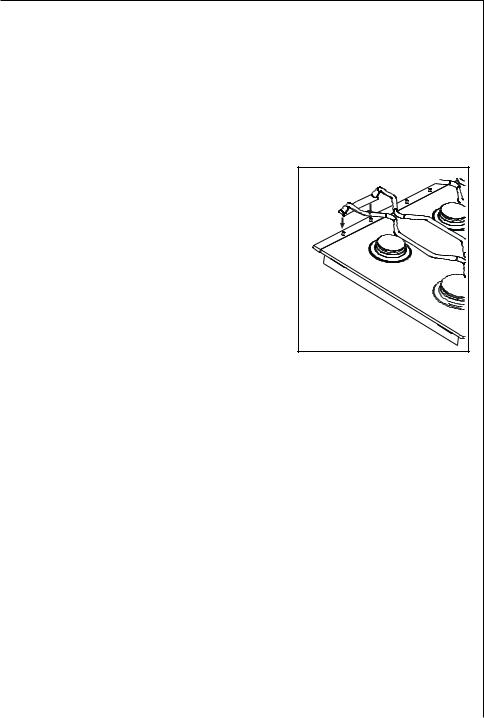
To keep the pan supports in the correct position, they are mounted on metal pins located in the back of the hob. After
cleaning the hob, ensure the pan supports are properly placed as shown in
the diagram.
The pan supports are dishwasher proof. If
washing them by hand, take care when drying them as the enamelling process
occasionally leaves rough edges. If necessary, remove stubborn stains using
a paste cleaner.
The Hob Top
Regularly wipe over the hob top using a soft cloth well wrung out in warm water to which a little wasing up liquid has been added. Avoid the use of the following:
-household detergent and bleaches;
-impregnated pads unsuitable for non-stick saucepans;
-steel wool pads;
-bath/sink stain removers.
Should the hob top become heavily soiled, the following product s are recommended:
-for stainless steel hobs use a proprietary stainless steel cleaner;
-for other hobs use Hob Brite or Bar Keepers Friend.
The Burners
The burner caps and crowns can be removed for cleaning.
Wash the burners taps and crowns using hot soapy water, and remove marks with a mild paste cleaner. A well moistened soap impregnated steel wool pad can be used with caution, if the marks are particularly difficult to remove.
After cleaning, be sure to wipe dry with a soft cloth.
7

Something Not Working?
If the hob is not working correctly, please carry out the following checks before contacting your local AEG Service Force Centre.
SYMPTOM |
SOLUTION |
There is no spark when lighting the |
Check that the unit is plugged in and |
gas |
the electrical supply is switched on |
|
Check that the RCCB has not tripped |
|
(if fitted) |
|
Check the mains fuse has not blown |
|
Check the burner cap and crown |
|
have been replaced correctly, e.g. |
|
after cleaning. |
The gas ring burns unevenly |
Check the main jet is not blocked and |
|
the burner crown is clear of food |
|
particles. |
|
Check the burner cap and crown |
|
have been replaced correctly, e.g. |
|
after cleaning. |
|
|
8
 Loading...