


INSTRUCTIONAND INSTALLATION BOOK
Gas hob
GB
6531 DG-m 1 GB |
949600278 |

Your New Appliance
Thank you for purchasing an AEG appliance.
To enable you to use your new appliance efficiently and safely, please read this instruction book carefully before installing or using the appliance, and retain for future reference. Should the appliance be transferred to a new owner please ensure this instruction book is left with the appliance in order that the new owner can get to know the functions of the appliance and the relevant warnings.
If you require further assistance or advice, please contact our Customer Care Department either by letter or telephone:
Customer Care Department
AEG Domestic Appliances
55-77 High Street
Slough
SL1 1DZ
Tel: 08705 350350*
* calls to this number may be recorded for training purposes
2

Table of contents |
|
Contents |
Page no |
For the user |
|
Your new appliance ...................................................................................... |
2 |
Safety information ........................................................................................ |
4 |
Description of the product ......................................................................... |
5 |
Operation instrutions .................................................................................. |
6 |
Burner ring/cover ................................................................................. |
7 |
Ignition electrode (A) ........................................................................... |
7 |
Thermo Sensor (B) ............................................................................... |
7 |
Ignition .................................................................................................. |
8 |
Maintenance and cleaning .......................................................................... |
9 |
Splashguard .......................................................................................... |
9 |
Stainless steel surfaces ....................................................................... |
10 |
The ceramic glass plate ...................................................................... |
10 |
The gas burner .................................................................................... |
11 |
Something not working ............................................................................. |
18 |
Service and spare parts ............................................................................ |
19 |
Guarantee conditions ................................................................................ |
20 |
For the installer |
|
Technical data ............................................................................................. |
12 |
Important safety requirements ................................................................ |
13 |
Mounting .................................................................................................. |
15 |
How to read the operating instructions: |
|
|
... ...1 2 Step by step |
|
Hint and tips |
Safety information |
|
Environmental information |
3

Safety information
These warnings are provided in the interests of your safety. Ensure you fully understand them before installing or using the appliance. Your safety is of paramount importance. If you are unsure about the meaning of these warnings contact the Customer Care Department for assistance.
Installing
Do not install the hob if the ceramic glass is damaged or cracked.
This hob must be installed according to the instructions supplied. Any installation work must be undertaken by a qualified competent person.
Do not alter the specifications or attempt to modify the appliance in any way.
During Use
The hob is intended for domestic cooking only. It is not designed for commercial/industrial purposes.
Ensure that all the control knobs are in the OFF position when not in use.
Do not use the hob if it is damaged in any way, contact your local AEG Service Centre.
Never use plastic or aluminium dishes on the hob.
Never leave the hob unattended while deep fat frying, or heating fats and oils.
The appliance is not intended for use by young children or infirm persons without supervision.
Child Safety
Young children should be supervised to ensure that they do not play
with the appliance
The hob gets hot when it is in use. Children should be kept away until the hob has cooled.
Maintenance and Cleaning
Only clean this hob in accordance with the instructions given in this book.
Service
Repairs carried out by inexperienced persons may cause injury or serious malfunction of the appliance. Repairs must only be carried out by a qualified/competent person. Contact your local AEG Service Centre.
Disposal
Make the hob unusable by cutting off the cable.
Dispose of any packaging material and old appliances at an authorised disposal site.
4
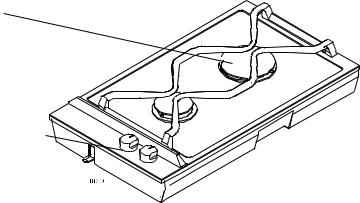
Description of the product
Burner
Control knob
5
Operations
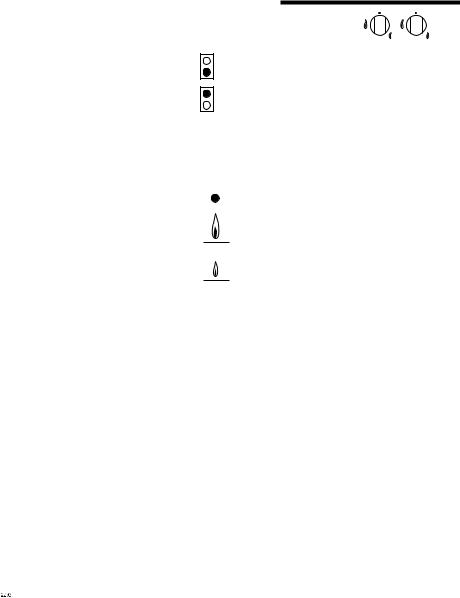
Burner markings
Symbols at each control knob indicates which burner is adjusted with the control knob.
Front Burner
Back burner
Panel markings
Each control knob has a ring showing the scale of markings.
Off.
Maximum flame
Minimum flame
6

Burner ring/cover
Together with the burner ring the burner ring/cover forms a space where the final mixture of gas and air takes place in order to make the gas burn correctly.
Please note: It is consequently very important that the individual burner cover/ring is placed correctly on the burner.
If the burner ring/cover are wrongly placed the burner will operate incorrectly, and the burners may be damaged within at short space of time.
Ignition electrode (A)
Burner |
Main nozzle |
Each burner has been provided with an ignition electrode. As long as the operating knob is depressed, the automatic ignition will ensure that a spark is emitted between the ignition electrode and the burner cover.
Thermo Sensor (B)
The hob unit features fully-secured gas taps (thermo-fuse)
In case the flame goes out, the thermo sensor automatically prevents gas admission after a shorter time (max. 90 seconds).
Note: Gas admission is always allowed while the operation button is pressed - See start-up procedure.
Burnercover
7
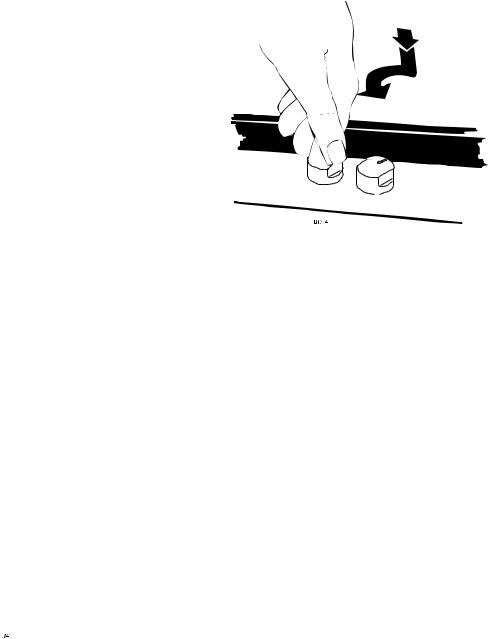
Ignition
1.Depress and turn the control knob
for the burner to the left to max. flame  . (Ignition position)
2.The ignition electrode will emit sparks, and when the mixture of gas and air is correct, the burner will be ignited. If it is not possible to connect the unit to mains, a
match may be used to ignite the burner.
3.After starting the burner, press the control knob for approx. 10 seconds to activate the automatic thermo-couple (thermo sensor
ready).
5.The burner can now be regulated between maximum  and minimum
8
 Loading...