


 Loading...
 ® Enterprise Reporter
USER
GUIDE
Administrator Console
Model: ER
Release 5.0.00 • Manual Version 1.01
II |
8E6 TECHNOLOGIES, ENTERPRISE REPORTER ADMINISTRATOR USER GUIDE |
8E6ENTERPRISEREPORTERADMINISTRATOR
USER GUIDE
© 2008 8e6 Technologies All rights reserved.
828 W. Taft Ave., Orange, CA 92865, USA
Version 1.01, published January 2009 for software release 5.0.00
Printed in the United States of America
This document may not, in whole or in part, be copied, photocopied, reproduced, translated, or reduced to any electronic medium or machine readable form without prior written consent from 8e6 Technologies.
Every effort has been made to ensure the accuracy of this document. However, 8e6 Technologies makes no warranties with respect to this documentation and disclaims any implied warranties of merchantability and fitness for a particular purpose. 8e6 Technologies shall not be liable for any error or for incidental or consequential damages in connection with the furnishing, performance, or use of this manual or the examples herein. Due to future enhancements and modifications of this product, the information described in this documentation is subject to change without notice.
The latest version of this document can be obtained from http://www.8e6.com/docs/er5server.pdf.
Trademarks
Other product names mentioned in this manual may be trademarks or registered trademarks of their respective companies and are the sole property of their respective manufacturers.
Part# ER5-SUG_v1.01-0901
8E6 TECHNOLOGIES, ENTERPRISE REPORTER ADMINISTRATOR USER GUIDE |
iii |
IV |
8E6 TECHNOLOGIES, ENTERPRISE REPORTER ADMINISTRATOR USER GUIDE |

CONTENTS |
|
ENTERPRISE REPORTER OVERVIEW ................................... |
1 |
Operations ................................................................................... |
1 |
How to Use this User Guide ....................................................... |
2 |
Organization ...................................................................................... |
2 |
Conventions ...................................................................................... |
3 |
Terminology ...................................................................................... |
4 |
ADMINISTRATOR SECTION ................................................. |
8 |
Introduction ................................................................................. |
8 |
Components and Environment ................................................ |
10 |
Components .................................................................................... |
10 |
Hardware .................................................................................. |
10 |
Software ................................................................................... |
10 |
Environment .................................................................................... |
11 |
Workstation Requirements ....................................................... |
11 |
Network Requirements ............................................................. |
11 |
Chapter 1: Accessing the Server ............................................. |
12 |
Preliminary Network Settings .......................................................... |
12 |
Procedures for Accessing the Server .............................................. |
12 |
Procedures for Logging On, Off the Server ..................................... |
13 |
Log On ...................................................................................... |
13 |
Logging on the First Time .................................................. |
15 |
Specify the Server’s function ........................................ |
15 |
Set up an Administrator Login ID ........................................ |
16 |
Log Off ...................................................................................... |
18 |
Chapter 2: Configuring the ER Server .................................... |
19 |
Administrator Console ..................................................................... |
19 |
Network Menu .......................................................................... |
20 |
Box Mode screen ............................................................... |
21 |
Live Mode ..................................................................... |
21 |
Archive Mode................................................................ |
21 |
Change the Box Mode.................................................. |
22 |
8E6 TECHNOLOGIES, ENTERPRISE REPORTER ADMINISTRATOR USER GUIDE |
v |

CONTENTS
Add/Edit/Delete Administrators screen .............................. |
23 |
View a List of Administrators ........................................ |
24 |
Add an Administrator .................................................... |
24 |
Edit an Administrator’s Login ID ................................... |
24 |
Delete an Administrator ................................................ |
25 |
Locked-out Accounts and IPs screen ................................. |
26 |
View Locked Accounts, IP addresses........................... |
27 |
Unlock Accounts, IP addresses .................................... |
27 |
Network Settings screen ..................................................... |
28 |
Set up/Edit IP Addresses.............................................. |
29 |
Routing Table screen ......................................................... |
30 |
View a List of Routers................................................... |
30 |
Add a Router................................................................. |
31 |
Delete a Router............................................................. |
31 |
Regional Setting screen ..................................................... |
32 |
Specify the Time Zone.................................................. |
33 |
Specify the Language Set............................................. |
33 |
Specify Network Time Protocol Servers ....................... |
33 |
Update the Time on the Server..................................... |
34 |
Network Diagnostics screen ............................................... |
35 |
Ping............................................................................... |
36 |
Trace Route.................................................................. |
37 |
SNMP screen ..................................................................... |
39 |
Enable SNMP ............................................................... |
40 |
Set up Community Token for Public Access................. |
40 |
Create, Build the Access Control List ........................... |
40 |
Maintain the Access Control List .................................. |
40 |
Server Menu . ............................................................................ |
41 |
Backup screen ................................................................... |
42 |
Backup and Recovery Procedures ............................... |
42 |
Set up/Edit External Backup FTP Password ................ |
44 |
Execute a Manual Backup ............................................ |
44 |
Perform a Remote Backup ........................................... |
45 |
Perform a Restoration to the ER Server ....................... |
46 |
Self Monitoring screen ....................................................... |
47 |
View a List of Contact E-Mail Addresses...................... |
48 |
Set up and Activate Self-Monitoring ............................. |
48 |
Remove Recipient from E-mail Notification List............ |
48 |
Deactivate Self-Monitoring............................................ |
48 |
SMTP Server Setting screen .............................................. |
49 |
Enter, Edit SMTP Server Settings ................................ |
49 |
vi |
8E6 TECHNOLOGIES, ENTERPRISE REPORTER ADMINISTRATOR USER GUIDE |

|
CONTENTS |
Verify SMTP Settings.................................................... |
50 |
Server Status screen........................................................... |
51 |
View the Status of the Server ....................................... |
52 |
Secure Access screen ....................................................... |
53 |
Activate a Port to Access the Server ............................ |
54 |
Terminate a Port Connection........................................ |
55 |
Terminate All Port Connections .................................... |
55 |
Software Update screen ..................................................... |
56 |
View Installed Software Updates .................................. |
57 |
Uninstall the Most Recently Applied Software Update . 57 |
|
View Available Software Updates................................. |
57 |
Install a Software Update.............................................. |
58 |
Software Update Setting screen ......................................... |
61 |
Specify Proxy Settings.................................................. |
62 |
Save Settings................................................................ |
62 |
Shut Down screen .............................................................. |
63 |
Server Action Selections............................................... |
63 |
Perform a Server Action ............................................... |
64 |
NIC Mode screen ................................................................ |
65 |
View the NIC Negotiation.............................................. |
66 |
Modify the NIC Mode Setting........................................ |
66 |
Web Client Server Management screen ............................. |
67 |
Restart the Web Client Server ...................................... |
68 |
Enable/Disable Web Client Server Access................... |
68 |
Enable/Disable the Web Client Scheduler.................... |
68 |
Hardware Failure Detection screen .................................... |
69 |
View the Status of the Hard Drives............................... |
69 |
Consolidated ER: Consolidated Mode Setting screen ....... |
71 |
View Remote ER Settings ............................................ |
71 |
Add a Remote ER......................................................... |
72 |
View Current Statistics for a Remote ER...................... |
72 |
Edit Settings for a Remote ER...................................... |
73 |
Remove a Remote ER from the Consolidated ER........ |
73 |
Database Menu . ....................................................................... |
74 |
User Name Identification screen ......................................... |
74 |
View the User Name Identification screen.................... |
77 |
Set up a Customized Label for Unidentified Machines . 77 |
|
Configure the Server to Log User Activity..................... |
77 |
Deactivate User Name Identification ............................ |
78 |
Username Display Setting screen ...................................... |
79 |
View the Current Username Display Setting ................ |
80 |
8E6 TECHNOLOGIES, ENTERPRISE REPORTER ADMINISTRATOR USER GUIDE |
vii |

CONTENTS
Modify the Username Display Setting........................... |
80 |
Page View Elapsed Time screen ....................................... |
82 |
Establish the Unit of Elapsed Time for Page Views...... |
82 |
Elapsed Time Rules...................................................... |
83 |
Page Definition screen ....................................................... |
84 |
View the Current Page Types....................................... |
84 |
Remove a Page Type ................................................... |
85 |
Add a Page Type .......................................................... |
85 |
Tools screen ....................................................................... |
86 |
View Diagnostic Reports............................................... |
87 |
View Database Status Logs.......................................... |
87 |
Expiration screen ............................................................... |
90 |
Expiration Screen Terminology..................................... |
91 |
Expiration Rules............................................................ |
92 |
View Data Storage Statistics ........................................ |
93 |
Change Data Storage Settings ..................................... |
97 |
NAS Status screen ............................................................. |
99 |
View NAS Status Information ..................................... |
100 |
Optional Features screen.................................................. |
100 |
Enable Search String Reporting ................................. |
102 |
Enable Block Request Count...................................... |
102 |
Enable Wall Clock Time.............................................. |
102 |
Enable Page and/or Object Count .............................. |
103 |
Enable, Configure Password Security Option............. |
104 |
User Group Import screen ................................................ |
106 |
Import User Groups .................................................... |
107 |
TECHNICAL SUPPORT / PRODUCT WARRANTIES ............. |
108 |
Technical Support ................................................................... |
108 |
Hours ............................................................................................. |
108 |
Contact Information ....................................................................... |
108 |
Domestic (United States) ........................................................ |
108 |
International ............................................................................ |
108 |
E-Mail ..................................................................................... |
108 |
Office Locations and Phone Numbers .................................... |
109 |
8e6 Corporate Headquarters (USA).................................. |
109 |
8e6 Taiwan........................................................................ |
109 |
Support Procedures ...................................................................... |
110 |
Product Warranties ................................................................. |
111 |
viii |
8E6 TECHNOLOGIES, ENTERPRISE REPORTER ADMINISTRATOR USER GUIDE |

|
CONTENTS |
Standard Warranty ........................................................................ |
111 |
Technical Support and Service ..................................................... |
112 |
Extended Warranty (optional) ....................................................... |
113 |
Extended Technical Support and Service ..................................... |
113 |
APPENDICES SECTION ................................................... |
114 |
Appendix A .............................................................................. |
114 |
Evaluation Mode ........................................................................... |
114 |
Administrator Console ............................................................ |
114 |
Use the Server in the Evaluation Mode ............................ |
116 |
Expiration screen ........................................................ |
116 |
Change the Evaluation Mode............................................ |
117 |
Activation Page........................................................... |
118 |
Appendix B .............................................................................. |
120 |
Disable Pop-up Blocking Software ................................................ |
120 |
Yahoo! Toolbar Pop-up Blocker .................................................... |
120 |
Add the Client to the White List .............................................. |
120 |
Google Toolbar Pop-up Blocker .................................................... |
122 |
Add the Client to the White List .............................................. |
122 |
AdwareSafe Pop-up Blocker ......................................................... |
123 |
Disable Pop-up Blocking ........................................................ |
123 |
Windows XP SP2 Pop-up Blocker ................................................ |
124 |
Set up Pop-up Blocking .......................................................... |
124 |
Use the Internet Options dialog box.................................. |
124 |
Use the IE Toolbar ........................................................... |
125 |
Add the Client to the White List . ............................................. |
126 |
Use the IE Toolbar ............................................................ |
126 |
Use the Information Bar ................................................... |
127 |
Set up the Information Bar.......................................... |
127 |
Access the Client ........................................................ |
127 |
Appendix C .............................................................................. |
129 |
RAID Maintenance ........................................................................ |
129 |
Part 1: Hardware Components ............................................... |
129 |
Part 2: Server Interface . ......................................................... |
130 |
LED indicators in SL and HL units .................................... |
130 |
Front control panels on H, SL, and HL units .................... |
132 |
Rear panels on H and HL units ........................................ |
134 |
Part 3: Troubleshooting . ......................................................... |
135 |
8E6 TECHNOLOGIES, ENTERPRISE REPORTER ADMINISTRATOR USER GUIDE |
ix |

CONTENTS
Hard drive failure............................................................... |
135 |
Step 1: Review the notification email.......................... |
135 |
Step 2: Verify the failed drive in the Admin console ... |
136 |
Step 3: Replace the failed hard drive.......................... |
137 |
Step 4: Rebuild the hard drive .................................... |
138 |
Step 5: Contact Technical Support ............................. |
138 |
Power supply failure.......................................................... |
138 |
Step 1: Identify the failed power supply ...................... |
138 |
Step 2: Unplug the power cord ................................... |
138 |
Step 3: Replace the failed power supply .................... |
139 |
Step 4: Contact Technical Support ............................. |
139 |
Fan failure ........................................................................ |
140 |
Identify a fan failure .................................................... |
140 |
INDEX ........................................................................... |
141 |
x |
8E6 TECHNOLOGIES, ENTERPRISE REPORTER ADMINISTRATOR USER GUIDE |
ENTERPRISE REPORTER OVERVIEW OPERATIONS
ENTERPRISE REPORTER OVERVIEW
Though many companies have Internet filtering solutions to prevent employees from accessing inappropriate, non-work related Web sites, simply blocking these sites is not enough. Administrators want the ability to know who is accessing which site, the duration of each site visit, and the frequency of these visits. This data can help administrators identify abusers, develop policies, and target sites to be filtered, in order to maximize bandwidth utilization and productivity.
The Enterprise Reporter (ER) from 8e6 Technologies is designed to readily obtain this information, giving the user the ability to interrogate massive datasets through flexible drill-down technology, until the desired view is obtained. This “view” can then be memorized and saved to a userdefined report menu for repetitive, scheduled execution and distribution.
Operations
In simplified terms, the ER operates as follows: the ER Server accepts log files (text files containing Web access data) from a source device such as the 8e6 R3000 Enterprise Filter. 8e6’s proprietary programs “normalize” the transferred data and insert them into a MySQL database. The ER Client reporting application accesses this database to generate a virtually unlimited number of queries and reports.
8E6 TECHNOLOGIES, ENTERPRISE REPORTER ADMINISTRATOR USER GUIDE |
1 |

ENTERPRISE REPORTER OVERVIEW HOW TO USE THIS USER GUIDE
How to Use this User Guide
Organization
This User Guide is organized into the following sections:
•Overview - This section provides information on how to use this user guide to help you configure the ER Server.
•Administrator Section - Refer to this section for information on configuring and maintaining the ER Server via the Administrator console application.
•Tech Support / Product Warranties Section - This section contains information on technical support and product warranties.
•Appendices Section - Appendix A provides information on how to use the ER Server in the evaluation mode, and how to switch to the activated mode. Appendix B explains how to disable many types of pop-up blocking software. Appendix C includes information about RAID maintenance and troubleshooting on an ER “H”, “SL”, or “HL” server.
•Index - This section includes an index of topics and the first page numbers where they appear in this user guide.
2 |
8E6 TECHNOLOGIES, ENTERPRISE REPORTER ADMINISTRATOR USER GUIDE |

ENTERPRISE REPORTER OVERVIEW HOW TO USE THIS USER GUIDE
Conventions
The following icons are used throughout this user guide:
NOTE: The “note” icon is followed by italicized text providing additional information about the current topic.
TIP: The “tip” icon is followed by italicized text giving you hints on how to execute a task more efficiently.
WARNING: The “warning” icon is followed by italicized text cautioning you about making entries in the application, executing certain processes or procedures, or the outcome of specified actions.
IMPORTANT: The "important" icon is followed by italicized text informing you about important information or procedures to follow to ensure maximum uptime on the ER Server.
8E6 TECHNOLOGIES, ENTERPRISE REPORTER ADMINISTRATOR USER GUIDE |
3 |
ENTERPRISE REPORTER OVERVIEW HOW TO USE THIS USER GUIDE
Terminology
The following terms are used throughout this user guide. Sample images (not to scale) are included for each item.
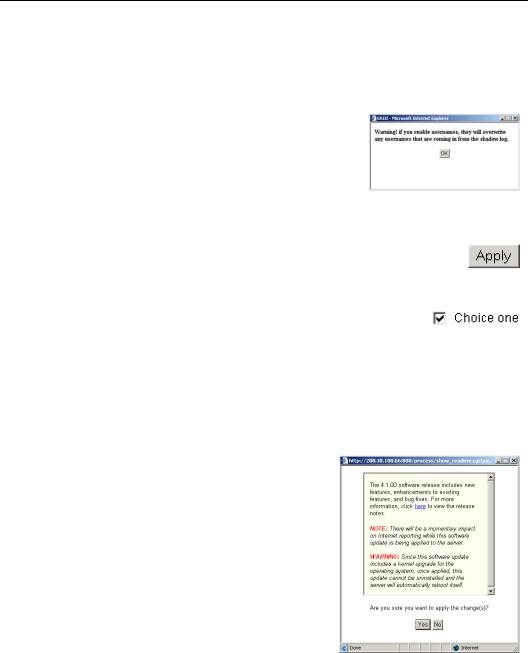
•alert box - a message box that opens in response to an entry you made in a dialog box, window, or screen. This box often contains a button (usually labeled “OK”) for you
to click in order to confirm or execute a command.
•button - an object in a dialog box, window, or screen that can be clicked with your mouse to execute a command.
•checkbox - a small square in a dialog box, window, or screen used for indicating whether or not you wish to
select an option. This object allows you to toggle between two choices. By clicking in this box, a check mark or an “X” is placed, indicating that you selected the option. When this box is not checked, the option is not selected.
•dialog box - a box that opens in response to a command made in a window or screen, and requires your input. You must choose an option by clicking a button (such as “Yes” or “No”, or “Next” or “Cancel”) to execute your command. As dictated by this box, you also might need to make one or more
entries or selections prior to clicking a button.
4 |
8E6 TECHNOLOGIES, ENTERPRISE REPORTER ADMINISTRATOR USER GUIDE |
ENTERPRISE REPORTER OVERVIEW HOW TO USE THIS USER GUIDE
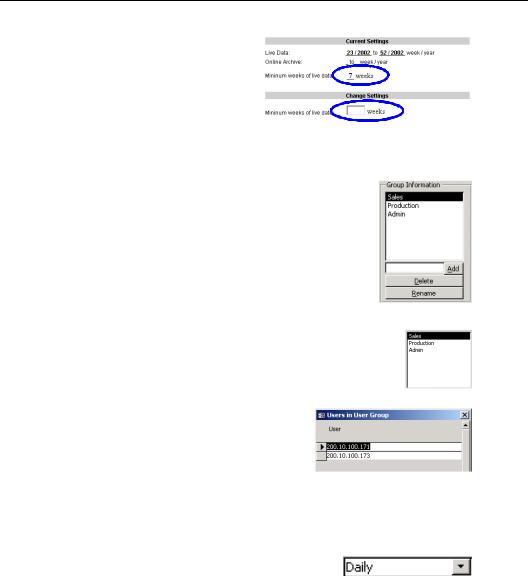
• field - an area in a dialog box, window, or screen that either accommodates your data entry, or displays pertinent information. A text box is a type of field.
•frame - a boxed-in area in a dialog box, window, or screen that includes a group of objects such as fields, text boxes, list boxes, buttons, radio buttons, and/or tables. Objects within a frame belong to a specific function or group. A frame often is labeled to indicate its function or purpose.
•list box - an area in a dialog box, window, or screen that accommodates and/or displays entries of items that can be added or removed.
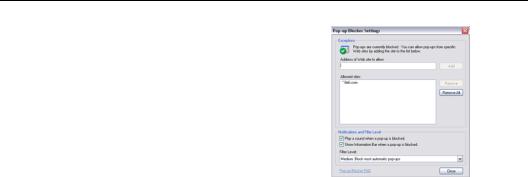
•pop-up box or pop-up window - a box or window that opens after you click a button in a dialog box, window, or screen. This box
or window may display information, or may require you to make one or more entries. Unlike a dialog box, you do not need to choose between options.
•pull-down menu - a field in a dialog box, window, or screen that contains a down arrow to the
right. When you click the arrow, a menu of items displays from which you make a selection.
8E6 TECHNOLOGIES, ENTERPRISE REPORTER ADMINISTRATOR USER GUIDE |
5 |
ENTERPRISE REPORTER OVERVIEW HOW TO USE THIS USER GUIDE
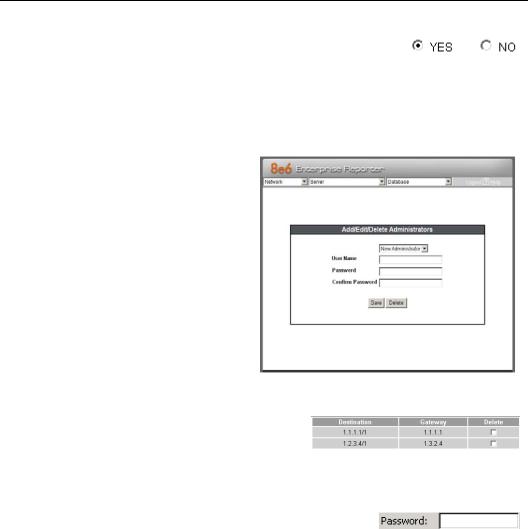
•radio button - a small, circular object in a dialog box, window, or screen used for selecting an option.
This object allows you to toggle between two choices. By clicking a radio button, a dot is placed in the circle, indicating that you selected the option. When the circle is empty, the option is not selected.
•screen - a main object of an application that displays across your monitor. A screen can contain windows, frames, fields, tables, text boxes,
list boxes, buttons, and radio buttons.
•table - an area in a window or screen that contains items previously entered or selected.
•text box - an area in a dialog box, window, or screen that accommodates your data
entry. A text box is a type of field.
6 |
8E6 TECHNOLOGIES, ENTERPRISE REPORTER ADMINISTRATOR USER GUIDE |
ENTERPRISE REPORTER OVERVIEW HOW TO USE THIS USER GUIDE
•window - displays on a screen, and can contain frames, fields, text boxes, list boxes, buttons, and radio buttons. Types of windows include ones from the system such as the Save As window, pop-up windows, or login windows.
8E6 TECHNOLOGIES, ENTERPRISE REPORTER ADMINISTRATOR USER GUIDE |
7 |

ADMINISTRATOR SECTION INTRODUCTION
ADMINISTRATOR SECTION
Introduction
The authorized administrator of the ER Server is responsible for integrating the Server into the existing network, and providing the Server a high speed connection to the designated logging device(s) and remote Client workstations. To attain this objective, the administrator performs the following tasks:
•executes Quick Start procedures defined in the ER Quick Start Guide booklet packaged with the ER Server
•provides a suitable environment for the Server, including:
•high speed, HTTPS link to the current logging device
•power connection protected by an Uninterruptible Power Supply (UPS)
•high speed access to the Server by authorized Client workstations
•adds new administrators
•sets up administrators for receiving automatic alerts
•updates the Server with software updates supplied by 8e6
•analyzes Server statistics
•utilizes diagnostics for monitoring the Server status to ensure optimum functioning of the Server
•establishes and implements backup and restoration procedures for the Server
Instructions on configuring and maintaining the ER Server are documented in this section.
8 |
8E6 TECHNOLOGIES, ENTERPRISE REPORTER ADMINISTRATOR USER GUIDE |

ADMINISTRATOR SECTION INTRODUCTION
NOTES: This user guide is accessible via the Help link beneath the banner in any screen in the Administrator console.
Information about the ER Client can be found in the ER Web Client User Guide that can be obtained from http:// www.8e6.com/docs/er5_wclient.pdf.
8E6 TECHNOLOGIES, ENTERPRISE REPORTER ADMINISTRATOR USER GUIDE |
9 |

ADMINISTRATOR SECTION COMPONENTS AND ENVIRONMENT
Components and Environment
Components
Hardware
•High performance server
•One or more high-capacity hard drives
•Optional: One or more attached “NAS” storage devices (e.g. Ethernet connected SCSI connected “SAN”)
Software
•Linux OS
•Administrator Graphical User Interface (GUI) console utilized by an authorized administrator to configure and maintain the ER Server
•MySQL database
•8e6 Technologies proprietary Client application employed by report users for generating “views” and reports
10 |
8E6 TECHNOLOGIES, ENTERPRISE REPORTER ADMINISTRATOR USER GUIDE |
ADMINISTRATOR SECTION COMPONENTS AND ENVIRONMENT
Environment
Workstation Requirements
•Windows 2000, NT 4.0, or XP operating system
•Internet Explorer (IE) Version 6.0 or later
•Pop-up blocking software, if installed, must be disabled
•Session cookies from the ER Server must be allowed in order for the Administrator console to function properly
NOTE: Information about disabling pop-up blocking software can be found in Appendix B: Disable Pop-up Blocking Software.
Network Requirements
•High speed connection from the ER Server to the Web access logging device(s)
•High speed connection from the ER Server to the Client workstation(s)
8E6 TECHNOLOGIES, ENTERPRISE REPORTER ADMINISTRATOR USER GUIDE |
11 |

ADMINISTRATOR SECTION CHAPTER 1: ACCESSING THE SERVER
Chapter 1: Accessing the Server
Preliminary Network Settings
To initially set up your ER Server, follow the instructions in the ER Quick Start Guide booklet packaged with your ER unit. This guide explains how to perform the initial configuration of the Server so that it can be accessed via an IP address on your network.
NOTE: If you do not have the ER Administrator Quick Start Guide, contact 8e6 Technologies immediately to have a copy sent to you.
WARNING: In order to prevent data from being lost or corrupted while the Server is running, the Server should be connected to a UPS or other battery backup system.
Procedures for Accessing the Server
WARNING: Once you turn on the Server, DO NOT interrupt the initial boot-up process. This process may take from five to 10 minutes per drive. If the process is interrupted, damage to key files may occur.
When the Server is fully booted, any workstation on the network that can access the Server’s IP address (set up during Quick Start procedures) will be able to communicate with the Server via the Internet.
1.Launch Internet Explorer (IE).
2.In the address line of the IE browser window, type in the Server’s IP address appended by the following port number:
•“:88” for an HTTP address
•“:8843” for an HTTPS address
12 |
8E6 TECHNOLOGIES, ENTERPRISE REPORTER ADMINISTRATOR USER GUIDE |
ADMINISTRATOR SECTION CHAPTER 1: ACCESSING THE SERVER
For example, if your IP address is 1.2.3.4, type in http:// 1.2.3.4:88 or https://1.2.3.4:8843.
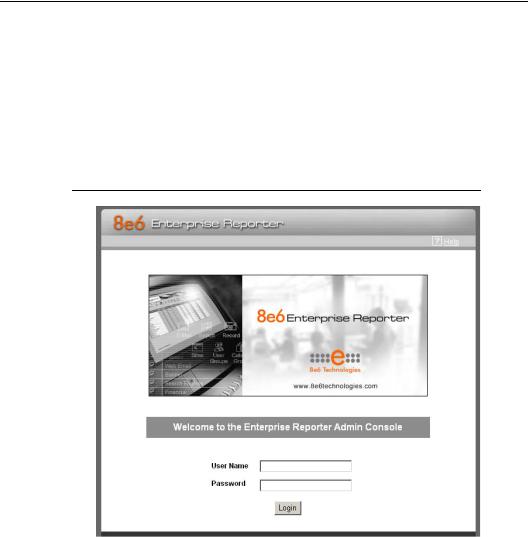
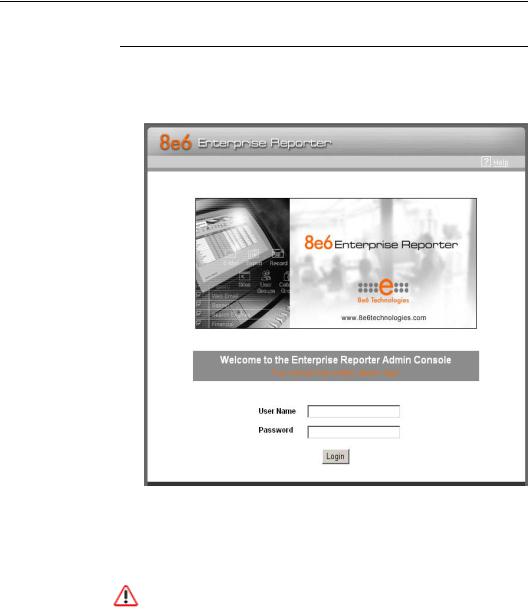
3.Click Go to open the login screen of the Administrator console application (see Fig. 1:1-1).
Procedures for Logging On, Off the Server
Log On
Fig. 1:1-1 Login screen
1.In the login screen, type in the generic User Name admin, and Password reporter, if you have not yet set up your own user name and password. Otherwise, enter your personal User Name and Password.
2.Click Login to go to the main screen of the Administrator console.
8E6 TECHNOLOGIES, ENTERPRISE REPORTER ADMINISTRATOR USER GUIDE |
13 |
ADMINISTRATOR SECTION CHAPTER 1: ACCESSING THE SERVER
NOTES: When logging on the Server for the first time, the ER Status pop-up box opens, and the main screen displays with a message, as shown in the example in Logging on the First Time. Follow the directions in this sub-section before proceeding. (Refer to Appendix A: Evaluation Mode for information on using the ER Server in the evaluation mode, or for changing the Server from this mode to the activated mode.)
If you are logging on during a subsequent session, the main screen displays as in Fig. 1:2-1. If you have not set up your own user name and password, see Set up an Administrator Login ID.
If using a consolidated ER server, some screens in the Administrator console differ; there are a few unique screens, and some screens are not included. The Consolidated Mode icon displays at the top of each screen, above the Help link:
A consolidated ER Server (CER) is used in environments with multiple ER Servers, and acts as the source for consolidating records from all remote ER Servers added in the Administrator console. See the ER Web Client User Guide for information on using the Web Client with a CER Server.
14 |
8E6 TECHNOLOGIES, ENTERPRISE REPORTER ADMINISTRATOR USER GUIDE |
ADMINISTRATOR SECTION CHAPTER 1: ACCESSING THE SERVER
Logging on the First Time
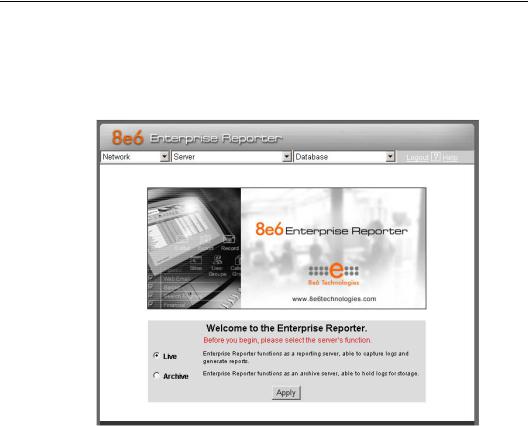
If you are logging on the Administrator console for the first time, the main screen displays with a message that asks you to specify the Server’s function:
Fig. 1:1-2 Administrator console, main screen, first-time access
Specify the Server’s function
1.Click the appropriate radio button to specify the function of the Server:
•choose Live if you wish the Server to function in the “live” mode, receiving and processing real time data from the Web access logging device.
•choose Archive if you wish the Server to function in the “archive” mode, solely as a receptacle for historical, archived files. In this mode, “old” files placed on the Server can be viewed using the Client reporting application.
8E6 TECHNOLOGIES, ENTERPRISE REPORTER ADMINISTRATOR USER GUIDE |
15 |
ADMINISTRATOR SECTION CHAPTER 1: ACCESSING THE SERVER
2.Click Apply to confirm your selection. The mode you specify will immediately be in effect.
TIP: After choosing the function for the ER Server box on the main screen, if you have not previously set up your own user name and password, you should do so before entering any Server settings.
Set up an Administrator Login ID
NOTE: If you have already set up your user name and password, you can skip this section.
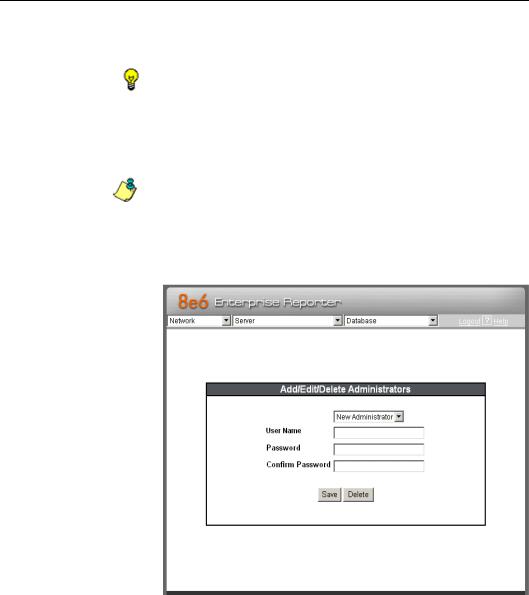
1.At the Network pull-down menu, choose Administrators to display the Add/Edit/Delete Administrators screen where you will set up your user name and password:
Fig. 1:1-3 Add/Edit/Delete Administrators screen
2. Select New Administrators from the pull-down menu.
16 |
8E6 TECHNOLOGIES, ENTERPRISE REPORTER ADMINISTRATOR USER GUIDE |

ADMINISTRATOR SECTION CHAPTER 1: ACCESSING THE SERVER
3.In the User Name field, enter up to 20 characters—this may include upperand/or lowercase alphanumeric characters, and special characters.
4.In the Password field, enter eight to 20 characters— including at least one alpha character, one numeric character, and one special character. The password is case sensitive.
5.In the Confirm Password field, re-enter the password in the exact format used at the Password field.
6.Click the Save button.
8E6 TECHNOLOGIES, ENTERPRISE REPORTER ADMINISTRATOR USER GUIDE |
17 |
ADMINISTRATOR SECTION CHAPTER 1: ACCESSING THE SERVER
Log Off
To log off the Administrator console, click the Logout link beneath the banner in any screen to display the log out screen:
Fig. 1:1-4 Logout screen
Click the “X” in the upper right corner of the browser window to close the window. Exiting the Administrator console will log you off the Server, but will not turn off the Server.
WARNING: If you need to turn off the Server, follow the shut down procedures outlined in the Shut Down screen sub-section under the Server Menu section in Chapter 2. Failure to properly shut down the Server can result in data being lost or corrupted.
18 |
8E6 TECHNOLOGIES, ENTERPRISE REPORTER ADMINISTRATOR USER GUIDE |
ADMINISTRATOR SECTION CHAPTER 2: CONFIGURING THE ER SERVER
Chapter 2: Configuring the ER Server
Administrator Console
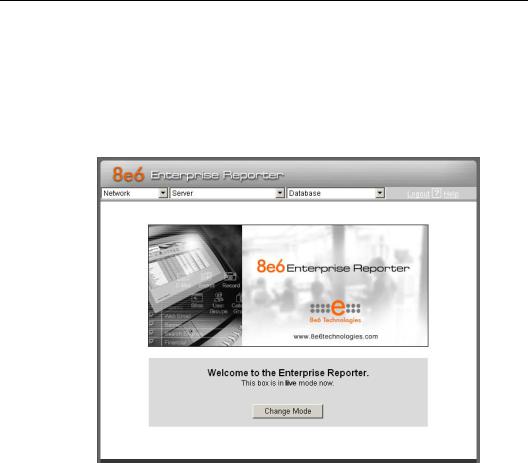
After logging on the Server, the main screen of the Administrator console displays in your Web browser:
Fig. 1:2-1 Administrator console, main screen
The Administrator console is used for configuring and maintaining the ER Server. Settings made in the Administrator console affect the Client reporting application. On the main screen of the Administrator console, there are three menus: Network, Server, and Database. Each menu contains options from which you make selections to access screens used for configuring your Server.
8E6 TECHNOLOGIES, ENTERPRISE REPORTER ADMINISTRATOR USER GUIDE |
19 |

ADMINISTRATOR SECTION CHAPTER 2: CONFIGURING THE ER SERVER
NOTE: The mode of the Server displays on the main screen. More information about the “live” and “archive” Server box modes can be found in the Box Mode sub-section under the Network Menu section in this chapter.
TIP: When making a complete configuration of the Server, 8e6 Technologies recommends you navigate from left to right (Network to Server to Database) in choosing your menu options.
Network Menu
The Network pull-down menu includes options for setting up and maintaining components to be used on the Server’s network. These options are: Box Mode, Administrators, Lockouts, Network Setting, Routing Table, Regional Setting, Diagnostics, and SNMP.
Fig. 1:2-2 Network menu, main screen
20 |
8E6 TECHNOLOGIES, ENTERPRISE REPORTER ADMINISTRATOR USER GUIDE |
Loading...