


 Loading...
Owner’s Manual

(Inside front cover – intentionally blank)

®
HARD DISK and MEMORY CARD RECORDER
with ETHERNET AUDIO™ FILE SHARING
OWNER’S MANUAL
MODEL E-3000
SOFTWARE VERSION 1.24
June, 2013
P R O F E S S I O N A L D I G I T A L A U D I O

SAFETY COMPLIANCE
DigiCart/EX complies with the following safety standards:
•UL 60950, 3rd Edition, dated December 1, 2000, Standard for Safety of Information Technology Equipment, Including Electrical Business Equipment.
EU ELECTROMAGNETIC COMPATIBILITY
Type of Equipment: Professional Use Audio Equipment.
Conforms to the Following Standards:
•EN55103-1 (1997) (Emissions) Electromagnetic compatibility – Product family standard for audio, video, audio-visual and entertainment lighting control apparatus for professional use.
•EN55103-2 (1997) (Immunity) Electromagnetic compatibility – Product family standard for audio, video, audio-visual and entertainment lighting control apparatus for professional use.
FCC COMPLIANCE
The equipment was tested to FCC Class A (using CISPR 22 Limits), EN55103-1 and EN55103-2: 1996 (for Environment 4). The unit complies with the standards.
This equipment complies with part 15 of the FCC rules. These limits are designed to provide reasonable protection against harmful interference when the equipment is operated in a commercial environment. This equipment generates, uses and can radiate radio frequency energy and if not installed and used in accordance with the owners manual, may cause interference to radio communications. Operation of this equipment in a residential area is likely to cause interference in which case the user will be required to correct the interference at his own expense.
This device will accept any interference received, including interference that may cause undesired operation. The user is cautioned that changes made to the equipment without the approval of the manufacturer could void the user's authority to operate this equipment. It is suggested that only shielded and grounded cables be used to ensure compliance with FCC rules.
NOTICE
This Class A digital apparatus meets all requirement of the Canadian Interference-Causing Equipment Regulations.
Français: Cet appariel numérique de la classe A respecte toute les exigences du Reglement sur le matériel brouilleur du Canada.
• Notices

Contents
OVERVIEW _________________________________________ 1
Introduction to the DigiCart Recorder |
|
What’s New in DigiCart/EX |
|
Supported File Formats........................................................... |
3 |
File Format Indicators on the Front Panel LCD .......... |
3 |
Notes on file formats ................................................. |
3 |
Storage Capability |
|
Accessories |
|
RC-320 Remote Control ......................................................... |
4 |
CHAPTER 1_________________________________________ 6
Installation |
|
Mounting................................................................................ |
6 |
Rear Panel Connections.......................................................... |
6 |
Power........................................................................ |
7 |
Control Signals .......................................................... |
7 |
Digital Audio............................................................. |
8 |
Analog Audio ............................................................ |
8 |
CHAPTER 2_________________________________________ 9
Control Panel |
|
LCD Display........................................................................... |
9 |
LED Indicators ........................................................................ |
9 |
Peak Level Meters................................................................. |
10 |
Headphone Jack ................................................................... |
10 |
Selection Knob ..................................................................... |
10 |
Buttons................................................................................. |
11 |
Navigation Arrows................................................... |
11 |
ENTER Button.......................................................... |
11 |
EXIT Button ............................................................. |
11 |
DRIVES Button ........................................................ |
11 |
DIRS Button ............................................................ |
11 |
FILES Button ............................................................ |
11 |
SETUP Button.......................................................... |
11 |
UTILITY Button ....................................................... |
12 |
EDIT Button............................................................. |
12 |
RECORD Button...................................................... |
12 |
PLAY Button............................................................ |
12 |
STOP Button ........................................................... |
12 |
VIEW LIST Button.................................................... |
13 |
LOOP Button .......................................................... |
13 |
PAUSE Button ......................................................... |
13 |
Bank Select and Hot Key Buttons............................. |
13 |
18bcontents • i

Memory Card Reader |
|
Memory Card Insertion ............................................ |
14 |
Memory Card Removal ............................................ |
14 |
Approved Memory Cards ......................................... |
15 |
Notes on Card Compatibility.................................... |
15 |
CHAPTER 3 _______________________________________ 16
File Organization and Navigation |
|
Overview of Drive and Directory Structure ........................... |
16 |
Drive Organization Strategy.................................................. |
17 |
Network Playlists and Hot Keys ............................... |
18 |
Structure Details.................................................................... |
19 |
Directories ............................................................... |
19 |
Files ......................................................................... |
19 |
Playlists.................................................................... |
19 |
Network Drive Error Messages .............................................. |
19 |
No Network Link ..................................................... |
19 |
Server Unavailable................................................... |
19 |
Waiting for NFS ....................................................... |
20 |
Waiting for Mount ................................................... |
20 |
File Navigation User Interface ............................................... |
20 |
Navigation Controls ................................................. |
20 |
File Find Function ................................................................. |
20 |
Using the FIND Function with a Keyboard............... |
21 |
Using the FIND Function with an RC-320................ |
21 |
CHAPTER 4 _______________________________________ 22
Setup and Utility Menus |
|
Menu Navigation .................................................................. |
22 |
Setup Menu Features............................................................. |
22 |
D-Net Receiver ........................................................ |
22 |
D-NET Receiver Input .............................................. |
22 |
D-NET Receiver Dir ................................................. |
22 |
D-NET Receiver Name............................................. |
22 |
D-NET Receiver Echo............................................... |
22 |
Play Digital Format .................................................. |
23 |
Play Hot Keys Using ................................................ |
23 |
Play Restart Mode .................................................... |
23 |
Play Sample Rate ..................................................... |
23 |
Play Word Size ........................................................ |
24 |
Record Audio Source ............................................... |
24 |
RECORD SAMPLE RATE .......................................... |
24 |
Record Data Format ................................................. |
25 |
Record Dithering ..................................................... |
25 |
Record Overwrite .................................................... |
26 |
Record Threshold..................................................... |
26 |
Record Time Limit ................................................... |
27 |
Set Aux Protocol ...................................................... |
27 |
Set Contrast.............................................................. |
27 |
Set Headphone Level ............................................... |
27 |
Set Input Monitor ..................................................... |
27 |
Set IP Address .......................................................... |
27 |
Set Keyboard Type ................................................... |
28 |
Set Sort Order .......................................................... |
29 |
ii • 18bcontents

Set Time Display ..................................................... |
29 |
Utility Menu Features ........................................................... |
29 |
Assign Hot Key (Preset)............................................ |
29 |
Copy Original.......................................................... |
33 |
Copying a Cut using Copy Original ......................... |
34 |
Copying a Playlist (Stack) using Copy Original ........ |
34 |
Copying a Directory using Copy Original................ |
34 |
Copy Edited............................................................. |
35 |
Delete ..................................................................... |
36 |
Rename ................................................................... |
36 |
Format Disk............................................................. |
36 |
Mount Network Drive ............................................. |
38 |
Update Directories .................................................. |
38 |
D-Net File Transfer .................................................. |
38 |
CHAPTER 5________________________________________ 39
Recording |
|
Transport Controls................................................................ |
41 |
Setup to Record.................................................................... |
41 |
Selecting a File Location for Recording.................... |
41 |
Setting Record Levels .............................................. |
42 |
Recording Commands ............................................. |
42 |
CHAPTER 6________________________________________ 43
Playback
Front Panel Indicators........................................................... |
43 |
Transport Controls................................................................ |
44 |
Playing a Single Cut.............................................................. |
44 |
Hot Keys............................................................................... |
44 |
Playing Multiple Cuts — Follow-On Play.............................. |
45 |
Quickstacks.......................................................................... |
45 |
Creating a Quickstack.............................................. |
45 |
CHAPTER 7________________________________________ 47
Playlists
Playlist Types........................................................... |
47 |
Creating a Playlist.................................................... |
49 |
Playing a Playlist ..................................................... |
50 |
Viewing a Playlist .................................................... |
51 |
Playlist Editing ...................................................................... |
51 |
Scan Mode .............................................................. |
51 |
Insert ....................................................................... |
51 |
Append ................................................................... |
51 |
Remove................................................................... |
52 |
Truncate .................................................................. |
52 |
Change Playlist Type ............................................... |
53 |
Converting a Linear Playlist to a Cut ..................................... |
53 |
To Convert a Linear Playlist to a Cut........................ |
53 |
CHAPTER 8________________________________________ 54
18bcontents • iii

Audio Editing |
|
User Interface........................................................................ |
54 |
Edit Audio Files..................................................................... |
54 |
Head........................................................................ |
55 |
Tail .......................................................................... |
55 |
Pre-Roll.................................................................... |
56 |
Fade In..................................................................... |
57 |
Fade Out.................................................................. |
57 |
Output Gain............................................................. |
58 |
CHAPTER 9 _______________________________________ 59
Maintenance |
|
General Cleaning .................................................................. |
59 |
Calibration ............................................................................ |
59 |
Disk Maintenance ................................................................. |
60 |
Program Updates .................................................................. |
60 |
Update the Program from a Network Server............. |
60 |
Update the Program from a Memory Card ............... |
60 |
Restoring Previous Version....................................... |
61 |
Memory Cards and Card Reader ........................................... |
61 |
Care and Handling of Memory Cards....................... |
61 |
Troubleshooting Memory Card Operation ............... |
62 |
Special Button Sequences ..................................................... |
62 |
APPENDIX A_______________________________________ 63
Interface Wiring |
|
Audio Connector Wiring....................................................... |
63 |
Audio I/O Interface Table......................................... |
63 |
Sync Input................................................................ |
63 |
GPI/O (General Purpose I/O) ................................................ |
64 |
GPI/O Connector Pinout ....................................................... |
65 |
Remote Control..................................................................... |
65 |
Remote Bus........................................................................... |
65 |
Aux Serial Port ...................................................................... |
66 |
Keyboard Port ....................................................................... |
66 |
Network Port ........................................................................ |
66 |
APPENDIX B_______________________________________ 67
Serial Control Protocols |
|
DigiCart/ES-Bus..................................................................... |
67 |
Host Device Message Summary ............................... |
67 |
Hardware Format ..................................................... |
67 |
Data Format ............................................................. |
67 |
Peripheral Bus....................................................................... |
68 |
Hardware Format ..................................................... |
68 |
Data Format ............................................................. |
68 |
APPENDIX C_______________________________________ 69
DigiCart History
iv • 18bcontents

DigiCart................................................................................ |
69 |
DigiCart II............................................................................. |
69 |
DigiCart II Plus ..................................................................... |
69 |
DigiCart/E............................................................................. |
69 |
APPENDIX D _______________________________________ 70
D-Net File Transfer |
|
Key Features ......................................................................... |
70 |
Transfer Rates .......................................................... |
70 |
Electrical Specification for D-Net Transfers .............. |
71 |
D-Net Setup.......................................................................... |
72 |
Making a File Transfer ............................................. |
74 |
Wildcard Transfers .................................................. |
75 |
Transfer Messages................................................................. |
75 |
Source Machine Displays ........................................ |
75 |
Aborted Transfer...................................................... |
76 |
Receiving Machine Displays.................................... |
76 |
D-Net Messages.................................................................... |
77 |
APPENDIX E _______________________________________ 78
Recording Encoded Digital Data
APPENDIX F _______________________________________ 79
Technical Specifications |
|
General Specifications.......................................................... |
79 |
Internal Hard Disk ................................................... |
79 |
Memory Card Reader .............................................. |
79 |
Miscellaneous ......................................................... |
79 |
Physical Dimensions (nominal)............................................. |
80 |
Audio Configuration Specifications....................................... |
80 |
Audio Performance Specifications ........................................ |
80 |
APPENDIX N _______________________________________ 81
Networking |
|
Overview ............................................................................. |
81 |
Choosing a Server................................................................. |
82 |
Setting up the Network......................................................... |
83 |
Connecting a Computer Directly to a DigiCart/E................... |
83 |
Setting up the Ethernet Audio Server..................................... |
84 |
Creating Network Drives ......................................... |
84 |
NFS Shares .............................................................. |
85 |
Setting up Windows Server 2008.......................................... |
86 |
Creating Net Drives in Windows Explorer ............................ |
97 |
Configuring Windows with Hanewin NFS Server ................. |
99 |
Managing Net Drives on the DigiCart/EX............................ |
102 |
Mount Network Drive ........................................... |
102 |
INDEX ___________________________________________ 104
18bcontents • v

WARRANTY AND REPAIR POLICY
The DigiCart/EX recorder is warranted against defects in material and workmanship for a period of one year from date of original purchase. This warranty includes parts and labor. This warranty excludes units that have been modified, repaired by unauthorized personnel, or damaged by rough handling, abuse, improper operation, dirt, lightning strike, or static electricity.
360 SYSTEMS ASSUMES NO LIABILITY WHATSOEVER FOR REAL OR CONSEQUENTIAL DAMAGES, LOSS OF PROFITS, INCONVENIENCE OR ANY OTHER LOSSES DUE TO OPERATIONAL FAULTS OF DIGICART/EX RECORDERS. 360 SYSTEMS’ SOLE LIABILITY UNDER THIS LIMITED WARRANTY SHALL BE THE REPAIR OR REPLACEMENT OF DEFECTIVE PRODUCT OR COMPONENTS DURING THE WARRANTY PERIOD.
Products being returned under warranty shall be sent to 360 Systems or one of its foreign service centers, freight prepaid, in the original or equivalent packaging. Please call 360 Systems for a return authorization number before returning any merchandise for any reason.
PRODUCT IMPROVEMENTS AND UPGRADES
360 Systems reserves the right to make changes and/or improvements to its products without incurring any obligation to incorporate such changes or improvements in units previously sold or shipped.
COMPANY ADDRESS
Please use the following addresses for shipping and correspondence. The Corporate Office in California is open Monday through Friday, from 8:30 AM to 5:00 PM, Pacific Time.
Corporate Office and Customer Services
3281 Grande Vista Drive Newbury Park, CA 91320 USA Telephone: (818) 991-0360 Fax: (818) 991-1360
E-mail info@360systems.com Website www.360systems.com
Please call 360 Systems for a return authorization number (RMA) before returning merchandise for any reason.
vi • Notices
TRADEMARKS
The following trademarks may appear in this manual:
 is a registered trademark of 360 Systems.
DigiCart® and Instant Replay® are registered trademarks of 360 Systems.
Short/cut, Quickstack, Bit-for-Bit, and Ethernet Audio are trademarks of 360 Systems. Zip® is a registered trademark of Iomega Corp.
SD and SDHC are trademarks or registered trademarks of SD-3C.
Zip® is a registered trademark of Iomega Corp.
Dolby® is a registered trademark of Dolby Licensing Corp.
All other product and brand names and any registered and unregistered trademarks mentioned in this manual are used for identification purposes only and remain the exclusive property of their respective owners.
COPYRIGHTS
Software contained in this product is copyrighted by 360 Systems, and Dolby Laboratories.
PATENTS
Designs incorporated in this product may be the subject of current or pending United States and foreign patents.
Notices • vii
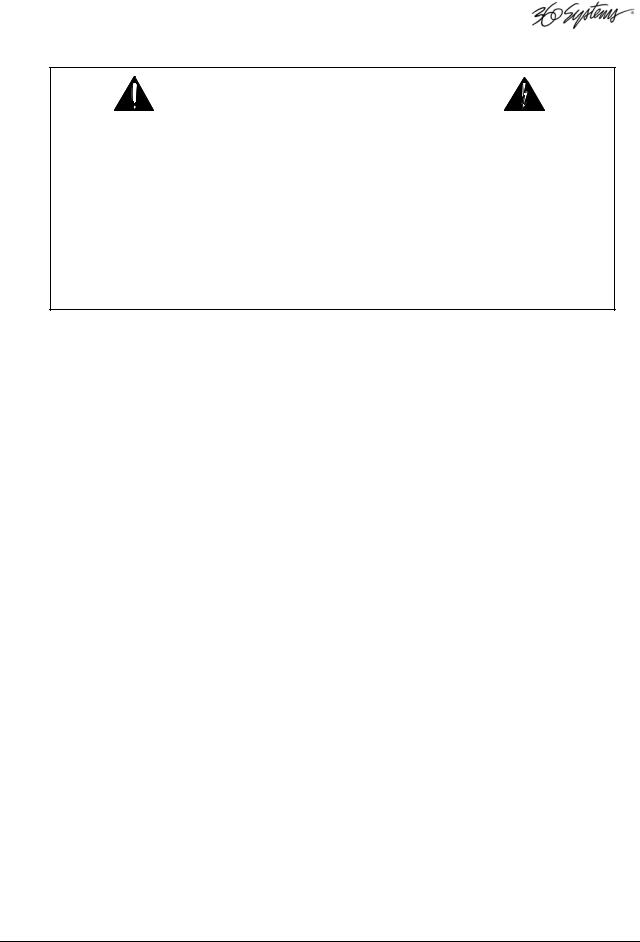
WARNING SYMBOLS
THE FOLLOWING WARNING SYMBOLS ARE USED ON THE PRODUCT IN THIS MANUAL:
ENGLISH |
ATTENTION: REFER TO OWNER’S MANUAL FOR IMPORTANT |
|
INFORMATION. |
FRANÇAIS |
ATTENTION: VEUILLEZ VOUS RÉFÉRER AU MODE D’EMPLOI |
|
POUR UNE INFORMATION IMPORTANTE. |
ITALIANO |
ATTENZIONE: FATE RIFERIMENTO AL MANUALE PER |
|
INFORMAZIONI IMPORTANTI. |
ESPAÑOL |
ATENTCION: FAVOR DE REFERIR AL MANUAL DE OPERACION |
|
POR INFORMACION IMPORTANTE. |
|
|
ENGLISH |
WARNING: ELECTRICAL SHOCK HAZARD. |
FRANÇAIS |
AVERTISSEMENT: DANGER DE CHOC ÉLECTRIQUE. |
ITALIANO |
AVVERTIMENTO: PERICOLO DI SHOCK ELETTRICO. |
ESPAÑOL |
ADVERTENSIA: PELIGRO DE CHOQUE ELECTRICO. |
GENERAL CAUTIONS
Please heed the following important cautions regarding the DigiCart/EX:
•Do not remove the cover. No user serviceable parts inside. Refer servicing to qualified service personnel.
•DigiCart/EX recorders contain a hard disk drive. While today’s hard disks are very reliable, they may be vulnerable to shock. Please handle with care, and exercise caution not to drop or bump the recorder — damage to the internal hard disk may result. Ensure that power is off before moving the unit.
•To reduce the risk of fire or electric shock, do not expose this unit to rain or moisture.
viii • Notices

Overview
Introduction to the DigiCart Recorder
As the 1980s came to a close, the promise of high-quality digital audio became a reality with the introduction of compact disks – but only for pre-recorded music. 360 Systems responded by designing the first practical digital cart machine, introducing it to the broadcast industry at the 1990 NAB Convention. Aptly named DigiCart®, this new broadcast standard rapidly replaced the industry’s analog NAB tape carts.
By including an internal hard disk as a standard component, the DigiCart recorder provides fast access to many thousands of cuts, plus a degree of reliability never before achieved with tape recorders. Remote controls, networking and distributed storage now make the DigiCart recorder a standard in broadcast facilities throughout the world.
There have been several advances since the original DigiCart, but all models share these common features: The ability to record and store thousands of cuts and play them back instantly, the ability to do routine editing, convenient front panel controls, automation control, and removable media for backups and file transfers. Transportable recordings for archiving and backup are now stored on removable SD format memory cards. These economical, re-recordable cards are DigiCart's "carts".
DigiCart offers several recording formats and sampling rates. Generally, linear recording is recommended because it will produce the highest quality playback and because today hard disk storage space is inexpensive. However, for compatibility with earlier DigiCart recorders, DigiCart/EX can record and play files using Dolby® AC-2 compression. AC-2 uses 5 times less disk space, while delivering full bandwidth stereo. It should only be used for new recordings when absolutely necessary for compatibility with older DigiCarts, or to make recordings longer than possible with the
.WAV format.
DigiCart/EX stores supplementary information along with each individual audio recording, including:
•An index file ID reference that identifies drive, directory and cut
•A name of up to fifteen alphanumeric characters
•Total running time
•Sampling rate
•Recording format
•Editing information for Head and Tail times, Fade In, Fade Out, and Gain
Much of this information is displayed on the front panel of the DigiCart to assist in managing a large audio library.
0BOverview • 1

What’s New in DigiCart/EX
DigiCart/EX is the most advanced hard disk/cart system in the broadcast industry. Building on the proven design of the industry-standard DigiCart II and DigiCart/E, your new DigiCart/EX delivers many significant enhancements, such as SD memory card removable media, network connectivity through 360 Systems’ Ethernet Audio network, 24-bit audio, WAV file format, a separate sync input, larger display, larger internal disk drive and many other refinements. Please refer to 360 Systems Ethernet Audio Network Manual for information on setting up the network.
The star feature of the new DigiCart/EX is its connection to the Ethernet Audio™ network. This 100Mb Ethernet connection allows file transfers, playback over the network, and recording to a network drive. With Bit-for-Bit™ technology, DigiCart/EX and the Ethernet Audio network are also fully compatible with non-PCM audio data such as Dolby-E and AC-3.
A notable feature of DigiCart is selectable recording formats. Choices include linear sampling rates of 96, 88.2, 48, or 44.1 kilosamples/second in stereo, or 48K Dolby AC-2. All formats can coexist. Further, DigiCart/EX has a built-in sample rate converter that can be switched into either the incoming or outgoing audio path. Now, each digital recording can be converted on-the-fly so an entire library can be maintained in at one sample rate standard. Alternately, a library of recordings may be maintained as a mixture of native sample rates; DigiCart/EX can convert these files on output to a predetermined standard (e.g. 48K, for broadcast).
DigiCart/EX can now build and store Playlists on network drives that can be accessed from any DigiCart on the network. Playlists can be used concurrently from many locations, or can be accessed from anywhere in the plant as a production moves from studio to studio.
Hot Keys have always been a DigiCart accessory, but fixed Hot Keys have now been added to the front panel of DigiCart/EX. Hot Keys allow pre-assignment of a cut or Playlist to a trigger key, so that it can be played immediately. This takes the work out of searching for a file when it is needed in a hurry.
An important feature in DigiCart/EX is network Hot Key assignments. Hot Keys can be stored and recalled in two ways, either Network Drive or Local Drive. The chief benefit of using Net Drive Hot Keys is that those Hot Key assignments can be accessed by more than one user concurrently from anywhere on the network.
DigiCart/EX now has a separate AES-11 sync input. An AES-75 ohm input connection is dedicated to this task. Also new are gain adjustment trims on the analog outputs so that DigiCart/EX can be matched perfectly with downstream equipment.
DigiCart/EX now provides power to the 360 Systems RC-320 remote control via the serial cable, so there is no need for a separate wall-mounted power supply. Additionally, there is now a second serial port available for ES-Bus or Peripheral Bus controls, so that the RC-320 remote control can always remain attached.
Finally, DigiCart/EX’s LCD display and menus have been organized to provide a clear understanding of the machine state and settings.
2 • 0BOverview

Supported File Formats
DigiCart/EX normally records audio in WAV format. Previous DigiCart models used a proprietary recording format. To ensure compatibility with existing DigiCarts and recordings, DigiCart/EX can also play and record those proprietary file formats.
DigiCart/EX displays a three-character abbreviation for each file’s format on its LCD display (Format Code). Certain operations are compatible with, or limited to, specific file formats. Understanding the formats will be useful in getting the most out of your DigiCart/EX.
The file suffix in the table below is the file name suffix assigned to Cuts recorded on or copied to a Network Drive. These suffixes can be seen when viewing files on the network using a PC. WAV audio files created on DigiCart/EX can be played by any program supporting that standard.
FILE FORMAT INDICATORS ON THE FRONT PANEL LCD
DigiCart II Compatible
Format |
Format Code |
Sample Rate |
DigiCart/EX Support |
File Suffix |
Compressed 5 |
AC2 |
48000 |
(Play/REC) |
.DC2 |
16-bit stereo linear 5 |
S16 |
44100, 48000 |
(Play/REC) |
.DC2 |
16-bit mono linear 3,5 |
M16 |
44100, 48000 |
(Play only) |
.DC2 |
New to DigiCart/E
16-bit stereo linear |
W16 |
44100, 48000 |
(Play/REC) |
.WAV |
|
24-bit stereo linear |
W24 |
44100, 48000, 88200, 96000 |
(Play/REC) |
.WAV |
|
16-bit mono linear 3 |
T16 |
44100, |
48000 |
(Play only) |
.WAV |
24-bit Non-PCM Audio 4 |
D24 |
44100, |
48000, 88200, 96000 |
(Play/REC) |
.WAV |
NOTES ON FILE FORMATS
1.DigiCart/EX will play DigiCart II files obtained via D-Net.
2.DigiCart/EX does not support 32K sample rate files.
3.Mono recordings (made on earlier DigiCarts) will be played from both channels. DigiCart/EX does not make mono recordings.
4.Non-PCM audio files are used to contain data for encoded or data-compressed audio formats(Dolby-E, Dolby AC-3 , etc.). This data can be recorded and played through the digital I/O ports only. DigiCart/EX will not play it on the analog outputs. DigiCart/EX does not encode or decode the data, instead using “Bit-for-Bit” technology to play back exactly the same data as recorded when using this file type.
5.D-Net can import or export DigiCart II-compatible file types (AC2, M16, S16). No file type conversions are performed during the D-Net transfer process.
6.The “COPY EDITED” utility can be used to convert between DigiCart II formats and WAV file formats. This applies only to linear 16-bit stereo recordings, not AC-2.
7.Non-destructive edits (Head/Tail Trim, Fade In/Out, Gain) can be performed on all formats. The edit parameters are saved in a vendor-specific area of the file header. When playing WAV files on non-DigiCart machines, the edits will not be recognized. However, the “COPY EDITED” utility can be used to render Head/Tail Trims to WAV files playable on other machines.
8.If WAV and DC2 files have the same sample size and sample rate, they may be mixed in a Playlist that is to be converted into a cut.
0BOverview • 3
Storage Capability
Storage time on DigiCart/EX drives will vary depending upon the sampling rate and recording format used. The table below shows approximate recording times, based on stereo recording at different sampling rates. Dolby AC-2 operates only in 48K stereo, 16-bit format.
DRIVE STORAGE TIMES
Storage per |
96K |
88.2K |
48K |
44.1K |
48K/16-bit |
1GB |
LINEAR |
LINEAR |
LINEAR |
LINEAR |
DOLBY AC-2 |
STEREO 16-bit |
Not available |
Not available |
86 min |
94 min |
462 min |
|
|
|
|
|
|
STEREO 24-bit |
28 min |
31 min |
57 min |
63 min |
|
|
|
|
|
|
|
Times quoted are approximate. Storage times may vary with actual use, depending on the combinations of bandwidths, formats and sample rates stored on a drive and the length and number of cuts and Playlists.
Accessories
The following accessories are available separately from 360 Systems.
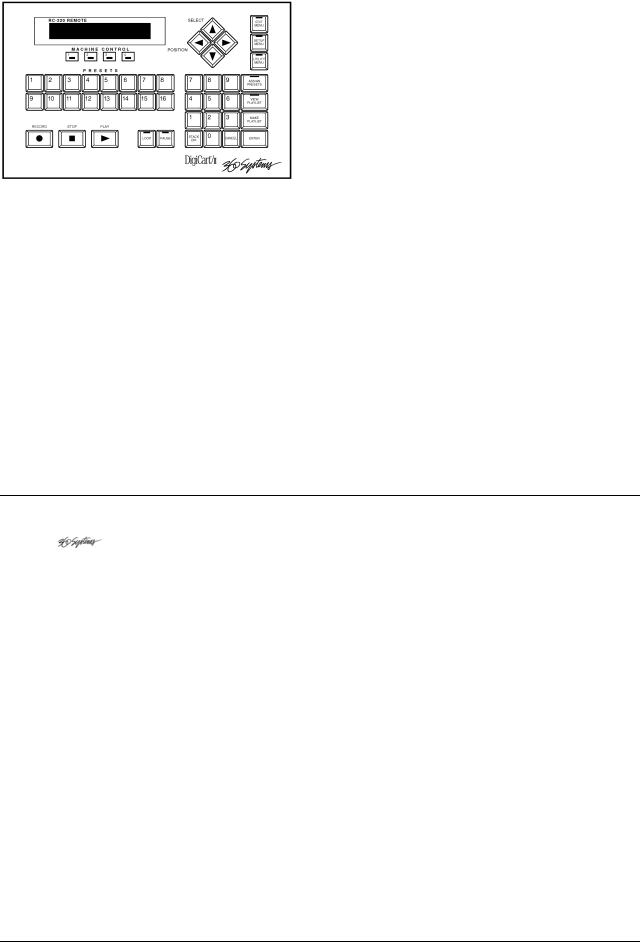
RC-320 Remote Control
• Fast, Easy Total Control of All DigiCart Functions
• Clear, Intuitive Display of All Operations
• Sixteen Hot Keys for Single Keystroke Playback
• Full Functions for Production Room Operations
• Controls four DigiCart/EX recorders
Remote control Model RC-320 provides full access to DigiCart functions. Each unit is housed in a low profile package that allows for convenient placement. User interface with DigiCart is enhanced through large format, color-coded keyboard-type buttons sensibly placed across the panel. The RC-320 is especially practical when building and editing Playlists and assigning Hot Keys.
A bright display duplicates the command line display on DigiCart/EX and is readable even in brightly lit rooms.
4 • 0BOverview

Programmable Hot Keys play back cuts with single-keystroke speed. Once the Hot Keys are assigned, they will remain in memory even if power is turned off between uses. Linear Playlists may also be directly assigned to Hot Keys. Hot Keys are ideal for frequently used cuts, such as sound effects, jingles, and station IDs.
In operation, cuts are found by simply typing in an ID number or scrolling through the directory listings. The RC-320 Pause button works in playback or analog record mode, while the Loop button is handy for repeating a cut without breaks.
The three menu choices, Utility, Setup and Edit, allow access and decision making on all related items. Use the Setup and Utility menu functions to reconfigure DigiCart to best accommodate current operational needs. The Edit menu works for both cuts and Playlists.
Four Machine Select keys allow a single RC-320 to independently control four DigiCarts.
RC-320 Operational Features
Display |
In the cued position, the display shows cut name, Index number, length of cut, assigned |
|
directory and drive source. It also shows the cuts sampling rate and recording mode— linear |
|
or Dolby AC-2 encoded. In the play mode, it shows remaining or elapsed time, current cut |
|
and the next cut cued up. |
Position Arrows |
Select drives and directories. |
Select Arrows |
Review cuts by scrolling through directory listing. Displays cut name and time. |
Hot Keys |
Provide rapid playback of sixteen pre-assigned cuts or Playlists. |
Find (NO DEDICATED KEY) |
Access cuts from any directory (including the Playlist directory), by entering the ID number. |
Keypad |
Use these 10 keys to enter cut ID numbers. Simply punch in the number and hit Enter for |
|
visual verification of the proper cut— then press Play. |
Playlist Directory |
Direct access to the Playlist directory. |
Cancel |
Cancels incorrect entries. |
Enter |
Enters/confirms new selections or entries. |
Assign Hot Keys |
Selected cuts or Playlists are "mapped" to the sixteen Hot Keys. |
View Playlist |
Visual preview of a Playlist before use. |
Make Playlist |
Assemble groups of cuts together. |
Play-Stop-Record |
Control DigiCart transport functions via RC-320. |
Loop |
Plays a cut or a Playlist continuously. |
Pause |
Places machine on "hold" in both Play and Record modes. |
Edit Menu |
Selects Edit Menu options. |
Setup Menu |
Selects Setup Menu options. |
Utility Menu |
Selects Utility Menu options. |
Mechanical Specifications
Dimensions |
1.875" x 11.5" x 7" (47.6mm x 292mm x 178mm) (H-W-D) |
Weight |
5 lbs. (2.3 kg) |
Display |
2-line x 20 character display. |
Power Supply |
External UL/CSA/VDE approved 9-volt modular supply. Feeds RC-320 through 9-conductor |
|
cable via connector at DigiCart end. |
Cable |
25 foot (7.5 meters) highly flexible 9 conductor cable. Connects directly to DigiCart. |
0BOverview • 5
Chapter 1
Installation
Mounting
DigiCart/EX may be used on a tabletop or mounted in a 2U, 19” equipment rack. Rack mounting ears are provided as part of the faceplate and chassis. Four 10-32 truss head screws with washers are provided for this purpose. In some cases, it may necessary to support the back end of the chassis or attached cables. 360 Systems does not provide a bracket for this purpose.
Depending on the space available in the rack, you may need to remove the four rubber feet from the bottom of the chassis to allow the chassis to fit into the rack space. Simply pry these rubber feet from the chassis holes with a small flat blade screwdriver.
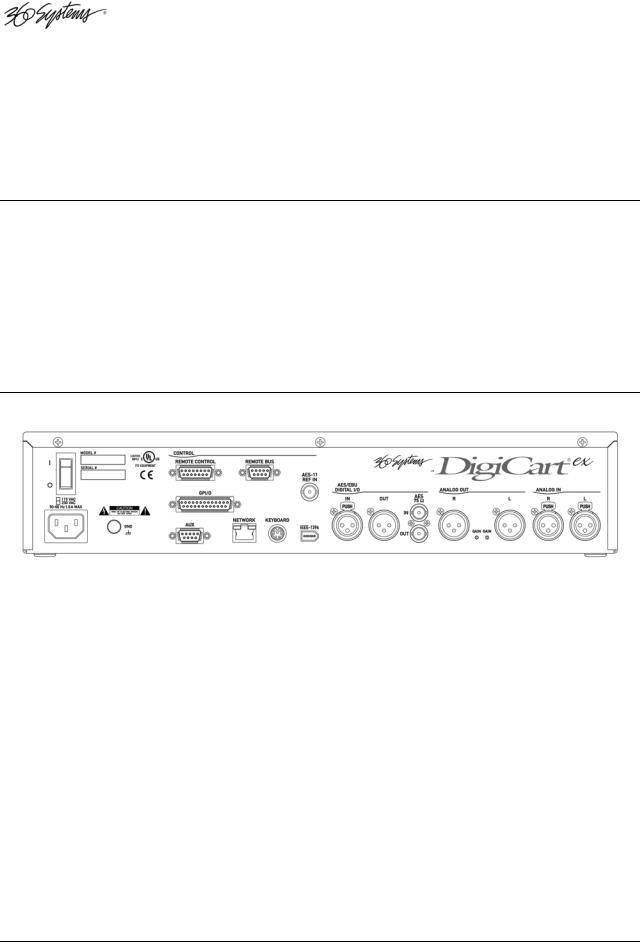
Rear Panel Connections
|
|
|
|
|
|
|
|
Rear Panel Interface |
Connector Type |
||
Power cable connector and switch |
IEC-320 |
||
|
|
||
Thumbscrew for chassis ground, not for safety ground |
Thumbscrew |
||
Remote Control Port – dedicated to RC-320 Remote Controls |
9-pin “D” female |
||
Remote Bus Port - EIA-485 (EIA-422 compatible) – connection of |
15-pin “D” female |
||
Remote Bus to other DigiCarts |
|
||
GPI/O interface |
25-pin “D” female |
||
Serial Port - EIA-485 (EIA-422 compatible) serial communications |
9-pin “D” female |
||
including ES-Bus and Peripheral Bus |
|
||
Connection to Ethernet network |
RJ-45 |
||
Port for QWERTY keyboard |
6-pin Mini DIN |
||
Connection for IEEE-1394 device |
IEEE-1394 |
||
Connection for AES-11 Sync Input |
BNC female |
||
AES/EBU digital audio input, left and right; AES/EBU digital audio |
3-pin XLR female |
||
output |
3-pin XLR male |
||
IEC-958 TYPE II or AES/SMPTE 75Ω digital audio input |
Dual BNC female |
||
Right and Left balanced analog audio outputs |
3-pin XLR male |
||
Right and Left balanced analog audio inputs |
3-pin XLR female |
||
6 • 23BInstallation
POWER
WARNING
CONNECT ONLY TO A GROUNDED 50/60 HZ AC OUTLET PROVIDING THE
CORRECT VOLTAGE (115 VAC OR 230 VAC, AS DELIVERED).
DO NOT REMOVE OR DEFEAT THE GROUNDING PIN ON THE AC POWER CORD.
A SERIOUS SHOCK HAZARD MAY RESULT FROM FAILING TO
MAKE CONNECTION TO A PROPERLY GROUNDED ELECTRICAL OUTLET.
DO NOT USE THE CHASSIS SIGNAL GROUND THUMBSCREW AS A
SAFETY GROUND POINT.
DO NOT USE THIS PRODUCT OUT OF DOORS, IN RAIN, OR
IN DAMP OR WET ENVIRONMENTS.
Each DigiCart/EX is factory configured for only 115VAC or 230VAC operation. Please check the marking on the rear panel to see if you have the correct DigiCart for your power supply. Use the AC service cord provided to connect the unit to utility power. Use only Underwriters Laboratories recognized replacement cords.
Chassis Ground Screw
A thumbscrew is provided to reduce longitudinal grounding errors between devices having interconnected low-level signals. This feature may reduce hum on the analog input ports.
CONTROL SIGNALS
Several of the most useful standards have been selected to interface DigiCart/EX with professional audio-video equipment and allow functionality with automation systems for the development of custom applications. Detailed technical information about the interfaces will be found in the Appendices.
Remote Control
A Remote Control port is included on the rear panel for connecting DigiCart/EX with a 360 Systems RC-320 desktop remote control.
The control port provides bi-directional serial communication and power. This port is dedicated to an RC-320 remote. Since an RC-320 remote can control more than one DigiCart, a Remote Bus connector is also supplied on DigiCart/EX to daisy-chain remote commands to several DigiCarts. The Remote Bus can be connected to a mix of DigiCart IIs and DigiCart/Es. The pinout used on the Remote Control port can be found in Appendix A, Interface Wiring. Specifics of supported protocols can be found in Appendix B, Serial Control Protocols.
Remote Bus
The Remote Bus connector on DigiCart/EX is used to daisy-chain remote commands to several DigiCarts. The Remote Bus can be connected to a mix of DigiCart IIs and DigiCart/Es. Automation systems can also control DigiCarts through this port. (The Remote Bus connector should not be used as an input when an RC-320 is connected to the Remote Control port)
See “Set Remote Control” in the Setup menu for machine addressing. The pinout used on the Remote Control port can be found in Appendix A, Interface Wiring.
23BInstallation • 7

GPI/O Connector
TRANSPORT CONTROLS
The PLAY, STOP, RECORD, PAUSE and LOOP remote control inputs are optically isolated from DigiCart/EX’s circuitry; a common floating return is provided. +12V may be sourced from pin 17, or provided from an external source. Current limiting devices are provided within DigiCart/EX so that voltage may be applied directly between ground on pin 4, and any of the transport control inputs.
NOTE: If +12V is sourced from DigiCart/EX, the optical isolators no longer provide isolation. Refer to the partial schematic of the DigiCart/EX interface circuits in Appendix A.
TRANSPORT LAMPS/TALLY OUTPUTS
Open-collector outputs are provided for the PLAY, STOP, RECORD, PAUSE and LOOP tally outputs. An open-collector transistor is used to bring the low side to ground to turn on the external lamp. A +12V source is available on pin 17 of the remote connector for use with external lamps. Refer to the partial schematic in Appendix A, Interface Wiring.
Aux Serial Control
An EIA-485 (RS-485) serial port is included on the rear panel. DigiCart/EX supports ES-Bus and Peripheral Bus protocols, selectable from the Setup menu. All of the functions of DigiCart/EX can be accessed and controlled via this serial port. EIA-485 is a multi-drop version of the EIA422 specification, and is fully compatible.
With properly terminated lines this port can communicate up to 1,000 meters. The connector pin assignments used on the serial and Remote ports can be found in Appendix A, Interface Wiring. Specifics of supported protocols can be found in Appendix B, Serial Control Protocols.
Alphanumeric Keyboard
An alphanumeric keyboard may be connected to the keyboard connector on your DigiCart/EX for controlling the machine and adding names to cuts, directories, Playlists and disks. Available models include a standard 101-key keyboard, a small footprint mini-keyboard (Model RC-205), or an infrared-linked mini-keyboard (Model RC-235) available from 360 Systems. Contact 360 Systems for details on these accessories.
The SETUP menu must be set to your choice of the standard 101-key PC-AT style keyboard or mini-keyboard types.
Network
An RJ-45 connector is provided for connection to the Ethernet Audio network.
DIGITAL AUDIO
The pinout for the digital audio ports will be found in Appendix A, Interface Wiring on page 63.
ANALOG AUDIO
The pinout for the analog audio ports will be found in Appendix A, Interface Wiring on page 63.
8 • 23BInstallation
Chapter 2
Control Panel
S D M E M O R Y C A R D
LCD Display
DigiCart/EX employs a graphics LCD with backlight as it’s main display. The display is generally divided into three areas. In the upper left area are the command lines that show machine dialogs, status, and menus. The upper right area is used to display context sensitive navigation clues. The lower area is used to display lists of files in a directory. The selection knob or navigation arrow buttons can scroll lists.
LED Indicators
A series of LED indicators below the LCD display indicate machine settings and I/O conditions. These indicators are arranged in three groups, I/O, Format, and a miscellaneous group.
I/O
Four front panel I/O indicators note the sample rate for recording. Available sample rates are 44.1K, 48K, 88.2K, 96K. During Playback, the I/O indicators show the current playback sample rate, while the recorded sample rate of the file being played is displayed on the LCD. (DigiCart/EX has separate Setup menu settings for record and play sample rates, see “Setup Menu Features” on page 22 for descriptions.)
Format
Two front panel Format indicators note the word size (24or 16-bit) of the recorded file. During Playback, the I/O indicators show the sample rate at the connectors, while the recorded sample rate of the file being played is displayed on the LCD. DigiCart/EX has separate Setup menu settings for record and play word size, see “Setup Menu Features” on page 22 for descriptions.
24BControl Panel • 9

Miscellaneous
EXT SYNC illuminates to indicate that sync source is set to an external reference in the Setup menu. The LED blinks if there is no valid sync signal presented at the connector. EXT SYNC may also illuminate or flash when D-NET Receive is on, see page 22.
The DITHERED LED illuminates during record when 24-bit digital audio is being dithered down to a 16-bit word size. It is also turned on during playback of a 24-bit cut when the output word size is set to 16-Bits. Dithering settings can be changed in the Setup menus.
SRC illuminates to indicate that the Sample Rate Converter has been switched into the data path between the recorded file and connectors. SRC may illuminate during either record or playback. SRC settings can be changed in the Setup menus.
When the machine is idle with Input Monitors on, or is in Record Ready, or is recording; the front panel indicators show the state of the signal to be recorded.
When the machine is idle with Input Monitors off, or while playing a cut; the front panel indicators show the state of the currently selected cut.
All front panel indicators are off while a D-Net send is in progress.
Peak Level Meters
DigiCart/E uses quasi-peak reading LED level meters for monitoring left and right channel audio levels. These meters have been selected over standard VU meters for their advantages in monitoring digital audio.
When a +4dBu reference signal is applied to an analog input, the amplitude of the resulting digital signal will be 16dB below digital full scale. Unity gain is always maintained from analog input to analog output, unless the cut’s output gain has been adjusted.
The meters on DigiCart/EX have a Clip level indication. The Clip LED will turn on during record whenever the signal exceeds digital full scale. If a clipped file is played, the Clip LED will only turn ON during the period when the signal exceeds digital full scale.
Headphone Jack
DigiCart/EX has a ¼” stereo headphone jack on the front panel for convenient monitoring. The master volume control for this jack is set via a menu item in Setup|Set Headphone Level. The level can be adjusted from 0-64 (1dB per step), and is saved in non-volatile memory.
Selection Knob
The front panel selection knob can be rotated to:
•Select audio files (Cuts) for playback or editing
•Scroll and select items in a list, such as Directories or Drives
•Select from different parameters or choices in a menu
•Adjust values in editable fields
10 • 24BControl Panel

Buttons
NAVIGATION ARROWS
The NAVIGATION ARROW buttons are used to:
•Navigate between drive, directory and cut levels
•Select from different values in a menu
•Select units for editing operations
•Move the cursor during naming operations
ENTER BUTTON
The ENTER button is used to:
•Confirm, execute, or continue an operation
•Answer “Yes” to a query from the display
•Save a playlist
EXIT BUTTON
The EXIT button is used to:
•Exit from a menu
•Cancel or abort an operation
•Answer “No” to a query from the display
On keyboards, the Escape [ESC] key is the equivalent to the EXIT button.
DRIVES BUTTON
The DRIVES button is used to immediately display a drive selection list. The button illuminates when the display is at the Drives level.
DIRS BUTTON
The DIRS button is used to immediately display a list of all available directories on the current drive. The button illuminates when the display is at the Directory level.
FILES BUTTON
The FILES button is used to immediately display a scrollable list of all available files in the current directory. The button illuminates when the display is at the Files level.
SETUP BUTTON
The SETUP button is used to access functions related to machine preferences and configurations. After selecting SETUP, use the selection knob to choose the parameter to be changed. Use the Arrow buttons to change the parameter setting. Setup options are displayed alphabetically in a rotating list. Press EXIT or SETUP to exit the setup menu.
Setup settings are stored in non-volatile memory. The button illuminates while in Setup mode.
24BControl Panel • 11

UTILITY BUTTON
The UTILITY button is used to access functions such as Hot Key assignments, copy, rename, delete, and disk format operations. Use the selection knob to select a particular Utility function. Utility options are displayed alphabetically in a rotating list. Press the ENTER button to initiate the chosen function. Press UTILITY or EXIT to exit the utility menu.
Your last menu selection is stored in temporary memory. For example, if you need to repeat a copy operation, that option will be displayed first upon subsequent presses of the UTILITY button. After recording, the Rename utility is pre-selected. The button illuminates while in Utility mode.
EDIT BUTTON
The EDIT button is used to access non-destructive editing functions such as head and tail trims, and fades. It is also used to edit a playlist. Rotate the selection knob to view options.
Your last menu selection is stored in temporary memory. For example, if you need to repeat a fadein operation, that option will be displayed first upon subsequent presses of the EDIT button.
RECORD BUTTON
When the RECORD button is pressed:
The Input Monitor function will turn on,. the LED meters will be active and the RECORD button will illuminate.
Pressing the PLAY button will initiate recording and illuminate the PLAY button. If a RECORD THRESHOLD level is set, recording will actually begin when the audio level exceeds the threshold level setting.
Audio will be recorded at the sampling rate and recording format currently selected in the SETUP MENU. If using digital inputs, the sampling rate will be automatically set at the sampling rate of the incoming signal, unless Sample Rate Conversion is selected.
PLAY BUTTON
Press the PLAY button to initiate playback of a cut or Playlist. Play has precedence over other machine functions and will cancel Setup, Utility, or Edit menus and begin to play the currently selected cut or playlist.
Subsequent presses of the PLAY button will cause the next selection to play immediately or on completion of the current one, dependent on the RESTART MODE.
A blinking PLAY button indicates another cut is ready for Follow-On play or that Loop mode is active.
A steadily illuminated PLAY button indicates DigiCart/EX will stop after the current cut.
STOP BUTTON
Press the STOP button to terminate playback or recording. When DigiCart/EX’s “virtual tape transport” is stopped, the button will be illuminated.
During Follow-on play, or playing a Playlist or loop; pressing STOP will end playback upon completion of the present cut. Press STOP a second time to stop the current cut and delete the Follow-on play list.
When DigiCart/EX is not playing a file, STOP may be pressed to display information about [INFO] the current drive number, name, and the available recording time remaining on the drive (based on the currently selected recording format).
12 • 24BControl Panel

VIEW LIST BUTTON
The VIEW LIST button will immediately display the contents of a Quickstack or Playlist. VIEW LIST is a toggle button that illuminates when active. The displayed list is scrollable. VIEW LIST can be used only when there is a current list to view. If there is no current list, the button will not respond.
LOOP BUTTON
Press the LOOP button to cause the current cut (or current cut in the queue or Playlist) to continue to cycle until the loop is disabled. Looping can only be activated during Play. The LOOP button will illuminate and the PLAY button will flash to indicate Looping.
To disable a loop, press LOOP again or press STOP. The LOOP button indicator will turn off, and the current cut will finish playing, but will not continue to loop. Press STOP a second time to immediately stop playback of the current cut.
To disable a loop that was enabled while playing a Quickstack or Playlist:
•Press LOOP again. The LOOP button indicator will turn off, the current cut will finish playing, and the Quickstack or Playlist will continue playing.
OR
•Press STOP once. The LOOP button indicator will turn off, the current cut will finish playing, and playback will stop at the end. (Quickstacks will be deleted).Pressing STOP a second time will immediately stop playback
PAUSE BUTTON
The PAUSE button is used to:
1.Pause playback. The button illuminates when active. Press PAUSE again to disengage it and playback will resume from the paused position.
2.Pause recordings. The button illuminates when active. Press PAUSE again to disengage it and recording will resume from the paused position. Note that Pause during Record does not work when using digital input.
3.In Stop mode, PAUSE is used to build a Quickstack or Playlist.
BANK SELECT AND HOT KEY BUTTONS
DigiCart/EX has four Hot Key buttons on its front panel (labeled 1 through 4), which can be used to trigger playout of a pre-assigned cut or Playlist. Any cut or Playlist can be assigned to any Hot Key. Hot Keys allow any cut to be played on command by a single key press.
Whenever an assigned Hot Key is pressed, the corresponding Cut is selected and played at once. (If PLAY RESTART MODE is set to ON COMPLETION, the Cut will be played after any playing Cut and any other Cuts that are waiting to play.) A Hot Key will interrupt any other operation.
Hot Keys can be triggered from an RC-series remote control, a keyboard, or the DigiCart/EX front panel. The front panel buttons are arranged into two banks that can be switched by pressing the BANK SELECT button. In this way, up to eight Hot Keys can be set up for play from the front panel. The button toggles between the two banks, and illuminates when bank B is active.
24BControl Panel • 13

Memory Card Reader
The Memory Card Reader allows the use of SD memory cards for audio storage. The Card Reader appears in the system as a Drive at ID 0, with the standard directories numbered 0 to 9, and an S directory for Stacks.
MEMORY CARD INSERTION
Insert the card label side up, with the contacts facing down. Slide it into the card slot until you feel a slight resistance, then press until the card reaches the end of the slot. The card will return slightly as you release pressure then remain locked in the Card Reader.
If the card is difficult to insert, check its orientation and try again. DO NOT FORCE THE CARD INTO THE READER. Objects inserted into the reader may damage it.
A Memory Card must be formatted in the DigiCart/EX before use. See formatting instructions on page 37. Unformatted cards will display NOT FORMATTED FOR DIGICART and NON-DIGICART DISK.
Cards formatted in a PC cannot be used unless reformatted in DigiCart/EX, and DigiCart formatted cards will not be recognized by a PC or other device.
Most memory cards will mount automatically after a short delay. The display will indicate MOUNTING MEMORY CARD (along with the detected size of the card; this is the total capacity, not the remaining capacity).
If the card does not mount automatically, press the Stop button to mount the card. The display will indicate CHECKING FOR MEMORY CARD. If the card is recognized the display will indicate MOUNTING MEMORY CARD. If the card is not recognized then the display will indicate NO MEMORY CARD FOUND. This can be caused by a faulty or incompatible card.
If the Card has been formatted the display will show INITIALIZING MEMORY CARD followed by the contents of Directory 0 or the first directory that contains recordings. Unformatted cards will display CARD NOT FORMATTED FOR DIGICART.
If a Card is inserted during Record or Playback, it may or may not mount automatically when the operation is stopped. If not, select Drive 0 and press Stop to mount the card.
MEMORY CARD REMOVAL
It is best to remove and insert memory cards only when the DigiCart is idle. REMOVING A CARD DURING MEMORY CARD PLAYBACK, MEMORY CARD RECORD, COPY OR RENAME OPERATIONS MAY RESULT IN LOSS OF DATA.
To remove the memory card, press inward lightly until the card reaches the back of the card slot. Upon release the card will unlatch and should be easily removed from the card slot. DO NOT USE FORCE TO REMOVE THE CARD, try pressing inward again until the mechanism releases the card.
Wait for the DigiCart to display the message MEMORY CARD REMOVED PLEASE WAIT... before continuing operation.
If you do remove a card during Playback, DigiCart/EX will lock out selection of the Card Reader (Drive 0) until after Playback has stopped and a MEMORY CARD REMOVED message has been displayed.
14 • 24BControl Panel

APPROVED MEMORY CARDS
The following memory cards have been tested and are known to work with DigiCart/EX.
•Kingston UltimateX 100X SDHC Class 10 SD10G2 - 4GB, 8GB and 16GB.
•Kingston SDHC Class 10 SD10V – 8 GB.
•Kingston Ultimate 100x SDHC Class 6 SD6G2 – 8 GB.
•Patriot LX Secure Digital High Capacity Class 10 – 8GB.
•PNY Professional High Speed SDHC Class 10 20MB/s – 8 GB.
•Sandisk Extreme SDHC UHS-1 Card Class 10 - 4GB, 8GB, 16GB.
•Sandisk SDHC Card Class 4 – 8 GB.
•Sony SDHC Class 10 SF-8NX/TQ2 - 8GB.
•Team Group Inc. SDHC High Performance Memory Card Class 10 – 4GB.
NOTES ON CARD COMPATIBILITY
Memory cards contain controller electronics that adhere to different revisions of industry standards. Because of these differences, some cards will not mount automatically upon insertion. If you are unable to find Approved cards, try to use cards that are SDHC compliant, and speed class 6 or greater, preferably class 10. The higher speed is not required for operation, but it increases the chances that the card uses newer industry standards.
Approved cards are known to mount automatically. Most cards will work well in the system even if they require mounting with the Stop button, however a few have been seen to cause other issues. See page 62 for notes on troubleshooting memory card operation.
24BControl Panel • 15
Chapter 3
File Organization and Navigation
Overview of Drive and Directory Structure
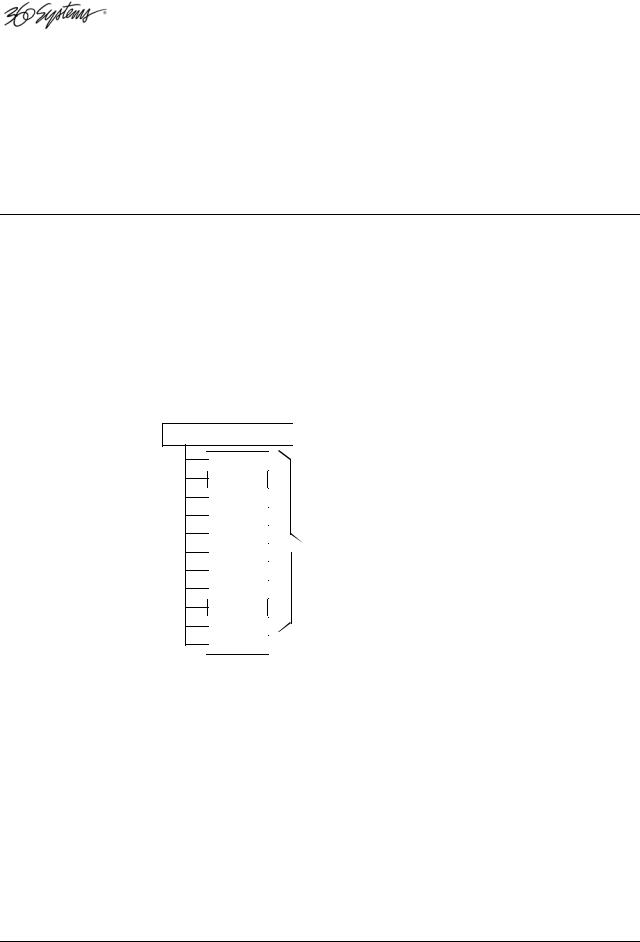
DigiCart/EX retains the same drive and directory structure as previous DigiCarts. DigiCart/EX can have up to seven “logical” drives (numbered 0-6). Drive 0 is always the Memory Card Reader. Drive 1 is always the internal hard disk. The internal hard disk can be partitioned into 1 to 5 logical drive partitions (see Format Disk under Utility Menu Features). Finally, up to four of remaining drive numbers may be mapped to Network Drives. (See Mount Network Drive under Utility Menu Features.)
It may seem overwhelming to consider that DigiCart/EX may access tens of thousands of individual recordings and Playlists. Yet the ID and name system of DigiCart/EX simplifies and clarifies the location and identity of every cut and Playlist.
NATIONAL NEWS
0 |
1 |
2 |
3 |
4 |
5 |
6 |
7 |
8 |
9 |
S |

 Drive Level
Directories
 Each may contain up to 1000 recordings
 Stack Directory
May contain up to
1000 Playlists
Each drive has 11 directories (numbered 0 through 9, plus “S”). Drives and Directories can be labeled for convenience. Each directory contains 1,000 Index numbers for audio files, called “Cuts”. Cuts can be of any length, but are identified by this fixed Indexing scheme. Directory S is reserved for up to 1,000 Playlists (or Stack files). Playlists are not audio files, but merely listings of file IDs. Audio files cannot be stored in the Stack Directory.
Network Drives are folders on a server, PC or other network storage resource. Four can be mounted on a single DigiCart/EX at a time. However, many of these “virtual drives” can be created on the network, and selected through the Mount Network Drive process. These folders can be shared by multiple DigiCart/EX units, and with proper network configuration can also be shared by other PC users.
16 • 26BFile Organization and Navigation

Files may be accessed by name or by file ID number. The key to the file ID system is an easily understood five-character basic identifier. The first character represents the logical disk drive.
Drive Level ID:
Indicates DigiCart
drive number 0-6
1 
 .
. 
 8
8
File ID: Index number within
each directory

 027
027 
 L
L
Directory ID:
Indicates DigiCart Directory
number 0-9, or S for Stack
(Playlist) directory
Playlist modifier: Indicates L for linear, or R for Rotating Playlist
After a "." (decimal) the second character represents one of ten directories, ranging from 0 - 9. A unique eleventh character, "S" is used to identify the Stack Directory (or Playlist Directory).
The next three digits identify individual cuts or Playlists: 000-999 so there can be 1000 cuts in each of the 10 regular directories. An extra character follows Playlist numbers: L for Linear Playlists, R for Rotating Playlists. For example:
Cut 27 in Directory 8 on the internal hard disk would have the ID: 1.8027 Rotating Playlist 5 on the Memory Card Reader would be identified as: 0.S005R
Every drive, directory, cut and Playlist can be given a 15-character alphanumeric name, so it is not necessary to crosscheck between a printed index and the screen display. DigiCart/EX can sort contents numerically by file ID, or alphabetically by name.
Drive Organization Strategy
As a network organizational strategy, it is recommended that all DigiCart/EX recorders in a network be configured largely with the same drive organization. This will simplify network management and sharing of Playlists and Hot Key assignments.
Each DigiCart drive has 10 fixed directories for audio recordings and one additional directory for Playlists. Each directory can hold up to 1000 files of any length. Depending upon your recording and organizational requirements, you may choose to partition this internal disk with 2 to 5 equally sized partitions within this 137 GB system capacity.
DigiCart/EX has a flexible drive arrangement that allows a mix of internal drive partitions and network drives. There are seven (0 through 6) drive selection numbers available on a DigiCart. Drive 0 is always the removable media drive. Drive 1 is always the first hard disk partition. Drive 6 is always available for a network drive assignment. Drives 2 through 5 can be either internal disk partitions or mapped to network drives. As more local partitions are created, fewer drive numbers are available to map to network drives. Once the internal disk is partitioned, drive numbers associated with those partitions cannot be re-mapped to network drives unless the internal disk is reformatted.
26BFile Organization and Navigation • 17

For example, if the internal disk is partitioned into three drives (Numbers 1, 2, and 3), three drive numbers (4, 5, and 6) are available to map network drives. If the internal disk is not partitioned (is only Drive 1), then drives 3, 4, 5, and 6 are available to map network drives; Drive 2 is not available in this case. See DigiCart/EX will exit the Utility menu when formatting is complete.
Allocation of Logical Drives on page 37 for detailed information on setting up drives.
Network drives become available to DigiCart/EX by mapping their mount path to a DigiCart/EX drive number. A mount path is simply a shared directory on the server. From the DigiCart/EX’s point of view, it looks like another drive, hence the name “network drive.” Using the Mount Network Drive utility, a list of available mount paths from the server can be viewed and selected for mounting to a particular drive number. Drive number-to-mount path associations can be changed at any time. Network drives are available to all DigiCart/EX recorders concurrently.
A common scheme for network organization will be to create a central library drive on the network. The central library is intended to hold recordings and Playlists that need to be available to all DigiCart/EX recorders on the network. Like all other DigiCart drives, the central library drive will have ten sub-directories and a Playlist (Stack) directory. Each sub-directory can be organized to hold homogenous material such as music or sound effects. While many “virtual drives” can be created on the network server, consideration should be given to the organizational strategy, so that DigiCart/EX users will be able to locate desired drive mount paths.
Different DigiCart/EX recorders in the facility may each have a different number of internal drive partitions, depending upon individual work requirements. Since drive 6 is always available for network use, regardless of the number of hard disk partitions, it should be assigned to your central library. Drives 3, 4, and 5 can be assigned to more task-specific network drives, such as a particular entertainment project or news production.
NETWORK PLAYLISTS AND HOT KEYS
Playlists on network drives can be accessed and played by any DigiCart/EX. It is recommended that all files called from a Playlist reside on the same drive as the Playlist (sources can be in any directory on the drive). Because individual DigiCarts might have unique drive path assignments, Playlists may not play correctly (or at all) if calls are being made to drives that are not correctly mapped.
Hot Key assignment lists (a new feature of DigiCart/E) allow users at any DigiCart/EX on the network to access the same Hot Key assignments. This allows several people to use the same setup when working together on a production. Hot Key assignment lists can be used concurrently.
Each drive contains one Hot Key assignment list. The Hot Key list on each drive is automatically selected when the PLAY HOT KEY USING parameter in the Setup menu is set to “Net Drive.” All files called from a Hot Key list must reside on the same drive as the Hot Key list, itself, though source files can be in any directory on that drive.
The PLAY HOT KEY USING parameter can be set to “Local Assignment,” causing DigiCart/EX to use a different Hot Key assignment list that is associated only with that particular DigiCart. Local Hot Keys can be assigned to cuts or Playlists on a local drive, only. If the PLAY HOT KEYS USING parameter is set to “Local Assignments”, the Local Hot Keys list will always be used, regardless of the current drive.
18 • 26BFile Organization and Navigation
Loading...