


TRX-1R
GB
TRX-1
(TRX-1T + TRX-1R)
Wireless Unit
Système sans fil
(TRX-1R) (TRX-1T)
OWNER’S MANUAL
MODE D’EMPLOI
BEDIENUNGSANLEITUNG
BRUKSANVISNING
MANUALE DI ISTRUZIONI
MANUAL DE INSTRUCCIONES
GEBRUIKSAANWIJZING
CAUTION: READ THIS BEFORE OPERATING TRX-1
• To assure the finest performance, please read this manual
carefully. Keep it in a safe place for future reference.
• Install TRX-1 in a well ventilated, cool, dry, clean place - away
from direct sunlight, heat sources, vibration, dust, moisture, and/
or cold. Allow ventilation space of at least 10 cm on the top, 10
cm on the left and right, and 10 cm on the back of these units.
• Locate TRX-1 away from other electrical appliances, motors, or
transformers to avoid humming sounds.
• Do not expose TRX-1 to sudden temperature changes from cold
to hot, and do not locate TRX-1 in a environment with high
humidity (i.e. a room with a humidifier) to prevent condensation
inside TRX-1, which may cause an electrical shock, fire, damage
to TRX-1, and/or personal injury.
• Avoid installing TRX-1 where foreign object may fall onto
TRX-1 and/or TRX-1 may be exposed to liquid dripping or
splashing. On the top of TRX-1, do NOT place:
- Other components, as they may cause damage and/or
discoloration on the surface of TRX-1.
- Burning objects (i.e. candles), as they may cause fire, damage
to TRX-1, and/or personal injury.
- Containers with liquid in them, as they may fall and liquid may
electrical shock to the user and/or damage to TRX-1.
• Do not cover the rear panel of TRX-1 with a newspaper,
tablecloth, curtain, etc., in order not to obstruct heat radiation. If
the temperature inside TRX-1 rises, it may cause fire, damage to
TRX-1, and/or personal injury.
• Do not plug in TRX-1 to a wall outlet until all connections are
complete.
• Do not operate TRX-1 upside-down. It may overheat, possibly
causing damage.
• Do not use force on switches and/or cables.
• When disconnecting the power cable from the wall outlet, grasp
the plug; do not pull the cable.
• Do not clean TRX-1 with chemical solvents; this might damage
the finish. Use a clean, dry cloth.
• Only voltage specified on TRX-1 must be used. Using TRX-1
with a higher voltage than specified is dangerous and may cause
fire, damage to TRX-1, and/or personal injury. YAMAHA will
not be held responsible for any damage resulting from use of
TRX-1 with a voltage other than specified.
• To prevent damage by lightning, disconnect the AC power cable
(or AC adaptor) from the wall outlet during an electrical storm.
• Do not attempt to modify or fix TRX-1. Contact qualified
YAMAHA service personnel when any service is needed. The
cabinet should never be opened for any reasons.
• When not planning to use TRX-1 for long periods of time (i.e.
vacation), disconnect the AC power plug (or AC adaptor) from
the wall outlet.
• Use only the included AC adaptor with the TRX-1T. Using
another adaptor may cause a malfunction or fire.
• Do not use the AC adaptor with any device other than the TRX1T.
WARNING
TO REDUCE THE RISK OF FIRE OR ELECTRIC SHOCK,
DO NOT EXPOSE THESE UNITS TO RAIN OR MOISTURE.
SPECIAL INSTRUCTIONS FOR U.K. MODEL
IMPORTANT
The wires in this mains lead are coloures in accordance with the
following code:
GREEN-and-YELLOW:Earth
BLUE:Neutral
BROWN:Live
As the colours of the wires in the mains lead of this apparatus
may not correspond with the coloured markings identifying the
terminals in your plug proceed as follows: The wire which is
coloured GREEN-and-YELLOW must be connected to the
terminal in the plug which is marked by the letter E or by the
safety earth symbol or coloured GREEN or GREEN-and YELLOW. The wire which is coloured BLUE must be
connected to the terminal which is marked with the letter N or
coloured BLACK. The wire which is coloured BROWN must be
connected to the terminal which is marked with the letter L or
coloured RED.
For U.K. customers
If the socket outlets in the home are not suitable for the plug
supplied with this appliance, it should be cut off and an
appropriate 3 pin plug fitted. For details, refer to the instructions
described above.
Note:
The plug severed from the mains lead must be destroyed,
as a plug with bared flexible cord is hazardous if engaged in a live
socket outlet.
For U.K. and European customers
We, the manufacturer YAMAHA hereby declare that the TRX-1
is in compliance with the essential requirements and other
relevant provisions of Directive 1999 / 5 / EC.
The TRX-1 uses wireless signals in the 864 MHz
band. Using it in close proximity to other devices
that utilize the same band range may cause
pauses or interruptions in sound output, or
cause the unit to lose connections with the
receivers. The TRX-1 may also cause certain
medical equipment to function improperly.
Take care to ensure that no interference will
occur before use.
This unit is not disconnected from the AC power source as long
as it is connected to the wall outlet, even if this unit itself is
turned off. This state is called the standby mode. In this state,
this unit is designed to consume a very small quantity of power.
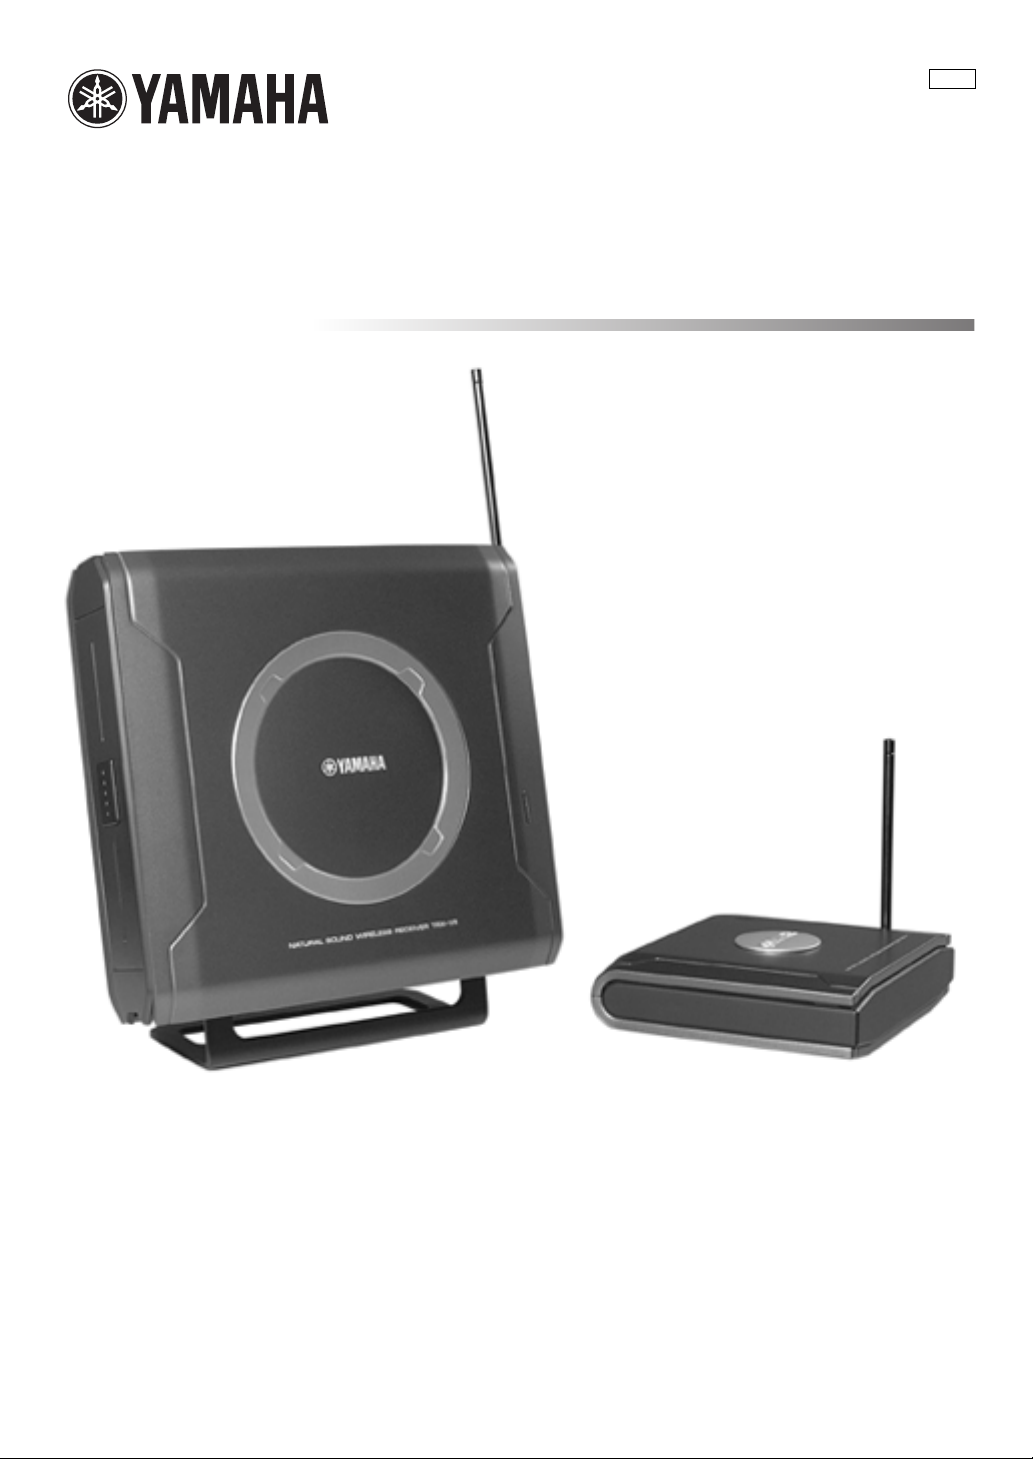
The TRX-1 is a wireless system for surround sound speakers, which allows you to enjoy your AV experience in a room
free of the clutter of speaker cables. It consists of a wireless transmitter unit (TRX-1T) and a wireless receiver unit (TRX1R).
This manual is printed prior to production. Design and specifications are subject to change in part as a result of
improvements, etc., In case of differences between the manual and the product, the product has priority.
CONTENTS
SUPPLIED ACCESSORIES...................................1
CONTROLS AND FUNCTIONS.............................2
Wireless transmitter unit (TRX-1T)......................2
Wireless receiver unit (TRX-1R)..........................2
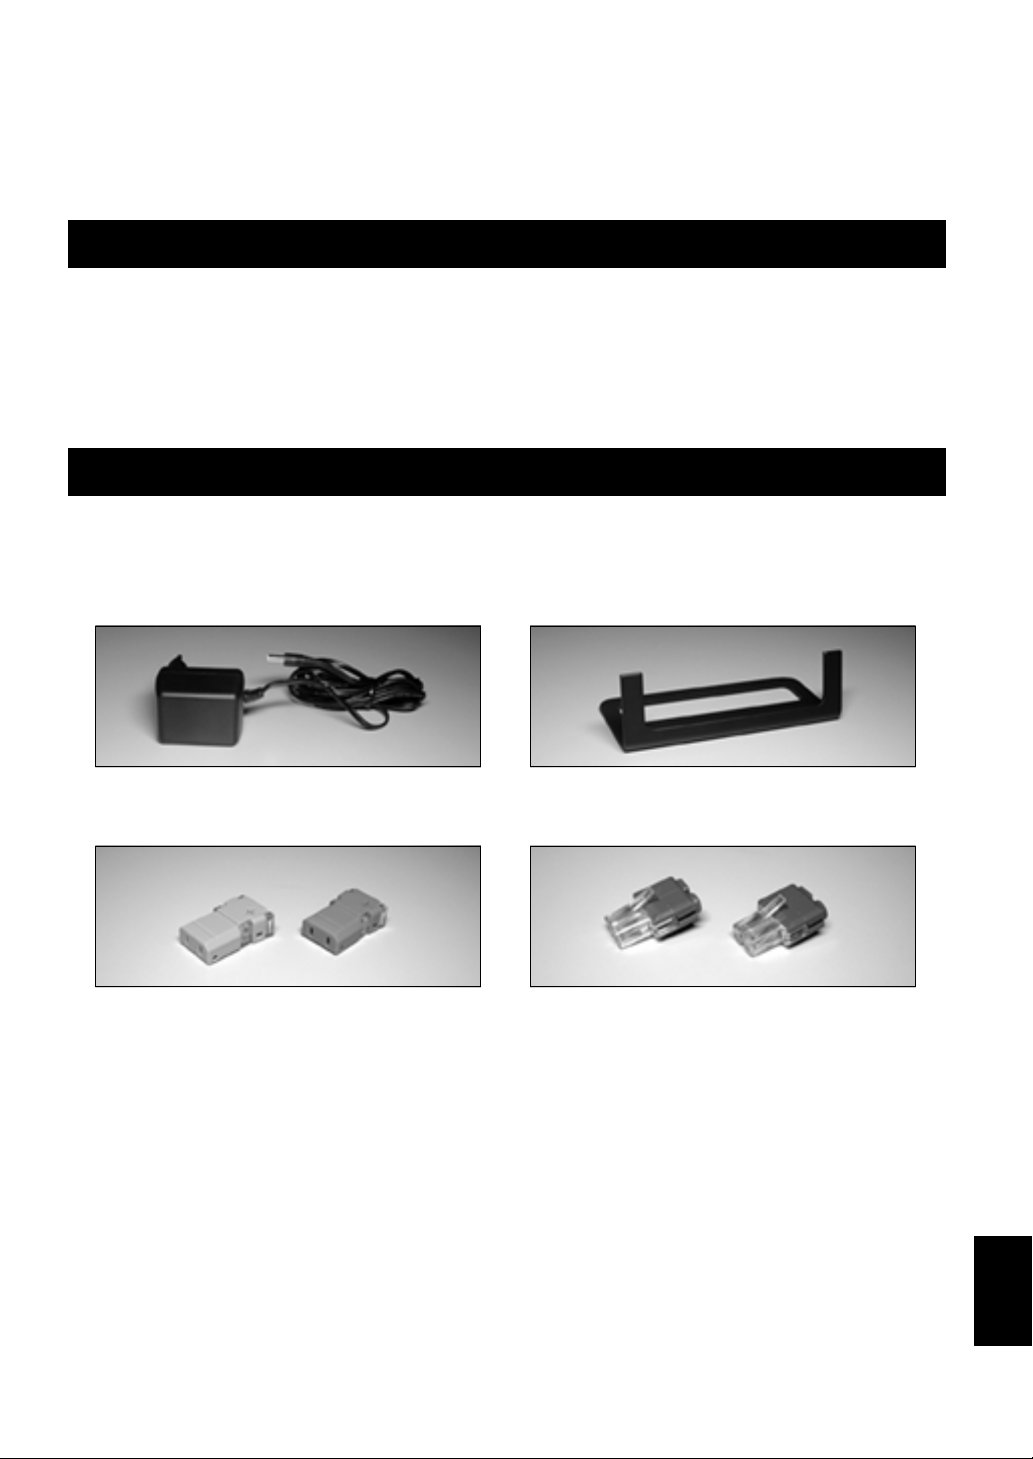
SUPPLIED ACCESSORIES
Please check that you received all of the following parts.
• AC adaptor
(Europe model: 430407890100)
(U.K. model: 430407890110) • Stand
• Cable plugs (A)
(Blue x 1, Gray x 1)
• Cable plugs (B)
CONNECTIONS.....................................................3
Placing the units..................................................3
Connecting the wireless transmitter unit .............3
Connecting the wireless receiver unit .................4
OPERATIONS........................................................5
SPECIFICATIONS .................................................5
(Blue x 1, Gray x 1)
English
1
 Loading...