


TE100-P1P

TABLE OF CONTENTS
ABOUT THIS GUIDE..................................................................................3
INTRODUCTION.........................................................................................4
PACKAGE CONTENTS ....................................................................................5
SYSTEM REQUIREMENTS...............................................................................5
GENERAL FEATURES.....................................................................................6
PRODUCT VIEW.............................................................................................7
HARDWARE INSTALLATION.................................................................9
NETWORKING APPLICATION .........................................................................9
INSTALLING THE PRINT SERVER.................................................................. 10
USING THE UTILITIES ...........................................................................11
AUTO-RUN INSTALLATION ......................................................................... 12
PS-UTILITY................................................................................................. 13
Installing PS-Utility................................................................................ 13
Using PS-Utility......................................................................................14
PS
WIZARD........................................... ERROR! BOOKMARK NOT DEFINED.
WEB CONFIGURATION..........................................................................20
WEB CONFIGURATION UTILITY ..................................................................20
HOME..........................................................................................................21
SETUP WIZARD ........................................................................................... 22
Second HTTP Port..................................................................................25
Save to Print Server................................................................................ 26
CHANGE IP ADDRESS..................................................................................27
PRINTER INFORMATION............................................................................... 28
FACTORY RESET .........................................................................................29
FIRMWARE UPGRADE.................................................................................. 30
ABOUT........................................................................................................31
PRINTING IN WINDOWS 95/98/ME...................................................... 32
INSTALLING THE LPR FOR TCP/IP PRINTING CLIENT .................................33
- 1 -

ADDING LPR PRINTER PORTS.....................................................................35
PRINTING FROM WINDOWS 95/98/ME.........................................................37
SETTING TCP/IP PRINTING SETTINGS.........................................................40
PRINTING IN WINDOWS 2000/XP ........................................................42
SETTING UP WINDOWS 2000 TCP/IP PRINTING.......................................... 42
SETTING UP WINDOWS XP TCP/IP PRINTING............................................. 50
PRINTING IN MAC OS ............................................................................ 57
RENDEZVOUS USES IN MAC OS 10.2......................................................... 57
- 2 -

ABOUT THIS GUIDE
This manual provides instructions and illustrations on how to use your
10/100Mbps Parallel Print Server, including:
z Chapter 1, Introduction, provides the general information on
the product.
z Chapter 2, Hardware Installation, describes the hardware
installation procedure for the product.
z Chapter 3, Using the Utilities, helps you to install and use the
software.
z Chapter 4, Web Configuration, completes the configuration
using the web browser.
z Chapter 5, Printing in Windows XP, lets you complete printing
task through your print server in Windows XP environment.
z Chapter 6, Printing in MAC OS, lets you complete printing task
through your print server in MAC OS environment.
Please note that the illustrations or setting values in this manual are
FOR YOUR REFERENCE ONLY. The actual settings and values
depend on your system and network. If you are not sure about the
respective information, please ask your net work administrator or MIS
staff for help.
- 3 -

1
INTRODUCTION
Congratulations on purchasing your 10/100Mbps Parallel Print Server,
the easiest and fastest way to deploy printers on your network.
This compact print server can connect your network through a switch
or hub between PC/Notebook and print server anywhere you wish to
locate printer services. It manages the flow of print files from your
workstation or file server to its connected printers, delivering print
jobs to high-performance printers much faster than a file server or a
PC acting as a print server can.
The 10/100Mbps Parallel Print Server features a Web-based
Configuration Utility, which allows you to set up the print server
through the web browser easily and quickly. It also includes a
simple software utility PS-Utility, a user-friendly program that allows
you to complete settings for the print server.
- 4 -

Package Contents
Unpack the package and check all the items carefully, and inspect that
you have the following:
♦ One TE100-P1P
♦ One AC Power Adapter suitable for your country’s electric power
service.
♦ One Multiple-Language Quick Installation Guide.
♦ One Installation CD-ROM containing the PS-Utility program and
the User’s Guide.
If any item contained is damaged or missing, please contact your local
dealer immediately. Also, keep the box and packing materials in
case you need to ship the unit in the future.
System Requirements
♦ Operating System:
Microsoft Windows 95/98/ME/NT/2000/XP/2003.
Apple Mac OS X or above
♦ For Web Configuration:
Java-enabled web browser, such as Microsoft® Internet
Explorer 5.0 and Netscape Navigator 6.0.
- 5 -

General Features
♦ Compliant with Bi-directional 36-pin parallel port
♦ Equipped 10/100 auto-MDIX Fast Ethernet LAN port
♦ Multi protocol support is ideal for shared printing in mixed-LAN
environments
♦ Windows-based program makes it possible to set up in a few
minutes.
♦ Offer LPR program for Windows 95/98/Me TCP/IP printing
♦ IP assignment support for DHCP
♦ Support Web configuration
♦ Provide Flash memory for easy firmware upgrade
♦ Support IPP for Windows 2000/XP
♦ Support second http port for remote web configuration.
- 6 -
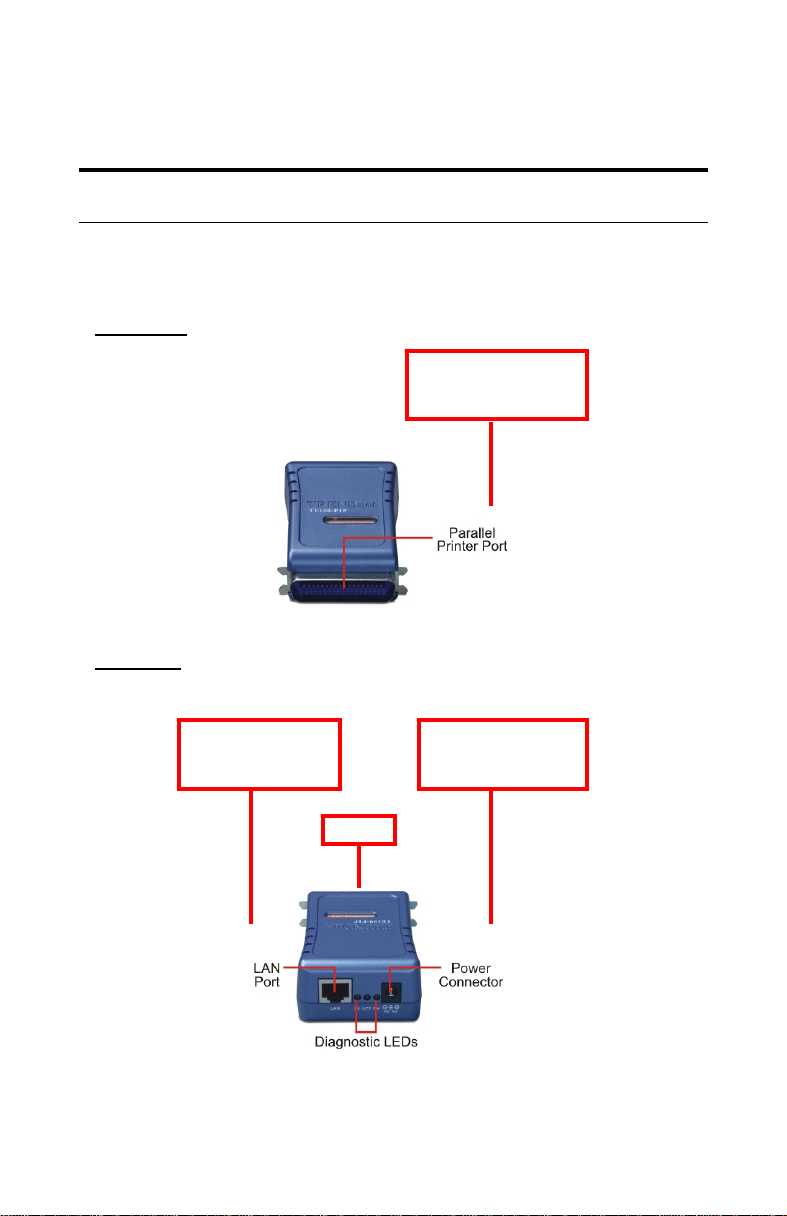
Product View
This section describes the externally visible features of the print
server.
Front View
Rear View
LAN Connector –
plug your LAN cable
to this connector.
Parallel Printer Port
connect the print
server to a Printer Port
Power Connector –
plug the AC Power
Adapter to this jack.
LEDs
- 7 -

* There are three green LED indicators on the rear panel:
LEDs Description
Power
Steady light confirms that the Print Server is powered
on.
LPT
Link/Act
When it is blinking, the printer connected is printing.
Steady light confirms that the print server has a good
connection to your network.
When it is blinking (briefly dark), the print server is
receiving/ transmitting data from/to the network.
- 8 -
2
HARDWARE
INSTALLATION
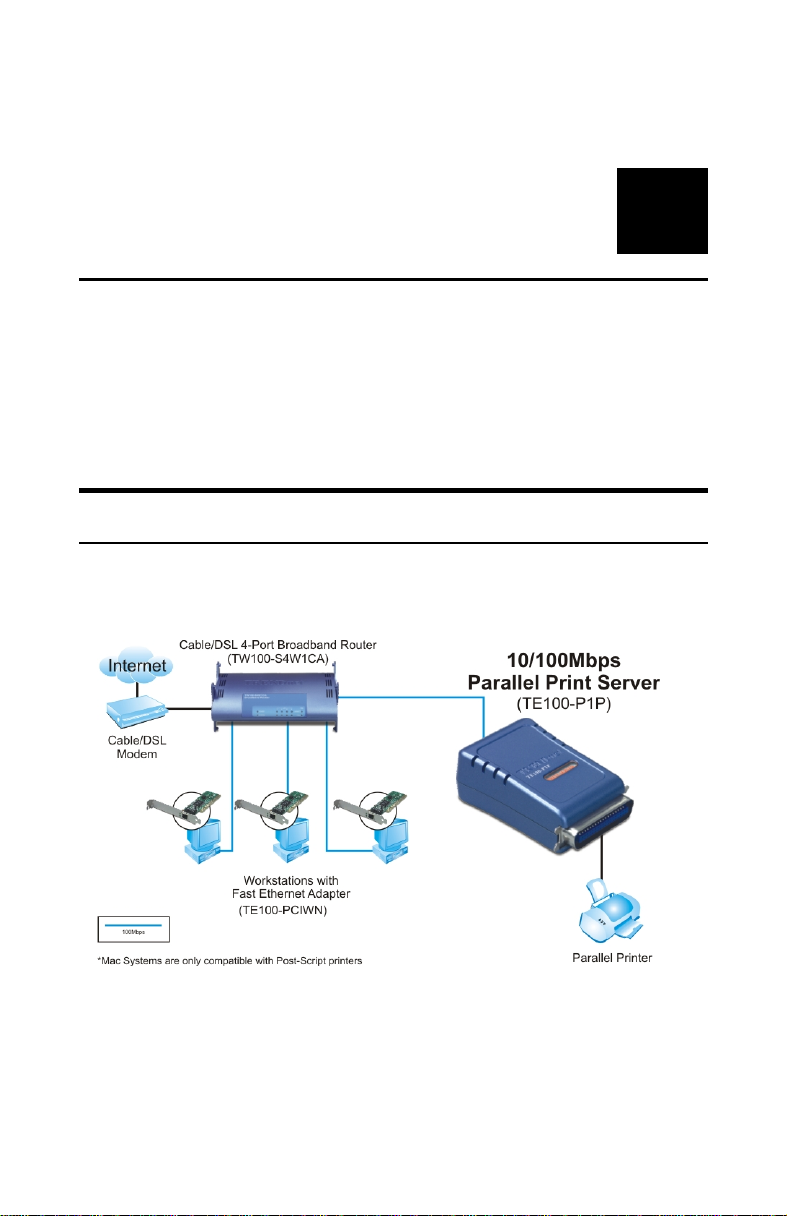
Networking Application
The following diagram explains the application of your print server.
Network Print Server Solution
- 9 -

Installing the Print Server
Follow these steps for a trouble-free start of print server operations
with your pocket-sized Print Server.
1. Confirm proper operation of the printer to be connected to the print
server.
2. When you have confirmed proper operation of the printer, turn off
the power.
3. Confirm that your network is operating normally.
4. Connect the print server to the network (through the RJ-45
connector of the print server).
5. While the printer is powered off, connect the print server to the
printer’s port.
6. Turn on the printer’s power.
7. Connect the DC end of the AC Power adapter to the DC power
input socket of the print server and the AC end to the wall outlet.
This will supply power to the print server immediately.
NOTE: This print server is built with a default IP Address. To
prevent from any conflict in your network, it is recommended to use
the PS-Utility program to change the IP setting when there is some
other device’s IP Address is the same as the print server’s default
IP Address.
- 10 -

3
USING THE UTILITIES
This chapter describes the software utilities for the print server,
including how to set up your print server with these utility. The PS-
Utility is designed with a user-friendly interface that allows you to set
up and administer the print server easily.
- 11 -
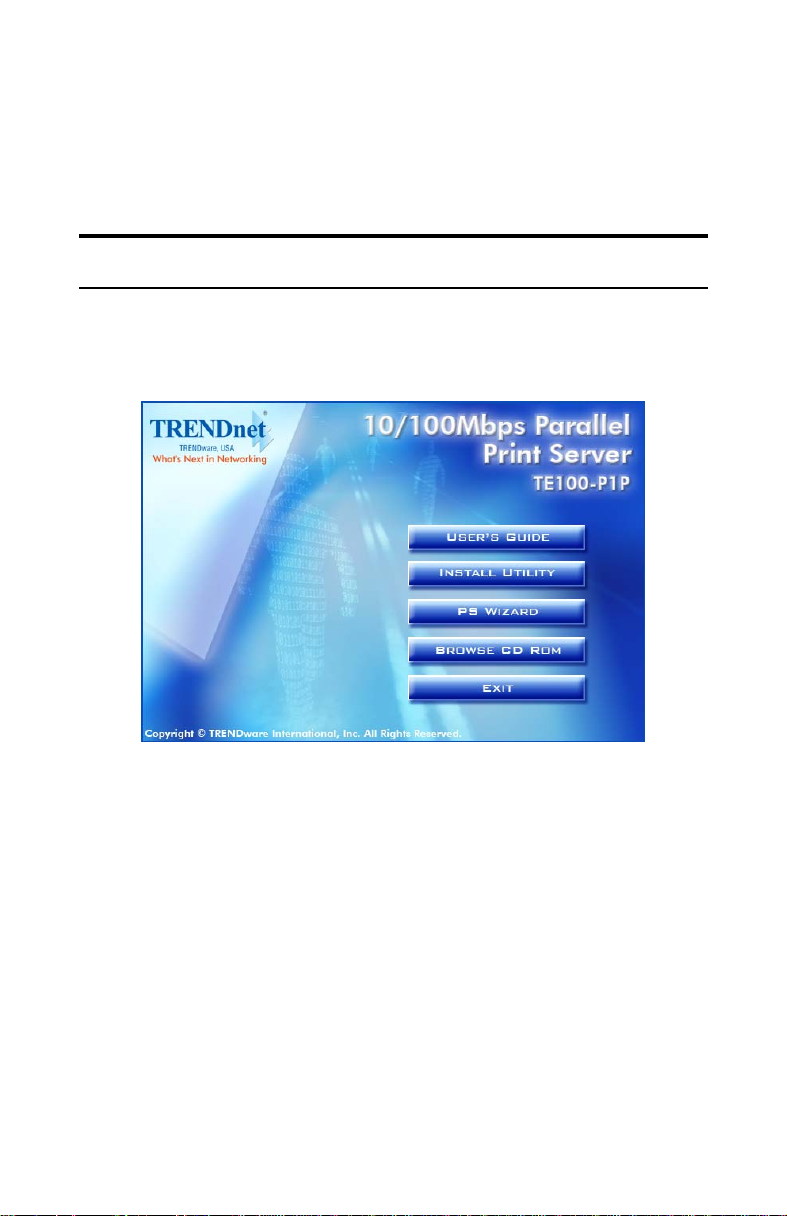
Auto-Run Installation
Insert the Installation CD-ROM into your computer’s CD-ROM drive
to initiate the Auto-Run program, and the menu screen will appear as
below.
• User's Guide – click to preview the User's Guide in PDF format
for detailed information of the Print Server.
• Install Utility – click to install PS-Utility. Please refer to the
next section for detailed information on installing the utility.
• PS Wizard – click to setup printer port connectivity
• Browse CD – if you want to browse the contents of the
Installation CD-ROM, click this button and the contents of the
CD will be available for preview.
• Exit – click to close the Auto-Run program.
- 12 -
PS-Utility
To avoid the conflict in your network, you can use PS-Utility to
change the related settings of your print server (such as the IP address)
after finishing the installation.
Installing PS-Utility
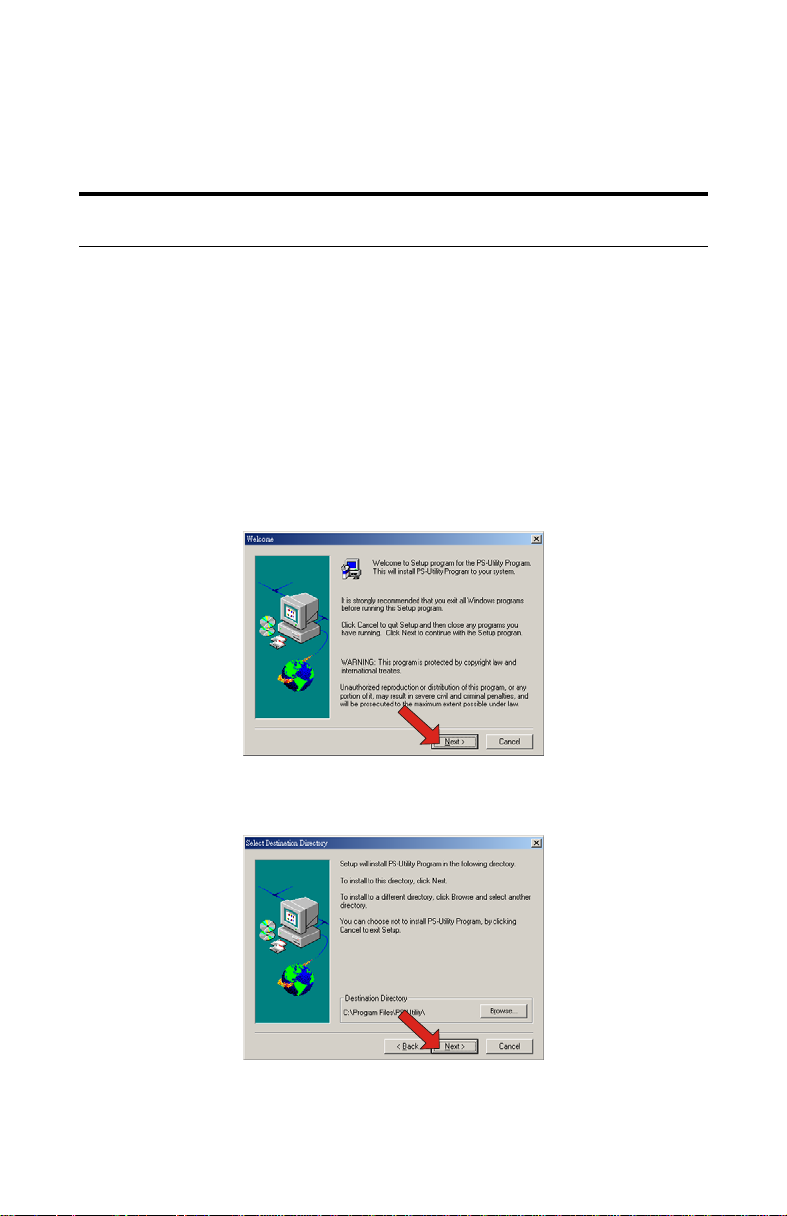
1. Click Install Utility from the Auto-Run menu screen. Once
executed, the Setup program will extract files to launch the
InstallShield Wizard; then, click Next > in the welcome screen of
InstallShield Wizard.
2. Choose the destination location. If no specific requirement,
leave the default setting and click Next >.
- 13 -
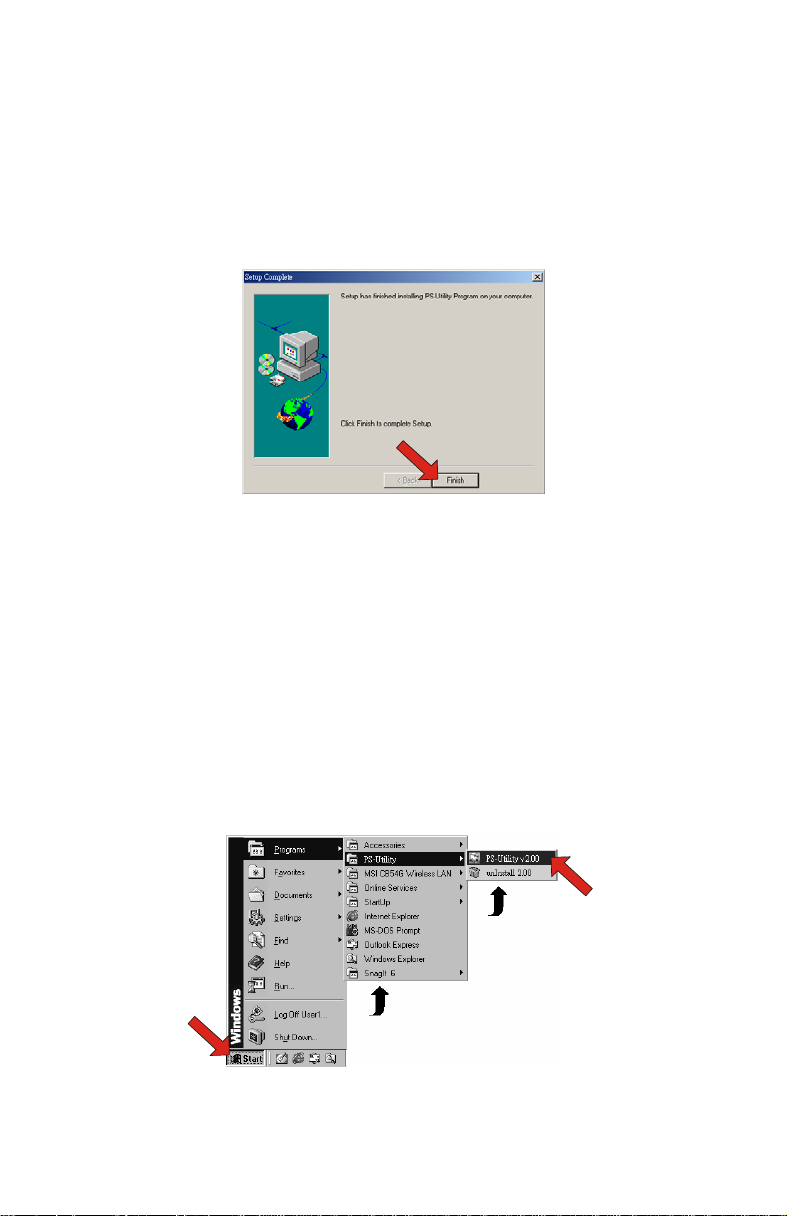
3. The InstallShield Wizard starts to install the software, and the
Progress bar indicates the installation is proceeding.
4. When completed, click Finish.
After installing the utility, the application program for the print server
is automatically installed to your computer, and creates a folder in
Start\Programs\PS-Utility.
Using PS-Utility
This section describes the operation of PS-Utility. To launch PSUtility:
1. Click Start -> Programs -> PS-Utility, and then click the PSUtility v2.00 item.
- 14 -
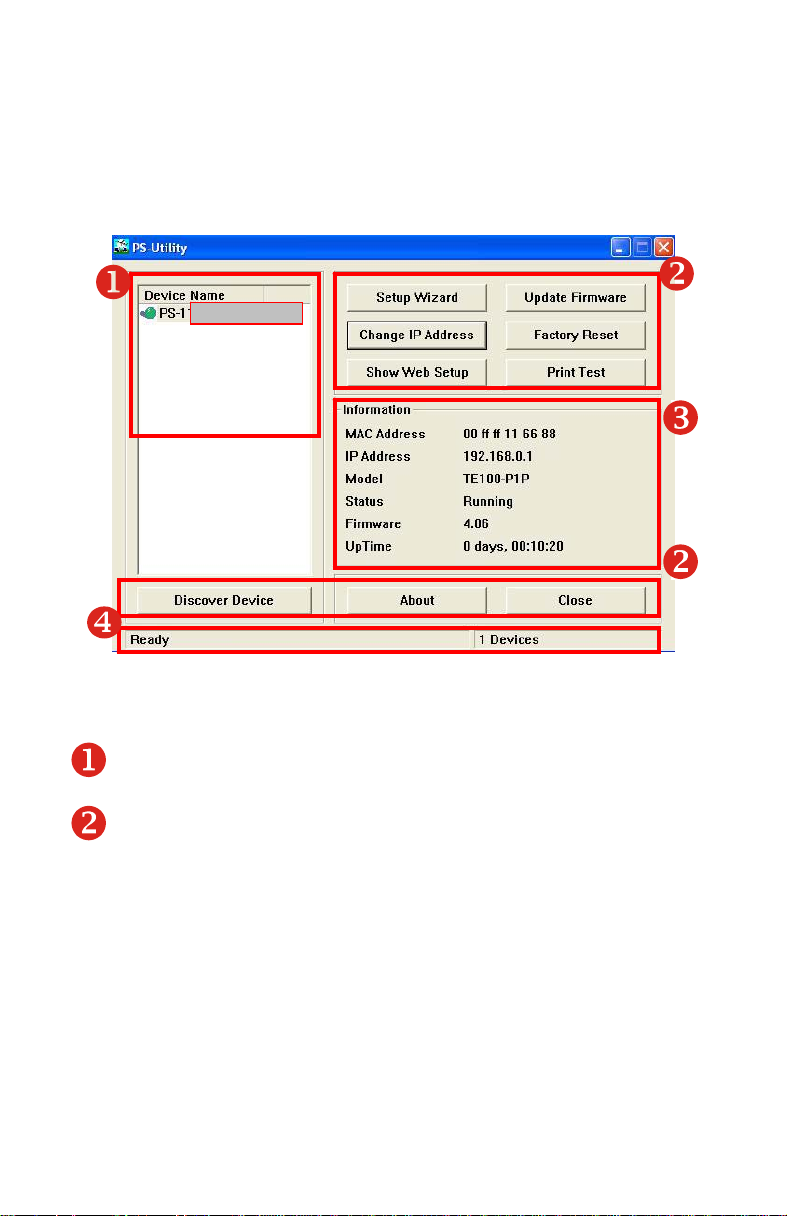
2. The main screen will appear as below, and it starts to search the
connected print server within the network.
Your print server
Component Features:
1. Device List: Display the connected print server within the
network.
2. Control Buttons
- Setup Wizard: Click this button to setup the configuration
- Update Firmware: Click this button to update the firmware
of the selected print server.
- Factory Reset: Click this button to reload the factory settings
of the print server.
- 15 -
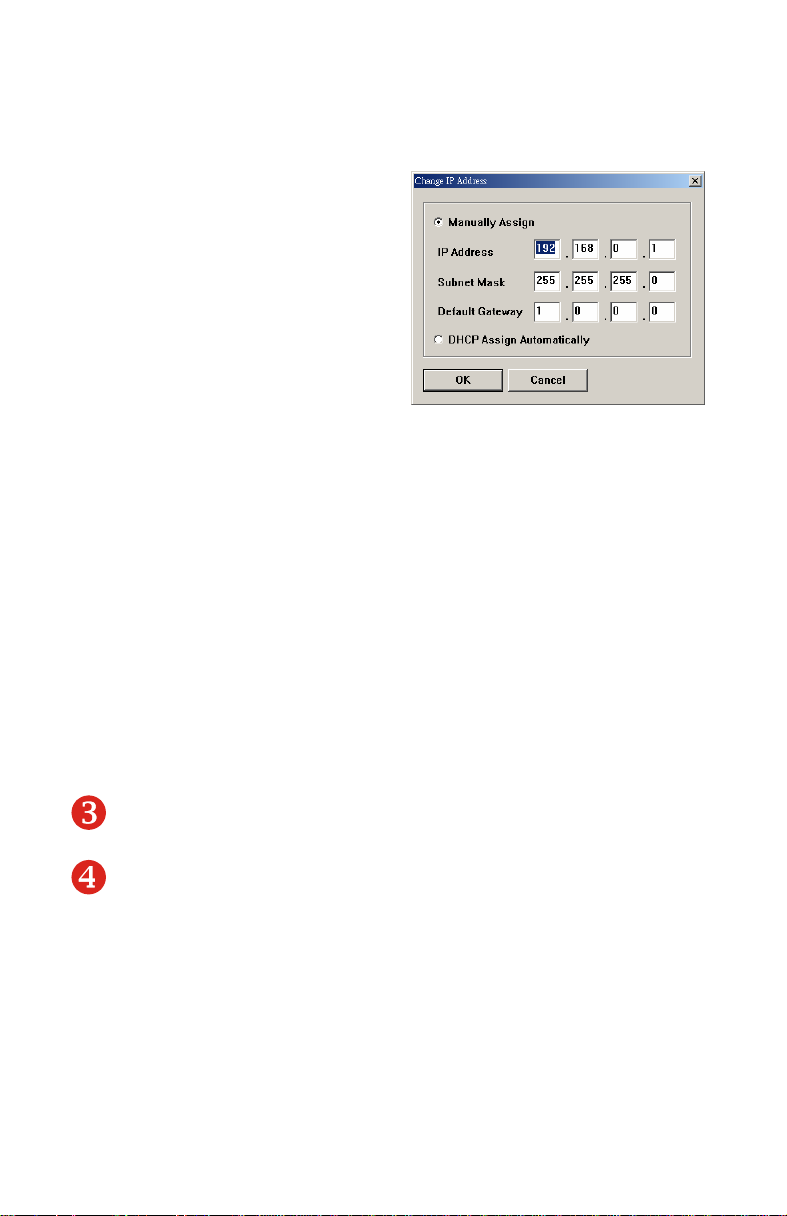
- Change IP Address:
Click this button to bring
up the following dialog
box, allowing you to
change the IP Address.
In this dialog box, you can
select either Manually
Assign or DHCP Assign
Automatically. When
completed, click OK.
- Show Web Setup: Click this button to open your web
browser and launch the Configuration Utility. Alternately,
you can double-click the print server in the Device List to
launch the Configuration Utility.
- Print Test: Once the printer has been setup, click this button
to test a page
- Discover Device: Click this button to search the connected
print server again.
- About: Click this button to bring up a window containing the
basic information of PS-Utility.
- Close: Click this button to exit PS-Utility.
3. Information Field: Display the basic information of the selected
print server in the Device List.
4. Status Bar: Display the system status.
- 16 -
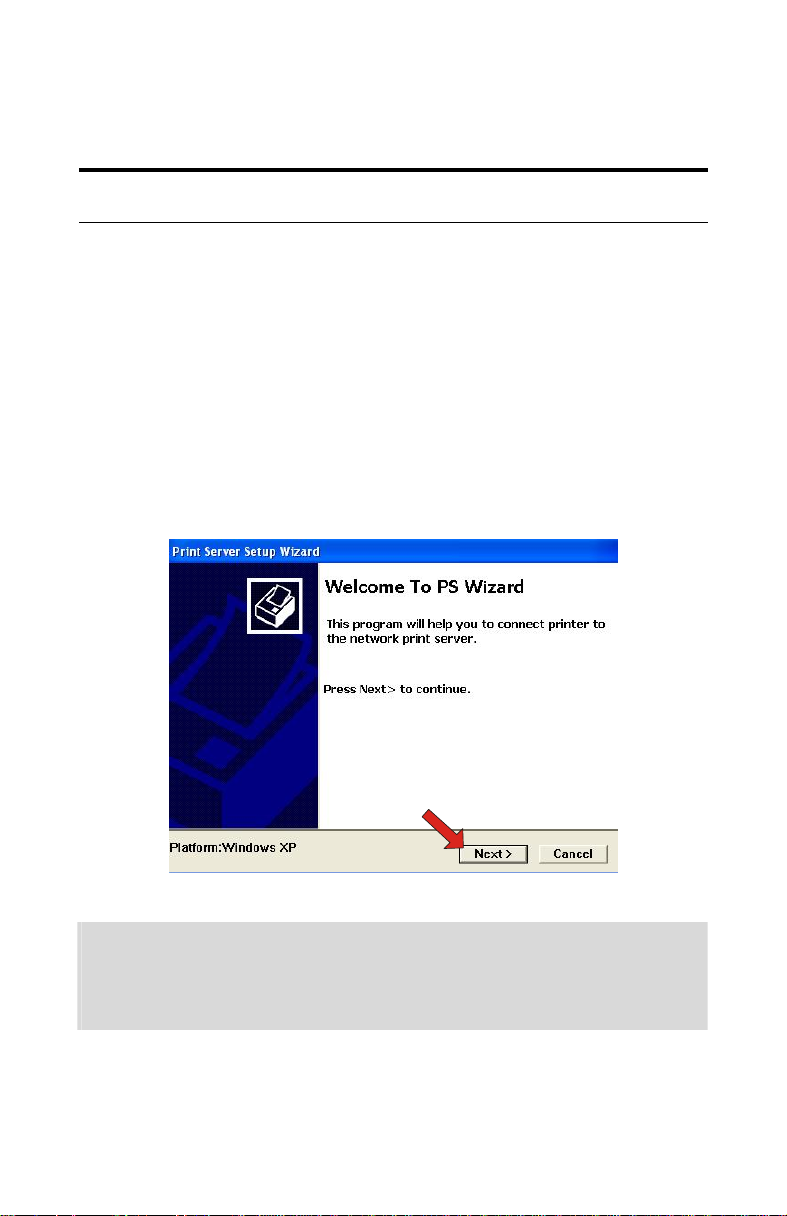
PS Wizard
Note: The PS Wizard doesn’t support Windows 95/98/ME. The
user can refer chapter 5 “Printing in Windows 95/98/ME” to set
up for printing with Windows 95/98/ME.
PS Wizard is a convenient utility that allows you to set up the print
server’s port connection.
To launch PS Wizard:
1. Insert the Installation CD-ROM into your computer’s CD-ROM
drive, and click PS Wizard button. The welcome screen appears
as below. Click Next >.
NOTE: For some specific printers, you may need to connect the
printer to the computer and install the driver. In this case, connect
it to the computer and install the driver first, and then connect it to
the print server.
- 17 -

2. In the following window, select one printer in the Printer List to
set up port connection, and then click Next >.
Choose one connected
printer within the network.
3. Select one printer port in the Print Server List, and click Next >.
Your print server name
Your printer port name
- 18 -
Choose one connected
printer port.
 Loading...