


 Loading...
MULTIFUNCTIONAL DIGITAL SYSTEMS
Operator’s Manual for TOSHIBA Viewer

LICENSE AGREEMENT
Wordcraft International Limited
Unimessage Pro Software Licence Agreement
CONDITIONS OF PURCHASE
Software is licensed subject to the limitations on permitted use. No refund will be given after the purchaser has installed the software. This Licence shall continue for as long as the Product is in use. Failure to comply with the terms and conditions detailed below will result in termination of the licence. All copies of the software must be destroyed on termination of the licence.
PERMITTED USES
The original purchaser may use the software on a computer system owned or used by the original purchaser for the purpose of any business or profession. The original purchaser may store the software on a hard disk system for use only by the permitted number of users and connected only to the permitted number of communication devices as specified in the system configuration file contained within the software product at the time of purchase, plus the number of users and devices added by obtaining a valid licensed upgrade from Wordcraft International Limited or an authorised agent of Wordcraft International Limited.
USES NOT PERMITTED
1.Downloading of the software from a computer service or bulletin board or use in a multi-site arrangement except in respect of users licensed by Wordcraft International Limited to do so.
2.Use of the software in a computer service business, network, time-sharing, interactive cable television or multiple CPU arrangement except in respect of users licensed by Wordcraft International Limited to do so.
3.The use of a single user version on a second or subsequent computer or network workstation. Details of multi-user packs are available from authorised dealers or authorised distributors of Wordcraft International Limited or direct from Wordcraft International Limited.
4.The use of a network version on a second or subsequent network.
5.The making of alterations and modifications to the software, merging all or any part of the software with another program, reverse engineering, decamping, or disassembling of the software.
6.Obscuring any areas of the software responsible for company branding, image, help system, contacting Wordcraft International Ltd, identifying Wordcraft International Ltd as the copyright and trademark owner, or any such related areas. Exemptions to this clause will only be granted in exceptional circumstances at the discretion of Wordcraft International Ltd Applications must be made in writing to Wordcraft International Ltd.
7.The right to rent, assign, lease, transfer or grant sub-licences or other rights to others.
8.The making of copies of any documentation belonging to Wordcraft International Limited.
9.The selling or transferring of software marked ‘Not for Resale’ or ‘Evaluation’ or ‘Demonstration’ or ‘Training’.
10.Any other uses not included in “Permitted Uses” above, which would require a licence to use the copy-
right in the software.
The license contained in this agreement will terminate automatically and without notice from Wordcraft International Limited if any provision in this agreement is not complied with.
GOVERNING LAW
This agreement shall be governed by the laws of the United Kingdom of Great Britain and Northern Ireland.
2 LICENSE AGREEMENT

LIMITED WARRANTY
Wordcraft International Limited make no representations or warranties, express or implied, of any kind with respect to the contents of this package and specifically disclaim any express or implied warranty of merchantability or fitness for any particular purpose. Wordcraft International Limited’s liability shall be limited to replacing any faulty product with alternative product or a cash refund up to but not exceeding the value of the monies paid for the product when originally purchased. In no event shall Wordcraft International Limited or their suppliers be liable for any special, incidental, indirect or consequential damages whatsoever (including, without limitation, damages for loss of revenue or profits, business interruption, lost or damaged data, or any other loss arising out of the installation of, use of or inability to use this software product). Wordcraft International Limited shall not be responsible for any claims arising from the use of software marked ‘Not for Resale’ or ‘Evaluation’ or ‘Demonstration’ or ‘Training’.
Wordcraft International Limited shall not be responsible for any claims arising from the use of software other than the use for which it was specifically sold.
Wordcraft International Limited shall not be responsible for any claims by a third party.
No oral or written information or advice given to Wordcraft International Limited, or given by Wordcraft International Limited, or an authorised representative shall create a warranty or in any way increase the scope of this warranty.
COPYRIGHT
Software and documentation produced by Wordcraft International Limited is protected by International Copyright Conventions.
TRADEMARKS
Wordcraft is a trademark of Wordcraft International Limited.
All other trademarks are acknowledged.
Following installation the package will be automatically registered.
This is a legally binding agreement with Wordcraft International Limited.
If you feel you cannot accept the conditions defined above please return the complete software package unopened to your supplier.
© 2005 Wordcraft International Limited
LICENSE AGREEMENT 3

4 LICENSE AGREEMENT

Notice to Users
USE OF RECYCLED PAPER IN THE COPIER
As with all copiers and reproduction devices, the use of the appropriate paper ensures the best image quality of the copies and the machine’s performance and reliability.
Because of the extreme variances in composition and quality of paper from various manufacturers, consumers should ensure the recycled paper they use is suitable for the copier. In accordance with the EPA Energy Star Program guidelines, TOSHIBA recommends the following recycled paper for use in the copier-
Great White MultiUse 20 paper
If you have any questions regarding the use of recycled paper in your copier, contact your authorized service technician.
FCC NOTICE
This equipment has been tested and found to comply with the limits for a Class A digital device, pursuant to Part 15 of the FCC Rules. These limits are designed to provide reasonable protection against harmful interference when the equipment is operated in a commercial environment. This equipment generates, uses and can radiate radio frequency energy and, if not installed and used in accordance with the instruction manual, may cause harmful interference to radio communications. Operation of this equipment in a residential area is likely to cause harmful interference in which case the user will be required to correct the interference at his own expense.
WARNING
Changes or modification made to this equipment, not expressly approved by TOSHIBA TEC or parties authorized by TOSHIBA TEC, could void the user’s authority to operate the equipment.
This Class A digital apparatus complies with Canadian ICES-003.
Cet appareil numérique de la classe A est conforme à la norme NMB-003 du Canada.
Notice to Users 5
Lineup of Our Manuals
Thank you for purchasing the TOSHIBA multifunctional digital systems e-STUDIO163/203/165/ 205.
We have provided you with these manuals for the operation of this equipment. Select and read the manual best suited to your needs.
Operator’s Manual for Copying Functions e-STUDIO163/203
This manual describes the basic operations, mainly copying functions, of this equipment. It also describes safety precautions to ensure correct and safe use of this equipment. Be sure to read this before you use the equipment.
Operator’s Manual for Copying Functions e-STUDIO165/205
This manual describes the basic operations, mainly copying functions, of this equipment. It also describes safety precautions to ensure correct and safe use of this equipment. Be sure to read this before you use the equipment.
Operator’s Manual for TOSHIBA Viewer (PDF)
This manual describes how to use the co-packed application software TOSHIBA Viewer, and how to print data from other Windows applications to this equipment.
To read manuals in PDF (Portable Document Format) files
Viewing and printing this operator’s manual in PDF files require that you install Adobe Reader or Adobe Acrobat Reader on your PC. If Adobe Reader or Adobe Acrobat Reader is not installed on your PC, download and install it from the website of Adobe Systems Incorporated.
6 Lineup of Our Manuals
Before Reading This Manual
This operator’s manual describes the following:
yHow to use this equipment
yHow to inspect and carry out maintenance on this equipment
yHow to remedy mechanical and copying problems
Precautions in this manual
To ensure correct and safe use of this equipment, this operator’s manual describes safety precautions according to the three levels shown below.
You should fully understand the meaning and importance of these items before reading this manual.
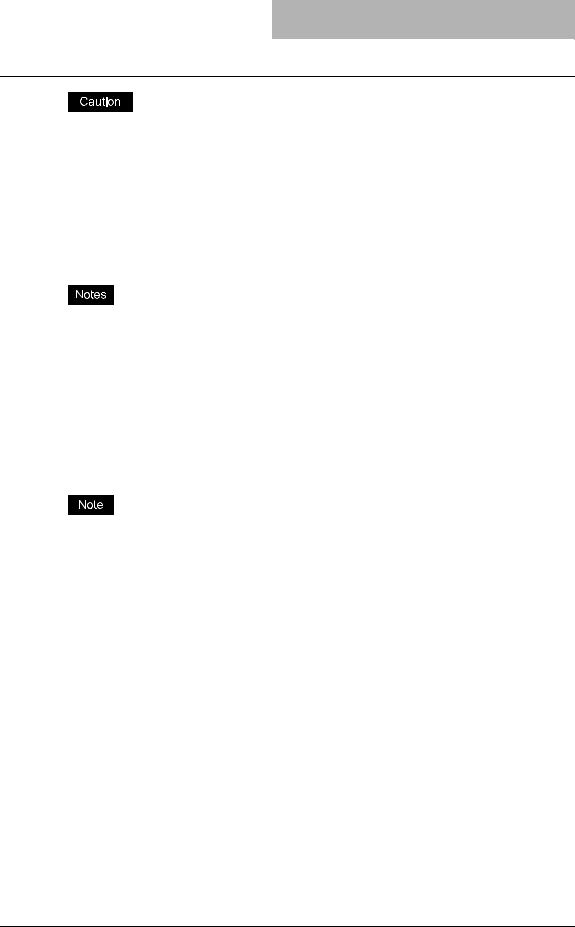
Indicates a potentially hazardous situation which, if not avoided, could result in death, serious injury, or serious damage, or fire in the equipment or surrounding assets.
Indicates a potentially hazardous situation which, if not avoided, may result in minor or moderate injury, partial damage of the equipment or surrounding assets, or loss of data.
Indicates a procedure you should follow to ensure the optimal performance of the equipment and problem-free copying.
Other than the above, this manual also describes information that may be useful for the operation of this equipment with the following signage:
Describes handy information that is useful to know when operating the equipment.
Pages describing items related to what you are currently doing. See these pages as required.
Trademarks
yMicrosoft and Windows are the trademarks of Microsoft Corporation in the US and other countries.
yAdobe, Adobe Acrobat, Adobe Reader and Adobe Acrobat Reader are the trademarks of Adobe Systems Incorporated.
yOther company or product names shown in this manual may be a brand name or a trademark of each company.
©2005 TOSHIBA TEC CORPORATION All rights reserved
Under the copyright laws, this manual cannot be reproduced in any form without prior written permission of TOSHIBA TEC CORPORATION. No patent liability is assumed, however, with respect to the use of the information contained herein.
Before Reading This Manual 7

8 Before Reading This Manual

CONTENTS
|
LICENSE AGREEMENT ................................................................................ |
2 |
|
Notice to Users ............................................................................................. |
5 |
|
Lineup of Our Manuals................................................................................. |
6 |
|
Before Reading This Manual ....................................................................... |
7 |
Chapter 1 |
INTRODUCTION |
|
|
Introduction................................................................................................. |
12 |
Chapter 2 |
INSTALLATION |
|
|
About Installation ....................................................................................... |
14 |
|
Before Installing the Softwares................................................................ |
14 |
|
Installing the USB Driver ........................................................................... |
17 |
|
From the Plug-and-Play Prompt.............................................................. |
17 |
|
Installing the Printer Driver to the Local Client ....................................... |
33 |
|
Before installing the Printer Driver........................................................... |
33 |
|
From the Add Printer Wizard ................................................................... |
34 |
|
Installing the TOSHIBA Viewer.................................................................. |
66 |
|
Before installing the TOSHIBA Viewer .................................................... |
66 |
|
Installation ............................................................................................... |
66 |
|
Device Setup ........................................................................................... |
71 |
|
To utilize TOSHIBA Viewer when logging on as different user |
|
|
who also has Admin rights....................................................................... |
78 |
|
Uninstalling the TOSHIBA Viewer............................................................. |
82 |
|
Before uninstalling the TOSHIBA Viewer ................................................ |
82 |
|
Removing the e-STUDIO163/203/165/205 COM Port ............................... |
86 |
|
Before removing the e-STUDIO163/203/165/205 COM port................... |
86 |
|
Installing the Printer Driver to the Network Client .................................. |
90 |
|
Before installing the Printer Driver........................................................... |
90 |
|
Supplement ............................................................................................... |
113 |
|
Cancelling print jobs .............................................................................. |
113 |
Chapter 3 DESCRIPTION OF THE FUNCTIONS |
|
|
|
Description of the Main Welcome Menu................................................. |
116 |
|
Summary of each menu ........................................................................ |
116 |
|
Browse Folders......................................................................................... |
118 |
|
How to operate "Browse Folders" and each function ............................ |
118 |
|
Copy........................................................................................................... |
142 |
|
CONTENTS 9 |
|

How to operate "Copy" and each function............................................. |
142 |
File Scan.................................................................................................... |
143 |
How to operate "File Scan" and each function ...................................... |
143 |
Email Scan ................................................................................................ |
146 |
How to operate "Email Scan" and each function ................................... |
146 |
Setup.......................................................................................................... |
148 |
How to operate "Setup" and each function............................................ |
148 |
TOSHIBA Viewer GDI Printer................................................................... |
154 |
How to print a document using TOSHIBA Viewer GDI Printer .............. |
154 |
INDEX ....................................................................................................................................... |
159 |
10 CONTENTS
INTRODUCTION
This section describes the overview of TOSHIBA Viewer. |
|
Introduction ............................................................................................................. |
12 |
1 INTRODUCTION
Introduction
“TOSHIBA Viewer” has been specially designed for use with the Toshiba Multifunctional Digital Systems e-STUDIO163/203/165/205 and TWAIN compatible scanning devices.
Available features of TOSHIBA Viewer include:
yUsing your e-STUDIO163/203/165/205 as a printer.
yUsing your e-STUDIO163/203/165/205 as a scanner.
yConfiguring your e-STUDIO163/203/165/205 from the PC.
yScanning hard copy documents using your TWAIN scanner.
yCreating graphics files in the TOSHIBA Viewer.
yStoring properties of files in the Unimessage Pro folders to be used with TOSHIBA Viewer’s sophisticated search engine.
yRouting of scanned images using TOSHIBA Viewer’s simple wizard style Routing Rules.
yCreate or edit the Phone/Fax numbers stored in your e-STUDIO165/205 from the PC. (only for the e-STUDIO165/205 with the fax option installed)
yCreating contacts in your TOSHIBA Viewer Phonebooks for frequently used fax numbers and E-mail addresses.
(only for the e-STUDIO165/205 with the fax option installed)
The Fax functions are only available for the e-STUDIO165/205 with the fax option installed.
This manual gives instructions on how to install the GDI printer driver, TWAIN scanner driver and TOSHIBA Viewer and basic information about some of the other functions listed above.
12 Introduction

INSTALLATION
This section describes the instructions on how to install the printer/scanner driver and TOSHIBA Viewer on your PC.
About Installation.................................................................................................... |
14 |
Before Installing the Softwares ......................................................................................................... |
14 |
Installing the USB Driver........................................................................................ |
17 |
From the Plug-and-Play Prompt........................................................................................................ |
17 |
Installing the Printer Driver to the Local Client.................................................... |
33 |
Before installing the Printer Driver .................................................................................................... |
33 |
From the Add Printer Wizard............................................................................................................. |
34 |
Installing the TOSHIBA Viewer .............................................................................. |
66 |
Before installing the TOSHIBA Viewer .............................................................................................. |
66 |
Installation ......................................................................................................................................... |
66 |
Device Setup..................................................................................................................................... |
71 |
To utilize TOSHIBA Viewer when logging on as different user who also has Admin rights............... |
78 |
Uninstalling the TOSHIBA Viewer ......................................................................... |
82 |
Before uninstalling the TOSHIBA Viewer .......................................................................................... |
82 |
Removing the e-STUDIO163/203/165/205 COM Port............................................ |
86 |
Before removing the e-STUDIO163/203/165/205 COM port ............................................................ |
86 |
Installing the Printer Driver to the Network Client............................................... |
90 |
Before installing the Printer Driver .................................................................................................... |
90 |
Supplement ........................................................................................................... |
113 |
Cancelling print jobs........................................................................................................................ |
113 |
2 INSTALLATION
About Installation
Before installing the printer/scanner driver and TOSHIBA Viewer, please read this section to ensure the requirements for the installation, and understand the various ways of the installation that you are provided.
Before Installing the Softwares
Computer Requirements
The Requirements indicated here are minimums.
As with most Windows applications, TOSHIBA Viewer will run faster when used on a PC with a faster processor or with more RAM.
If you are using other applications on your PC at the same time as TOSHIBA Viewer, a faster processor and additional RAM are highly recommended.
The TOSHIBA Viewer system is compatible with Microsoft Windows 98 Second Edition, Microsoft Windows Me, Microsoft Windows 2000, Microsoft Windows XP or Microsoft Windows Server 2003.
Make sure that your computer meets the following criteria.
The functions of TOSHIBA Viewer are not available for the e-STUDIO165/205 with the optional Network Printer Kit installed.
The TOSHIBA Viewer system is not applicable to a 64-bit OS.
PC: |
PC/AT 100% compatible; Pentium 120 MHz or higher for |
|
Windows 98 Second Edition |
|
PC/AT 100% compatible; Pentium 150 MHz or higher for |
|
Windows Me or Windows 2000 Professional |
|
PC/AT 100% compatible; Pentium 300 MHz or higher for |
|
Windows XP Home or Professional, or Windows 2000 |
|
Server |
|
PC/AT 100% compatible; Pentium 400 MHz or higher for |
|
Windows Server 2003 |
Operating system: |
Microsoft Windows 98 Second Edition |
|
Microsoft Windows Me |
|
Microsoft Windows 2000 Professional or Server |
|
Microsoft Windows XP Home or Professional |
|
Microsoft Windows Server 2003 |
PC memory: |
32M Bytes RAM for Windows 98 Second Edition |
|
64M Bytes RAM (128MB recommended) for Windows Me or |
|
Windows 2000 Professional |
|
128M Bytes RAM for Windows XP Home or Professional |
|
256M Bytes RAM for Windows 2000 Server |
|
512M Bytes RAM for Windows Server 2003 |
Display: |
A 24 bit color video card and driver is recommended |
14 About Installation

Configuration of the TOSHIBA Viewer CD-ROM
The configuration of the TOSHIBA Viewer CD-ROM and the purposes for each folder are as described below.
y\Toshiba Viewer
Includes the Setup.exe to install the TOSHIBA Viewer, printer driver and TWAIN driver.
y\Driv_USB\e-ST163,203,165,205\Win98SE Includes the USB driver for Windows 98 SE
y\Driv_USB\e-ST163,203,165,205\WinMe Includes the USB driver for Windows Me
y\Driv_USB\e-ST163,203,165,205\Win2k Includes the USB driver for Windows 2000
y\Driv_USB\e-ST163,203,165,205\WinXP Includes the USB driver for Windows XP
y\Driv_USB\e-ST163,203,165,205\Win2003 Includes the USB driver for Windows Server 2003
y\Driv9xMe\Local
Includes the printer driver and TWAIN driver for ADD Printer function in Windows 98 SE/Me that e-STUDIO163/203/165/205 is connected in local.
y\Driv9xMe\Network
Includes the printer driver for the network client computers of Windows 98 SE/Me
y\Driv2kXp\Local
Includes the printer driver and TWAIN driver for ADD Printer function in Windows 2000/XP/ Server 2003 that e-STUDIO163/203/165/205 is connected in local.
y\Driv2kXp\Network
Includes the printer driver for the network client computers of Windows 2000/XP/Server 2003
About Installation 15
2 INSTALLATION
Navigating your Installation
There are many different ways of installing the e-STUDIO163/203/165/205 softwares according to the environments or your requirements.
Please carefully read the instruction below and find out what you should do for installing the softwares.
yP.17 “Installing the USB Driver”
First of all, it is recommended to install the USB driver when connecting the e-STUDIO163/ 203/165/205 to your PC via the USB cable.
yP.33 “Installing the Printer Driver to the Local Client”
After you install the USB driver, you can install the GDI printer driver when connecting the e- STUDIO163/203 to your PC in local. For Windows 2000, XP, Server 2003, the printer driver can be installed automatically when you install the USB driver.
This driver allows you to print the document with e-STUDIO163/203.
yP.66 “Installing the TOSHIBA Viewer”
After you install the GDI printer driver, you can install the TOSHIBA Viewer if you want use this utility.
This utility allows you to control your e-STUDIO163/203/165/205 from your PC, such as scanning, copying, and configuring the device settings. For further details of the TOSHIBA Viewer, see the following page.
P.116 “Description of the Main Welcome Menu”
yP.90 “Installing the Printer Driver to the Network Client”
You can also install the GDI printer driver to the network clients.
This allows printing from the network clients with e-STUDIO163/203/165/205.
Screens used in the installation procedures of the above softwares are captured in system environment with the e-STUDIO163 connected.
16 About Installation
Installing the USB Driver
Never turn the power off of the equipment or pull out the USB cable while you are installing the e-STUDIO163/203/165/205 software and data communication is being performed between the equipment and your PC.
From the Plug-and-Play Prompt
When using the e-STUDIO163/203/165/205 is connected to your PC via the USB cable and powered on Windows will prompt to install drivers for the new hardware.
Drivers are provided on the CD in the "Driv_USB" folder, select to install drivers from this specific location.
These drivers will install an additional COM port, in Windows through which the Toshiba Viewer will then communicate with the e-STUDIO163/203/165/205. There are various ways of installation according to the Windows version running on your PC.
P.17 “Windows 98 SE/Me”
P.23 “Windows 2000”
P.28 “Windows XP/Server 2003”
Windows 98 SE/Me
The following describes an installation on Windows 98 Second Edition.
The procedure is almost the same when Windows Me is used.
Make sure you understand the following information.
An additional COM port can only be installed on your PC by your executing USB driver installation two times. Even if you finish the installation by clicking the [Finish] button on the “Add New Hardware Wizard”, the communication port will not be installed. When the “Add New Hardware Wizard” appears again after clicking the [Finish] button, follow the procedure in the manual to execute the USB driver installation once again.
1 Connect the e-STUDIO163/203/165/205 to the computer by a USB cable, make sure it is turned on and start Windows.
Installing the USB Driver 17

2 INSTALLATION
2 When Windows detects the device, the Plug-and-Play screen is displayed.
Windows 98 SE
Click [Next].
Windows Me
Proceed to step 3.
18 Installing the USB Driver
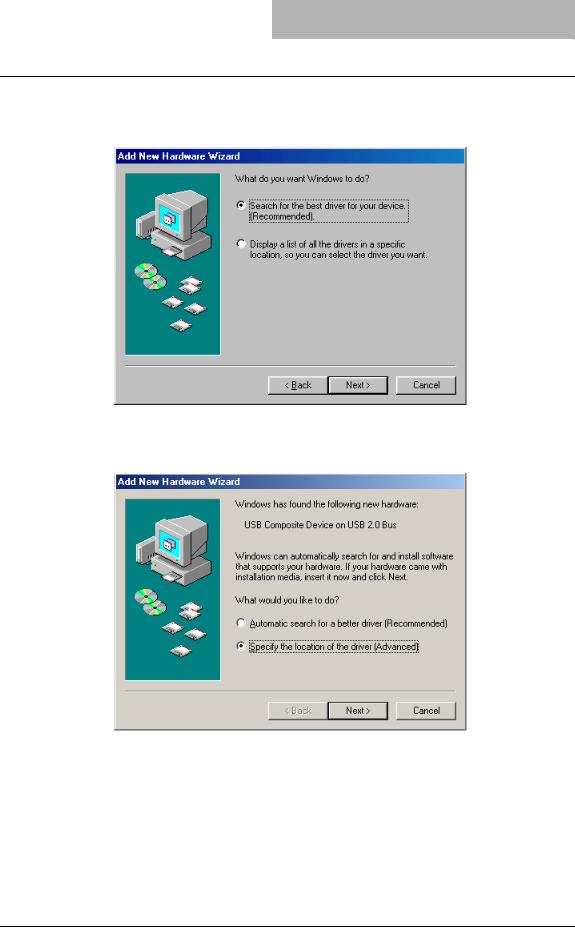
3 Select what you want Windows to do.
Windows 98 SE
Select [Search for the best driver for your device (Recommended)] and click [Next].
Windows Me
Select [Specify the location of the driver (Advanced)] and click [Next].
Installing the USB Driver 19
2 INSTALLATION
4
5
6
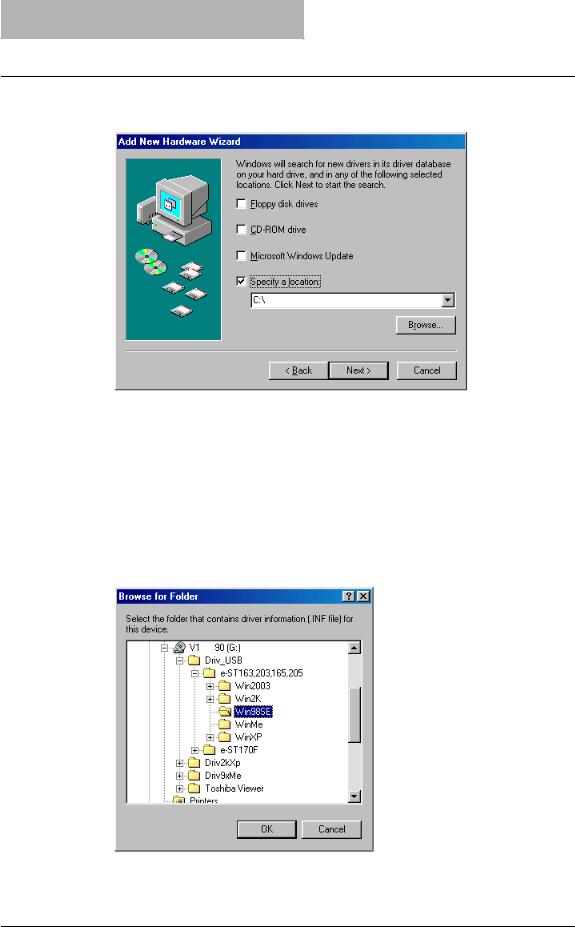
Select the search location.
Select [Specify a location] and click [Browse].
Insert the TOSHIBA Viewer CD-ROM in to the CD-ROM drive.
Browse to the USB driver folder.
Windows 98 SE
To install the USB driver, locate “[CD-ROM drive]:\Driv_USB\e-ST163,203,165,205\ Win98SE”.
Windows Me
To install the USB driver, locate “[CD-ROM drive]:\Driv_USB\e-ST163,203,165,205\ WinMe”.
Select the folder and click [OK].
20 Installing the USB Driver
7
8
Click [Next].
Click [Next].
It starts copying file.
Installing the USB Driver 21
2 INSTALLATION
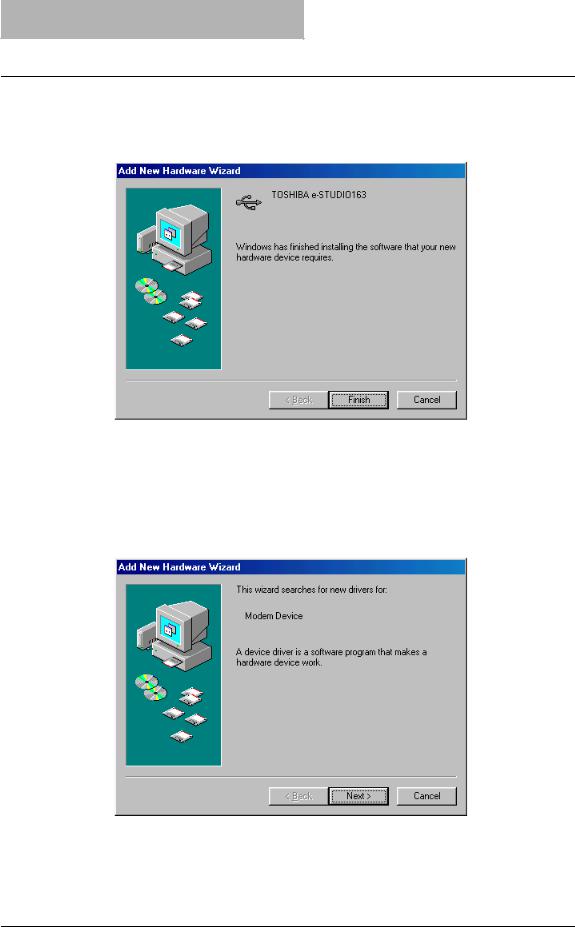
9
10
Click [Finish] to complete the installation.
Proceed to step 10.
An additional COM port is installed on your PC by your executing USB driver installation two times.
The “Add New Hardware Wizard” appears again.
Follow steps 2 to 9 to execute the USB driver installation once again.
This will install an additional COM port, e. g. COM3 if the PC already has COM1 and COM2, through which the device driver will communicate with the e-STUDIO163/203/ 165/205 device.
Proceed to step 11.
22 Installing the USB Driver

11 After the USB driver is installed, “Add Printer Wizard” appears.
Follow steps 4 and after in the section “From the Add Printer Wizard” to install the printer driver for the e-STUDIO163/203/165/205.
P.34 “From the Add Printer Wizard”
If “Add Printer Wizard” does not appear, or you clicked the [Cancel] button on “Add Printer Wizard”, go to the following page to install the printer driver for the e-STUDIO163/ 203/165/205.
P.34 “From the Add Printer Wizard”
Windows 2000
Please make sure that you have Administrator access right.
1 Connect the e-STUDIO163/203/165/205 to the computer by a USB cable, make sure it is turned on and start Windows.
2 When Windows detects the device, the Plug-and-Play screen is displayed.
Click [Next].
Installing the USB Driver 23
2 INSTALLATION
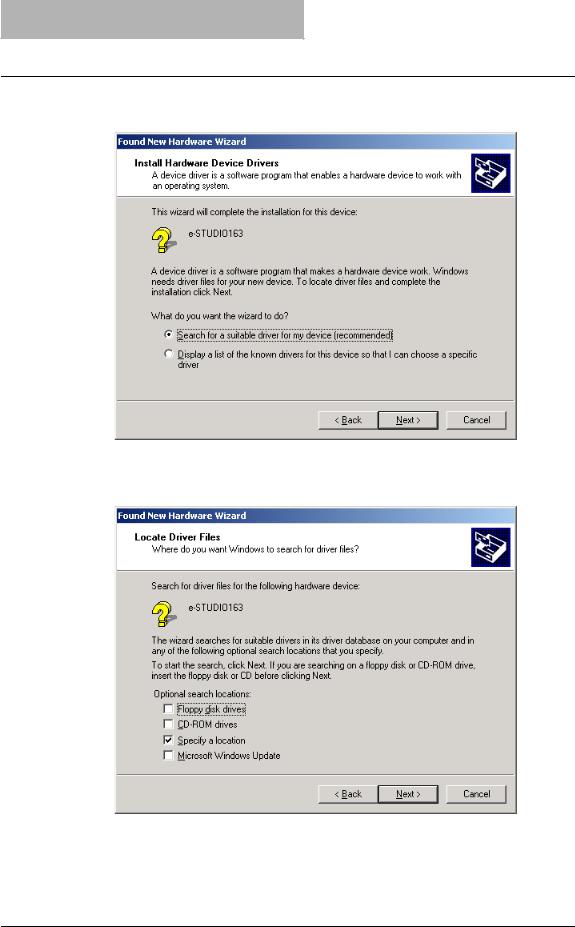
3
4
Select what you want Windows to do.
Select [Search for a suitable driver for my device (recommended)] and click [Next].
Select the search location.
Select [Specify a location] and click [Next].
24 Installing the USB Driver
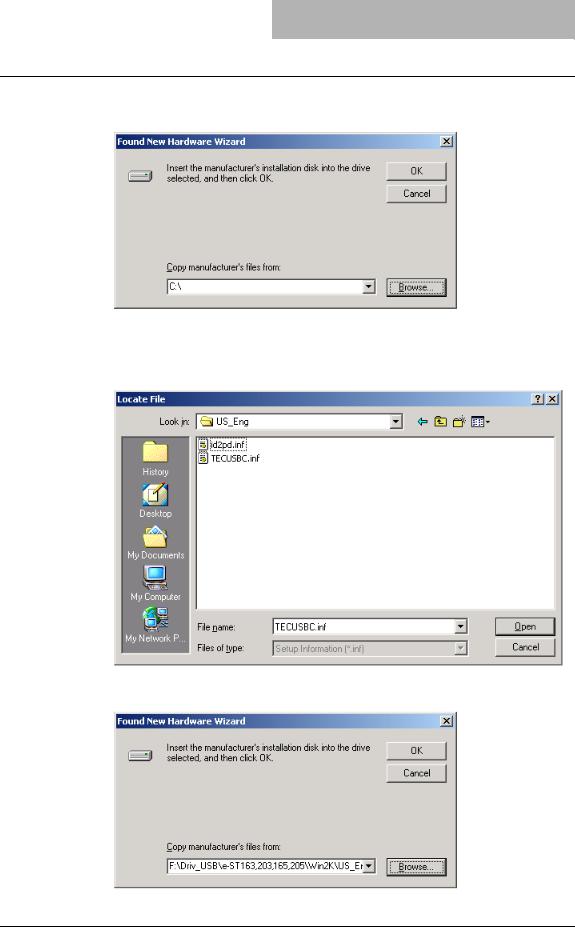
5
6
7
Insert the TOSHIBA Viewer CD-ROM to the CD-ROM drive.
Click [Browse].
Browse to the USB driver folder.
To install the USB driver, locate “[CD-ROM drive]:\Driv_USB\e-ST163,203,165,205\ Win2k” then specify the language sub-folder you want to install and click [Open].
Click [OK].
Installing the USB Driver 25
2 INSTALLATION
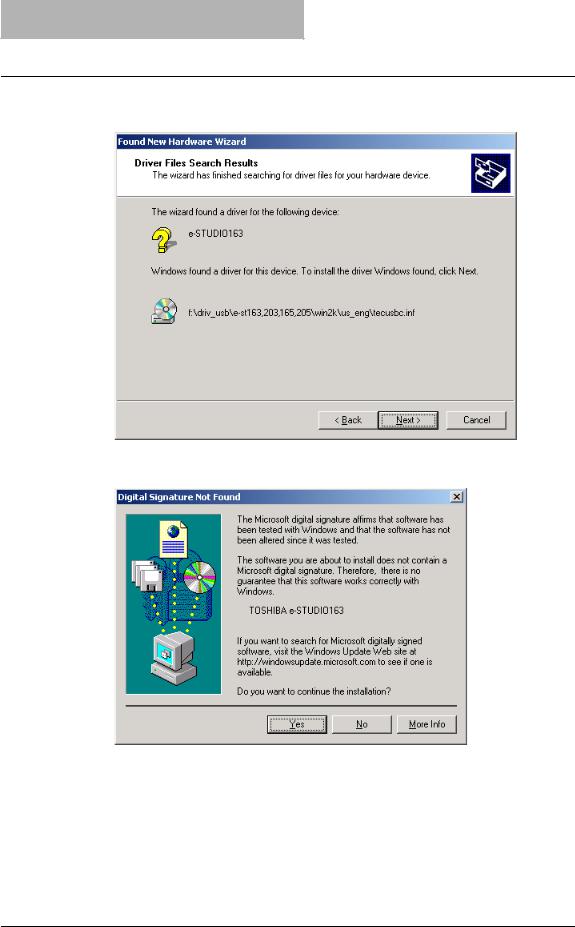
8
9
Click [Next].
It starts copying file.
Click [Yes].
26 Installing the USB Driver
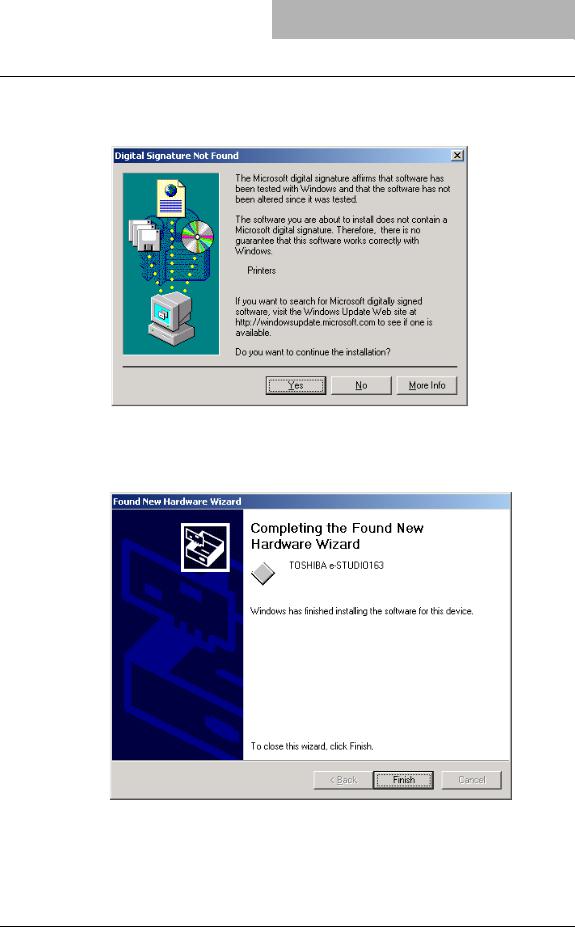
10 After the USB driver is installed, installation of the printer driver for the e-STUDIO163/203/165/205 automatically begins.
Click [Yes].
11 Click [Finish] to complete the installation.
This will install an additional COM port, e. g. COM3 if the PC already has COM1 and COM2, through which the device driver will communicate with the e-STUDIO163/203/ 165/205 device.
Installing the USB Driver 27
2 INSTALLATION
Windows XP/Server 2003
The following describes an installation on Windows XP.
The procedure is almost the same when Windows Server 2003 is used.
Please make sure that you have Administrator access right.
1 Connect the e-STUDIO163/203/165/205 to the computer by a USB cable, make sure it is turned on and start Windows.
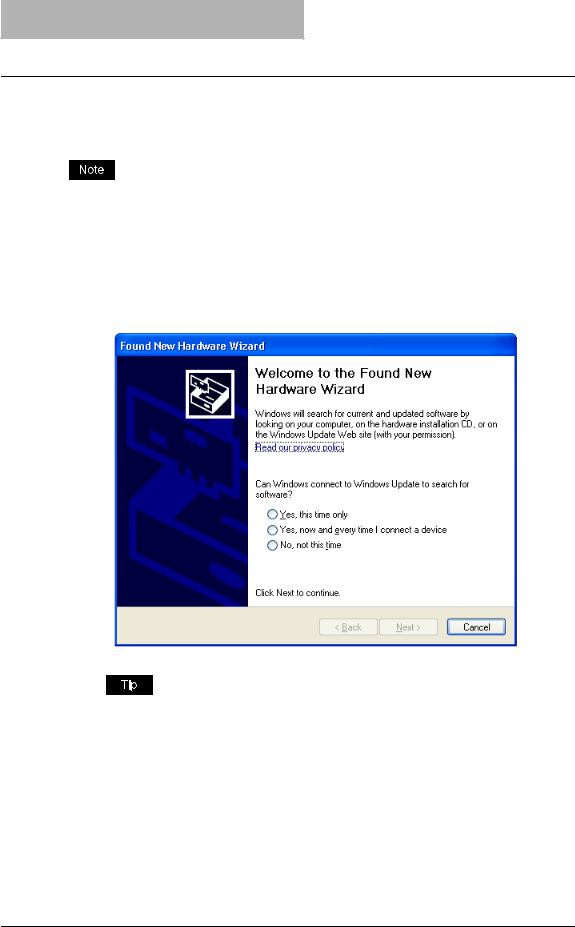
The Found New Hardware Wizard dialog box appears.
2 Select whether or not Windows connects to Windows Update to search for software.
Select [No, not this time] and click [Next].
This screen is not displayed with versions prior to SP2.
28 Installing the USB Driver

3
4
5
Select what you want Windows to do.
Select [Install from a list or specific location (Advanced)] and click [Next].
Select the search location.
Select [Search for the best driver in these locations] and [Include this location in the search]. Click [Browse].
Insert the Toshiba Viewer CD-ROM in to the CD-ROM drive.
Installing the USB Driver 29

2 INSTALLATION
6
7
Browse to the USB driver folder.
Windows XP
To install the USB driver, locate "[CD-ROM drive]:\Driv_USB\e-ST163,203,165,205\ WinXP", then specify the language sub-folder you want to install.
Windows Server 2003
To install the USB driver, locate "[CD-ROM drive]:\Driv_USB\e-ST163,203,165,205\ Win2003", then specify the language sub-folder you want to install.
Select the folder and click [OK].
Click [Next].
It starts copying files.
30 Installing the USB Driver
Loading...