


STEAM MASTER RETRACTABLE CORD IRON
STEAM MASTER PLANCHA CON CABLE RETRACTABLE
Instruction Manual
STEAM MASTER®‚ LX IRON
Manual de Instrucciones
PLANCHA STEAM MASTER® LX

IMPORTANT SAFEGUARDS
When using your flatiron, basic safety precautions should always be followed, including the following:
READ ALL INSTRUCTIONS BEFORE USING
1.Use iron only for its intended use.
2.To protect against risk of electric shock, do not immerse the iron in water or other liquids.
3.The iron should always be turned to “OFF” before plugging or unplugging from outlet. Never yank cord to disconnect from outlet; instead, grasp plug and pull to disconnect.
4.Do not allow cord to touch hot surfaces. Let iron cool completely before putting away. Retract cord into cord reel when storing.
5.Always disconnect iron from electrical outlet when filling with water or emptying and when not in use.
6.Do not operate iron with a damaged cord or if the iron has been dropped or damaged. To avoid the risk of electric shock, do not disassemble the iron. Take it to a qualified serviceman for examination and repair. Incorrect reassembly can cause a risk of electric shock when the iron is used.
7.Close supervision is necessary for any appliance being used by or near children. Do not leave iron unattended while connected or on an ironing board.
8.Burns can occur from touching hot metal parts, hot water or steam. Use caution when you turn a steam iron upside down — there may be hot water in the reservoir.
9.If the flatiron is not operating normally, disconnect from the power supply and have the flatiron serviced by qualified service personnel.
10.Your Sunbeam® Iron is designed to rest on the heel rest. Do not leave the iron unattended. Do not set the iron on an unprotected surface, even if it is on its heel rest.
11.This is a 1200 Watt appliance* To avoid a circuit overload, do not operate another high wattage appliance on the same circuit.
12.If an extension cord is absolutely necessary, a 10-ampere cord should be used. Cords rated for less amperage may overheat. Care should be taken to arrange the cord so that it cannot be pulled or tripped over.
*In Mexico, the iron runs at 127 Volts, 1350 Watts. If an extension cord is necessary, a 13 ampere cord should be used.
3

SAVE THESE INSTRUCTIONS
FOR PRODUCTS PURCHASED IN THE U.S. AND CANADA ONLY
To reduce the risk of electrical shock, this appliance has a polarized plug (one blade is wider than the other). This plug fits a polarized outlet only one way; if the plug does not fit fully into the outlet, reverse the plug. If it still does not fit, contact a qualified electrician. Do not attempt to defeat this safety feature.
4
E
A B C F
M
L
K
G
J 
I H
H
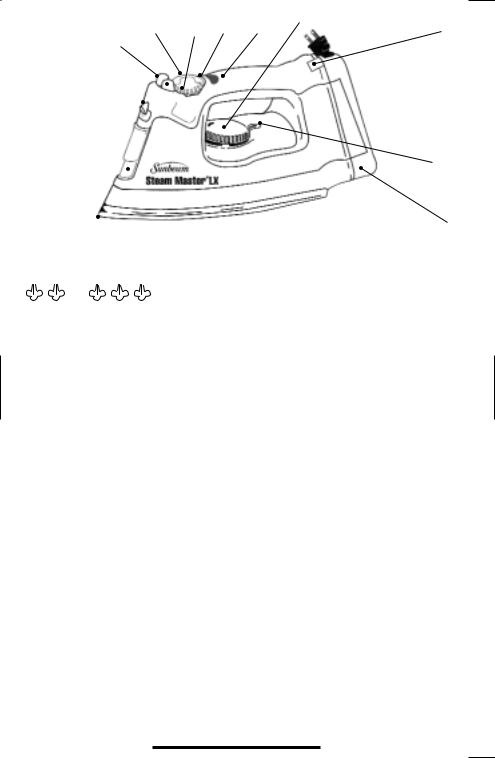
FEATURES
A.Variable Steam Dial — Adjusts steam level for different ironing needs. For dry ironing. turn dial to DRY. For steam ironing, turn dial to the  . For additional steam, turn dial to the
or |
. (Refer to Ironing Guide for recommended settings). |
B.Steam Valve (connected to the variable steam dial) — Removable to prevent scale build up.
C.Steam Indicator Mark
D.Auto-Off Indicator (Some Models Only)
E.Temperature Dial — Controls heat output of iron. Adjust dial according to ironing needs. For low temperatures, turn dial to first dot. For medium temperatures, turn dial to second
set of dots. For high temperatures, turn dial to third set of dots. (Refer to Ironing Guide for recommended settings).
F.Winding Button — Retracts cord with a push of the button. (Refer to Using the Retractable Cord)
G.Temperature Indicator Mark
H.Cord Reel — Provides convenient cord storage. Allows for use of only the amount of cord needed, eliminating extra cord that gets in the way. Push button to automatically retract cord.
I.Soleplate — Has full length button grooves for added convenience when ironing shirts and blouses; some models have non-stick coating.
J.Sliding Water Reservoir Cover — Prevents dust and foreign matter from entering the water tank; resists water splashing during ironing.
K.SPRAY MIST® Feature (Some Models Only)
L.SPRAY MIST® Button — Provides a fine spray mist for spot dampening.
(Some Models Only)
M.SHOT OF STEAM® Button — Provides a powerful burst of steam for maximum steam power. On select models, can also be used while holding the iron vertically to remove wrinkles from hung garments or drapes.
•MOTION SMART® Auto off (Some Models Only) — Shuts off if iron is unmoved for 15 minutes in the upright position, or 30 seconds in the ironing position.
5
USING THE RETRACTABLE CORD
1.When winding the cord, hold the plug with one hand, and press the winding buttonwith the other hand. (Failure to hold plug may cause plug to fly).
2.The cord reel is compact for multi-layer winding of the cord. In case cord is not fully rewound, pull out the cord and steer cord evenly on the reel.
3.In case the cord is not pulled out easily, pull cord firmly.
4.Select the amount of cord desired before plugging into an electrical outlet.
5.Do not allow children to use retractable cord feature as the cord may cause injury.
BEFORE THE FIRST USE
•When turned on for the first time, your new iron may give off a slight odor for up to ten minutes. This is due to the initial heating of the materials used. It is safe, not detrimental to the performance of the product, and will not recur.
•Prior to first use, clean steam vents using the SHOT OF STEAM‚ feature. After cleaning vents, run iron over an all-cotton cloth to remove any residue.
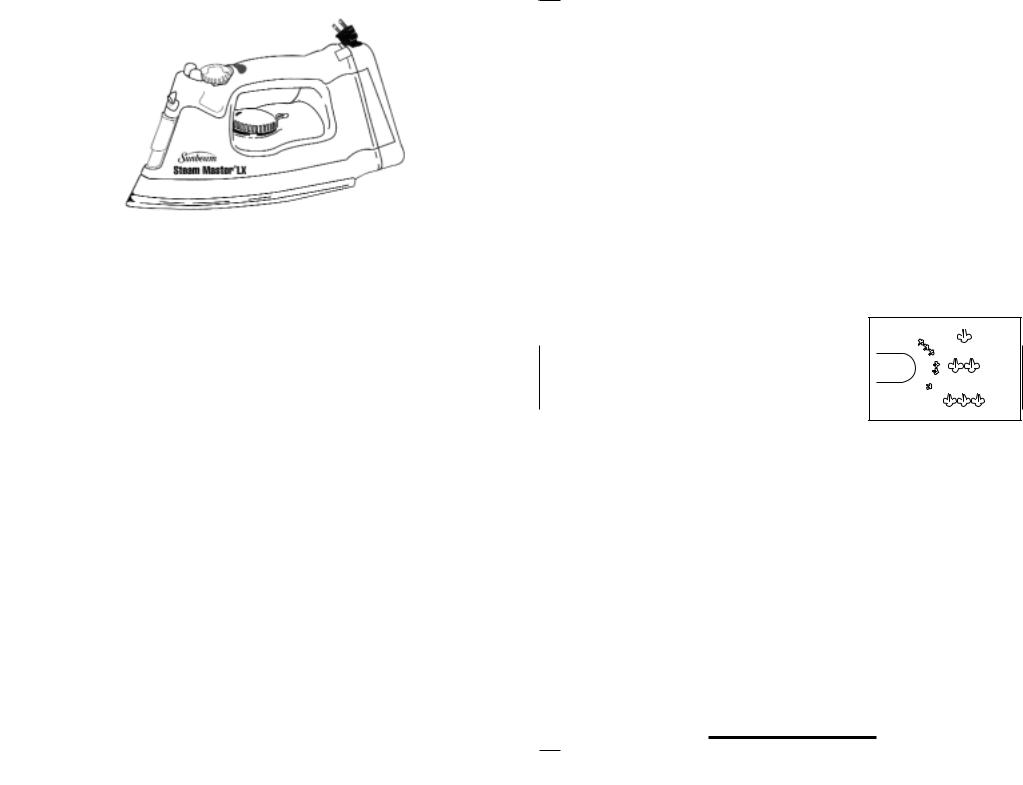
•When not ironing, always have steam dial turned to DRY (See Diagram).
INSTRUCTIONS FOR USE
Dry Ironing
•Plug the cord into a 120 volt AC outlet. On units with automatic shut off, the auto off light will illuminate.
•Turn the temperature dial to the desired setting (refer to Ironing Guide for recommended settings). While iron is heating, place iron on heel rest on a stable, protected surface.
|
M |
|
CLEAN |
A |
|
E |
||
|
||
|
T |
|
|
S |
|
DRY |
||
STEAM
EXTRA
STEAM
ULTRA
STEAM
• Set the steam dial on DRY to prevent steam flow if water is in the tank.
Steam Ironing
•Make sure the plug is removed from the wall socket before filling the iron with water.
•Turn the the steam dial to DRY.
•Place the iron on its heel and open the water reservoir cover. Pour water slowly into the water reservoir. Fill up to the maximum water level. To prevent the risk of burns, use caution when filling a hot iron with water. Burns can occur from touching hot metal parts, hot water or steam. Push firmly to close the cover. NOTE: Tap water may be used due to the special design of this iron. However, in areas with very hard water, distilled or demineralized water is recommended.
•Turn the temperature dial to any of the temperatures within the steam band and allow the iron to heat for approximately 2 minutes before ironing. While heating, place iron on heel rest on a stable, protected surface.
•Turn steam dial to  for regular steam, or to
 for extra steam or

 for ultra steam. NOTE: When using extra or ultra steam, it may be necessary to fill the tank more often.
6
SHOT OF STEAM® Feature
•The SHOT OF STEAM® feature provides an extra burst of steam for deep penetration of stubborn wrinkles. The SHOT OF STEAM® feature can be used with dry or steam ironing provided the tank is at least 1/4 full of water and the temperature dial is set within the steam band.
•Place the iron on top of the wrinkle and press the SHOT OF STEAM® button each time you would like an extra burst of steam. THE SHOT OF STEAM® feature can be used continuously with just a short pause between shots.
VERTICAL STEAM (Select models only)
• The vertical steam feature allows your iron to function as a garment steamer.
TIP: When using the vertical steam on clothing, hang the clothing on a clothes hanger for best results. Hanging curtains and drapes may also be steamed.
To Use VERTICAL STEAM:
1.Make sure that the iron has heated up (2 minutes).
2.Hold the iron in a vertical position, with the iron close to but not touching the fabric you want to steam.
3.With your other hand, pull the fabric tight.
4.Press the SHOT OF STEAM® button in approximately 3-second intervals as you move the iron across the wrinkled area.
WARNING: To prevent the risk of burns, keep your hand away from the area being steamed.
DO NOT steam garments while wearing them; this may result in injuries.
SPRAY MIST® Feature
(Some Models Only)
•Use the SPRAY MIST® feature to dampen fabrics with stubborn wrinkles.
•Press the gray SPRAY MIST® button firmly to produce spray.
MOTION SMART® Auto Off Feature (Some Models Only)
• When the iron is plugged into 120 volt AC electrical outlet, the steady red light signals that the iron is plugged in and is ready to be turned on.
•If the iron is left on the heel rest unmoved the iron will stop heating in
15 minutes. The light on the handle will blink to indicate the iron has automatically shut off and will continue blinking until the iron is restarted or unplugged.
•If the iron is left unmoved in the ironing position or accidentally tipped over, the iron will stop heating in 30 seconds. Again, the light on the handle will blink to indicate the iron has automatically shut off and will continue blinking until the iron is restarted or unplugged.
NOTE: If the temperature dial is turned to the OFF position, the light will continue blinking and then go off.
•To restart the iron, move the iron back and forth. Allow the iron to heat and continue ironing as normal.
7
Non-Stick Finish
(Some Models Only)
•The non-stick coating prevents sticking of fabrics and starch residue to the soleplate.
•To clean the soleplate, allow iron to cool and wipe with a soft cloth using a mild vinegar solution.
•Do not use scouring pads, abrasives or chemical cleaning solvents as they may damage the finish. NOTE: Scratches in the non-stick soleplate do not affect the performance of the iron.
CARE AFTER EACH USE
•Turn the steam dial to DRY.
•Unplug the iron from the power outlet.
•Empty the water tank by opening the water reservoir cover and turn the iron upside down to allow water to flow from the opening. Shake the iron gently to remove trapped water drops.
•Use cover and allow the iron to cool.
•Retract cord into cord reel. Always store iron on its heel rest.
•When not ironing, always set steam dial to DRY.
CARE AND MAINTENANCE
Steam Valve
The steam valve (attached to the variable steam dial) is removable for easy cleaning of lint and scale build up. Cleaning the steam valve is only necessary if you notice a reduction in steam performance. To remove the steam valve, empty the water tank and place iron on the soleplate. Turn the variable steam dial to CLEAN. The valve will “pop-up”. Pull up to remove the steam valve fully. Wipe the tip gently with a damp cloth to clean. To replace, align CLEAN with the indicator mark. Push down and rotate clockwise to DRY.
NOTE: Do not pour water into the steam valve hole.
Soleplate
If starch or other material clings to the irons soleplate, allow the iron to cool and wipe with a soft, damp cloth. Avoid ironing over snaps, zippers, rivets, etc., as they may scratch the soleplate.
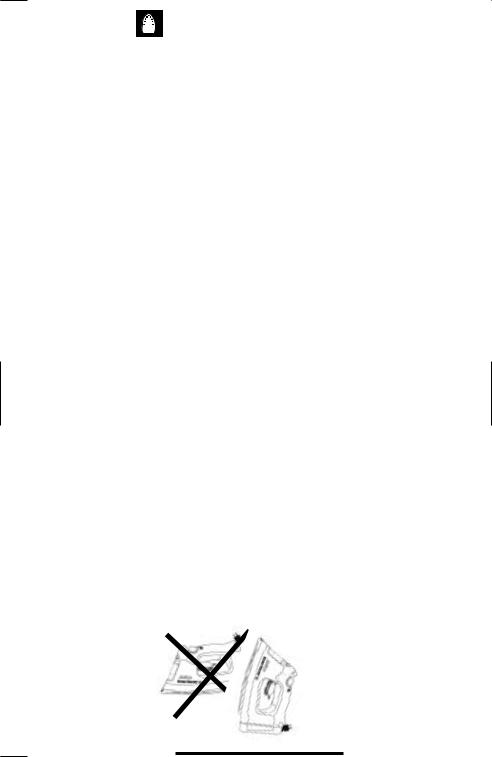
Storage
Always store your iron on the heel rest. Never store with the soleplate facing down or in the carton. Always store your iron with the steam dial turned to DRY. Retract cord into cord reel.
8

Maintenance
Other than the recommended instructions in this pamphlet, no further maintenance is necessary. However, following is a list of frequently asked questions and their resolutions. If for any reason your iron continues to exhibit one of these symptoms, or requires repair for another reason, send it to the Sunbeam Appliance Service Center or call our Consumer Hot Line 1-800-597-5978.
SYMPTOM |
RESOLUTION |
|
|
Iron emits an odor |
• Iron gives off an odor when turned on for the first time. |
|
Allow ten minutes for odor to disappear. |
Iron does not heat |
• Iron should be plugged into a 120 volt, AC electrical |
|
outlet only. |
|
• The temperature dial must be set at the desired temperature. |
|
• The auto shut-off feature may have been activated (Some Models |
|
Only). Move the iron back and forth to restart. |
|
|
Iron does not steam |
• The water tank may be empty. Turn steam valve to DRY |
|
and add water. |
|
• Allow iron to heat, then set the steam dial to one of the steam |
|
settings. Use temperature settings within the steam band. |
|
• There may be an obstruction. Remove steam valve by turning |
|
it to CLEAN. Replace and set the steam dial to one of the |
|
steam settings. |
|
|
SHOT OF STEAM® feature • The water tank must be at least 1/4 full.
does not work |
• Temperature must be set to steam position. |
|
|
|
• Iron should be in the horizontal position. |
|
• Prime pump briefly. |
|
• Allow a short pause between shots. |
|
• Be sure to fully depress the SHOT OF STEAM® button. |
SPRAY MIST® feature |
• The water tank must be at least 1/4 full. |
does not work |
|
Iron is leaking |
• The variable steam dial must be set on DRY until the iron is hot |
|
• The temperature setting is too low to produce steam |
|
(See Ironing Guide) |
|
|
Cord will not pull out |
• Pull cord firmly to unwind. |
|
• Press winding button to reset device, then pull cord. |
Cord does not retract |
• Pull out the cord once and wind cord evenly on the reel. |
9

IRONING TIPS
•Always read garment labels and follow the manufacturer's ironing instructions.
•Sort the articles to be ironed according to the type of fabric.
•Garments requiring low temperature and steam should be ironed first to avoid damaging garments with a too-hot iron.
•If you are unsure of the fabric content of the garment, test a small area such as a seam or facing before ironing a visible area. Start with a low temperature and gradually increase the heat to find the best setting.
•When changing the temperature from a high setting to a low setting, allow approximately 5 minutes for the lower temperature to be reached.
•When steam ironing, use long slow glides. This will allow the steam to penetrate the fabric while it allows the heat of the soleplate to dry out the moisture.
•To iron linens, turn garment inside out. Be careful not to use a too-hot iron as lining may melt or stick to soleplate.
•To iron zippers, use an ironing cloth or make sure the zipper is closed and iron over the flap. Never iron directly over an unprotected zipper.
•Use the following chart to select the best setting and method for the fabric you plan to iron.
10
 Loading...