


Gigaset 4010
Table of contents
 Loading...
Gigaset 4010 Comfort, GBR, A31008-G4010-B102-1-
s
4010cover vor-
Be inspired
11.6.01
Operating instructions
and safety precautions
!
Gigaset 4010 Comfort, GBR, A31008-G4010-B102-1-7619
General
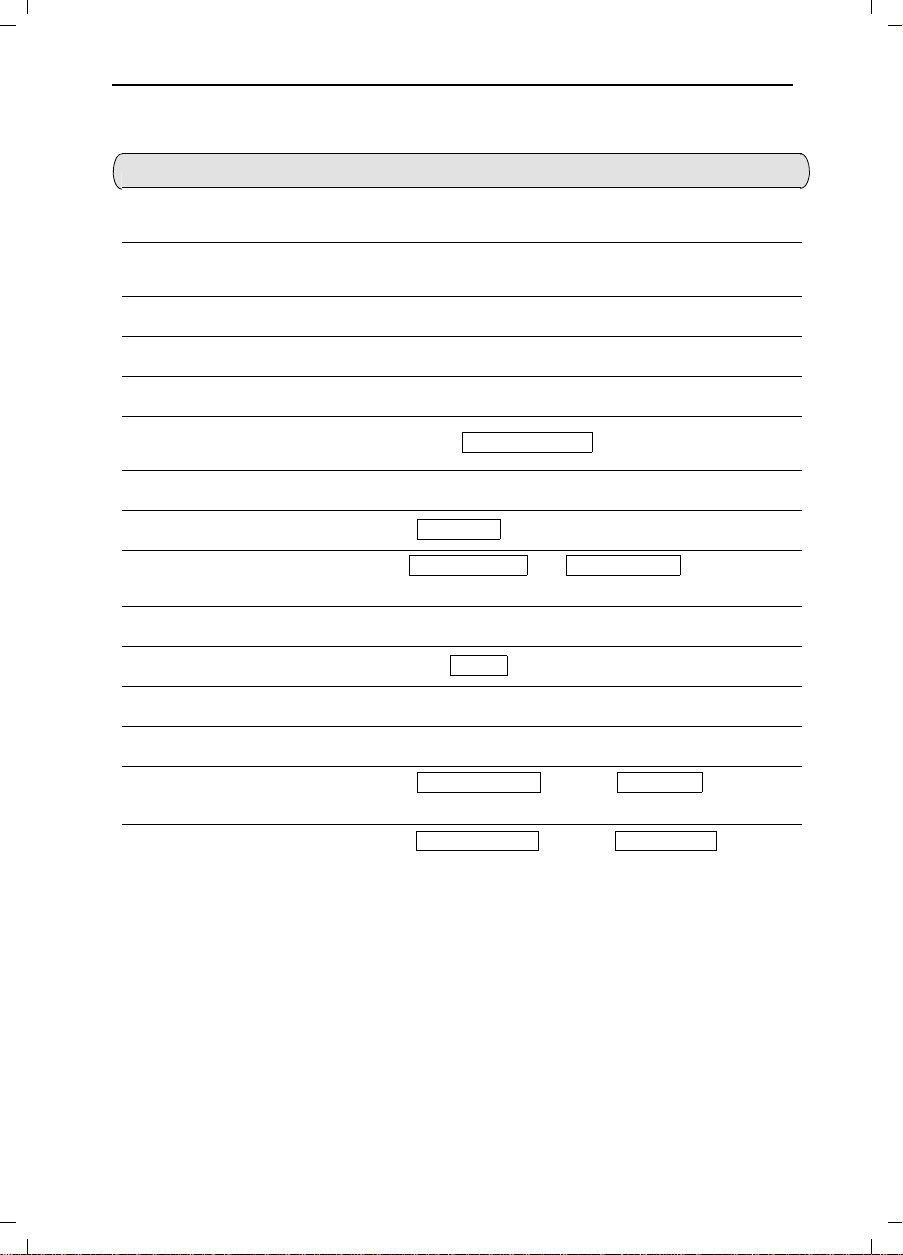
Quick reference guide
umschl_v.fm
11.6.01
Handset
Activate/deactivate the
handset
Activate/deactivate the
keypad protection
Activate/deactivate tones
Make an external call
Redial a number
Save a call number in the
directory
Dial with the directory
Dial with the caller list
Set the handset volume
Make an internal call
Call all handsets
Transfer call to other handset
Internal enquiry calls
hold down
hold down
hold down
)
!
if necessary
/
/
A
A
[Name] if necessary
)
Caller List
Sound Settings
and
and
and
and
B
C
select entry
Copy to Directory
if necessary
=
=
6DYH
!
or
=
!
=
internal user
Call All
internal user
internal user
!
=
!
(QG
or
Handset Volume
=
C
;end:
!
entry
!
Set date, time
Set the alarm clock
II
Calendar/Clock Date/Time
A
Set
date and time
A
Enter settings
Calendar/Clock Alarm Clock
=
6DYH
=
6DYH
=
=
Gigaset 4010 Comfort, GBR, A31008-G4010-B102-1-7619
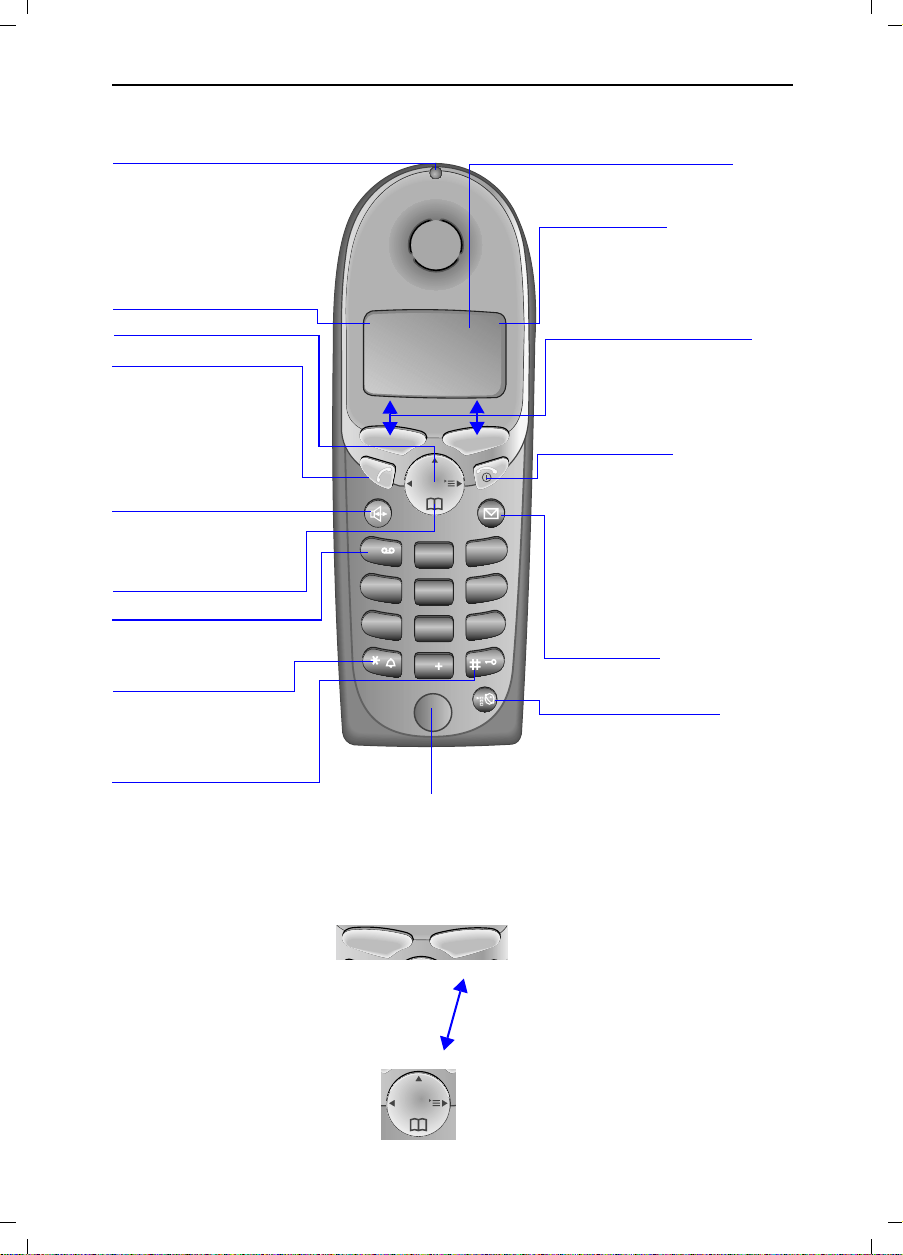
Brief overview of the handset
Status LED (light-emitting diode)
lights up during a call;
flashes at:
– Incoming call
– New messages
– Alarm call, appoint-
ments, anniversaries
Reception strength
Control key
Talk key
– Accept call
– Dial number
– Switch from hands-
free talking to
handset
Handsfree key
Switch from handset to
handsfree talking.
Open the directory
Key 1
Hold down to select
Mailbox
Asterisk key
Hold down to activate and deactivate
the ringer
Keypad protection
On/off
hold key down!
U"
Annabella
19.07.01 13:13
0@
INT
1
2
4
5
7
8
ABC
JKL
TUV
DEF
3
MNOGHI
6
WXYZPQRS
9
0
Microphone
umschl_v.fm
11.6.01
General
Display (display field)
Charging status
empty
full
flashes: Caution
Current functions
and display keys
With the display keys, you
have access to the current
functions.
End call and On/
Off key
– End call
– Cancelling function
– One menu level back
(press briefly)
– Return to idle state
(hold down)
– Handset on/off
(hold key down)
Caller list
Access to message lists
Sel Services key
– Open network access
list: press briefly!
– R key function:
hold key down!
Interaction between control key and display keys
Display keys
Control key
With the
can carry out functions that
can also be partly controlled
with the
The side of the
which you must press is indicated in the operating instructions by arrows:
INT
/
/
display keys
control key
(left/right)
(top/bottom)
you
.
control key
III

Gigaset 4010 Comfort, GBR, A31008-G4010-B102-1-7619
umschl_v.fm
General
Functions of the control key
The control key has different functions in individual operating situations.
11.6.01
Control
key
When the telephone is idle
Hold down key:
Voicedialling
Open directory or scroll down or move cursor one
Open menu or select entry (OK) or move cursor right
Open the list of inter-
nal users
In lists and menus In an entry field
or scroll up or move cursor one
line up
line down
or one menu level
back (cancel)
or move cursor left
Displays
The following symbols appear in the display, depending on the operating situation:
Display keys Meaning
@
0
R
Menu button: Activate the general menu when telephone is idle.
Confirm menu function and select. End and save the setting.
Delete key (Backspace): Delete entries from right to left.
Automatic redial key: Open the list of the last 5 numbers dialled.
Display if SMS, mailbox or cal ler list or answ ering mac hine is active
One menu level back, cancel
Example for menu operation: Set volume for handsfree talking
1.
2.
3.
4.
5.
6.
IV
or Lfor
or Lfor
or
6DYH
Press or the right display key
Scroll to
Select
2.
2.
Audio
Select the
Select the required volume for handsfree talking.
Store the required volume for handsfree talking.
.
Audio
.
telephone volume
L
.
for A.

Gigaset 4010 Comfort, GBR, A31008-G4010-B102-1-7619
4010CoIVZ.fm
11.6.01
Contents
Quick reference guide . . . . . . . . . . . . . . . . . . . . . . . . . . . . . . . . . . . . . . . . . . . . . .II
Brief overview of the handset . . . . . . . . . . . . . . . . . . . . . . . . . . . . . . . . . . . . . . . III
Interaction between control key and display keys . . . . . . . . . . . . . . . . . . . . . . . . III
Functions of the control key . . . . . . . . . . . . . . . . . . . . . . . . . . . . . . . . . . . . . . . . . IV
Displays . . . . . . . . . . . . . . . . . . . . . . . . . . . . . . . . . . . . . . . . . . . . . . . . . . . . . . . . IV
Example for menu operation: Set volume for handsfree talking . . . . . . . . . . . . . IV
Safety precautions . . . . . . . . . . . . . . . . . . . . . . . . . . . . . . . . . . . . . .4
Preparing the telephone . . . . . . . . . . . . . . . . . . . . . . . . . . . . . . . . .5
Installing the base station . . . . . . . . . . . . . . . . . . . . . . . . . . . . . . . . . . . . . . . . . . . .5
Operating the handset . . . . . . . . . . . . . . . . . . . . . . . . . . . . . . . . . . . . . . . . . . . . . .7
Attaching the belt clip . . . . . . . . . . . . . . . . . . . . . . . . . . . . . . . . . . . . . . . . . . . . . .8
Activating/deactivating the handset . . . . . . . . . . . . . . . . . . . . . . . . . . . . . . . . . . . .8
Activating/deactivating keypad protection . . . . . . . . . . . . . . . . . . . . . . . . . . . . . . .8
Date and time. . . . . . . . . . . . . . . . . . . . . . . . . . . . . . . . . . . . . . . . . . .9
Setting the date and the time . . . . . . . . . . . . . . . . . . . . . . . . . . . . . . . . . . . . . . . . .9
Setting the alarm clock . . . . . . . . . . . . . . . . . . . . . . . . . . . . . . . . . . . . . . . . . . . . .10
Schedule . . . . . . . . . . . . . . . . . . . . . . . . . . . . . . . . . . . . . . . . . . . . . . . . . . . . . . . .11
Display missed appointments and anniversaries . . . . . . . . . . . . . . . . . . . . . . . . .13
Making calls. . . . . . . . . . . . . . . . . . . . . . . . . . . . . . . . . . . . . . . . . . .14
Make an external call . . . . . . . . . . . . . . . . . . . . . . . . . . . . . . . . . . . . . . . . . . . . . .14
Making internal calls . . . . . . . . . . . . . . . . . . . . . . . . . . . . . . . . . . . . . . . . . . . . . . .14
Answering a call . . . . . . . . . . . . . . . . . . . . . . . . . . . . . . . . . . . . . . . . . . . . . . . . . .15
Displaying the telephone number (CLIP) . . . . . . . . . . . . . . . . . . . . . . . . . . . . . . .15
Handsfree talking . . . . . . . . . . . . . . . . . . . . . . . . . . . . . . . . . . . . . . . . . . . . . . . . .16
Muting the microphone . . . . . . . . . . . . . . . . . . . . . . . . . . . . . . . . . . . . . . . . . . . .17
Mailbox (external answering machine) . . . . . . . . . . . . . . . . . . . . . . . . . . . . . . . . .18
Enhanced telephone features. . . . . . . . . . . . . . . . . . . . . . . . . . . .19
Automatic redial . . . . . . . . . . . . . . . . . . . . . . . . . . . . . . . . . . . . . . . . . . . . . . . . . .19
Directory and network access list . . . . . . . . . . . . . . . . . . . . . . . . . . . . . . . . . . . .21
Character map . . . . . . . . . . . . . . . . . . . . . . . . . . . . . . . . . . . . . . . . . . . . . . . . . . .22
Caller list . . . . . . . . . . . . . . . . . . . . . . . . . . . . . . . . . . . . . . . . . . . . . . . . . . . . . . .28
For further information, please refer to the index – page 92!
1

Gigaset 4010 Comfort, GBR, A31008-G4010-B102-1-7619
4010CoIVZ.fm
11.6.01
Mailbox features. . . . . . . . . . . . . . . . . . . . . . . . . . . . . . . . . . . . . . .31
Functions before a call . . . . . . . . . . . . . . . . . . . . . . . . . . . . . . . . . . . . . . . . . . . . .31
Functions during a call . . . . . . . . . . . . . . . . . . . . . . . . . . . . . . . . . . . . . . . . . . . . .33
Call waiting during a call . . . . . . . . . . . . . . . . . . . . . . . . . . . . . . . . . . . . . . . . . . . .34
Callback when busy . . . . . . . . . . . . . . . . . . . . . . . . . . . . . . . . . . . .35
Making cost-effective calls. . . . . . . . . . . . . . . . . . . . . . . . . . . . . .36
Network access list (call-by-call) . . . . . . . . . . . . . . . . . . . . . . . . . . . . . . . . . . . . .36
Automatic preselection . . . . . . . . . . . . . . . . . . . . . . . . . . . . . . . . . . . . . . . . . . . . .38
Setting call charges . . . . . . . . . . . . . . . . . . . . . . . . . . . . . . . . . . . . . . . . . . . . . . .41
Text messages (SMS) . . . . . . . . . . . . . . . . . . . . . . . . . . . . . . . . . .43
Incoming list . . . . . . . . . . . . . . . . . . . . . . . . . . . . . . . . . . . . . . . . . . . . . . . . . . . . .46
Outgoing list . . . . . . . . . . . . . . . . . . . . . . . . . . . . . . . . . . . . . . . . . . . . . . . . . . . . .48
SMS centre . . . . . . . . . . . . . . . . . . . . . . . . . . . . . . . . . . . . . . . . . . . . . . . . . . . . .49
Troubleshooting . . . . . . . . . . . . . . . . . . . . . . . . . . . . . . . . . . . . . . . . . . . . . . . . . .52
Registering and de-registering handsets . . . . . . . . . . . . . . . . . .53
Automatic registration: . . . . . . . . . . . . . . . . . . . . . . . . . . . . . . . . . . . . . . . . . . . . .53
Manual registration: . . . . . . . . . . . . . . . . . . . . . . . . . . . . . . . . . . . . . . . . . . . . . . .54
De-registering handsets . . . . . . . . . . . . . . . . . . . . . . . . . . . . . . . . . . . . . . . . . . . .56
Switching the base station . . . . . . . . . . . . . . . . . . . . . . . . . . . . . . . . . . . . . . . . . .56
Operating more than one handset. . . . . . . . . . . . . . . . . . . . . . . .57
Changing the name of a handset . . . . . . . . . . . . . . . . . . . . . . . . . . . . . . . . . . . . .57
Changing a handset's internal number . . . . . . . . . . . . . . . . . . . . . . . . . . . . . . . . .58
Making internal calls . . . . . . . . . . . . . . . . . . . . . . . . . . . . . . . . . . . . . . . . . . . . . . .58
Connecting a call . . . . . . . . . . . . . . . . . . . . . . . . . . . . . . . . . . . . . . . . . . . . . . . . .59
Internal enquiry calls . . . . . . . . . . . . . . . . . . . . . . . . . . . . . . . . . . . . . . . . . . . . . . .59
Accepting or rejecting a waiting call . . . . . . . . . . . . . . . . . . . . . . . . . . . . . . . . . . .60
Barging in on a call . . . . . . . . . . . . . . . . . . . . . . . . . . . . . . . . . . . . . . . . . . . . . . . .60
Deactivating the ringer . . . . . . . . . . . . . . . . . . . . . . . . . . . . . . . . . . . . . . . . . . . . .61
Assigning authorisation from the handset . . . . . . . . . . . . . . . . . . . . . . . . . . . . . .62
Room monitoring . . . . . . . . . . . . . . . . . . . . . . . . . . . . . . . . . . . . . . . . . . . . . . . . .63
Walkie-Talkie mode . . . . . . . . . . . . . . . . . . . . . . . . . . . . . . . . . . . . . . . . . . . . . . .66
Individual handset settings . . . . . . . . . . . . . . . . . . . . . . . . . . . . . .68
Changing a handset's display language . . . . . . . . . . . . . . . . . . . . . . . . . . . . . . . .68
Changing volumes, melodies and tones . . . . . . . . . . . . . . . . . . . . . . . . . . . . . . . .68
Activating/deactivating Auto Talk . . . . . . . . . . . . . . . . . . . . . . . . . . . . . . . . . . . . .71
Resetting the handset to the factory setting . . . . . . . . . . . . . . . . . . . . . . . . . . . .71
2

Gigaset 4010 Comfort, GBR, A31008-G4010-B102-1-7619
4010CoIVZ.fm
11.6.01
Base station settings . . . . . . . . . . . . . . . . . . . . . . . . . . . . . . . . . . .72
Repeater support . . . . . . . . . . . . . . . . . . . . . . . . . . . . . . . . . . . . . . . . . . . . . . . . .72
Resetting the base station to the factory setting . . . . . . . . . . . . . . . . . . . . . . . . .73
Base station and handset security. . . . . . . . . . . . . . . . . . . . . . . .74
Changing the system PIN . . . . . . . . . . . . . . . . . . . . . . . . . . . . . . . . . . . . . . . . . . .74
Saving and changing the emergency number . . . . . . . . . . . . . . . . . . . . . . . . . . .75
Displaying and dialling the emergency number . . . . . . . . . . . . . . . . . . . . . . . . . .75
Connecting the base station to a PABX . . . . . . . . . . . . . . . . . . .76
Dialling mode and flash time . . . . . . . . . . . . . . . . . . . . . . . . . . . . . . . . . . . . . . . .76
Saving the prefix (APL) . . . . . . . . . . . . . . . . . . . . . . . . . . . . . . . . . . . . . . . . . . . . .77
Switching temporarily to tone dialling . . . . . . . . . . . . . . . . . . . . . . . . . . . . . . . . .77
Setting pauses . . . . . . . . . . . . . . . . . . . . . . . . . . . . . . . . . . . . . . . . . . . . . . . . . . .78
Appendix. . . . . . . . . . . . . . . . . . . . . . . . . . . . . . . . . . . . . . . . . . . . . .79
Maintenance . . . . . . . . . . . . . . . . . . . . . . . . . . . . . . . . . . . . . . . . . . . . . . . . . . . . .79
Troubleshooting . . . . . . . . . . . . . . . . . . . . . . . . . . . . . . . . . . . . . . . . . . . . . . . . . .79
Guarantee . . . . . . . . . . . . . . . . . . . . . . . . . . . . . . . . . . . . . . . . . . . . . . . . . . . . . . .81
Service: . . . . . . . . . . . . . . . . . . . . . . . . . . . . . . . . . . . . . . . . . . . . . . . . . . . . . . . . .81
Technical data . . . . . . . . . . . . . . . . . . . . . . . . . . . . . . . . . . . . . . . . . . . . . . . . . . . .82
Procedures for mailbox features . . . . . . . . . . . . . . . . . . . . . . . . .84
Activating/deactivating functions . . . . . . . . . . . . . . . . . . . . . . . . . . . . . . . . . . . . .84
Functions during a call . . . . . . . . . . . . . . . . . . . . . . . . . . . . . . . . . . . . . . . . . . . . .84
Compatibility. . . . . . . . . . . . . . . . . . . . . . . . . . . . . . . . . . . . . . . . . . .85
Menu table. . . . . . . . . . . . . . . . . . . . . . . . . . . . . . . . . . . . . . . . . . . .87
Accessories . . . . . . . . . . . . . . . . . . . . . . . . . . . . . . . . . . . . . . . . . . .90
Index . . . . . . . . . . . . . . . . . . . . . . . . . . . . . . . . . . . . . . . . . . . . . . . . .92
3
Gigaset 4010 Comfort
, GBR,
A31008-G4010-B102-1-7619
sichhinw.fm
11.6.01
Congratulations
on purchasing your Siemens Gigaset!
Please read the follo wing pages to find out ho w y our telephone w orks so you can get
the best out of your new phone.
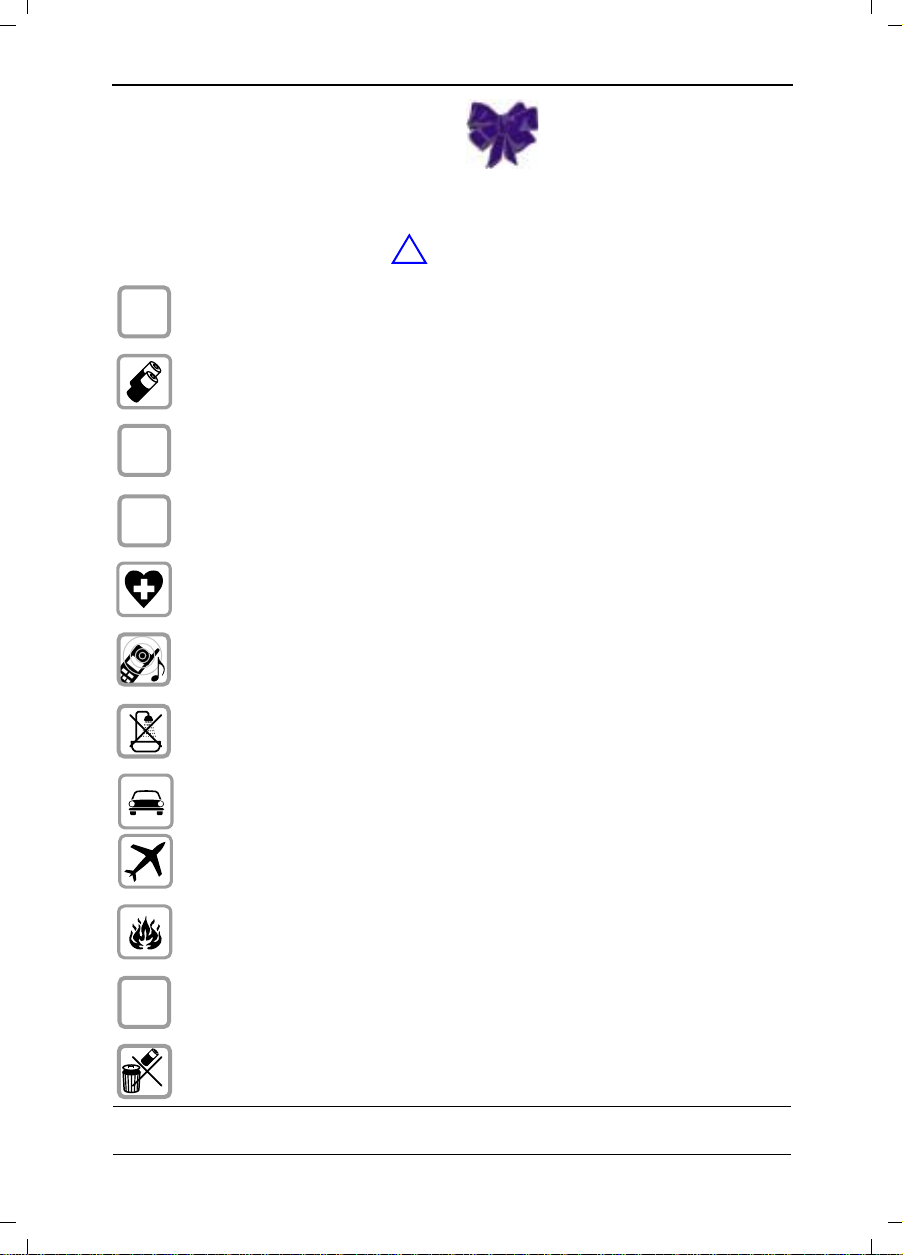
Safety precautions
use
+
,
Only
on the underside of the device.
Only use
Never use ordinary (non-rechargeable) batteries. Otherwise health risks
and personal injuries cannot be excluded.
Insert rechargeable batteries in accordance with polarity symbols
(this instruction is found in the handset's battery compartments).
Use the batteries indicated in these operating instructions
(this instructions is found in the handset's battery compartments).
Medical equipment can be affected by the use of the telephone. Observe
the conditions in your environment (e.g. doctor's practice).
The handset can cause an unpleasant humming sound in hearing aids.
Do not install the base station in bathrooms or showers.
Do not use the telephone while driving a vehicle (Walkie-Talkie mode).
the power supply unit supplied,
approved rechargeable batteries of the same type.
!
identified by the symbol
4
)
Telephones must be switched off at all times in aircrafts (Walkie-Talkie
mode). Prevent accidental activation.
Do not operate the telephone in environments where there is risk of explosion (e.g. paint shops).
Ensure that the operating instructions are included when passing on your
Gigaset to a third party
Dispose of batteries and telephone in an environmentally friendly manner.
Not all functions described in these operating instructions ar e available in all
countries.
Gigaset 4010 Comfort, GBR, A31008-G4010-B102-1-
Preparing the telephone
The package contains the following:
O
one base station
O
one handset
O
one power supply unit
O
one telephone cable
O
one belt clip for the handset
O
two batteries
O
one set of operating instructions.
vorberei.fm
11.6.01
Installing the base stat ion
Notes on the installation
The base station is designed for operation in rooms with a temperature range from +5 °C to +45 °C. Install the base station in a central
location in the home, for example in the hall.
Range and reception strength
The base station range is approx. 300 m outdoors and up to 50 m indoors. The receive strength display sho ws the quality of the radio contact between the base station and the handset:
receive strength 100%
T
receive strength 75%
K
receive strength 50%
U
low receive strength
V
no reception (flashes)
1
5

Gigaset 4010 Comfort, GBR, A31008-G4010-B102-1-7619
Connecting the base station
For the analogue network:
Po wer supply unit
(220/230 V with
mains cable)
1
Insert the
O
small plug
on the mains
into
cable
Place cable in
O
cable duct
Insert power
O
supply unit
into mains
socket
jack
vorberei.fm
11.6.01
Telephone jack with telephone cable
(type varies depending on country)
Key to register additional handsets
(see page 54)
2
Insert
O
O
O
small black plug on the
telephone cable
(clicks into place)
into
;
jack
3
2
1
Place cable in cable duct
Insert telephone jack into tele-
phone socket
O
Only
use
the power supply unit supplied
as indicated on
the underside of the device.
If you buy another cable, ensure that the telephone leads
O
4
free
1
free
2
5
a
3
6
b
4
free
5
free
6
have 3-4 assignment.
Attention: new telephone cable. Only use the cable supplied.
!
6
Gigaset 4010 Comfort, GBR, A31008-G4010-B102-1-
Operating the handset
The display is protected by a plastic film.
Remove
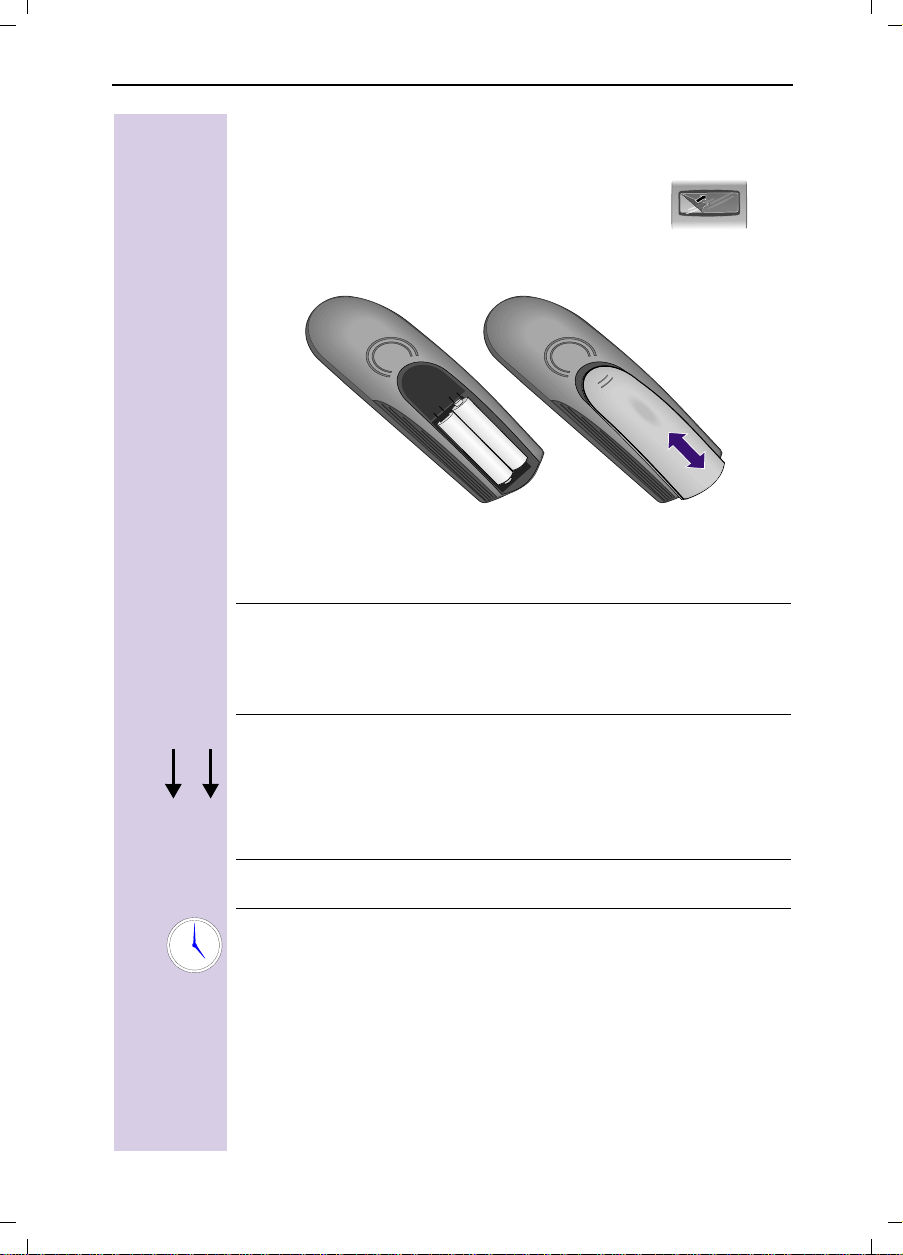
Inserting the batteries
the protective plastic film!
+
–
–
+
vorberei.fm
11.6.01
F
5 h
O
Insert the batteries
Replace
O
To open,
O
cover and push gently
press the grooved area on the cover and slide
O
Only insert the recommended rechargeable
page 82). Never use ordinary (non-rechargeable) batteries as
they may pose a health hazard or cause injury.
O
Never use non-Siemens char ging units as these may damage
the batteries.
ensuring correct polarity
upward
until it clicks into place.
– see figure on left.
back
.
batteries
(see
Placing handset into base station and charging the batteries
Before activ ating your handset, place it in the base station with the display facing upward. After approx. one minute, the handset's internal
number is displayed (e.g. “INT 1”). Successful registration is signalled
by a confirmation beep (crescendo tone sequence).
You can register
Leave the handset for approx. five hours in the base station to charge
the batteries, as they are not charged in the factory. The charging status icon flashes on the handset to indicate that the bat teries are being
charged:
"
Note:
Your Gigaset is now ready for oper ation. Please set date and time (see
page 9) so that the time of incoming calls can be noted correctly.
Batt. flat (symbol flashes)
Batteries
further handsets
1
/3 charged
(see page 54).
Batt.
Batteries full
2
/3 charged
7

Gigaset 4010 Comfort, GBR, A31008-G4010-B102-1-7619
Once the initial charging operation is completed you can re-
O
place your handset in the base station after each call. Charging is controlled electronically. This ensures optimum charging and prolongs battery life.
The batteries heat up during c harging. This is normal and not
O
dangerous.
The battery charging status is correctly displayed only after
O
uninterrupted charging/discharging. You should therefore
avoid opening the battery compartment unnecessarily.
Attaching the belt clip
vorberei.fm
11.6.01
Push the belt clip onto the back of the handset until the side “protru-
sions” click into place.
Activating/deactivating the handset
T o acti vate/deactiv ate, hold
confirmation
The handset is activated as soon as you insert the bat teries and
place the handset in the base station.
beep *.
the end call key – y ou will hear the
down
Activating/deactivating keypad protection
You should disable the handset keypad if you are going to carry the
handset in your pocket or bag. This prevents numbers being dialled by
accident.
If there is an incoming call, the key lock is automatically deactivated
and re-activated after the call has ended.
Accepting a call: press the talk key
T o activ ate/deactivate, ho ld
B
*
beep
!
* Confirmation beep = rising tone sequence,
Error beep = descending tone sequence.
down
.
!
key – you will hear the confirmation
8

Gigaset 4010 Comfort, GBR, A31008-G4010-B102-1-7619
Press keys:
Date and tim e
Your Gigaset can act as an organizer and alarm clock to
help you keep your appointments.
Setting the date and the time
You need to set the date and time so that the date and
time when messages or calls are received can be displayed correctly.
You can also set the clock mode to either 12 h (
) or 24 h display.
pm
Open the menu.
A
Calendar/Clock
]]]]]]]]]]]]]]]]]]]]]]]]]]]]]]]]
Date/Time
]]]]]]]]]]]]]]]]]]]]]]]]]]]]]]]]
e.g.
[<9[[
Select the menu item and confirm.
Select the menu item and confirm.
The current setting is displayed.
Entering the date
Enter the day/month/year (e.g.: 05-20-01, as shown).
Scroll forward one line.
uhrzeit.fm
11.6.01
am
or
e.g.
D[<
6DYH
Entering the time
Enter the hours/minutes (e.g.: 19.05 h, as shown).
Factory default: 24 h mode. If
next to the time, 12 h mode is activated. If you move
the cursor to the time field, you can c hange from am to
using the left display key.
pm
Scroll forward one line.
Select display mode
If necessary, select either 24 h or 12 h display mode.
Save the settings.
or
am
pm is
displayed
9

Gigaset 4010 Comfort, GBR, A31008-G4010-B102-1-7619
Press keys:
Setting the alarm clock
You can use your handset as an alarm clock.
Activating the alarm clock
The active alarm clock rings every day at the time entered. If you have set a time for the alarm call, this is
indicated by the
The telephone is idle:
Open the menu.
A
Calendar/Clock
]]]]]]]]]]]]]]]]]]]]]]]]]]]]]]]]
Alarm Clock
]]]]]]]]]]]]]]]]]]]]]]]]]]]]]]]]
e.g.
[=[[
Select the menu item and confirm.
Select the menu item and confirm.
The current setting is displayed.
Select the menu item.
2Q
Scroll forward one line.
Entering the time for the alarm call
Enter the hours/minutes. The e xample her e is 06.00 h.
Scroll forward one line.
Choosing the ringer melody for the alarm call
Choose the ringer melody.
Save the settings.
6DYH
When the handset is idle, a stored time for the alarm
call is indicated by the
Alarm calls are not made if the room monitor is
active or during automatic redial.
uhrzeit.fm
I
icon in the display.
I
icon.
11.6.01
10

Gigaset 4010 Comfort, GBR, A31008-G4010-B102-1-7619
Press keys:
Deactivating the alarm clock
The alarm clock is set but y ou do not want it to ring e very day
Open the menu.
A
Calendar/Clock
]]]]]]]]]]]]]]]]]]]]]]]]]]]]]]]]
Alarm Clock
]]]]]]]]]]]]]]]]]]]]]]]]]]]]]]]]
Select the menu item and confirm.
Select the menu item and confirm.
Select
2))
Save the settings.
6DYH
Turning off the alarm call
An alarm call is signalled in the same way as an incoming call. The handset rings and the status LED flashes
(approx. 30 s).
Press any key to turn off the alarm call.
Schedule
uhrzeit.fm
.
11.6.01
Calendar/Clock
]]]]]]]]]]]]]]]]]]]]]]]]]]]]]]]]
Set Appoints.
]]]]]]]]]]]]]]]]]]]]]]]]]]]]]]]]
e.g.
A
[<9[
Your handset is able to remind you of
ment. You need to store the date and time of this appointment. You may only set one appointment at a
time.
If you have set an appointment, this is indicated b y the
I
iconin the display.
one
appoint-
Setting an appointment
Open the menu.
Select the menu item and confirm.
Select the menu item and confirm.
Activating the appointment alarm
Select this menu item if the current setting is
2Q
Scroll forward one line.
Entering the date
Enter day/month (e.g.: 05.20 as shown).
Scroll forward one line.
2))
.
11

Gigaset 4010 Comfort, GBR, A31008-G4010-B102-1-7619
Press keys:
Entering the time
e.g.
[D[<
Enter the hours/minutes (e.g.: 9.05 h as shown).
Scroll forward one line.
Choosing the ringer melody for the appointment
alarm
Choose the ringer melody.
Save the settings.
6DYH
uhrzeit.fm
11.6.01
An appointment alarm will ring only if the handset is idle. An appointment alarm is not activated if the room monitor is active or during
automatic redial.
Turning off the appointment alarm
An appointment alarm is signalled in the same way as
an incoming call. The handset rings and the status LED
flashes (approx. 30 sec).
Press any key to turn off the appointment alarm.
12

Gigaset 4010 Comfort, GBR, A31008-G4010-B102-1-7619
Press keys:
Display missed appointments and anniversaries
Appointments and anniversaries that have been signalled on the handset but not been accepted are sa ved
in a list.
signals a new unaccepted appointment/anniver-
$SSW
sary. Press the right display key to show the list of
events.
Then select
Proceed as f ollo ws to display the appoint ment already
shown once more:
A
Open the menu.
Calendar/Clock
]]]]]]]]]]]]]]]]]]]]]]]]]]]]]]]]
Missed Dates
]]]]]]]]]]]]]]]]]]]]]]]]]]]]]]]]
Select the menu item and confirm.
Select the menu item and confirm.
Select a missed appointment. The information on the
missed appointment is displayed.
A missed appointment is identified by
A missed anniversary (see page 27) is identified by
.
4
uhrzeit.fm
Missed Appoint.
11.6.01
I
.
I
.
Use
ry.
Go back to the list.
to delete a missed appointment/anniversa-
'HOHWH
13

Gigaset 4010 Comfort, GBR, A31008-G4010-B102-1-7619
Press keys:
Making calls
Make an external call
External calls are calls into the public telephone network.
Enter the call number; if you make a mistake, use the
Q
display key and enter the correct number.
Press the talk key.
!
Press the end call key to end the call.
telef.fm
11.6.01
or
or
&DOO$OO
e.g.
or
!
9
!
C
You can also press the talk key
O
(you hear the dial tone) and then enter the
telephone number – each digit is dialled immediately.
You can cancel the dialling operation by
O
pressing the end call key
You can insert a
O
and the call number: After entering the prefix, open the supplementary menu using
the display key
item “Insert Pause”.
pause
A
between the prefix
and select the menu
.
!
first
Making internal calls
Internal calls are calls to other registered handsets. Internal calls are free of charge (calls, sa y , from a handset
in the kitchen to one in the living room).
Open the list of internal users. Your own handset is
identified by “<”.
Select the handset you want to call and press the talk
key.
Enter the handset's internal telephone number.
Call all handsets:
All handsets are called.
14
End the call:
Press the end call key to end the call.
Gigaset 4010 Comfort, GBR, A31008-G4010-B102-1-7619
Press keys:
Answering a call
Your handset rings (ringer) and the status LED flashes.
!
/
Press the lifting or handsfree key.
,
or
telef.fm
11.6.01
Y
Simply remove the handset from th e base station (f ac -
M
tory setting: “Auto talk” (see page 71).
If the
O
O
O
ringer is disturbing you,
display key
As long as the call is displayed, you can ac-
cept it by pressing the talk key
handsfree talking key ,.
You can also adjust the handset volume during the call (see page 68).
6LOHQW
.
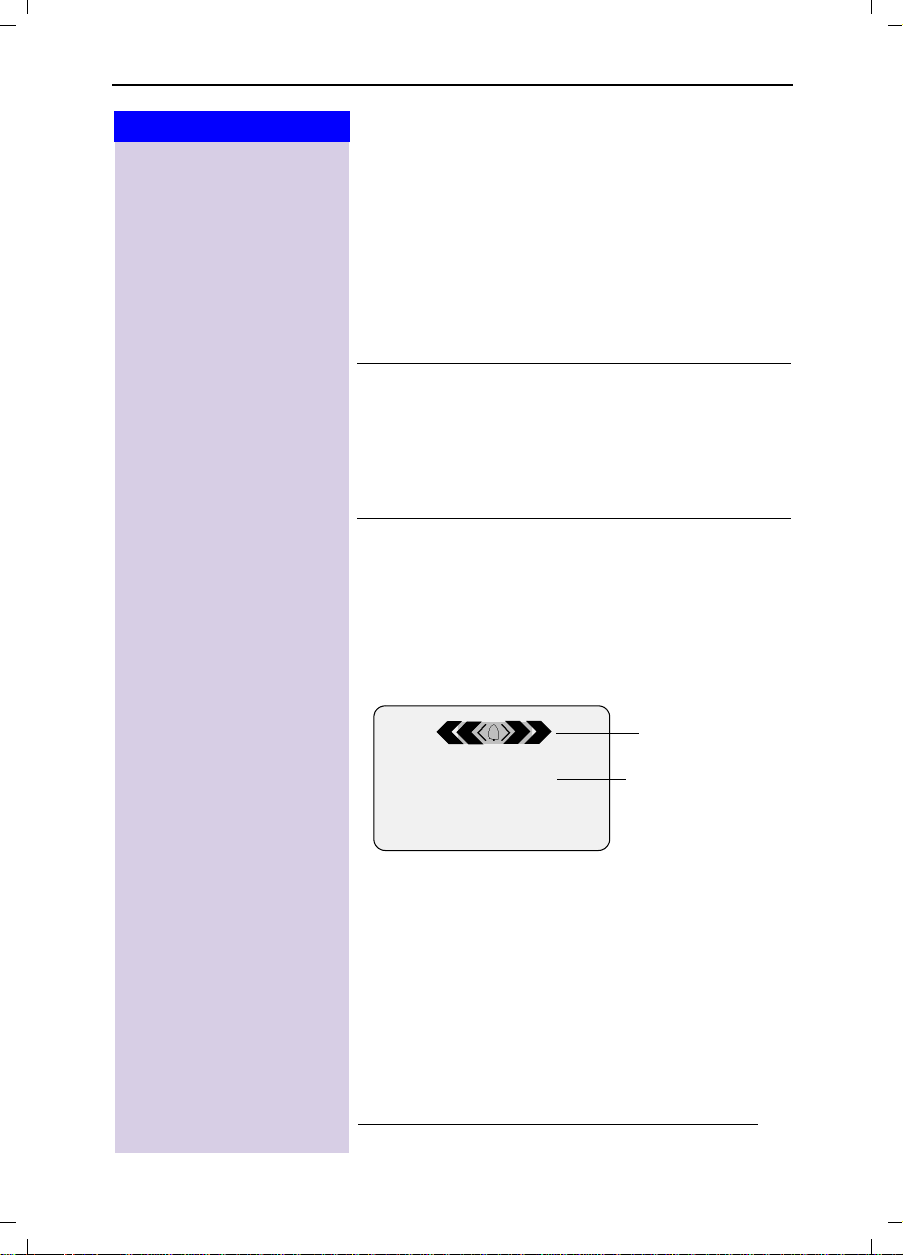
Displaying the telephone number (CLIP)
The network provider must support calling line identification (
been sent. Contact your network provider to use this
function.
An incoming call is displayed as follows (example):
6LOHQW $FFHSW
The caller's name is displayed if t he telephone number
received is stored in the handset’s directory (for exam-
ple: Anna).
) and the telephone number must have
CLIP
Bell icon
0891234567
Telephone
number
press the
or the
!
*
* Not available in all countries.
15

Gigaset 4010 Comfort, GBR, A31008-G4010-B102-1-7619
Press keys:
If the telephone number or the name is not displayed,
you will see:
External
Unavailable
or
liberately suppressed by the caller (
Calling Line Identification Presentation =
CLIP
The caller's telephone number is displayed
Calling Line Identification Restriction =
CLIR
The callers telephone number is suppressed
Handsfree talking
Handsfree talking, with the loudspeaker switched on,
offers the following advantages:
Befor e dialling, you hear the dial tone without having
O
to lift the handset to your ear.
Other people can listen in and join in the call.
O
This leaves your hands free, for example to take
O
notes.
telef.fm
If you have not requested
11.6.01
CLIP
.
If call number display has been de-
).
CLIR
16
Handsfree talking when dialling
Dial the call number.
Q
Press the handsfree key.
,

Gigaset 4010 Comfort, GBR, A31008-G4010-B102-1-7619
Press keys:
Handsfree talking during a call
Activate handsfree talking.
,
Set the volume:
more.
Raise or lower the volume.
Save the volume level.
6DYH
Change from handsfree talking to the handset.
!
End the call.
If you want to replace the handset in the base
station/charging unit during a call (if for example the battery is flat),
free key
Muting the microphone
If, during an e xternal call, y ou wish to talk to other people
in the room in confidence you can s witc h off the microphone. The external cal ler will th en not be able t o hear
your conver sation. You will also not be able to hear the external caller.
Mute the microphone – the call is placed on hold and
the external caller will hear music.
Re-activate the microphone:
S
Press to return to the external caller.
telef.fm
press the handsfree key
hold down the hands-
.
,
,
11.6.01
once
Copy to Directory
]]]]]]]]]]]]]]]]]]]]]]]]]]]]]]]]
Save Entry
]]]]]]]]]]]]]]]]]]]]]]]]]]]]]]]]
Copying a telephone number to the directory
You can copy a telephone number to the directory during a call.
You are conducting an external call:
A
Open the menu
Select the menu item and confirm.
An input field opens in which you can enter the telephone number and the name of the caller . If the incoming call number has been transmitted it appear s in the
input field.
Enter the name of the caller if necessary.
Q
A
Open the menu.
Save the set t ings
17

Gigaset 4010 Comfort, GBR, A31008-G4010-B102-1-7619
Press keys:
Mailbox (external answering machine)
Storing the mailbox for fast access
You can use the mailbox for fast access. Check with
your network provider for this.
Open the menu.
A
Ans Machine
]]]]]]]]]]]]]]]]]]]]]]]]]]]]]]]]
Set Key 1
]]]]]]]]]]]]]]]]]]]]]]]]]]]]]]]]
Mailbox
]]]]]]]]]]]]]]]]]]]]]]]]]]]]]]]]
Save Entry
]]]]]]]]]]]]]]]]]]]]]]]]]]]]]]]]
Mailbox
]]]]]]]]]]]]]]]]]]]]]]]]]]]]]]]]
Select the menu item and confirm.
Select the menu item and confirm.
Set the mailbox.
Dial the mailbox number.
)
Open the menu.
A
Store entry.
Holding down the key connects you dir ectly
to the mailbox (fast access).
Checking the mailbox
Prerequisite:
You have dialled the mailbox number.
Display flashes.
"
Select the menu item and confirm.
Follow the mailbox instructions.
telef.fm
11.6.01
18
Gigaset 4010 Comfort, GBR, A31008-G4010-B102-1-7619
Press keys:
Enhanced telephone features
Your Gigaset not only lets you make and receive telephone calls it gives you quick and easy access to a
wide range of modern communication features.
Automatic redial
Your handset automatically saves the last five telephone numbers or names dialled (see page 21).
komfort.fm
11.6.01
Automatic Redial
]]]]]]]]]]]]]]]]]]]]]]]]]]]]]]]]
/
!
/
A
!
Manual redial
Display the telephone number/name.
Select the required telephone number/name.
Press the talk key – the tele phone nu mber is dialled.
Automatic redial
The telephone number is automatically re dialled ten times
with an interval of 20 seconds in each case. T he handsfree
key and the LED flashes and speaker on/off is active.
This function switches itself of f aft er 10 unsuccessful tries.
To cancel automatic redial, press or any key.
The person you called is not available:
Display the telephone number/name.
Select a telephone number/name and open the menu.
Activate automatic redialling.
When the user answers:
Press the talk key.
Automatic redialling is deactivated if you subse-
quently make a call. You must re-activate it af terwards.
Off
19

Gigaset 4010 Comfort, GBR, A31008-G4010-B102-1-7619
Press keys:
Copying the telephone number to the directory
Display the telephone number.
/
Select a telephone number and open the menu.
The directory entry field opens.
The telephone number is already entered.
If necessary, change the telephone number, enter the
)
name (and, if appropriate, an anniversary, see page 27).
For information on entering letters and characters see
page 22.
Open the menu.
A
Save the entry.
Copy to Directory
]]]]]]]]]]]]]]]]]]]]]]]]]]]]]]]]
Save Entry
]]]]]]]]]]]]]]]]]]]]]]]]]]]]]]]]
A
Deleting a number from redialling list
Display the telephone number/name.
/
Select a telephone number and open the menu.
The telephone number is deleted.
Delete Entry
]]]]]]]]]]]]]]]]]]]]]]]]]]]]]]]]
A
komfort.fm
11.6.01
In the automatic redialling menu you can also
display a telephone number or add to it.
20

Gigaset 4010 Comfort, GBR, A31008-G4010-B102-1-7619
Press keys:
Directory and network access list
komfort.fm
11.6.01
New Entry
]]]]]]]]]]]]]]]]]]]]]]]]]]]]]]]]
Save Entry
]]]]]]]]]]]]]]]]]]]]]]]]]]]]]]]]
/
With the
phone numbers and then dial them at push of a button
(depending on the size of the entries).
If you wish to take advantage of offers from low-cost
telephone companies you can save their prefixes
(Call-by-Call) in the
The telephone directory and the network access list are
used in exactly the same way.
directory
you can store up to 200 tele-
network access list
Storing an entry
Open the directory/network access list.
Select the menu item and confirm.
Enter the
Q
For information on entering letters and characters see
page 22.
Scroll to the name field and enter the
Q
(In the case of directory: enter the anniversary, where
applicable, see page 27 ).
Open the menu.
A
Save the entry.
telephone number
If your Gigaset is connected to a PABX and if a
prefix (“0” for example) has to be entered before the number f or e xternal calls in your PABX,
you must enter this prefix as the first digit of the
telephone directory entry (see page 77).
(max. 32 digits).
name
.
21
Gigaset 4010 Comfort, GBR, A31008-G4010-B102-1-7619
Press keys:
Character map
Press the relevant key repeatedly or hold it down:
1 x 2 x3 x4 x5 x6 x7 x8 x9 x10 x11x12x13x14x
\
9
;
<
=
>
?
D
C
[
B
1
*
abc2дбавгз
def3ëéèê
gh i4ïíìî
jkl5
mno6цсутфх
pqrs7ß
tuv8üúùû
wxyz9яэжше
aoA* /()<=>%
.,?!0+-:¿¡
#@\&§
£$¥¤
komfort.fm
“‘
11.6.01
;_
The
The entries are sorted in the
1. Blank:
2.Digits: (0 - 9)
3.Letters (alphabetical)
4.Other characters
To bypass the alphabetical sequence of entries in the
directory, enter a blank before the name. This entry
then goes to the start of the directory (for example,
“
Karla”).
*
first letter
written in
marks), the letters immediately afterwards are
written in lower case.
To change a
case or vice versa press
Control the cursor with
The letter to the left of the cursor is deleted
with
Letters ar e alwa ys inserted to the lef t of the cursor.
*
of the name is
upper case
letter
.
automatically
(also after punctuation
from upper case to lower
.
C
following sequence:
.
22

Gigaset 4010 Comfort, GBR, A31008-G4010-B102-1-7619
Press keys:
Dialling a number from the directory
Open the directory.
e.g.
Enter the first letter of the name
(e.g. “E“ f or Emma): Press the
with the
order.
Press the talk key. The number is dialled.
!
After selecting the number, you can also open
the menu
change the number using and dial with the
talk key
Dialling with the network access list (call-bycall)
This function enables the prefix of thenetw ork provider
to be inserted before the telephone number (linking).
Open the network access list.
A
Display Number
]]]]]]]]]]]]]]]]]]]]]]]]]]]]]]]]
Select a call-by-call number and open menu.
Select the menu item and confirm.
Enter the telephone number for “linking”
)
or
komfort.fm
key twice and scroll
key. The names are listed in alphabetical
, select , extend/
A
!
.
Display Number
11.6.01
!
Select the telephone number for “linking” in the dir ectory and confirm.
Press the talk key. The number is dialled.
Dialling from the network access list is best
done using fast access (see page 37). The prefix
of the network provider is dialled before the telephone number.
23

Gigaset 4010 Comfort, GBR, A31008-G4010-B102-1-7619
Press keys:
Displaying and changing a directory entry
Open the directory.
Select the required entry.
Display the complete information on the entry.
9LHZ
If necessary, you can change the telephone number/
name:
&KDQJH
Save Entry
]]]]]]]]]]]]]]]]]]]]]]]]]]]]]]]]
Open the input field and make the required changes.
If necessary change the telephone number.
Q
Scroll to the name field and, if necessary, change the
Q
name.
For information on entering letters and characters see
page 22.
Scroll to the anniversary field and, if necessary, change
Q
the date and time of the anniversary (see page 27).
Open the menu.
A
Confirm changes.
komfort.fm
11.6.01
Delete Entry
]]]]]]]]]]]]]]]]]]]]]]]]]]]]]]]]
Deleting a single entry
Open the directory/network access list.
/
Select the required entry.
Open the menu.
A
A confirmation beep sounds. The entry is deleted.
24

Gigaset 4010 Comfort, GBR, A31008-G4010-B102-1-7619
Press keys:
Copying an entry to another handset
Y ou can cop y an entry to another Comfort handset to sa ve
yourself time and ef fort.
Open the directory/network access list.
/
Select the required entry.
Open the menu.
A
Select the menu item and confirm.
Select the internal user (receiving handset) and confirm.
The directory/network access list is being copied.
Copying a further entry:
Press.
<(6
Select the required entry.
Initiate copying process.
&RS\
Ending the copying process:
Press.
12
When the entry has been successfully copied, you will
hear a confirmation beep on the receiving handset.
Copy Entry
]]]]]]]]]]]]]]]]]]]]]]]]]]]]]]]]
komfort.fm
11.6.01
25

Gigaset 4010 Comfort, GBR, A31008-G4010-B102-1-7619
Press keys:
Copying the directory or network access list
You can copy the
cess list to another Comfort handset to save yourself
time and effort.
Open the directory/network access list.
/
Select the required entry.
Open the menu.
A
Select the menu item and confirm.
The list of internal users is displayed.
Select the internal user (receiving handset) and con-
firm.
The directory/network access list is being copied.
When it has been successfully copied, you will hear a
confirmation beep on the receiving handset. Older entries are not affected...
The transmission is interr upte d:
if the memory of the receiving handset is full
O
(the last entry is displayed)
if you are called.
O
Transmission of an entry currently being sent
will be completed.
Send List
]]]]]]]]]]]]]]]]]]]]]]]]]]]]]]]]
komfort.fm
directory or the network ac-
entire
11.6.01
Delete List
]]]]]]]]]]]]]]]]]]]]]]]]]]]]]]]]
26
Receiving the telephone book or network access list
Transfer of the telephone book or network access list
is automatic.
The display shows how many entries have been received by the telephone after transmission has been
completed. Entries with identical numbers are not
overwritten.
For this reason the number of stored entries can differ
from the number of transmitted entries.
Deleting the directory or network access list
Open the directory or network access list.
/
Select the required entry.
Open the menu.
A
Select the menu item and confirm.
Confirm delete all entries.
<(6
Loading...