


PRO-2052
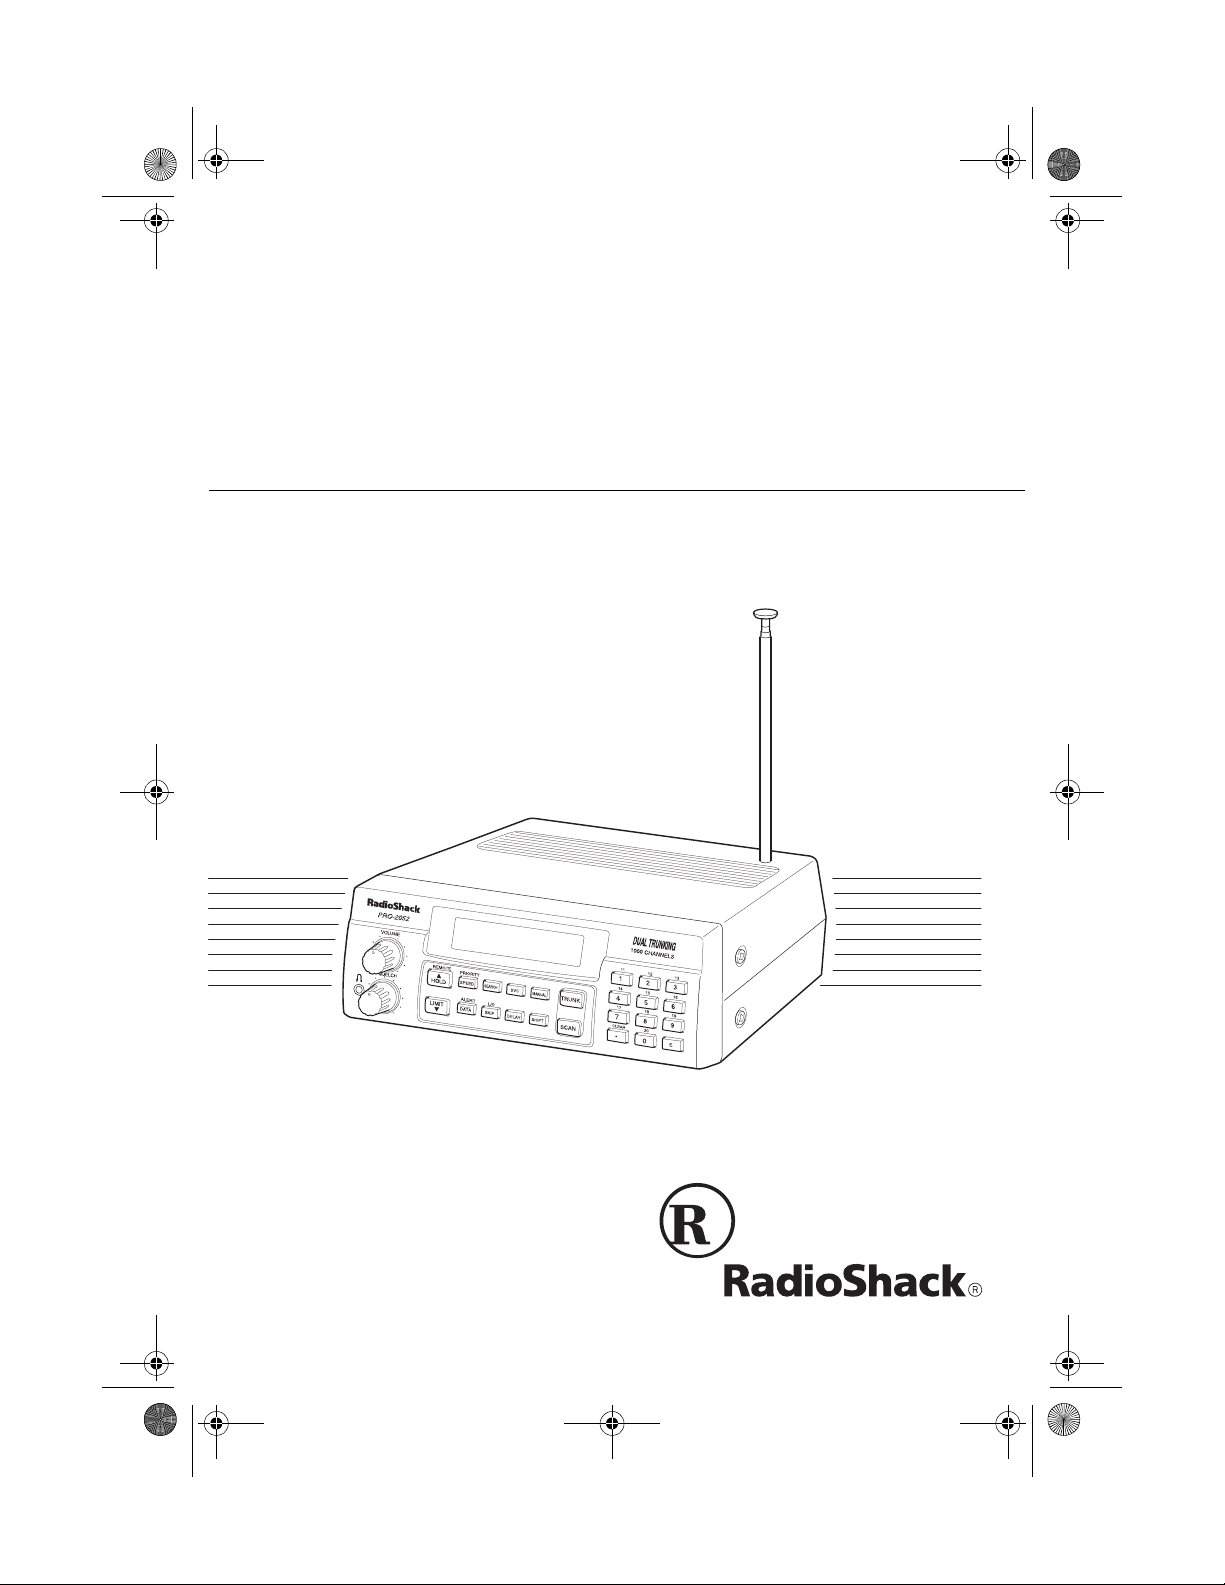
Owner’s Manual
Cat. No. 20-432
PRO-2052
1000-Channel Dual Trun king
TrunkTracker Home Scanner
Please read before using this equipment.
20-432.fm Page 1 Friday, July 14, 2000 11:30 AM

2
INTRODUCTION
Your new RadioShack PRO-2052
1000-Channel Dual Trunking Trunk-
Tracker Home Scanner is one of a
new generation of scann ers designed
to track Motorola
Type I, Type II
(such as Smartnet
and Privacy
Plus
), GE/Ericsson EDACS, and hy -
brid analog trunking systems, which
are extensively used in many 800
MHz, 900 MHz and UHF communi ca-
tion systems.
Trunking communications systems let
a large group of 2 -way r adio users (or
even different groups of 2-way radio
users) efficiently use a group of fre-
quencies. Instead of selecting a spe-
cific frequency for a transmissio n, the
2-way radio user simply sel ects a talk
group. The trunking s ystem automati-
cally transmits the call on the first
available frequency , and also sends a
code that uniquely identifies that 2-
way radio user’s transmission on a dif-
ferent frequency called a data chan-
nel.
Since the trunking system might send
individual 2-way radi o user’s c alls and
response transmissions on different
frequencies, it is difficult to listen to
trunked communications using a regu-
lar scanner. The PRO-2052 monitors
the data channel frequ ency sent with
a 2-way radio user’s tran smissi on and
instantly switches to an active fre-
quency, so you can he ar the call and
response for that 2-way radio user
and easily “follow” the conversation.
The scanner also lets you scan con-
ventional transmissions, and is pre-
programmed with service-search
banks for conven ience. By pre ssing a
single button, you can quickly search
those frequencies most commonly
used by public service and other
agencies without tedious and compli-
cated programming.
This scanner gives you di rect access
to over 51,000 exciting frequencies,
including those used by police and fire
departments, ambulance services,
and amateur radio services, and you
can change your selection at any time.
FEATURES
Your scanner also has these special
features:
Flexible Operation
— you can track
both Motorola and GE/Erics son trunk-
ing systems (used by most trunking
communications systems today), let-
ting you hear more calls than many
standard trunking scanners.
Frequency Coverage to 1.3 GHz
—
provides a wide ran ge of frequencies
you can listen to.
Twenty Channel-Storage Banks
—
let you store 50 channels in each bank
(1000 total channels), letting you
group channels so you can more easi-
ly identify calls.
©
1999 Tandy Corporation.
All Rights Reserved.
RadioShack is a registered trademark used by Tandy Corporation.
HyperSearch and HyperScan are trademarks used by Tandy Corporation.
20-432.fm Page 2 Friday, July 14, 2000 11:30 AM

3
NWR-SAME/Weather Alert
— you
can set the scanner to sound an alert
when it receives NOAA’s Specific
Area Message En codi ng (S AM E) co d -
ed weather emergency sig nal, provid-
ing more complete information about
weather conditions in yo ur immediate
area and letting you avoid hearing
alerts for geographical areas that do
not interest you.
Remote PC Function
— lets you con-
trol the PRO-2052 from your pe rsonal
computer.
Five Scan Lists
— let you store up to
50 IDs in each tracki ng bank (up to a
total of 1000).
Triple-Conversion Circuitry
— virtu-
ally eliminates any interference from
IF (intermediate frequency) images,
so you hear only the selected frequen-
cy.
Scan Delay
— delays scanning for
about 2 seconds bef ore m oving to an -
other channel in conventional mode,
so you can hear more replies that are
made on the same channel. In trunk
scanning mode, it delays for about 5
seconds before moving to another ID.
Lock-Out Function
— lets you set
your scanner to skip over specified
channels or frequencies when scan-
ning or searching, and skip over IDs
when tracking trunked systems.
Priority Channels
— lets you pro-
gram one channel in each bank (10 in
all). As the scanner scans a bank, it
checks the bank’s pr iority channel e v-
ery 2 seconds so you don't miss trans-
missions on that channel.
Five Service-Search Banks
— let
you search preset frequen cies in sep-
arate public se rvice, police, fire/emer -
gency, aircraft, and weather b anks, to
make it easy t o loca t e sp e cif i c types of
calls.
HyperSearch
and HyperScan
—
let you set the scanner to search at up
to 300 steps per se cond (i n frequen cy
bands with 5 kHz steps) and scan at
up to 50 channel s per se cond, to help
you quickly find interesting broad-
casts. (The normal search speed is
100 steps per second).
Data Signa l Skip
— lets you set the
scanner to skip non-modulated or data
signals during scanning and searches.
This lets the scanner avoid non-voi ce
signals, making a sc an or sea rch fast-
er.
Manual Access
— you can directly
access any stored channel by entering
that channel’s number.
Liquid-Crystal Display
— makes it
easy to view and change program-
ming information.
Display Backlight
— makes the
scanner easy to read in low-light situa-
tions.
20-432.fm Page 3 Friday, July 14, 2000 11:30 AM

4
Supplied Telescoping Antenna
—
provides good reception of strong lo-
cal signals.
External Antenna Terminal
— lets
you connect an external ante nna with
a BNC connector to the scanner for
improved reception of distant/weaker
signals.
Memory Backup
— keeps the chan-
nel frequencies stored in memory in
the event AC power goes out.
Key Confirmation Tones
— the
scanner sounds a to ne when yo u per-
form an operation correctly, and an er-
ror tone if you make an error.
Duplicate Channel Alert
— warns
you when the frequency you are stor -
ing already exists in memory.
Disconnect Tone Detect
— the scan-
ner automatically tunes to th e tr un ki ng
data channel when it receives a dis-
connect transmission. You can turn
this feature off to conti nuo usl y mon ito r
a channel with a weak transmission
during disconnected conversations.
Your PRO-2052 scanner can receive
these bands:
Note:
See “Specifications” on Page 68
for more information about the scan-
ner’s frequency steps.
Frequency
Range (MHz)
Types of
Transmissions
29–29.7 10-Meter Ham Band
29.7–50 VHF Lo
50–54 6-Meter Ham Band
108–136.975 Aircraft
137–144 Military Land Mobile
144–148 2-Meter Ham Band
148–174 VHF Hi
179.75–215.75 VHF TV
216–225 1-Meter Ham Band
225–400 UHF Aircraft
400–420 Federal
Government
420–450 70-cm Ham Band
450–470 UHF Standard Band
470–512 UHF “T” Band
806–824
851–869
896–956
Public Service “800”
except
Cellular Band
1240–1300 25-cm Ham Band
20-432.fm Page 4 Friday, July 14, 2000 11:30 AM

5
FCC NOTICE
Your scanner m ight cause radio or TV
interference even when it is op erating
properly. To determine whether your
scanner is causing the interference,
turn off your scanner. If the interfer-
ence goes away, your scanner is
causing it. Try the following methods
to eliminate the interference:
• Move your scann er a w ay from the
receiver.
• Connect your scanner to an outlet
that is on a different electr ical cir-
cuit from the receiver.
• Contact your local RadioShack
store for help.
Note:
Mobile use of this scanner is
unlawful or requires a per mit in some
areas. Check the laws in your area.
SCANNING LEGALLY
Your scanner covers frequencies
used by many different group s includ-
ing police and fire departments, ambu-
lance services, government agencie s,
private companies, a mateur rad io ser -
vices, military operations, pager ser-
vices, and wireline (telephone and
telegraph) service pro vide rs. It is leg al
to listen to almo st every transmission
your scanner can receive. However,
there are some transmissions you
should never intentionally listen to.
These include:
• telephone conversations (cellular,
cordless, or other private means
of telephone signal transmission)
• pager transmissions
• any scrambled or encrypted trans-
missions
According to th e Electro nic Comm uni-
cations Privacy Act (ECPA), you are
subject to fines and possible imprison-
ment for intentionally listening to, us-
ing, or divulging the contents of such a
transmission unless you have the con-
sent of a par ty to the communication
(unless such activity is otherwise ille-
gal).
This scanner is designed to prevent
reception of illegal transmissions, in
compliance with the law which re-
quires that scanners be man ufactured
in such a way as to not be easily mod-
ifiable to pick up those transmi ssions.
Do not open your scanner's case to
make any modifications that c ould al-
low it to pick up transmissions that it is
not legal to listen to. Doing so could
subject you to legal penalties.
We encourage responsible, legal
scanner use.
20-432.fm Page 5 Friday, July 14, 2000 11:30 AM

6
CONTENTS
Preparation ........................................................................................................... 8
Connecting an Antenna ................................................................................... 8
Connecting Power ........................................................................................... 9
Connecting an Extension Speaker ................................................................ 10
Connecting an Earphone/Headphones ......................................................... 11
Understanding Your Scanner ............................................................................ 12
A Look at the Front Panel .............................................................................. 12
A Look at the Display ..................................................................................... 14
Understanding Banks .............. ....... ...... ....... ...... ....... ...... ....... ...... .................. 17
Understanding Trunking ............................... ............................................. ..... 17
Operation ............................................................................................................ 18
Turning On the Scanner and Setting Squelch ............................................... 18
Storing Known Frequencies into Channels .................................................... 18
Searching Service Banks .............................................................................. 19
Limit Search ................................................................................................... 20
Scanning the Stored Channels ...................................................................... 21
Manually Selecting a Channel ....................................................................... 21
Deleting a Frequency from a Channel ........................................................... 21
Priority ........................................................................................................... 21
Special Features ................................. ...... ....... ...... ....... ...... ....... ...... ....... ...... ..... 23
Delay ............................................................................................................. 23
Turning Channel-Storage Banks On and Off ................................................. 23
Locking Out Channels and Frequencies ........................................................ 23
Turning the Key Tone On and Off ................................................................... 24
Changing Search Speeds .............................................................................. 25
Skipping Data Signals ................................................................................... 25
Using NWR-SAME and Weather Alert .......................................................... 25
Testing Weather Alert Reception ................................................................... 28
Trunk Scanning .................................................................................................. 30
Types of Trunking Systems ............................................................................ 30
Setting the Scanner to the Trunk Scanning Mode ......................................... 31
Setting Squelch for the Trunk Scanning Mode ............................................... 31
Programming Trunked Frequencies ............................................................... 32
Scanning a Trunked Bank .............................................................................. 33
Monitoring IDs ............................................................................................... 37
Channel Activity Indicators ............................................................................ 37
Scan Lists ...................................................................................................... 37
Scanning the Scan Lists ................................................................................ 39
Scanning Type I and Hybrid Trunked Systems .............................................. 40
20-432.fm Page 6 Friday, July 14, 2000 11:30 AM

7
PC Remote Function ......................................................................................... 46
Connecting the Scanner to a Computer ........................................................ 46
Setting the Remote Communication Format ................................................. 46
Turning the Remote Function On and Off ..................................................... 47
PC to Scanner Commands ............ ....... ...... ............................................. ..... 47
PC to Scanner Functions List ....................................................................... 48
Scanner to PC Responses ............................................................................ 52
Scanner Mode Codes ................................................................................... 53
A General Guide to Scanning ........................................................................... 55
Guide to Frequencies .................................................................................... 55
Guide to the Action Bands ............................................................................ 56
Band Allocation ............................................................................................. 57
Frequency Conversion .................................................................................. 63
Troubleshooting ..................... .................... ................... .................... ................. 64
Resetting the Scanner .................................................................................. 66
Care and Maintenance ...................................................................................... 67
Specifications .................................................................................................... 68
20-432.fm Page 7 Friday, July 14, 2000 11:30 AM
8
PREPARATION
This scanner is des igned primarily for
use in the home as a base station.
You can place it on a desk, she lf, or
table.
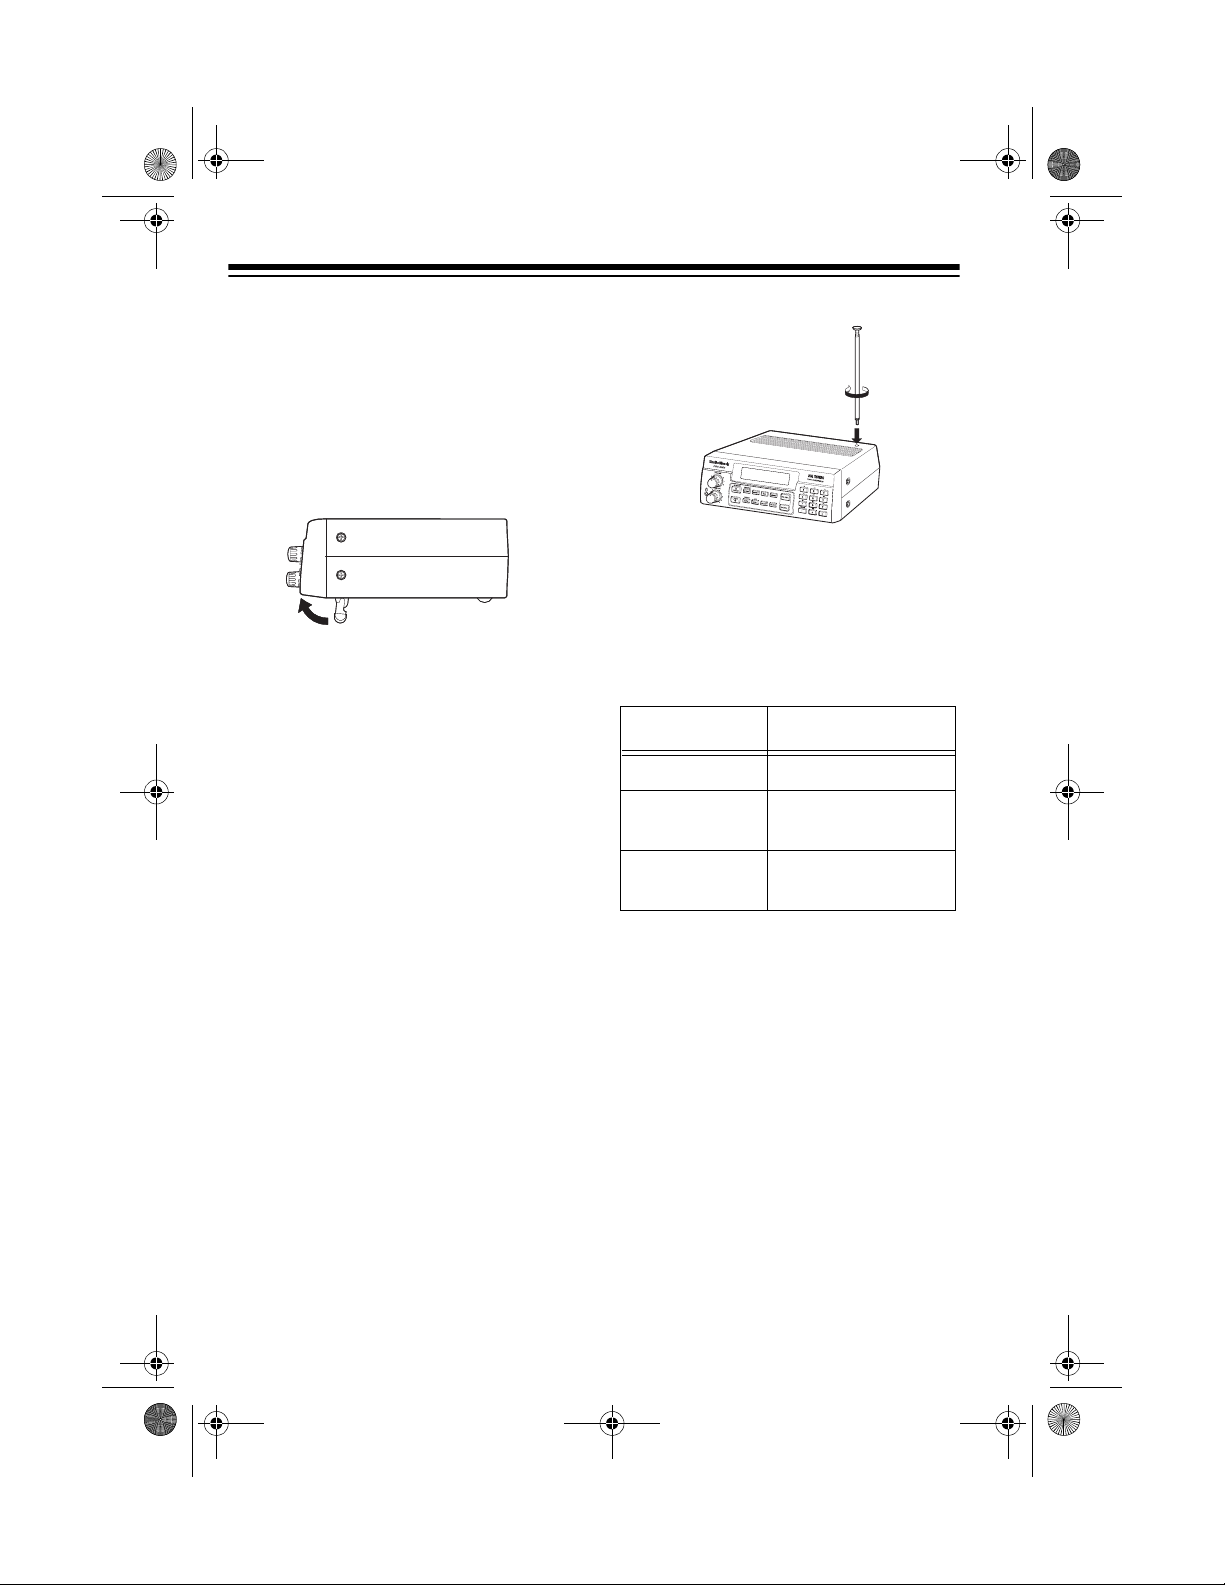
Your scanner’s front feet fold up or
down. Adjust them to give you the
best view of the display.
Your scanner’s display is protected
during shipment by a piece of film.
Peel off this film before you use the
scanner.
CONNECTING AN
ANTENNA
Connecting the Supplied
Antenna
You must install an antenna before
you can operate the scanner.
The supplied telescoping antenna
helps your scann er receive strong lo-
cal signals. To install the antenna,
thread it clockwise into the hole on the
scanner’s top.
The scanner’s sensitivity depends on
the antenna’s leng th an d v ariou s e nv i-
ronmental condition s. For the best re-
ception of the transm issions you want
to hear, adjust the antenna’s length.
Connecting an Outdoor
Antenna
Instead of the supplied antenna, you
can connect an outdoor base-station
or mobile antenna (not supplied) to
your scanner using a BNC conn ector.
Your local RadioShack store sells a
variety of antennas. Choose the one
that best meets your needs.
When deciding on a mobile or base-
station antenna an d its location, con-
sider these points:
Frequency Antenna Length
29–54 MHz Extend fully
108–400 MHz Collapse one
segment
406–1300 MHz Collapse both
segments
20-432.fm Page 8 Friday, July 14, 2000 11:30 AM
9
• The antenna should be as hi gh a s
possible on the vehicle or build-
ing.
• The antenna and its cable shoul d
be as far as possible from sources
of electrical noise (appliances,
other radios, etc.).
• The antenna should be vertical for
the best performance.
To connect an optional base-station or
mobile antenna, first re move the sup-
plied antenna from the scanner. Al-
ways use 50-ohm co axial cable, such
as RG-58 or RG-8, to connect the
base-station or mobile antenna. For
lengths over 50 feet, use RG-8 low-
loss dielectric co axial cable. If the an-
tenna cable’s connec tor does not fit i n
the
ANT.
jack, you migh t also need a
Motorola-to-BNC ante nna plug adapt-
er, such as RadioShack Ca t. No. 278 -
117. Your local RadioShac k store c ar-
ries a wide variety of coaxial a ntenna
cable and connectors.
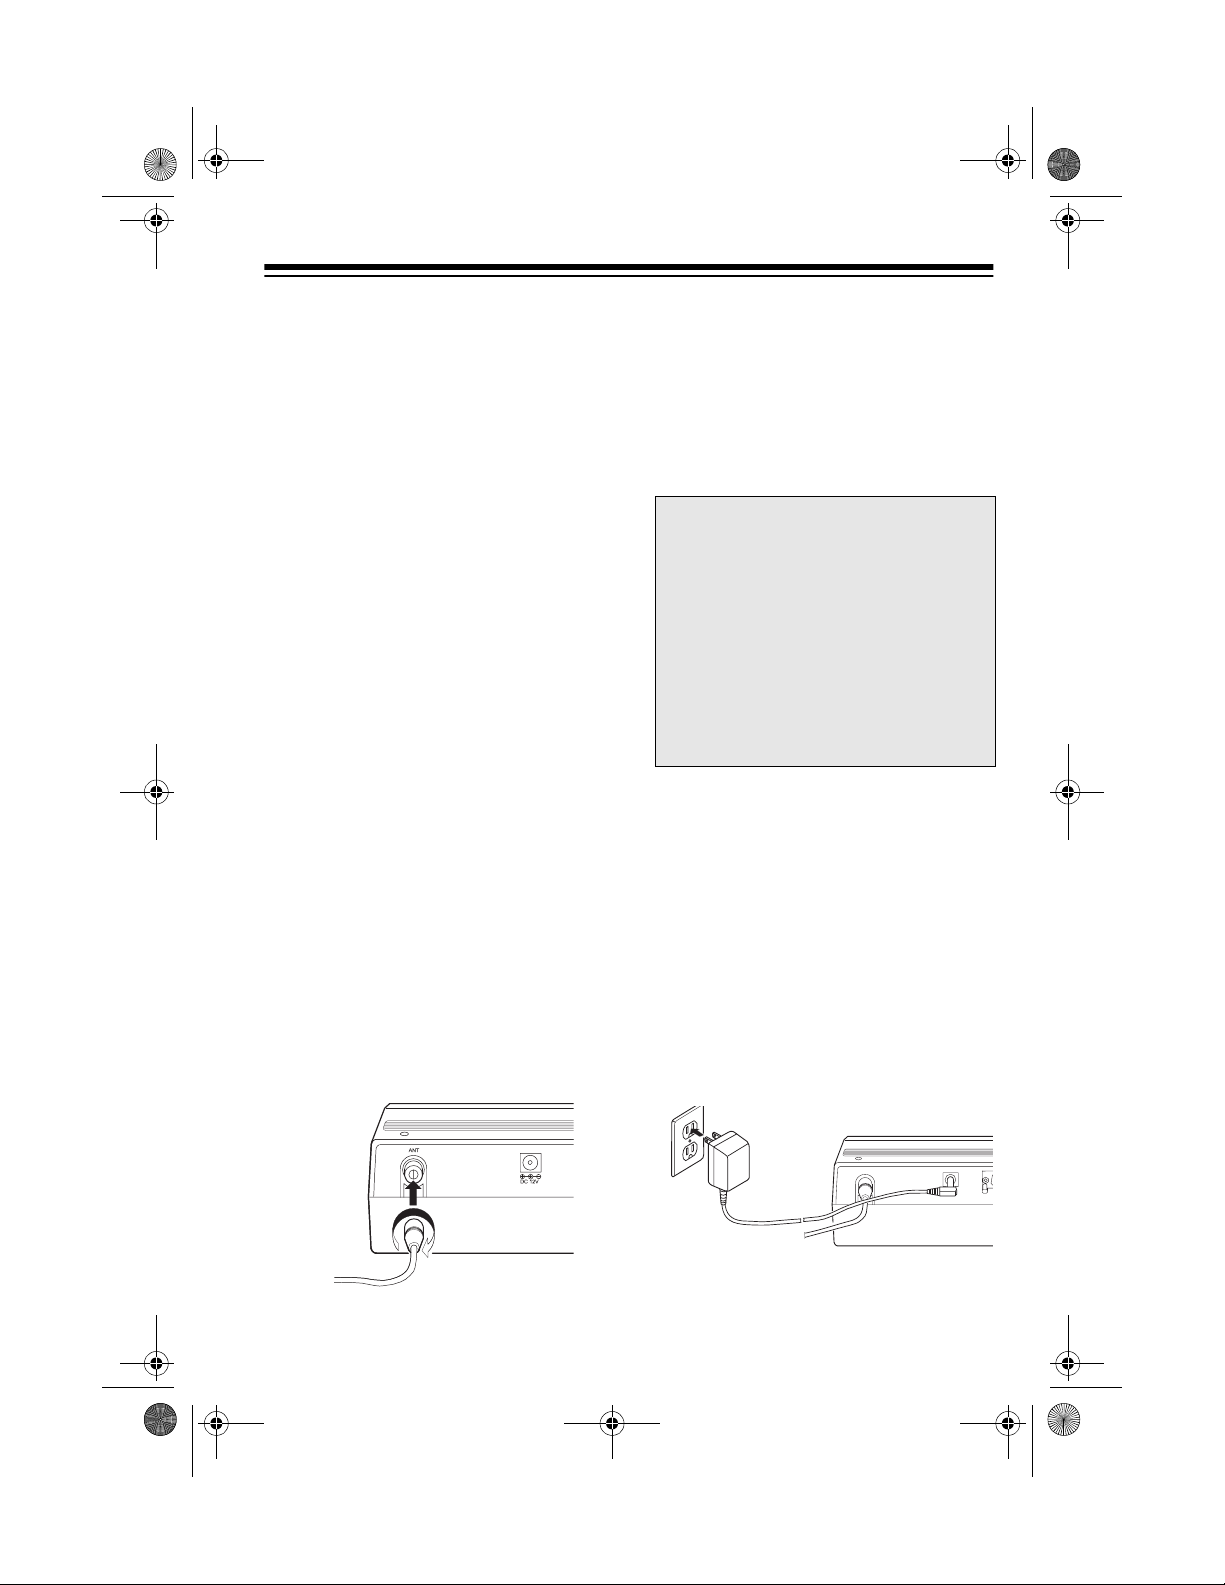
Once you choose an antenna, follow
the mounting instructions supplied
with the antenna. Then route the an-
tenna’s cable to the scanner and con-
nect the cable to the
ANT.
jack on the
back of the scanner.
Cautions:
• Do not run the cable over sharp
edges or mov ing parts that might
damage it.
• Do not run the cable next to power
cables or other antenna cables.
Warning:
Use extreme caution
when you install or remove an out-
door antenna. If the antenna starts to
fall, let it go! It could contact over-
head power lines. If the antenna
touches a power line, contact with
the antenna, mast, cable, or guy
wires can cause electrocution and
death. Call the power company to re-
move the antenna. DO NOT attempt
to do so yourself.
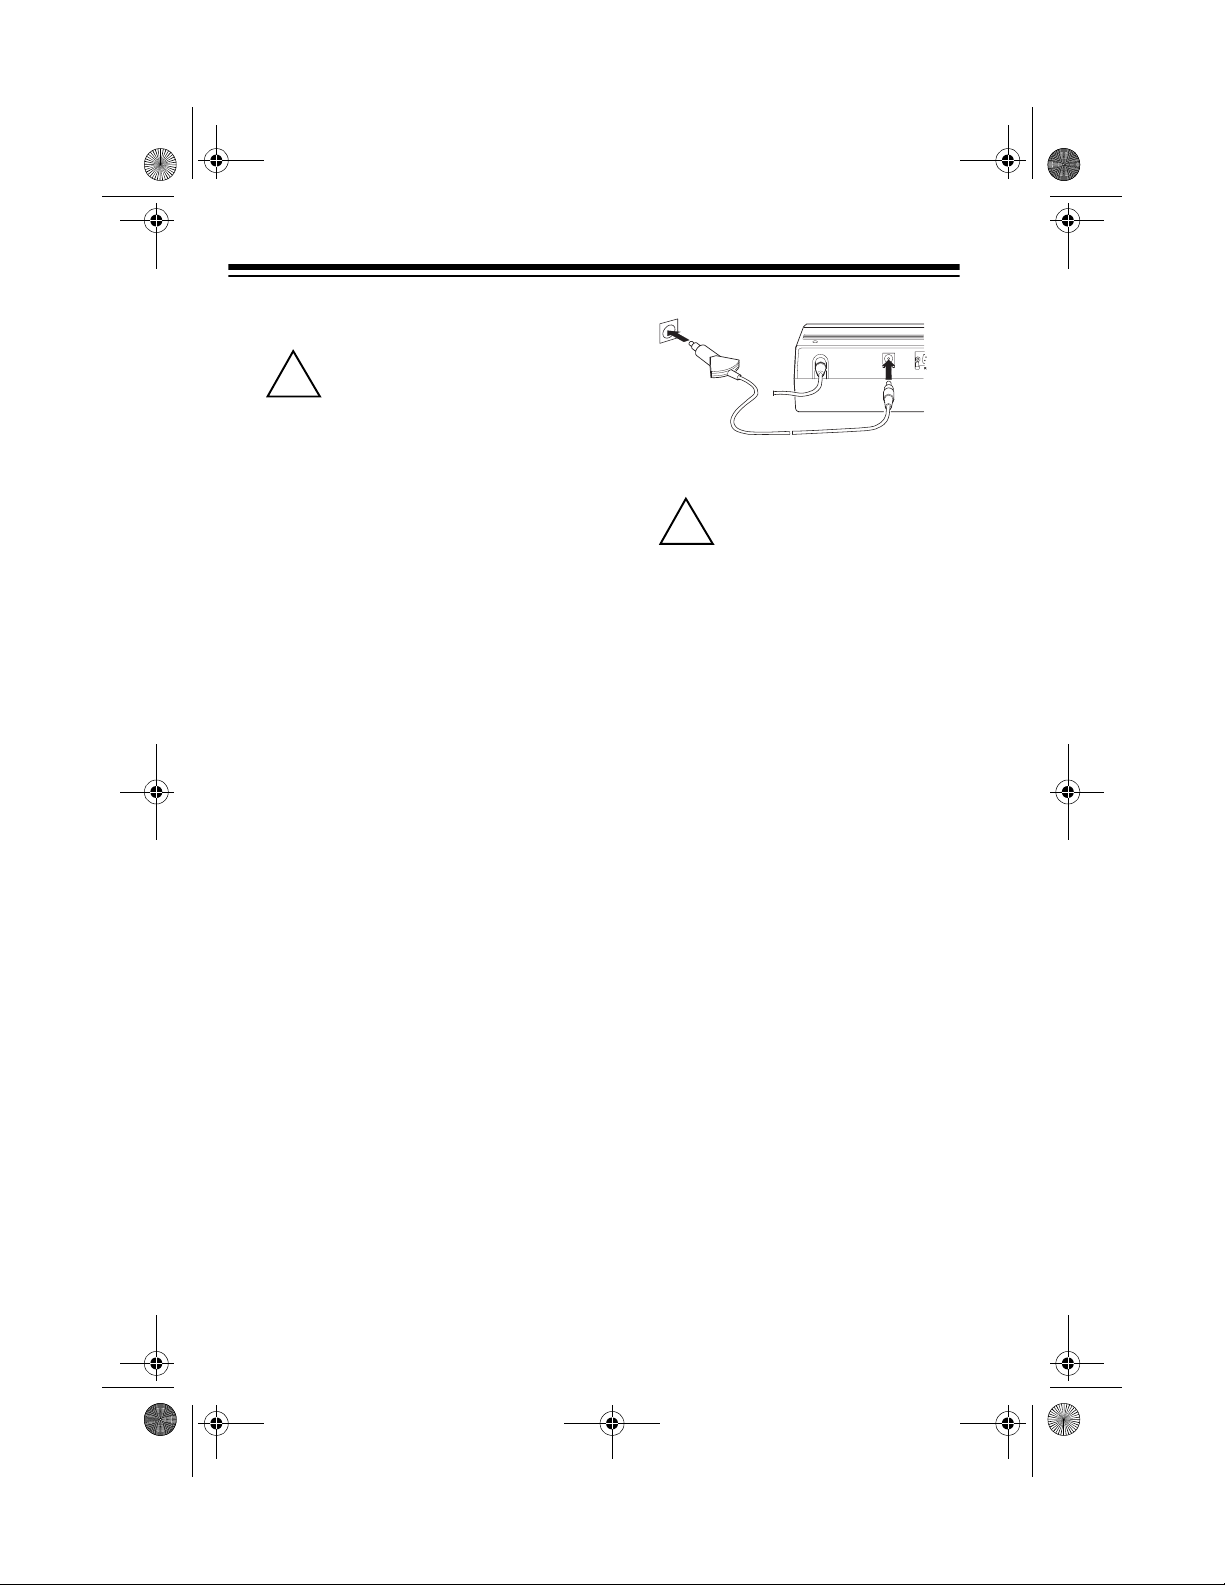
CONNECTING POWER
Using AC Power
The scanner’s supplied AC adapter
lets you power the scanner from a
standard AC ou tlet. To conne ct po wer
to the scanner, insert the AC adapter’s
barrel plug into the
DC 12V
jack on the
back of the scanner, then plug the AC
adapter into a standard AC outlet.
ANT
20-432.fm Page 9 Friday, July 14, 2000 11:30 AM
10
Cautions:
You must use a Class 2
power source that sup-
plies 12V DC and deliv-
ers at least 500 mA. Its center t ip
must be set to positive and its
plug must fit the scann er's
DC 12V
jack. The supplied a dapter meets
these specifications. Using an
adapter that does not meet these
specifications could damage the
scanner or the adapter.
• Always connect the AC adapter to
the scanner before y ou connect it
to AC power. When you finish, dis-
connect the adapter from AC
power before you disconnect it
from the scanner.
Warning:
Do not use the AC adapt-
er’s polarized plug with an extension
cord receptacle unl ess the bl ades can
be fully inserted to prevent blade ex-
posure.
Using Yo ur Vehicle’s Battery
Power
If your AC power fails (during an
emergency, for example), you can
power your scanner from your vehi-
cle’s cigarette lighter socket with an
optional DC cigarette lighter power ca-
ble, (not supplied).
To connect an optional DC cigarette
lighter power cable, insert its barrel
plug into the
DC 12V
jack on the back
of the scanner, then plug the power
cable into your vehicle’s cigarette
lighter socket.
Cautions:
You must use a power
source that supp lies 12V
DC and delivers at least
500 mA. Its center ti p must be set
to positive and its pl ug mus t fi t th e
scanner's
DC 12V
jack. The sup-
plied adapter meets these specif i-
cations. Using an adapter that
does not meet these specifica-
tions could damage the scanner
or the adapter.
• Always conne ct the ad apter to the
scanner before you connect it to
the power source. When you fin-
ish, disconnect the DC adapter
from the power source befor e you
disconnect it from the scanner.
Note:
If you use a cigarette lighter
power cable and your vehicle’s engine
is running, you might hear electrical
noise from the engine whi le scanning.
This is normal.
CONNECTING AN
EXTENSION SPEAKER
In a noisy area, an amplified extension
speaker (available at your local Ra-
dioShack stor e) positi oned in the r ight
place, might provide more comfortable
listening.
!
DC 12V
ANT
!
20-432.fm Page 10 Friday, July 14, 2000 11:30 AM
11
Plug the speaker ca ble’s
1
/
8
-inch (3.5-
mm) plug into your scanner’s jack.
Note:
Connecting an external speaker
disconnects the scanner’s internal
speaker.
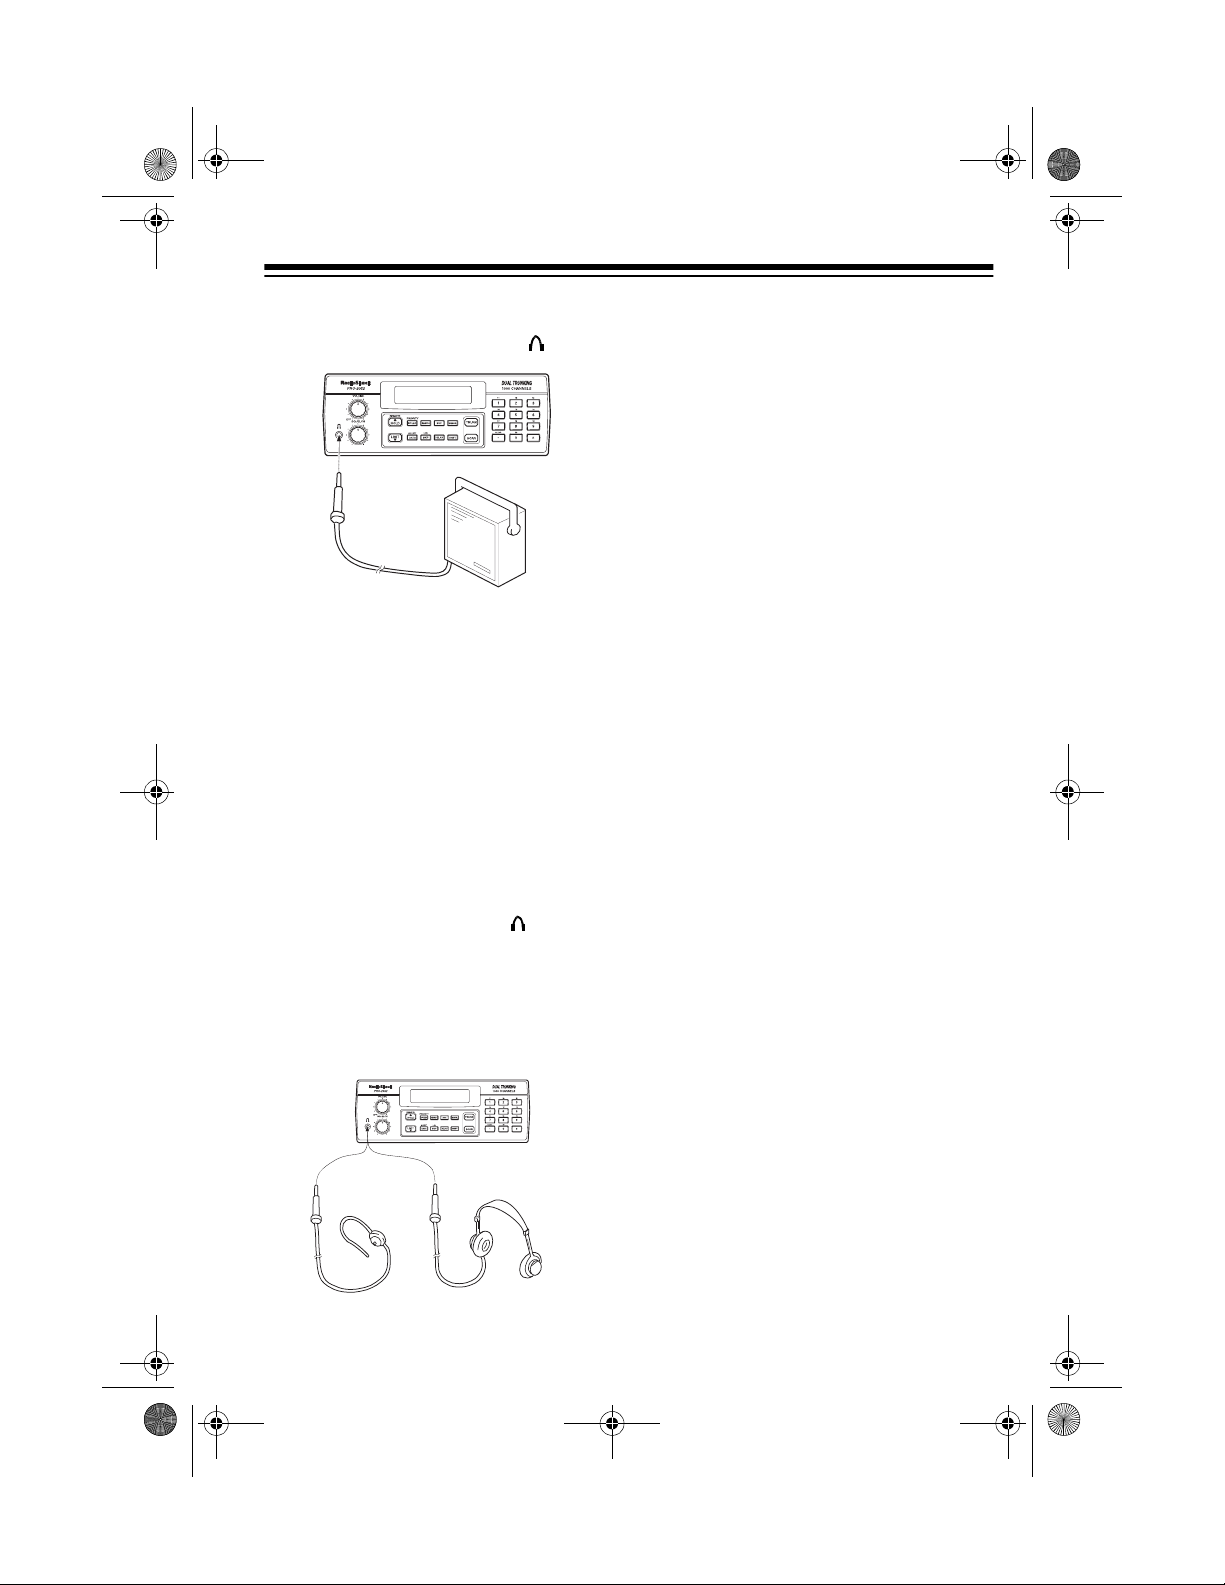
CONNECTING AN
EARPHONE/
HEADPHONES
For private listeni ng, you can connect
an earphone or headphones with a
1
/
8
-
inch (3.5-mm) plug to the jack on
the front of the scanner. (Your local
RadioShack store carries a wide se-
lection of earphones and head-
phones). This automatically dis-
connects the internal speaker.
Listening Safely
To protect your hearing, follow these
guidelines when you u se an ea rphon e
or headphones.
• Do not listen at extremely high
volume levels. Extended high-
volume listening can lead to per-
manent hearing loss.
•Set
VOLUME
to the lowest settin g
before you begin listening. After
you begin listening, adjust
VOL-
UME
to a comfortable level.
• Once you set
VOLUME
, do not
increase it. Over time, your ears
adapt to the volume level, so a
volume level that doe s not cause
discomfort might still damage your
hearing.
20-432.fm Page 11 Friday, July 14, 2000 11:30 AM
12
UNDERSTANDING YOUR SCANNER
Once you understand a few simple terms we use in this manual and familiarize
yourself with your scanner’s features, you can put the scanner to work for you. You
simply determine the type of communications you want to receive, then set the
scanner to scan them.
A
frequency
is the tuning loc ation of a station (express ed in k Hz or MHz ). To fin d
active frequencies, you can use the
search
function.
You can also search the
service-search banks
, which are preset gr oups of fre-
quencies categorized by type of service.
When you find a freque ncy, you c an stor e it into a prog ramma ble me mory lo catio n
called a
channel
, which is grouped with your other channels in a
channel-storage
bank
. You can then
scan
the channel-storag e banks to see if there is ac tivity on
the frequencies stor ed there. Each time the scanner finds an a ctive frequency, it
stays on that channel until the transmission ends.
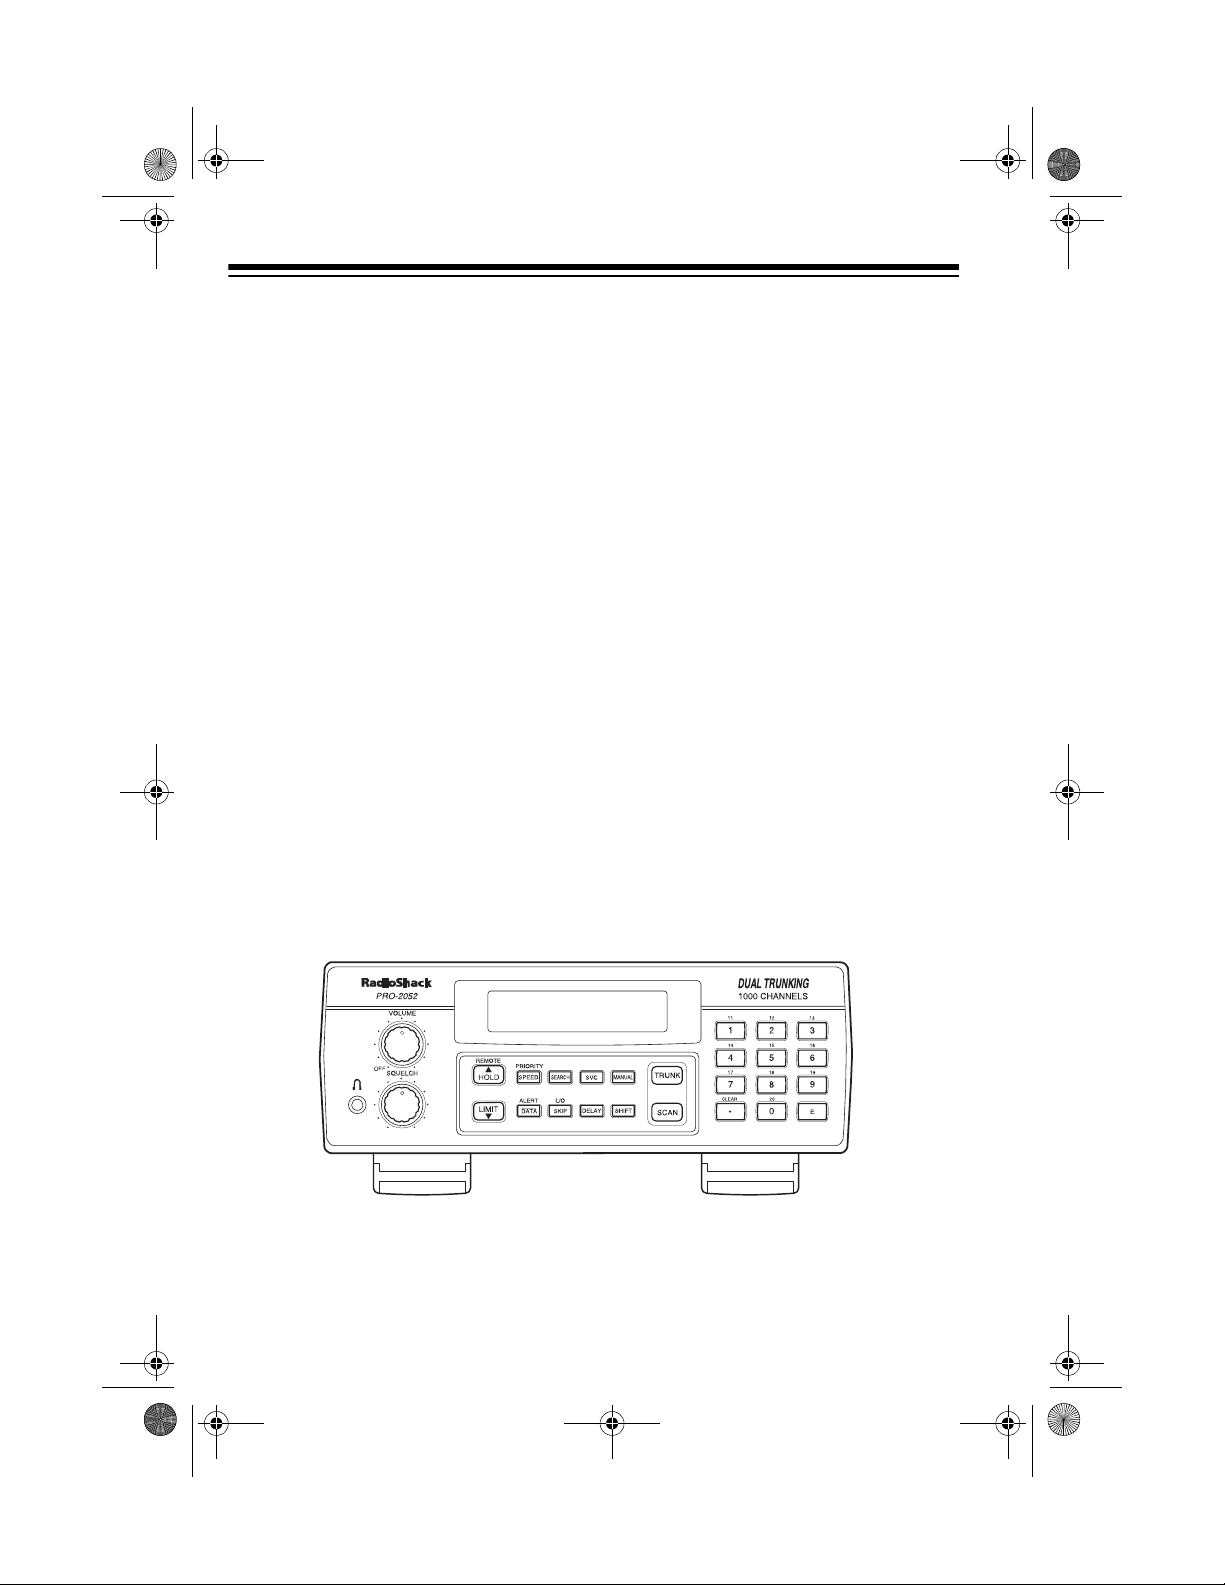
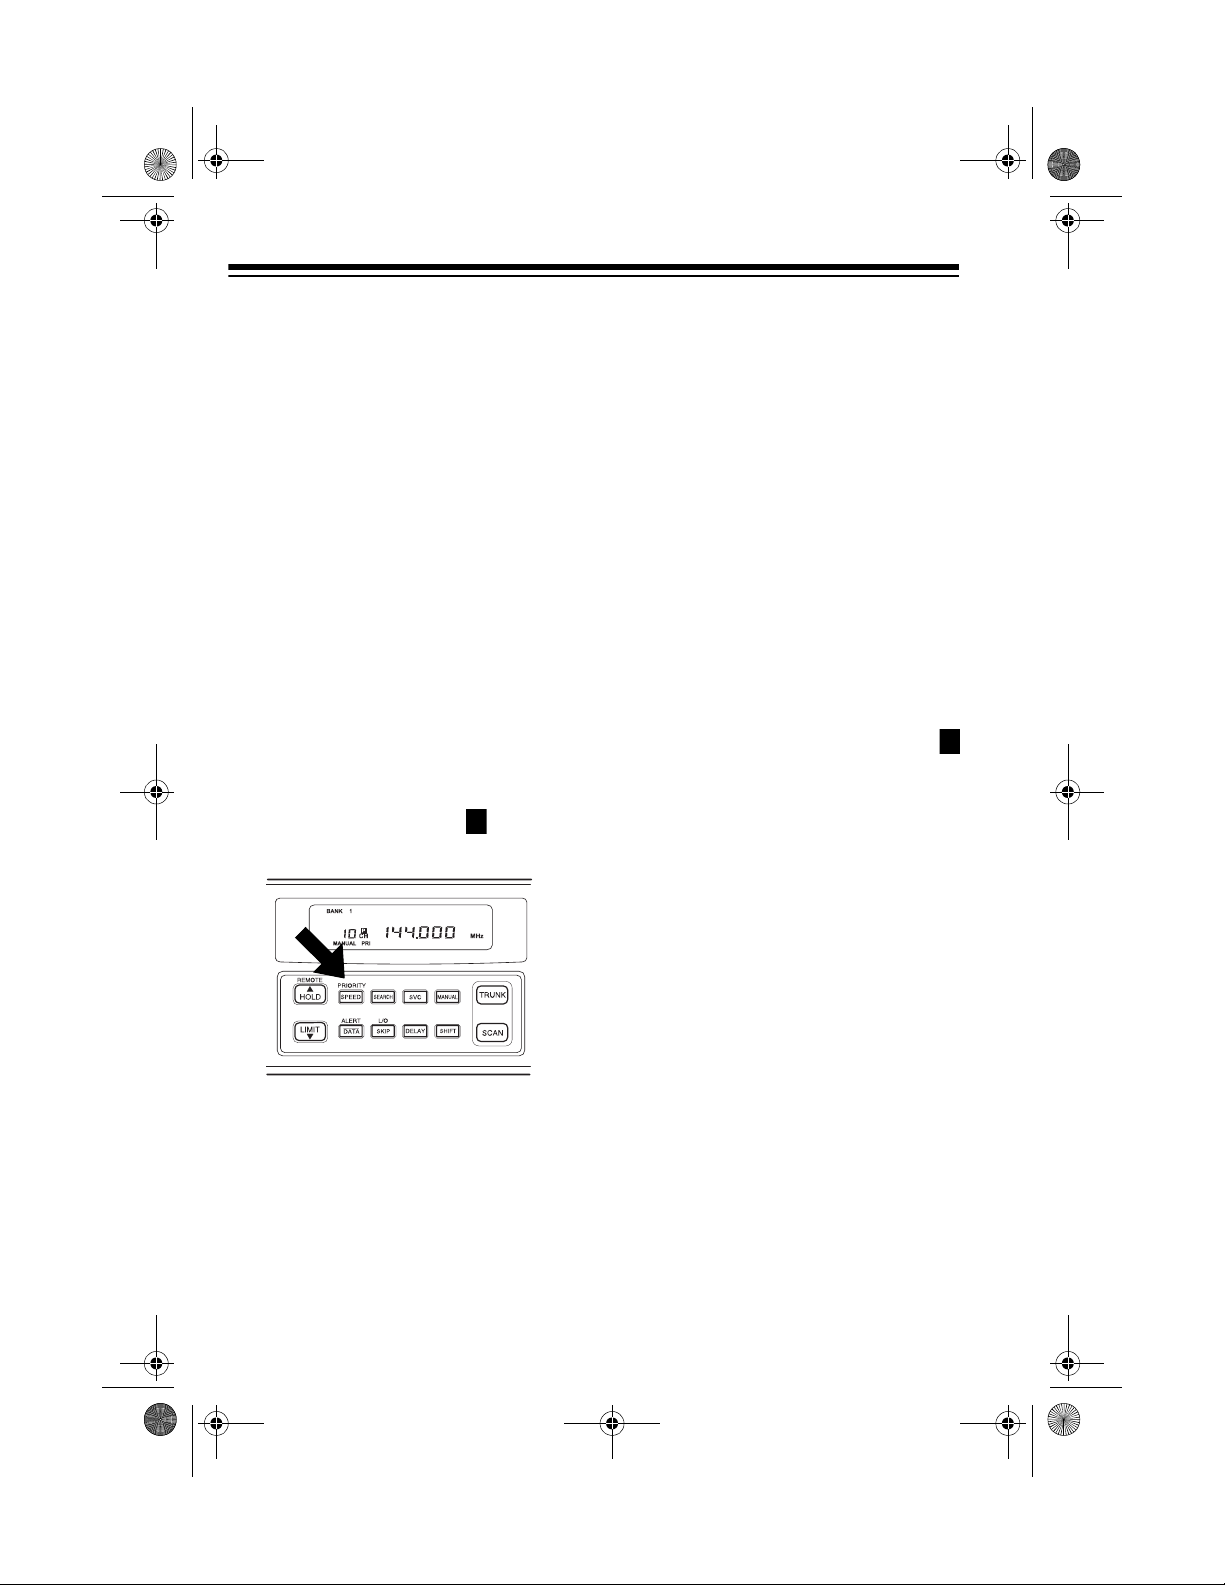
A LOOK AT THE FRONT PANEL
Your scanner’s k eys mi ght s eem confusing at first, but th is i nfor m atio n sh oul d h el p
you understand each key’s function.
Note:
Some of the scanner’s keys perform more than one function and are marked
with more than one l ab el. The steps in this Ow ner ’s Manual show only th e l abe l o n
the key appropriate to the action being performed.
VOLUME
Turns the scanner on or off and adjusts the volume.
SQUELCH
Adjusts the scanner’s squelch.
20-432.fm Page 12 Friday, July 14, 2000 11:30 AM

13
SCAN
In conventional sca nning, scan s through stor ed ch an-
nels; in trunking mode, scans through the scan lists
and turns on/off the S-bit feature.
MANUAL
Stops scanning and lets you directly en ter a channel
number or frequency.
TRUNK
Selects trunk scanning or conventional mode.
SVC
(service) Selects a service bank; turns on/off the disconnect
tone detect feature.
PRIORITY/SPEED
Sets and turns on and off the priority feature; turns the
HyperSearch mode on and off; in Trunking mode, pro-
grams the priority ID.
Number Keys Each key has singl e-digit ( 0 to 9) an d do uble-di git (1 1
to 20) labels. Use single di gits to enter a cha nnel, fr e-
quency, ID number, or bank numbers 1 to 10. Use
double-digits to enter bank numbers 11 to 20.
CLEAR
/
•
Clears an entry; enters a decim al point ; in trunk scan-
ning mode, sets the range between fleet and sub-fleet
for Motorola Type 1 IDs an d sets the range between
agency and fleet for Ericsson EDACS IDs.
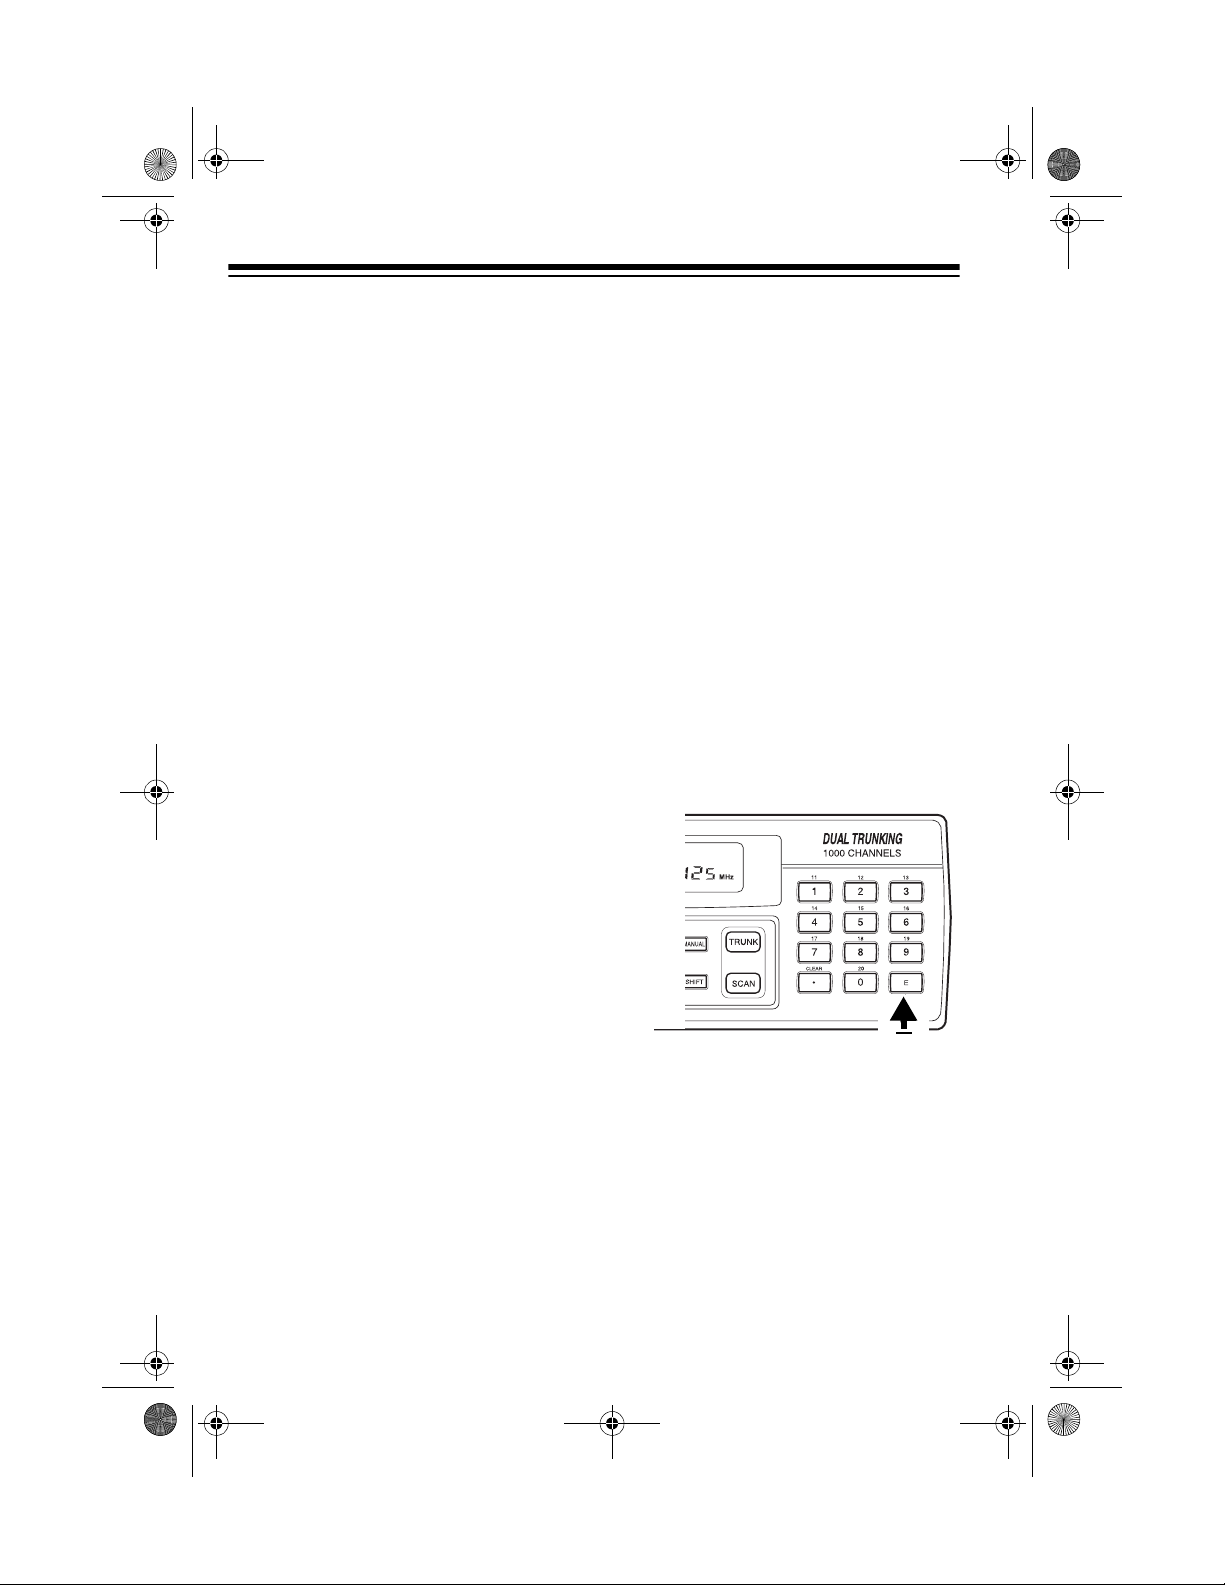
E
(enter) Enters frequencies into channels; enters IDs into scan
lists.
LIMIT/
▼
Sets the frequency range; sets the search direction
and holds a frequency search.
DELAY
Programs a 2-secon d delay for the se lected channel ,
a limit search, or each se rvice scan. Al so programs a
5-second delay in trunk scanning mode.
SEARCH
Searches a specified frequency range to find frequen-
cies; searches for active IDs in the trunk scanning
mode.
L/O/SKIP
(lock out/skip) Lets you lock out selected channels or frequencies;
lets you lock out a selec ted ID in the trunk scanning
mode.
20-432.fm Page 13 Friday, July 14, 2000 11:30 AM
14
REMOTE/HOLD/
▲
Turns the remote function on or off;
holds on the cur-
rent ID in trunk scanning mode; sets the sear ch direc -
tion and holds the frequency search.
DATA/ALERT
Turns the data signal sk ip feature and the SAME aler t
features on or off, or chec ks th e c ur rent tr un ki ng b ank
in trunk scanning mode.
SHIFT
Press with number keys to select banks 11 through
20.
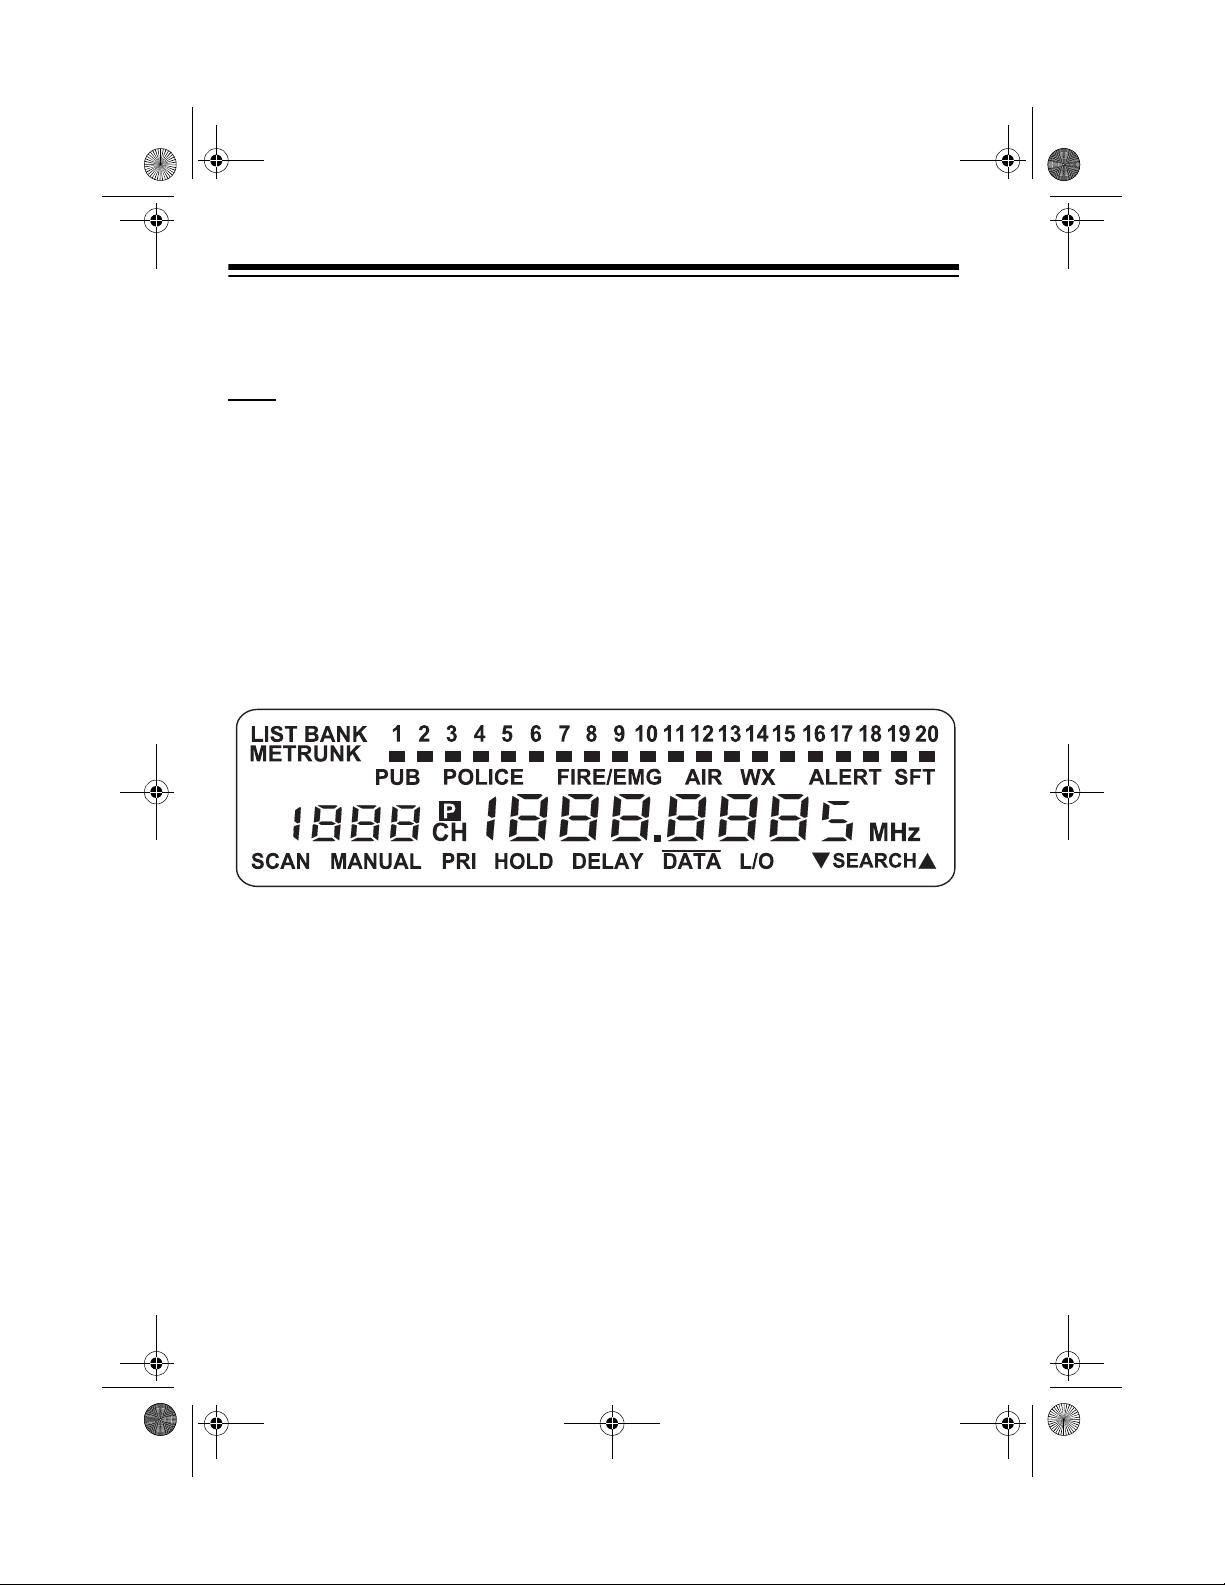
A LOOK AT THE DISPLAY
The display has ind icators that show the scanner ’s current operating status. This
quick look at the display will help you understand how your scanner operates.
LIST
Appears with a number ( 1–5) to indic ate the list nu m-
ber.
BANK
Appears with numbers (1–20) to indicate the scan
bank.
PUB
Indicates (along with the activity indicator) that the
scanner is searching the public safety service bank.
POLICE
Indicates (along with the activity indicator) that the
scanner is searching the police service bank.
FIRE/EMG
Indicates (along with the activity indicator) that the
scanner is searching the fire/emergency service bank.
AIR
Indicates (along with the activity indicator) that the
scanner is searching the air service bank.
20-432.fm Page 14 Friday, July 14, 2000 11:30 AM

15
WX
Indicates (along with the activity indicator) that the
scanner is searching the weather service bank.
TRUNK
Appears when the scanner is in trunk scanning
mode. 1–20 appears as the bank number or list
number.
Shows which service bank is currently active. Shows
(activity indicator)
which control/voice channels are currently ac-
tive.
SFT
Appears when the scanner is in the shift mode;
flashes when the remote function is on.
M
Appears when the trunking syste m type is Motor-
ola.
E
Appears when the trunking system type is
EDACS.
ALERT
Appears when the weather alert is on; flashes
when the scanner receives an ALERT signal or
SAME alert.
Appears when a priority channel is selected or the
priority ID is set.
SCAN
Appears when the scanner scans channels.
MANUAL
Appears when you set the scanne r to its manual
mode.
PRI
Appears when the priority feature is turned on.
HOLD
Appears when the scanner is holding during a
search.
DELAY
Appears when the delay feature is turned on.
DATA
Appears when the data skip function is active; ap-
pears in the trun k scanning mode when the dis-
connect tone detect function is off.
P
20-432.fm Page 15 Friday, July 14, 2000 11:30 AM

16
L/O
(lockout) Appears when you manually select a channel, fre-
quency, or ID that is locked out.
▼
SEARCH
▲
Lights steadily duri ng a limit search, service search,
and ID search, and blinks while HyperSearch is active
and when you monitor IDs. The arrow indicates the
search direction.
Error
Appears if you make an entry error.
20-432.fm Page 16 Friday, July 14, 2000 11:30 AM

17
UNDERSTANDING
BANKS
Channel Storage Banks
To make it easier to identify and select
the channels you want to listen to,
channels are divi ded into 20 banks of
50 channels each. Use each channel-
storage bank to group frequencies,
such as those used by th e police de-
partment, fire department, am bulance
services, or aircraft (see “Guide to the
Action Bands” on Page 56).
For example, the police department
might use four frequencies, one for
each side of town. You could program
the police frequencies starting with
Channel 1 (the first channel in ba nk 1)
and program the fire department fre-
quencies starting with Channel 51 (the
first channel in bank 2).
Service Banks
The scanner is preprogrammed with
the frequencies allocated by public
safety, police, fire/emergen cy, airc raft,
and weather services. This is handy
for quickly finding active frequencies
instead of searching th rough an en tire
band (see “Searchin g Service Banks”
on Page 19).
UNDERSTANDING
TRUNKING
In the past, groups that b roadcast fre-
quently, such as police departments,
were restricted to tr ansmitting on just
a few frequencies. This resulted in
heavy traffic and often r equired 2-way
radio users to wait for a specific fre-
quency to clear before transmitting.
Trunked systems allow more groups
of 2-way radio users to use fewer fre-
quencies. Instead of selecting a spe-
cific frequency to transmit on, a
trunked system c hooses on e of sev er -
al frequencies when the 2-way radio
user presses PTT (push to talk). The
system automatically transmits the
call on that frequency, and also se nds
a code that ide ntifies that 2-wa y radio
user’s transmission on a data channel.
You can set this scanner to monitor
the data channel frequency, so you
can hear both the call and response
transmissions for that 2-way radio
user and therefore fo llow the conver-
sation. (You canno t listen to the data
channel itself in trunking mode.)
20-432.fm Page 17 Friday, July 14, 2000 11:30 AM
18
OPERATION
TURNING ON THE
SCANNER AND SETTING
SQUELCH
1. Turn
SQUELCH
and
VOLUME
fully
counterclockwis e.
2. Turn
VOLUME
back clockwis e u nt il
you hear a hissing sound.
3. Turn
SQUELCH
clockwise, then
leave it set to a p oint ju st afte r the
hissing sound stops.
Notes:
• If the scanner does not scan, tur n
SQUELCH
further clockwise.
• If the scanner picks up unwanted,
partial, or very weak transmis-
sions, turn
SQUELCH
clockwise to
decrease the scanne r’s sensitiv ity
to these signals. If you want to li s-
ten to a weak or distant station,
turn
SQUELCH
counterclockwise.
• If
SQUELCH
is adjusted so you
always hear a hissing so und, the
scanner will not scan properly.
STORING KNOWN
FREQUENCIES INTO
CHANNELS
Good references for active frequen-
cies are the RadioShack “Police Call
Guide including Fire and Emergency
Services,” “Official Aeronautical Fre-
quency Directory,” and “Mariti me Fre-
quency Directory.” We update these
directories every year, so be sure to
get a current copy.
Note:
To store trunking system fre-
quencies, see “P rogramming Trunke d
Frequencies” on Page 32.
Follow these steps to store frequen-
cies into channels.
1. Press
MANUAL
, enter the chan-
nel number (1–1000) where you
want to store a frequency, then
press
MANUAL
again. The chan-
nel number appears.
2. Use the number keys and
•
to
enter the frequency (including the
decimal point) you want to store.
3. Press
E
to store the frequency into
the channel.
Notes:
• If you made a mistake in Step
2,
Error
appears and the
scanner beeps when y ou press
E
. Simply start again from Step
2.
• Your scanner automatically
rounds the entered frequency to
the nearest valid f re que nc y. For
example, if you enter a fre-
20-432.fm Page 18 Friday, July 14, 2000 11:30 AM

19
quency of 151.473, your scan-
ner accepts it as 151.475.
• If you entered a frequency that
is already stored in another
channel, the scanner beeps
three times and displays the
lowest channel number where
the frequency is alr eady stor ed.
If you want to store the fre-
quency anyway, press
E
again.
•Press
DELAY
if you want the
scanner to pause 2 se conds on
this channel after a transmis-
sion ends before it proceed s to
the next channel (see “Delay”
on Page 23). The sca nner also
stores this setting in the chan-
nel.
4. To program the next channel in
sequence, press
MANUAL
and
repeat Steps 2 and 3.
SEARCHING SERVICE
BANKS
You can search for publ ic servi ce, po-
lice, fire/emergency, aircraft, and
weather transmissions even if you do
not know the s pecific frequen cies that
are used in your area. You can also
store any of the frequencies you find
into channels.
Your scanner has the following pre-
programmed service banks.
• PUB — contains 140 public ser-
vice frequencies
• POLICE — contains 2,392 police
frequencies
• FIRE/EMG — contains 197 fire
and emergency service frequen-
cies
• AIR — contains 2,319 aircraft an d
air service frequencies
• WX — contains 7 weather fre-
quencies
To select a service ba nk, press
SVC
.
(activity indicator) appears above
the service bank’s nam e
(
PUB,
PO-
LICE
,
FIRE/EMG
,
AIR
, and
WX
)
,
and one of the preset public service
frequencies appe ar. After a 2-second
delay, scannin g be gins in the selected
bank.
To select another service bank, re-
peatedly press
SVC
until appears
above the name of t he bank y ou want
to use.
Notes:
• To skip data signals (such as
modem signals ), p ress
DATA
. See
“Skipping Data Signals” on
Page 25.
• Because frequencies are not
always assigned to the same se r-
vices everywher e, you might hear
transmissions from one service in
another service bank.
20-432.fm Page 19 Friday, July 14, 2000 11:30 AM

20
Press
SEARCH
to start searching im-
mediately or to continue searching if
you want to skip a frequency.
During service-searc h, you can press
HOLD
to pause the searching.
HOLD
appears. Press
▲
or
▼
to move up or
down one step, or press
SEARCH
to
resume search ing .
Follow these steps to store service
bank frequencies into channels.
1. Press
MANUAL
.
2. Use the number keys to enter the
channel number (1–1000) where
you want to store the frequency,
then press
MANUAL
.
3. Press
SVC
then
SEARCH
to select
a service bank and begin search-
ing.
4. When the scanner stops on a
transmission, press
HOLD
. The
frequency appears.
5. Press
E
to store the frequency into
the channel.
LIMIT SEARCH
If you do not know a frequency to
store, you can search for transmis-
sions within a range of frequencies
you select, called the
limit search
range
. Then you can store any inter-
esting frequencies yo u find into chan-
nels.
1. Press
MANUAL
, enter the chan-
nel number where you want to
store a frequency, then press
MANUAL
again. The channel num-
ber appears.
2. Use the number keys and
•
to
enter the frequency that is the
lower limit of the range you want
to search.
3. Press
LIMIT.
4. Use the number keys and
•
to
enter the frequency that is the
upper limit of the range you want
to search.
5. Press
LIMIT
then
SEARCH
. The
scanner begins to search from the
lower limit to the upper limit.
6. When the scanner stops on a
transmission, quickly press either:
•
E
to store the displayed fre-
quency into the channel. The
scanner stores the frequency.
•
▲
or
▼
to stop searching so
you can listen to the transmis-
sion.
HOLD
appears.
To release hold and continue
searching, press
SEARCH
.
Notes:
• To step through the frequencies
while
HOLD
appears, press
▲
or
▼
.
•Press
▲
then
SEARCH
to search
from lowest to highest frequency,
or press
▼
then
SEARCH
to
search from highest to lowest fre-
quency.
20-432.fm Page 20 Friday, July 14, 2000 11:30 AM

21
• If you tune to a search skip fre-
quency,
L/O
appears. See “Lock-
ing Out Channels and Fre-
quencies” on Page 23.
• To skip data signals (such as
modem signals), press
DATA
. See
“Skipping Data Signals” on
Page 25.
SCANNING THE STORED
CHANNELS
To begin scanning channels, press
SCAN
. The scanner scans throu gh all
non-locked channe ls in all banks that
are turned on, then stops on the fir st
transmission it fin ds. When the trans-
mission ends, the scanner resumes
scanning.
Notes:
• Channels with no frequencie s are
automatically locked out during
scanning.
• To scan in the trunkin g mode, see
“Scanning a Trunked Bank” on
Page 33.
MANUALLY SELECTING
A CHANNEL
You can continuously monit or a si ngle
channel without sc ann ing . T his i s u se -
ful if you hear an emergency broad-
cast on a chann el and do not want to
miss any details — even thou gh there
might be periods of silence — or if you
want to monitor a specific channel.
Follow these steps to man ually select
a channel.
1. Press
MANUAL
.
2. Enter the channel number.
3. Press
MANUAL
again.
Or, if your scanner is scanning and
stops at the desired channel, press
MANUAL
one time. (Pressing
MANUAL
additional time s causes your scanner
to step through the channels.)
To resume scanning, press
SCAN
.
DELETING A
FREQUENCY FROM A
CHANNEL
1. Press
MANUAL
.
2. Use the number keys to enter th e
channel number containing the
frequency you want to delete.
Then press
MANUAL
again.
3. Press
0
then
E
. The frequency is
deleted.
PRIORITY
The priority feature lets you scan
through channels and still not miss im-
portant or inte resting calls on speci fic
channels. You can program one
stored channel in each bank as a pri-
20-432.fm Page 21 Friday, July 14, 2000 11:30 AM
22
ority channel (for up to a total of 10
stored channels). As the scanner
scans the bank, if the priority feature is
turned on, the scan ner c hecks the pri -
ority channel for activit y every 2 sec-
onds.
Changing Priority Channels
The scanner automatically desig-
nates each bank's fir st channel as its
priority channel. Follo w these steps to
select a different channel as the priori-
ty channel for a bank.
1. Press
MANUAL
.
2. Enter the channel number you
want to select as the priority chan-
nel, then press
MANUAL
again.
3. Hold down
PRIORITY
until the
scanner beeps twice. appears
to the right of the channel number.
4. Repeat Steps 2 and 3 for the
channel in each bank you want to
program as a priority channel.
To turn on the priority feature, press
PRIORITY
during scanning.
PRI
ap-
pears. As you scan the bank, the
scanner checks the bank’s priority
channel ever y 2 se c ond s in ea ch ban k
that is turned on, starting from the low-
est to the highest-numbered priority
channel.
To turn off the priority feature, press
PRIORITY
.
PRI
disappears.
Note:
The priority feature must be
turned off to use the data ski p feature
(see “Skipping Data Signals” on
Page 25).
Locking Out Priority
Channels
You can lock out priority channels. If
you lock out all priority channels,
CH
Loc
Out
appears when you t urn
on the priority feature.
P
P
20-432.fm Page 22 Friday, July 14, 2000 11:30 AM
 Loading...