


 Loading...
LPF 5120
LPF 5125
LPF 5135
EN User Manual
Introduction
Dear Customer
EN
With the purchase of this device, you have chosen a quality PHILIPS product brand. Their device fulfils the most varied requirements for private use or in your office and business everyday.
You use the power and toner saving functions to save electricity and toner, by switching the device to power saving mode or printing in toner saving mode. Use the ECObutton to make toner saving copies quickly and simply.
For printing purposes, your device utilises the most up-to- date laser printing technology. A starter cartridge is provided with the device. This starter cartridge is already installed; however you must remove the packaging used for transportation before you can use the device.
You can insert a supply of paper into the paper tray of up to 250 sheets. You can insert special paper formats, envelopes, slides, sheets of labels or printed documents into the manual paper feed.
In the telephone book of your device, you can save entries with multiple numbers and collect multiple entries into groups. You can assign various ring tones to the entries.
You have many functions available to you for fax transmission, for example, different resolutions or the timer function. You can secure your fax reception with a code. In that case, incoming faxes are not printed out, but rather are stored in the fax memory. With the fax polling function, you can retrieve faxes that lie ready in the dialled device.
With the broadcasting key (= Broadcasting) you can add further numbers during the dialing process and send a message quickly and simply to several recipients.
Five fax templates, which you can use, are stored in your device. With these templates you can quickly create, for example, a short fax note or an invitation.
You can copy several documents onto one page to save paper. The documents are adjusted automatically during the copying process.
Your device prints a weekly overview as a calendar page for you – for the current week, the coming week or a freely selectable week.
If you want, your device can print Sudoku puzzles in four different difficulty levels with solution.
You can connect the device to your computer and use it as a printer (LPF¦5135). With the TWAIN scanner driver you can access the device and scan documents from any application which supports this standard.
We hope you enjoy your device and its many functions!
About this User Manual
With the installation guide on the following pages, you can start using your device quickly and easily. Detailed descriptions can be found in the following sections of this user manual.
Read the entire user manual carefully. Follow all safety instructions in order to ensure proper operation of your device. The manufacturer accepts no liability if these instructions are not followed.
Multiple models of this device series are described in this user manual. Please note that some functions are only available with specific models.
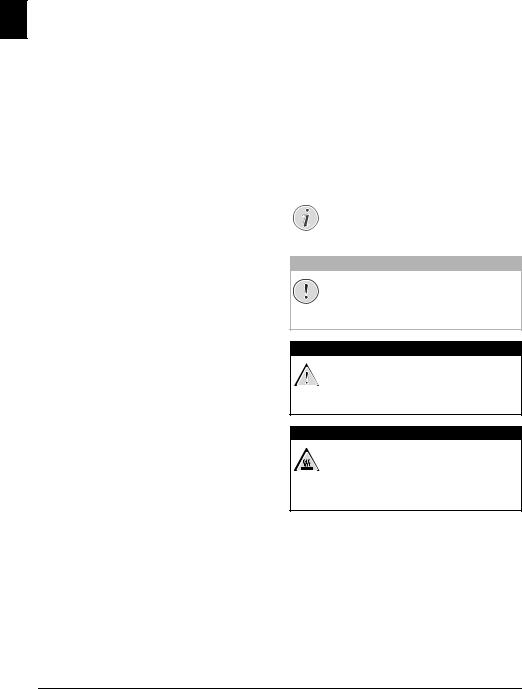
Symbols Used
Notice
Troubleshooting
This symbol designates tips that will help you to use your device more effectively and easily.
CAUTION!
Damage to the Device or Loss of Data!
This symbol gives warning of damage to the device and possible loss of data. These damages can result from improper handling.
DANGER!
Danger to Persons!
This symbol gives warning of danger to persons. Physical injury or damage can result from improper handling.
DANGER—HEAT!
Heat risk!
This symbol in the user manual or inside the device indicates a danger of hot surfaces. Physical injury or damage can result from improper handling.
2 |
Philips · Laserfax 5120 · 5125 · 5135 |

Table of Contents |
|
|
Introduction .............................................. |
2 |
|
Dear Customer ............................................................ |
2 |
|
About this User Manual .............................................. |
2 |
|
1 |
General Safety Information ................ |
5 |
2 |
Overview............................................... |
7 |
Device Overview .......................................................... |
7 |
|
Connections on the Rear Side ...................................... |
7 |
|
Panel with Display ....................................................... |
8 |
|
Overview of the Menu Functions ................................ |
9 |
|
Print Lists and Reports .............................................. |
10 |
|
3 |
Initial Operation ................................ |
11 |
Packing Contents ...................................................... |
11 |
|
Removing Packaging Material ................................... |
11 |
|
Attaching the Document Support .............................. |
13 |
|
Fold Out the Print Out Support ................................ |
13 |
|
Attaching the Document Outlet Tray ........................ |
14 |
|
Connecting the Telephone Handset .......................... |
14 |
|
Connecting the Telephone Cable .............................. |
14 |
|
Connecting the Mains Cable ..................................... |
14 |
|
Initial Installation ...................................................... |
15 |
|
Connecting to the Computer ..................................... |
16 |
|
4 |
Telephone Functions ......................... |
17 |
Placing a Call on the Device ...................................... |
17 |
|
Getting Outside Line ................................................. |
17 |
|
Chain Dialling ........................................................... |
17 |
|
Insert Dialling Pause .................................................. |
17 |
|
Dialling with the Handset Replaced .......................... |
17 |
|
Calling Line Identification (CLIP) ............................. |
18 |
|
Missed Calls .............................................................. |
18 |
|
5 Telephone Book of the Device ......... |
19 |
|
Looking up an Entry ................................................. |
19 |
|
Saving Entry .............................................................. |
19 |
|
Edit Entry .................................................................. |
19 |
|
Delete an Entry ......................................................... |
20 |
|
Delete all Entries ....................................................... |
20 |
|
Printing the Telephone Book ..................................... |
20 |
|
Groups ...................................................................... |
20 |
|
6 Printer and Printing Media ............... |
22 |
|
Connecting to the Computer ..................................... |
22 |
|
Specifications for Print Media .................................... |
22 |
|
Pulling out Paper Stopper .......................................... |
22 |
|
Insert Paper into the Paper Tray ................................ |
23 |
|
Load Paper into the Manual Paper Feed .................... |
24 |
|
Loading Pre-printed Material .................................... |
24 |
|
Inserting Slides and Labels ......................................... |
24 |
|
Printing on Both Sides (Manual Duplex Printing) ..... |
25 |
|
Print Calendar ........................................................... |
25 |
|
Sudoku: Printing a Game .......................................... |
25 |
|
7 |
Fax ....................................................... |
27 |
Send a Fax Using Standard Settings ........................... |
27 |
|
Loading Documents .................................................. |
27 |
|
Dialling a Number .................................................... |
28 |
|
Getting Outside Line ................................................. |
28 |
|
Sending Fax Later (= Timer Function) ....................... |
28 |
|
.............................................Manually Sending a Fax |
29 |
|
Chain Dialling ........................................................... |
29 |
EN |
Eavesdropping while Connection is Established ......... |
29 |
|
.......Sending to Multiple Recipients (= Broadcasting) |
29 |
|
Using Fax Templates ................................................. |
29 |
|
Fax Reception ............................................................ |
29 |
|
Receiving Fax Manually ............................................. |
30 |
|
Receive Faxes Silently ................................................. |
30 |
|
Setting Protected Fax Reception ................................ |
30 |
|
Polling Faxes .............................................................. |
30 |
|
Jobs ............................................................................ |
30 |
|
8 Copier ................................................. |
32 |
Loading Documents .................................................. |
32 |
Make Copies Using Standard Settings ........................ |
33 |
Make Copies Using the Second Profile ...................... |
33 |
Make Copies Using User-Defined Settings ................ |
33 |
Make Enlarged or Compressed Copies ....................... |
34 |
Copying Several Documents onto one Page |
|
(Mosaic Copy) ........................................................... |
34 |
Configure Settings for Second Profile ........................ |
34 |
9 Settings............................................... |
36 |
Set Up Power Saving Function .................................. |
36 |
Set Up Toner Saving Function .................................. |
36 |
Selecting the Country ................................................ |
36 |
Selecting the Language ............................................... |
36 |
Entering the Date and Time ...................................... |
36 |
Set the Time Zone ..................................................... |
36 |
Entering Your Telephone Number and Name ........... |
37 |
Setting the Ring Tones .............................................. |
37 |
Set Resolution ............................................................ |
37 |
Setting the Contrast ................................................... |
38 |
Set the Level of Brightness for the Copier .................. |
38 |
Deactivating the Button Tones .................................. |
38 |
Configure Paper Settings ............................................ |
38 |
Set Fax Transmission from the Memory .................... |
38 |
Turning Page Header On/Off .................................... |
38 |
Switching Transmission Report On/Off .................... |
39 |
Setting the Fax Reception Mode ................................ |
39 |
Silent Fax Reception .................................................. |
39 |
Additional Options for Fax Transmission .................. |
39 |
Additional Fax Reception Options ............................. |
40 |
Locking the Device .................................................... |
40 |
Print Lists and Reports ............................................... |
41 |
10 Telephone Lines and Additional |
|
Devices .................................................... |
42 |
Selecting the Dialling Process ..................................... |
42 |
Set up the Public Switch Telephone Network (PSTN) |
42 |
................................................................................... |
|
Set up Private Branch Exchange (PABX) .................... |
42 |
DSL Connection ........................................................ |
43 |
ISDN Connection ..................................................... |
43 |
Connecting Additional Devices .................................. |
43 |
Using Additional Telephones (Easylink) .................... |
43 |
Using an External Answering Machine ...................... |
43 |
Table of Contents |
3 |

|
11 Service................................................. |
44 |
|
Display Counter Levels .............................................. |
44 |
|
Displaying the Toner Level ........................................ |
44 |
|
Checking the Firmware Version ................................ |
44 |
|
Changing the Toner Cartridge ................................... |
44 |
EN |
Fixing a Paper Jam ..................................................... |
46 |
|
Fixing a Document Jam ............................................. |
49 |
|
Cleaning .................................................................... |
49 |
|
Calibrating the scanner .............................................. |
51 |
|
Using Service Codes .................................................. |
52 |
|
Power Cycling ........................................................... |
52 |
|
Problems and Possible Causes .................................... |
53 |
|
Error Messages and Possible Causes ........................... |
55 |
|
12 Glossary .............................................. |
58 |
|
13 Appendix............................................. |
61 |
|
Technical Data .......................................................... |
61 |
|
Guarantee .................................................................. |
62 |
|
Declaration of Conformity (DoC) ............................. |
63 |
|
Customer Information ............................................... |
68 |
4 |
Philips · Laserfax 5120 · 5125 · 5135 |

1 General Safety Information
Your device has been tested in conformity with standards EN 60950-1 and IEC 60950-1 and should only be operated with telephone systems and power equipment that meet these standards. The device was built exclusively for use in the indicated sales region.
Do not make any changes or settings that are not described in this user manual. Physical injury or damage to the device or loss of data can result from improper handling. Take note of all warning and safety notes indicated.
Setting Up the Device
The device should rest securely on a stabile, flat surface. If the device should fall, it can be damaged or can cause injury to people, especially small children. Position all cables in such a way that no one will stumble on them, thus avoiding possible injuries to persons or damage to the device itself.
The distance between the device and other devices or objects must be at least 15 centimetres; this also applies to the use of additional cordless telephones. Do not place the device in the vicinity of radios or televisions.
Protect the device against direct sunlight, heat, large temperature fluctuations and moisture. Do not place the device in the vicinity of heaters or air conditioners. Observe the information on temperature and humidity in the technical data.
The device must have sufficient ventilation and may not be covered. Do not put your device in closed cabinets or boxes. Do not place the machine on soft surfaces such as tablecloths or carpets and do not cover the ventilation slits. Otherwise, the device can overheat and catch on fire.
The area in which you operate the device must be adequately ventilated, especially if the device is used frequently. Set up your device in such a way that the flow of the exhaust air stream points away from the work station.
In the event that the device becomes too hot, or if you see smoke coming from the device, you must immediately pull the power cable out of the power socket. Have your device examined by trained professionals at a technical service location. To prevent the spread of fire, open flames should be kept away from the device.
Do not plug in the device in moist rooms. Never touch the mains cable, the mains connection or the telephone socket with wet hands.
Do not allow liquids to enter into the device. Disconnect the device from the electrical power source and from the telephone network, if liquids or foreign objects have entered the device and have your device examined by trained professionals at a technical service location.
Do not allow children to handle the device without supervision. The packing materials should be kept out of the hands of children.
The telephone handset of the device is magnetic. Caution, small metallic objects (paper clips) may be retained if placed near or on the telephone handset.
Power Supply/Telephone Line
Check whether the mains voltage of your device (indicated
on the type label) matches the mains voltage available at EN the setup location.
This device complies with EN 55022 Class B. Use only the power and telephones cables supplied. Before you use the device make sure that you connected the telephone cable supplied as described.
Never touch the power or telephone cable if the insulation is damaged. Replace damaged wires immediately. Use suitable cables only; if necessary please contact our technical customer service or your retailer.
Disconnect your device from the power and telephone networks during an electrical storm. If this is not possible, do not use the device during an electrical storm.
Before cleaning the surface of your device, disconnect it from the power and telephone networks. Use a soft, lintfree cloth. Never use liquid, gaseous or easily flammable cleansers (sprays, abrasives, polishes, alcohol). Do not allow any moisture to reach the interior of the device.
Only clean the display with a dry, soft cloth. If the display breaks, a mildly corrosive liquid may escape. Avoid all contact with your skin and eyes.
In the event of a power failure, your device will not function; saved data is retained.
Consumable Materials
Use only original consumable materials. These are available from a specialised retailer or through our order service (see back side of this user manual). Other consumable materials could damage the device or shorten its service life.
Dispose of old consumable materials according to the waste regulations of your country.
Caution when Handling Toner Powder:
If you breathe in toner powder, go into the fresh air immediately. Call a doctor immediately!
If you get toner powder in your eyes, rinse them with a lot of water for at least 15 minutes. Call a doctor immediately! If you have swallowed toner powder, drink small amounts of water. Try NOT to vomit. Call a doctor immediately!
Never open a toner cartridge. Store both new and used cartridges in a place where they will not come into the hands of children.
In case of a paper jam, remove the paper carefully out of the device. Throw the paper away carefully: It is possible that the toner may not be completely set on the print-out, and toner dust could be released into the air.
If toner dust is released into the air, you should avoid allowing it to contact your skin and eyes. Do not inhale the released toner dust. Remove the toner dust from clothing or objects with cold water; hot water would only cause the toner to set. Never remove loose toner dust with a vacuum cleaner.
General Safety Information · |
5 |

|
Repairs |
|
|
The fuser unit and and its surroundings inside the device |
|
|
become hot during operation. Do not touch these parts if |
|
|
you have opened the device. Proceed with care when you |
|
|
||
EN |
are removing a paper jam for instance. |
|
Should disruptions occur, follow the instructions on the |
||
|
||
|
display and on the error report. |
|
|
||
|
Do not make any repairs to the device yourself. Improper |
|
|
maintenance can result in injuries or damage to the device. |
|
|
Only have your device repaired by an authorised service |
|
|
centre. |
Do not remove the type label from your device; this would void the warranty.
6 |
Philips · Laserfax 5120 · 5125 · 5135 |

2 Overview
Device Overview
‚ Document support
ƒ Document feed slot
„ Document guide
… Panel with display
† Document outlet tray
‡ Device cover
ˆ Manual paper feed
‰ Paper tray
Š Printer output tray
‹ Print output
Œ Telephone handset with spiral cable (LPF¦5125, LPF¦5135)
‚Scanner glass |
|
||||||
ƒToner cartridge |
EN |
||||||
„Paper jam door (print unit) |
|
||||||
|
|||||||
|
|
|
|
|
|
|
|
|
|
|
|
|
|
|
|
|
|
|
|
|
|
|
|
|
Connections on the Rear |
|
Side |
|
‚On/Off switch |
|
ƒMains cable socket |
|
„Paper jam door (fuser unit) |
|
… Ð socket—Connection socket for the telephone |
|
(LPF¦5125, LPF¦5135) |
|
† Ï/EXT. socket—Connection socket for additional |
|
devices |
|
‡ Î/LINE socket—Connection socket for telephone |
|
cable |
|
ˆý Socket—USB connection for Firmware update |
|
(LPF¦5120, LPF¦5125) / USB connection for the computer |
|
(LPF¦5135) |
|
‰Tension lever of the fixer unit (Two levers!) |
Overview · Device Overview |
7 |
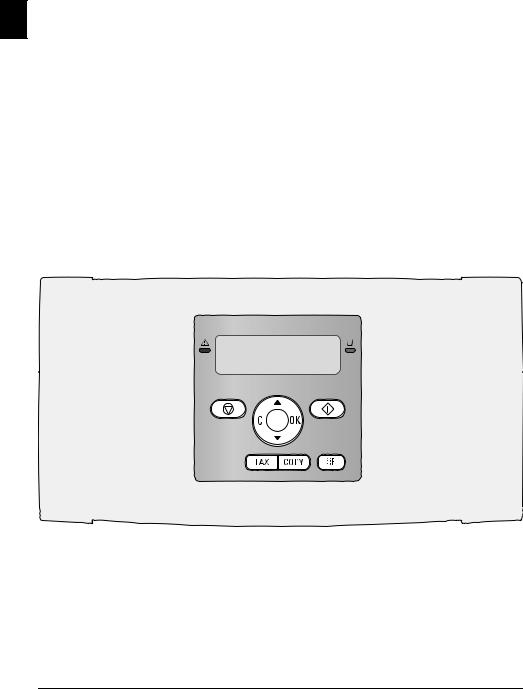
Panel with Display
Keys (A—Z)—Telephone book register: Calling up telephone book entries / entering letters.
;ü—Entering special characters (punctuation marks EN and symbols). Select the entries with [. Confirm with
OK.
ûü—Entering language specific special characters (special letters). Select the entries with [. Confirm with OK.
ú—Shift key: entering capital letters / in combination with other keys: calling additional functions
am—Calls up telephone book functions
Red lamp Æ—If the lamp flashes or is lit, please read what is indicated on the display
Green Lamp â—The green lamp â on the panel will be lit whenever there is a fax present in the memory.
j—Function abort / return to the starting mode
C—Returning to the previous menu level / deleting individual digits
[—Calling the menu functions / navigation within the menu / selecting options / moving the cursor
OK—Calling the menu functions / confirming input
o—Starting transmission of message / starting action
FAX—Start a fax transmission or fax reception
COPY—Press twice: making copies automatically. Press once: adjusting copies
f—Setting higher resolution for faxes and copying (STANDARD, FINE, SUPER FINE, PHOTO)
¨—Print lists: Function list / fax journal / telephone book / jobs list / calendar / fax templates / settings
À—Broadcasting: You can send one fax to multiple recipients in succession.
ECO—Set up power saving and toner saving functions / make a copy using the toner saving function
Numeric keys (0—9)—Entering digits
@—Redial / caller list: The redial / caller list contains the last numbers dialled and the last calls received (© indicates the numbers dialled, ® the calls received and * the calls missed).
μ—(LPF¦5120): Listening while the connection is established / (LPF¦5125, LPF¦5135): Dialling with the handset replaced
Rø—Insert short line interruption (Hook Flash) as office index on PABX or for calling special functions in the public telephone network (PSTN)
úand Rø—Inserting dialling pause
8 |
Philips · Laserfax 5120 · 5125 · 5135 |

Overview of the Menu Functions
The following functions are available on your device. There are two ways in which you can call functions.
Navigating in the Menu: Press OK or one of the two arrow keys [, to open the function menu. Page through [menu entries. Use OKto select a menu function. Press C to return to the previous menu level. Press j to close the menu and return to the starting mode.
Calling Functions Directly: You can call a menu function directly using the function number. Press OK and enter the appropriate function number using the numeric keypad. Confirm with OK. You will find the function number in the following list.
0 Settings
002Set up power saving and toner saving
functions. ....................................................... |
page 36 |
007Deactivating the Button Tones........ |
page 38 |
011Entering the date and time .............. |
page 36 |
012Set the time zone ............................. |
page 36 |
021Entering name ................................. |
page 37 |
022Entering number ............................. |
page 37 |
031Setting the Country ......................... |
page 36 |
032Set the telephone network¦* ............. |
page 42 |
033Setting the Language ....................... |
page 36 |
041Setting the fax reception mode......... |
page 39 |
042Set the number of ring tones for fax reception
....................................................................... |
page 37 |
051Switch PABX operation on/off ........ |
page 42 |
0522 Enter a dialling code for the PABX |
|
operation ........................................................ |
page 42 |
053Set the dialling mode (tone/pulse dialling)¦*
....................................................................... |
page 42 |
054Selecting the Ring Tone................... |
page 37 |
055Setting the ring volume.................... |
page 37 |
*¦Function is not supported in all countries and networks
1 Copier
10 Set the copier settings............................. |
page 37 |
11 Make copies using standard settings ....... |
page 33 |
12 Make copies using the second profile ..... |
page 33 |
13 Make enlarged or compressed copies...... |
page 34 |
14 Copy several documents on one page |
|
(Mosaic-copy)................................................. |
page 34 |
2 Printer
201 Set paper weight.............................. |
page 38 |
|
202 Set paper source .............................. |
page 38 |
|
................203 Setting the Paper Format |
page 38 |
EN |
4 Fax |
|
|
|
|
|
401 Set fax transmission......................... |
page 38 |
|
402 Set fax reception.............................. |
page 40 |
|
403 Setting Protected Fax Reception ..... |
page 30 |
|
41 Sending a Fax........................................ |
page 27 |
|
42 Poll faxes ............................................... |
page 30 |
|
45 Printing the Fax Templates ................... |
page 29 |
|
5 Telephone Book |
|
|
511 Looking up an entry........................ |
page 19 |
|
512 Saving Entry ................................... |
page 19 |
|
513 Creating group................................ |
page 20 |
|
514 Edit Entry....................................... |
page 19 |
|
515 Deleting an Entry ........................... |
page 20 |
|
516 Printing the telephone book............ |
page 20 |
|
7 Jobs |
|
|
71 Immediate job execution ....................... |
page 31 |
|
72 Changing a job...................................... |
page 31 |
|
73 Deleting a job........................................ |
page 31 |
|
74 Printing a job ........................................ |
page 31 |
|
75 Printing the jobs list .............................. |
page 31 |
|
8 Lists and Reports |
|
|
80 Printing list of settings........................... |
page 41 |
|
81 Printing the List of Available Functions. page 41
82 Printing Fax Journal/Call Log (LPF¦5125,
LPF¦5135)...................................................... |
page 41 |
83 Printing the telephone book .................. |
page 41 |
84 Printing the jobs list .............................. |
page 31 |
85 Print Calendar....................................... |
page 25 |
86 Sudoku: printing a game ....................... |
page 25 |
87 Printing the Fax Templates ................... |
page 29 |
9 Miscellaneous
92 Locking the Device................................ |
page 40 |
931 Calibrating the Scanner................... |
page 51 |
933 Using service codes.......................... |
page 52 |
934 Checking the firmware version........ |
page 44 |
94 Query the counter levels........................ |
page 44 |
946 Displaying the Toner Level ............. |
page 44 |
Overview · Overview of the Menu Functions |
9 |

Print Lists and Reports
Printing the Functions List
You can also print the function list by pressing ¨. Using EN [ select FUNCTION LIST. Confirm with OK.
Printing the Telephone Book
You can also print the telephone book by pressing ¨. Using [ select PHONEBOOK. Confirm with OK.
Printing the Fax Templates
You can also print the fax template by pressing ¨. Using [ select FAX-TEMPLATES. Confirm with OK.
Printing Fax Journal/Call Log
You can also print the fax journal and the call log (LPF¦5125, LPF¦5135) by pressing ¨. Using [ select LOGS. Confirm with OK.
Printing the Job List
You can also obtain a print jobs list by pressing ¨. Using [ select COMMANDS. Confirm with OK.
Print Calendar
You can also print the calendar by pressing ¨. Using [ select CALENDAR. Confirm with OK.
Sudoku: Printing a Game
You can also print a new Sudoku by pressing ¨. Using [ select SUDOKU. Confirm with OK.
Prints the List of Settings
You can also obtain a list of all the settings by pressing ¨. Using [ select SETUP. Confirm with OK.
10 |
Philips · Laserfax 5120 · 5125 · 5135 |
3 Initial Operation
Packing Contents
‚ Device
ƒ Starter cartridge (already installed)
„ Document support (in the paper tray)
… Document outlet tray (in the paper tray)
† Paper tray (already installed)
‡ Telephone handset (LPF¦5125, LPF¦5135)
ˆ Spiral cable for telephone handset (LPF¦5125, LPF¦5135)
‰ Mains cable with plug (country-specific)
Š Telephone cable with plug (country-specific) User manual with installation guide (not depicted) Installation-CD (LPF¦5135) (not depicted)
Notice |
Removing Packaging Mate- |
|
|
EN |
||
rial |
||
|
||
|
|
Removing Packaging Material from the Device
Remove the existing tape used for transportation from the device.
Remove the Packaging Material from the Toner Cartridge
1 Open the device by lifting the device cover forwards
Missing Package Contents
If one of the parts is missing or damaged, please contact your retailer or our customer service.
DANGER!
Edges on the Device Cover!
Take care of the edges on the device cover. You could injure yourself if you reach into the device from the side.
|
|
|
Initial Operation · Packing Contents |
11 |
|

2Remove the toner cartridge by gripping the handle in the middle and pulling it forwards out of the device
EN
3Remove the tape and protective paper, but do not remove the protective strip from the cartridge yet .
DANGER!
Escaping Toner Dust!
Never open a toner cartridge. If toner dust is released into the air, you should avoid allowing it to contact your skin and eyes. Do not inhale the released toner dust. Remove the toner dust from clothing or objects with cold water; hot water would only cause the toner to set. Never remove loose toner dust with a vacuum cleaner.
4Shake the new toner cartridge back and forth several times in order to distribute the toner evenly, thereby improving the print quality.
5Only after completely pull off the protection strip located on the left side of the cartridge.
DANGER!
Escaping Toner Dust!
Once you have removed the protection strip, do not shake the toner cartridge any more. Otherwise, it is possible that toner dust will be released into the air.
6Place the toner cartridge into your device. The cartridge should snap securely into position.
7 Close the device.
CAUTION!
Toner Cartridge Not Inserted Correctly!
If the device cover would not close, the toner cartridge is not inserted correctly. Take the toner cartridge out and insert it again correctly.
Remove the Packaging Material from the Paper Tray
1 Pull the paper tray out of the device.
12 |
Philips · Laserfax 5120 · 5125 · 5135 |

2 Please remove the protective cardboard from the paper |
Attaching the Document |
tray before loading paper. |
Support |
|
|
|
Insert the document support into the two openings in the |
|
cover. The document support should snap securely into place. EN |
3 Remove the document support and the document outlet tray from the paper tray.
4Removing the tape in the paper tray which was used for transportation purposes.
Notice
Loading Paper
Adjust the paper tray to the paper and insert the paper (see also chapter Printing Media, page 22).
5Push the paper tray into the device all the way to the stopping point.
Fold Out the Print Out Support
1 Fold the additional printer output tray forward.
CAUTION!
Do Not Use the Paper Stopper with Legal Paper!
Do not pull out the additional paper stopper on the print out support if you are printing on Legal paper.
2Printing on A4 Paper: Pull out the additional paper stopper on the print out support.
|
|
|
|
|
|
|
|
|
|
|
|
|
|
|
|
|
|
|
|
Initial Operation · Attaching the Document Support |
13 |
|||

3 Printing on A5 Paper: Fold the print out support |
Connecting the Telephone |
with the pulled out paper stopper back again. |
|
Cable
|
Connect the telephone cable to the device by inserting it in |
EN |
the socket designated with Î/LINE (RJ-11-Connector). |
|
Insert the telephone plug into your PTT line socket. |
Attaching the Document |
|
Outlet Tray |
CAUTION! |
Insert the document outlet tray into the two openings |
Connection to an ISDN system! |
under the operation panel. |
You can not connect your devices directly to the |
|
|
|
digital output of the ISDN system. Details for |
|
ISDN connections can be found in the instruc- |
|
tions provided with the terminal adapter or the |
|
dial-up router. |
Notice
Connection to Private Automatic Branch Exchange
If you connect your device as extension to a telephone system, you must set it for working as an extension (also see Chapter Telephone connections and additional devices, page 42).
Connecting the Telephone
Handset
(LPF¦5125, LPF¦5135)
Plug one end of the spiral cable into the socket on the telephone handset. Insert the other end into the socket designated with the Ð symbol.
Connecting the Mains Cable
CAUTION!
Mains Voltage at the Site of Installation!
Check whether the mains voltage of your device (indicated on the type label) matches the mains voltage available at the setup location.
1Insert the mains cable into the connection located on the rear side of the device. Plug the power cable into the electrical outlet.
14 |
Philips · Laserfax 5120 · 5125 · 5135 |

2Switch the device on using the on/off switch on the rear.
Notice
Automatic Changeover Between Summer Time/Winter Time
With setting the country and time zone, the |
|
automatic changeover between summer and |
EN |
winter time is switched on. The automatic |
|
changeover is switched off if you enter the devi- |
|
ance from UTC manually using the time zones |
|
editor |
|
Initial Installation
After you connect your device to the mains voltage, the device starts. During the booting process, the lights flash. Wait until the initial installation process begins.
Selecting the Language
1 Use [ to select the desired display language.
2 Confirm with OK.
Selecting the Country
CAUTION!
Setting the Country Correctly!
You must set the country in which you are operating the device. Otherwise your device is not adapted to the telephone network. If your country is not included in the list, you must select a different setting and use the correct telephone cable for the country. Consult your retailer.
1Use [ to select the country in which you are operating the device.
2 Confirm with OK.
Set the Time Zone
(Function is not supported in all countries and networks)
In countries with several time zones, you can select from preset time zones or manually enter the deviance of your time zone from UTC (see also chapter on setting the time zone, page 36). In countries with one time zone, the setting is adjusted automatically if you set the country correctly.
1Use [ to select the time zone in which you are operating the device.
2 Confirm with OK.
Entering Name
Your name and number are added together with date, time and page number at the top edge of each fax transmission (= header).
1 Enter the name using the keys (A—Z).
Notice
Enter Letters
Enter capital letters by pressing and holding úkey. You can enter space using ½.
To insert special characters and symbols, press ;ü. Press ûü to insert language specific special characters. Select with [. Confirm with OK.
You can move the cursor using [. Use Cto delete individual characters.
2 Confirm with OK.
Entering Number
1 Enter your number.
Notice
Enter Special Characters and Symbols
To insert special characters and symbols, press ;ü. Select with [. Confirm with OK.
You can move the cursor using [. Use C to delete individual characters.
2 Confirm with OK.
Entering the Date and Time
1Enter the date (two digits for each field), for example 31¦05¦25for May 31th, 2025.
2 Enter the time, e.g. 14 00 for 2 pm.
3 Confirm with OK.
Initial Operation · Initial Installation |
15 |
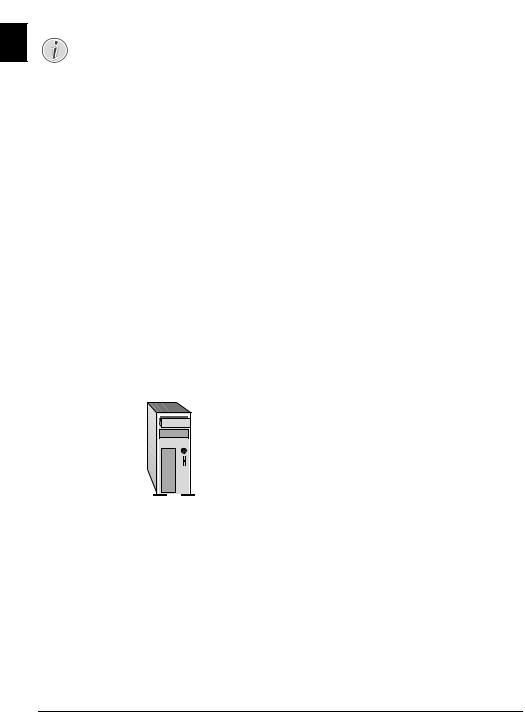
Connecting to the Computer
(LPF¦5135)
Notice
EN |
Only high-speed certified USB cable |
Use only a custom high speed certified USB cable to connect the device to your computer. The cable should be no longer than 1.5 metres.
You can connect the device to a computer and use it as a printer and scanner. You can find all instructions on installation and usage in the operating instructions on the installation CD supplied.
Requirements
Your computer must have one of the following operating systems.
Microsoft Windows
2000 (SP¦4) · XP · Vista · Windows 7
Windows Server 2003/2008
Apple Macintosh
OS 10.4 · 10.5 · 10.6
Linux
Redhat 9.0 · Debian 5.0 · Suse 11.1 · Fedora 11
Ubuntu 9.10
Connecting USB Cable
1Close all open programs and applications before beginning the installation process. Place the installation CD in the CD-ROM drive of your computer. The program will start automatically.
2Connect the device to your PC with a typical USB cable. The USB port of your device can be found on the rear side.
Notice
Only high-speed certified USB cable
Use only a custom high speed certified USB cable to connect the device to your computer. The cable should be no longer than 1.5 metres.
16 |
Philips · Laserfax 5120 · 5125 · 5135 |

4 Telephone Functions
(LPF¦5125, LPF¦5135)
For information on how to connect additional telephones and which functions are available to you, please refer the chapter on Telephone Connections and Additional Devices, Page 42.
Placing a Call on the Device
Dial the desired number. There are several ways to do this: Then pick up the handset.
Notice
Direct Dialling
You can also lift up the receiver first, then dial a number. The dialling process begins immediately.
Manual Dialling: Dial the desired number using the numeric keypad.
Telephone book register: with the keys (A—Z) you can access entries saved in the telephone book. Enter the initial letters or the name of the desired entry. Your device will show you the telephone book entries for the corresponding letters. Select an entry using [.
Notice
Using the Telephone Book
You can also call the telephone book entries by pressing amand select using [SEARCH.
The function Search works even while you are conversing on the telephone.
If you are loading entries from the telephone book, it is possible to edit the numbers after you have loaded them. For example, you can add or delete prefixed numbers or direct dial numbers.
Redial / caller list: The redial / caller list contains the last numbers dialled and the last calls received (© indicates the numbers dialled, ® the calls received and * the calls missed).
Getting Outside Line
Private branch exchanges (PABX) are typical in many offices and some households. You must dial an outside line access code in order to get a connection to the public telephone network (PSTN) from a PABX.
Enter the outside line access code with which you reach the public telephone network before you enter the desired number or select a stored entry. The outside line access code is usually 0.
Notice
Incorrect Outside Line Access Code |
EN |
|
In rare cases, the outside line access code may be |
||
|
||
a different number or a two-digit number. For |
|
|
|
||
older telephone systems, the outside line access |
|
|
code can be R (= Flash). Press Røto enter this |
|
|
outside line access code. If the connection to the |
|
|
public telephone network is not possible, con- |
|
|
tact your telephone system supplier. |
|
|
Connection to Private Automatic |
|
|
Branch Exchange |
|
|
If you operate your device permanently on an |
|
|
extension, save the outside line access code (see |
|
|
also chapter on setting Private Branch Exchange |
|
|
(PABX) , page 42). |
|
|
Notice |
|
|
Chain Dialling |
|
|
You can combine and edit manually entered digits and |
|
|
saved entries, before the dialling process starts. If you have |
|
|
saved, for example, the telephone number prefix of an |
|
|
inexpensive telephone service provider (call-by-call) as a |
|
|
telephone book entry, select this entry and manually enter |
|
|
the subsequent telephone number or select another saved |
|
|
entry. |
|
|
Insert Dialling Pause |
|
|
It may be necessary to insert a dial pause in telephone |
|
|
number, for example, for a direct-inward dialling number, |
|
|
a sub-address or in a long distance number. Press ú and |
|
|
Rø. The second part of the number is dialled only after a |
|
|
short pause. |
|
Dialling with the Handset Replaced
1Press μ to dial without lifting up the handset. You will hear the dial tone from the loudspeaker; the dialling process will commence immediately. Select the desired volume level using [.
2Pick up the hand-set when the subscriber accepts the call.
Notice
No Hands-free Operation Possible
Hands-free operation is not possible with this function. You cannot answer if the subscriber picks up.
Telephone Functions · Placing a Call on the Device |
17 |

Calling Line Identification (CLIP)
(Function is not supported in all countries and EN networks)
The number of an incoming call appears on the display. For this function to work, the Calling Line Identification Presentation (CLIP) must be activated for your telephone connection. Enquire with your telephone company. Caller Line Identification may be associated with a fee.
Notice
Setting the Country Correctly
If the Caller Line Identification does not work even though the function is activated for your telephone connection, check if you have set the correct country (also see Chapter Settings, page 36)
Missed Calls
You can find reference to missed calls in the redial/caller list.
1 Press @.
2Page through the dialled numbers, the calls received and calls missed in the list using [ (© indicates the numbers dialled, ® the calls received and * the calls missed).
Notice
Displaying Telephone Book Names
Your device displays the name with which you have saved the number in the telephone book. The number and name will not be shown if the caller suppresses his number.
3 To call back, pick up the handset.
18 |
Philips · Laserfax 5120 · 5125 · 5135 |

5 Telephone Book of the Device
Call the telephone book functions using am: You can store new entries, search for entries as well as set and edit groups. You can save up to 250 entries in the telephone book of your device.
Notice
Navigating in the Editor
You can move the cursor using [. Use C to delete individual characters. Press jto close the menu and return to the starting mode.
Looking up an Entry
Telephone book register: with the keys (A—Z) you can access entries saved in the telephone book. Enter the initial letters or the name of the desired entry. Your device will show you the telephone book entries for the corresponding letters. Select an entry using [.
1 Press am.
2 Using [select SEARCH.
3 Confirm with OK.
Notice
Access Function
You can also search for an entry in the telephone book by pressing OK, 511 and OK.
4 Select an entry using [.
Notice
Help Button
Press ¨ to display the information saved on this entry.
Saving Entry
Notice
No Repeat Entries
You cannot save two entries under the same name.
1 Press am.
2 Using [select NEW ENTRY.
3 Confirm with OK.
Notice
Access Function
You can also call the function by pressing
OK, 512and OK.
4 Enter the name using the keys (A—Z).
Notice
Enter Letters |
EN |
|
Enter capital letters by pressing and holding |
||
|
||
úkey. You can enter space using ½. |
|
|
|
||
To insert special characters and symbols, |
|
|
press ;ü. Press ûü to insert language spe- |
|
|
cific special characters. Select with [. Con- |
|
|
firm with OK. |
|
|
5 Confirm with OK. |
|
|
6 Enter the number using the number pad. |
|
|
7 Confirm with OK. |
|
|
Notice |
|
|
Number from the Last Number Redi- |
|
|
al List |
|
|
You can retrieve a saved number from the list |
|
|
of the last numbers dialled and last calls |
|
|
received (redial/caller list). Press @. Select |
|
|
an entry using [. Confirm with OK. |
|
|
Notice |
|
|
Outside Line Access Code |
|
If you have set your device up to work on a public telephone network (see Private Branch Exchange) and entered the outside line access code, save the number without the outside line access code (see also chapter Setting up outside line access code (PABX), page 42).
8You can assign a ring tone to the number. Use [ or the number buttons 1to 7to select a ring tone.
9 Confirm with OK.
Notice
Assigning the Standard Ring Tone
Select 1, in order to assign the standard ring tone to the number.
10 Select the speed for fax transmissions to this recipient. Normally you can select the highest speed. Set a lower transmission speed if you are sending faxes into networks with poor line quality.
11 Confirm with OK. The entry is saved.
Edit Entry
1 Press am.
2 Using [ select MODIFY.
3 Confirm with OK.
Notice
Access Function
You can also call the function by pressing
OK, 514 and OK.
Telephone Book of the Device · Looking up an Entry |
19 |

4Enter the initial letters or select the entry you would like to change with [.
5 |
Confirm with OK. |
|
|
6 |
Edit the name. |
|
||
EN |
7 |
Confirm with OK. |
|
8 |
Edit the number. |
9 |
Confirm with OK. |
|
10 You can assign a ring tone to the number. Use [ or the number buttons 1to 7 to select a ring tone.
11 Confirm with OK.
Notice
Assigning the Standard Ring Tone
Select 1, in order to assign the standard ring tone to the number.
12 Select the speed for fax transmissions to this recipient. Normally you can select the highest speed. Set a lower transmission speed if you are sending faxes into networks with poor line quality.
13 Confirm with OK. The entry is saved.
Delete an Entry
1 |
Press am. |
2 |
Using [select DELETE. |
3 |
Confirm with OK. |
|
Notice |
|
Access Function |
|
You can also call the function by pressing |
|
OK, 515and OK. |
4 |
Using [select DELETE: SINGLE. |
5 |
Confirm with OK. |
6Enter the initial letters or select the entry you would like to delete with [.
7 Confirm with OK.
8 Using [select DELETE: YES.
9 Confirm with OK.
Notice
Groups
The entry is deleted from all the groups in which it is included.
Delete all Entries
CAUTION!
All Telephone Book Entries are Deleted!
This function deletes all entries and groups in your telephone book.
1 Press am.
2 Using [ select DELETE.
3 Confirm with OK.
Notice
Access Function
You can also call the function by pressing
OK, 515 and OK.
4 |
Using [ select DELETE: |
ALL. |
5 |
Confirm with OK. |
|
6 |
Using [ select DELETE: |
YES. |
7 |
Confirm with OK. |
|
Printing the Telephone Book
Printing List of all Entries
Press OK, 83 and OK to print a list of all saved entries and groups in the telephone book.
Notice
Help Button
You can also print the telephone book by pressing ¨. Using [select PHONEBOOK. Confirm with OK.
Printing an Individual Entry
1Telephone book register: with the keys (A—Z) you can access entries saved in the telephone book. Enter the initial letters or the name of the desired entry. Your device will show you the telephone book entries for the corresponding letters. Select an entry using [.
2 Press COPY.
Groups
You can create groups containing several numbers. A message is sent to all members of this group in succession. A group is displayed as an individual telephone book entry.
Creating Group
1 Press am.
2 Using [ select NEW GROUP.
3 Confirm with OK.
Notice
Access Function
You can also call the function by pressing
OK, 513 and OK.
4 Enter a name for the group.
5 Confirm with OK.
6Enter the initial letters or select the entry you would like to add to the group using [.
20 |
Philips · Laserfax 5120 · 5125 · 5135 |
7Entries which belong to the group are highlighted with a star (*). Add other members to the group by selecting the entries and press OK. Remove group members by selecting the highlighted entry and press OK.
8 |
Using [ select ACCEPT GROUP to complete the |
EN |
|
selection. |
|
9 |
Confirm with OK. |
|
Edit Group
1 Press am.
2 Using [select MODIFY.
3 Confirm with OK.
Notice
Access Function
You can also call the function by pressing
OK, 514and OK.
4 Using [select the group you would like to edit.
5 Confirm with OK.
6 If necessary, enter a new name for the group.
7 Confirm with OK.
8Entries which belong to the group are highlighted with a star (*). Add other members to the group by selecting the entries and press OK. Remove group members by selecting the highlighted entry and press OK.
9Using [ select ACCEPT GROUP to complete the selection.
10 Confirm with OK.
Deleting a Group
Notice
Entries are Not Deleted
This function only deletes the group but not the telephone book entries contained in it.
1 Press am.
2 Using [select DELETE.
3 Confirm with OK.
Notice
Access Function
You can also call the function by pressing
OK, 515and OK.
4 |
Using [select DELETE: |
SINGLE. |
5 |
Confirm with OK. |
|
6 |
Using [select the group you would like to delete. |
|
7 |
Confirm with OK. |
|
8 |
Using [select DELETE: |
YES. |
9 |
Confirm with OK. |
|
Telephone Book of the Device · Groups |
21 |
Loading...