


Heart Rate Monitor
Model: SE122
USER MANUAL

Heart Rate Monitor |
|
MODEL: SE122 |
|
USER MANUAL |
|
CONTENTS |
|
Introduction ............................................................... |
2 |
Know your data ......................................................... |
2 |
Training zones ........................................................ |
2 |
Receiver / wrist watch control buttons .................... |
3 |
The transmitter ........................................................... |
4 |
The receiver ................................................................ |
4 |
Effective range............................................................ |
5 |
Use in the water.......................................................... |
5 |
Operation .................................................................... |
5 |
The backlight .......................................................... |
5 |
Activating keypad lock ............................................ |
5 |
Operating modes .................................................... |
5 |
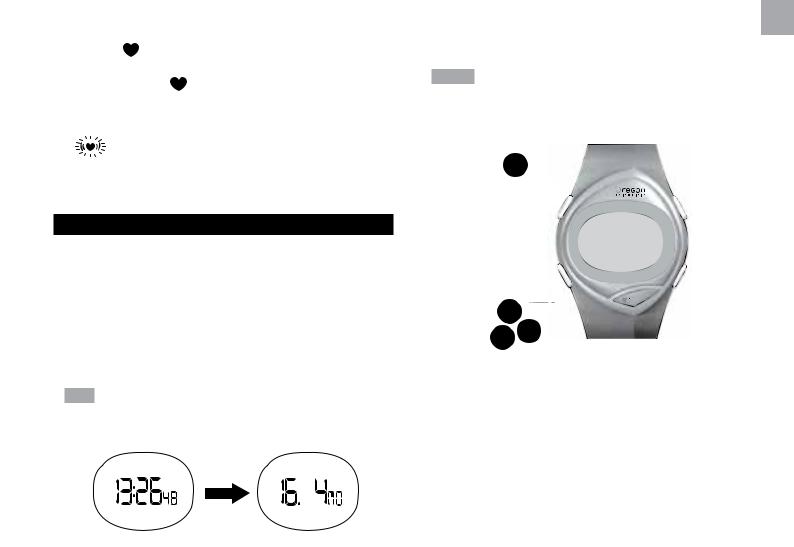
HR / kcal mode ....................................................... |
6 |
Heart rate limits ...................................................... |
6 |
Time and date ............................................................. |
7 |
Stopwatch............................................................... |
8 |
User data ..................................................................... |
8 |
Additional information ............................................... |
8 |
Battery .................................................................... |
8 |
Energy saving feature............................................. |
9 |
Specifications............................................................. |
9 |
Precautions................................................................. |
9 |
About Oregon Scientific.......................................... |
10 |
EU-Declaration of Conformity ................................. |
10 |
EN
1

EN
INTRODUCTION
Thank you for selecting the Oregon ScientificTM Heart Rate Monitor (SE122). The SE122 is a very useful sports &
fitness product that can help you achieve and maintain your optimum exercise zone by monitoring your heart rate while exercising. The SE122 bundles a heart rate transmitter and receiver watch complete with real-time clock, stopwatch, and backlight functions.
KNOW YOUR DATA
To help achieve the maximum health benefits from your workout program, it is important to know your:
•Maximum heart rate (MHR) training zone
•Upper heart rate limit
•Lower heart rate limit
MHR is expressed in beats per minute. You can get your MHR from a MHR test, or you can estimate it using the following formula:
220 - age = MHR
There are several training zones that are relevant to a fitness program. The most popular zone range is from 50% to 80% of your maximum heart rate. This is where you achieve cardiovascular benefits, burn fat, and become fitter. When programming your watch, the lower % of the zone you choose becomes your lower heart rate limit and the higher % becomes the upper heart rate limit.
50%
60%
Moderate Activity
70%
Weight Management
80%
Aerobic Zone
90%
Anaerobic Threshold Zone
100%
Red Line Zone ( maximum capacity )
The upper and lower heart rate limits are calculated by multiplying your MHR by the percentages of the selected training zone.
For example:
A 40-year-old user training for basic health maintenance:
•His Upper Heart Rate Limit [220 - 40(age)] x 78%
•His Lower Heart Rate Limit [220 - 40(age)] x 65%
TRAINING ZONES
Always warm up before exercising and select the training zone that best suits your physique. Exercise regularly, 20 to 30 minutes per session, three to four times a week for a healthier cardiovascular system.
2
There are three training zones, as described below:
TRAINING |
MHR% |
DESCRIPTION |
|
ZONE |
|||
|
|
||
|
|
|
|
|
|
This is the lowest |
|
|
|
training intensity level. |
|
Health |
|
It is good for beginners |
|
65-78% |
and those who |
||
Maintenance |
|||
|
want to strengthen |
||
|
|
||
|
|
their cardiovascular |
|
|
|
systems. |
|
|
|
|
|
|
|
Increases strength |
|
|
|
and endurance. It |
|
|
|
works within the |
|
Aerobic |
65-85% |
body’s oxygen intake |
|
Exercise |
capability, burns more |
||
|
|||
|
|
calories and can be |
|
|
|
maintained for a long |
|
|
|
period of time. |
|
|
|
|
|
|
|
Generates speed |
|
|
|
and power. It works |
|
|
|
at or above the |
|
Anaerobic |
78-90% |
body’s oxygen intake |
|
Exercise |
capability, builds |
||
|
|||
|
|
muscle, and cannot be |
|
|
|
maintained for a long |
|
|
|
period of time. |
|
|
|
|
WARNING Determining your individual training zone is a critical step in the process towards an efficient and safe training program. Please consult your doctor or
health professional to help you determine your maximum |
EN |
|
|
|
|
heart rate, upper and lower limits, exercise frequency and |
|
duration appropriate for your age, condition and specific |
|
goals. |
|
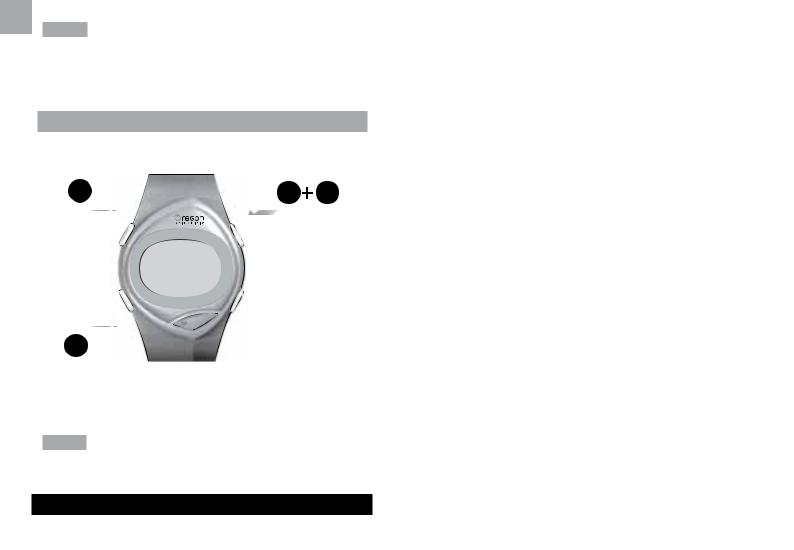
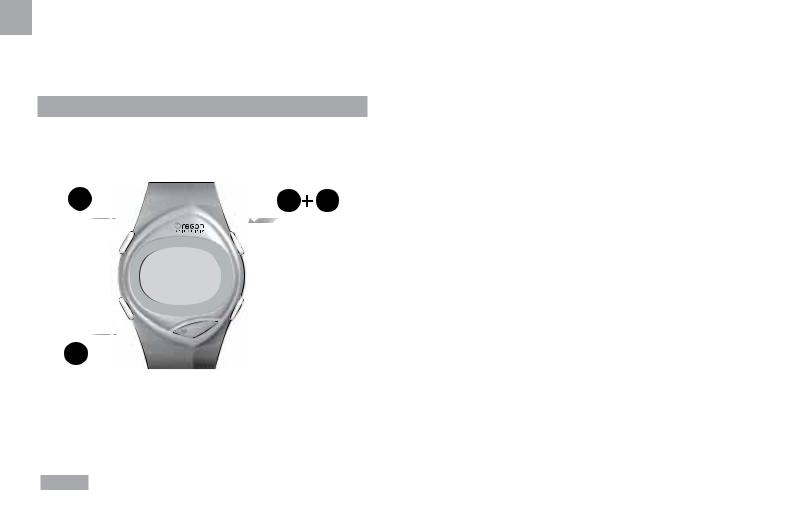
RECEIVER / WRIST WATCH CONTROL BUTTONS
1 |
|
|
|
|
8 |
2 |
|
|
|
|
9 |
|
|
|
|
10 |
|
3 |
|
|
|
|
|
|
|
|
|
11 |
|
4 |
|
|
|
|
|
|
|
|
|
12 |
|
|
|
|
|
||
|
|
|
|
||
|
|
|
|
||
5 |
|
|
|
|
|
6 |
|
|
|
|
13 |
7 |
|
|
|
|
14 |
|
|
|
AL |
|
|
|
|
|
KC |
15 |
|
|
|
|
|
|
|
1. |
SET : Change values in settings mode; turns the alarm |
|
|
ON/OFF in Alarm mode; reset stopwatch |
|
2. |
: 12 hour clock |
|
3. |
|
: Weight unit |
|
||
4. |
Displays stopwatch / alarm / clock / heart rate / weight |
|
3 |
|
|
EN
and mode banners
5. : Indicates battery power is low
6. : Indicates alarm in On
7.MODE: Toggle between modes; enter settings mode
8.ST/SP: Start / stop stopwatch
9.
 : Calorie unit
10.

 : indicates a heart rate reading is detected
11.
 : Upper / Lower heart rate limits reached
12. : Indicates keypad is locked
13. : Indicates stopwatch is running
14.

 : Activate backlight; lock / unlock keypad
15. |
KCAL |
: Display heart rate; activate high/low heart |
rate alert
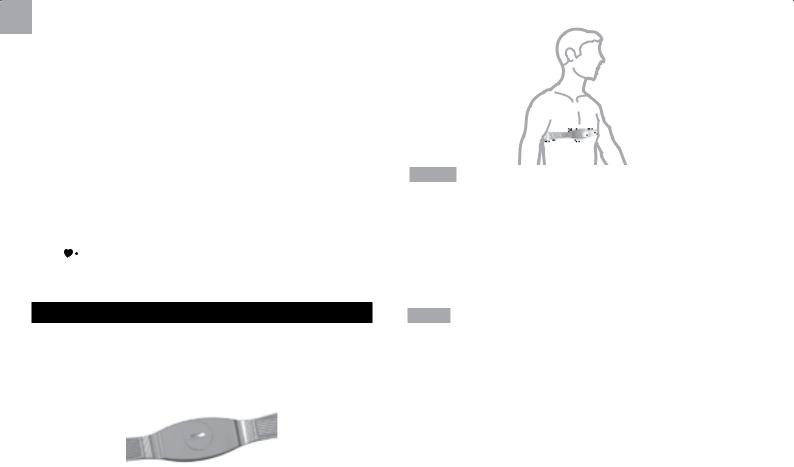
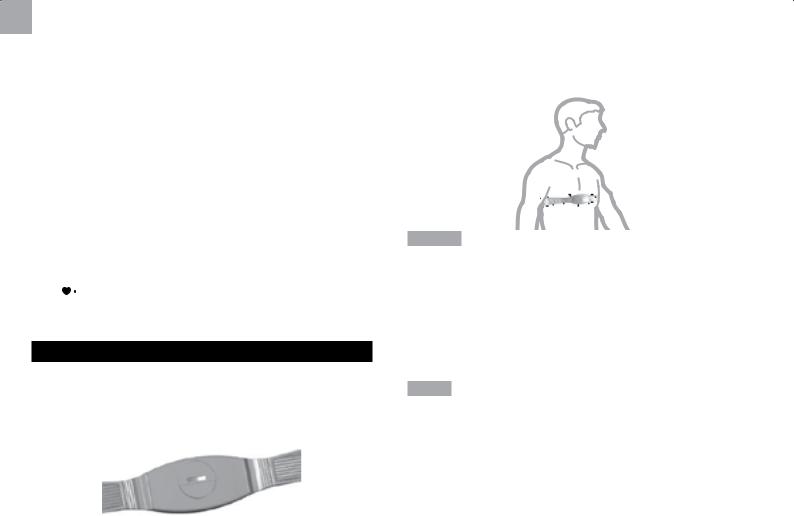
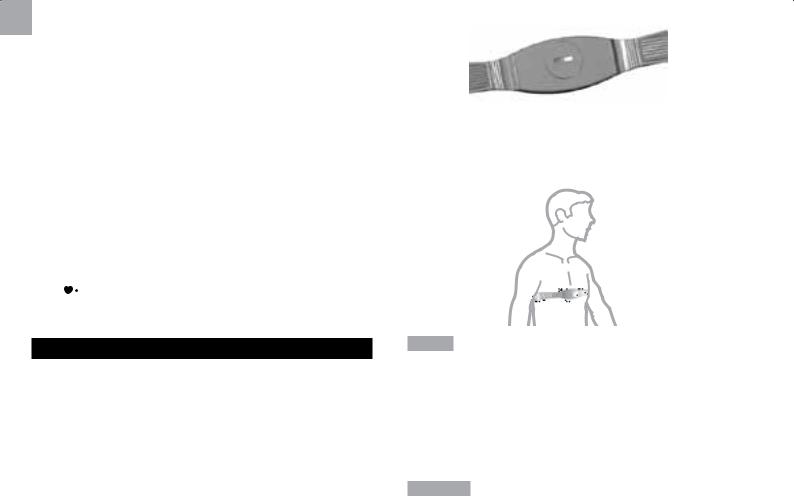
THE TRANSMITTER
The transmitter is used to count your heartbeat and transmit the data to the receiver. To put it on:
1.Wet the conductive pads on the underside of the transmitter with water or a conductive gel to help establish a solid contact.
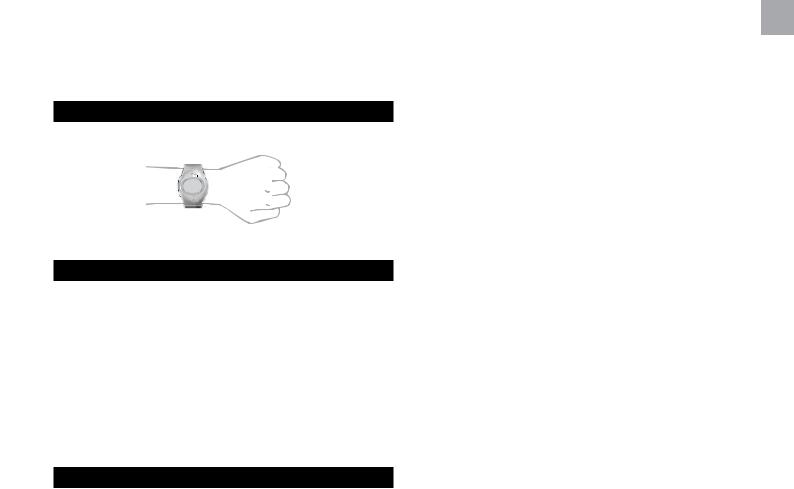
2.Strap the transmitter across the chest. Adjust the strap until the transmitter sits snugly below the pectoral muscles for an accurate heart rate signal.
4
HINTS
•The position of the transmitter affects its performance.
Move the transmitter along the strap for the best transmission. Avoid areas with dense chest hair.
•In dry, cold climates, it takes the transmitter a while to function steadily. This is normal, as the conductive pads need a film of sweat to improve contact with the skin.
NOTE To maintain the best performance of your chest belt, please handle it with care according to the following:
•Do not wrap the chest belt in a wet towel nor with other wet materials.
•Do not store the chest belt in a hot (about 50°C) and humid (about 90%) environment.
•Do not place or wash the chest belt under running water, instead clean it with a wet cloth.
•Do not place the conductive rubber face down on a metal table or surface.
•Properly dry the chest belt immediately after use.
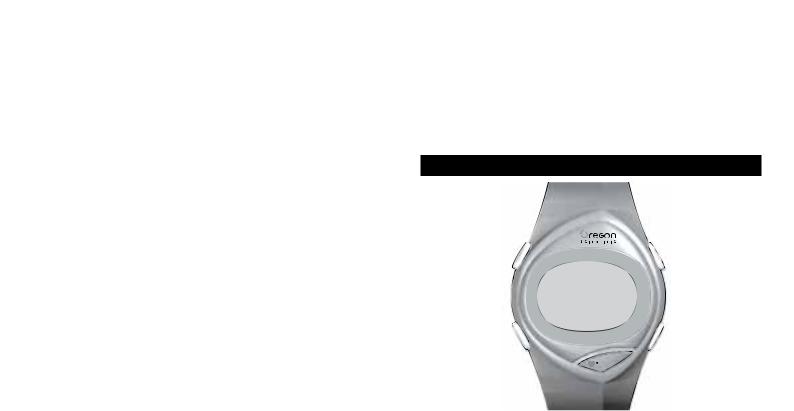
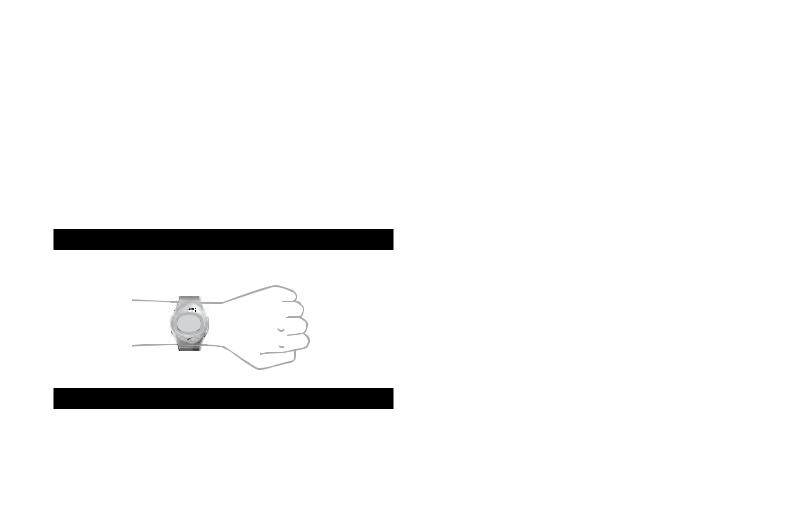
THE RECEIVER
The |
. |
EFFECTIVE RANGE
The transmitter and receiver will start transmitting and receiving signals after the batteries are in place. When the battery is full, both units can be worn or mounted up to 76 cm (30 inches) apart.
If signals become unsteady:
•Shorten the distance between the transmitter and receiver.
•Re-adjust the position of the transmitter.
•Check the batteries. Replace them when necessary.
USE IN THE WATER
The SE122 wristwatch is water-resistant up to 50 meters (164 feet).
EN
|
|
SHOWERING |
|
SHALLOW |
|
|
|
(WARM/ |
LIGHT |
DIVING/ |
SNORKELING |
|
RAIN |
COOL |
SWIMMING |
SURFING/ |
/ DEEP |
|
SPLASHES |
WATER |
/ SHALLOW |
WATER |
WATER |
|
ETC |
ONLY) |
WATER |
SPORTS |
DIVING |
|
|
|
|
|
|
50M |
|
|
|
|
|
/ 164 |
OK |
OK |
OK |
OK |
NO |
FEET |
|||||
|
|
|
|
|
|
NOTE Set the unit before exposing it to excessive water. Pressing the keys while in the water or during heavy rainstorms may cause water to enter the unit.
OPERATION
THE BACKLIGHT
Press 
 to turn backlight ON for 5 seconds.
ACTIVATING KEYPAD LOCK
To toggle keypad lock ON / OFF:
Press and hold 
 for 2 seconds.
  indicates keypad is locked.
5
EN
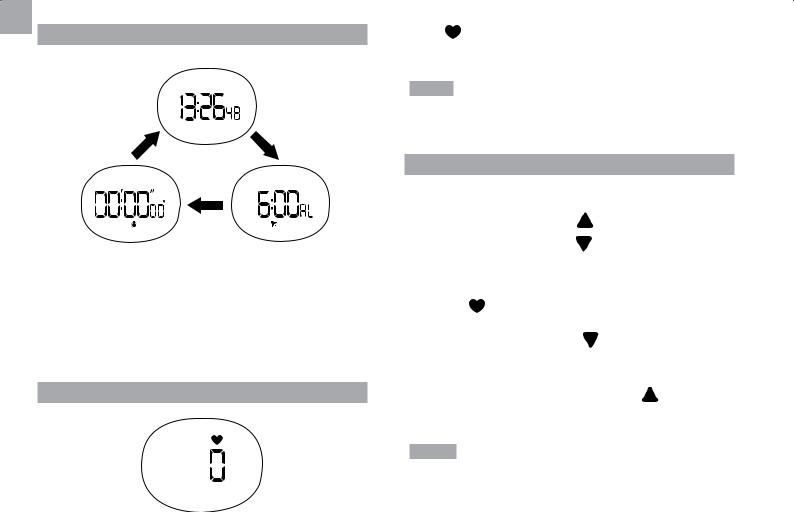
OPERATING MODES
TIME
CHRONO (Stopwatch) |
ALARM |
Press MODE to switch between: |
|
•Time mode
•Alarm mode
•Chrono (Stopwatch) mode
HR / KCAL MODE
HEART RATE MEASUREMENT
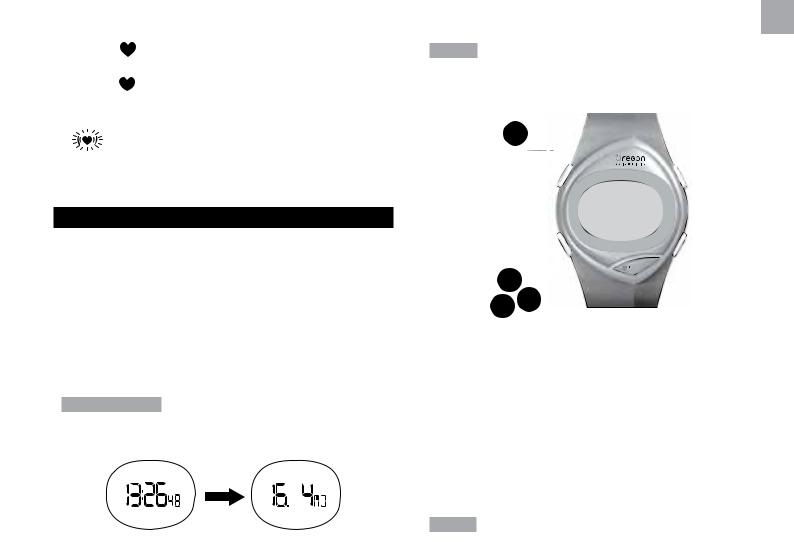
Press / KCAL to enter HR Measurement mode. Press MODE to return to previous mode.
NOTE When no signals are received or the measurement is out of range for five minutes, the receiver will automatically return to the previous operating mode.
HEART RATE LIMITS
The heart rate limits help you determine if you are exercising within your training zone.
• |
If you go above your limits |
will flash |
• |
If you go below your limits |
will flash |
To set the heart rate limits:
1.Press / KCAL to navigate to HR Measurement mode.
2. Press and hold MODE |
appears. |
3.Press SET to choose the lower limit, then press MODE to confirm.
4. Press SET to choose the upper limit |
, then press |
MODE to confirm. |
|
NOTE The upper limit must exceed the lower limit. The transmitter will adjust the ranges automatically according to the data entered. You can also activate the heart rate limit alert function, so the transmitter will emit a beeping sound when the limits are exceeded.
6
To activate |
heart rate limits alarm: |
||
1. |
Press |
/ KCAL to Navigate to HR Measurement |
|
|
Mode. |
|
|
2. |
Press and |
/ KCAL. |
|
|
|
|
|
|
ICON |
|
HIGH / LOW ALARM |
|
|
|
|
|
|
|
On |
|
|
|
|
|
No Icon |
|
Off |
|
|
|
|
TIME AND DATE
To set the time and date:
1.Press MODE to navigate to Time mode.
2.Press and hold MODE to enter settings.
3.Press SET to increase / change values of the setting.
4.Press MODE to confirm.
The setting sequence is as follows: 12 / 24-hour time; hour; minute; day-month / month-day; month; day; day of the week.
TIP Press and hold SET to rapidly scroll through value settings.
To display the date:
EN
Press SET in Time mode.
NOTE If no key is pressed for ten seconds, the display will return to Time mode.
To set the alarm:
1. Press
3
2
2.Press and hold MODE to enter settings.
3.Press SET to increase / change values of the setting.
4.Press MODE to confirm.
The setting sequence is as follows: hour; minute.
To activate or deactivate the alarm:
1. Press MODE to navigate to Alarm mode.
2. Press SET to turn the alarm on or off. A |
will indicate |
that the alarm has been activated. |
|
7
EN
NOTE When the alarm clock is activated, it will sound at the set time every day. Press any button to stop the alarm for that day. The alarm clock is still active and will set off again the following day.
STOPWATCH
To use the stopwatch: |
|
1. |
. |
4 |
2 |
1
2.Press ST/SP to start the stopwatch.
3.Press ST/SP to stop the stopwatch.
4.Press and hold SET to reset.
NOTE Unless you stop the stopwatch, ” will blink in all modes to remind you that the stopwatch is still timing.
USER DATA
To access the full benefits of this product, set up your user data
8
before you exercise. This will automatically enable the watch to calculate the level of calories burned when exercising. This information helps you track your progress over time.
To set |
|
1. Press |
/ KCAL to navigate to HR measurement |
mode. |
|
2.Press and hold to MODE to enter User Data mode.
3.Press SET to change values of the setting.
4.Press MODE to confirm.
The setting sequence is as follows: set Lower limit; set Upper limit; set Age; set Weight unit; set Weight.
NOTE You must enter your user data to enable the calorie count function.
To view |
of calories burnt: |
•/ KCAL to navigate to HR mode.
•/ KCAL to view calories burnt.
NOTE The calorie display will only appear for approximately 3 seconds.
ADDITIONAL INFORMATION
BATTERY
The SE122 uses a CR2032 lithium battery for the transmitter and a CR2032 for the receiver. Both are included with the
unit. When the |
battery is running low, the low |
battery indicator |
will light up on the watch display. |

If the heart rate readings become erratic or stop, your transmitter battery may need replacing.
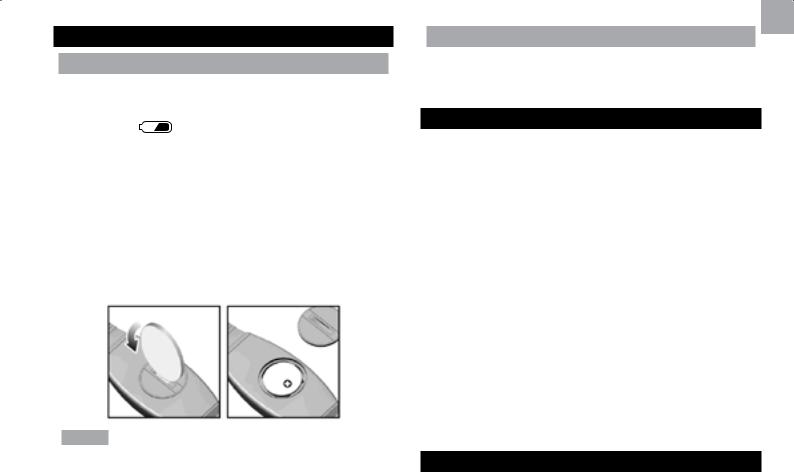
To change the battery:
1.Open the transmitter battery lid with a coin by turning it counterclockwise.
2.Insert a new CR2032, 3V lithium battery.
3.Replace the battery compartment door.
NOTE Take care not to touch the two contacts otherwise the battery can discharge. If you are unsure about the procedure consult your dealer.
ENERGY SAVING FEATURE
If the watch receives no transmitter signal after 5 minutes, the SE122 will switch back to the previous display mode.
SPECIFICATIONS
Real time clock |
12/24 hour with hour / minute |
|
/ second |
||
|
||
|
|
|
Stopwatch |
00:00:00 to 29:59:59 (hrs: |
|
min: sec) |
||
|
||
|
|
EN
Heart rate |
30 - 240 bpm |
|
|
|
|
Upper limit |
80 - 240 bpm |
|
|
|
|
Lower limit |
30 - 220 bpm |
|
|
|
|
Calorie range |
0 - 9999 kcal |
|
|
|
|
|
Watch 1 x CR2032 3V battery |
|
Power |
Chest belt 1 x CR2032 3V |
|
|
battery |
|
|
|
|
Operating temp |
-10°C to +50°C (14°F to 122°F) |
|
|
|
|
Storage temp |
-20°C to +60°C (-4°F to 140°F) |
|
|
|
|
Water resistant |
Up to 50 meters (164 feet) |
|
without pressing keys |
||
|
||
|
|
PRECAUTIONS
•Do not subject the unit to excessive force, shock, dust, temperature or humidity.
•Do not cover the ventilation holes with any items such as newspapers, curtains etc.
•Do not immerse the unit in water. If you spill liquid over it, dry it immediately with a soft, lint-free cloth.
•Do not clean the unit with abrasive or corrosive materials.
•Do not tamper with the unit’s internal components. This invalidates the warranty.
•Only use fresh batteries. Do not mix new and old batteries.
•Images shown in this manual may differ from the actual display.
9
EN
•When disposing of this product, ensure it is collected separately for special treatment and not as normal household waste.
•Placement of this product on certain types of wood may result in damage to its finish for which Oregon Scientific will not be responsible. Consult the furniture manufacturer’s care instructions for information.
•The contents of this manual may not be reproduced without the permission of the manufacturer.
•Do not dispose old batteries as unsorted municipal waste. Collection of such waste separately for special treatment is necessary.
•Please note that some units are equipped with a battery safety strip. Remove the strip from the battery compartment before first use.
NOTE The technical specifications for this product and the contents of the user manual are subject to change without notice.
NOTE Features and accessories will not be available in all countries. For more information, please contact your local retailer.
ABOUT OREGON SCIENTIFIC
Visit our website (www.oregonscientific.com) to learn more about Oregon Scientific products.
If you’re in the US and would like to contact our Customer Care department directly, please visit:
www2.oregonscientific.com/service/support.asp For international inquiries, please visit: www2.oregonscientific.com/about/international.asp.
EU-DECLARATION OF CONFORMITY
Hereby, Oregon Scientific, declares that this Heart Rate Monitor (model: SE122) is in compliance with EMC directive 2004/108/EC. A copy of the signed and dated Declaration of Conformity is available on request via our Oregon Scientific Customer Service.
10

MONITOR DE RITMO CARDÍACO
MODELO: SE122 |
|
MANUAL DE USUARIO |
|
ÍNDICE |
|
Introducción .................................................................. |
2 |
Conozca sus datos ....................................................... |
2 |
Zonas de entrenamiento .......................................... |
2 |
Reloj / Botones de control del reloj............................. |
3 |
El Transmisor (Banda pectoral)................................... |
4 |
El Reloj........................................................................... |
5 |
Alcance efectivo............................................................ |
5 |
Uso en el agua............................................................... |
5 |
Funcionamiento ............................................................ |
5 |
Retroiluminación ...................................................... |
5 |
Activación del bloqueo de botones .......................... |
5 |
Modos de operación ................................................ |
6 |
Modo Hr / Kcal ......................................................... |
6 |
Límites de ritmo cardiaco......................................... |
6 |
Fecha y hora.................................................................. |
7 |
Cronómetro .............................................................. |
8 |
Datos del usuario.......................................................... |
8 |
Información adicional................................................... |
9 |
Pila ........................................................................... |
9 |
Dispositivo de ahorro de energía |
.............................9 |
Ficha Técnica ................................................................ |
9 |
Precaución..................................................................... |
9 |
Sobre Oregon Scientific............................................. |
10 |
EU - Declaración de Conformidad............................. |
10 |
ES
1

ES
INTRODUCCIÓN
Gracias por elegir el Monitor de ritmo cardíaco de Oregon ScientificTM (SE122). El SE122 es un producto muy útil para el deporte y el ejercicio que puede ayudarle a mantener su forma fisica óptima haciendo un seguimiento de su ritmo cardíaco durante el ejercicio, el SE122 combina un transmisor de ritmo cardíaco y un reloj receptor con hora real, cronómetro y retroiluminación.
CONOZCA SUS DATOS
Para conseguir los máximos beneficios en su ejercicio, es importante que conozca su:
•Ritmo cardíaco máximo (RCM) zona de entrenamiento
•Límite máximo de ritmo cardiaco
•Límite mínimo de ritmo cardiaco
El RCM se expresa en latidos por minuto. Puedes obtener tu RCM con una prueba o calcularlo con la fórmula siguiente:
RCM = 220 - edad
Los programas de ejercicio tienen distintas zonas de ejercicio posibles. Las más populares se sitúan entre el 50% y el 80% del ritmo cardíaco máximo: en esta zona se consiguen beneficios cardiovasculares, se queman grasas y se ejercita el organismo. Al programar su reloj, cuanto más bajo sea el % de la zona que elija, más bajo será el límite mínimo de ritmo cardíaco, y cuanto más alto el %, mayor el límite de ritmo cardíaco.
50%
60%
Actividad moderada
70%
Control del peso
80%
Zona aeróbica
90%
Zona umbral anaeróbica
100%
Zona línea roja (capacidad máxima)
Los límites cardíacos superior e inferior se calculan multiplicando el RCM por los porcentajes de la zona de entrenamiento seleccionada.
Por ejemplo:
Una persona de 40 años que hace ejercicio de mantenimiento:
•Su límite cardíaco máximo [220 - 40(edad)] x 78%
•Su límite cardíaco mínimo [220 - 40(edad)] x 65%
ZONAS DE ENTRENAMIENTO
Haga siempre un calentamiento antes de hacer ejercicio y seleccione la zona de entrenamiento que mejor encaje con su físico. Haga ejercicio regularmente, entre 20 y 30 minutos por sesión, tres o cuatro veces a la semana para mejorar su sistema cardiovascular.
2
Hay tres zonas de entrenamiento, que se describen a continuación:
ZONA DE |
RCM% |
DESCRIPCIÓN |
|
ENTRENAMIENTO |
|||
|
|
|
|
|
|
Este es el nivel de |
|
|
|
entrenamiento de |
|
|
|
menor intensidad. |
|
Mantenimiento de |
65-78% |
Es bueno para los |
|
la salud |
principiantes y para |
||
|
|||
|
|
quien desee fortalecer |
|
|
|
sus sistemas |
|
|
|
cardiovasculares. |
|
|
|
|
|
|
|
Incrementa la fuerza |
|
|
|
y la resistencia. |
|
|
|
Funciona con |
|
|
|
la capacidad de |
|
Ejercicio aeróbico |
65-85% |
consumo de oxígeno |
|
del cuerpo, quema |
|||
|
|
||
|
|
más calorías y puede |
|
|
|
mantenerse durante |
|
|
|
un largo periodo de |
|
|
|
tiempo. |
|
|
|
|
|
|
|
Genera velocidad y |
|
|
|
potencia. Funciona |
|
|
|
con o por encima |
|
|
|
de la capacidad de |
|
Ejercicio anaeróbico |
78-90% |
consumo de oxígeno |
|
del cuerpo, construye |
|||
|
|
||
|
|
músculo y no puede |
|
|
|
mantenerse durante |
|
|
|
un largo periodo de |
|
|
|
tiempo. |
|
|
|
|
|
|
ES |
|
ADVERTENCIA |
Determinar su zona de entrenamiento |
||
|
|||
|
individual es un paso crítico en el avance hacia un programa de entrenamiento eficiente y seguro. Sírvase consultar a su médico o profesional de la salud para determinar su ritmo cardíaco máximo, los límites superior e inferior, la frecuencia y duración del ejercicio apropiados para su edad, su forma física y sus objetivos.
RELOJ / BOTONES DE CONTROL DEL RELOJ
1 |
|
|
|
|
|
8 |
2 |
|
|
|
|
|
9 |
|
|
|
|
|
10 |
|
3 |
|
|
|
|
|
|
|
|
|
|
|
11 |
|
4 |
|
|
|
|
|
|
|
|
|
|
|
12 |
|
|
|
|
|
|
||
5 |
|
|
|
|
|
|
6 |
|
|
|
|
|
13 |
7 |
|
|
|
|
|
14 |
|
|
|
AL |
|
||
|
|
|
KC |
15 |
||
|
|
|
|
|
|
|
1.SET: Modifica los valores del modo de configuración, activa / desactiva la alarma en el modo alarma; reinicia el cronómetro
2. : Reloj de 12 horas
3.
 : Unidad de peso
4.Muestra cronómetro / alarma / reloj / ritmo cardiaco / peso y modo
3
ES
5. : Indica que la pila se está acabando
6. : Indica que la alarma está activada
7.MODE: Alterna entre modos; accede al modo de configuración
8.ST/SP: Iniciar / detener cronómetro
9.
 : Unidad de caloría
10.

 : Indica que se detecta una lectura de ritmo cardíaco
11.
 : Límite máximo / mínimo de ritmo cardiaco alcanzado
12.  : Indica que los botones están bloqueados
13. : Indica que el cronómetro está en marcha
14.

 : Activa retroiluminación; bloquea / desbloquea botones
15. |
KCAL: Muestra ritmo cardiaco; activa la alerta de |
|
ritmo cardiaco alto / bajo |
EL TRANSMISOR (BANDA PECTORAL)
El transmisor sirve para contar el ritmo cardíaco y transmitir los datos al receptor. Cómo colocarlo:
1. Moje las almohadillas conductoras de la cara interior de la cinta con unas cuantas gotas de agua o un gel conductor para garantizar un buen contacto.
2.Póngase el transmisor diagonalmente colgado del cuello. Ajústese la cinta hasta que quede exactamente por debajo de sus músculos pectorales para que el ritmo cardíaco se lea correctamente (ver figura).
NOTAS
•La posición del transmisor afecta al rendimiento del dispositivo. Mueva el transmisor por la cinta para obtener la mejor transmisión. Evite las zonas con vello denso.
•En climas secos y fríos podrían pasar varios minutos antes de que el transmisor funcione correctamente. Es normal, puesto que la almohadilla necesita una película de sudor para mejorar el contacto con la piel.
NOTA Para que la cinta funcione con el mejor rendimiento tenga en cuenta las instrucciones siguientes:
• No envuelva la cinta en una toalla mojada ni con otros materiales húmedos.
• No guarde la cinta en lugares con temperaturas superiores a los 50°C ni humedad superior al 90%.
• No moje la cinta ni la lave con agua corriente, límpiela con un paño húmedo.
• No coloque la cara de goma conductora cara abajo
4
sobre una mesa o superficie de metal.
•Seque bien la cinta inmediatamente después de utilizarla.
EL RELOJ
El receptor pulsera.
ALCANCE EFECTIVO
El transmisor y el receptor empezarán a emitir y recibir señales en cuanto las pilas estén colocadas. Con la bateria a su nivel maximo, ambas unidades pueden llevarse o montarse a hasta 76 cm de distancia (30 pulgadas).
Si la señal se pierde:
•Reduzca la distancia de separación entre el transmisor y el receptor.
•Reajuste la posición del transmisor.
•Compruebe las pilas. Reemplácelas si es necesario.
USO EN EL AGUA
El reloj SE122 es resistente al agua a hasta 50 metros (164 pies).
ES
|
|
|
|
BUCEO EN |
HACER SNORKER |
|
SALPICADURAS DE |
DUCHA |
NADAR EN |
/ SUBMANIRISMO |
|
|
AGUAS |
AGUAS POCO |
EN AGUAS |
||
|
LLUVIA ETC |
||||
|
(CALIENTE/ |
POCO |
PROFUNDAS |
PROFUNDAS |
|
|
|
||||
|
|
FRÍA POCO |
PROFUDAS |
/ DEPORTES |
|
|
|
PROFUDAS |
|
ACUÁTICOS / |
|
|
|
SÓLO) |
|
SURFING |
|
|
|
|
|
|
|
50M / 164 |
OK |
OK |
OK |
OK |
NO |
PIES |
|
|
|
|
|
|
|
|
|
|
|
NOTA Configure la unidad antes de exponerla a agua excesiva. Si pulsa los botones debajo del agua o durante tormentas fuertes, el agua podría entrar en la unidad.
FUNCIONAMIENTO
RETROILUMINACIÓN
Pulse 
 para iluminar la pantalla durante 5 segundos.
ACTIVACIÓN DEL BLOQUEO DE BOTONES
Para activar / desactivar el bloqueo de botones:
Pulse 
 y manténgalo pulsado durante 2 segundos. aparecerá si el bloqueo de botones está activo.
5

ES
MODOS DE OPERACIÓN
HORA
Pulse / KCAL para entrar en el modo de medición de RC. Pulse MODE para volver al Modo Hora.
NOTA Si no se reciben lecturas o la emisión está fuera de alcance durante cinco minutos, el reloj volverá automáticamente al modo de operación anterior.
LÍMITES DE RITMO CARDIACO
Los límites de ritmo cardíaco le ayudan a determinar si está
haciendo ejercicio dentro de su zona |
entrenamiento. |
||
• |
Si supera su límite, parpadeará |
. |
|
• |
Si baja por debajo de su límite, parpadeará |
. |
|
|
CRONÓMETRO |
Para ajustar los límites de ritmo cardíaco: |
||
|
ALARMA |
Pulse / KCAL para entrar en el modo de medición |
||
Pulse MODE para alternar entre: |
1. |
|||
|
de RC. |
|||
• |
Modo Hora |
|
||
2. |
MODE y manténgalo pulsado hasta que aparezca |
|||
• |
Modo de Alarma |
|||
|
. |
|||
|
|
|
||
• |
Modo Crono (Cronómetro) |
3. |
Pulse SET para seleccionar el límite inferior, y luego |
|
|
|
|||
MODE para confirmar.
MODO HR / KCAL
MEDICIÓN DE RITMO CARDÍACOS
4. Pulse SET para seleccionar el límite superior |
, y |
luego MODE para confirmar. |
|
NOTA El límite máximo no puede ser inferior al límite mínimo. El transmisor ajustará automáticamente el alcance de conformidad a los datos introducidos. También puede activar la función de alerta de ritmo cardíaco, de modo que el transmisor emitirá un pitido cuando se supere un límite.
6
Para activar |
límites de ritmo cardíaco: |
1.Pulse / KCAL para entrar en el modo de medición de
2.Pulse / KCAL y manténgalo pulsado.
ICONO |
ALARMA ALTO/BAJO |
|
|
|
On (encendido) |
|
|
No Icon |
Off (apagado) |
|
|
FECHA Y HORA
Para ajustar fecha y hora:
1.Pulse MODE para acceder al Modo Hora.
2.Pulse MODE y manténgalo pulsado para entrar en configuración.
3.Pulse SET para incrementar / modificar los valores del ajuste.
4.Pulse MODE para confirmar.
La secuencia de ajuste es: formato de 12 ó 24 horas, hora, minuto, día-mes mes-día, mes; año, día, día de la semana.
SUGERENCIA Pulse SET y manténgalo pulsado para modificar rápidamente un valor.
Para mostrar la fecha:
Pulse SET en el modo Hora.
NOTA Si no se pulsa ninguna tecla, la pantalla volverá al modo Hora.
Para configurar la alarma: |
|
1. Pulse |
. |
3
2
2.Pulse MODE y manténgalo pulsado para entrar en configuración.
3.Pulse SET para incrementar / modificar los valores del ajuste.
4.Pulse MODE para confirmar.
La secuencia de ajuste es: hora; minuto.
Para activar o desactivar la alarma:
1.Pulse MODE para acceder al modo de Alarma.
2.Pulse SET para activar o desactivar la alarma. El icono indica que la alarma está activada.
NOTA Si la alarma está activa, sonará a la misma hora
ES
7
ES
todos los días. Pulse cualquier botón para detener la alarma por ese día. La alarma sigue activa y volverá a sonar a la misma hora el día siguiente.
CRONÓMETRO
Para usar el cronómetro:
1. Pulse MODE para acceder al modo Cronómetro.
4 |
2 |
1
2.Pulse ST/SP para iniciar el cronómetro.
3.Pulse ST/SP para detener el cronómetro.
4.Pulse SET y manténgalo pulsado para reiniciar.
NOTA Si no para el cronómetro, ” parpadeará en todos los modos para recordarle que el cronómetro está activado.
8
DATOS DEL USUARIO
Para obtener los maximos beneficios del producto, configure su perfil de usuario antes de empezar con el ejercicio.
De este modo generará automáticamente un índice de forma física y permitirá al reloj calcular el nivel de calorías quemadas durante el ejercicio. Esta información le permitirá hacer un seguimiento de su progreso.
Para configurar el perfil de usuario:
1.Pulse / KCAL para entrar en el modo de medición de RC.
2.Pulse MODE y manténgalo pulsado para acceder al modo Información del usuario.
3.Pulse SET para incrementar / modificar los valores del ajuste.
4.Pulse MODE para confirmar.
La secuencia de ajuste es: ajustar límite inferior, ajustar límite superior, ajustar edad, ajustar unidad de peso, ajustar peso.
NOTA Deberá configurar su perfil de usuario para poder utilizar la función de recuento de calorías.
Para ver cantidad de calorías quemadas:
•Pulse / KCAL para entrar en el modo de RC.
•Pulse / KCAL para ver las calorías quemadas.
NOTA La pantalla de calorías sólo aparecerá durante unos 3 segundos.
INFORMACIÓN ADICIONAL
PILA
El SE122 funciona con una pila de litio CR2032 en el transmisor y una pila CR2032 en el reloj. Ambas vienen
incluidas. |
pila del reloj receptor se está agotando, |
se encenderá |
en la pantalla del reloj. |
Si las lecturas de ritmo cardíaco se vuelven erroneas o se interrumpen, es posible que tenga que cambiar la pila del transmisor.
Para cambiar la pila:
1.Abra la tapa del compartimento para pilas del transmisor con una moneda, haciéndola girar en la dirección opuesta a la de las manecillas del reloj.
2.Introduzca 1 pila de litio CR2032 3V nueva.
3.Vuelva a colocar la tapa del compartimento para pilas.
NOTA Tenga cuidado de no tocar los contactos o la pila se podría descargar. Si no está seguro de cómo proceder consulte a su distribuidor.
ES
DISPOSITIVO DE AHORRO DE ENERGÍA
Si el reloj no recibe ninguna transmisión en 5 minutos, el SE122 volverá a la pantalla anterior.
FICHA TÉCNICA
Reloj con hora real |
formato de 12 ó 24 horas, |
|
hora, minuto y segundo |
||
|
||
Cronómetro |
00:00:00 a 29:59:59 (hrs: |
|
min: seg) |
||
|
||
Ritmo cardíaco |
30 - 240 bpm |
|
Límite superior |
80 - 240 bpm |
|
Límite inferior |
30 -220 bpm |
|
Alcance de calorías |
0 - 9999 kcal |
|
|
El reloj funciona con 1 x pila |
|
Alimentación |
CR2032 de 3V |
|
La cinta funciona con 1 x pila |
||
|
||
|
CR2032 de 3V |
|
|
|
|
Temperatura de |
-10°C a +50°C (14°F a 122°F) |
|
funcionamiento |
||
|
||
Temperatura de |
-20°C a +60°C (-4°C a 140°C) |
|
almacenamiento |
||
|
||
Resistente al agua |
Hasta 50 metros (164 pies) sin |
|
pulsar botones. |
||
|
PRECAUCIÓN
•No exponga el producto a fuerza extrema, descargas, polvo, fluctuaciones de temperatura o humedad.
•No cubra los orificios de ventilación con objetos como
9 |
periódicos, cortinas, etc. |
|
ES
•No sumerja el dispositivo en agua. Si se vertiera líquido en la unidad, límpiela con un paño suave y sin electricidad estática.
•No limpie la unidad con materiales abrasivos o corrosivos.
•No manipule los componentes internos. De hacerlo se invalidaría la garantía.
•Use siempre pilas nuevas. No mezcle pilas viejas con pilas nuevas.
•Las imágenes de esta guía para el usuario pueden ser distintas al producto en sí.
•Cuando elimine este producto, asegúrese de que no vaya a parar a la basura general, sino separadamente para recibir un tratamiento especial.
•La colocación de este producto encima de ciertos tipos de madera puede provocar daños a sus acabados.
Oregon Scientific no se responsabilizará de dichos daños. Consulte las instrucciones de cuidado del fabricante para obtener más información.
•Los contenidos de este manual no pueden reproducirse sin permiso del fabricante.
•No elimine las pilas gastadas con la basura normal. Es necesario desecharlas separadamente para poder tratarlas.
•Tenga en cuenta que algunas unidades disponen de una cinta de seguridad para las pilas. Retire la cinta de compartimento para pilas antes de usarlo por primera vez.
NOTA La ficha técnica de este producto y los contenidos
de este manual de usuario pueden experimentar cambios
10
sin previo aviso.
NOTA No todas las funciones y accesorios estarán disponibles en todos los países. Sírvase ponerse en contacto con su distribuidor local si desea más información.
SOBRE OREGON SCIENTIFIC
Visite nuestra página web (www.oregonscientific.com) para conocer más sobre los productos de Oregon Scientific.
Si está en EE.UU y quiere contactar directamente con nuestro Departamento de Atención al Cliente, por favor visite www2.oregonscientific.com/service/support.asp
Si está en España y quiere contactar directamente con nuestro Departamento de Atención al Cliente, por favor visite www.oregonscientific.es o llame al 902 338 368.
Para consultas internacionales, por favor visite www2.oregonscientific.com/about/international.asp.
EU - DECLARACIÓN DE CONFORMIDAD
Por medio de la presente, Oregon Scientific declara que el Monitor de Ritmo Cardíaco (SE122) cumple con la Directiva 2004/108/EC del EMC. Tiene a su disposición una copia firmada y sellada de la Declaración de Conformidad, solicítela al Departamento de Atención al Cliente de Oregon
Scientific.

HERZFREQUENZMESSER |
|
MODELL: SE122 |
|
BEDIENUNGSANLEITUNG |
|
INHALT |
|
Einleitung...................................................................... |
2 |
Ihre Daten Kennen ....................................................... |
2 |
Trainingszonen ........................................................ |
2 |
Empfänger / Bedientasten Der Armbanduhr ............. |
3 |
Der Sender.................................................................... |
4 |
Der Empfänger ............................................................. |
5 |
Effektive Reichweite .................................................... |
5 |
Verwendung Im Wasser .............................................. |
5 |
Betrieb........................................................................... |
5 |
Hintergrundbeleuchtung .......................................... |
5 |
Tastensperre Aktivieren........................................... |
6 |
Betriebsmodi............................................................ |
6 |
Hf- / Kcal-modus...................................................... |
6 |
Herzfrequenzgrenzen .............................................. |
6 |
Uhrzeit Und Datum....................................................... |
7 |
Stoppuhr .................................................................. |
8 |
Benutzerdaten .............................................................. |
9 |
Weitere Informationen ................................................ |
9 |
Batterie .................................................................... |
9 |
Energiesparfunktion............................................... |
10 |
Technische Daten.................................................. |
10 |
Vorsichtsmassnahmen.......................................... |
10 |
Über Oregon Scientific.............................................. |
11 |
Eu-konformitätserklärung ......................................... |
11 |
DE
1

DE
EINLEITUNG
Wir danken Ihnen, dass Sie sich für den Herzfrequenzmesser
(SE122) von Oregon ScientificTM entschieden haben. Der SE122 ist ein sehr nützliches Sportund Fitnessprodukt, das Sie dabei unterstützen kann, Ihre optimale Trainingszone zu erreichen und aufrechtzuerhalten, indem es Ihre Herzfrequenz beim Training überwacht. Der SE122 beinhaltet eine Senderund Empfängeruhr für die Herzfrequenz mit Echtzeituhr, Stoppuhr und Hintergrundbeleuchtung.
IHRE DATEN KENNEN
Um den größtmöglichen gesundheitlichen Nutzen aus Ihrem Fitnessprogramm zu ziehen, ist es wichtig folgendes zu kennen:
•Maximale Herzfrequenz (MHF) der Trainingszone
•Obere Herzfrequenzgrenze
•Untere Herzfrequenzgrenze
Die MHF wird in Schlägen pro Minute angegeben. Sie können Ihre MHF in einem MHF-Test feststellen oder anhand der folgenden Formel berechnen:
220 - Alter = MHF
Es gibt mehrere Trainingszonen, die für ein Fitnessprogramm relevant sind. Der gängigste Zonenbereich liegt zwischen
50 % und 80 % Ihrer maximalen Herzfrequenz. In diesem
Bereich erzielen Sie den größten Nutzen für Ihr Herz- Kreislauf-System, verbrennen Fett und erhöhen Ihren Fitnessgrad. Beim Programmieren Ihrer Uhr entspricht der niedrigere Prozentsatz der gewählten Zone Ihrer unteren
Herzfrequenzgrenze und der höhere Prozentsatz Ihrer
2
oberen Herzfrequenzgrenze.
50%
60%
Mäßige Anstrengung
70%
Gewichtsregulierung
80%
Aerobe Zone
90%
Anaerobe Grenzzone
100%
Rote Zone (max. Kapazität)
Die oberen und unteren Herzfrequenzgrenzen werden durch Multiplikation Ihrer MHF mit den Prozentsätzen der gewählten Trainingszone errechnet.
Beispiel:
Training eines 40jährigen Benutzers zur grundlegenden Erhaltung der Gesundheit:
•Seine obere Herzfrequenzgrenze [220 - 40(Alter)] x 78 %
•Seine untere Herzfrequenzgrenze [220 - 40(Alter)] x 65 %
TRAININGSZONEN
Sie sollten sich immer vor dem Training aufwärmen. Wählen Sie die Trainingszone, die Ihrer Konstitution am besten entspricht. Trainieren Sie regelmäßig zur Erhaltung eines gesunden Herz-Kreislauf-Systems, ca. 20 bis 30 Minuten pro Einheit und 3 – 4x pro Woche.
Es gibt drei Trainingszonen, wie nachstehend erläutert:
TRAININGS- |
MHF% |
BESCHREIBUNG |
|
ZONE |
|||
|
|
||
|
|
|
|
|
|
Dies ist die |
|
|
|
niedrigste Stufe der |
|
|
|
Trainingsintensität. Sie |
|
Erhaltung der |
65-78% |
ist gut für Anfänger |
|
Gesundheit |
und diejenigen |
||
|
|||
|
|
geeignet, die ihr Herz- |
|
|
|
Kreislauf-System |
|
|
|
stärken möchten. |
|
|
|
|
|
|
|
Verbessert Kraft |
|
|
|
und Ausdauer. |
|
|
|
Wirkt innerhalb |
|
|
|
der Fähigkeit der |
|
Aerobes Training |
65-85% |
Sauerstoffaufnahme |
|
des Körpers, verbrennt |
|||
|
|
||
|
|
mehr Kalorien und |
|
|
|
kann über einen |
|
|
|
längeren Zeitraum |
|
|
|
ausgeübt werden. |
|
|
|
|
|
|
|
Erzeugt Schnelligkeit |
|
|
|
und Kraft. Wirkt |
|
|
|
an oder oberhalb |
|
|
|
der Fähigkeit der |
|
Anaerobes |
78-90% |
Sauerstoffaufnahme |
|
Training |
des Körpers, baut |
||
|
|||
|
|
Muskeln auf und |
|
|
|
kann nicht über einen |
|
|
|
längeren Zeitraum |
|
|
|
ausgeübt werden. |
|
|
|
|
|
|
DE |
|
WARNUNG |
Die Bestimmung Ihrer persönlichen |
||
|
|||
|
Trainingszone ist ein wichtiger Schritt im Prozess zur Erzielung eines wirksamen und sicheren Trainingsprogramms. Ziehen Sie bitte Ihren Hausarzt oder einen medizinischen Fachmann zu Rate, um Ihre maximale Herzfrequenz, die obere und untere Herzfrequenzgrenze, sowie Ihre Trainingsfrequenz und –dauer zu bestimmen, die
Ihrem Alter, Ihrer Kondition und Ihren spezifischen Zielen entsprechen.
EMPFÄNGER / BEDIENTASTEN DER ARMBANDUHR
1 |
|
|
|
|
8 |
2 |
|
|
|
|
9 |
|
|
|
|
10 |
|
3 |
|
|
|
|
|
|
|
|
|
11 |
|
4 |
|
|
|
|
|
|
|
|
|
12 |
|
|
|
|
|
||
|
|
|
|
||
|
|
|
|
||
5 |
|
|
|
|
|
6 |
|
|
|
|
13 |
7 |
|
|
|
|
14 |
|
|
|
AL |
|
|
|
|
|
KC |
15 |
|
|
|
|
|
|
|
1.SET: Werte im Einstellungsmodus ändern; Alarm im Alarmmodus ein- / ausschalten (ON/OFF); Stoppuhr zurücksetzen
2. : 12-Stundenuhr
3.
 : Gewichtseinheit
4. Stoppuhr / Alarm / Uhr / Herzfrequenz / Gewicht und
3
DE
Modusbanner anzeigen
5. : Gibt an, dass die Ladung der Batterien niedrig ist
6. : Gibt an, dass der Alarm aktiviert ist
7.MODE: Zwischen Modi umschalten; Einstellungsmodus aufrufen
8.ST/SP: Stoppuhr starten / beenden
9.
 : Kalorieneinheit
10.

 : Gibt an, dass ein Messwert der Herzfrequenz erfasst wird
11.
 : Obere / untere Herzfrequenzgrenzen erreicht
12. : Gibt an, dass die Tasten gesperrt sind
13. : Gibt an die Stoppuhr ausgeführt wird
14.

 : Hintergrundbeleuchtung aktivieren; Tasten sperren / entsperren
15. |
KCAL: Herzfrequenz anzeigen; Alarm für hohe / |
|
niedrige Herzfrequenz aktivieren |
DER SENDER
Der Senderteil wird benutzt, um Ihren Herzschlag zu zählen und die Daten an den Empfänger zu übertragen. So legen Sie ihn an:
1.Befeuchten Sie die leitfähigen Polster an der Unterseite des Senderteils mit Wasser oder einem Leitgel, um einen guten Kontakt zu gewährleisten.
4
2.Schnallen Sie den Senderteil um Ihre Brust. Verstellen Sie den Gurt für ein präzises Herzfrequenzsignal, bis der Sender genau unter Ihren Brustmuskeln sitzt.
TIPPS
•Die Position des Brustgurts beeinflusst seine Leistung.
Ziehen Sie den Sender für eine optimale Übertragung am Riemen entlang. Vermeiden Sie Bereiche mit dichtem Brusthaar.
•In einem trockenen und kalten Klima kann es eine Weile dauern, bis der Sender zuverlässig funktioniert. Dies ist normal, da die leitfähigen Polster eine Schweißschicht benötigen, um den Hautkontakt zu verbessern.
HINWEIS Um die bestmögliche Funktion Ihres Brustgurtes zu erhalten, behandeln Sie ihn mit Sorgfalt gemäß den nachfolgenden Punkten:
•Wickeln Sie den Brustgurt nicht in ein feuchtes Handtuch oder in andere feuchte Materialien.
•Bewahren Sie den Brustgurt nicht in einer heißen (etwa 50°C) oder feuchten (etwa 90%) Umgebung auf.
•Halten oder reinigen Sie den Brustgurt nicht unter fließendem Wasser, sondern säubern Sie ihn mit einem feuchten Tuch.
•Legen Sie die leitfähige Gummifläche nicht auf einen Metalltisch oder eine metallische Oberfläche.
•Trocknen Sie den Brustgurt sofort und gründlich nach Verwendung.
DER EMPFÄNGER
Der |
. |
EFFEKTIVE REICHWEITE
Der Senderund der Empfangsteil starten die Übertragung der Signale, nachdem die Batterien eingelegt wurden. Wenn die Batterien voll sind, können beide Geräte bis zu 76 cm voneinander entfernt getragen oder montiert werden.
Wenn die Signalleistung schwankt:
•Verkürzen Sie die Distanz zwischen Sender und Empfänger.
• |
Verstellen Sie die Position des Senderteils. |
DE |
|
||
|
||
• |
Überprüfen Sie die Batterien und tauschen Sie sie ggf. |
|
|
aus. |
|
VERWENDUNG IM WASSER
Die Armbanduhr SE122 ist bis zu 50 Meter wasserfest.
|
REGEN- |
DUSCHEN |
LEICHTES |
TAUCHEN IN |
SCHNORCHELN IN |
|
(NUR |
SCHWIMMEN |
FLACHEM |
TIEFEM WASSER |
|
|
SPRITZER |
||||
|
WARMES/ |
/ FLACHES |
WASSER/ |
TAUCHEN |
|
|
USW. |
||||
|
KALTES |
WASSER |
SURFEN/ |
|
|
|
|
|
|||
|
|
WASSER) |
|
WASSER- |
|
|
|
|
|
SPORT |
|
|
|
|
|
|
|
50M |
OK |
OK |
OK |
OK |
NEIN |
|
|
|
|
|
|
HINWEIS Stellen Sie das Gerät ein, bevor Sie es im Wasser benutzen. Wenn Sie die Tasten im Wasser oder bei starkem Regen drücken, kann Wasser in das Gerät gelangen.
BETRIEB
HINTERGRUNDBELEUCHTUNG
Drücken Sie auf 
 , um die Hintergrundbeleuchtung 5
5
 Loading...