


DIGITAL CAMERA
SZ-10/SZ-20
Instruction Manual
●Thank you for purchasing an Olympus digital camera. Before you start to use your new camera, please read these instructions carefully to enjoy optimum performance and a longer service life. Keep this manual in a safe place for future reference.
●We recommend that you take test shots to get accustomed to your camera before taking important photographs.
●In the interest of continually improving products, Olympus reserves the right to update or modify information contained in this manual.
●This manual covers the SZ-10 and SZ-20. The camera illustrations on this manual is of SZ-10. Unless otherwise specified, the explanation about these illustrations is provided for SZ-10 and SZ-20.
Step 1 |
Checking the contents of the box |
|
|
||
|
|
|
|
|
or |
Digital camera |
Strap |
Lithium Ion |
USB cable |
AV cable |
USB-AC adapter (F-2AC) OLYMPUS Setup |
|
|
Battery |
|
|
CD-ROM |
|
|
(LI-50B) |
|
|
|
Other accessories not shown: Warranty card |
|
|
|
||
Contents may vary depending on purchase location. |
|
|
|
||
Step 2 |
Preparing the Camera |
|
Step 3 |
Shooting and Playing Back Images |
|
“Preparing the Camera” (p. 13) |
|
|
“Shooting, Playback, and Erasing” (p. 19) |
||
Step 4 |
How to Use the Camera |
|
Step 5 |
Printing |
|
“Camera Settings” (p. 3) |
|
|
“Direct printing (PictBridge)” (p. 55) |
||
|
|
|
|
“Print Reservations (DPOF)” (p. 58) |
|
Contents |
|
¾Names of Parts............................................... |
9 |
¾Preparing the Camera.................................. |
13 |
¾Shooting, Playback, and Erasing ............... |
19 |
¾Using Shooting Modes ................................ |
28 |
¾Using Shooting Functions .......................... |
34 |
¾Menus for Shooting Functions ................... |
38 |
¾Menus for Playback, Editing, and Printing |
|
Functions...................................................... |
44 |
¾Menus for Other Camera Settings.............. |
48 |
¾Printing.......................................................... |
55 |
¾Usage Tips .................................................... |
60 |
¾Appendix....................................................... |
65 |
2 EN
Camera Settings
Using the Direct Buttons
Frequently used functions can be accessed using the direct buttons.
 Zoom lever (p. 21, 24)
Shutter button (p. 20, 60)
 Rbutton (record movies) (p. 20)
qbutton (switching between  shooting and playback) (p. 20,
22, 49)
 m button (p. 6)
E button (camera guide/ menu guide) (p. 26)
EN 3
Operation guide
The symbols FGHIdisplayed for image selections and settings indicate that the wheel controller is to
be used by pressing, not turning, the wheel controller sections shown on the right.
X |
|
|
|
4/30 |
Y M D |
Time |
|
|
|
2011.02 .26 |
00 :00 Y/M/D |
|
NORM 14M |
|
|
FILE 100 |
0004 |
||
|
|
|
’11/02/26 |
00:00 |
|
|
|
Print OK |
|
Cancel MENU |
Set OK |
Single Print |
More |
|
Operation guides displayed at the bottom of the screen indicate that the m button, A button, or zoom lever can be used.
Wheel controller
F(up) /
INFO button (changing information display) (p. 22, 25)
H(left) |
I(right) |
A button
G(down) /
D button (erase) (p. 24)
1 |
Reset |
|
|
2 |
Image Size |
14M |
|
|
Compression |
Normal |
|
|
Shadow Adjust |
Auto |
|
1 |
AF Mode |
Face/iESP |
|
2 |
ESP/ |
ESP |
|
3 |
Digital Zoom |
Off |
4/30 |
Exit MENU |
Set OK |
|
|
Set OK |
OK |
Erase/Cancel MENU |
The wheel controller can also be used to change the selections.
Operation guide
4 EN

Using the Menu
Use the menu to change camera settings such as the shooting mode.
There may be menus that are unavailable depending on other related settings or the shooting mode.
Function menu
Press Hduring shooting to display the function menu. The function menu is used to choose the shooting mode and provides access to frequently used shooting settings.
Selected option
|
Shooting mode |
Program Auto 3D P |
|
0.0 |
Function menu |
WB |
|
AUTO |
|
ISO |
|
AUTO |
|
4 14M |
|
Shooting |
Setup menu |
To select the shooting mode
Use HIto select the shooting mode and press the A button.
To select the function menu
Use FGto select a menu and use HIto select a menu option. Press the A button to set the function menu.
EN 5
Setup menu
Press the m button during shooting or playback to display the setup menu. The setup menu provides access to a variety of camera settings, including options not listed in the function menu, display options, and the time and date.
1 Press the m button.
● The setup menu is displayed.
1 |
Reset |
|
2 |
Image Size |
14M |
|
Compression |
Normal |
|
Shadow Adjust |
Auto |
1 |
AF Mode |
Face/iESP |
2 |
ESP/ |
ESP |
3 |
Digital Zoom |
Off |
Exit MENU |
Set OK |
|
2 Press Hto select the page tabs. Use FG to select the desired page tab and press I.
Page tab |
Submenu 1 |
1 |
Reset |
|
2 |
Image Size |
14M |
|
Compression |
Normal |
|
Shadow Adjust |
Auto |
1 |
AF Mode |
Face/iESP |
2 |
ESP/ |
ESP |
3 |
Digital Zoom |
Off |
Exit MENU |
Set OK |
|
1 |
Reset |
|
2 |
Image Size |
14M |
|
Compression |
Normal |
|
Shadow Adjust |
Auto |
1 |
AF Mode |
Face/iESP |
2 |
ESP/ |
ESP |
3 |
Digital Zoom |
Off |
Exit MENU |
Set OK |
|
4 Use FGto select the desired submenu 2 and then press the A button.
●Once a setting is selected, the display returns to the previous screen.
There may be additional operations. “Menu Settings” (p. 38 to 54)
1 |
Reset |
|
2 |
Image Size |
14M |
|
Compression |
Normal |
|
Shadow Adjust |
Auto |
1 |
AF Mode |
Face/iESP |
2 |
ESP/ |
ESP |
3 |
Digital Zoom |
On |
Exit MENU |
Set OK |
|
5 Press the m button to complete the setting.
3 Use FGto select the desired submenu 1 and then press the A button.
Submenu 2
1 |
Reset |
|
2 |
Image Size |
14M |
|
Compression |
Normal |
|
Shadow Adjust |
Auto |
1 |
AF Mode |
Face/iESP |
2 |
ESP/ |
ESP |
3 |
Digital Zoom |
Off |
Exit MENU |
Set OK |
|
1 |
Reset |
Digital Zoom |
|
2 |
Image Size |
|
14M |
|
Compression |
Normal |
|
|
Shadow Adjust |
OffAuto |
|
1 |
AF Mode |
|
Face/iESPOn |
2 |
ESP/ |
|
ESP |
3 |
Digital Zoom |
|
Off |
Back MENU |
|
Set OK |
|
6 EN
Menu Index |
|
|
|
|
|
|
|
|
|
|
|
|
Menus for Shooting Functions |
|
|
|
|
|
|
|
|
|
|
|
|
Program Auto |
3D P |
1 |
9 |
1 |
Reset |
|
|
|
|
|
|
|
|
|
2 |
|
2 |
Image Size |
1 |
14M |
|
|
|
ON |
|
|
|
|
|
Compression |
|
Image Stabilizer |
|
|
|
|||
|
|
|
|
|
2 |
Normal |
|
|
|
|
|
|
|
|
3 |
|
|
Shadow Adjust |
AF Illuminat. |
|
|
Image Size |
720p |
||
|
|
|
|
|
Auto |
|
1 |
|||||
|
|
4 |
|
|
AF Mode |
|
Rec View |
|
|
|
ON |
Normal |
|
|
|
1 |
|
Face/iESP |
|
2 |
Image Quality |
||||
|
0.0 |
5 |
|
|
ESP/ |
|
Pic Orientation |
|
|
ON |
Off |
|
|
|
2 |
|
ESP |
|
|
Is Movie Mode |
|||||
|
WB |
|
|
|
Digital Zoom |
1 |
Icon Guide |
|
|
R |
ON |
On |
|
6 |
|
3 |
|
Off |
|
|
|
||||
|
AUTO |
|
|
|
2 |
Date Stamp |
|
|
|
|
|
|
|
ISO |
7 |
|
Exit MENU |
3 |
Set OK |
|
1 |
|
|
|
|
|
AUTO |
8 |
|
|
|
Exit MENU |
|
2 |
|
Set OK |
|
|
4 14M |
|
|
|
0 |
|
3 |
|
|
||||
|
|
|
|
|
|
a |
Exit MENU |
Set OK |
||||
|
|
|
|
|
|
|
|
|
|
|
|
|
1 Shooting mode |
|
P(Program Auto) ............. |
p. 19 |
M(iAUTO)................... |
p. 28 |
s (Scene Mode) ......... |
p. 28 |
P(Magic Filter) .......... |
p. 29 |
p(Panorama).................. |
p. 30 |
W(3D) ............................ |
p. 32 |
2 Flash................................. |
p. 34 |
3 Macro ............................... |
p. 34 |
4 Self-timer .......................... |
p. 35 |
5 Exposure compensation... |
p. 35 |
6 White balance................... |
p. 36 |
7 ISO ................................... |
p. 36 |
8 Drive ................................. |
p. 37 |
9 p(Shooting menu 1) |
|
Reset ................................ |
p. 38 |
Image Size ....................... |
p. 39 |
Compression .................... |
p. 39 |
Shadow Adjust.................. |
p. 40 |
AF Mode........................... |
p. 40 |
ESP/n........................... |
p. 40 |
Digital Zoom ..................... |
p. 41 |
0 q(Shooting menu 2) |
|
Image Stabilizer................ |
p. 41 |
AF Illuminat. .................... |
p. 41 |
Rec View .......................... |
p. 42 |
Pic Orientation.................. |
p. 42 |
Icon Guide ........................ |
p. 42 |
Date Stamp ...................... |
p. 42 |
a A(Movie menu) |
|
Image Size ....................... |
p. 39 |
Image Quality ................... |
p. 39 |
IS Movie Mode ................. |
p. 41 |
R(Movie sound recording)
......................................p. 43
EN 7
Menus for Playback, Editing, and Printing Functions
1 |
Slideshow |
|
2 |
Photo Surfing |
|
|
Edit |
|
1 |
Erase |
|
1 |
Print Order |
|
2 |
R |
|
3 |
y |
|
Exit MENU |
Set OK |
|
1 q(Playback) |
|
Slideshow ..................... |
p. 44 |
Photo Surfing................ |
p. 44 |
Edit ............................... |
p. 45 |
Erase ............................ |
p. 46 |
Print Order.................... |
p. 47 |
R(Protect) .................... |
p. 47 |
y(Rotate).................... |
p. 47 |
Menus for Other Camera Settings
|
1 |
Memory Format |
|
|
2 |
Backup |
|
|
|
Eye-Fi |
Off |
|
|
USB Connection |
Auto |
1 |
1 |
qPower On |
Yes |
2 |
2 |
KeepzSettings |
Yes |
3 |
3 |
Pw On Setup |
Off |
|
Exit MENU |
Set OK |
|
1 r(Settings 1) |
|
Memory Format/ |
|
Format ........................ |
p. 48 |
Backup ......................... |
p. 48 |
Eye-Fi ........................... |
p. 48 |
USB Connection........... |
p. 49 |
qPower On ............... |
p. 49 |
KeepzSettings............ |
p. 49 |
Pw On Setup ................ |
p. 49 |
2 s(Settings 2) |
|
Sound Settings ............. |
p. 50 |
File Name ..................... |
p. 50 |
Pixel Mapping............... |
p. 51 |
s(Monitor) ................ |
p. 51 |
TV Out .......................... |
p. 51 |
Power Save .................. |
p. 53 |
l(Language) ........... |
p. 53 |
3 t(Settings 3) |
|
X(Date/time)............. |
p. 54 |
World Time ................... |
p. 54 |
Data Repair .................. |
p. 54 |
8 EN


 Names of Parts
Camera unit
1
2
3
4
5
6
7
8
9
10 |
1 |
nbutton....... |
p. 17, 19 |
|
|
2 |
Shutter button ........ |
p. 20, 60 |
|
11 |
3 |
Zoom lever............. |
p. 21, 24 |
|
4 |
Connector cover .... |
p. 14, 16 |
||
|
5 |
Multi-connector |
|
|
|
6 |
..................p. 14, 16, 52, 55 |
||
|
HDMI micro connector |
|||
|
7 |
.................................... |
p. 52 |
|
|
Strap eyelet ................. |
p. 10 |
||
|
8 |
Battery/card compartment |
||
12 |
9 |
lock ............................. |
p. 13 |
|
Battery/card compartment |
||||
|
||||
|
10 |
cover........................... |
p. 13 |
|
|
Indicator lamp ........ |
p. 14, 16 |
||
|
11 |
Flash switch................. |
p. 34 |
|
|
12 |
Lens............................. |
p. 65 |
|
|
13 |
Tripod socket |
|
|
13 |
|
|
|
|
SZ-10 |
SZ-20 |
14 |
Flash |
p. 34 |
15 |
|
|||
14 |
15 |
15 |
Microphone............ |
p. 43, 45 |
16 |
AF illuminator............... |
p. 41 |
||
16 |
14 |
|
Self-timer lamp ............ |
p. 35 |
|
15 |
|
|
|
|
16 |
|
|
|
EN 9
1
Attaching the camera strap
1
2
3
2 4
3
4 5

 5 6
5 6
6
 7 8
7 8
7
8
 Pull the strap tight so that it does not come loose.
Speaker |
|
|
Monitor....... |
p. 11, 19, 51, 60 |
|
Rbutton (record movies) |
||
q....................................button (switching |
p. 20 |
|
|
||
between shooting and |
||
playback) |
p. 20, 22, 49 |
|
........................ |
||
A button (OK)............... |
p. 4 |
|
Wheel controller............. |
p. 4 |
|
INFO button (changing |
||
information display) |
|
|
.............................. |
p. 22, 25 |
|
D button (erase)......... |
p. 24 |
|
E button (camera guide/ |
||
menu guide)................ |
p. 26 |
|
m button.............. |
p. 3, 6 |
|
10 EN
Monitor
Shooting mode display
1 |
|
2 |
|
25 |
|
P |
3 |
|
|
||
24 |
|
|
4 |
23 |
|
|
5 |
|
0.0 |
6 |
|
22 |
|
WB |
7 |
|
AUTO |
||
21 |
|
ISO |
8 |
|
AUTO |
||
20 |
00:34 |
|
9 |
19 |
4 14M NORM |
DATE |
|
18 |
17 16 15 14 13 12 11 10 |
|
|
|
1/100 |
F3.0 |
|
|
27 |
26 |
|
1 |
Battery check.......... |
p. 16, 61 |
2 |
Shooting mode ....... |
p. 19, 28 |
3 |
Flash............................. |
p. 34 |
|
Flash standby/flash charge |
|
4 |
.................................... |
p. 60 |
Macro/super macro |
......p. 34 |
|
5 |
Self-timer ...................... |
p. 35 |
6Exposure compensation
....................................p. 35
7 |
White balance............... |
p. 36 |
|
8 |
ISO ............................... |
p. 36 |
|
9 |
Drive ............................. |
p. 37 |
|
10 Recording with sound |
|
||
|
(movies)...................... |
p. 43 |
|
11 Date stamp ................... |
p. 42 |
||
12 World time .................... |
p. 54 |
||
13 Image stabilization (still |
|
||
|
images)/Digital image |
|
|
|
stabilization (movies) |
p. 41 |
|
14 Metering.................................... |
|||
p. 40 |
|||
15 Shadow Adjustment |
|
|
Technology.................. |
p. 40 |
|
16 Compression (still images) |
||
..............................p. 39, 68 |
||
17 Image size (still images) |
||
..............................p. 39, 68 |
||
18 Number of storable still |
|
|
pictures (still images) |
p. 19 |
|
19 Current....................................memory |
||
p. 67 |
||
20 Movie recording icon .... |
p. 20 |
|
21 Remaining recording time |
||
(movies)...................... |
p. 20 |
|
22 Image size (movies) |
|
|
..............................p. 39, 69 |
||
23 Histogram ..................... |
p. 22 |
|
24 AF target mark.............. |
p. 20 |
|
25 Camera shake warning |
|
|
26 Aperture value .............. |
p. 20 |
|
27 Shutter speed ............... |
p. 20 |
|
EN 11
Playback mode display |
|
|
|
|
|
|
|
1 |
Battery check |
|
p. 16, 61 |
||||
● Standard display |
|
|
|
|
|
|
|
|
|
|
|||||
|
|
|
|
|
|
|
|
|
2 |
Grouped image |
|
p. 23 |
|||
1 2 |
3 4 |
5 6 |
7 |
8 9 |
|
1 |
|
|
|
|
|
||||
|
|
|
|
|
3 |
3D image ...................... |
|
p. 26 |
|||||||
|
3D |
10 |
|
|
4/30 |
|
|
|
|
|
|
4 |
Print reservation/number of |
||
|
|
|
|
|
|
|
|
|
|
|
|
5 |
prints.................. |
|
p. 58/p. 57 |
|
|
|
|
|
|
|
|
|
|
|
|
Eye-Fi transferred |
.........p. 48 |
||
|
|
|
|
|
|
|
|
|
|
|
10 |
6 |
Protect .......................... |
|
p. 47 |
|
|
|
|
|
|
|
|
|
|
|
7 |
Adding sound ......... |
|
p. 43, 45 |
|
|
|
|
|
|
|
|
|
|
|
|
|
8 |
Current memory ........... |
p. 67 |
|
|
|
’11/02/26 |
00:00 |
20 |
|
|
00:12/00:34 |
9 |
9 |
Frame number/total number |
|||||
|
|
|
|
|
|
|
|
of images (still images) |
|||||||
|
|
|
|
|
|
|
|
|
|
|
|
|
|||
|
Still image |
|
|
|
|
Movie |
|
|
|
.................................... |
|
p. 22 |
|||
|
|
|
|
|
|
|
|
|
|
|
|
|
Elapsed time/total |
||
● Advanced display |
|
|
|
|
|
|
|
|
|
|
recording time (movies) |
||||
1 2 |
3 4 |
5 6 |
7 |
8 9 |
|
12 |
13 |
14 |
15 |
|
10 Volume.................................... |
|
p. 23 |
||
|
|
|
p. 23, 50 |
||||||||||||
|
|
|
|
|
|
|
1/1000 |
F3.0 |
|
2.0 |
|
|
|||
|
3D |
10 |
|
|
4/30 |
11 |
|
|
11 Histogram ..................... |
|
p. 22 |
||||
|
|
|
|
|
|
|
|
|
|
|
|
||||
|
|
|
|
|
|
|
P |
ISO |
WB |
|
12 Shutter speed |
|
p. 20 |
||
|
|
|
|
|
|
22 |
|
16 |
|
||||||
|
|
|
|
|
|
|
100 |
AUTO |
13 Aperture value |
|
p. 20 |
||||
|
|
1/1000 |
F3.0 |
|
2.0 |
|
|
|
|
|
17 |
|
|||
|
|
|
21 |
|
NORM 14M |
18 |
14 ISO |
|
p. 36 |
||||||
|
|
|
P |
ISO |
WB |
|
|
||||||||
|
|
|
100 |
AUTO |
|
|
FILE 100 0004 |
19 |
15 Exposure compensation |
||||||
|
|
|
NORM 14M |
|
|
||||||||||
|
|
|
|
|
|
|
|
p. 35 |
|||||||
|
|
|
FILE 100 0004 |
|
’11/02/26 |
00:00 |
20 |
16 White....................................balance |
|
||||||
|
|
’11/02/26 |
00:00 |
|
|
p. 36 |
|||||||||
|
|
|
|
|
|
|
|
|
|
|
|
17 Compression (still images) |
|||
|
|
|
|
|
|
|
|
|
|
|
|
|
.............................. |
|
p. 39, 68 |
|
|
|
|
|
|
|
|
|
|
|
|
|
Image quality (movies) |
||
|
|
|
|
|
|
|
|
|
|
|
|
18 Image..............................size |
|
p. 39, 69 |
|
|
|
|
|
|
|
|
|
|
|
|
|
p. 39, 68, 69 |
|||
|
|
|
|
|
|
|
|
|
|
|
|
19 File number |
|
|
|
|
|
|
|
|
|
|
|
|
|
|
|
20 Date and time ......... |
|
p. 17, 54 |
|
|
|
|
|
|
|
|
|
|
|
|
|
21 Shadow Adjustment |
|||
|
|
|
|
|
|
|
|
|
|
|
|
|
Technology.................. |
|
p. 40 |
|
|
|
|
|
|
|
|
|
|
|
|
22 Shooting mode ....... |
|
p. 19, 28 |
|
12 EN


 Preparing the Camera
Inserting the battery
1 |
|
Battery/card |
|
2 |
|
|
compartment cover |
|
|
|
|
|
|
1 |
|
|
Battery/card compartment lock |
2
 Battery lock knob
Insert the battery as illustrated with the C mark toward the battery lock knob.
Damage to the battery exterior (scratches, etc.) may produce heat or an explosion.
Insert the battery while sliding the battery lock knob in the direction of the arrow.
Slide the battery lock knob in the direction of the arrow to unlock, and then remove the battery.
Turn off the camera before opening the battery/card compartment cover.
When using the camera, be sure to close the battery/ card compartment cover.
3 1
2
Charging the battery and setting up using the supplied CD
Connect the camera to the computer to charge the battery and use the supplied CD for setup.
User registration using the supplied CD and installation of [ib] computer software is available on Windows computers only.
The camera battery can be charged while the camera is connected to a computer.
●The indicator lamp lights during charging and turns off when charging is complete.
Charging takes up to 3.5 hours.
If the indicator lamp does not light, the camera is not correctly connected or the battery, camera, computer, or USB cable may not be functioning as expected.
We recommend that you use a computer equipped with Windows XP (Service Pack 2 or later), Windows Vista, or Windows 7. See “Charging the battery with the included USB-AC adapter” (p. 16) if you are using a different computer or wish to charge the battery without using a computer.
EN 13
Windows
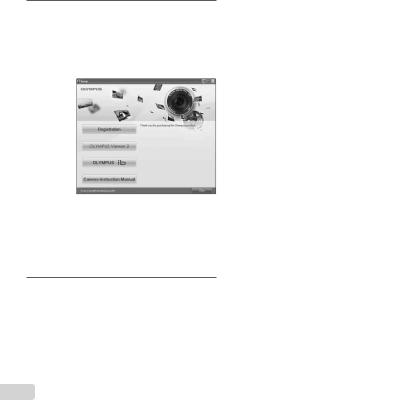
1 Insert the supplied CD in a CD-ROM drive.
Windows XP
● A “Setup” dialog will be displayed.
Windows Vista/Windows 7
●An Autorun dialog will be displayed. Click “OLYMPUS Setup” to display the “Setup” dialog.
If the “Setup” dialog is not displayed, select “My Computer” (Windows XP) or “Computer” (Windows Vista/Windows 7) from the start menu. Double-click the CD-ROM (OLYMPUS Setup) icon to open the “OLYMPUS Setup” window and then double-click “Launcher.exe”.
If a “User Account Control” dialog is displayed, click “Yes” or “Continue”.
2 Follow the on-screen instructions on your computer.
If nothing is displayed on the camera screen even after connecting the camera to the computer, the battery may be exhausted. Leave the camera connected to the computer until the battery has charged, then disconnect and reconnect the camera.
Connecting the camera
Indicator lamp
Multi-connector
USB cable (supplied)
Connector cover
Computer (on and running)
3 Register your Olympus product.
●Click the “Registration” button and follow the onscreen instructions.
4 Install OLYMPUS Viewer 2 and [ib] computer software.
●Check the system requirements before beginning installation.
●Click the “OLYMPUS Viewer 2” or “OLYMPUS ib” button and follow the on-screen instructions to install the software.
14 EN
OLYMPUS Viewer 2
Operating |
Windows XP (Service Pack 2 or later) / |
|
System |
Windows Vista / Windows 7 |
|
Processor |
Pentium 4 1.3 GHz or better |
|
RAM |
1 GB or more (2 GB or more |
|
recommended) |
||
|
||
Free Hard |
1 GB or more |
|
Drive Space |
||
|
||
Monitor |
1024 x 768 pixels or more |
|
Minimum 65,536 colors (16,770,000 |
||
Settings |
||
colors recommended) |
||
|
||
|
|
|
[ib] |
|
|
Operating |
Windows XP (Service Pack 2 or later) / |
|
System |
Windows Vista / Windows 7 |
|
|
Pentium 4 1.3 GHz or better |
|
Processor |
(Pentium D 3.0 GHz or better required |
|
|
for movies) |
|
|
512 MB or more (1 GB or more |
|
RAM |
recommended) |
|
(1 GB or more required for movies — 2 GB |
||
|
||
|
or more recommended) |
|
Free Hard |
1 GB or more |
|
Drive Space |
||
|
||
Monitor |
1024 x 768 pixels or more |
|
Minimum 65,536 colors (16,770,000 |
||
Settings |
||
colors recommended) |
||
|
||
Graphics |
A minimum of 64 MB video RAM with |
|
DirectX 9 or later. |
||
|
* See online help for information on using the software.
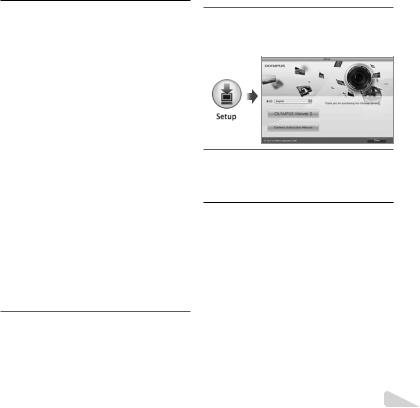
5 Install the camera manual.
●Click the “Camera Instruction Manual” button and follow the on-screen instructions.
Macintosh
1 Insert the supplied CD in a CD-ROM drive.
●Double-click the CD (OLYMPUS Setup) icon on the desktop.
●Double-click the “Setup” icon to display the “Setup” dialog.
2 Install OLYMPUS Viewer 2.
●Check the system requirements before beginning installation.
●Click the “OLYMPUS Viewer 2” button and follow the on-screen instructions to install the software.
OLYMPUS Viewer 2
Operating |
Mac OS X v10.4.11–v10.6 |
|
System |
||
|
||
Processor |
Intel Core Solo/Duo 1.5 GHz or better |
|
RAM |
1 GB or more (2 GB or more |
|
recommended) |
||
|
||
Free Hard |
1 GB or more |
|
Drive Space |
||
|
||
Monitor |
1024 x 768 pixels or more |
|
Minimum 32,000 colors (16,770,000 |
||
Settings |
||
colors recommended) |
||
|
*Other languages can be selected from the language combo box. For information on using the software, see online help.
EN 15

3 Copy the camera manual.
●Click the “Camera Instruction Manual” button to open the folder containing the camera manuals. Copy the manual for your language to the computer.
Charging the battery with the included USB-AC adapter
The included F-2AC USB-AC adapter (hereafter referred to as USB-AC adapter) differs depending on the region where you purchased the camera. If you received a plug-in type USB-AC adapter, plug it directly into AC outlet.
The included USB-AC adapter has been designed to be used for charging and playback. Do not take pictures while the AC adapter is connected to the camera.
1
Multi-connector
2
Connector cover |
USB cable |
|
(supplied) |
||
|
||
|
1 |
|
AC outlet 3 |
|
2
Indicator lamp On: Charging Off: Charged
The battery is not fully charged at shipment. Before use, be sure to charge the battery until the indicator lamp turns off (up to 3.5 hours).
If the indicator lamp does not light, the USB-AC adapter is not connected to the camera correctly, or the battery, camera, or USB-AC adapter may be broken.
For details on the battery and the USB-AC adapter, see “Battery and USB-AC adapter” (p. 65).
The battery can be charged while the camera is connected to the computer. Charging time varies depending on the performance of a computer. (There may be cases in which it takes approx. 10 hours.)
When to charge the batteries
Charge the battery when the error message shown below appears.
Flashes in red
Battery Empty
 4 14M
4 14M
Monitor top left Error message
16 EN
Date, time, time zone, and language
The date and time set here are saved to image file names, date prints, and other data. You can also choose the language for the menus and messages displa yed in the monitor.
1 Press the nbutton to turn on the camera.
●The date and time setting screen is displayed when the date and time are not set.
|
X |
|
|
Y |
M |
D |
Time |
---- |
. -- |
. -- |
-- : -- Y/M/D |
Cancel MENU
Date and time setting screen
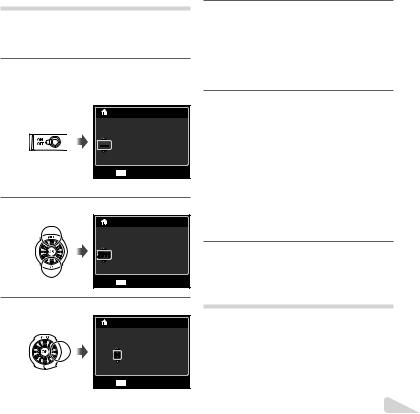
2 Use FGto select the year for [Y].
X
Y M D Time
2011. -- . -- -- : -- Y/M/D
Cancel MENU
3 Press Ito save the setting for [Y].
X
Y M D Time
2011.01 . -- -- : -- Y/M/D
Cancel MENU
4 As in Steps 2 and 3, use FGHIto set [M] (month), [D] (day), [Time] (hours and minutes), and [Y/M/D] (date order), and then press the A button.
For precise time setting, press the A button as the time signal strikes 00 seconds.
To change the date and time, adjust the setting from the menu. [X] (Date/time) (p. 54)
5 Use HIto select the [x] time zone and then press the A button.
●Use FGto turn daylight saving time ([Summer]) on or off.
|
’11.02.26 00:00 |
Seoul |
|
Tokyo |
|
Summer |
Set OK |
The menus can be used to change the selected time zone. [World Time] (p. 54)
6 Use FGHIto select your language and press the A button.
The menus can be used to change the selected language. [l] (p. 53)
Inserting the card
Always use SD/SDHC/SDXC cards or Eye-Fi card with this camera. Do not insert other types of memory cards. “Using the card” (p. 66)
This camera can be used without a card by storing images in its internal memory.
EN 17

1
Write-protect switch
Insert the card straight until it clicks into place.
Do not touch the contact area directly.
2 1
2
“Number of storable pictures (still images)/Continuous recording length (movies) in the internal memory and cards” (p. 68, 69)
To remove the card
1 |
2 |
Press the card in until it clicks and comes out slightly, then remove the card.
18 EN


 Shooting, Playback, and Erasing
Shooting with the optimum aperture |
2 Hold the camera and compose the shot. |
value and shutter speed (Pmode) |
|
In this mode, automatic shooting settings are activated |
Monitor |
while also allowing changes to a wide range of |
|
other shooting menu functions, such as exposure |
|
compensation, white balance, etc. as needed. |
|
1 Press the nbutton to turn on the |
|
camera. |
Horizontal grip |
|
|
Pmode indicator. |
|
 P
P
 0.0
0.0
WB
AUTO
ISO Vertical grip
AUTO
00:34
4 14M
Number of storable still pictures (p. 68)
Monitor (standby mode screen)
If Pmode is not displayed, press Hto display the function menu screen and then set the shooting mode to P. “Using the Menu” (p. 5)
Current shooting mode display
Program Auto 3D P 
 0.0
0.0
WB
AUTO
ISO
AUTO
4 14M |
MENU |
EN 19
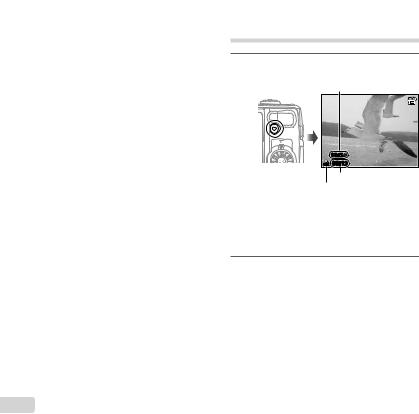
3 Press the shutter button halfway down to focus on the subject.
●When the camera focuses on the subject, the exposure is locked (shutter speed and aperture value are displayed), and the AF target mark changes to green.
●The camera was unable to focus if the AF target mark flashes red. Try focusing again.
AF target mark
P
Press halfway
1/400 F3.5
Shutter speed Aperture value
“Focusing” (p. 62)
4 To take the picture, gently press the shutter button all the way down while being careful not to shake the camera.
P
Press fully
1/400 F3.5
Image review screen
To view images during shooting
Pressing the qbutton enables playback of images. To return to shooting, either press the qbutton or press the shutter button halfway down.
To turn off the camera
Press the nbutton again.
Shooting movies
1 Press the Rbutton to start recording.
Continuous recording length (p. 69)
 00:34
00:34
REC 00:12
Recording time
Lights up red when recording
The effects of the set shooting mode can be used when shooting movies. When the set shooting mode is p, W, s (Beauty) or P(Sparkle), shooting is performed in Pmode.
2 Press the Rbutton again to stop recording.
Sound will also be recorded.
During sound recording, only the digital zoom can be used (SZ-10). To record a movie with optical zoom, set [R] (movies) (p. 43) to [Off].
20 EN
Using the zoom
Turning the zoom lever adjusts the shooting range.
W side |
T side |
Zoom bar |
|
P |
P |
0.0 |
0.0 |
WB |
WB |
AUTO |
AUTO |
ISO |
ISO |
AUTO |
AUTO |
00:34 |
00:34 |
4 14M |
4 14M |
Optical zoom:18x (SZ-10) 12.5x (SZ-20)
Digital zoom: 4x
[On] selected for [Digital Zoom]:
Image size |
Zoom bar |
14M (SZ-10) |
|
16M (SZ-20) |
Digital zoom range |
|
The magnification Other ratio changes
depending on the
image size setting.*1Digital zoom range
*1 If [Image Size] is less than the full resolution, after reaching the maximum optical zoom, the camera will automatically resize and crop the image to the selected [Image Size], then enter the digital zoom range if [Digital Zoom] is [On].
Photographs taken with the zoom bar displayed in red may appear “grainy.”
To take larger images [Digital Zoom]
The type and amount of zoom can be identified from the appearance of the zoom bar. The display differs depending on the options selected for [Digital Zoom] (p. 41) and [Image Size] (p. 39).
[Off] selected for [Digital Zoom]: |
|
Image size |
Zoom bar |
14M (SZ-10) |
|
16M (SZ-20) |
Optical zoom range |
|
|
Other |
The magnification ratio changes |
|
|
|
depending on the image size setting.*1 |
Changing the shooting information display
The display of the screen information can be changed to best match the situation, for example, the need for a clear view of the screen or for making a precise composition by using the grid display.
EN 21
1 Press F(INFO).
●The displayed shooting information changes in the order shown below each time the button is pressed. “Shooting mode display” (p. 11)
Normal |
|
No information |
|
P |
P |
|
0.0 |
|
|
WB |
|
|
AUTO |
|
|
ISO |
|
00:34 |
AUTO |
|
|
|
|
4 14M |
MENU |
|
Movie information (SZ-20 only)
 P
P
 0.0
0.0
WB
AUTO
ISO
AUTO
 00:34
00:34
 4 14M
4 14M
Detailed
 P
P
 0.0
0.0
WB
AUTO
ISO
 00:34
00:34
AUTO
4 14M NORM |
MENU |
Reading a histogram
If the peak fills too much of the frame, the image will appear mostly white.
If the peak fills too much of the frame, the image will appear mostly black.
The green section shows luminance distribution within the screen’s center.
Viewing images
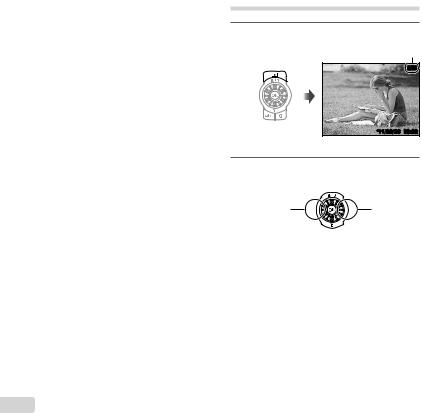
1 Press the q button.
Number of frames/ Total number of images
 4/30
4/30
’11/02/26 00:00
Playback image
2 Turn the wheel controller to select an image.
● It can be performed by pressing HI.
Displays |
Displays next |
|
previous |
||
image |
||
image |
||
|
Keep turning the wheel controller to fast forward or reverse. It can be performed by holding HI.
The display size of the images can be changed. “Index view and close-up view” (p. 24)
22 EN
To play sound recordings
To play sound recorded with an image, select the image and press the A button.
!appears
During audio playback
Press FGto adjust volume.
To view sequential images (SZ-20 only)
Pictures taken using sequential mode (p. 37) are displayed as a group.
●Turn the zoom lever to the T side. Use FGHI
to select the image in index view, and then press the A button to display the image. Press HIto view the previous/next frame.
Expand T
Play OK
Sequentially shot frame
●Select the sequentially shot frame and press the A button to playback the series of images continuously. Press the A button to stop the continuous playback, and then use HIto view the images frame by frame.
To play back movies
Select a movie, and press the A button.


 4/30
4/30
Movie Play OK |
’11/02/26 |
00:00 |
|
Movie |
During playback |
||
Pausing and |
Press the A button to pause |
||
playback. During pause, fast |
|||
restarting |
|||
forward or reverse, press the A |
|||
playback |
|||
button to restart playback. |
|||
|
|||
Fast forward |
Press Ito fast forward. Press Iagain |
||
to increase the fast forward speed. |
|||
|
|||
Press Hto rewind. The speed Rewind at which the recording rewinds
increases each time His pressed.
Adjusting the Turn the wheel controller or use volume FGto adjust the volume.
Operations while playback is paused
Elapsed time /Total recording time
00:14/00:34 |
During pause
EN 23
|
Use Fto display the first frame |
|
Cueing |
and press Gto display the last |
|
|
frame. |
|
Advancing and |
Turn the wheel controller to advance |
|
or rewind by one frame at a time. |
||
rewinding one |
||
Keep turning the wheel controller for |
||
frame at a time*1 |
||
|
continuous advance or rewind. |
|
Resuming |
Press the Abutton to resume playback. |
|
playback |
||
|
Index view and close-up view
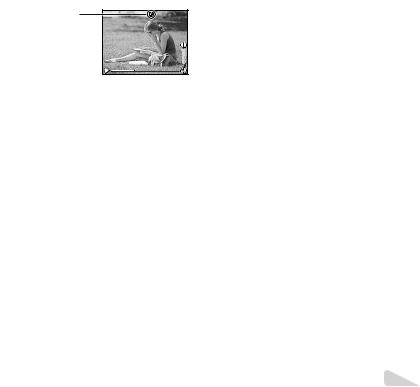
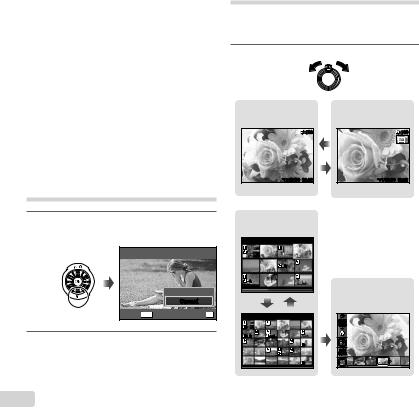
Index view enables quick selection of a desired image. Close-up view (up to 10x magnification) allows checking of image details.
1 Turn the zoom lever.
To operate with HI
*1 Press Ior Hto advance or rewind one frame at a time. Hold Ior Hpressed for continuous advance or rewind.
To stop movie playback
Press the m button.
Erasing images during playback (Single image erase)
1 Display the image you want to erase and press G(D).
Erase
Erase
Cancel
Cancel MENU |
Set OK |
2 Press FGto select [Erase], and press the A button.
Multiple images or all images can be erased at a time (p. 46).
Single-image view |
|
Close-up view |
|
|
|
4/30 W |
|
4/30 |
|
’11/02/26 |
00:00 |
T |
’11/02/26 |
00:00 |
W 
 T
T
Index view
|
’11/02/26 |
|
|
|
2 |
|
|
4 |
|
|
Photo Surfing |
|
|
|
|
W |
|
T |
(p. 44) |
|
|
||
|
’11/02/26 |
W |
ALL |
|
2011/ |
||
|
|
||
|
|
|
02/26 |
2 |
4 |
|
|
|
|
|
35ºN |
|
|
|
139ºE |
24 EN
To select an image in index view
Use FGHIto select an image, and press the A button to display the selected image in single-image view.
To scroll an image in close-up view
Use FGHIto move the viewing area.
To stop [Photo Surfing]
Use FGto select [ALL], then press the A button.
Changing the image information display
Shooting information settings displayed on the screen can be changed.
1 Press F(INFO).
●The displayed image information changes in the order shown below each time the button is pressed.
Normal
3D 10
10

 4/30
4/30
No information
’11/02/26 00:00
Detailed
 10
10

 4/30
4/30
1/1000 |
F3.0 |
2.0 |
P ISO WB AUTO AUTO
 NORM 14M
FILE 100 0004 ’11/02/26 00:00
“Reading a histogram” (p. 22)
Playing back panorama images
Panorama images that were combined together using [Auto] or [Manual] can be scrolled for viewing.
“Creating panoramic images (pmode)” (p. 30)
1 Select a panorama image during playback.
“Viewing images” (p. 22)
 4/30
4/30
Replay OK |
’11/02/26 00:00 |
2 Press the A button.
Current viewing area
To control panorama image playback
Zoom in/Zoom out: Press the A button to pause playback. Then turn the zoom lever to enlarge/shrink the image.
EN 25

Playback direction: Press FGHIto pause playback and scroll the image in the direction of the pressed button.
Pause: Press the A button.
Restart scrolling: Press the A button.
Stop playback: Press the m button.
To start a slideshow, press the m button.
To stop the slideshow, press the m or A button.
3D images are composed of JPEG files and MPO files. If any files are deleted on a computer, playback of 3D images may not be possible.
Playing back Wimages
3D images shot with this camera can be played back on 3D-compatible devices connected to this camera using an HDMI cable (sold separately).
“Shooting 3D images (3D mode)” (p. 32)
When playing back 3D images, read the warnings in the instruction manual for the 3D-compatible devices carefully.
1 Connect the 3D-compatible device and camera using the HDMI cable.
For the connection and setting method, see “Connection via HDMI cable” (p. 52)
2 Use the wheel controller or HIto select [3D show] and then press the A button.
3 Use the wheel controller or HIto select the 3D image to play back and then press the A button.
Slideshow MENU |
Set OK |
Using the menu guide
Pressing the E button in the setup menu displays a description of the current item.
“Using the Menu” (p. 5)
Using the camera guide
Use the camera guide to look up camera operations.
1 Press the E button in the standby mode screen or the playback screen.
Search by |
Search for a |
purpose |
solution |
Search by |
Learn about the |
situation |
camera |
Search by |
History |
keyword |
|
Exit |
Set OK |
26 EN
 Loading...