


NI USB-9219
USER GUIDE AND SPECIFICATIONS
NI USB-9219
4-Channel, 24-Bit, Universal Analog Input Module
This user guide describes how to use the National Instruments USB-9219
and lists the device specifications.
Introduction
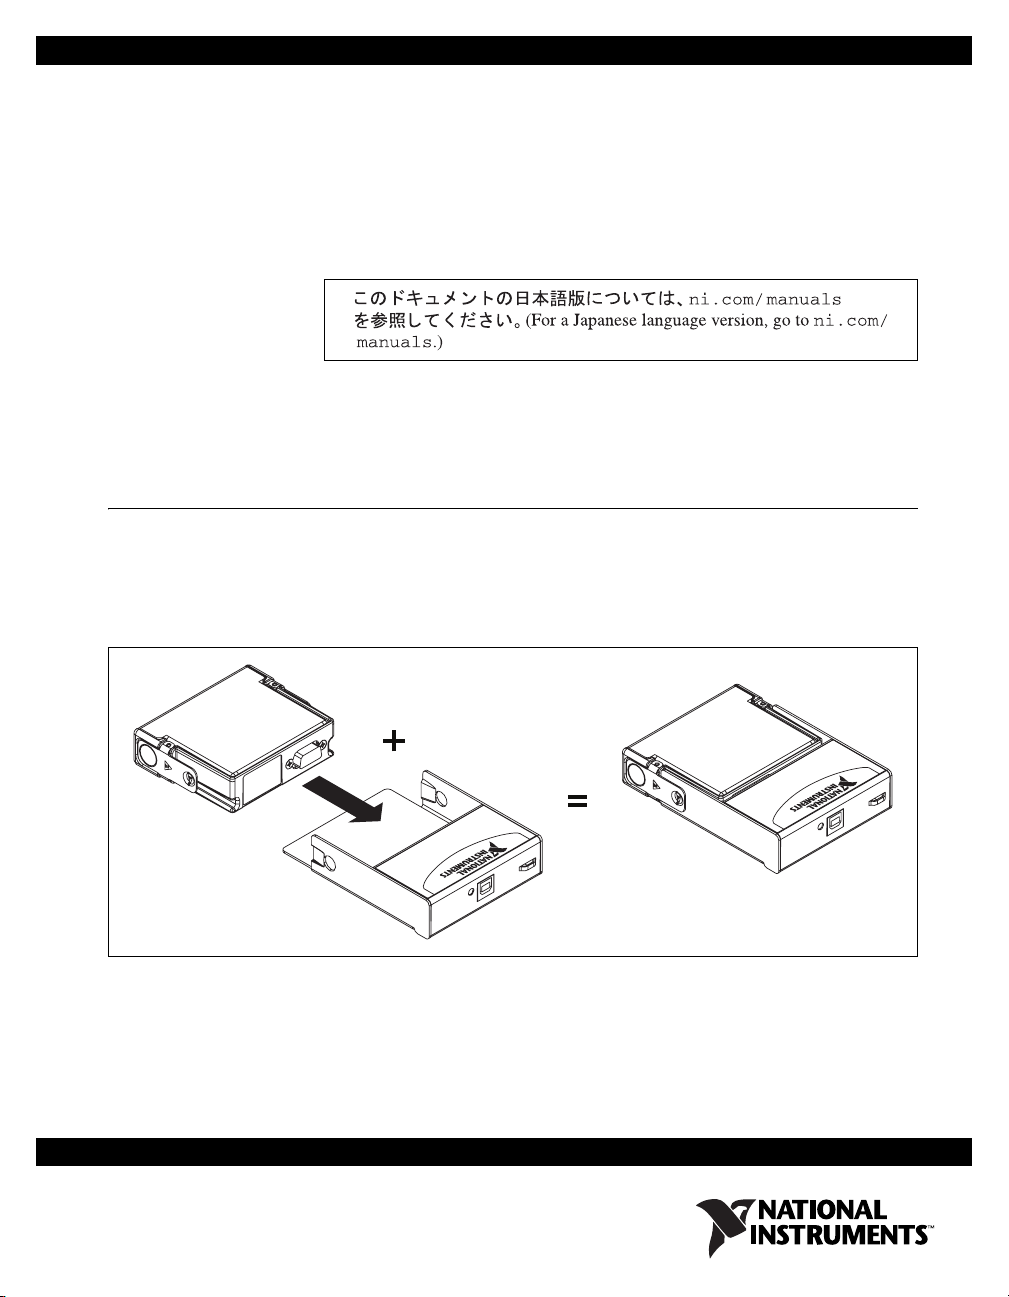
The NI USB-9219 provides a USB interface for four channels of universal
analog input with integrated signal conditioning. The NI USB-9219
consists of two components: an NI 9219 module, and an NI USB-9162
carrier, as shown in Figure 1.
NI 9219
NI USB-9162
Hi-SP
N
I U
eed USB Carrier
S
B-9162
Figure 1. NI USB-9219 Components
N
I U
S
B-9162
NI USB-9219
Hi-Speed USB Carrier
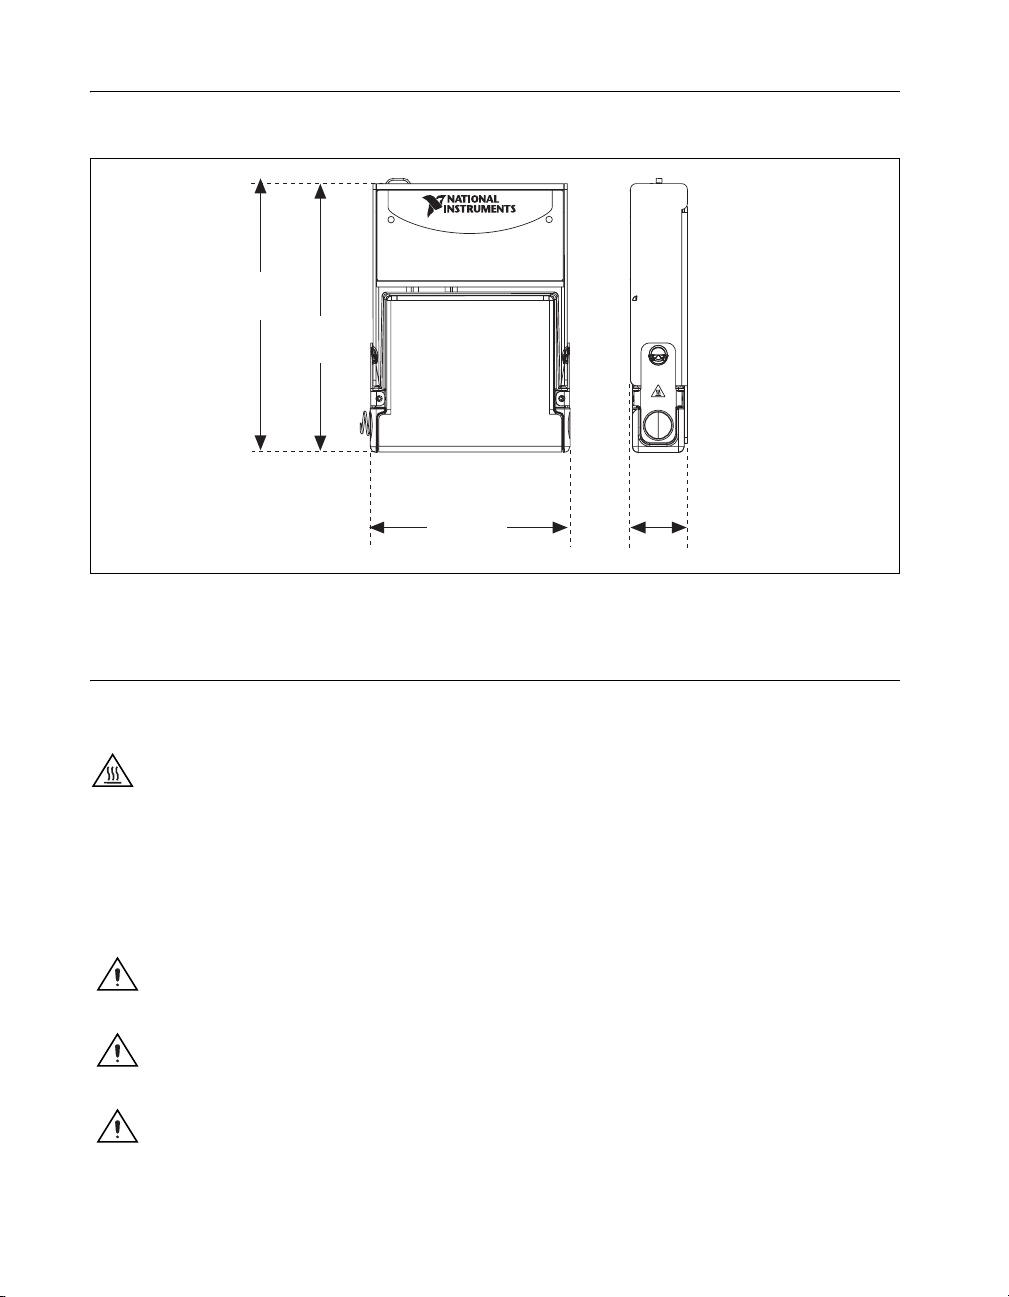
Dimensions
120.68 mm
(4.751 in.)
Figure 2 shows the NI USB-9219 device dimensions.
Hi-Speed USB Carrier
NI USB-9162
118.26 mm
(4.656 in.)
88.12 mm
(3.469 in.)
Figure 2. NI USB-9219 Device in Millimeters (Inches)
Safety Guidelines
Operate the NI USB-9219 only as described in these operating instructions.
Hot Surface This icon denotes that the component may be hot. Touching this component
may result in bodily injury.
Safety Guidelines for Hazardous Voltages
If hazardous voltages are connected to the module, take the following
precautions. A hazardous voltage is a voltage greater than 42.4 V
60 VDC to earth ground.
Caution Ensure that hazardous voltage wiring is performed only by qualified personnel
adhering to local electrical standards.
Caution Do not mix hazardous voltage circuits and human-accessible circuits on the same
module.
25.34 mm
(0.998 in.)
or
pk
Caution Make sure that devices and circuits connected to the module are properly
insulated from human contact.
NI USB-9219 User Guide and Specifications 2 ni.com
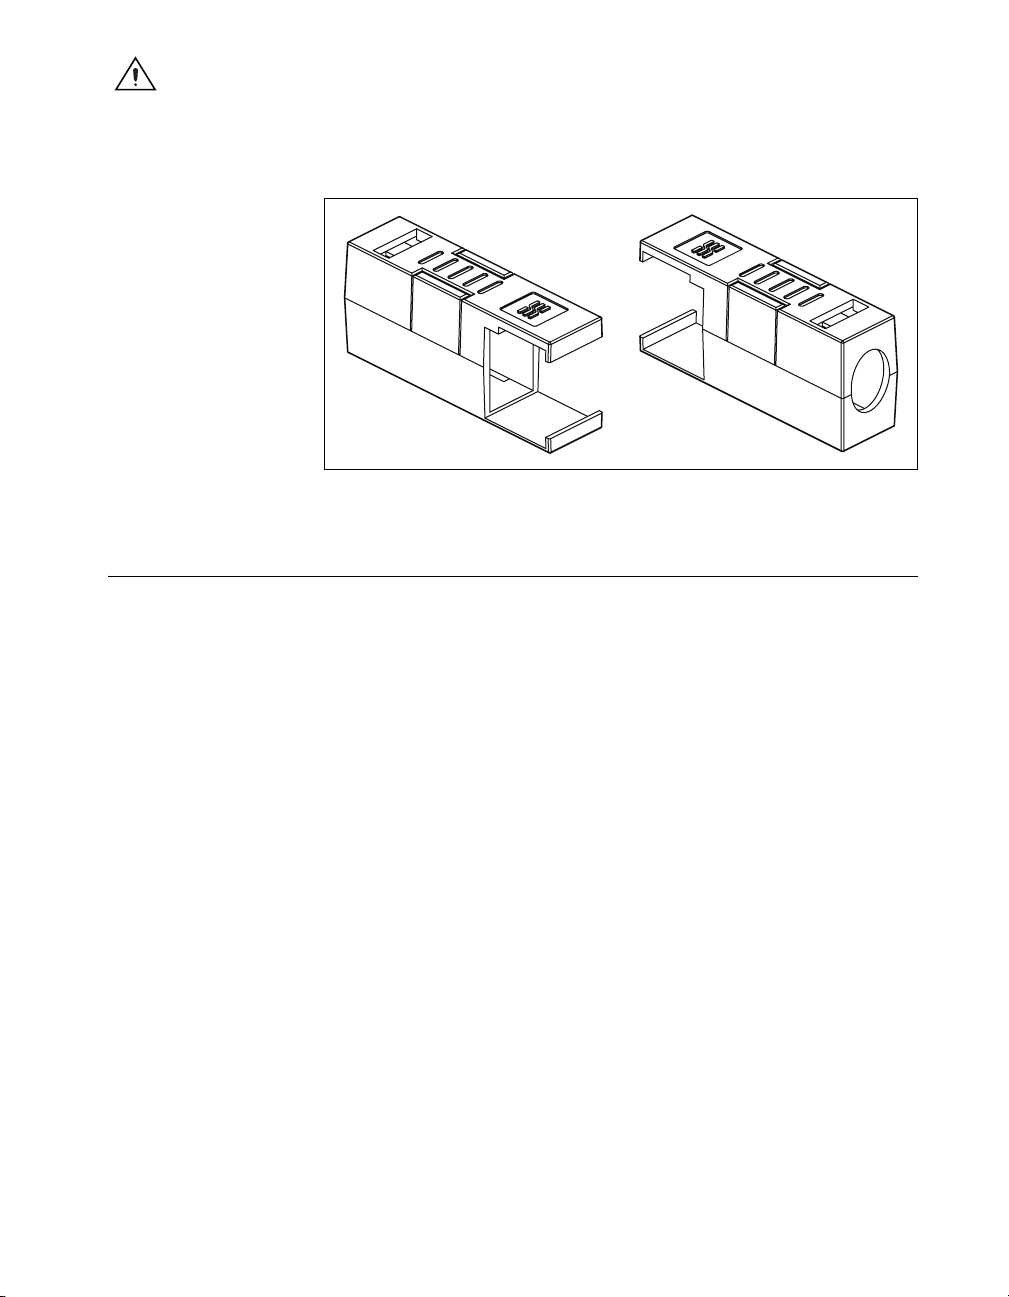
Caution When module terminals are hazardous voltage LIVE (>42.4 V
must ensure that devices and circuits connected to the module are properly insulated from
human contact. You must use the NI 9972 connector backshell kit, as illustrated in Figure 3
to ensure that the terminals are not accessible.
Related Documentation
Each application software package and driver includes information about
writing applications for taking measurements and controlling measurement
devices. The following references to documents assume you have
NI-DAQmx 8.7 or later, and where applicable, version 7.1 or later of the
NI application software.
Figure 3. NI 9972 Connector Backshell
/60 VDC), you
pk
NI-DAQmx for Windows
The DAQ Getting Started Guide describes how to install your NI-DAQmx
for Windows software, your NI-DAQmx-supported DAQ device, and
how to confirm that your device is operating properly. Select Start»
All Programs»National Instruments»NI-DAQ»DAQ Getting Started
Guide.
The NI-DAQ Readme lists which devices are supported by this version of
NI-DAQ. Select Start»All Programs»National Instruments»NI-DAQ»
NI-DAQ Readme.
The NI-DAQmx Help contains general information about measurement
concepts, key NI-DAQmx concepts, and common applications that
are applicable to all programming environments. Select Start»
All Programs»National Instruments»NI-DAQ»NI-DAQmx Help.
© National Instruments Corporation 3 NI USB-9219 User Guide and Specifications

LabVIEW
If you are a new user, use the Getting Started with LabVIEW manual to
familiarize yourself with the LabVIEW graphical programming
environment and the basic LabVIEW features you use to build data
acquisition and instrument control applications. Open the Getting Started
with LabVIEW manual by selecting Start»All Programs»National
Instruments»LabVIEW»LabVIEW Manuals or by navigating to the
labview\manuals directory and opening LV_Getting_Started.pdf.
Use the LabVIEW Help, available by selecting Help»Search the
LabVIEW Help in LabVIEW, to access information about LabVIEW
programming concepts, step-by-step instructions for using LabVIEW, and
reference information about LabVIEW VIs, functions, palettes, menus, and
tools. Refer to the following locations on the Contents tab of the LabVIEW
Help for information about NI-DAQmx:
• Getting Started»Getting Started with DAQ—Includes overview
information and a tutorial to learn how to take an NI-DAQmx
measurement in LabVIEW using the DAQ Assistant.
• VI and Function Reference»Measurement I/O VIs and
Functions—Describes the LabVIEW NI-DAQmx VIs and properties.
• Taking Measurements—Contains the conceptual and how-to
information you need to acquire and analyze measurement data
in LabVIEW, including common measurements, measurement
fundamentals, NI-DAQmx key concepts, and device considerations.
LabWindows/CVI
The Data Acquisition book of the LabWindows/CVI Help contains
measurement concepts for NI-DAQmx. This book also contains Taking an
NI-DAQmx Measurement in LabWindows/CVI, which includes
step-by-step instructions about creating a measurement task using the DAQ
Assistant. In LabWindows
Using LabWindows/CVI»Data Acquisition.
The NI-DAQmx Library book of the LabWindows/CVI Help contains
API overviews and function reference for NI-DAQmx. Select Library
Reference»NI-DAQmx Library in the LabWindows/CVI Help.
™
/CVI™, select Help»Contents, then select
Measurement Studio
If you program your NI-DAQmx-supported device in Measurement Studio
using Visual C++, Visual C#, or Visual Basic .NET, you can interactively
create channels and tasks by launching the DAQ Assistant from MAX or
from within Visual Studio .NET. You can generate the configuration code
based on your task or channel in Measurement Studio. Refer to the DAQ
Assistant Help for additional information about generating code. You also
NI USB-9219 User Guide and Specifications 4 ni.com

can create channels and tasks, and write your own applications in your
ADE using the NI-DAQmx API.
For help with NI-DAQmx methods and properties, refer to the NI-DAQmx
.NET Class Library or the NI-DAQmx Visual C++ Class Library included
in the NI Measurement Studio Help. For general help with programming in
Measurement Studio, refer to the NI Measurement Studio Help, which is
fully integrated with the Microsoft Visual Studio .NET help. To view
this help file in Visual Studio. NET, select Measurement Studio»
NI Measurement Studio Help.
To create an application in Visual C++, Visual C#, or Visual Basic .NET,
follow these general steps:
1. In Visual Studio .NET, select File»New»Project to launch the New
Project dialog box.
2. Find the Measurement Studio folder for the language you want to
create a program in.
3. Choose a project type. You add DAQ tasks as a part of this step.
ANSI C without NI Application Software
The NI-DAQmx Help contains API overviews and general information
about measurement concepts. Select Start»All Programs»National
Instruments»NI-DAQ»NI-DAQmx Help.
The NI-DAQmx C Reference Help describes the NI-DAQmx Library
functions, which you can use with National Instruments data acquisition
devices to develop instrumentation, acquisition, and control applications.
Select Start»All Programs»National Instruments»NI-DAQ»
NI-DAQmx C Reference Help.
.NET Languages without NI Application Software
With the Microsoft .NET Framework version 1.1 or later, you can use
NI-DAQmx to create applications using Visual C# and Visual Basic .NET
without Measurement Studio. You need Microsoft Visual Studio .NET
2003 or Microsoft Visual Studio 2005 for the API documentation to be
installed.
The installed documentation contains the NI-DAQmx API overview,
measurement tasks and concepts, and function reference. This help is fully
integrated into the Visual Studio .NET documentation. To view the
NI-DAQmx .NET documentation, go to Start»Programs»National
Instruments»NI-DAQ»NI-DAQmx .NET Reference Help. Expand
NI Measurement Studio Help»NI Measurement Studio .NET Class
Library»Reference to view the function reference. Expand
NI Measurement Studio Help»NI Measurement Studio .NET Class
© National Instruments Corporation 5 NI USB-9219 User Guide and Specifications
Library»Using the Measurement Studio .NET Class Libraries to view
conceptual topics for using NI-DAQmx with Visual C# and Visual
Basic .NET.
To get to the same help topics from within Visual Studio, go to Help»
Contents. Select Measurement Studio from the Filtered By drop-down
list and follow the previous instructions.
Device Documentation and Specifications
NI-DAQmx includes the Device Document Browser, which contains
online documentation for supported DAQ, SCXI, and switch devices, such
as help files describing device pinouts, features, and operation, and PDF
files of the printed device documents. You can find, view, and/or print the
documents for each device using the Device Document Browser at any
time by inserting the CD. After installing the Device Document Browser,
device documents are accessible from Start»All Programs»National
Instruments»NI-DAQ»Browse Device Documentation.
Note You can also download these documents at ni.com/manuals.
Training Courses
If you need more help getting started developing an application with
NI products, NI offers training courses. To enroll in a course or obtain
a detailed course outline, refer to
ni.com/training.
Technical Support on the Web
For additional support, refer to ni.com/support or zone.ni.com.
Installing the Software
Software support for the NI USB-9219 for Vista/XP/2000 is provided by
NI-DAQmx. The DAQ Getting Started Guide, which you can download at
ni.com/manuals, offers NI-DAQmx users step-by-step instructions for
installing software and hardware, configuring channels and tasks, and
getting started developing an application.
Installing Other Software
If you are using other software, refer to the installation instructions that
accompany your software.
NI USB-9219 User Guide and Specifications 6 ni.com
Example Programs
The NI-DAQmx CD contains example programs that you can use to get
started programming with the NI USB-9219. Refer to the NI-DAQmx for
USB Devices Getting Started Guide that shipped with your device, and
is also accessible from Start»All Programs»National Instruments»
NI-DAQ, for more information.
Installing the NI USB-9219 Device
Before installing the device, you must install the software you plan to use
with the device. Refer to the Installing the Software section of this guide
and the documentation included with the software for more information.
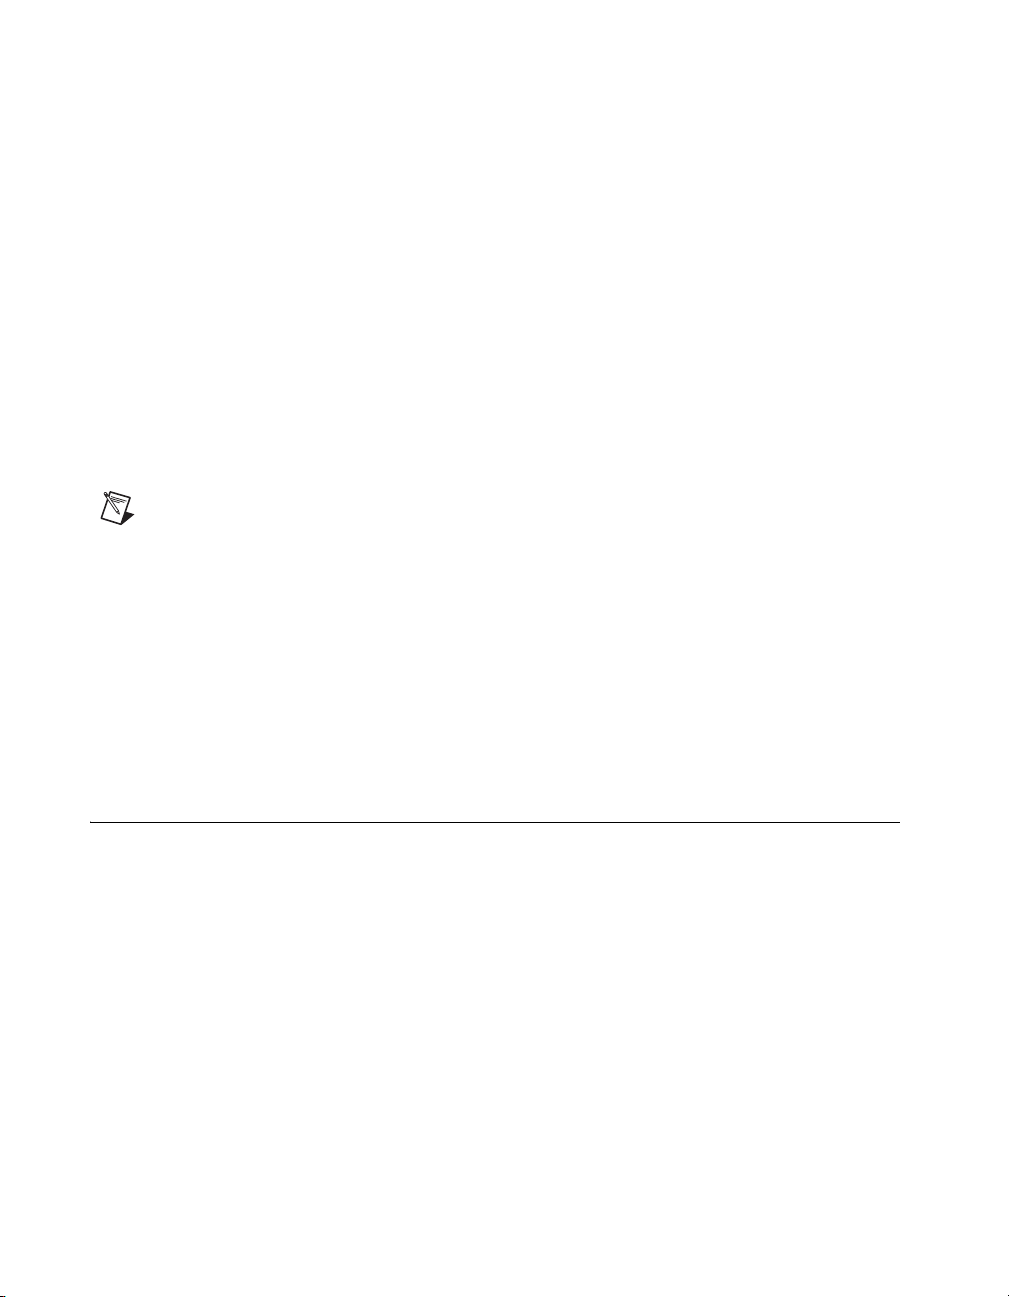
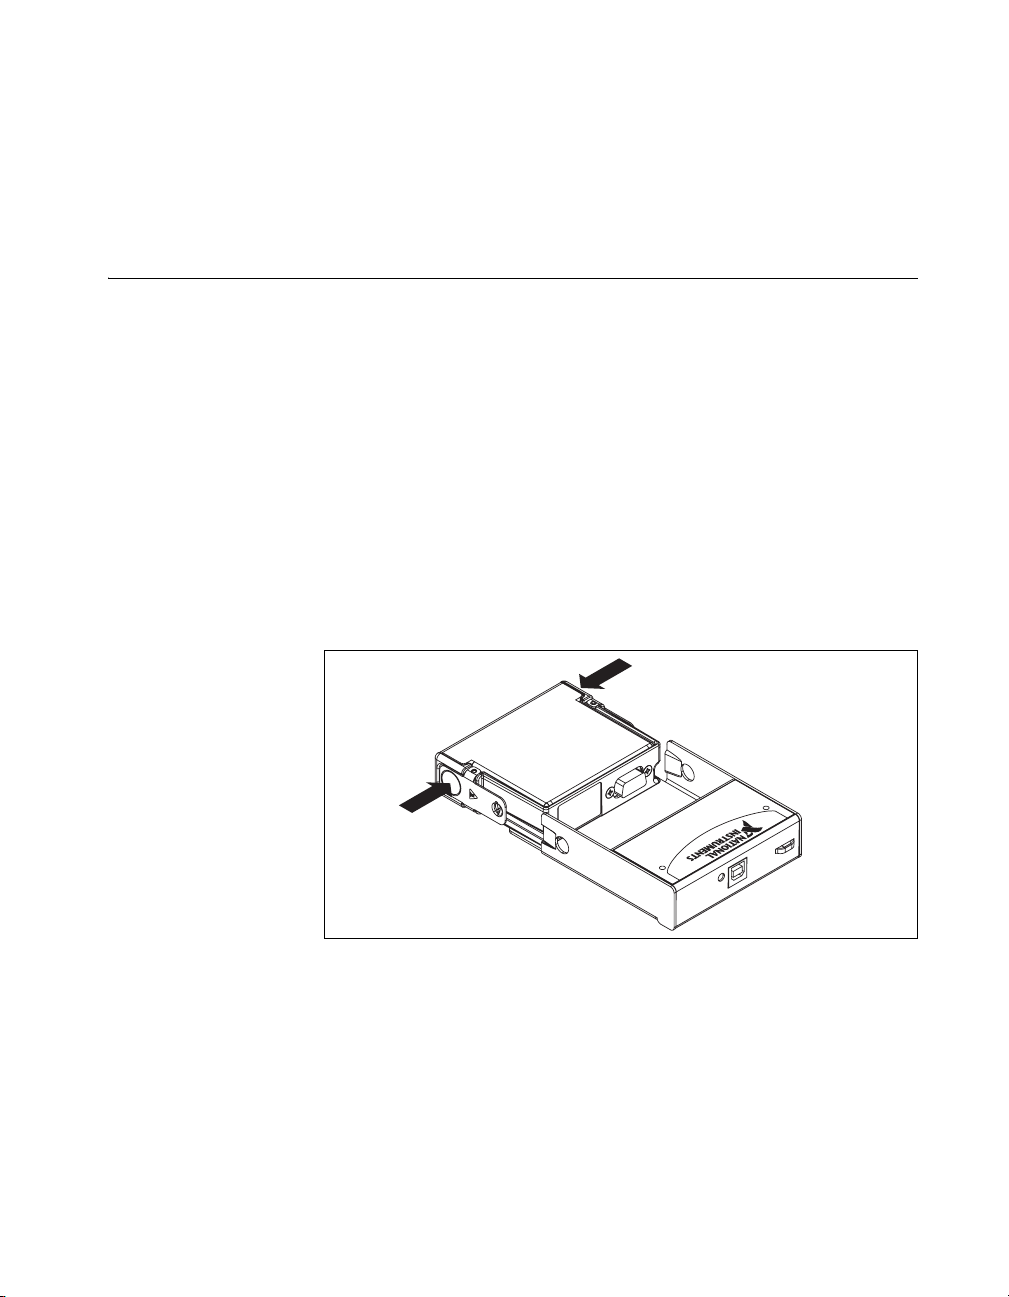
Installing the NI USB-9219 Device into the NI USB-9162 Carrier
The NI USB-9219 module and NI USB-9162 carrier are packaged
separately. Refer to Figure 4, while completing the following assembly
steps:
1. Make sure that no signals are connected to the NI USB-9219 module
and the USB cable is not connected to the device.
2. Remove the protective cover from the 15-pin D-SUB connector.
3. Align the I/O module with the carrier, as shown in Figure 4.
Figure 4. Module Installation
4. Squeeze the latches and insert the NI USB-9219 module into the
NI USB-9162 carrier.
© National Instruments Corporation 7 NI USB-9219 User Guide and Specifications
5. Press firmly on the connector side of the NI USB-9219 module until
the latches lock the module into place, as shown in Figure 5.
Figure 5. Locking Module into Place
6. Connect the USB cable to the assembled NI USB-9219.
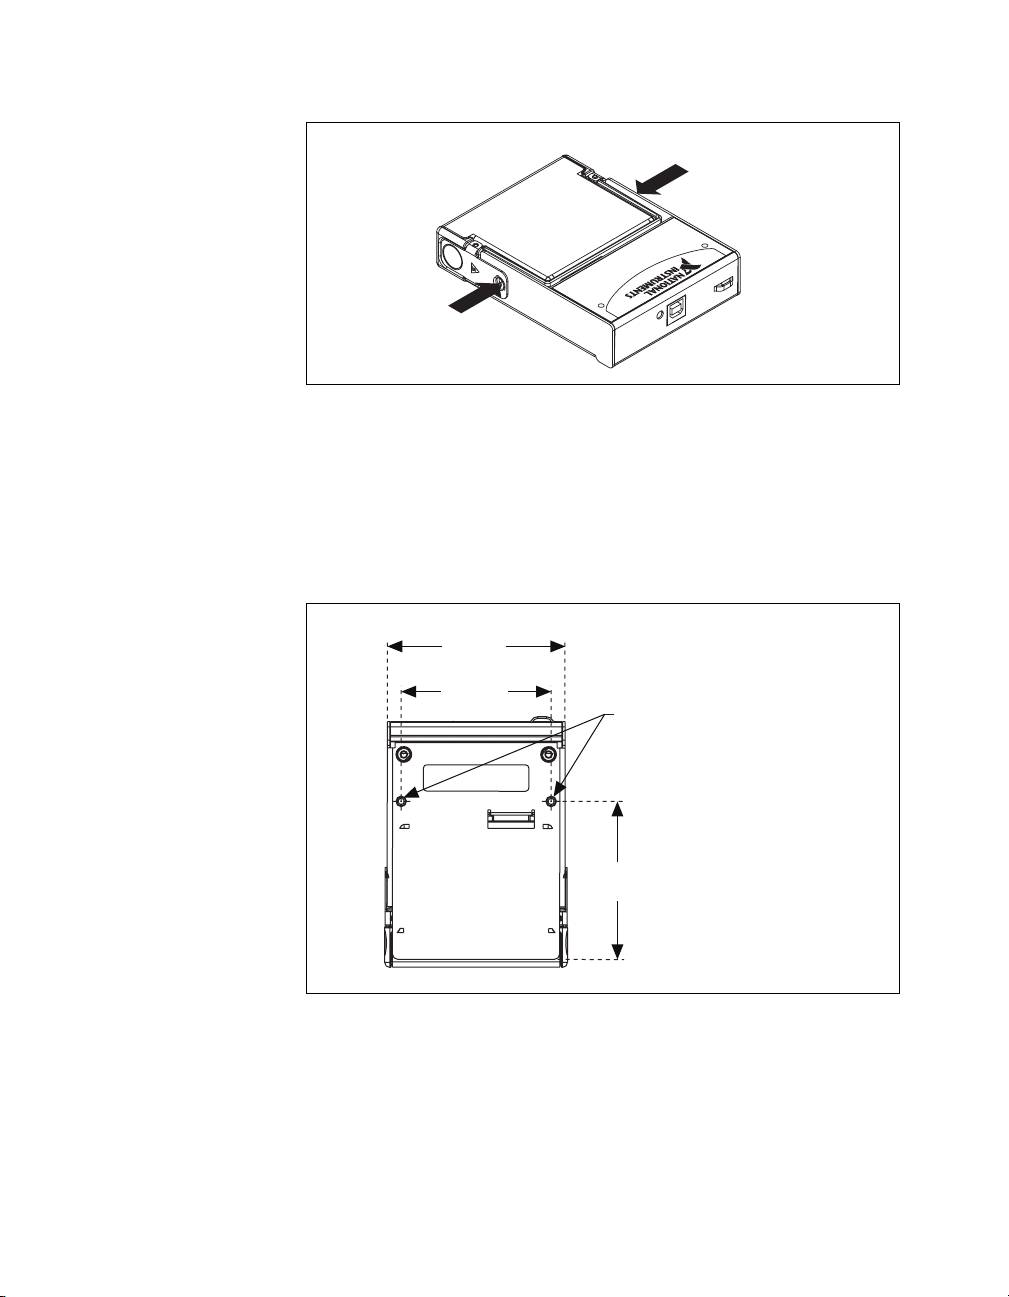
Mounting the NI USB-9219 to a Panel
Threaded inserts are located in the NI USB-9219 for mounting it to a panel.
Refer to Figure 6 for dimensions.
85.7 mm
(3.37 in.)
72.2 mm
(2.84 in.)
Threaded Insert
M3 x 0.5
8.5 mm (0.34 in.) Max Depth
76.1 mm
(3.00 in.)
Figure 6. Module Dimensions In Millimeters (Inches)
NI USB-9219 User Guide and Specifications 8 ni.com
 Loading...