


 Loading...
.3 |
High Resolution Active Studio Monitor |
>F=4A½B <0=D0; |
MR5
IMPORTANT SAFETY INSTRUCTIONS
1.Read these instructions.
2.Keep these instructions.
3.Heed all warnings.
4.Follow all instructions.
5.Do not use this apparatus near water.
6.Clean only with dry cloth. Use a non-scratch cloth to protect the finish.
7.Do not block any ventilation openings. Install in accordance with the manufacturer’s instructions.
8.Do not install near any heat sources such as radiators, heat registers, stoves, or other apparatus (including amplifiers) that produce heat.
9.Do not defeat the safety purpose of the polarized or grounding-type plug. A polarized plug has two blades with one wider than the other. A grounding-type plug has two blades and a third grounding prong. The wide blade or the third prong are provided for your safety. If the provided plug does not fit into your outlet, consult an electrician for replacement of the obsolete outlet.
10.Protect the power cord from being walked on or pinched particularly at plugs, convenience receptacles, and the point where they exit from the apparatus.
11.Only use attachments/accessories specified by the manufacturer.
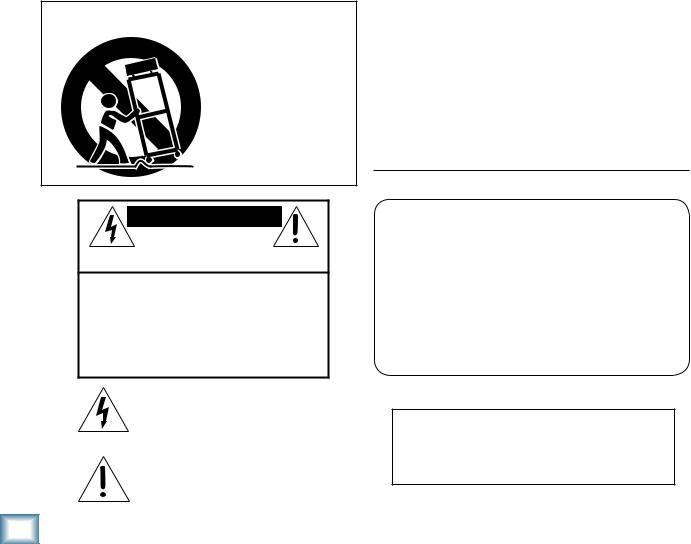
12.Use only with a cart, stand, tripod, bracket, or table specified by the manufacturer, or sold with the apparatus. When a cart is used, use caution when moving the cart/apparatus combination to avoid injury from tip-over.
PORTABLE CART WARNING
Carts and stands - The Component should be used only with a cart or stand that is recommended by the manufacturer.
A Component and cart combination should be moved with care. Quick stops, excessive force, and uneven surfaces may cause the Component and cart combination to overturn.
13.Unplug this apparatus during lightning storms or when unused for long periods of time.
14.Refer all servicing to qualified service personnel. Servicing is required when the apparatus has been damaged in any way, such as powersupply cord or plug is damaged, liquid has been spilled or objects have fallen into the apparatus, the apparatus has been exposed to rain or moisture, does not operate normally, or has been dropped.
15.This apparatus shall not be exposed to dripping or splashing, and no object filled with liquids, such as vases, shall be placed on the apparatus.
16.This apparatus has been designed with Class-I construction and must be connected to a mains socket outlet with a protective earthing connection (the third grounding prong).
17.Note that this apparatus is not completely disconnected from the AC mains service when the power switch is in the OFF position.
18.This apparatus does not exceed the Class A/Class B (whichever is applicable) limits for radio noise emissions from digital apparatus as set out in the radio interference regulations of the Canadian Department of Communications.
ATTENTION — Le présent appareil numérique n’émet pas de bruits radioélectriques dépassant las limites applicables aux appareils numériques de class A/de class B (selon le cas) prescrites dans le réglement sur le brouillage radioélectrique édicté par les ministere des communications du Canada.
19.Exposure to extremely high noise levels may cause permanent hearing loss. Individuals vary considerably in susceptibility to noise-induced hearing loss, but nearly everyone will lose some hearing if exposed to sufficiently intense noise for a period of time. The U.S. Government’s Occupational Safety and Health Administration (OSHA) has specified the permissible noise level exposures shown in the following chart.
According to OSHA, any exposure in excess of these permissible limits could result in some hearing loss. To ensure against potentially dangerous exposure to high sound pressure levels, it is recommended that all persons exposed to equipment capable of producing high sound pressure levels use hearing protectors while the equipment is in operation. Ear plugs or protectors in the ear canals or over the ears must be worn when operating the equipment in order to prevent permanent hearing loss if exposure is in excess of the limits set forth here.
CAUTION AVIS
RISK OF ELECTRIC SHOCK
DO NOT OPEN
RISQUE DE CHOC ELECTRIQUE
NE PAS OUVRIR
CAUTION: TO REDUCE THE RISK OF ELECTRIC SHOCK
DO NOT REMOVE COVER (OR BACK)
NO USER-SERVICEABLE PARTS INSIDE
REFER SERVICING TO QUALIFIED PERSONNEL
ATTENTION: POUR EVITER LES RISQUES DE CHOC ELECTRIQUE, NE PAS ENLEVER LE COUVERCLE. AUCUN ENTRETIEN DE PIECES INTERIEURES PAR L'USAGER. CONFIER L'ENTRETIEN AU PERSONNEL QUALIFIE.
AVIS: POUR EVITER LES RISQUES D'INCENDIE OU D'ELECTROCUTION, N'EXPOSEZ PAS CET ARTICLE A LA PLUIE OU A L'HUMIDITE
The lightning flash with arrowhead symbol within an equilateral triangle is intended to alert the user to the presence of uninsulated "dangerous voltage" within the product's enclosure, that may be
of sufficient magnitude to constitute a risk of electric shock to persons.
Le symbole éclair avec point de flèche à l'intérieur d'un triangle équilatéral est utilisé pour alerter l'utilisateur de la présence à l'intérieur du coffret de "voltage dangereux" non isolé d'ampleur suffisante pour constituer un risque d'éléctrocution.
The exclamation point within an equilateral triangle is intended to alert the user of the presence of important operating and maintenance (servicing) instructions in the literature accompanying the appliance.
Le point d'exclamation à l'intérieur d'un triangle équilatéral est employé pour alerter les utilisateurs de la présence d'instructions importantes pour le fonctionnement et l'entretien (service) dans le livret d'instruction accompagnant l'appareil.
DurationPerDay |
SoundLeveldBA, |
Typical |
InHours |
SlowResponse |
Example |
8 |
90 |
Duo in small club |
692
4 |
95 |
Subway Train |
397
2100 Very loud classical music
1.5102
1105 Home theater (loudest peaks)
0.5110
0.25 or less 115 |
Loudest parts at a rock concert |
WARNING — To reduce the risk of fire or electric shock, do not expose this apparatus to rain or moisture.
|
MR5 |

Contents |
|
IMPORTANTSAFETYINSTRUCTIONS........... |
2 |
INTRODUCTION.................................................. |
4 |
QUICKSTART............................................................................ |
5 |
REARPANELDESCRIPTION.............................. |
6 |
1.SIGNALINPUTS................................................................ |
6 |
2.INPUTLEVEL..................................................................... |
6 |
3.HIGHFREQUENCYFILTER............................................. |
6 |
4.LOWFREQFILTER............................................................ |
7 |
5.PowerSwitch..................................................................... |
7 |
6.MainsInputandFuse...................................................... |
7 |
7.BassReflexPort................................................................ |
7 |
FRONTPANELDESCRIPTION........................... |
7 |
8.PowerIndicator................................................................ |
7 |
PROTECTIONCIRCUITS..................................... |
8 |
OverexcursionProtection................................................ |
8 |
ThermalProtection............................................................ |
8 |
IntegratedMagneticShielding........................................ |
8 |
InputSignalWiring............................................................. |
8 |
CAREANDCLEANING........................................ |
8 |
AppendixA:SERVICEINFO............................... |
9 |
Troubleshooting.................................................................. |
9 |
Repair.................................................................................... |
10 |
AppendixB:CONNECTORS............................. |
11 |
AppendixC:TECHNICALINFORMATION.... |
12 |
MR5Specifications................................................................ |
12 |
MR5BlockDiagram............................................................... |
13 |
MR5LimitedWarranty..................................... |
15 |
• Please write the serial number for your studio monitor here
(all studio monitors if you have more than one) for future reference (i.e., insurance claims, tech support, return authorization, etc.):
Monitor 1 |
|
Monitor 2 |
|
Monitor 3 |
|
|
|
|
|
Purchased at:___________________________________ Date of Purchase:_____________
Don’t forget to visit our website at www.mackie.com for more information about this and other Mackie products.
Manual Owner’s
Part No. SW0567 Rev. B 01/08
©2007-2008 LOUD Technologies Inc. All Rights Reserved.
Owner’s Manual |
|

MR5
INTRODUCTION
Thank you for choosing the MR5 Mackie Reference Studio Monitors. Just as we revolutionized the studio monitor market with our flagship HR824 Studio Monitor, we have done it again with the most affordable precision active studio monitors ever made. The MR5 features design elements shared by our HR MK2 Series high resolution studio monitors, providing a level of performance never before available at this price.
InvestmentsinExcellence...
The MR5s were designed by our expert loudspeaker and transducer engineering teams at Mackie and EAW. These compact studio monitors can be used in a variety of applications, including small project studios, surround sound editing, home theater playback, and desktop audio workstations (DAWs).
High-frequency and low-frequency switches are provided on the rear panel to adjust the sound of the monitors to the characteristics of the room. Three types of input connectors are provided, XLR, 1/4-inch, and RCA, to interface with virtually any application you may have.
The result? The MR5 Studio Monitors are extremely accurate and versatile, with unique controls that allow you to fine-tune the sound to match your individual environment precisely. You’re gonna love these!
Whatarethey?TheAdvantages...
The MR5 Studio Monitors are two-way, bi-amplified, active monitors employing a bass reflex (ported) design for an extended low-frequency response. There are many benefits to integrating an active crossover, power amplifiers, and drivers into a single cabinet, and we’ve taken full advantage of these benefits in the design of the MR5.
•The crossover point is designed so that the highand low-frequency drivers are fed only the frequencies they are best able to reproduce.
•The amplifiers are designed to provide maximum acoustic output from the speakers, yet minimize the danger of speaker damage due to overdriving.
•In addition, the amplifiers’ gain and frequency responses are individually hand-trimmed to compensate for typical manufacturing tolerances between the drivers and produce a smooth frequency response from 60 Hz to 20 kHz.
•The connecting wires between the amplifier outputs and the drivers are kept to an absolute minimum, so the damping factor of the amplifier isn’t compromised by the resistance of long speaker cables.
•The acoustic sum of the outputs from the two drivers are optimized electronically, as well as physically, so the amplitude response is unity and the phase difference is minimal.
In short, all the complex interconnected components in the system are designed to work in harmony with each other to produce the best possible sound.
TheTransducers...
The MR5s feature a 5.25-inch high-precision, low-dis- tortion woofer and a 1-inch high-resolution tweeter.
The high-frequency driver is mounted on a molded baffle/waveguide, which reduces diffraction and results in wide, controlled dispersion of high-frequency sounds. This widens the “sweet spot” and improves the time domain characteristics of the system.
TheCabinet...
The cabinet is made of MDF with a matte-black finish. Internal bracing increases the strength and rigidity (stiffness) of the box. An open-cell adiabatic foam material fills the inside of the box to absorb internal reflections and dampen standing waves.
PowerAmplifiers...
The low-frequency amplifier produces up to 55 watts continuous before clipping, while the high-frequency amplifier produces up to 30 watts continuous. Both amplifiers are Class A/B with power MOSFET outputs and active protection circuits.
MR5

QUICK START
We realize that you can’t wait to hook up your new Mackie MR5 Studio
Monitors and try them out. Neverthe-
less, please take the time to read this page NOW, and the rest can wait until you’re good and ready.
1.Turn the INPUT LEVEL [2] control on the back of the cabinet down (fully counterclockwise) before turning on the monitor for the first time.
2.Set the power switch [5] on the back panel off. This will prevent you from accidentally connecting a hot signal source to the monitor and getting a rude surprise.
3.Leave the High Freq [3] and Low Freq [4] Filter switches at their Normal positions.
4.Connect the line-level monitor signal from your mixer, preamp, or other signal source to the INPUT [1] jack on the MR5 Studio Monitor (1⁄4-inch PHONE, XLR, or RCA).
5.Connect the supplied AC power cord to the IEC socket [6] on the back of the monitor. Plug the other end into an AC outlet properly configured with the voltage corresponding to the markings next to the IEC socket.
6.Start your signal source (tape deck, CD, DAW, or whatever), but leave the master volume control on your mixer or preamp down.
7.Turn on the power switch [5] on the MR5. The power LED [8] on the front panel will illuminate.
6.Slowly turn up the INPUT LEVEL [2] control on the back of the monitor to its fully clockwise position (MAX).
7.Adjust the master volume on your mixer or preamp to a comfortably loud listening level. If the MR5 gets loud really fast, turn down the INPUT LEVEL control to its center position (12 o’clock) to provide more volume control on your mixer or preamp.
Enjoy the silky smooth highs and authoritative, commanding lows of the MR5. Then read the rest of this manual.
AN EXTREMELY IMPORTANT NOTE ON MR5 BASS RESPONSE AND YOUR CONTROL ROOM.
 Your new MR5s achieve their best bass
response in a room that’s optimized
for bass reproduction. A lot of fac-
tors can conspire to thwart the MR5s’
 extended low frequency — including room shape, room volume and acoustical treatment.
This is not a cop-out or an apology. It’s plain old physics in action. Luckily we’ve armed you with some compensating controls that you can use to optimize the frequency response of the speakers in your particular room. Consider the following:
Low-FrequencyResponse
When you put your MR5s in a corner or up against walls, their bass characteristics change. The apparent loudness of the low frequencies increases when the monitors are placed close to a wall, and even more so when they are placed in a corner.
If you have placed the monitors away from the walls and corners and you would like to hear a little more bass, try setting the LOW FREQ FILTER [4] switch to the +2 dB position to provide a gentle boost to the low frequencies (below 100 Hz). If it’s still not enough bass, try the +4 dB position to provide a little more bass boost.
High-FrequencyResponse
The MR5s are designed to provide a smooth frequency response throughout the mid and high range. Nevertheless, you may decide that you need a little more or a little less high frequencies in your monitors while you are mixing. The HIGH FREQ FILTER [3] switch provides a gentle boost or cut in the frequencies above 5 kHz. Remember that boosting the high frequencies in the monitors can result in a duller mix, while reducing the high frequencies can result in a brighter overall mix.
AdditionalTidbitsofWisdom
•Never listen to loud music for prolonged periods. Please see the Safety Instructions on page 2 for information on hearing protection.
•When you shut down your equipment, turn off the MR5 studio monitors first to prevent thumps and other noises generated by any upstream equipment from coming out the speakers. When powering up, turn on the monitors last.
•Save the shipping box! You may need it someday, and you don’t want to have to pay for another one.
•Save your sales receipt in a safe place.
•Also record all MR5 serial numbers in the space provided on page 3, along with where and when you bought them.
Owner’s Manual
Manual Owner’s
Loading...